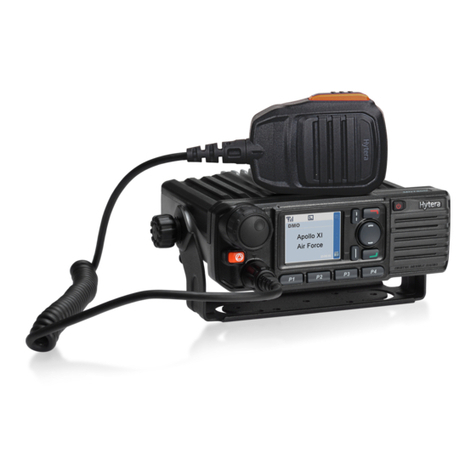
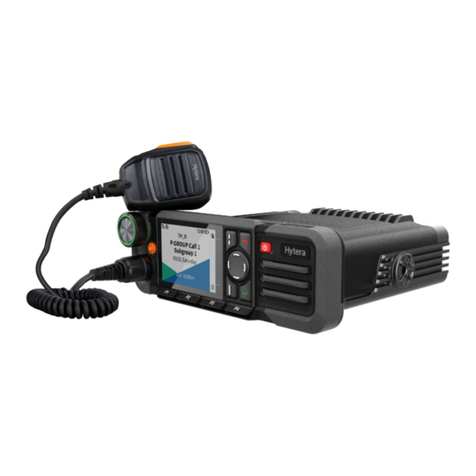
Hytera MNC360 User manual

MNC360 PoC Mobile Radio
User Manual
Hytera Canada
100 Leek Crescent, Unit 11
Richmond Hill, ON L4B 3E6
(905) 305-7545
Hytera US Inc.
1363 Shotgun Road,
Sunrise, FL 33326
(954) 846-1011
(C) 2022 Hytera Communications Ltd. All rights reserved.
8 Whatney,
Irvine, CA 92618
(949) 326-5742

Preface
Welcome to the world of Hytera and thank you for purchasing this product. This manual includes a description of the
functions and step-by-step procedures for use.
To avoid bodily injury or property loss caused by incorrect operation, please carefully read the Safety Information
Booklet before use.
This manual is applicable to the following product:
MNC360 PoC Mobile Radio

Copyright Information
Hytera is the trademark or registered trademark of Hytera Communications Corporation Limited (the Company).
The Company retains the ownership of its trademarks and product names. All other trademarks and/or product
names that may be used in this manual are properties of their respective owners.
The product described in this manual may include the Company's computer programs stored in memory or other
media. The purchase of this product shall not be deemed to grant, either directly or by implication, any rights to the
purchaser regarding the Company's computer programs. The Company's computer programs may not be copied,
modified, distributed, decompiled, or reverse-engineered in any manner without the prior written consent of
the Company.
Disclaimer
The Company endeavors to achieve the accuracy and completeness of this manual, but no warranty of accuracy
or reliability is given. All the specifications and designs are subject to change without notice due to
continuous technological development. No part of this manual may be copied, modified, translated, or distributed in
any manner without the prior written consent of the Company.
We do not guarantee, for any particular purpose, the accuracy, validity, timeliness, legitimacy or completeness of
the third-party products and contents involved in this manual.
CE
Spectrum and maximum power: 2.4 GHz band 18 dBm (EIRP), BT 8 dBm (EIRP), GSM900 33 dBm
(Conducted), UMTS 23.5 dBm (Conducted), LTE: 22.5 dBm (Conducted)
Hereby, Hytera Communications Corporation Limited declares that the radio equipment type MNC360 PoC mobile
radio is in compliance with Directive 2014/53/EU. The full text of the EU declaration of conformity is available at
the following internet address: https://www.hytera.com/en/download-center.page.
Waste Electrical and Electronic Equipment (WEEE)
This symbol means that according to local laws and regulations your product shall be disposed of separately
from household waste. When this product reaches its end of life, take it to a collection point designated by local
authorities. Proper recycling of your product will protect human health and the environment.

FCC
This device complies with part 15 of the FCC Rules. Operation is subject to the following two conditions: (1) This
device may not cause harmful interference, and (2) this device must accept any interference received, including
interference that may cause undesired operation.
Changes or modifications not expressly approved by the party responsible for compliance could void the user's
authority to operate the equipment.
This equipment has been tested and found to comply with the limits for a Class B digital device, pursuant to part 15
of the FCC Rules. These limits are designed to provide reasonable protection against harmful interference in a
residential installation. This equipment generates, uses and can radiate radio frequency energy and, if not installed and
used in accordance with the instructions, may cause harmful interference to radio communications. However, there is
no guarantee that interference will not occur in aparticular installation. If this equipment does cause harmful
interference to radio or television reception, which can be determined by turning the equipment off and on, the user is
encouraged to try to correct the interference by one or more of the following measures:
—Reorient or relocate the receiving antenna.
—Increase the separation between the equipment and receiver.
—Connect the equipment into an outlet on a circuit different from that to which the receiver is connected.
—Consult the dealer or an experienced radio/TV technician for help.
This device complies with FCC radiation exposure limits set forth for an uncontrolled environment. In order to
avoid the possibility of exceeding the FCC radiofrequencyexposure limits, human proximity to the antenna shall
not be less than 20 cm (8 inches) during normal operation.

User Manual
Contents
i
Contents
Documentation Information........................................................................................................................ 1
1. Packing List..............................................................................................................................................2
2. Product Layout.........................................................................................................................................3
3. Installation ................................................................................................................................................4
3.1 Precautions........................................................................................................................................... 4
3.2 Procedure.............................................................................................................................................4
4. Basic Operations...................................................................................................................................... 6
4.1 Turning On or Off the Radio.................................................................................................................6
4.2 Restarting the Radio.............................................................................................................................6
4.3 Adjusting the Volume ...........................................................................................................................6
4.4 Understanding the Screen....................................................................................................................6
4.4.1 Status Indications.......................................................................................................................6
4.4.2 Screen Operations .....................................................................................................................7
4.5 Setting Programmable Keys.................................................................................................................7
4.6 Using the Dual SIM Cards....................................................................................................................8
4.6.1 Enabling or Disabling the SIM Cards.........................................................................................8
4.6.2 Setting the Preferred SIM Card..................................................................................................8
4.7 Checking the Radio Information...........................................................................................................8
5. PoC Services ............................................................................................................................................9
6. System Settings..................................................................................................................................... 10
6.1 WLAN .................................................................................................................................................10
6.2 BT.......................................................................................................................................................10
6.2.1 Pairing with a BT Accessory.....................................................................................................10
6.2.2 Unpairing a BT Accessory........................................................................................................10
6.2.3 Modifying a BT Accessory Name.............................................................................................10
6.3 Cellular Network.................................................................................................................................11
6.3.1 Enabling the Cellular Data ....................................................................................................... 11
6.3.2 Checking the Data Usage ........................................................................................................ 11
6.3.3 Selecting the Network Type ..................................................................................................... 11
6.3.4 Enabling the Data Roaming ..................................................................................................... 11
6.4 Airplane Mode ....................................................................................................................................11
6.5 Hotspot ...............................................................................................................................................12
6.6 Display................................................................................................................................................12
6.6.1 Adjusting the Brightness .......................................................................................................... 12
6.6.2 Setting the Sleep Time.............................................................................................................12
6.6.3 Adjusting the Font Size ............................................................................................................12
6.7 Sound .................................................................................................................................................13

Contents
User Manual
ii
6.7.1 Setting the Profile.....................................................................................................................13
6.7.2 Selecting the Speaker..............................................................................................................13
6.7.3 Enabling the Emergency Broadcast ........................................................................................13
6.8 Storage...............................................................................................................................................13
6.8.1 Checking the Storage Usage ...................................................................................................13
6.8.2 Freeing up the Storage Space.................................................................................................14
6.9 Memory...............................................................................................................................................14
6.10 Location............................................................................................................................................14
6.10.1 Setting the Location Mode .....................................................................................................14
6.10.2 Improving Location Accuracy.................................................................................................14
6.11 Language.......................................................................................................................................... 15
6.12 Factory Data Reset...........................................................................................................................15
6.13 Safe Mode........................................................................................................................................15
6.14 Date and Time.................................................................................................................................. 16
6.14.1 Setting the Date, Time, and Time Zone ................................................................................. 16
6.14.2 Setting the Time Format.........................................................................................................16
6.15 Upgrade............................................................................................................................................16
7. Applications............................................................................................................................................18
7.1 Installing an Application......................................................................................................................18
7.1.1 Through the APP Center .......................................................................................................... 18
7.1.2 Through the Android Debug Bridge .........................................................................................18
7.2 Uninstalling an Application.................................................................................................................18
7.3 Forcibly Stopping an Application........................................................................................................ 18
7.4 Clearing the Data or Cache................................................................................................................19
7.5 Setting the Application Permissions................................................................................................... 19
8. Sound Recorder..................................................................................................................................... 20
8.1 Recording an Audio File.....................................................................................................................20
8.2 Managing an Audio File......................................................................................................................20
9. Camera....................................................................................................................................................21
9.1 Taking a Photo...................................................................................................................................21
9.2 Recording a Video..............................................................................................................................21
9.3 Viewing a Photo or Video...................................................................................................................21
10. Gallery...................................................................................................................................................22
10.1 Photos...............................................................................................................................................22
10.1.1 Viewing a Photo .....................................................................................................................22
10.1.2 Managing Photos ...................................................................................................................22
10.2 Videos...............................................................................................................................................23
10.2.1 Playing a Video ......................................................................................................................23
10.2.2 Managing Videos ...................................................................................................................23

User Manual
Contents
iii
11. Troubleshooting...................................................................................................................................25
12. Care and Cleaning................................................................................................................................ 27
12.1 Product Care .................................................................................................................................... 27
12.2 Product Cleaning..............................................................................................................................27
13. Optional Accessories ..........................................................................................................................28
14. Abbreviations ....................................................................................................................................... 29

User Manual
Packing List
1
Documentation Information
Instruction Conventions
Icon
Description
Indicates references that can further describe the related topics.
Indicates situations that could cause data loss or equipment damage.
Notation Conventions
Item
Description
Example
Boldface
Denotes menus, tabs, parameter names,
window names, dialogue names, and
hardware buttons.
To save the configuration, click Apply.
The Log Level Settings dialogue appears.
Press the PTT key.
" "
Denotes messages, directories, file names,
folder names, and parameter values.
The screen displays "Invalid Battery!"
Open "PSS.exe".
Go to "D:/opt/local".
In the Port text box, enter "22".
>
Directs you to access a multi-level menu.
Go to File > New.
Italic
Denotes document titles.
For details about using the DWS, refer to Dispatch
Workstation User Guide.
Courier
New
Denotes commands and their execution
results.
To set the IP address, run the following command:
vos-cmd - m name IP
Key Operations
Operation
Description
Short press
Press and release quickly.
Long press
Press and hold for preset time.
Press and hold
Keep the key pressed.

Packing List
User Manual
2
1. Packing List
Please unpack carefully and check that you have received the following items. If any item is missing or damaged,
contact your dealer.
Item
Quantity
(PCS)
Item
Quantity
(PCS)
Mobile Radio
1
GPS Antenna
1
Bracket
1
Self-tapping Screw (5 mm x 12 mm)
4
Palm Microphone
1
Self-tapping Screw (4 mm x 16 mm)
3
Microphone Hanger
1
Power Cord (with fuse)
1
RF Antenna
2
Documentation Kit
1
Figures in this manual are only for reference.

User Manual
Product Layout
3
2. Product Layout
Mobile Radio
Palm Microphone

Installation
User Manual
4
3. Installation
3.1 Precautions
Before installation, read the following guidelines carefully:
Before installation, ensure that the vehicle power supply has a negative ground with the voltage of 13.6±15% V. If
you use 24 V power supply, convert the voltage through a voltage converter.
Before installation, measure the length of screws protruding from the radio surface. During installation, drill the
holes on the vehicle according to the screw length to avoid damaging the vehicle wires or other components.
Use the antenna and power cord approved by the Company.
Install the radio with the mounting bracket approved by the Company. Otherwise, the accidental drop of the radio
may injure people in the vehicle.
To facilitate wiring, keep sufficient space at the back of the radio.
When replacing the fuse for the DC power cord, ensure that the new fuse has the same specification as the old one.
If any other communication devices such as repeaters are in the vicinity of the radio, keep the antenna of these
devices at least 10 meters away from that of the radio.
Place the GPS antenna away from metal objects.
3.2 Procedure
Select a location for installation.
Mark the positions for drilling four holes using the bracket.
Drill the four holes according to the marks.
Use the tapping screws (5 mm x 12 mm) to secure the bracket.
Attach the antenna and power cord to the radio.

User Manual
Installation
5
Mount the radio to the fixed bracket.
Install the microphone hanger in a reachable range, and then use the tapping screws (4 mm x 16 mm) to secure
it.
Plug the aviation connector on the palm microphone into aviation port on the radio with the triangle index on the
palm microphone upwards, and then rotate the connector clockwise to secure it.
Place the palm microphone on the hanger.

Basic Operations
User Manual
6
4. Basic Operations
4.1 Turning On or Off the Radio
Turning On the Radio
After the vehicle is started, the radio automatically turns on.
Long press the On-Off key for two seconds until the startup screen appears.
Turning Off the Radio
After the vehicle shuts off, the radio automatically turns off.
Long press the On-Off key for two seconds, press the Navigation key to select Power off, and then press the OK
key.
4.2 Restarting the Radio
Long press the On-Off key for two seconds, press the Navigation key to select Reboot, and then press the OK
key.
Long press the On-Off key for 15 seconds to forcibly restart the radio.
4.3 Adjusting the Volume
Rotate the Volume knob clockwise to increase the volume, or counter-clockwise to decrease the volume.
4.4 Understanding the Screen
4.4.1 Status Indications
4.4.1.1 LCD Icon
Icon
Radio Status
No SIM card is installed.
E/3G/4G
The 2G/3G/4G cellular network is enabled.
The radio has registered with the cellular network.
The radio has not registered with the cellular network.
The radio is connected to the WLAN network.
The WLAN hotspot is enabled.

User Manual
Basic Operations
7
Icon
Radio Status
The radio operates in Airplane mode.
An earpiece is connected.
An accessory is connected.
The radio operates in Silent mode.
The BT feature is enabled.
A BT device is connected.
The GPS is positioning.
The memory is insufficient.
4.4.1.2 LED Indicator
Indicator Status
Radio Status
Glows red
Fatigue driving alarm
Overspeed alarm
4.4.2 Screen Operations
Turning Off the Screen
Short press the On-Off key.
Waking Up the Screen
Press any key.
4.5 Setting Programmable Keys
The radio provides P1, P2,P3, and P4 as the programmable key. These keys can be programmed to perform specific
task. At one press of the programmable key, you can get quick access to radio functions.
Press the Navigation key to select Settings, and then press the OK key.
Press the Navigation key to select Programmable key, and then press the OK key.
Press the Navigation key to select P1, P2, P3, or P4, and then press the OK key.
Press the Navigation key to select the feature, and then press the OK key.

Basic Operations
User Manual
8
4.6 Using the Dual SIM Cards
You can use two SIM cards, but cannot access data services simultaneously.
4.6.1 Enabling or Disabling the SIM Cards
Press the Navigation key to select Settings, and then press the OK key.
Press the Navigation key to select SIM cards, and then press the OK key.
Press the Navigation key to select SIM slot 1 or SIM slot 2, and then press the OK key to enable or disable the
SIM cards.
4.6.2 Setting the Preferred SIM Card
You can set a SIM card as the default card to access the Internet.
Press the Navigation key to select Settings, and then press the OK key.
Press the Navigation key to select SIM cards, and then press the OK key.
Press the Navigation key to select Preferred SIM for, and then press the OK key to set the preferred SIM card.
4.7 Checking the Radio Information
Press the Navigation key to select Settings, and then press the OK key.
Press the Navigation key to select About phone, and then press the OK key.
You can check the radio information such as status, model, and version.

User Manual
PoC Services
9
5. PoC Services
You can use Push-to-Talk over Cellular (PoC) services such as one-to-one or one-to-many voice call over the public
network.
This service is available only when you have installed the PoC application on the radio.
After the radio is connected to a WLAN or cellular network, you can initiate a call through the PoC application.
Press the Navigation key to select the PoC application, and then press the OK key.
Select a contact.
On the palm microphone, press and hold the PTT key, and then speak.
Release the PTT key.
You can receive a call without any operation.

System Settings
User Manual
10
6. System Settings
Press the Navigation key to select Settings, press the OK key, and then set the following radio parameters.
6.1 WLAN
After the radio connects to WLAN, you can access the Internet.
Press the OK key twice to enable the WLAN.
Press the Navigation key to select an available WLAN in the list, and then press the OK key.
(Optional) If a password is required, enter the password, press the Navigation key to select Done, and then press
the OK key.
The radio saves WLAN information after successful connection.
6.2 BT
The BT feature allows you to transmit voice through wireless earpiece or remote speaker microphone.
6.2.1 Pairing with a BT Accessory
Press the Navigation key to select BT, and then press the OK key twice to enable the BT.
Press the Navigation key to select the device from the Available devices list.
Press the OK key.
The Pair with xxx? dialog box appears. xxx indicates the BT device name.
Press the OK key again to pair with the device.
6.2.2 Unpairing a BT Accessory
Enable the BT.
For details, see step 1 in 6.2.1 Pairing with a BT .
Press the Navigation key to select the device from the Paired devices list, and then press the OK key twice to
disconnect from the device.
6.2.3 Modifying a BT Accessory Name
You can rename the BT accessory for easier identification.
Press the Navigation key to select Device name, and then press the OK key.
Enter the device name.

User Manual
System Settings
11
Press the Navigation key to select Done, and then press the OK key.
6.3 Cellular Network
Before connecting to the cellular network, make sure that the Nano SIM card is installed and the cellular data
service is activated. When using a Nano SIM card make sure you use the Micro adapter to install your SIM.
Press the Navigation key to select Cellular networks, and then press the OK key. You can perform the following
operations.
6.3.1 Enabling the Cellular Data
Press the OK key again.
6.3.2 Checking the Data Usage
Press the Navigation key to select Mobile network settings, and then press the OK key.
Press the Navigation key to select SIM slot 1 or SIM slot 2.
Press the Navigation key to select Data usage, and then press the OK key.
You can keep track of your data usage and avoid exceeding the limit.
6.3.3 Selecting the Network Type
Press the Navigation key to select Mobile network settings, and then press the OK key.
Press the Navigation key to select SIM slot 1 or SIM slot 2.
Press the Navigation key to select Preferred network type, and then press the OK key.
Press the Navigation key to select the network, and then press the OK key.
6.3.4 Enabling the Data Roaming
Press the Navigation key to select Mobile network settings, and then press the OK key.
Press the Navigation key to select SIM slot 1 or SIM slot 2.
Press the Navigation key to select Data roaming, and then press the OK key.
You can still use cellular data even when you are outside of your network.
6.4 Airplane Mode
In Airplane mode, your radio automatically disconnects from the cellular networkand WLAN. In this case, you cannot
use data services.
To enable or disable Airplane mode, press the Navigation key to select More, and then press the OK key twice.

System Settings
User Manual
12
6.5 Hotspot
After the radio connects to the cellular or WLAN network, you can share your internet connection with other devices.
Press the Navigation key to select More, and then press the OK key.
Press the Navigation key to select Tethering & portable hotspot, and then press the OK key.
Press the OK key to enable Portable WLAN hotspot.
Specify Network name, Security, and Password.
6.6 Display
6.6.1 Adjusting the Brightness
You can adjust the brightness to make the screen brighter or dimmer in different situations.
Press the Navigation key to select Display, and then press the OK key.
Press the OK key again to select Brightness level.
Press the Navigation key left or right.
6.6.2 Setting the Sleep Time
You can set the sleep time to allow the radio to automatically turn off its screen if no operation is made within the
preset sleep time. It helps save battery power.
Press the Navigation key to select Display, and then press the OK key.
Press the Navigation key to select Sleep, and then press the OK key.
Press the Navigation key to select the sleep time, and then press the OK key.
6.6.3 Adjusting the Font Size
You can adjust the font size according to your reading habit.
Press the Navigation key to select Display, and then press the OK key.
Press the Navigation key to select Font size, and then press the OK key.
Press the Navigation key left or right.

User Manual
System Settings
13
6.7 Sound
6.7.1 Setting the Profile
You can set the profile of the radio according to different scenarios.
Press the Navigation key to select Sound, and then press the OK key.
Press the OK key again.
Press the Navigation key to select Silent or Ringtone, and then press the OK key.
6.7.2 Selecting the Speaker
You can use the internal or external speaker according to different scenarios.
Press the Navigation key to select Sound, and then press the OK key.
Press the Navigation key to select Speaker, and then press the OK key.
Press the Navigation key to select Internal or External, and then press the OK key.
If you use an external speaker, ensure that the radio is connected to it.
6.7.3 Enabling the Emergency Broadcast
In case of emergencies, the emergency broadcast allows you to receive the relevant information through the radio.
Press the Navigation key to select Sound, and then press the OK key.
Press the Navigation key to select Emergency broadcasts, and then press the OK key.
Do one of the following:
Press the Navigation key to select a broadcast type, and then press the OK key.
The options include Show extreme threats, Show severe threats, and Show AMBER alerts.
Press the Navigation key to select Turn on notifications, and then press the OK key to enable or disable it.
Press the Navigation key to select Alarm reminder, press the OK key, press the Navigation key to select
the frequency of alarm reminder, and then press the OK key again.
6.8 Storage
6.8.1 Checking the Storage Usage
Press the Navigation key to select Storage, and then press the OK key.
Table of contents
Other Hytera Radio manuals

Hytera
Hytera PD78X Series Installation and operation manual

Hytera
Hytera PD605 User manual

Hytera
Hytera MD65X User manual

Hytera
Hytera HM65X User manual

Hytera
Hytera PD3 Series Installation and operation manual

Hytera
Hytera PD562 User manual

Hytera
Hytera MD78Xi User manual

Hytera
Hytera BP36X User manual

Hytera
Hytera PNC380 User manual

Hytera
Hytera PDC760UXB2 User manual

Hytera
Hytera TM-610 User manual

Hytera
Hytera PTC680FXB1 User manual

Hytera
Hytera DMR User manual

Hytera
Hytera PDC7 Series User manual

Hytera
Hytera PD78X Series User manual

Hytera
Hytera MD61X User manual

Hytera
Hytera MD78X User manual

Hytera
Hytera HM652GBTV User manual

Hytera
Hytera TM-600 VHF User manual

Hytera
Hytera MD785 User manual