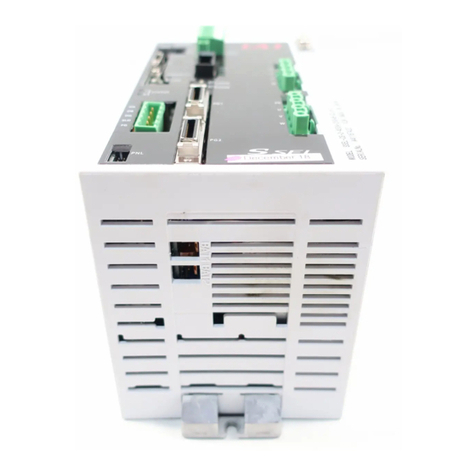
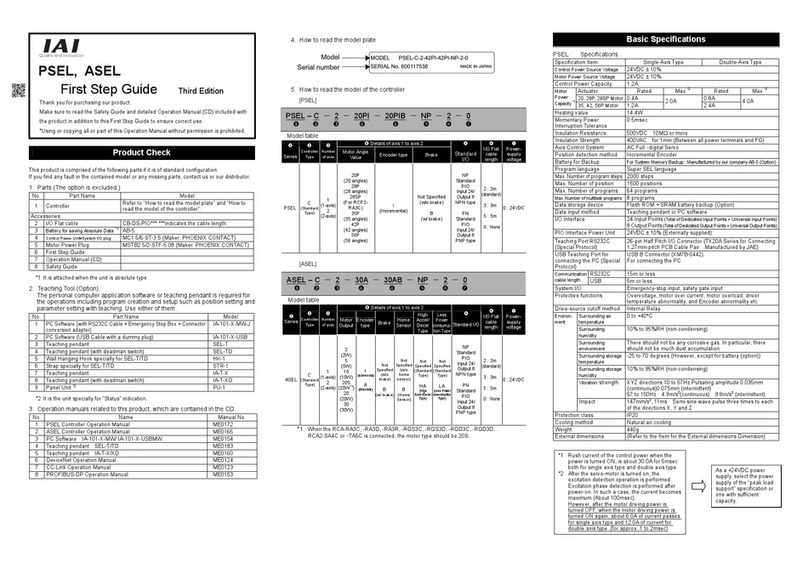
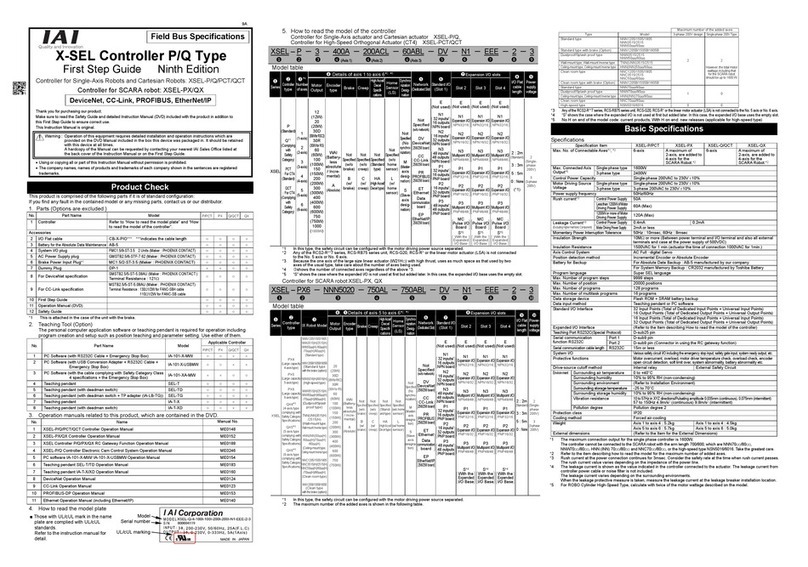
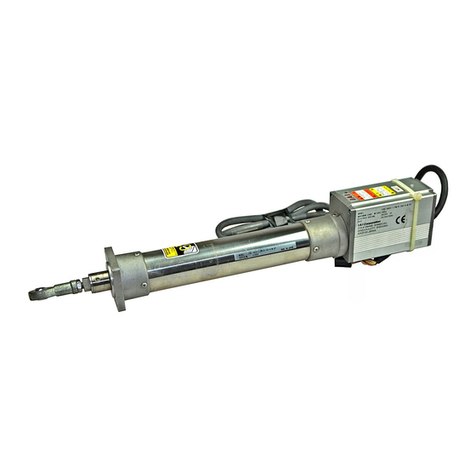
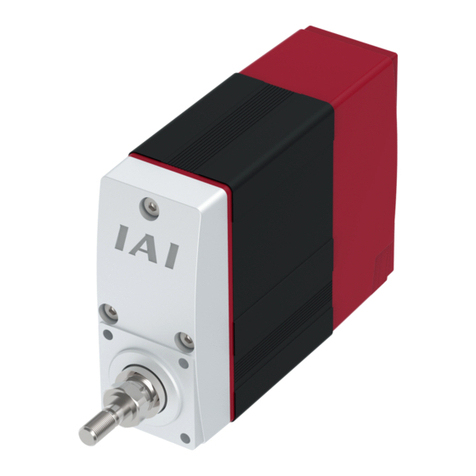
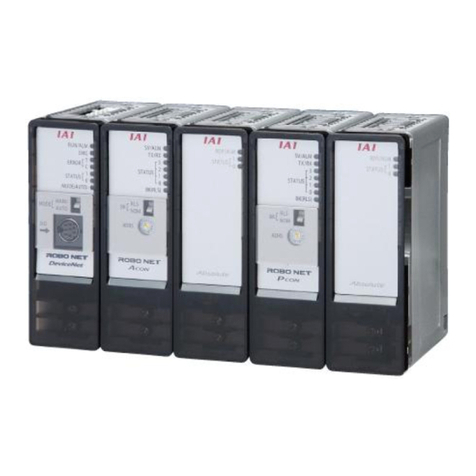
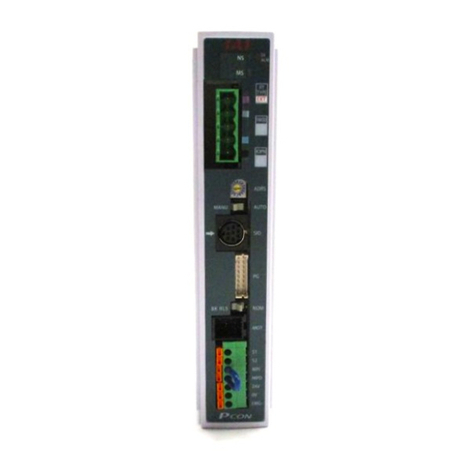
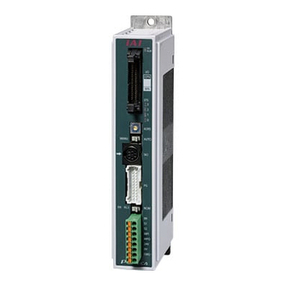
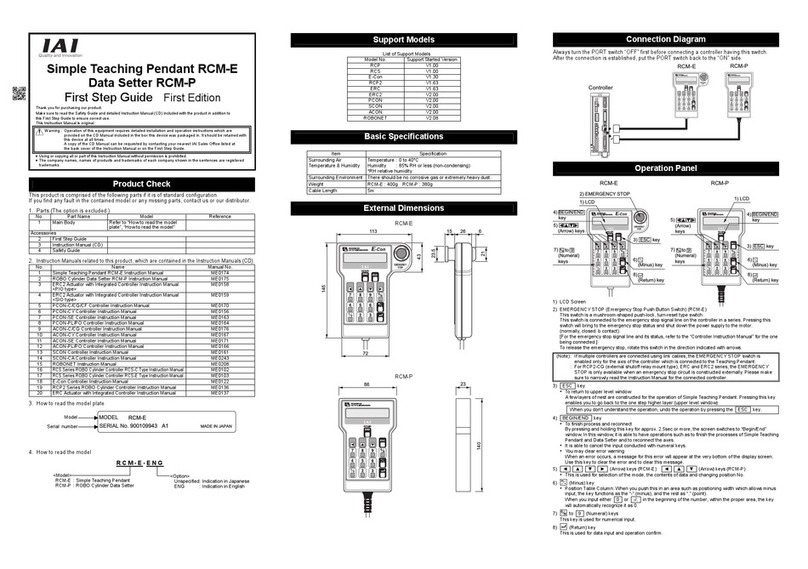
IAI PCON-CA User manual

PCON-CA/CFA/CB/CFB/CGB/CGFB,
ACON-CA/CB/CGB, DCON-CA/CB/CGB
First Step Guide Seventh Edition
Thank you for purchasing our product.
Make sure to read the Safety Guide and detailed Instruction Manual (DVD) included with the product in addition to
this First Step Guide to ensure correct use. This First Step Guide is original manual written by only this product.
• Using or copying all or part of this Instruction Manual without permission is prohibited.
• The company names, names of products and trademarks of each company shown in the sentences are registered
trademarks.
Product Check
The standard configuration of this product is comprised of the following parts.
If you find any fault with the product you have received, or any missing parts, contact us or our distributor.
1. Parts
No. Part Name Model Reference
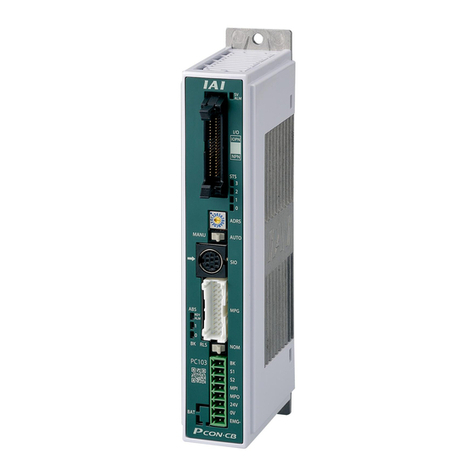
1 Controller Main Body Refer to “How to read the model plate”,
“How to read the model of the controller”
Accessories
2 Field Network Connector MSTB2.5/5-STF-5.08AU (CC-Link)
MSTB2.5/5-STF-5.08AUM (DeviceNet)
Prepare for separately except for CC,
DV type.
3 Power Connector FMC1.5/8-ST-3.5
(Supplier : PHOENIX CONTACT)
Recommended cable size AWG16 to 20
(1.25 to 0.5mm2)
4 Dummy plug DP-5 For the safety category compliant type
5 Absolute Battery (Option) AB-7 or SEP-ABU* If applicable for Simple Absolute Type
6 Serial Absolute Battery (Option) AB-5 If applicable for Serial Absolute Type
(for ACON only)
7 First Step Guide
8 Instruction Manual (DVD)
9 Safety Guide
2. Teaching Tool (to be purchased separately)
A teaching tool, such as PC Software, is necessary when performing programming and commissioning, such
as editing position data or parameters.
Please utilise any of the following teaching tools.
(Note) TB-01/01D/01DR are not applicable for CC-Link IE.
No. Part Name Model
1 PC Software
(with RS232C converter adapter + external equipment communication cable) RCM-101-MW
2 PC Software
(with USB converter adapter + USB cable + external equipment communication cable) RCM-101-USB
3
Touch Panel Teaching TB-01 (Standard / with Deadman Switch Attached on the Left/ Right side)
TB-01/01D/01DR
4 Touch Panel Teaching TB-02 (Standard / with Deadman Switch Attached) TB-02/02D
5 Data Setter TB-03 TB-03
3. Instruction Manuals related to this product, which are contained in the Instruction Manual (DVD).
No. Name Manual No.
1 PCON-CA/CFA Controller Instruction Manual ME0289
2 PCON-CB/CFB Controller Instruction Manual ME0342
3 ACON-CA, DCON-CA Controller Instruction Manual ME0326
4 ACON-CB Series Contoroller, DCON-CB Series Contoroller Instruction Manual ME0343
5 PC Software RCM-101-MW/RCM-101-USB Instruction Manual ME0155
6 Touch Panel Teaching TB-01/TB-02/TB-03 Position Controller Instruction Manual
ME0324/ME0355/ME0376
7 Instruction Manual for the Serial Communication [for Modbus] ME0162
8 CC-Link Instruction Manual ME0254
9 DeviceNet Instruction Manual ME0256
10 PROFIBUS-DP Instruction Manual ME0258
11 CompoNet Instruction Manual ME0220
12 MECHATROLINK-Ⅰ/Ⅱ Instruction Manual ME0221
13 MECHATROLINK-Ⅲ Instruction Manual ME0317
14 EtherCAT Instruction Manual ME0273
15 EtherNet/IP Instruction Manual ME0278
16 PROFINET-IO Instruction Manual ME0333
17 MECHATROLINK-Ⅲ Instruction Manual ME0317
18 CC-Link IE Instruction Manual ME0389
4. How to read the model plate
5. How to read the model of the controller
z PCON PCON-CA-56P WAI-EP-2-0-ABU-DN-**
z ACON
ACON-CA-30 I-EC-2-0-AB-DN-**
z DCON
DCON-CA-3 I-EP-2-0-DN-**
Basic Specifications
PCON List of Specifications
Description
Item PCON-CA/CB/CGB PCON-CFA/CFB/CGFB
Number of controlled axes 1-axis
Power-supply Voltage 24V DC ±10%
20P, 28P, 28SP MAX. 1A
35P, 42P, 56P MAX. 2.2A
RCP2
RCP3
Motor
Type
60P, 86P MAX. 6A
High-thrust function
is disabled MAX.2.2A
28P, 35P, 42P,
56P
High-thrust function
is enabled
Rated 3.5A /
MAX. 4.2A
Load
Capacity
(including
control side
current
consumption)
(Note1)
RCP4
RCP5
RCP6
Motor
Type
56SP, 60P, 86P MAX. 6A
Power Supply for Electromagnetic Brake
(for actuator equipped with brake) 24V DC ±10% 0.15A (MAX.)
RCP2 , RCP3 5W 26.4W Heat Generation
RCP4 to RCP6 3W
Rush Current (Note2) 8.3A 10A
Transient Power Cutoff Durability MAX. 500μs
Motor Control System Weak field-magnet vector control
RCP2 to RCP5 Incremental Encoder, Battery-less Absolute Encoder Resolution 800pulse/rev Corresponding
Encoder RCP6 Battery-less Absolute Encoder Resolution 8192pulse/rev
Actuator Cable Length MAX. 20m
Serial Communication Interface
(SIO Port)
RS485 : 1 CH (based on Modbus Protocol RTU/ASCII)
Speed : 9.6 to 230.4Kbps
Control available with serial communication in the modes other than the pulse train
PIO Type Signal I/O dedicated for 24V DC (selected from NPN/PNP) … Input 16 points max.,
output 16 points max.
Cable length MAX. 10m
External
Interface
Fieldbus Type DeviceNet, CC-Link, PROFIBUS-DP, CompoNet, MECHATROLINK-Ⅰ/Ⅱ,
EtherCAT, EtherNet/IP, PROFINET-IO, MECHATROLINK-Ⅲ*, CC-Link IE*
(* Some types cannot connect it.)
Data Setting and Input PC Software, Touch Panel Teaching, Teaching Pendant, Data Setter
Data Retention Memory Saves position data and parameters to non-volatile memory
(There is no limitation to the number of times data may be written.)
Operation Mode Positioner Mode/Pulse Train Control Mode (selected by parameter setting)
Number of Positions in Positioner Mode Standard 64 points, MAX. 512 points (PIO Type)
(Note) Number of positions differs depending on the selection in PIO pattern.
Differential System (Line Driver System) : MAX. 200kpps
Cable length MAX. 10m
Input Pulse Frequency
Open Collector System : Not applicable.
* If the host applies the open collector output, prepare AK-04 (option) separately to
convert to the differential type.
Command Pulse Multiplying Factor
(Electrical Gear : A/B)
1/50 < A/B < 50/1
Setting Range of A and B (set to parameter) : 1 to 4096
Pulse
Train
Interface
Feedback Pulse Output None
LED Display
(mounted on Front Panel)
SV (GN)/ALM (RD)
: Servo ON/Alarm generated
STS0 to 3
: Status display
RDY (GN)/ALM (RD)
: Absolute function in normal / absolute function error (for the
simple absolute type)
1, 0 (GN) (RD)
: Absolute function status display (for the simple absolute type)
Electromagnetic Brake Compulsory Release
Switch (mounted on Front Panel)
Switching NOM (standard)/BK RLS (compulsory release)
Insulation Resistance 500V DC 10MΩ or more
Protection Function against Electric Shock
Class I basic insulation
Incremental Type Screw fixed type : 250g or less
DIN rail fixed type : 285g or less
Screw fixed type : 270g or less
DIN rail fixed type : 305g or less
Weight
(Note3)
Simple Absolute Type
(including 190g for battery)
Screw fixed type : 450g or less
DIN rail fixed type : 485g or less
Cooling Method Natural air-cooling Forced air-cooling
External dimensions Screw fixed type : 35W×178.5H×69.6D
DIN rail fixed type : 35W×185H×78.1D
Screw fixed type : 35W×190H×69.6D
DIN rail fixed type : 35W×196.5H×78.1D
Surrounding Air Temperature 0 to 40°C
Surrounding Humidity 85%RH or less (non-condensing)
Surrounding Environment [Refer to Installation Environment]
Surrounding Storage
Temperature
-20 to 70°C (Excluding battery)
Usage Altitude 1000m or less
Protection Class IP20
Environment
Vibration Durability Frequency 10 to 57Hz / Swing width : 0.075mm
Frequency 57 to 150Hz / Acceleration 9.8m/s2
XYZ directions Sweep time : 10 minutes Number of sweep : 10 times
Note1 Add an additional 0.3A inrush for Fieldbus Types.
Note2 In-rush current will flow for approximately 5msec after the power is turned on (at 40°C).
Note that the value of in-rush current differs depending on the impedance of the power supply line.
Note3 Add an additional 30g for CA/CB/CGB Fieldbus Type. Add an additional 10g for CFA/CFB/CGFB Fieldbus Type.
ACON, DCON List of Specifications
Description
Item ACON-CA/CB/CGB DCON-CA/CB/CGB
Number of controlled axes 1-axis
Power-supply Voltage 24V DC ±10%
Series Motor Type Rated Max. Power
Consumption MAX.(Note5) Rated MAX.
2W 0.8A 4.6A
5W 1.0A 6.4A
10W (RCL) 1.3A 6.4A
10W (RCA/ RCA2) 1.3A 2.5A 4.4A
20W 1.3A 2.5A 4.4A
20W (Model: 20S) 1.7A 3.4A 5.1A
RCA,
RCA2,
RCL
30W 1.3A 2.2A 4.0A
Load
Capacity
(It does
not
including
control
side
current
consump
tion)
(Note1)
RCD 3W 0.7A 1.5A
Power Supply for Electromagnetic
Brake (for actuator equipped with brake) 24V DC ±10% 0.15A (MAX.)
Heat Generation 8.4W 4W
Rush Current (Note2) 10A
Transient Power Cutoff Durability MAX. 500μs
<Identification for IAI use only>
* There is no identification in some cases.
<Type of Installation>
(Not Specified) : Screw Attachment Type
DN : DIN Rail Mounting Type
<Applicable to Simplified Absolute Unit>
(Not Specified): Incremental
/ Battery-less Absolute
AB : Simple Absolute Type
(With the Absolute Battery)
ABU : Simple Absolute Type
(With the Absolute Battery Unit
(SEP-ABU))
ABUN : Simple Absolute Type
(With no Absolute Battery)
<Power-supply Voltage>
0 : 24V DC
<I/O Cable Length>
0 : Equipped with no cable
2 : 2m (Standard)
3 : 3m
5 : 5m
Warning : Operation of this equipment requires detailed installation and operation instructions which are
provided on the DVD Manual included in the box this device was packaged in. It should be retained
with this device at all times.
A hardcopy of the Manual can be requested by contacting your nearest IAI Sales Office listed at
the back cove
r
of the Instruction Manual or on the First Step Guide.
Serial number
Model
Model
SER NO.
Input
Output
Actuator **
CAUTION: Connect the wiring correctly and
properly, use IAI specified cables
or min 60°C Cu wire.
IP20
*********
*********
DC24V A
0-24Vac,3ph,0-333Hz, A
*****
Applicable to Fieldbus
<Identification for IAI use only>
* There is no identification in some cases.
<Type of Installation>
(Not Specified) : Screw Attachment Type
DN : DIN Rail Mounting Type
<Applicable to Simplified Absolute Unit>
AB : Simple Absolute Type
(With the Absolute Battery)
ABU : Simple Absolute Type
(With the Absolute Battery Unit
(SEP-ABU))
ABUN : Simple Absolute Type
(With no Absolute Battery)
<Power-supply Voltage>
0 : 24V DC
<I/O Cable Length>
0 : Equipped with no cable
2 : 2m (Standard)
3 : 3m
5 : 5m
<Identification for IAI use only>
* There is no identification in some cases.
<Type of Installation>
(Not Specified) : Screw Attachment Type
DN : DIN Rail Mounting Type
<Power-supply Voltage>
0 : 24V DC
<I/O Cable Length>
0 : Equipped with no cable
2 : 2m (Standard)
3 : 3m
5 : 5m
<Series>
<Type>
CA/CB : Standard Type
CFA/CFB : High-Thrust Actuator
Connection Type
CGB
:
Sagety Categories Complied Type
CGFB
: High-Thrust Actuator
Connection Sagety Categories
Complied Type
<Detail of Connected Axis>
[Motor Type]
20P : 20□ pulse motor, 20SP : 20□ pulse motor
28P : 28□ pulse motor, 28SP : 28□ pulse motor
35P : 35□ pulse motor, 42P : 42□ pulse motor
42SP : 42□ pulse motor, 56P : 56□ pulse motor
56SP : 56□ pulse motor, 60P : 60□ pulse motor
86P : 86□ pulse motor
[Encoder Type]
WAI : Incremental / Battery-less Absolute Shared
SA : Simple Absolute
<I/O Type>
NP : NPN Type (Sync. Type) (Standard),
PN : PNP Type (Source Type),
PLN : Pulse Train Control NPN Type (Sync. Type),
PLP : Pulse Train Control PNP Type (Source Type),
DV : DeviceNet Connection Type, CC : CC-Link Connection Type
PR : PROFIBUS-DP Connection Type, CN : CompoNet Connection Type
PRT : PROFINET-IO Connection Type, EC : EtherCAT Connection Type
EP : EtherNet/IP Connection Type, ML : MECHATROLINK-Ⅰ/Ⅱ Connection Type
ML3 : MECHATROLINK-Ⅲ Connection Type (Except for PCON-CA/CFA)
CIE : CC-Link IE Type (PCON-CB/CFB/CGB/CGFB only)
<Series>
<Type>
CA/CB : Standard Type
CGB : Safety Categories Complied Type
<Detail of Connected Axis>
[Motor Type]
2 : 2W AC servo motor
5 : 5W AC servo motor
10 : 10W AC servo motor
20S : 20W AC servo motor
20 : 20W AC servo motor
30 : 30W AC servo motor
[Encoder Type]
WAI : Incremental / Battery-less Absolute
shared (CB only)
I : Incremental A : Serial Absolute
[Option]
HA : High Acceleration/Deceleration Type
LA : Low Power Consumption Type
No description : Standard Type
<I/O Type>
NP : NPN Type (Sync. Type) (Standard), PN : PNP Type (Source Type),
PLN : Pulse Train Control NPN Type (Sync. Type),
PLP : Pulse Train Control PNP Type (Source Type),
DV : DeviceNet Connection Type, CC : CC-Link Connection Type
PR : PROFIBUS-DP Connection Type, CN : CompoNet Connection Type
PRT : PROFINET-IO Connection Type, EC : EtherCAT Connection Type
EP : EtherNet/IP Connection Type, ML : MECHATROLINK-Ⅰ/Ⅱ Connection Type
ML3 : MECHATROLINK-Ⅲ Connection Type (Except for ACON-CA)
CIE : CC-Link IE Type (ACON-CB/CGB only)
<Series>
<Type>
CA/CB : Standard Type
<Detail of Connected Axis>
[Motor Type]
3 : 2.5W DC Brushless motor
[Encoder Type]
I : Incremental
<I/O Type>
NP : NPN Type (Sync. Type) (Standard), PN : PNP Type (Source Type),
PLN : Pulse Train Control NPN Type (Sync. Type),
PLP : Pulse Train Control PNP Type (Source Type),
DV : DeviceNet Connection Type, CC : CC-Link Connection Type
PR : PROFIBUS-DP Connection Type, CN : CompoNet Connection Type
PRT : PROFINET-IO Connection Type, EC : EtherCAT Connection Type
EP : EtherNet/IP Connection Type, ML : MECHATROLINK-Ⅰ/Ⅱ Connection Type
ML3 : MECHATROLINK-Ⅲ Connection Type (Except for DCON-CA)
CIE : CC-Link IE Type (DCON-CB only)

Description
Item ACON-CA/CB/CGB DCON-CA/CB/CGB
Motor Control System Sinusoidal Waveform (AC) Drive Rectangular Waveform (DC) Drive
Corresponding Encoder Incremental Encoder
Serial Absolute Encoder
Battery-less Absolute Encoder
Incremental Encoder
Incremental Type 800pulse/rev RCA
Serial Absolute Type 16384pulse/rev
RCA2_*** N 1048pulse/rev RCA2
Other than
RCA2_*** N
800pulse/rev
RCA
/RCA2
Battery-less
Absolute Type
16384pulse/rev
RA1, RA4, SA1, SA4 715pulse/rev
RA2, RA5, SA2, SA5 855pulse/rev
RCL
RA3, RA6, SA3, SA6 1145pulse/rev
Correspon
ding
Encoder
Resolution
RCD 400pulse/rev
Actuator Cable Length MAX. 20m MAX. 10m
Serial Communication Interface
(SIO Port)
RS485 : 1 CH (based on Modbus Protocol RTU/ASCII)
Speed : 9.6 to 230.4Kbps
Control available with serial communication in the modes other than the pulse train
PIO Type Signal I/O dedicated for 24V DC (selected from NPN/PNP) … Input 16 points max.,
output 16 points max. Cable length MAX. 10m
External Interface
Field Network Type DeviceNet, CC-Link, PROFIBUS-DP, CompoNet, MECHATROLINK-Ⅰ/Ⅱ,
EtherCAT, EtherNet/IP, PROFINET-IO, MECHATROLINK-Ⅲ*, CC-Link IE*
(* Some types cannot connect it.)
Data Setting and Input PC Software, Touch Panel Teaching, Teaching Pendant, Data Setter
Data Retention Memory Saves position data and parameters to non-volatile memory
(There is no limitation to the number of times data may be written.)
Operation Mode Positioner Mode/Pulse Train Control Mode (selected by parameter setting)
Number of Positions in Positioner Mode Standard 64 points, MAX. 512 points (PIO Type)
(Note) Number of positions differs depending on the selection in PIO pattern.
Differential System (Line Driver System) : MAX. 200kpps
Cable length MAX. 10m
Input Pulse Frequency
Open Collector System : Not applicable.
* If the host applies the open collector output, prepare AK-04 (option) separately to
convert to the differential type.
Command Pulse Multiplying
Factor (Electrical Gear : A/B)
1/50 < A/B < 50/1
Setting Range of A and B (set to parameter) : 1 to 4096
Pulse
Train
Interface
(Note4)
Feedback Pulse Output None
LED Display (mounted on Front Panel)
SV (GN)/ALM (RD)
: Servo ON/Alarm generated
STS0 to 3
: Status display
RDY (GN)/ALM (RD)
: Absolute function in normal / absolute function error (for the
simple absolute type)
1, 0 (GN) (RD)
: Absolute function status display (for the simple absolute type)
Electromagnetic Brake Compulsory
Release Switch (mounted on Front Panel)
Switching NOM (standard)/BK RLS (compulsory release)
Insulation Resistance 500V DC 10MΩ or more
Protection Function against Electric Shock
Class I basic insulation
Incremental Type Screw fixed type : 230g or less DIN rail fixed type : 265g or less
Simple Absolute Type Battery (AB-7) : 190g or less
Absolute Battery Case (SEP-ABU) :
140g or less
Weight
(Note3)
(Other
than Field
Network
Type) Serial Absolute Type Battery (AB-5) : 20g
Cooling Method Natural air-cooling
External dimensions Screw fixed type : 35W×178.5H×69.6D
DIN rail fixed type : 35W×185H×78.1D
Surrounding Air Temperature 0 to 40°C
Surrounding Humidity 85%RH or less (non-condensing)
Surrounding Environment [Refer to Installation Environment]
Surrounding Storage
Temperature
-20 to 70°C (Excluding battery)
Usage Altitude 1000m or less
Protection Class IP20
Environment
Vibration Durability Frequency 10 to 57Hz / Swing width : 0.075mm
Frequency 57 to 150Hz / Acceleration 9.8m/s2
XYZ directions Sweep time : 10 minutes Number of sweep : 10 times
Note1 Control power capacity is 0.3A.
Note2 In-rush current will flow for approximately 5msec after the power is turned on (at 40°C).
Note that the value of in-rush current differs depending on the impedance of the power supply line.
Note3 Add the weight of the battery (case) for “Simple Absolute Type” and “Serial Absolute Type”.
Note4 Serial absolute type is not applicable for the pulse train control mode.
Note5 The current reaches the maximum at the excitation phase detection of the motor conducted when the servo is turned
on for the first time after the power is supplied. (TYP 1 to 2 second, MAX. 10 second)
External Dimensions (ACON, DCON, PCON-CA/CB/CGB)
* There is only Incremental Type in DCON.
● Screw fixed type
● DIN rail fixed type
35
178.5
185
M3 M3
35
178.5
185
M3
35
178.5
185
8.5
4
(5)
(58)
(5)
(5)
(52)
78.1
Simplified Absolute Type
(Option) Serial Absolute Type
(Option) Side View
Battery-less Absolute/
Incremental Type
104 from DIN rail center
35.4 (Width of 35mm DIN rail)
(for FG cable
attachment)
(for FG cable
attachment)
(for FG cable
attachment)
External Dimensions (PCON-CFA/CFB/CGFB)
● Screw fixed type
● DIN rail fixed
Installation Environment
This product is capable for use in the environment of pollution degree 2*1 or equivalent.
*1 Pollution Degree 2: Environment that may cause non-conductive pollution or transient conductive
pollution by frost (IEC60664-1)
1. Installation Environment
Do not use this product in the following environment
• Location where the surrounding air temperature exceeds the range of 0 to 40°C
• Location where condensation occurs due to abrupt temperature changes
• Location where relative humidity exceeds 85%RH
• Location exposed to corrosive gases or combustible gases
• Location exposed to significant amount of dust, salt or iron powder
• Location subject to direct vibration or impact
• Location exposed to direct sunlight
• Location where the product may come in contact with water, oil or chemical droplets
• Environment that blocks the air vent [Refer to Installation and Noise Elimination]
When using the product in any of the locations specified below, provide a sufficient shield.
• Location subject to electrostatic noise
• Location where high electrical or magnetic field is present
• Location with the mains or power lines passing nearby
2. Storage and Preservation Environment
• Storage and preservation environment follows the installation environment. Especially in a long-term storage, consider
to avoid condensation of surrounding air.
Unless specially specified, moisture absorbency protection is not included in the package when the machine is
delivered. In the case that the machine is to be preserved in an environment where dew condensation is anticipated,
take the condensation preventive measures from outside of the entire package, or directly after opening the package.
Installation and Noise Elimination
1. Noise Elimination Grounding (Frame Ground)
2. Precautions regarding wiring method
1) Wire is to be twisted for the 24V DC power supply.
2) Separate the signal and encoder lines from the power
supply and power lines.
3. Noise Sources and Elimination
Carry out noise elimination measures for power devices on
the same power path and in the same equipment.
The following are examples of measures to eliminate noise
sources.
1) AC solenoid valves, magnet switches and relays
[Measure] Install a Surge absorber parallel with the coil.
2) DC solenoid valves, magnet switches and relays
[Measure] Install a diode parallel with the coil. Use a DC
relay with a built-in diode.
4. Heat Radiation and Installation
Design and Build the system considering the size of the
controller box, location of the controller and cooling factors to keep the surrounding temperature around
the controller below 40°C.
Connection Diagram
● Connection to RCP2 (High-Thrust), RCA and RCL Series
● Connection to RCP3, RCP4, RCP5, RCP6 and RCA2 Series
Surge absorber
Relay
coil
Relay coil
R
C
+24V 0V
+24V 0V
+-
MIN.
30mm
MIN.
30mm
MIN.
30mm
MIN.
30mm
MIN. 100mm
MIN. 50mm
MIN. 100mm
Ensure enough space
for wiring.
(Note1) Detach the fan unit before
attaching screws to the
main unit.
PCON
ACON
Motor/
Encoder Connector
Connection
Cable
(Note
1
)
Connection
Cable
(Note
1
)
PCON
ACON
Motor/
Encoder Connector
Do not share the ground wire with or connect
to other equipment. Ground each controller.
Controller
Other
equipment
Controller
Other
equipment
Other
equipment
Connect the ground cable
using the tapped hole for
FG connection on the main unit.
M3 × 5 nickeled pan head
machine screw
(enclosure dedicated for
DIN rail fixed type)
Screw fixed type DIN rail fixed type
Connect the ground line
together to the main unit
using the fixing screw.
Copper wire:
Connect a ground wire with a
diameter of 1.6mm (2mm
2
) or larger.
Earth Terminal
Grounding resistance 100Ω or less
(Class D grounding)
Teaching Pendant (Option)
PC Software
(Option)
Personal
Computer
Actuator
Brake Release Switch
Host System <PLC>
Axis No. Setting Switch
Operation Mode
Setting Switch
35
(7)
170.5
190
5
69.6
φ
5
(Note1)
35
(7)
190
(5)
78.1
8.5
4
196.5
115 from DIN rail center
35.4 (Width of 35mm DIN rail)
35
φ
5
170.5
178.5
5
35
φ5
5
(40.5)
(58)
170.5
178.5
35
φ5
5
(34.5)
(52)
170.5
178.5
69.6
Simplified Absolute Type
(Option) Serial Absolute Type
(Option) Side View
Battery-less Absolute/
Incremental Type

● Connection to RCD Series
Note 1 Applicable Connection Cable Model Codes □□□ : Cable Length Example) 030 = 3m
Model Name Cable Reference
RCP2 CB-PSEP-MPA□□□ Robot cable from 0.5 to 20m
CB-APSEP-MPA□□□ Robot cable from 0.5 to 20m
RCP3 CB-APSEP-MPA□□□-LC Standard cable from 0.5 to 20m
CB-CA-MPA□□□-RB Robot cable from 0.5 to 20m
RCP4 (Other than GR* Type)
RCD (Applicable Controller Symbol : D3)
CB-CA-MPA□□□ Standard cable from 0.5 to 20m
CB-CAN-MPA□□□ Standard cable from 0.5 to 20m
RCP4 (GR Type), RCP5, 6
RCD (Applicable Controller Symbol : D5)
CB-CAN-MPA□□□-RB Robot cable from 0.5 to 20m
CB-CFA-MPA□□□ Standard cable for CFA type from 0.5 to 20m
RCP2 CB-CFA-MPA□□□-RB Robot cable for CFA type from 0.5 to 20m
CB-CFA2-MPA□□□ Standard cable for CFA type from 0.5 to 20m
RCP4 CB-CFA2-MPA□□□-RB Robot cable for CFA type from 0.5 to 20m
CB-CFA3-MPA□□□ Standard cable for CFA type from 0.5 to 20m
High-Thrust
RCP5, RCP6 CB-CFA3-MPA□□□-RB Robot cable for CFA type from 0.5 to 20m
RCA, RCL (Incremental Type) CB-ASEP-MPA□□□
CB-ASEP2-MPA□□□ Robot cable from 0.5 to 20m
RCA (Serial Absolute Type)
RCA2 CB-APSEP-MPA□□□ Robot cable from 0.5 to 20m
(Note) There are some exceptions. See in the general catalog.
Power Supply and Emergency Stop Circuit
This shows the circuit example when the emergency stop switch in the teaching pendant is enabled on the
emergency stop circuit to be built up by the client.
In the example below, uses PCON-CA. It is the same in case of except for PCON-CA.
Note 1 : The safety categories complied type (CGB Type, etc.) is not equipped with the relay to have the controller
automatically identify that a teaching tool was plugged in and switch the wiring layout. Those other than the safety
categories complied type do the automatic identification and have S1 and S2 short-circuited.
Note 2 : When the motor driving source is cut off externally for a compliance with the safety category, connect a contact
such as a contactor to the wires between MPI and MPO. Also, the ratings for the emergency stop signal that turns
ON/OFF at the contact CR1 are 24V DC and 10mA or less.
Note 3 : For CR1, select the one with coil current 0.1A or less.
Caution If supplying power with using a 24V DC, having it turned ON/OFF, keep the 0V connected and have the
+24V supplied/cut (cut one side only).
[Reference] Example for operating an actuator by using the standard type (CA or CB Type) with optimum wiring layout
(Note) In this example, the emergency stop switch on the teaching pendant would not work.
Operation Modes and Functions (Except for MECHATROLINK-Ⅲ)
(Note) Refer to the Section for MECHATROLINK-
Ⅲ
for the operation modes and features of MECHATROLINK-
Ⅲ
.
The machine can be operated selecting one mode from the following five operation modes.
(1) Remote I/O Mode : This is the method where the operation through PIO (24V I/O) is performed using the fieldbus.
(2) Position/ : This is the method where the machine is operated by means of directly specifying the target
Simple Direct position using numerical values.
Value Mode For the speed, acceleration, deceleration, or positioning width, the already registered position
data values are used.
(3) Half Direct Value Mode : In this operation mode, in addition to the target position, the speed, acceleration, deceleration
and push current value are directly specified using numerical values.
(4) Full Direct Value Mode : In this operation mode, all the values related to the position control, are directly specified using
numerical values.
(5) Remote I/O Mode 2 : Additionally, the current position and current speed reading functions are added to the remote I/O mode.
Operation Modes and Main Functions
Main Functions Remote I/O
Mode
Position/Simple
Direct Value Mode
Half Direct
Val ue Mo de
Full Direct
Val ue Mo de
Remote I/O
Mode 2
No. of Occupied Channels (DeviceNet) 1 4 8 16 6
Number of occupied stations (CC-Link) 1 1 2 4 1
No. of Occupied Bytes (PROFIBUS) 2 8 16 32 12
No. of Occupied Bytes (CompoNet) 2 8 16 32 12
Operation with the Position No. Specified ○○ × × ○
Operation with the Position Data Specified ×○ (*1) ○ ○ ×
Speed and Acceleration Direct Setup × × ○ ○ ×
Pressing Operation ○ ○ ○ ○ ○
Current Position Read × ○ ○ ○ ○
Current Speed Read × × ○ ○ ○
Completion Position No. Read ○ ○ × × ○
Max. Number of position table 512 768 Unused Unused 512
(*1) The actuator is operated by specifying all position data, other than the position, using a position number.
Address Map
The table shows the address maps separately for CC-Link type, CC-Link IE type and those other.
z CC-Link
• PLC output → Input in PCON / ACON / DCON (* n is the top register address for each axis.)
DI on the PCON / ACON / DCON side and Input Data Register
Remote I/O Mode Position/Simple
Direct Value Mode
Half Direct Value
Mode
Full Direct Value
Mode Remote I/O Mode 2
Parameter No.84 : 0
(Set in delivery) Parameter No.84 : 1 Parameter No.84 : 2 Parameter No.84 : 3 Parameter No.84 : 4
Address on the
PLC side
Number of occupied
stations : 1 Station
Number of occupied
stations : 1 Station
Number of occupied
stations : 2 Stations
Number of occupied
stations : 4 Stations
Number of occupied
stations : 1 Station
RY n0 to nF Port No.0 to 15 Occupied Domain Port No.0 to 15
RY (n+1) 0 to (n+1) F
System Domains System Domains Occupied Domain System Domains
RY (n+2) 0 to (n+2) F
System Domains
RY (n+3) 0 to (n+3) F
RY (n+4) 0 to (n+4) F
RY (n+5) 0 to (n+5) F
RY (n+6) 0 to (n+6) F
Occupied Domain
RY (n+7) 0 to (n+7) F
System Domains
RWw (n+0)
RWw (n+1) Target Position Target Position Target Position
RW w (n+ 2) Specified Position No.
RWw (n+3)
Occupied Domain
Control Signal Positioning Width Positioning Width Occupied Domain
RWw (n+4) Speed
RWw (n+5)
Acceleration/Deceleration
Speed
RWw (n+6)
Push Current Limit Value
RWw (n+7) Control Signal
Zone Boundary Value+
RWw (n+8)
RWw (n+9)
Zone Boundary Value-
RWw (n+A) Acceleration
RWw (n+B) Deceleration
RWw (n+C)
Push Current Limit Value
RWw (n+D)
Load Current Threshold
RWw (n+E) Control Signal 1
RWw (n+F)
Control Signal 2
• PCON / ACON / DCON output → PLC input side (* n is the top register address for each axis.)
DO on the PCON / ACON / DCON side and Input Data Register
Remote I/O Mode Position/Simple
Direct Value Mode
Half Direct Value
Mode
Full Direct Value
Mode Remote I/O Mode 2
Parameter No.84 : 0
(Set in delivery) Parameter No.84 : 1 Parameter No.84 : 2 Parameter No.84 : 3 Parameter No.84 : 4
Address on the
PLC side
Number of occupied
stations : 1 Station
Number of occupied
stations : 1 Station
Number of occupied
stations : 2 Stations
Number of occupied
stations : 4 Stations
Number of occupied
stations : 1 Station
RX n0 to nF Port No.0 to 15*2 Occupied Domain Port No.0 to 15*2
RX (n+1) 0 to (n+1) F
System Domains System Domains System Domains
RX (n+2) 0 to (n+2) F
Occupied Domain
RX (n+3) 0 to (n+3) F
System Domains
RX (n+4) 0 to (n+4) F
RX (n+5) 0 to (n+5) F
RX (n+6) 0 to (n+6) F
Occupied Domain
RX (n+7) 0 to (n+7) F
System Domains
RWr (n+0)
RWr (n+1) Current Position Current Position Current Position Current Position
RWr (n+2)
Completion Position No.
(Simple Alarm ID)
RWr (n+3)
Occupied Domain
Status Signal
Command Current Command Current Command Current
RWr (n+4)
RWr (n+5) Current Speed Current Speed
RWr (n+6) Alarm Code Alarm Code
RWr (n+7) Status Signal
RWr (n+8)
RWr (n+9)
Occupied Domain
RWr (n+A)
RWr (n+B)
Total Number of
Movement
RWr (n+C)
RWr (n+D)
Total Number of
Drive
RWr (n+E) Status Signal 1
RWr (n+F)
Status Signal 2
*1 The Occupied Domain stands for the domain occupied depending on the setting of the remote device station quantity.
Therefore, this domain cannot be used for any other purpose. Also, take care to avoid shared use of the data register.
*2 When an alarm is sounded, the completion position No. (4 bits for PM1 to PM8) shows the simple alarm code.
z CC-Link IE
• PLC output → Input in PCON / ACON / DCON (* n is the top register address for each axis.)
DI on the PCON / ACON / DCON side and Input Data Register
Remote I/O Mode Position/Simple
Direct Value Mode
Half Direct Value
Mode
Full Direct Value
Mode Remote I/O Mode 2
Parameter No.84 : 0
(Set in delivery) Parameter No.84 : 1 Parameter No.84 : 2 Parameter No.84 : 3 Parameter No.84 : 4
Address on the
PLC side
Number of Occupied
Words : 4
Number of Occupied
Words : 4
Number of Occupied
Words : 8
Number of Occupied
Words : 16
Number of Occupied
Words : 4
RY n0 to nF Port No.0 to 15 Port No.0 to 15
RY
(n+1) 0 to (n+1) F
Occupied Domain Occupied Domain Occupied Domain
RWw (n+0)
RWw (n+1) Target Position Target Position Target Position
RW w (n+ 2) Specified Position No.
RWw (n+3)
Occupied Domain
Control Signal Positioning Width Positioning Width
Occupied Domain
RWw (n+4) Speed
RWw (n+5) Acceleration/
Deceleration Speed
RWw (n+6) Push Current Limit
Value
RWw (n+7) Control Signal
Zone Boundary
Value+
RWw (n+8)
RWw (n+9)
Zone Boundary
Value-
RWw (n+A) Acceleration
RWw (n+B) Deceleration
RWw (n+C) Push Current Limit
Value
RWw (n+D) Load Current
Threshold
RWw (n+E) Control Signal 1
RWw (n+F)
Control Signal 2
• PCON / ACON / DCON output → PLC input side (* n is the top register address for each axis.)
DO on the PCON / ACON / DCON side and Input Data Register
Remote I/O Mode Position/Simple
Direct Value Mode
Half Direct Value
Mode
Full Direct Value
Mode Remote I/O Mode 2
Parameter No.84 : 0
(Set in delivery) Parameter No.84 : 1 Parameter No.84 : 2 Parameter No.84 : 3 Parameter No.84 : 4
Address on the
PLC side
Number of Occupied
Words : 4
Number of Occupied
Words : 4
Number of Occupied
Words : 8
Number of Occupied
Words : 16
Number of Occupied
Words : 4
RX n0 to nF Port No.0 to 15*2 Port No.0 to 15*2
RX
(n+1) 0 to (n+1) F
Occupied Domain Occupied Domain Occupied Domain Occupied Domain
RWr (n+0)
RWr (n+1) Current Position Current Position Current Position Current Position
RWr (n+2)
Completion Position No.
(Simple Alarm ID)
RWr (n+3)
Occupied Domain
Status Signal
Command Current Command Current Command Current
RWr (n+4)
RWr (n+5) Current Speed Current Speed
RWr (n+6) Alarm Code Alarm Code
RWr (n+7) Status Signal
RWr (n+8)
RWr (n+9)
Occupied Domain
RWr (n+A)
RWr (n+B)
Total Number of
Movement
RWr (n+C)
RWr (n+D)
Total Number of
Drive
RWr (n+E) Status Signal 1
RWr (n+F)
Status Signal 2
*1 The Occupied Domain describes the domains occupied for each mode.
Therefore, this domain cannot be used for any other purpose. Also, take care to avoid shared use of the data register.
*2 When an alarm is sounded, the completion position No. (4 bits for PM1 to PM8) shows the simple alarm code.
z Other than CC-Link (DeviceNet / PROFIBUS-DP / CompoNet / MECHATROLINK-Ⅰ/Ⅱ)
• PLC output → Input in PCON / ACON / DCON
DI on the PCON / ACON / DCON side and Input Data Register
Remote I/O Mode Position / Simple
Direct Value Mode
Half Direct Value
Mode
Full Direct Value
Mode*4 Remote I/O Mode 2
Parameter No.84 : 0
(Set in delivery) Parameter No.84 : 1 Parameter No.84 : 2 Parameter No.84 : 3 Parameter No.84 : 4
PLC Output
Area*3
Number of Occupied
Channels : 1CH
Number of Occupied
Channels : 4CH
Number of Occupied
Channels : 8CH
Number of Occupied
Channels : 16CH
Number of Occupied
Channels : 6CH
n Port No.0 to 15 Port No.0 to 15
n+1 Target Position Target Position Target Position
n+2 Specified Position No.
n+3 Control Signal Positioning Width Positioning Width
n+4 Speed
n+5 Acceleration/
Deceleration
Speed Setup
Occupied Domain
n+6 Push Current Limit
Val ue
n+7 Control Signal
Zone Boundary
Value+
n+8
n+9
Zone Boundary
Value-
n+10 Acceleration
n+11 Deceleration
n+12 Push Current Limit
Val ue
n+13 Load Current
Threshold
n+14 Control Signal 1
n+15
Control Signal 2
• PCON / ACON / DCON output → PLC input side
DO on the PCON / ACON / DCON side and Output Data Register
Remote I/O Mode Position / Simple
Direct Value Mode
Half Direct Value
Mode
Full Direct Value
Mode*4 Remote I/O Mode2
Parameter No.84 : 0
(Set in delivery) Parameter No.84 : 1 Parameter No.84 : 2 Parameter No.84 : 3 Parameter No.84 : 4
PLC Output
Area*3
Number of Occupied
Channels : 1CH
Number of Occupied
Channels : 4CH
Number of Occupied
Channels : 8CH
Number of Occupied
Channels : 16CH
Number of Occupied
Channels : 6CH
n Port No.0 to 15*2 Port No.0 to 15*2
n+1 Current Position Current Position Current Position Occupied Domain
n+2
Completion Position No.
(Simple Alarm ID)
n+3 Status Signal
Command Current Command Current Current Position
n+4
n+5
Current Speed Current Speed Command Current
Connection
Cable(Note
1
)
DCON
Motor/
Encoder Connector
S1
S2
MPI
MPO
24V
0V
24V
0V
EMG-
BKLS
Power Supply
Connector
Emergency-stop
Switch on the
Teaching Pendant
Control
Power
Supply
SIO Connector
Wiring Condected
at Delivery
24V DC
Power Supply
Motor Power Supply
Emergency Stop Control Circuit
Brake Release Power Supply
(Note) Supply 24V when connecting actuator
equipped with brake and release brake
compulsorily
Emergency
-stop Switch
24V 0V
0V
Emergency
Stop Reset
Switch
Emergency
Stop Switch
CR1
S1
S2
MPI
MPO
24V
EMG-
BKLS
CR1
(Note 3)
Brake Forced
Release Switch
Power Supply
Connector
PCON-CA
Emergency-stop
Switch on the
Teaching Pendant
Control
Power
Supply
SIO Connector
(Note 1)
Motor Power Supply
CR1
(Note 2)
Emergency Stop Control Circuit
Brake Release Power Supply
(Note) Supply 24V when connecting actuator
equipped with brake and release brake
compulsorily

NS
MS
SV
ALM
Status indicator LEDs
BS-
BDL
BDH
BS+
Monitor LED : The board operation status and network conditions can be obtained.
CompoNet Communication Connector : XW7D-PB4-R (OMRON)
DO on the PCON / ACON / DCON side and Output Data Register
Remote I/O Mode Position / Simple
Direct Value Mode
Half Direct Value
Mode
Full Direct Value
Mode*4 Remote I/O Mode2
Parameter No.84 : 0
(Set in delivery) Parameter No.84 : 1 Parameter No.84 : 2 Parameter No.84 : 3 Parameter No.84 : 4
PLC Output
Area*3
Number of Occupied
Channels : 1CH
Number of Occupied
Channels : 4CH
Number of Occupied
Channels : 8CH
Number of Occupied
Channels : 16CH
Number of Occupied
Channels : 6CH
n+6 Alarm Code Alarm Code
n+7 Status Signal
n+8
n+9
Occupied Domain
n+10
n+11
Total Number of
Movement
n+12
n+13
Total Number of
Drive
n+14 Status Signal 1
n+15
Status Signal 2
*1 The Occupied Domain shows the domain to be occupied with the operation mode setting.
Therefore, this domain cannot be used for any other purpose. Also, be careful of using duplicated node addresses.
*2 When an alarm is sounded, the completion position No. (4 bits for PM1 to PM8) shows the simple alarm code.
*3 The unit differs for each field network.
・DeviceNet or CompoNet : CH Number
・PROFIBUS-DP or MECHATROLINK : byte address
*4 It is not applicable for MECHATROLINK-Ⅰ/Ⅱ
DeviceNet
● Specification
Refer to section DeviceNet instruction manual (ME0256).
● Interface Section
LED color Indication
Status Description
Illuminating Normal operation
GN Flashing Hardware Error. It might be recovered with reconnect of the power.
Illuminating Hardware Error. The replacement of the board is required.
OR Flashing It is a minor error such as a user setting error or configuration error.
It can be recovered by re-setting, etc.
MS
- OFF The DeviceNet is being initialized, or the power is not supplied.
Illuminating The connection has been established and the communication is
being performed normally.
GN
Flashing The machine is on-line, but the connection has not been
established. Communication Stop (Network is normal).
Illuminating Node address is duplicated or Busoff is detected.
Communication Unavailable.
OR
Flashing Communication Error (Communication Time-out Detection)
NS
- OFF The machine is not on-line.
The power to the DeviceNet is not supplied.
● Wiring
● Operation Mode Setting and Address Allocation
The operation mode is set using the parameters.
Set the mode change switch on the front of the board to “MANU” side and set the parameter No. 84 “FMOD: Fieldbus
Operation Mode” using the Personal Computer Application Software for RC. [Refer to Address Map]
● Station No. Setting
The station No. is set using specific parameters.
Set the parameter No.85 “NADR: Fieldbus Node Address” using the personal computer application software for RC.
Settable Range:0 to 63 (It is set to “63” when the machine is delivered from the factory.)
● Communication Speed Setting
The setting for the communication speed is not required because it automatically follows the master’s communication speed.
(Note)
After the parameter setting, cycle the control power, and return the mode toggle switch on the front of the controller to “AUTO” side.
CC-Link
● Specification
Refer to section CC-Link instruction manual (ME0254).
● Interface Section
LED Color Indication
Status
Indication Description
(Meaning of the Indication)
Illuminating
• An error occurs.
(CRC Error/Station No. (parameters) Setting
Error/Baud Rate Setting (parameters) Error)
• Period between the power injection or software
reset and the CC-Link initialization completion
OFF • Under Normal Communication
ERR OR
Flashing • Station No. setting or communication speed
setting is changed during the communication.
Illuminating • Under communication
RUN GN OFF • Not communicated
● Wiring
● Operation Mode Setting and Address Allocation
The operation mode is set using the parameters.
Set the mode change switch on the front of the board to “MANU” side and set the parameter No.84 “FMOD:
Fieldbus Operation Mode” using the Personal Computer Application Software for RC.
● Station No. Setting
The station No. is set using specific parameters.
Set the parameter No.85 “NADR: Fieldbus Node Address” using the personal computer application software for RC.
Settable Range : 1 to 64 (Already set in system delivery)
● Communication Speed Setting
Set the parameter No.86 “FBRS: Fieldbus Communication Speed” using the personal computer application
software for RC.
Set Value Communications speed
0 (Set in delivery) 156kbps
1 625kbps
2 2.5Mbps
3 5Mbps
4 10Mbps
(Note) Set the Station Data for the Master Station to “ver 1, Remote Device Station”.
(Note) After the parameter setting, cycle the control power, and return the mode toggle switch on the front of the
controller to “AUTO” side.
PROFIBUS-DP
● Specification
Refer to section PROFIBUS-DP instruction manual (ME0258).
● Interface Section
LED Color Indication
Status Indication Description (Meaning of the Indication)
Illuminating The communication is being performed normally from the
fieldbus in online mode.
GN
Flashing The machine is in offline mode from the fieldbus
NS
OR Flashing A communication error is caused.
Illuminating The machine is in the normal operation.
GN Flashing Preparation for the operation is performed.
MS
OR Illuminating A communication hardware error was detected in the
operation preparation mode.
Pin No. Description Contents
3 B-Line RxD·TxD(Communication Line on the Plus Terminal Side)
5 GND Signal Cable Grounding (Insulated)
6 +5V +5V Output (Insulated)
8 A-Line /RxD·/TxD (Signal Line on the Minus Terminal Side)
Housing Shield Cable Shield (for Case and Connection)
● Wiring
● Bus Terminal Treatment
When the line is connected to the network terminal, connect the terminal resistance to the
PROFIBUS-DP communication connector as shown in the following figure, or use the connector with the
terminal resistance.
•
Example of using the connector with the terminal resistance : SUBCON-PLUS-PROFIB/AX/SC (PHOENIX CONTACT)
• Connection of the Terminal Resistance
● Operation Mode Setting and Address Allocation
The operation mode is set using the parameters.
Set the mode change switch on the front of the board to “MANU” side and set the parameter No. 84 “FMOD :
Fieldbus Operation Mode” using the Personal Computer Application Software for RC.
● Station No. Setting
The station No. is set using specific parameters.
Set the parameter No.85 “NADR: Fieldbus Node Address” using the personal computer application software for RC.
Settable Range : 0 to 125 (It is set to “1” when the machine is delivered from the factory.)
● Communication Speed Setting
The setting for the communication speed is not required because it automatically follows the master’s
communication speed.
(Note) After the parameter setting, cycle the control power, and return the mode toggle switch on the front of the
controller to “AUTO” side.
CompoNet
● Specification
Refer to section CompoNet instruction manual (ME0220).
● Interface Section
LED Color Indication
Status Description
GN Illuminating In the normal operation
Illuminating Hardware Error. The replacement of the board is required.
RD Flashing It is a minor error such as a user setting error or configuration
error. It can be recovered by re-setting, etc.
MS
- OFF The CompoNet is being initialized, or the power is not supplied.
Illuminating The connection has been established and the communication is
being performed normally.
GN
Flashing The machine is on-line, but the connection has not been
established. Communication Stop (Network is normal).
Illuminating A duplicated node address is considered.
RD Flashing Communication Error (Communication Time-out Detection)
NS
- OFF The machine is not on-line.
The power is not supplied.
● Wiring
* Comnication supply power is not required.
However, when multiple power supply is to be conducted to another slave, there would be no problem
even if connecting to the communication power to BS+ and BS- terminals.
● Station No. Setting
The station No. is set using specific parameters.
Set the parameter No.85 “NADR: Fieldbus Node Address” using the personal computer application software for RC.
Settable Range : 0 to 63 (It is set to “0” when the machine is delivered from the factory.)
(Note) The setting for the communication speed is not required because it automatically follows the master’s
communication speed.
(Note) After the parameter setting, cycle the control power, and return the mode toggle switch on the front of the
controller to “AUTO” side.
MECHATROLINK-Ⅰ/Ⅱ
● Specification
Refer to section MECHATROLINK instruction manual (ME0221).
● Interface Section
NS
MS
SV
ALM
Red
White
Blue
Black
DeviceNet Communication
Connector
: MSTB2.5/5-GF-5.08AU
(PHOENIX CONTACT)
Status indicator LEDs
Monitor LED : The board operation status and network conditions can be obtained.
ERR
SV
ALM
FG
SLD
DG
DB
DA
Status indicator LEDs
Status LED : The board operation status and network conditions can be obtained.
CC-Link Communication Connector : MSTB2.5/5-GF-5.08AU (PHOENIX CONTACT)
RUN
* Prepare for 9 pin male D-sub connector at Cable side connector.
NS
SV
ALM
Status indicator LEDs
Status LED : The board operation status and network conditions can be obtained.
PROFIBUS-DP Communication Connector : 9 pin female D-sub
MS
1
STATUS
0
SV
ALM
Status LED : The board operation status and network conditions can be obtained.
Status indicator LEDs
MECHATROLINK Communication Connector : DUSB-ARB82-T11A-FA (DDK)
NC
/DATA
DATA
SH
M
aster
Unit PCON, ACON, DCON
+5V
A-Line
B-Line
GND
+5V
A-Line
B-Line
GND
+5V
A-Line
B-Line
GND
390W
220W
390W
390W
220W
390W
PCON, ACON, DCON
DA
DB
DG
SLD
FG
DA
DB
DG
SLD
FG
DA
DB
DG
SLD
FG
PCON,
ACON,
DCON
Master
Unit Terminal
Resistance
Terminal
Resistance
CC-Link Dedicated Cable CC-Link Dedicated Cable
SLD and FG are internally connected.
The terminator varies according to the model name
of the CC-Link compatible cable as follows:
·Cable FANC-SBH···130W1/2W
(CC-Link dedicated high performance cable)
·Cable FANC-SB······110W1/2W
(CC-Link Dedicated Cable)
PCON,
ACON,
DCON
Female Connector
on the Controller Side
Male Connector
on the Network Side
(Viewing from the opposite
of the insertion side)
9
6
5
1
9
8
6
5
3
1
GND
A-Line
B-Line
+5V
390Ω, 1/4W
220Ω, 1/4W
390Ω, 1/4W
Network Wiring
RD
BK
BL
WT
RD
BK
RD
BK
CAN_H
CAN_L
V+
V-
Drain
(Shield)
CAN_H
CAN_L
V+
V-
Drain
(Shield)
CAN_H
CAN_L
V+
V-
Drain
(Shield)
Terminal Resistance
121
Terminal Resistance
121
Grouding resistance
100 or less
24V
Power supply
Master
Unit
BL
WT
BL
WT
PCON, ACON, DCON
PCON, ACON, DCON
BS+
BS+
BDH
BDH
BDL
BDL
BS-
BS- BS+ BDH BDL BS-
PCON, ACON, DCON PCON, ACON, DCON
Terminal Resistance
121Ω
Communication cable
·Round Cable l/ll
·Flat Cable l/ll

● Wiring
Set Value Communications speed Data Length
0 4 Mbps (MECHATROLINK-Ⅰ) 17 byte
1 10 Mbps (MECHATROLINK-Ⅱ) 17 byte
2 (Set in delivery) 10 Mbps (MECHATROLINK-Ⅱ) 32 byte
(Note) After the parameter setting, cycle the control power, and return the mode toggle switch on the front of the
controller to “AUTO” side.
MECHATROLINK-Ⅲ(Dedicated for CB Type)
Since MECHATROLINK-III is applicable for the standard servo profile but not for the standard I/O profile, it is
not applicable for the operation modes for other fieldbus products (such as Full Direct Mode).
● Specification
Refer to the Instruction Manual (ME0317)
● Status LED
LED Color
Illumination Status
Explanation
GN Illuminating Receiving CONNECT (connected to master)
CON − Off Connection is not established to master
OR Illuminating Illumination flashes when communication alarm or command alarm is
generated (warning excepted). Illumination turned off when alarm is cancelled
ERR
− Off In normal condition (no alarm generated)
LK1 GN Illuminating
LK2 GN Illuminating
Illumination turns on when physically connected to another device applicable
for MECHATROLINK-Ⅲ (for cable breakage check purpose)
● Interface Area
● Node Address Setting
Node address can be set with the parameter.
Set Parameter No. 85 “NADR : Fieldbus Node Address” with using
the PC software for RC.
Available range for Setting : 3 to 239 [hex] (setting at delivery : 3)
● Data Length Setting
Establish the setting in Parameter No. 86 “FBRS : Fieldbus
Communication Speed” in RC PC software considering the data
length to be used.
Setting Value Data Length Baud Rate
0 32 bytes
1 (at the delivery) 48 bytes 100Mbps
● Electronic Gear Ratio Setting
Set the electronic gear numerator in Parameter No. 65 “CNUM : Electronic Gear Numerator” and the electronic
gear denominator in No. 66 “CDEN : Electronic Gear Denominator”. In the RC PC software
Establish the settings to satisfy the following condition:
Stroke [mm] Electronic Gear Ratio Denominator
Ball Screw Lead Length [mm] Electronic Gear Ratio Numerator
● Pulse Count Direction Setting
Set the value in Parameter No. 62 “FPIO : Pulse Count Direction” to be the same as what is set in No. 5 “ORG :
Home-Return Direction” in the RC PC software.
(Note) Reboot the power on the controller after the parameter settings are completed, and make sure to put the
switchover switch on the front face of the controller back to the AUTO side.
● Wiring
Wiring, please use the MECHATROLINK-Ⅲ dedicated cable.
CC-Link IE
(Except for PCON-CA/CFA, ACON-CA, DCON-CA)
● Specification
Refer to the CC-Link IE Instruction Manual
● Status LED
LED Color
Illumination Status
Explanation
Steady Light Operation in normal conditions
GN: RUN Off Hardware error occurred, Power not supplied
Steady Light
Error being occurred (Node Error / Station Number Setting Error)
MS
OR: ERR Off Operation in normal conditions, Power not supplied
Steady Light Cyclic transmission in process
Blinking Cyclic transmission paused
GN: D LINK
Off
Cyclic transmission not conducted, parallel off, Power not supplied
Steady Light Received data in error (Lightened up together with L.ER)
NS
OR: L ERR Off Received data in normal conditions, Power not supplied
Steady Light Linkup in process
LINK GN Off Link-down in process, Power not supplied
Steady Light Received data in error
L.ER OR Off Received data in normal conditions, Power not supplied
● Interface Area
Connector
Name CC-Link IE Connector Remarks
Cable Side Ethernet ANSI/TIA/EIA-568-B Category 5e and above
8P8C modular plug equipped with shield (RJ45)
Please prepare
separately
Controller
Side
Ethernet ANSI/TIA/EIA-568-B Category 5e and above
8P8C modular Jack equipped with shield (RJ45)
Pin No. Signal Name Description Applicable cable diameter
1 TP0+ Data 0+
2 TP0- Data 0-
3 TP1+ Data 1+
4 TP2+ Data 2+
5 TP2- Data 2-
6 TP1- Data 1-
7 TP3+ Data 3+
8 TP3- Data 3-
It is recommended to
prepare a straight STP cable
in Category 5e or above for
the Ethernet cable.
● Wiring
Starting Procedure
When using this product for the first time, make sure to avoid mistakes and incorrect wiring by referring to
the procedure below
● Node Address Setting
The node address is set using specific parameters.
Set the parameter No.85 “NADR: Fieldbus Node
Address” using the personal computer application
software for RC.
Settable Range : 61 to 7F [hex]
(It is set to “61” when the machine is delivered from
the factory.)
● Communication Speed Setting
Set the parameter No.86 “FBRS: Fieldbus
Communication Speed” using the personal computer
application software for RC.
Manual No.: ME0303-7A
Check of Packed Items
Are there all the delivered items?
No
Contact the sales shop.
Installation and Wiring
Install the controller and actuator and perform wiring according
to the instruction manual and the contents in this book.
Yes
Point Check Item
·Have you performed the frame grounding (FG) and protective earthing (PE)?
·Has the noise countermeasure been taken?
Yes
Operation Mode Setting
Set it according to the items for the operation modes and functions, and each fieldbus.
(Operation Mode, Station No. and Communication Speed)
Power Supply and Alarm Check
Connect the personal computer or teaching pendant, set the mode
change switch to “MANU” side and input the power to each unit.
Select [Teaching Mode 1 Safety Speed Enabled/PIO Startup Disabled]
in the personal computer application software or the teaching pendant.
Check Item
Is the LED indicator
[ALM] turned OFF on
the front panel?
No
Yes
Connect the personal computer or
teaching pendant and confirm the
alarm description to treat the problem.
Set the Safety Speed
Set it using the parameter No.35, if necessary.
When the machine is delivered, the safety speed has been set to “100mm/s”.
Servo ON
Turn ON the servo motor with the personal computer or
teaching pendant operation.
Caution
When the machine is turned ON/OFF repeatedly at the same
position, it might be lowered slightly due to its own weight.
Take care not to catch your hand or damage the work.
Check Item
Does the Status LED Indicator
[SV] illuminate in green?
When an alarm is sounded, connect the
personal computer or teaching pendant
and confirm the alarm description to treat
the problem.
Check of Safety Circuit
Yes
Yes
Yes
Yes
Yes
Check that the emergency stop circuit (or motor drive-power cutoff circuit)
operates normally to turn OFF the servo.
No
No
Check the emergency stop circuit.
Target Position Setting
Set a target position in the “Position” field for each position in the position table.
When carrying out direct teaching, perform home return operation first.
When the unit is equipped with the brake, move it after setting the brake release switch to “BK RLS” side.
Caution
To ensure safety, it is recommended
that safety speed be enabled during
initial movements.
Trial Run Adjustment
(1) Set the safety speed to “Disable” using the personal computer application
software or teaching pendant and perform the performance check.
(2) Set the personal computer or teaching pendant to “MANU” operation mode,
select the “Monitor Mode 2: Safety Speed Disabled/PIO Start-up Permitted”
and then, remove it from the controller.
(3) Set the mode toggle switch to “AUTO”.
(4) Set the fieldbus on the host side.
No In the case that vibration or abnormal noise is caused
Confirm that there is no problem in the actuator
installation or the actuator operation condition demands
more than the rated voltage.
Check Item
Start up the host side and check if the LED indications on the front panel
for each fieldbus are as follows.
CC-Link : ERR OFF, RUN Green Light is turned ON.
DeviceNet, CompoNet, PROFIBUS : Green light is turned ON for both MS and NS.
MECHATROLINK : Green light is turned ON for both STATUS1 and STATUS0.
No ·Check the station No. setting.
·Check the terminal resistance.
·Check the communication speed setting.
The driving preparation was completed above. Please do the system driving adjustment.
NC
/DATA
DATA
SH
NC
/DATA
DATA
SH
NC
/DATA
DATA
SH
Master
Unit PCON, ACON, DCON
Terminator
JEPMC-W6022
MECHATROLINK Cable
·JEPMC-W6002-□□
·JEPMC-W6003-□□
PCON, ACON, DCON
CON
ERR
Status LED
Upstream Side
LK1 (link 1)LED
Downstream
Side
LK2 (link 2)LED
× No. of Encoder Pulses × ≤ 231
Top Vi ew of
Connector on
Controller side
L.ER
LINK
L.ER
LINK
Ethernet Straight Cable Category 5e or more
Double shielded cable braided with aluminum foil recommended
(Note) Terminal resistance is not required
There is no distinction
of IN/OUT on the
connector.
Master Unit Slave Devices PCON, ACON, DCON CC-Link IE Type
Other manuals for PCON-CA
1
This manual suits for next models
11
Table of contents
Other IAI Controllers manuals

IAI
IAI ROBO Cylinder RCP2 Series User manual

IAI
IAI X-SEL User manual

IAI
IAI SS-S User manual

IAI
IAI PCON-CA User manual

IAI
IAI RA3R User manual

IAI
IAI XSEL-R User manual

IAI
IAI ROBO Cylinder RCP6 User manual

IAI
IAI ISDB Series User manual

IAI
IAI EC ELECYLINDER EC-RP4 User manual

IAI
IAI ROBO Cylinder RCP2 Series User manual
Popular Controllers manuals by other brands

resideo
resideo R7284 Series Quick reference guide

Toyama
Toyama SmartGen HGM400N Series owner's manual

RKC INSTRUMENT
RKC INSTRUMENT CD101 instruction manual

Celerity
Celerity ACX3200 Series user guide

Kelly
Kelly KLS-RM Series user manual

Bosch
Bosch Rexroth IndraDrive CsDrive System with HCS01 instruction manual