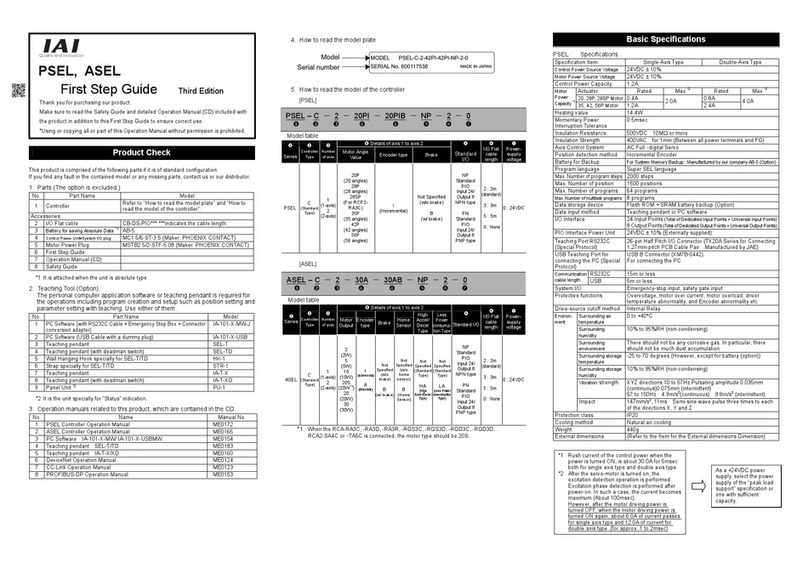
IAI SEL User manual

Instruction Manual Eleventh Edition
SEL CONTROLLER
Teaching Pendant
SEL-T, SEL-TD, SEL-TG
IAI Corporation


[Important]
This Instruction Manual is original.
The product cannot be operatedin any way unless expressly specified in this Instruction Manual.
IAI shall assume no responsibility for the outcome of any operation not specified herein.
Information contained in this Instruction Manual is subject to change without notice for the
purpose of product improvement.
If you have any question or comment regarding the content of this manual, please contact the
IAI sales office near you.
Using or copying all or part of this Instruction Manual without permission is prohibited.
The company names, names of products and trademarks of each company shown in the
sentences are registered trademarks.
Please Read Before Use
Thank you for purchasing our product.
This Instruction Manual describes all necessary information to operate this product safely such as the
operation procedure, structure and maintenance procedure.
Before operation, read this manual carefully and fully understand it to operate this product safely. The
enclosed CD or DVD in this product package includes the Instruction Manual for this product.
For the operation of this product, print out the necessary sections in the Instruction Manual or display them
using the personal computer.
After reading through this manual, keep this Instruction Manual at hand so that the operator of this
product can read it whenever necessary.


Support Models
Model Name Support Started Version
XSEL-K V1.00
XSEL-KX V1.00
XSEL-P/Q V1.00
TT V1.00
XSEL-PX/QX V1.00
SSEL V1.00
ASEL V1.00
PSEL V1.00
XSEL-R /S V1.12
XSEL-RX /SX V1.12
XSEL-RXD /SXD V1.12
TTA (Note 1) V1.16
(Note 1) On the model code label for SEL-T/TD/TG that are applicable
for TTA, it is indicated a number 2 or higher as shown below.
[Model Code Label]
MODEL SEL-T
SERIAL No.000009942 F2 MADE IN JAPAN
Applicable for TTA is 2 or higher


Table of Contents
Safety Guide.........................................................................................................Pre-1
1. Forward ................................................................................................................1
2. Warranty Period and Scope of Warranty ..............................................................2
3. Connection to Controller.......................................................................................3
3.1. Connection to SEL-T, TD ............................................................................................3
3.2. Connection between SEL-TG and the Controller......................................................12
3.3. Teaching Pendant Connection Procedure ................................................................18
4. Teaching Pendant Function and Specications ..................................................19
4.1. General Specications ..............................................................................................19
4.2. Main Operation Keys and Functions.........................................................................20
5. How to Save Data...............................................................................................25
5.1. Set-up at Shipment with System Memory Backup Battery .......................................25
5.2. Set-up at Shipment without System Memory Backup Battery
(Table Top Actuator (TT), SSEL, ASEL, PSEL).........................................................28
5.3. XSEL-R/S/RX/SX/RXD/SXD.....................................................................................30
5.4. TTA............................................................................................................................31
5.5. Caution......................................................................................................................32
6. Mode Transition Diagram....................................................................................33
6.1. X-SEL K, P/Q, R/S, TT, TTA Controller ....................................................................33
6.2. X-SEL KX Controller .................................................................................................38
6.3. X-SEL PX/QX, RX/SX, RXD/SXD Controller ............................................................43
6.4. SSEL, ASEL or PSEL Controller ...............................................................................48
6.4.1. Program mode ..............................................................................................48
6.4.2. Positioner Mode ............................................................................................53
7. Simple Operation Procedure .............................................................................57
7.1. Orthogonal Axis: 5th and 6th Axes of XSEL-K, P/Q or PX/QX Controller,
5th to 8th Axes of R/S or RX/SX Controller or TT, TTA, SSEL, ASEL or
PSEL Controller............................................................................................................ 57
7.1.1. Creation of Position Data ..........................................................................58
7.1.2. Programming (Excluding the positioner mode of the SSEL, ASEL
and PSEL controller) .................................................................................67
7.1.3. Changing Application Program
(Excluding the positioner mode of the SSEL, ASEL and
PSEL controller.)........................................................................................75

7.2. SCARA Axis: 1st to 4th Axes of XSEL-KX, PX/QX or RX/SX Controller or
1st to 4th Axes or 5th to 8th Axes of RXD/SXD Controller ........................................80
7.2.1. Creation of position data............................................................................81
7.2.2. Creation of program ..................................................................................88
7.2.3. Change of application program .................................................................98
8. Program Execution
(Excluding the positioner mode of the SSEL, ASEL and PSEL controller.) .... 103
8.1. Operation Conrmation...........................................................................................103
8.2. Setting of Brake Point .............................................................................................105
8.3. Monitor under Operation .........................................................................................106
9. Execute or stop the positioner mode of the SSEL, ASEL and PSEL controller.. 108
10. Position Edit ................................................................................................... 109
10.1. Mdi (Manual Direct Input) .......................................................................................109
10.2. Teaching of the orthogonal axis: 5th and 6th Axes of XSEL-K, P/Q or
PX/QX Controller, 5th to 8th Axes of R/S or RX/SX Controller or TT, TTA,
SSEL, ASEL or PSEL Controller ............................................................................. 110
10.2.1. Teac (Teaching) ....................................................................................... 110
10.2.2. Example of Teaching Input .....................................................................121
10.3. Teaching for SCARA axis: 1st to 4th Axes of X-SEL-KX, PX/QX or RX/SX
controller or 1st to 4th Axes or 5th to 8th Axes of RXD/SXD controller...................126
10.3.1. Teac (teaching) ........................................................................................126
10.3.2. Jog movement direction and coordinate system ....................................132
10.3.3. Actuator operation ...................................................................................137
10.3.4. Teaching input example...........................................................................151
10.4. Copy and movement of position data ....................................................................157
10.5. Deletion of position data .........................................................................................158
11. Program Edit
(Excluding the positioner mode of the SSEL, ASEL and PSEL controller.) .... 159
11.1. How to Input Program .............................................................................................159
11.2. Symbol Input during Program Edit ..........................................................................165
11.3. Single Line Comment Input ....................................................................................167
11.4. Program: Copy or Move ..........................................................................................169
11.5. Program: Clear .......................................................................................................170
11.6. Flash ROM Writing .................................................................................................172

12. Coordinate System Data Editing of the SCARA Axis:
1st to 4th Axes of XSEL-KX, PX/QX or RX/SX controller
or 1st to 4th Axes or 5th to 8th Axes of RXD/SXD controller ........................... 173
12.1. Editing of work coordinate system data ..................................................................174
12.2. Editing of tool coordinate system data ....................................................................177
12.3. Editing of simple interference check zone .............................................................180
13. Symbol Edit
(Excluding the positioner mode of the SSEL, ASEL and PSEL controller.) ..... 185
13.1. Symbol Edit Items ...................................................................................................185
13.2. Input Example: Symbolize Local Integer Variable ..................................................186
13.3. Symbol Edit Screen of Each Items ........................................................................190
13.4. Flash ROM Writing .................................................................................................195
14. Parameter Edit ................................................................................................ 196
14.1. Parameter Edit Items ..............................................................................................196
14.2. Input Example: Edit Each-Axis Parameter..............................................................197
15. Monitor ............................................................................................................ 200
15.1. Monitor Items ..........................................................................................................200
15.2. Input Port ................................................................................................................201
15.3. Output Port..............................................................................................................201
15.4. Global Flag .............................................................................................................201
15.5. Global Variable........................................................................................................202
15.6. Axis Status ..............................................................................................................203
15.7. System Status ........................................................................................................208
15.8. Error Detail Information........................................................................................... 211
15.9. Version Information ................................................................................................212
15.10. Maintenance Information Window...........................................................................215
15.11. Virtual Input/Output Port..........................................................................................216
16. Controller ......................................................................................................... 217
16.1. Controller Items.......................................................................................................217
16.2. Flash ROM Writing .................................................................................................218
16.3. Software Reset .......................................................................................................219
16.4. Error Reset..............................................................................................................219
16.5. Memory Clear..........................................................................................................220
16.5.1. Groval Variable ........................................................................................220
16.5.2. User Data Hold Memory .........................................................................220
16.6. Re-Connection ........................................................................................................220
16.7. Baud Rate Change .................................................................................................221
16.8. Safety Velocity ........................................................................................................221
16.9. Driver Power Recovery Request ............................................................................222

16.10. Action Pause Release Request ..............................................................................222
16.11. Driver Power Recovery Request (RPwr) and
Action Pause Release Request (RAct) ...................................................................223
16.11.1.
In the case of Controller Other Than SSEL, ASEL and PSEL Controllers
......223
16.11.2. In the case of SSEL, ASEL or PSEL Controller ........................................224
16.12. Selection of Two or More Programs Start Prohibition/Permission ..........................225
16.13. Absolute Reset........................................................................................................226
16.13.1. Absolute Reset of the orthogonal axis: 5th and 6th Axes of
XSEL-K, P/Q or PX/QX Controller, 5th to 8th Axes of R/S or RX/SX
Controller or SSEL or ASEL Controller ....................................................226
16.13.2. Absolute Reset of the orthogonal axis: PSEL Controller .........................229
16.13.3. Absolute Reset of the SCARA axis: 1st to 4th Axes of XSEL-KX,
PX/QX or RX/SX Controller or 1st to 4th Axes or 5th to 8th Axes of
RXD/SXD Controller ................................................................................232
16.13.4. Perform Absolute Reset on ZR Unit (Absolute Type) ..............................248
16.13.5.
Perform Ball Screw Spline Shaft Adjusting on ZR Unit (Incremental Type)
........255
16.14. Procedures for Resetting Absolute-Battery Voltage-Down Warning Error
for orthogonal axis
: 5th and 6th Axes of X-SEL-K, P/Q or PX/QX controller, 5th to 8th Axes of
R/S or RX/SX controller or SSEL, ASEL or PSEL controller.................................261
16.15. Time setting.............................................................................................................263
16.16. Flash ROM writing data recovery (one generation before) .....................................264
17. Gateway Function Associated ......................................................................... 266
17.1. Editing of the RC Position Data in X-SEL ...............................................................266
17.1.1. RC Position Data Creation ......................................................................266
17.1.2. RC Position Data Input using the Teaching Operation ............................270
17.1.3. RC Position Data Deletion.......................................................................281
17.2. RC Actuator Monitoring...........................................................................................285
17.3. RC Actuator Alarm Reset ........................................................................................286
17.4. User Data Hold Memory Initialization......................................................................287
17.4.1. Description...............................................................................................287
17.4.2. Operation Procedure ...............................................................................288
* Supplement.......................................................................................................... 290
Orthogonal Axis Synchro Specication Absolute Reset:
5th and 6th Axes of XSEL-K, P/Q, or PX/QX Controller, 5th to 8th Axes of
R/S or RX/SX Controller or SSEL Controller...........................................................290
About Error Level Management..........................................................................................298
X-SEL Teaching Pendant Error List (Application Part)........................................................299
Change History....................................................................................................... 303
Pre-1
1
Safety Guide
“Safety Guide” has been written to use the machine safely and so prevent personal injury or
property damage beforehand. Make sure to read it before the operation of this product.
Safety Precautions for Our Products
The common safety precautions for the use of any of our robots in each operation.
No. Operation
Description Description
1 Model
Selection
●This product has not been planned and designed for the application
where high level of safety is required, so the guarantee of the protection
of human life is impossible. Accordingly, do not use it in any of the
following applications.
1) Medical equipment used to maintain, control or otherwise affect
human life or physical health.
2) Mechanisms and machinery designed for the purpose of moving or
transporting people (For vehicle, railway facility or air navigation
facility)
3) Important safety parts of machinery (Safety device, etc.)
●Do not use the product outside the specifications. Failure to do so may
considerably shorten the life of the product.
●Do not use it in any of the following environments.
1) Location where there is any inflammable gas, inflammable object or
explosive
2) Place with potential exposure to radiation
3) Location with the ambient temperature or relative humidity exceeding
the specification range
4) Location where radiant heat is added from direct sunlight or other
large heat source
5) Location where condensation occurs due to abrupt temperature
changes
6) Location where there is any corrosive gas (sulfuric acid or
hydrochloric acid)
7) Location exposed to significant amount of dust, salt or iron powder
8) Location subject to direct vibration or impact
●For an actuator used in vertical orientation, select a model which is
equipped with a brake. If selecting a model with no brake, the moving
part may drop when the power is turned OFF and may cause an
accident such as an injury or damage on the work piece.

Pre-2
2
No. Operation
Description Description
2 Transportation ●When carrying a heavy object, do the work with two or more persons or
utilize equipment such as crane.
●When the work is carried out with 2 or more persons, make it clear who
is to be the leader and who to be the follower(s) and communicate well
with each other to ensure the safety of the workers.
●When in transportation, consider well about the positions to hold,
weight and weight balance and pay special attention to the carried
object so it would not get hit or dropped.
●Transport it using an appropriate transportation measure.
The actuators available for transportation with a crane have eyebolts
attached or there are tapped holes to attach bolts. Follow the
instructions in the instruction manual for each model.
●Do not step or sit on the package.
●Do not put any heavy thing that can deform the package, on it.
●When using a crane capable of 1t or more of weight, have an operator
who has qualifications for crane operation and sling work.
●When using a crane or equivalent equipments, make sure not to hang a
load that weighs more than the equipment’s capability limit.
●Use a hook that is suitable for the load. Consider the safety factor of the
hook in such factors as shear strength.
●Do not get on the load that is hung on a crane.
●Do not leave a load hung up with a crane.
●Do not stand under the load that is hung up with a crane.
3 Storage and
Preservation
●The storage and preservation environment conforms to the installation
environment. However, especially give consideration to the prevention
of condensation.
●Store the products with a consideration not to fall them over or drop due
to an act of God such as earthquake.
4 Installation
and Start
(1) Installation of Robot Main Body and Controller, etc.
●Make sure to securely hold and fix the product (including the work part).
A fall, drop or abnormal motion of the product may cause a damage or
injury.
Also, be equipped for a fall-over or drop due to an act of God such as
earthquake.
●Do not get on or put anything on the product. Failure to do so may
cause an accidental fall, injury or damage to the product due to a drop
of anything, malfunction of the product, performance degradation, or
shortening of its life.
●When using the product in any of the places specified below, provide a
sufficient shield.
1) Location where electric noise is generated
2) Location where high electrical or magnetic field is present
3) Location with the mains or power lines passing nearby
4) Location where the product may come in contact with water, oil or
chemical droplets

Pre-3
3
No. Operation
Description Description
(2) Cable Wiring
●Use our company’s genuine cables for connecting between the actuator
and controller, and for the teaching tool.
●Do not scratch on the cable. Do not bend it forcibly. Do not pull it. Do
not coil it around. Do not insert it. Do not put any heavy thing on it.
Failure to do so may cause a fire, electric shock or malfunction due to
leakage or continuity error.
●Perform the wiring for the product, after turning OFF the power to the
unit, so that there is no wiring error.
●When the direct current power (+24V) is connected, take the great care
of the directions of positive and negative poles. If the connection
direction is not correct, it might cause a fire, product breakdown or
malfunction.
●Connect the cable connector securely so that there is no disconnection
or looseness. Failure to do so may cause a fire, electric shock or
malfunction of the product.
●Never cut and/or reconnect the cables supplied with the product for the
purpose of extending or shortening the cable length. Failure to do so
may cause the product to malfunction or cause fire.
4 Installation
and Start
(3) Grounding
●The grounding operation should be performed to prevent an electric
shock or electrostatic charge, enhance the noise-resistance ability and
control the unnecessary electromagnetic radiation.
●For the ground terminal on the AC power cable of the controller and the
grounding plate in the control panel, make sure to use a twisted pair
cable with wire thickness 0.5mm
2
(AWG20 or equivalent) or more for
grounding work. For security grounding, it is necessary to select an
appropriate wire thickness suitable for the load. Perform wiring that
satisfies the specifications (electrical equipment technical standards).
●Perform Class D Grounding (former Class 3 Grounding with ground
resistance 100Ωor below).

Pre-4
4
No. Operation
Description Description
4 Installation
and Start
(4) Safety Measures
●When the work is carried out with 2 or more persons, make it clear who
is to be the leader and who to be the follower(s) and communicate well
with each other to ensure the safety of the workers.
●When the product is under operation or in the ready mode, take the
safety measures (such as the installation of safety and protection
fence) so that nobody can enter the area within the robot’s movable
range. When the robot under operation is touched, it may result in
death or serious injury.
●Make sure to install the emergency stop circuit so that the unit can be
stopped immediately in an emergency during the unit operation.
●Take the safety measure not to start up the unit only with the power
turning ON. Failure to do so may start up the machine suddenly and
cause an injury or damage to the product.
●Take the safety measure not to start up the machine only with the
emergency stop cancellation or recovery after the power failure. Failure
to do so may result in an electric shock or injury due to unexpected
power input.
●When the installation or adjustment operation is to be performed, give
clear warnings such as “Under Operation; Do not turn ON the power!”
etc. Sudden power input may cause an electric shock or injury.
●Take the measure so that the work part is not dropped in power failure
or emergency stop.
●Wear protection gloves, goggle or safety shoes, as necessary, to
secure safety.
●Do not insert a finger or object in the openings in the product. Failure to
do so may cause an injury, electric shock, damage to the product or
fire.
●When releasing the brake on a vertically oriented actuator, exercise
precaution not to pinch your hand or damage the work parts with the
actuator dropped by gravity.
5 Teaching ●When the work is carried out with 2 or more persons, make it clear who
is to be the leader and who to be the follower(s) and communicate well
with each other to ensure the safety of the workers.
●Perform the teaching operation from outside the safety protection
fence, if possible. In the case that the operation is to be performed
unavoidably inside the safety protection fence, prepare the “Stipulations
for the Operation” and make sure that all the workers acknowledge and
understand them well.
●When the operation is to be performed inside the safety protection
fence, the worker should have an emergency stop switch at hand with
him so that the unit can be stopped any time in an emergency.
●When the operation is to be performed inside the safety protection
fence, in addition to the workers, arrange a watchman so that the
machine can be stopped any time in an emergency. Also, keep watch
on the operation so that any third person can not operate the switches
carelessly.
●Place a sign “Under Operation” at the position easy to see.
●When releasing the brake on a vertically oriented actuator, exercise
precaution not to pinch your hand or damage the work parts with the
actuator dropped by gravity.
* Safety protection Fence : In the case that there is no safety protection
fence, the movable range should be indicated.

Pre-5
5
No. Operation
Description Description
6 Trial
Operation
●When the work is carried out with 2 or more persons, make it clear who
is to be the leader and who to be the follower(s) and communicate well
with each other to ensure the safety of the workers.
●After the teaching or programming operation, perform the check
operation one step by one step and then shift to the automatic
operation.
●When the check operation is to be performed inside the safety
protection fence, perform the check operation using the previously
specified work procedure like the teaching operation.
●Make sure to perform the programmed operation check at the safety
speed. Failure to do so may result in an accident due to unexpected
motion caused by a program error, etc.
●Do not touch the terminal block or any of the various setting switches in
the power ON mode. Failure to do so may result in an electric shock or
malfunction.
7 Automatic
Operation
●Check before starting the automatic operation or rebooting after
operation stop that there is nobody in the safety protection fence.
●Before starting automatic operation, make sure that all peripheral
equipment is in an automatic-operation-ready state and there is no
alarm indication.
●Make sure to operate automatic operation start from outside of the
safety protection fence.
●In the case that there is any abnormal heating, smoke, offensive smell,
or abnormal noise in the product, immediately stop the machine and
turn OFF the power switch. Failure to do so may result in a fire or
damage to the product.
●When a power failure occurs, turn OFF the power switch. Failure to do
so may cause an injury or damage to the product, due to a sudden
motion of the product in the recovery operation from the power failure.

Pre-6
6
No. Operation
Description Description
8 Maintenance
and
Inspection
●When the work is carried out with 2 or more persons, make it clear who
is to be the leader and who to be the follower(s) and communicate well
with each other to ensure the safety of the workers.
●Perform the work out of the safety protection fence, if possible. In the
case that the operation is to be performed unavoidably inside the safety
protection fence, prepare the “Stipulations for the Operation” and make
sure that all the workers acknowledge and understand them well.
●When the work is to be performed inside the safety protection fence,
basically turn OFF the power switch.
●When the operation is to be performed inside the safety protection
fence, the worker should have an emergency stop switch at hand with
him so that the unit can be stopped any time in an emergency.
●When the operation is to be performed inside the safety protection
fence, in addition to the workers, arrange a watchman so that the
machine can be stopped any time in an emergency. Also, keep watch
on the operation so that any third person can not operate the switches
carelessly.
●Place a sign “Under Operation” at the position easy to see.
●For the grease for the guide or ball screw, use appropriate grease
according to the Instruction Manual for each model.
●Do not perform the dielectric strength test. Failure to do so may result in
a damage to the product.
●When releasing the brake on a vertically oriented actuator, exercise
precaution not to pinch your hand or damage the work parts with the
actuator dropped by gravity.
●The slider or rod may get misaligned OFF the stop position if the servo
is turned OFF. Be careful not to get injured or damaged due to an
unnecessary operation.
●Pay attention not to lose the cover or untightened screws, and make
sure to put the product back to the original condition after maintenance
and inspection works.
Use in incomplete condition may cause damage to the product or an
injury.
* Safety protection Fence : In the case that there is no safety protection
fence, the movable range should be indicated.
9 Modification
and Dismantle
●Do not modify, disassemble, assemble or use of maintenance parts not
specified based at your own discretion.
10 Disposal ●When the product becomes no longer usable or necessary, dispose of it
properly as an industrial waste.
●When removing the actuator for disposal, pay attention to drop of
components when detaching screws.
●Do not put the product in a fire when disposing of it.
The product may burst or generate toxic gases.
11 Other ●Do not come close to the product or the harnesses if you are a person
who requires a support of medical devices such as a pacemaker. Doing
so may affect the performance of your medical device.
●See Overseas Specifications Compliance Manual to check whether
complies if necessary.
●For the handling of actuators and controllers, follow the dedicated
instruction manual of each unit to ensure the safety.

Pre-7
7
Alert Indication
The safety precautions are divided into “Danger”, “Warning”, “Caution” and “Notice” according to
the warning level, as follows, and described in the Instruction Manual for each model.
Level Degree of Danger and Damage Symbol
Danger
This indicates an imminently hazardous situation which, if the
product is not handled correctly, will result in death or serious
injury. Danger
Warning
This indicates a potentially hazardous situation which, if the
product is not handled correctly, could result in death or serious
injury. Warning
Caution
This indicates a potentially hazardous situation which, if the
product is not handled correctly, may result in minor injury or
property damage. Caution
Notice This indicates lower possibility for the injury, but should be kept to
use this product properly. Notice


1. Forward
1
1. Forward
Thank you very much for purchasing our X-SEL, TT, TTA, SSEL, ASEL and PSEL Controller
Teaching Pendant. Improper usage or mishandling may result in a product not only being unable
to deliver full functions but also produce unexpected troubles or shorten the product’s life. Please
read this Manual carefully, and operate the product properly by paying attention to its handling.
When operating the Teaching Pendant, always keep this Manual at hand and read the relevant
items as required.
For the actuator and controller to be used, be sure to refer to the Instruction Manuals attached
to the products.
▪While the teaching pendant is left connected, “Effect” is valid for the safety velocity. Therefore,
in the case of the orthogonal axis, the maximum velocity is 250 mm/sec or lower when the
program is started from the teaching pendant. In the case of the SCARA axis, the maximum
velocity is 250 mm/sec or lower for CP motion and 3% or less for PTP motion. To operate the
controller according to the program velocity command, it is required to change the condition to
“No Effect.”
For selection of the safety velocity between Effect and No Effect, refer to “16.8. Safety Velocity.”
▪The display screens of this manual are of version 1.00 or later of the teaching pendant
application. To confirm the version, refer to the section “15.9. Version Information.”

2
2. Warranty Period and Scope of Warranty
2
3
4. Warranty Period and Scope of Warranty
The Teaching Pendant you purchased has been delivered upon completion of our strict
shipping test.
We shall warrantee this product as follows.
1. Warranty Period
The warranty term shall be either of the following terms, whichever is reached first.
▪18 months after our shipment
▪12 months after delivery to the place designated by you
2. Scope of Warranty
Where a defective condition occurs during proper use conditions and obviously under the
responsibility of the manufacturer, within the term above, we shall repair the product without
charge. However, any items that apply to the following are excluded from the warranty coverage.
▪Defects resulting from changes over time such as natural color fading of paint
▪Defects resulting from use wear of consumable parts (such as a cable)
▪Defects resulting from sensory phenomena such as generated noise that have no
functional effects
▪Defects resulting from mishandling or improper use
▪Defects resulting from an inadequacy or error in maintenance and inspection
▪Defects resulting from the use of any part other than our genuine parts
▪Defects resulting from a modification not approved by us or our dealers
▪Defects resulting from Acts of God, accident, fire, etc.
Only a delivered product shall be singly warranted, and no damage induced by the defect of
the delivery product can be warranted. For repair, transport the product to our factory.
3. Service Coverage
The cost of a delivered product does not include expenses for program creation and engineer
dispatching. Therefore, the following are charged separately even within the warranty term:
▪Maintenance and inspection
▪Technical guidance and technical training in operating instructions
▪Technical guidance and technical training on program-related matters such as program
creation
2.
This manual suits for next models
3
Table of contents
Other IAI Controllers manuals

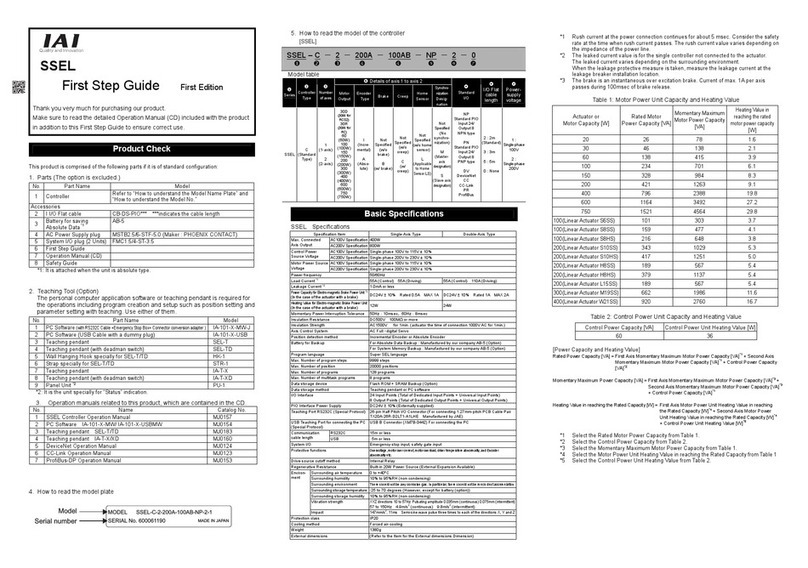
IAI
IAI SCON-CA User manual

IAI
IAI X-SEL User manual

IAI
IAI ELECYLINDER User manual

IAI
IAI ROBO Cylinder RCS4-TA4C User manual

IAI
IAI MCON-C User manual

IAI
IAI SCON series User manual

IAI
IAI ROBO CYLINDER RCM-P User manual

IAI
IAI EC-RR6*AH series User manual

IAI
IAI RA Series User manual

IAI
IAI ROBO Cylinder RCS2 User manual
Popular Controllers manuals by other brands

Johnson Controls
Johnson Controls M9132-AG -1N Series installation instructions

Nieuwkoop B.V.
Nieuwkoop B.V. C3645 instruction manual

MKS
MKS 649B instruction manual

Savant
Savant Savant SmartLighting 2 Quick reference guide

bentrup
bentrup TC 500 Series operating instructions

Boston gear
Boston gear ACE101V1P0002C user guide