manuals.online logo
Brands
  1. Home
  2. •
  3. Brands
  4. •
  5. IAI
  6. •
  7. Controllers
  8. •
  9. IAI RCM-P User manual

IAI RCM-P User manual

Simple Teaching Pendant RCM-E
Data Setter RCM-P
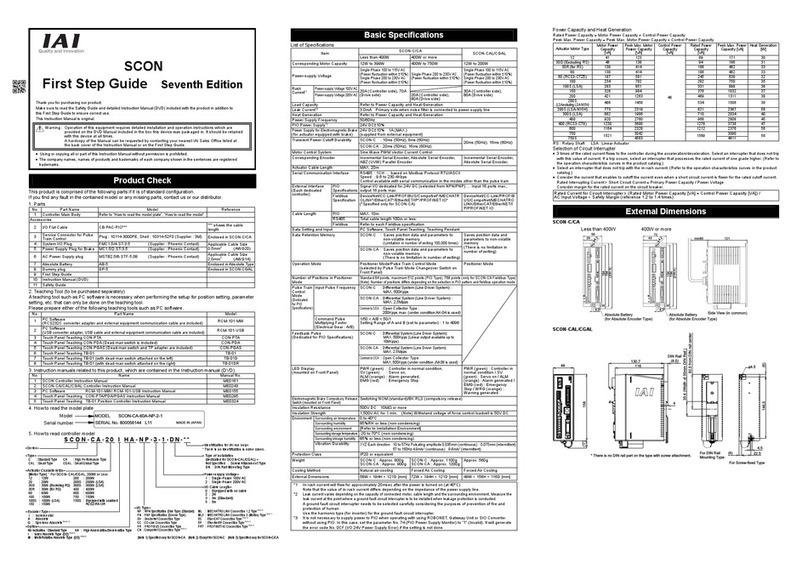
First Step Guide First Edition
Thank you for purchasing our product.
Make sure to read the Safety Guide and detailed Instruction Manual (CD) included with the product in addition to
this First Step Guide to ensure correct use.
This Instruction Manual is original.
•Using or copying all or part of this Instruction Manual without permission is prohibited.
•The company names, names of products and trademarks of each company shown in the sentences are registered
trademarks.
Product Check
This product is comprised of the following parts if it is of standard configuration.
If you find any fault in the contained model or any missing parts, contact us or our distributor.
1. Parts (The option is excluded.)
2.
Instruction Manuals related to this product, which are contained in the Instruction Manuals (CD).
3. How to read the model plate
4. How to read the model
List of Support Models
Model No. Support Started Version
RCP V1.00
RCS V1.00
E-Con V1.30
RCP2 V1.63
ERC V1.63
ERC2 V2.00
PCON V2.00
SCON V2.00
ACON V2.00
ROBONET V2.08
Item Specification
Surrounding Air
Temperature & Humidity
Temperature : 0 to 40°C
Humidity : 85%RH or less (non-condensing)
*RH relative humidity
Surrounding Environment There should be no corrosive gas or extremely heavy dust.
Weight RCM-E : 400g RCM-P : 380g
Cable Length 5m
RCM-E
RCM-P
Always turn the PORT switch “OFF” first before connecting a controller having this switch.
After the connection is established, put the PORT switch back to the “ON” side.
1) LCD Screen
2) EMERGENCY STOP (Emergency Stop Push Button Switch) (RCM-E)
This switch is a mushroom-shaped push-lock, turn-reset type switch.
This switch is connected to the emergency stop signal line on the controller in a series. Pressing this
switch will bring to the emergency stop status and shut down the power supply to the motor.
(normally, closed: b contact).
[For the emergency stop signal line and its status, refer to the “Controller Instruction Manual” for the one
being connected.]
To release the emergency stop, rotate this switch in the direction indicated with arrows.
(Note) : If multiple controllers are connected using link cables, the EMERGENCY STOP switch is
enabled only for the axis of the controller which is connected to the Teaching Pendant.
: For RCP2-CG (external shutoff relay mount type), ERC and ERC2 series, the EMERGENCY
STOP is only available when an emergency stop circuit is constructed externally. Please make
sure to narrowly read the Instruction Manual for the connected controller.
3) ESC key
• To return to upper level window
A few layers of nest are constructed for the operation of Simple Teaching Pendant. Pressing this key
enables you to go back to the one step higher layer (upper level window).
When you don’t understand the operation, undo the operation by pressing the ESC key.
4) BEGIN/END key
• To finish process and reconnect
By pressing and holding this key for approx. 2.5sec or more, the screen switches to “Begin/End”
window. In this window, it is able to have operations such as to finish the processes of Simple Teaching
Pendant and Data Setter and to reconnect the axes.
• It is able to cancel the input conducted with numeral keys.
• You may clear error warning
When an error occurs, a message for this error will appear at the very bottom of the display screen.
Use this key to clear the error and to clear this message.
5) ◄▲▼►(Arrow) keys (RCM-E) ◄▲▼ (Arrow) keys (RCM-P)
• This is used for selection of the mode, the contents of data and changing position No.
6) (Minus) key
• Position Table Column: When you push this in an area such as positioning width which allows minus
input, the key functions as the “-” (minus), and the rest as “.” (point).
When you input either 0 or -/. in the beginning of the number, within the proper area, the key
will automatically recognize it as 0.
7) to 9 (Numeral) keys
This key is used for numerical input.
8) (Return) key
This is used for data input and operation confirm.
No. Part Name Model Reference
1 Main Body Refer to “How to read the model
plate”, “How to read the model”
Accessories
2 First Step Guide
3 Instruction Manual (CD)
4 Safety Guide
No. Name Manual No.
1 Simple Teaching Pendant RCM-E Instruction Manual ME0174
2 ROBO Cylinder Data Setter RCM-P Instruction Manual ME0175
3 ERC2 Actuator with Integrated Controller Instruction Manual
<PIO type>
ME0158
4 ERC2 Actuator with Integrated Controller Instruction Manual
<SIO type>
ME0159
5 PCON-C/CG/CF Controller Instruction Manual ME0170
6 PCON-CY Controller Instruction Manual ME0156
7 PCON-SE Controller Instruction Manual ME0163
8 PCON-PL/PO Controller Instruction Manual ME0164
9 ACON-C/CG Controller Instruction Manual ME0176
10 ACON-CY Controller Instruction Manual ME0167
11 ACON-SE Controller Instruction Manual ME0171
12 ACON-PL/PO Controller Instruction Manual ME0166
13 SCON Controller Instruction Manual ME0161
14 SCON-CA Controller Instruction Manual ME0243
15 ROBONET Instruction Manual ME0208
16
RCS Series ROBO Cylinder Controller RCS-C Type Instruction Manual
ME0102
17
RCS Series ROBO Cylinder Controller RCS-E Type Instruction Manual
ME0103
18 E-Con Controller Instruction Manual ME0122
19 RCP2 Series ROBO Cylinder Controller Instruction Manual ME0136
20 ERC Actuator with Integrated Controller Instruction Manual ME0137
Support Models
Basic Specifications
External Dimensions
Connection Diagram
Operation Panel
RCM-E-ENG
<Model>
RCM-E : Simple Teaching Pendant
RCM-P : ROBO Cylinder Data Setter
<Option>
Unspecified: Indication in Japanese
ENG : Indication in English
Model
Serial number
RCM-E
MODEL
SERIAL No.
900109943 A1
MADE IN JAPAN
113
145
72
43
15 26 6
23.5
21
86 23
140
Warning : Operation of this equipment requires detailed installation and operation instructions which are
provided on the CD Manual included in the box this device was packaged in. It should be retained with
this device at all times.
A copy of the CD Manual can be requested by contacting your nearest IAI Sales Office listed at
the back cove
r
of the Instruction Manual or on the First Step Guide.
Controller
RCM-E RCM-P
RCM-E RCM-P
1) LCD
4)
BEGIN/END
key
7)
to 9
(Numeral)
keys
7)
to 9
(Numeral)
keys
3) ESC key
6)
8)
(Minus) key
(Return) key
1) LCD
2) EMERGENCY STOP
5)
(Arrow) keys
5)
(Arrow)
keys
6)
(Minus) key
8)
(Return) key
3) ESC key
4)
BEGIN/END
key
[PCON, ACON, SCON, ERC2, ROBONET]
Set the Position Data to operate the actuator.
1)
No.
2)
Pos
3)
Vel
4)
Acc
5)
Dcl
6)
Push
7)
LoTh
8)
Range
9)
Zone+
9)
Zone−
10)
Acc/Dcl
Mode
11)
Incre-
mental
12)
Cmnd
Mode
13)
Stop
Mode
000 0.00 100.00 0.20 0.20 0 0 0.01 0.00 10.00 0 0 0 0
001 10.00 100.00 0.20 0.20 0 0 0.01 95.00 105.00 0 0 0 0
002
003
1) No. … Indicates position number.
2) Pos … Set the position where the actuator is moved.
3) Vel … Set the actuator speed.
4) Acc … Set the actuator acceleration.
5) Dcl … Set the actuator deceleration.
6) Push … When the push & hold operation is to be performed, set the current limit value
(%) except for “0”.
When “0” is set, the positioning operation is performed.
7) LoTh … In the case of the PCON-CF controller, the load output signal will be output
when the command torque exceeds the threshold if it is set.
8) Range … Defines the distance before the target position to output the positioning
complete signal during the positioning operation.
During the pressing operation, it enables to set the distance to perform the
pressing operation after reaching the target position.
9) Zone+/−… Defines the zone where the PZONE output signal turns ON.
10) Acc/Dcl Mode … In the case of the ACON and SCON controllers, one of the
acceleration/deceleration patterns can be selected from the trapezoid pattern,
S-shape motion or the first-order delay filter.
11) Incremental … Set to “0” when desired the absolute position command. Set to “1” for the
relative position command.
12) Cmnd Mode … This is ineffective even if performing a setting. It is set to “0” at delivery.
(V1.00 or earlier)
13) Stop Mode … Standby power saving mode after positioning is complete can be selected from
Auto Servo, OFF or Full-Servo Control System. Power saving mode is invalid if
it is set to “0”.
[RCP, RCS, E-Con, RCP2, ERC]
Set the Position Data to operate the actuator.
1)
No.
2)
Pos
3)
Vel
4)
Acc/Dcl
5)
Push
6)
Range
7)
Acc only MAX
8)
Incremental
000 0.00 100.00 0.20 0 0.01 0 0
001 10.00 100.00 0.20 0 0.01 0 0
002
003
1) No. … Indicates position number.
2) Pos … Set the position where the actuator is moved.
3) Vel … Set the actuator speed.
4) Acc/Dcl … Set the actuator Acceleration/Deceleration.
5) Push … When the push & hold operation is to be performed, set the current limit value
(%) except for “0”.
6) Range … Defines the distance before the target position to output the positioning
complete signal during the positioning operation.
During the pressing operation, it enables to set the distance to perform the
pressing operation after reaching the target position.
7) Acc only MAX … Set to “0” to reflect the setting done in 4) Acc/Dcl for the
acceleration/deceleration speed.
Set it to “1” and the acceleration speed automatically becomes the maximum
acceleration speed corresponding to the load. Deceleration speed will follow the
setting in 4) Acc/Dcl.
8) Incremental … Set to “0” when desired the absolute position command. Set to “1” for the
relative position command.
After the power to the controller is turned on, the display shows as shown below.
Operation is to be performed on the operation panel. [Refer to Operation Panel]
Operation Mode
*Edit Display and Edit function for positioner
table
*Teach/Play Jog Operation, Inching Operation
*Monitor Controller status display
*Error List Alarm content detailed display
*User Parm Setting of axis zone signal output
range and axis attributes
*User Adjust Executing homing and axis number
setting of controller series
*TP Op Mode Setting the TP Operation Mode
Operation Mode
*Edit Display and Edit function for
positioner table
*Monitor Controller status display
*Error List Alarm content detailed display
*User Parm Setting of axis zone signal output
range and axis attributes
*User Adjust Executing homing and axis number
setting of controller series
*TP Op Mode Setting the TP Operation Mode
(Note) An actuator operation is not available with RCM-P.
[TP Operation Mode]
Stated below explains TP Operation Mode for RCM-E.
For RCM-P, an actuator operation is not available even in Teach 1 or Teach 2.
• Teach 1
PIO Prh : Enables writing of position data, parameters, etc., in the controller and commands of the
actuator movement system.
SftyVel Efct : Keeps the maximum speed at the safety speed set for the parameter regardless of
position data.
• Teach 2
PIO Prh : Enables writing of position data, parameters, etc., in the controller and commands of the
actuator movement system.
SftyVel Non : Enables movement at the speed registered in position data.
• Monitor 1
PIO Per : Enables monitoring only. Writing of position data, parameters, etc., in the controller and
commands of the actuator movement system are disabled.
SftyVel Efct : The maximum speed is the safety speed set for the parameter regardless of the
command from the PLC.
• Monitor 2
PIO Per : Enables monitoring only. Writing of position data, parameters, etc., in the controller and
commands of the actuator movement system are disabled.
SftyVel Non : It is allowed to move at a speed as commanded from the PLC.
Position Data Setting
Example for inputting Position 1: Position 50.00mm, Velocity 100mm/s, Acceleration 0.1G, Deceleration
0.1G
(Note) In the chart below explains with the RCM-E operation windows. For RCM-P, the mode selection
window is displayed as “*Edit/Teach”.
No. Operation Screen Reference
1
Select “Edit” with using
▲▼keys and press
the return key.
2
Select “MDI” with using
▲▼keys and press
the return key.
3
The display switches to
“Position” input window.
“*” is displayed when no
data is input.
4
Forward the position number to
“1” by pressing ▲key.
Position No. 1
5
The display switches to
“Position No. 1” input window.
Input “50” with the numeral
keys and press the return key.
6
The display switches to “Vel”
input window.
Input “100” with the numeral
keys and press the return key.
When the position is newly
registered, the values set in
the user parameters are
automatically input to “Vel”,
“Acc” and “Dcl”.
No. Operation Screen Reference
7
The display switches to “Acc”
input window.
Input “0.1” with the numeral
keys and press the return key.
8
The display switches to “Dcl”
input window.
Input “0.1” with the numeral
keys and press the return key.
9
Other settings such as “Push” are
as they are set for the initial values.
Press ESC key twice to go
back to Mode Setting Window.
10
1) Hold down the BEGIN/END key for approx. 2.5sec or more.
2) Use the Arrow keys to select “Complete” Screen, and then press the Return key.
3) In the case of any controller with a PORT switch, turn the controller PORT switch to OFF.
4) Remove the Simple Teaching Pendant connector.
(Note) : In the case of PCON, ACON, SCON, or ERC2, an instantaneous stop will be made when the
Teaching Pendant is disconnected. However, this is not an error.
(Note) : In the case of the PCON, ACON, or ERC2 controller not having the AUTO/MANU switch, set the
TP Operation Mode to “Monitor 2” before disconnecting the Teaching Pendant from the
controller. (Refer to Instruction Manual)
In the case of ERC2 or when controller setting is made by connecting the Teaching Pendant to
the gateway unit or SIO converter :
• If the Teaching Pendant is disconnected while the setting of “Teach 1” or “Teach 2” remains,
I/O will become invalid and control from PLC will become impossible.
• If the Teaching Pendant is disconnected while the setting of “Monitor 1” remains, the
maximum speed will become the safety speed set for the parameter regardless of a command
from PLC.
Troubleshooting
If the connection does not work properly, check the following item.
Hardware Related Error Detected on RCM-E/RCM-P
Code Error Description Cause and Treatment
308 Response Timeout Error
No response is returned from the
controller.
1) A wire breakage is caused in the controller
connection cable. Check the wiring for or wire
breakage in the connection cable.
2) It is temporary error due to noise.
Re-input the power to the controller.
Head Office: 577-1 Obane Shimizu-KU Shizuoka City Shizuoka 424-0103, Japan
TEL +81-54-364-5105 FAX +81-54-364-2589
website: www.iai-robot.co.jp/
Ober der Röth 4, D-65824 Schwalbach am Taunus, Germany
TEL 06196-88950 FAX 06196-889524
SHANGHAI JIAHUA BUSINESS CENTER A8-303, 808, Hongqiao Rd. Shanghai 200030, China
TEL 021-6448-4753 FAX 021-6448-3992
website: www.iai-robot.com
Technical Support available in USA, Europe and China
Head Office: 2690 W. 237th Street, Torrance, CA 90505
TEL (310) 891-6015 FAX (310) 891-0815
Chicago Office: 110 East State Parkway, Schaumburg, IL 60173
TEL(847) 908-1400 FAX (847) 908-1399
TEL (678) 354-9470 FAX (678) 354-9471
website: www.intelligentactuator.com
Atlanta Office: 1220 Kennestone Circle, Suite 108, Marietta, GA 30066
825 PhairojKijja Tower 12th Floor, Bangna-Trad RD., Bangna, Bangna, Bangkok 10260, Thailand
TEL +66-2-361-4458 FAX +66-2-361-4456
Position Table Operation
How to Operate (Examples)
Disconnecting Process
RCM-E
Select “TP Operation Mode”.
Select the controller axis No. that the setting is desired.
Following screen will be
displayed when connected
to multiple axes.
Select the mode with using keys and
press the return key to confirm.
Following screen will be
displayed only for ACON,
PCON, SCON and ERC2.
RCM-P
Select “TP Operation Mode”.
Select the controller axis No. that the setting is desired.
Following screen will be
displayed when connected
to multiple axes.
Select the mode with using keys and
press the return key to confirm.
Following screen will be
displayed only for ACON,
PCON, SCON and ERC2.
Manual No.: ME0282-1D
This manual suits for next models

1

Other IAI Controllers manuals

IAI SCON-CGAL User manual

IAI

IAI SCON-CGAL User manual

IAI Msep User manual

IAI

IAI Msep User manual

IAI ACON-C User manual

IAI

IAI ACON-C User manual

IAI RCP4 User manual

IAI

IAI RCP4 User manual

IAI ROBO Cylinder RCP6 User manual

IAI

IAI ROBO Cylinder RCP6 User manual

IAI MSEL User manual

IAI

IAI MSEL User manual

IAI ACON-C User manual

IAI

IAI ACON-C User manual

IAI ROBO Cylinder RCP5-BA4 User manual

IAI

IAI ROBO Cylinder RCP5-BA4 User manual

IAI XSEL-P User manual

IAI

IAI XSEL-P User manual

IAI ROBO Cylinder RCP2 Series User manual

IAI

IAI ROBO Cylinder RCP2 Series User manual

IAI SCON-CB-F User manual

IAI

IAI SCON-CB-F User manual

IAI ssel User manual

IAI

IAI ssel User manual

IAI SCON-CB-F User manual

IAI

IAI SCON-CB-F User manual

IAI ROBO Cylinder RCP5-SA4C User manual

IAI

IAI ROBO Cylinder RCP5-SA4C User manual

IAI RCON-PC User manual

IAI

IAI RCON-PC User manual

IAI XSEL-R User manual

IAI

IAI XSEL-R User manual

IAI X-SEL User manual

IAI

IAI X-SEL User manual

IAI PSEL User manual

IAI

IAI PSEL User manual

IAI X-SEL-J*-1-CC0 series User manual

IAI

IAI X-SEL-J*-1-CC0 series User manual

IAI ROBO Cylinder RCP2 Series User manual

IAI

IAI ROBO Cylinder RCP2 Series User manual

IAI ERC2 Installation manual

IAI

IAI ERC2 Installation manual

IAI ROBO Cylinder RCS2 User manual

IAI

IAI ROBO Cylinder RCS2 User manual

IAI MCON-C User manual

IAI

IAI MCON-C User manual

IAI PCON-CB series User manual

IAI

IAI PCON-CB series User manual

Popular Controllers manuals by other brands

Sealey REG/MO.V2 manual

Sealey

Sealey REG/MO.V2 manual

Impulse ECOMIZER-PRO user manual

Impulse

Impulse ECOMIZER-PRO user manual

Omron CP1E INTRODUCTION Introduction manual

Omron

Omron CP1E INTRODUCTION Introduction manual

Mitsubishi Electric Procon BAC-IP50 Installation and user guide

Mitsubishi Electric

Mitsubishi Electric Procon BAC-IP50 Installation and user guide

Fisher FIELDVUE DLC3010 instruction manual

Fisher

Fisher FIELDVUE DLC3010 instruction manual

Controls MVP-302 product manual

Controls

Controls MVP-302 product manual

Galcon 7001D Installation and operating instructions

Galcon

Galcon 7001D Installation and operating instructions

Prolon M2000 SERIES Quick start guides

Prolon

Prolon M2000 SERIES Quick start guides

Fisher 1061 instruction manual

Fisher

Fisher 1061 instruction manual

DKS 6002 owner's manual

DKS

DKS 6002 owner's manual

Aalborg DFC operating manual

Aalborg

Aalborg DFC operating manual

Cryo-con 26 quick start guide

Cryo-con

Cryo-con 26 quick start guide

Viking RC-3 Technical practice

Viking

Viking RC-3 Technical practice

MFJ MFJ-1270X instruction manual

MFJ

MFJ MFJ-1270X instruction manual

rako RAH07 Programming and operating instructions

rako

rako RAH07 Programming and operating instructions

Zamp Solar DOMETIC SCC1012 user manual

Zamp Solar

Zamp Solar DOMETIC SCC1012 user manual

YASKAWA CIMR-JC4A0002BAA quick start guide

YASKAWA

YASKAWA CIMR-JC4A0002BAA quick start guide

Mateksys F722-WING quick start guide

Mateksys

Mateksys F722-WING quick start guide

manuals.online logo
manuals.online logoBrands
  • About & Mission
  • Contact us
  • Privacy Policy
  • Terms and Conditions

Copyright 2025 Manuals.Online. All Rights Reserved.