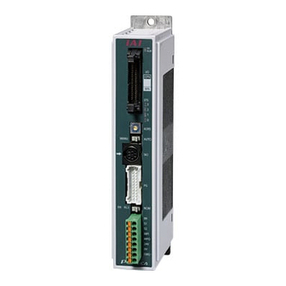
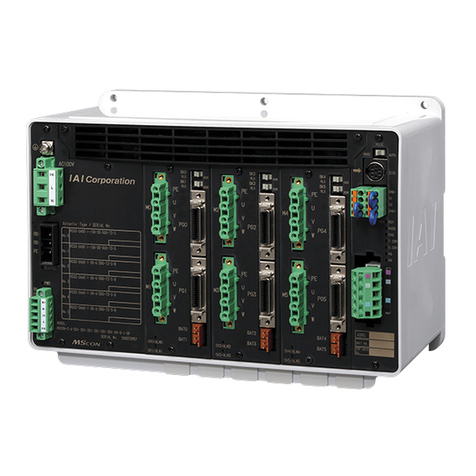
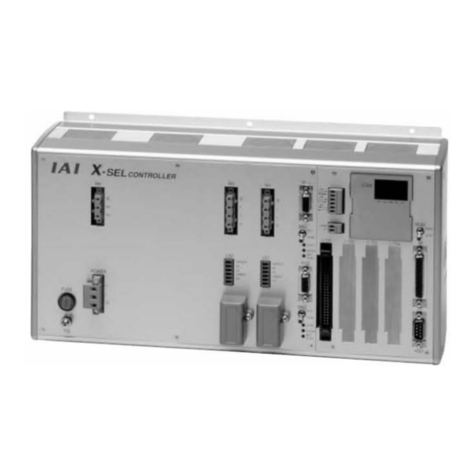
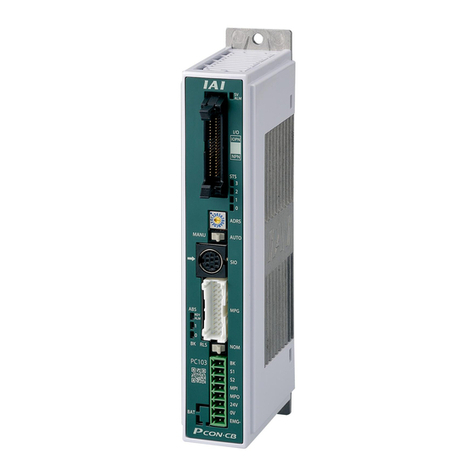
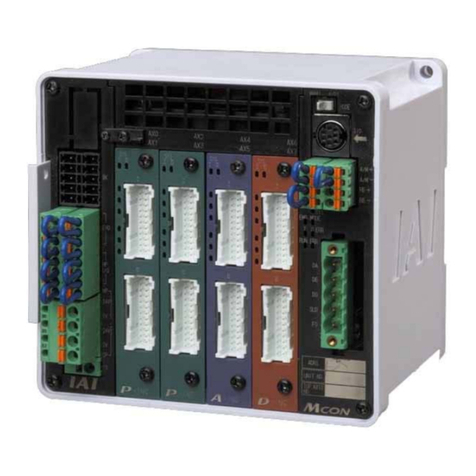
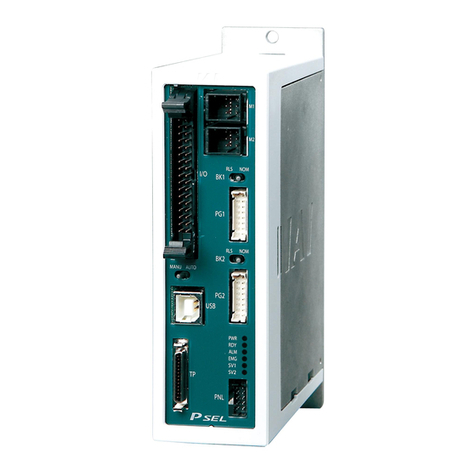
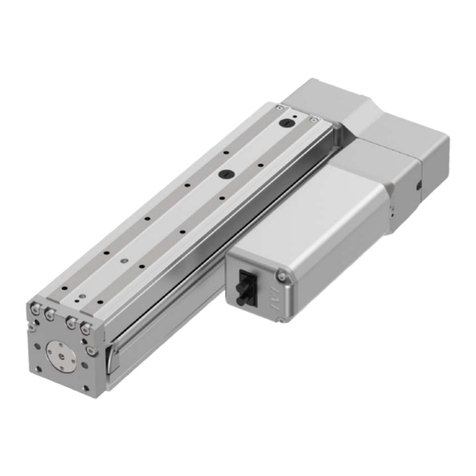
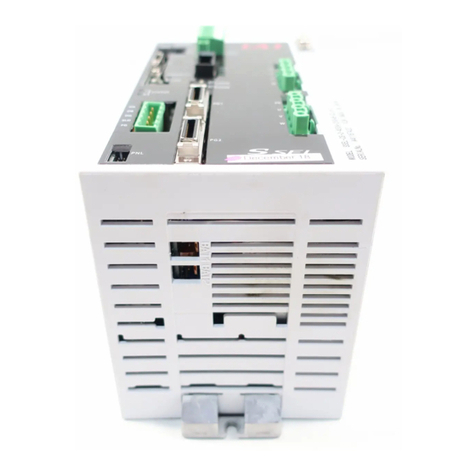
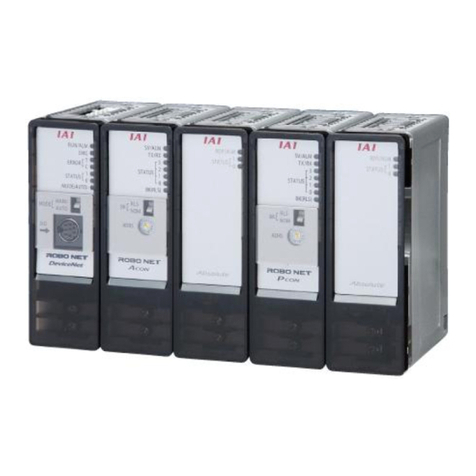
IAI X-SEL-J*-1-CC0 series User manual

CC-Link
Instruction Manual
Ver. 5.0
X-SEL
RCS-C
E-Con
IAI Corporation

CC-Link
Safety Precautions
Read these “Safety Precautions” carefully before selecting a model and to ensure proper use of the product.
The precautions shown below allow you to use the product safely and prevent harm to you and others and
damage to property from occurring.
Be sure to observe these precautions as well as the safety regulations of JIS B 8433 (Industrial Robot Safety
egulations).R
Indications are divided into “DANGER,” “WARNING,” “CAUTION,” and “ATTENTION” according to the degree
of risk and trouble.
DANGER In the case of mishandling, imminent danger of death or serious injury is assumed.
WARNING In the case of mishandling, the possibility of death or serious injury is assumed.
CAUTION In the case of mishandling, the possibility of harm or property damage is assumed.
ATTENTION There is no possibility of harm, but indicated instructions are requested to be
observed for proper use of the product.
The product is designed and manufactured as a part for general industrial machinery.
Before selecting and handling equipment, personnel with satisfactory knowledge and experience such as a
system designer and a person in charge must never fail to read the Catalogues and Instruction Manuals
(Specially, the “Safety Precautions”). It is dangerous if equipment is mishandled.
For the Instruction Manuals, read the Manuals for all equipment including the main unit and controller.
Use the product at your responsibility after verifying and judging its compatibility with your system.
After reading the Catalogues and Instruction Manuals, be sure to retain them at a place where users of the
product can read them at any time.
When transferring or renting the product for use, be sure to attach the Catalogues and Instruction Manuals in
a noticeable location with the product main unit to allow a new owner to learn about safe and proper usage of
the product.
The DANGER, WARNING, and CAUTION indications described in these Safety Precautions do not cover all
cases. Especially for separate details, read the Catalogues and Instruction Manual of the relevant equipment
carefully for your safe and proper handling.
DANGER
General
●Do not use the product for the following applications:
1. Medical appliances that involve human life, physical maintenance and control, etc.
2. Systems, machines or equipment to move or convey people
3. Important security parts of a machine or equipment
The product is not planned or designed for any applications that require advanced type safety. It does not
guarantee human life. This warranty covers the product only.

CC-Link
Installation
●Do not use the product in any place where there are dangerous objects such as combustibles,
inflammables, and explosives. Failure to do so may result in ignition, inflammation, or explosion.
●Avoid use in any place where drops of water or oil droplets drip onto the main unit or controller.
●Never disconnect and reconnect a cable to extend or shorten the cable of the product. Failure to do so
may result in fire.
Operation
●Those who use a pacemaker must not approach within 1 meter from the product. Failure to do so may
result in malfunction of the pacemaker due to the product’s powerful magnetic field.
●Do not pour water on the product. Pouring water, cleaning, or using the product in water may result in
personal injury, electric shock, or fire because of malfunction.
Maintenance, inspection and, repair
●Never modify the product. Failure to do so may result in personal injury, electric shock, or fire.
●Do not disassemble and assemble the product. Failure to do so may result in personal injury, electric
shock, or fire.
WARNING
General
●Do not use the product outside the scope of product specifications. Failure to do so may result in product
failure, breakdown, or damage, in addition to a reduction in service life. Specially, observe the maximum
loading weight and maximum speed.
Installation
●Design the safety circuit or apparatus in such a manner as to avoid equipment damage and accidents
resulting in injury or death when the machine stops during system failure such as at emergency stop and
power failure.
●Be sure to provide the actuator and controller with class D grounding (previous class 3 grounding, ground
resistance: 100Ωor less). Failure to do so may result in electric shocks or malfunction in the case of a
short circuit.
●Before supplying electricity to the product and operating it, be sure to confirm the safety of the operating
range of equipment. Supplying electricity carelessly may result in electric shocks or personal injury upon
contact with moving parts.
●Install wiring of the product in such a manner as to avoid faulty wiring by referring to the Instruction Manual.
Establish cable and connector connections securely so that there is no disconnection or looseness. Failure
to do so may result in product malfunction or fire.
Operation
●Do not touch the terminal block or various switches when the power is turned on. Failure to do so may
result in electric shock or malfunction.
●When moving the moving part of the product manually (such as in the case of manual positioning), do so
after checking the servo off condition (with a teaching box). Failure to do so may result in personal injury.
●Cables superior in flexibility are used, but these are not robot cables. Do not put them in a movable wiring
duct with a radius out of specification (such as the cable bear).
●Do not damage cables. Scratching, forcedly bending, pulling, winding, placing a heavy article on, or
pinching them may result in fire, electric shock, or malfunction due to a short circuit or faulty electrical
continuity.

CC-Link
●In the event of a power failure, turn off the power. Failure to do so may result in personal injury or product
damage due to abrupt movement of the product during recovery from the power failure.
●When abnormal heat, smoke, or offensive odors occur in the product, turn off the power immediately.
Continued use of the product may result in product damage or fire.
●When the protective equipment (alarm) of the product is activated, turn off the power immediately. Failure
to do so may result in personal injury, or product breakage/damage due to product malfunction. After
turning off the power and investigating the cause, remove it and turn on the power again.
●When the product LED does not light even at power on, turn off the power immediately. The protective
equipment (fuse, etc.), may be activated without blowing. Request our sales office from which you
purchased the product to carry out repairs.
Maintenance, inspection, and repair
●Before starting various operations such as maintenance, inspection, service, and replacement related to
the product, be sure to shut off electrical supply completely. Observe the following at this time:
1. Indicate “MEN WORKING, POWER ON PROHIBITED” at an easy-to-see location to prevent a third
party from turning on the power inadvertently during operation.
2. When more than one operator carries out maintenance and inspection, be sure to confirm safety
by calling out to other(s) before turning on/off the power and moving the axis.
Disposal
●Do not throw the product into a fire. Failure to do so may result in product explosion or toxic gas
generation.
CAUTION
Installation
●Do not use the product at locations in direct sunshine (ultraviolet light), locations with dust, salt content or
iron powder, humid locations, or in an atmosphere containing organic solvents or phosphate ester
hydraulic oil.
Failure to do so may result in function loss in a short period, or rapid performance deterioration or
reduction in service life.
●Do not use the product in an atmosphere of corrosive gases (sulfuric acid, hydrochloric acid, etc.). Failure
to do so may result in severe deterioration due to rust formation.
●When using the product at any of the locations shown below, take proper shielding measures. Failure to do
so may result in malfunction.
1. Location with a large current or high magnetic field
2. Location with arc discharge due to welding operation
3. Location with noise due to electrostatic action
4. Location with the possibility of receiving radiation
●Install the main unit and controller at a location with minimal dust and dirt. Failure to do so may result in
malfunction.
●Do not install the product at a location where great vibrations or shocks travel (4.9 m/S2or more). Failure
to do so may result in malfunction.
●Install emergency stop equipment at a location where an emergency stop can be applied upon an
immediate dangerous occurrence in operation during operation. Failure to do so may result in personal
injury.
●When installing the product, secure space for maintenance work. Failure to do so may result in equipment
stop or product damage because a daily check or maintenance becomes impossible.
CC-Link
●When installing the product, do not hold its moving parts or cables. Failure to do so may result in personal
injury.
●Be sure to use our genuine cable product between the actuator and controller. For components such as
the actuator, controller and teaching box, use a combination of our genuine products.
●When carrying out installation or adjustment work, indicate “MEN WORKING, POWER ON PROHIBITED”
to prevent unexpected power-on. Failure to do so may result in electric shock or personal injury due to
abrupt operation of the actuator.
Operation
●When turning on the power, do so from the higher-order equipment in sequence. Failure to do so may
result in personal injury or product damage due to abrupt start of the product.
●Do not place fingers or objects into the opening of the product. Failure to do so may result in fire, electric
shock, or personal injury.
●Do not bring floppy disks or magnetic media within one meter from the product. Failure to do so may result
in data corruption due to the magnetic field.
Maintenance, inspection, and repair
●When carrying out an insulation resistance test, do not touch the terminals. Failure to do so may result in
electric shock. (For a product using DC power, do not carry out an insulation resistance test.)
ATTENTION
General
●When considering use in conditions or environments not described in the Catalogues or Instruction Manual,
use in air navigation facilities, combustion equipment, amusement machinery, clean room, or fail-safe
devices, or other applications that specially require safety with a strong influence on human life and
property expected, give adequate consideration to safety measures such as usage with sufficient margins
of fail-safe ratings and performance.
Installation
●Do not place any obstacles around the controller. Failure to do so may result in damage to the controller.
●Do not frame controls under which work falls during a power failure. Frame controls that secure the safety
of the table, work, etc., for a power failure and emergency stop of the equipment.
Installation, operation, and maintenance
●When handling the product, ensure safety by wearing protective gloves, protective glasses, safety shoes,
etc., as required.
Disposal
●When the product becomes unavailable or unnecessary, dispose of it appropriately as industrial waste.
OTHER
■In a case where you do not observe the full-scope of descriptions in the
Safety Precautions, we shall accept no liability or responsibility.
■For inquiries as relates to the product, contact our sales office nearest you.
The address and telephone number are shown on the back of the Instruction
Manual.

CC-Link
Contents
1. Overview············································································································ 1
2. Interface Specifications······················································································ 2
3. X-SEL················································································································· 3
3.1 Remote device station······················································································································· 3
3.1.1 Models··································································································································· 3
(1) Compact type (J type)············································································································ 4
(2) General type (K type)············································································································· 5
3.1.2 CC-Link board························································································································ 6
(1) Names of each part ··············································································································· 6
(2) Rotary switches ····················································································································· 7
(3) Display of monitor LEDs ········································································································ 8
3.1.3 Setting of I/O parameters (assignment of I/O ports)····························································· 10
(1) Board installation positions (slots) and parameter numbers ················································ 10
(2) Factory-configured parameters (standard setting)································································11
(3) CC-Link connection with standard I/O ports········································································· 12
(4) Combined use of CC-Link board and I/O board··································································· 14
(5) X-SEL I/O port numbers······································································································· 19
(6) Correspondence between X-SEL I/O port number and PLC address·································· 20
(7) Data in remote registers······································································································· 22
3.1.4 CSP file································································································································ 29
3.2 Remote I/O station·························································································································· 30
3.2.1 Models································································································································· 30
3.2.2 CC-Link board······················································································································ 33
(1) Names of each part ············································································································· 33
(2) Rotary switches ··················································································································· 34
(3) Display of monitor LEDs ······································································································ 35
3.2.3 Setting of I/O parameters (assignment of I/O ports)····························································· 36
(1) Board installation positions (slots) and parameter numbers ················································ 36
(2) Factory-configure parameters······························································································ 37
(3) CC-Link connection with standard I/O ports········································································· 38
(4) General I/O connection of CC-Link boards·········································································· 41
(5) X-SEL I/O port numbers······································································································· 44
3.3 Troubleshooting ······························································································································ 46

CC-Link
4. RCS-C and E-Con···························································································· 47
4.1 Models ············································································································································ 47
(1) RCS-C ································································································································· 47
(2) E-Con ·································································································································· 47
4.2 CC-Link interface ···························································································································· 48
(1) Names of each part ············································································································· 48
(2) Rotary switches ··················································································································· 49
(3) Display of monitor LEDs ······································································································ 50
4.3 Input and output (I/O)······················································································································ 51
(1) RCS-C signal assignment···································································································· 51
(2) E-Con signal assignment····································································································· 52
4.4 Troubleshooting ······························································································································ 54
5. Common Items and Others·············································································· 55
5.1 Communications cable···················································································································· 55
5.2 Connection of communications cable connector············································································· 55
5.3 Terminators····································································································································· 55
5.4 Useful functions for X-SEL controller adjustment············································································ 56
CC-Link and GX Configurator-CC are trademarks of Mitsubishi Electric Corporation.
Corporate and product names in the text are trade names or trademarks of each company.

CC-Link
1. Overview
CC-Link stands for Control & Communication Link, which is a field network system.
It is possible to construct the systems of X-SEL, RCS-C, and E-Con with wire saving by connecting each of
these controllers to this CC-Link.
The X-SEL controller has two types of remote device station and remote I/O station. Each of the
RCS-C and E-Con controllers is handled as a remote I/O station, which allows for communications
of I/O data.
* For further information on CC-Link, refer to the Instruction Manual for the master unit and the
programmable controller (PLC) to be mounted.
Use this Instruction Manual together with the Instruction Manual of each controller of X-SEL, RCS-C,
and E-Con.
CC-Link cannot be used for any method other than those described as possible in this Instruction
Manual.
(Remote I/O station)(Remote device station)(Remote I/O station)(Remote I/O station)
Remote I/O
Remote device
station
Remote I/O
Master
station
CPU unit
1

CC-Link
2. Interface Specifications
Item Specification
Communications standard CC-Link Ver1.0 (*1)
Communications speed 10M/5M/2.5M/625k/156kbps (Selection with rotary switch)
Communications system Broadcast polling system
Synchronization system Frame synchronization system
Encoding system NRZI
Transmission path format Bus format (EIA RS485 conformance)
Transmission format HDLC conformance
Error control system CRC (X16 + X12 + X5+ 1)
Number of occupied stations X-SEL: Remote device station: Max. 3 stations
Remote I/O station: 1 station
RCS-C/E-Con: 1 station
Communications speed (bps) 10M 5M 2.5M 625k 156KCommunications cable length
(*2) Overall cable length (m) 100 160 400 900 1200
MC1.5/5-G-3.81 (E-Con, RCS)Connector (*3) Manufactured by Phoenix
Contact: MSTB2.5/5-5.08 (X-SEL)
(*1) Already certified: RCS-C 24V specifications
To be certified: X-SEL
RCS-100V, RCS-200V specifications
E-Con
(*2) For T-branch transmission, refer to the Instruction Manuals for the master unit and PLC to be mounted.
(*3) The cable-side connector is a standard accessory.
Manufactured by Phoenix Contact: MC1.5-ST-3.81 (E-Con, RCS)
SMSTB2.5/5-ST-5.08 (X-SEL)
2

CC-Link
3. X-SEL
The CC-link compatible X-SEL controller has the following two types:
a. Remote device station: Number of I/O points = Max. 256 points each
b. Remote I/O station: Number of I/O points = 16 points each
3.1 Remote device station
3.1.1 Models
The CC-Link compatible X-SEL controller handled as a remote device station has one type each of J and K as
follows:
●CC-Link board installation position
Board installation position
No. Controller
type
Number of I/O
points in
network
(Max
input/output) Standard
slot (I/O1)
Expansion
slot 1
(I/O2)
Expansion
slot 2
(I/O3)
Expansion
slot 3
(I/O4)
X-SEL model I/O slot
arrangement
M
1 J type 256/256 ●None for
single axis
and two axes
X-SEL-J□-□-CC0-□Fig. 2-1
2 K type 256/256 ●
X-SEL-K□-□-CC0-□Fig. 2-2
Note: 16 points each for input and output out of the number of I/O points are the system areas for the remote device
station and cannot be used.
For further information, refer to “3.1.3 (6) Correspondence between X-SEL I/O port No. and PLC address.”
3

CC-Link
(1) Compact type (J type)
For single axis For two axes For three and four axes
CC-Link boardExpansion slotCC-Link boardCC-Link board
X-SEL-J□-1-CC0-□X-SEL-J□-2-CC0-□X-SEL-J□-3-CC0-□
X-SEL-J□-4-CC0-□
Note: For items of single axis and two axes, a PIO board cannot be installed. For those of three and four axes, an
expansion I/O board (*1) can be inserted into the expansion slot.
Fig. 3-1-1
4

CC-Link
(2) General type (K type)
●The CC-link board is inserted into the standard slot (I/O1: leftmost).
●Either of an expansion I/O board (*1) or SIO board (*2) can be inserted into the expansion slot.
●When an expansion I/O board (*1) is not used, it is not required to supply 24V DC to the IO 24V
power connector.
Expansion slotCC-Link board
X-SEL-K□-□-CC0-□
Fig. 3-1-2
(*1) Expansion I/O board
Model (1): IA-103-X-32
(Input: 32 points, Output: 16 points)
Model (2): IA-103-X-16
(Input: 16 points, Output: 32 points)
For further information on specifications, refer to the X-SEL Controller Instruction Manual.
(*2) SIO board
Model (1): IA-105-X-MW-A
(for RS232C)
Model (2): IA-105-X-MW-B
(for RS422)
Model (3): IA-105-X-MW-C
(for RS485)
Any single board above is 2-channel compatible.
5

CC-Link
3.1.2 CC-Link board
(1) Names of each part
Monitor LED
Station number setting rotary switch
Communications speed setting rotary switch
CC-Link communications connector
6

CC-Link
(2) Rotary switches
The following can be carried out by rotary switches:
a. Setting of station number
b. Setting of communications speed
a. Setting of station number
In the CC-Link, a maximum of 64 stations can be connected.
The station number is set in the 1 to 64 range by the two rotary switches.
SA×10: Sets the tens place.
SA×1: Sets the ones place.
Station number
Rotary switch selection
number SA ×10 SA ×1
0 0 0
1 10 1
2 20 2
3 30 3
4 40 4
5 50 5
6 60 6
7 ⎯7
8 ⎯8
9 ⎯9
(Example) When setting the station number to 12:
Set the rotary switch SA ×10 to 1.
Set the rotary switch SA ×1 to 2.
Note: The CC-Link first I/O address in PLC is determined according to the master unit installation position and the number
of I/O occupied points of the unit installed prior to that.
The I/O addresses in PLC are assigned from the first I/O address above in order of station number.
For further information regarding setting of the station number and setting of the I/O address in the PLC, refer to the
Instruction Manuals for the master unit and PLC to be mounted.
7

CC-Link
b. Setting of communications speed
The communications speed is set by the rotary switch BR.
Rotary switch selection number Communications speed
0 156kbps
1 625kbps
2 2.5Mbps
3 5Mbps
4 10Mbps
Setting to 5 or more prohibited Error
(3) Display of monitor LEDs
The four LEDs mounted on the front of the board can indicate the board operating state and network
condition.
LED Color
Display
condition Display details (display indication)
RUN Green Lighting
Lights when communications start and turns off when
communications are interrupted for a fixed time or
longer.
SD Green Flashing
Flashing during data transmission
RD Green Flashing
Flashing during data reception
Lighting Local station address receiving data has an error.
ERR Red
Flashing
Setting by the communications speed setting rotary
switch was changed during communications.
Setting by the station number setting rotary switch
was changed during communications.
8

CC-Link
9

CC-Link
3.1.3 Setting of I/O parameters (assignment of I/O ports)
The X-SEL I/O ports used in the CC-Link are set. X-SEL allows a variety of settings of different I/O ports with
I/O parameters. (For further information, refer to the X-SEL Controller Instruction Manual.)
The typical setting methods are shown below in this Manual.
Basically, the I/O parameter No. 1 sets the I/O port assignment type to automatic assignment, while the I/O
parameter No. 2 and No. 3 set the I/O port addresses. When the expansion I/O boards are used, the I/O ports
are automatically assigned if the expansion I/O boards are installed in order of slot number. Accordingly, it is
not required to set the I/O port start numbers of the expansion I/O boards with parameters.
I/O parameter No. Value Description
1 1 Assigns the I/O number automatically. (Standard setting)
2 0 Assigns the standard DI from the input port No. 0. (Standard setting)
3 300 Assigns the standard DO from the output port No. 300. (Standard setting)
14 n
Designates the number of CC-Link input points in multiples of 16. (16≤n≤256)
15 m
Designates the number of CC-Link output points in multiples of 16. (16≤n≤256)
(1) Board installation positions (slots) and parameter numbers
a. J type
(Three- and four-axes
specifications)
Parameter No. 4
No. 5
No. 11
Parameter No. 2
No. 3
No. 10
Note: With no slots, parameters No. 6 to No. 9 are all set to “-1” and parameters No. 12 and No. 13 are set to “0.”
For the single-axis and two-axes specifications, parameters No. 4 and No. 5 are set to “-1” and parameter No. 11 is
set to “0.”
b. K type
Parameter No. 2
No. 3
No. 10
Parameter No. 8
No. 9
No. 13
Parameter No. 6
No. 7
No. 12
Parameter No. 4
No. 5
No. 11
10

CC-Link
(2) Factory-configured parameters (standard setting)
No. Parameter name Input
range Set
value Remarks
1 I/O port assignment type 0 – 20 1 0: Fixed assignment
1: Automatic assignment (Priority: slot 1 —)
* The ports only in the continuous installation
range from slot 1 are assigned for safety.)
2 Standard I/O:
Input port start No. (I/O1) -1 – 599 000 0 + (multiples of 8) (Invalid for negative values)
3 Standard I/O:
Output port start No. (I/O1) -1 – 599 300 300 + (multiples of 8)
(Invalid for negative values)
4 Expansion I/O1 fixed assignment
time: Input port start No. (I/O2) -1 – 599 -1 0 + (multiples of 8) (Invalid for negative values)
(Slot next to the standard I/O)
5 Expansion I/O1 fixed assignment
time: Output port start No. (I/O2) -1 – 599 -1 300 + (multiples of 8)
(Invalid for negative values)
6 Expansion I/O2 fixed assignment
time: Input port start No. (I/O3) -1 – 599 -1 0 + (multiples of 8) (Invalid for negative values)
7 Expansion I/O2 fixed assignment
time: Output port start No. (I/O3) -1 – 599 -1 300 + (multiples of 8)
(Invalid for negative values)
8 Expansion I/O3 fixed assignment
time: Input port start No. (I/O4) -1 – 599 -1 0 + (multiples of 8) (Invalid for negative values)
9 Expansion I/O3 fixed assignment
time: Output port start No. (I/O4) -1 – 599 -1 300 + (multiples of 8)
(Invalid for negative values)
10 Standard I/O error monitoring
(I/O1) 0 – 5 2
11 Expansion I/O1 error monitoring
(I/O2) 0 – 5 0
12 Expansion I/O2 error monitoring
(I/O3) 0 – 5 0
13 Expansion I/O3 error monitoring
(I/O4) 0 – 5 0
0: Non-monitoring
1: Monitoring
2: Monitoring (Non-monitoring of 24V I/O power
related errors)
(Main application of Ver. 0.55 or later)
3: Monitoring (Monitoring of 24V I/O power
related errors only)
(Main application of Ver. 0.55 or later)
14 Network I/F card remote:
Number of ports used for input 0 – 256 64 Multiples of 16
15 Network I/F card remote:
Number of ports used for output 0 – 256 64 Multiples of 16
(I/O1) to (I/O4) indicate the slot numbers.
11

CC-Link
(3) CC-Link connection with standard I/O ports
The following are settings in cases where 16 points each for input and output are used from the first
standard I/O ports of X-SEL and other I/O ports are not used.
X-SEL (J type)
Not used
(None for single axis and two axes) Input port No. 000 – 015
Output port No. 300 – 315
y
X-SEL (K type)
Not used
Input port No. 000 – 015
Output port No. 300 – 315
(The above are cases where the installation conditions as shown in Fig. 3-1-1 and Fig. 3-1-2 in section 3.1.1
are applied.)
12

CC-Link
X-SEL I/O parameter
No. Parameter name Default
(reference) Input
range Setting Remarks
1 I/O port assignment type 1 0 – 20 1 0: Fixed assignment
1: Automatic assignment (Priority: slot 1 —)
* The ports only in the continuous
installation range from slot 1 are
assigned for safety.)
2 Standard I/O:
Input port start No. (I/O1)
000 -1 – 599 000 0 + (multiples of 8) (Invalid for negative values)
3 Standard I/O:
Output port start No. (I/O1)
300 -1 – 599 300 300 + (multiples of 8)
(Invalid for negative values)
4 Expansion I/O1 fixed assignment
time: Input port start No. (I/O2)
-1 -1 – 599 -1 0 + (multiples of 8) (Invalid for negative values)
(Slot next to the standard I/O)
5 Expansion I/O1 fixed assignment
time: Output port start No. (I/O2)
-1 -1 – 599 -1 300 + (multiples of 8)
(Invalid for negative values)
6 Expansion I/O2 fixed assignment
time: Input port start No. (I/O3)
-1 -1 – 599 -1 0 + (multiples of 8) (Invalid for negative values)
7 Expansion I/O2 fixed assignment
time: Output port start No. (I/O3)
-1 -1 – 599 -1 300 + (multiples of 8)
(Invalid for negative values)
8 Expansion I/O3 fixed assignment
time: Input port start No. (I/O4)
-1 -1 – 599 -1 0 + (multiples of 8) (Invalid for negative values)
9 Expansion I/O3 fixed assignment
time: Output port start No. (I/O4)
-1 -1 – 599 -1 300 + (multiples of 8)
(Invalid for negative values)
10 Standard I/O error monitoring
(I/O1)
2 0 – 5 2
11 Expansion I/O1 error monitoring
(I/O2)
0 0 – 5 0
12 Expansion I/O2 error monitoring
(I/O3)
0 0 – 5 0
13 Expansion I/O3 error monitoring
(I/O4)
0 0 – 5 0
0: Non-monitoring
1: Monitoring
2: Monitoring (Non-monitoring of 24V I/O
power related errors)
(Main application of Ver. 0.55 or later)
3: Monitoring (Monitoring of 24V I/O power
related errors only)
(Main application of Ver. 0.55 or later)
14 Network I/F card remote:
Number of ports used for input
64 0 – 256 16 Multiples of 16
15 Network I/F card remote:
Number of ports used for output
64 0 – 256 16 Multiples of 16
(I/O1) to (I/O4) indicate the slot numbers.
13
This manual suits for next models
5
Table of contents
Other IAI Controllers manuals
Popular Controllers manuals by other brands

resideo
resideo R7284 Series Quick reference guide

Toyama
Toyama SmartGen HGM400N Series owner's manual

RKC INSTRUMENT
RKC INSTRUMENT CD101 instruction manual

Celerity
Celerity ACX3200 Series user guide

Kelly
Kelly KLS-RM Series user manual

Bosch
Bosch Rexroth IndraDrive CsDrive System with HCS01 instruction manual