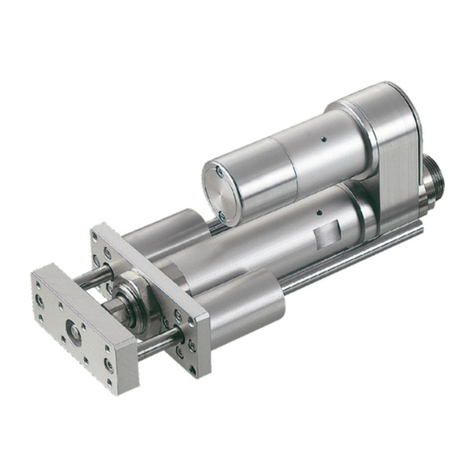
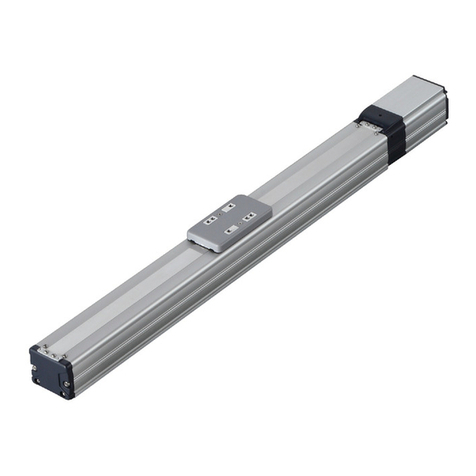
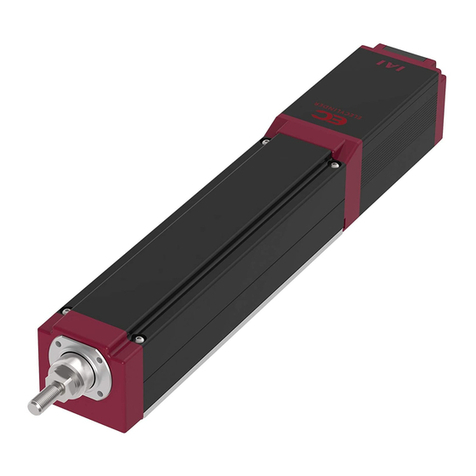
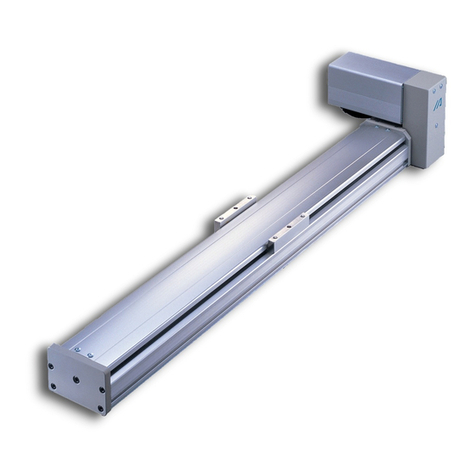
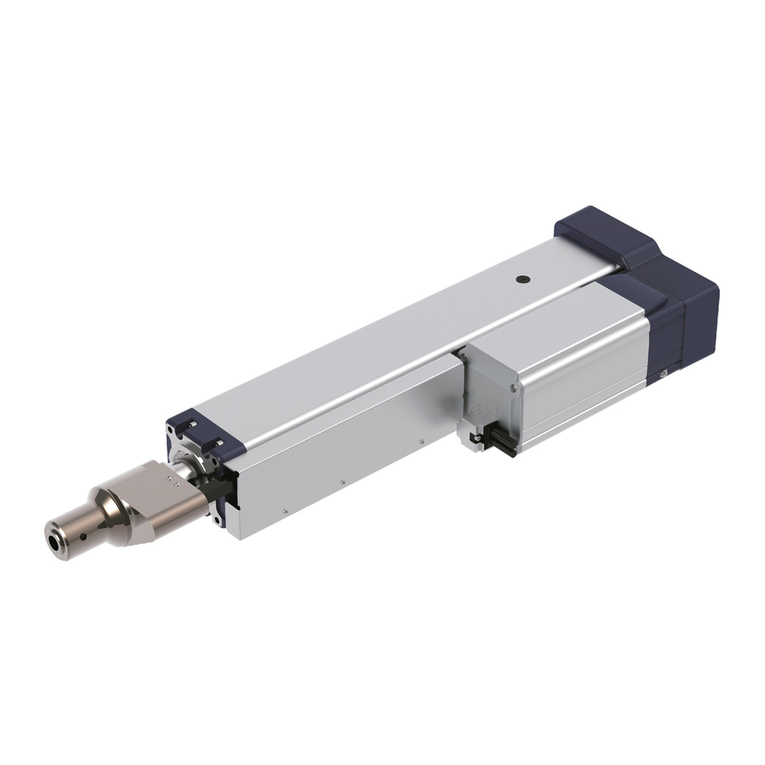
IAI ROBO Cylinder RCS4-WRA12C User manual

Specifications
Installation
Maintenance and
Inspection
External Dimensions
Life
Warranty
Appendix
ROBO Cylinder ®
ch.
1
ch.
2
ch.
3
ch.
4
ch.
5
ch.
6
ch.
7
ch.
8
Instruction Manual
Connecting with
the Controller
Wide Radial Cylinder
First Edition ME3772-1B
RCS4- WRA10C/WRA12C/WRA14C/WRA16C
WRA10R/WRA12R/WRA14R/WRA16R


Please Read Before Use
Thank you for purchasing our product.
This instruction manual explains the handling methods, structure and maintenance of this product,
providing the information you need in order to use the product safely.
Before using the product, be sure to read this manual and fully understand the contents explained
herein to ensure safe use of the product.
The DVD enclosed with the product contains instruction manuals for IAI products.
When using the product, refer to the necessary sections of the applicable instruction manual by
printing them out or displaying them on a PC.
After reading the instruction manual, keep it in a convenient place so that whoever is handling the
product can refer to it quickly when necessary.
[Important]
● This instruction manual is an original document dedicated for this product.
● This product cannot be used in ways not shown in this instruction manual. IAI shall not be
liable for any result whatsoever arising from the use of the product in any other way than what
is noted in the manual.
● The information contained in this instruction manual is subject to change without notice for the
purpose of product improvement.
● If any issues arise regarding the information contained in this instruction manual, contact our
customer center or the nearest sales office.
● Use or reproduction of this instruction manual in full or in part without permission is prohibited.
● The company names, names of products and trademarks of each company shown in the text
are registered trademarks.

RCS4 Wide Radial Cylinder Type Instruction Manual Configuration
Product name Instruction manual name Control
number
RCS4 First Step Guide ME3775
RCS4 Wide Radial Cylinder Type Instruction Manual
(this document) ME3772
SCON-CB/CFB Controller SCON-CB/CFB Controller
Instruction Manual ME0340
SCON-CAL/CGAL Controller SCON-CAL/CGAL Controller
Instruction Manual ME0243
MSCON-C Controller MSCON-C Controller
Instruction Manual ME0306
SSEL-CS Controller SSEL-CS Controller
Instruction Manual ME0157
XSEL-P/Q Controller XSEL-P/Q Controller
Instruction Manual ME0148
XSEL-R/S Controller XSEL-R/S Controller
Instruction Manual ME0313
XSEL-RA/SA Controller XSEL-RA/SA Controller
Instruction Manual ME0359
PC Compatible Software for RC/EC RCM-101-MW/RCM-101-USB
Instruction Manual ME0155
PC Compatible Software for XSEL IA-101-X-MW/IA-101-X-USBMW
Instruction Manual ME0154
Touch Panel Teaching Pendant
TB-01/01D/01DR
Applicable for Position Controller
Instruction Manual
ME0324
Touch Panel Teaching Pendant
TB-02/02D
Applicable for Position Controller
Instruction Manual
ME0355
Data Setter TB-03
Applicable for Position Controller ME0376
Touch Panel Teaching Pendant
TB-01/01D/01DR
Applicable for Program Controller
Instruction Manual
ME0325
Touch Panel Teaching Pendant
TB-02/02D
Applicable for Program Controller
Instruction Manual
ME0356
Data Setter TB-03
Applicable for Program Controller ME0377

Contents
Safety Guide ···················································································· Intro-1
Precautions for Handling ···································································· Intro-9
International Standard Compliance ······················································· Intro-10
Names of the Parts ··········································································· Intro-11
Chapter 1 Specifications
1.1 Checking the Product ································································ 1-1
Parts ··········································································································· 1-1
How to Read the Model Nameplate ······································································· 1-2
How to Read the Model Number ·········································································· 1-2
Product List ····································································································· 1-3
1.2 Specifications ·········································································· 1-4
Specifications ··································································································· 1-4
Duty ratio ········································································································ 1-108
1.3 Options ·················································································· 1-110
Brake Type (Model Code: B) ··············································································· 1-110
Cable Eject Direction Changed
(Model Code: CJT, CJR, CJL, CJB and CJO) ........................................................... 1-110
Motor Reversed Direction (Model Code: ML, MR) ···················································· 1-110
Reversed-home Specification (Model Code: NM) ····················································· 1-110
T-Slot Nut Bar (Model Code: NTBL, NTBR) ···························································· 1-111
Flange Bracket (Model Code: FL) ········································································· 1-112
1.4 Accessories ············································································ 1-114
Motor Cable ····································································································· 1-114
Encoder Cable ································································································· 1-115
Chapter 2 Installation
2.1 Precautions for Transportation ···················································· 2-1
2.2 Installation and Storage / Preservation Environment ························ 2-3
Installation Environment ······················································································· 2-3
Storage/ Preservation Environment ········································································· 2-4
2.3 How to Install ·········································································· 2-5
Installation Orientation ························································································· 2-5
Installation Surface ······························································································ 2-6
Installation of the Main Unit ··················································································· 2-7
Attachment of Transported Object ·········································································· 2-21
Precautions Regarding the Rod ············································································· 2-23
Chapter 3 Connecting with the Controller
3.1 Connecting with the Controller ···················································· 3-1

Chapter 4 Maintenance and Inspection
4.1 Precautions for Maintenance and Inspection Work ·························· 4-1
4.2 Inspection Items and Schedule ··················································· 4-3
Wide Radial Cylinder ··························································································· 4-3
Grease Supply Timing ·························································································· 4-3
4.3 Visual Inspection Items ····························································· 4-4
External Visual Inspection ····················································································· 4-4
Internal Visual Inspection ······················································································ 4-5
4.4 Cleaning ················································································ 4-7
External Cleaning ································································································ 4-7
Internal Cleaning ································································································· 4-7
4.5 Greasing Method ····································································· 4-8
Grease used ······································································································ 4-8
Greasing method ································································································ 4-9
4.6 How to Replace Components ····················································· 4-12
Belt Replacement and Tuning ················································································ 4-12
Motor Replacement ····························································································· 4-22
Chapter 5 External Dimensions
5.1 External Dimensions ································································· 5-1
RCS4-WRA10C ·································································································· 5-1
RCS4-WRA12C ·································································································· 5-2
RCS4-WRA14C ·································································································· 5-3
RCS4-WRA16C ·································································································· 5-4
RCS4-WRA10R ·································································································· 5-5
RCS4-WRA12R ·································································································· 5-6
RCS4-WRA14R ·································································································· 5-7
RCS4-WRA16R ·································································································· 5-8
Chapter 6 Life
Chapter 7 Warranty
7.1 Warranty period ······································································· 7-1
7.2 Scope of the warranty ······························································· 7-1
7.3 Honoring the warranty ······························································· 7-1
7.4 Limited liability ········································································· 7-2
7.5 Conformance with applicable standards/regulations,etc.,
and application conditions ·························································· 7-2
7.6 Other Items excluded from warranty ············································· 7-2
Chapter 8 Appendix
8.1 Index ····················································································· 8-1
8.2 Revision history ······································································· 8-3

Safety Guide
Intro-1
Safety Guide
The Safety Guide is intended to permit safe use of the product and thus to prevent risks and property
damage. Be sure to read it before handling the product.

Safety Guide
Intro-2
Safety Precautions for Our Products
Common safety precautions for the use of robots in various operations are indicated here.
No. Operation Precautions
1 Model
Selection
● This product is not intended or designed for applications where high levels of
safety are required, and so cannot guarantee that human lives will be
protected. Accordingly, do not use it in any of the following applications.
(1) Medical equipment used to maintain, control or otherwise affect human life
or physical health
(2) Mechanisms or machinery designed for the purpose of moving or
transporting people (vehicles, railway facilities, aviation facilities etc.)
(3) Machinery components essential for safety (safety devices etc.)
● Do not use the product outside the range of the specifications. Otherwise,
the product life may be drastically shortened, and product damage or facilities
stoppage may occur.
● Do not use it in any of the following environments.
(1) Locations with flammable gases, ignitable objects or explosives
(2) Locations with potential exposure to radiation
(3) Locations with ambient temperature or relative humidity exceeding the
specifications range
(4) Locations where radiant heat is applied by direct sunlight or other large
heat source
(5) Locations where condensation occurs due to abrupt temperature changes
(6) Locations with corrosive gases (sulfuric acid, hydrochloric acid, etc.)
(7) Locations exposed to significant amounts of dust, salt or iron powder
(8) Locations subject to direct vibration or impact
● For an actuator used in vertical orientation, select a model which is equipped
with a brake. If a model without brake is selected, the moving parts may fall
when the power is turned OFF, causing accidents such as injury or workpiece
damage.

Safety Guide
Intro-3
No. Operation Precautions
2 Transportation ● When transporting heavy objects, do the work with two or more persons or
utilize equipment such as a crane.
● When working with two or more persons, make it clear who is to be in charge
and communicate well with each other to ensure safety.
● During transportation, carefully consider the carrying positions, weight, and
weight balance, and be careful to avoid collisions or dropping.
● Use appropriate transportation measures for transport.
The actuators available for transportation with a crane have eyebolts attached
or tapped holes to attach bolts. Follow the instructions in the instruction manual
for each model.
● Do not climb onto the package.
● Do not put anything heavy that could deform the package on it.
● When using a crane with capacity of 1t or more, have an operator qualified for
crane operation and sling work.
● When using a crane or equivalent equipment, make sure not to suspend loads
exceeding the equipment's rated load.
● Use a hook that is suitable for the load. Consider the safety factor of the hook in
such factors as shear strength. Also, check to make sure that the hook is free of
damage.
● Do not climb on loads suspended from cranes.
● Do not leave loads suspended from cranes for long periods.
● Do not stand under loads suspended from cranes.
3 Storage
and
Preservation
● For the storage and preservation environment, see the installation
environment. However, give especial consideration to the prevention of
condensation.
● Store the products so as to prevent them from falling over or down in the case
of natural disasters such as earthquakes.

Safety Guide
Intro-4
No. Operation Precautions
4 Installation
and
Startup
(1) Installation of robot body and controller, etc.
● Be sure to securely hold and fix the product (including the workpiece).
If the product falls over, is dropped, or operates abnormally, it may lead to
damage and injury.
Also, be equipped for falls over or down due to natural disasters such as
earthquakes.
● Do not climb on or put anything on the product. Otherwise, this may lead to
accidental falling, injury or damage to the product due to falling objects, product
loss of function or performance degradation, or shortening of product life.
● When using the product in any of the places specified below, provide sufficient
shielding.
(1) Locations where electrical noise is generated
(2) Locations with strong electrical or magnetic fields
(3) Locations with mains or power lines passing nearby
(4) Locations where the product may come in contact with water, oil or
chemical spray
(2) Cable wiring
● Use IAI genuine cables for connecting the actuator and controller, and for the
teaching tools.
● Do not scratch cables, bend them forcibly, pull them, coil them, snag them,
or place heavy objects on them. Otherwise, this may lead to fire, electric shock,
or abnormal operation due to leakage or conduction malfunction.
● Perform the wiring for the product after turning OFF the power to the unit, and
avoid miswiring.
● When wiring DC power (+24V), be careful with the positive/negative polarity.
Incorrect connections may lead to fire, product breakdown or abnormal
operation.
● Connect the cable connector securely so that there is no disconnection or
looseness. Otherwise, this may lead to fire, electric shock, or abnormal
operation of the product.
● Never cut or reconnect the cables supplied with the product for the purpose of
extending or shortening the cable length. Otherwise, this may lead to fire or
abnormal operation of the product.
(3) Grounding
● Grounding must be performed, in order to prevent electric shocks or
electrostatic charge, enhance noise-resistant performance and control
unnecessary electromagnetic radiation.
● For the ground terminal on the AC power cable of the controller and the
grounding plate in the control panel, be sure to use a twisted pair cable with
wire thickness 0.5mm2 (AWG20 or equivalent) or more for grounding work.
For safeguard grounding, it is necessary to select an appropriate wire diameter
for the load. Perform wiring that satisfies the specifications (electrical
equipment technical standards).
● Perform Class D grounding (former Class 3 grounding, with ground resistance
100Ω or below).

Safety Guide
Intro-5
No. Operation Precautions
4 Installation
and
Startup
(4) Safety measures
● When working with two or more persons, make it clear who is to be in charge
and communicate well with each other to ensure safety.
● When the product is operating or in the ready mode, take safety measures
(such as the installation of safety/protection fences) so that nobody can enter
the area within the robot's movable range. Contact with an operating robot may
lead to death or serious injury.
● Be sure to install an emergency stop circuit so that the unit can be stopped
immediately in an emergency during operation.
● Take safety measures such that turning the power ON alone will not start up the
unit. Otherwise, this may cause the product to start unexpectedly, leading to
injury or product damage.
● Take safety measures such that emergency stop cancel or recovery after
power failure alone will not start up the unit. Otherwise, this may lead to injury
or equipment damage.
● When installation or adjustment operation is to be performed, display signs
such as "Operating: No Power ON!" etc. Sudden power input may cause
electric shock or injury.
● Take measures to prevent workpieces, etc. from falling during power failures or
emergency stop.
● Wear protection gloves, goggles and safety shoes, as necessary, to secure
safety.
● Do not insert fingers or objects into the openings in the product. Otherwise,
this may lead to injury, electric shock, product damage, or fire.
● When releasing the brake on a vertically oriented actuator, be careful that it
does not fall under its own weight, catching the operator's hand or damaging
workpieces.
5 Teaching ● When working with two or more persons, make it clear who is to be in charge
and communicate well with each other to ensure safety.
● Perform teaching operation from outside the safety/protection fence,
if possible. If operation must be performed within the safety/protection fence,
prepare "Work Regulations" and make sure that all the workers acknowledge
and understand them well.
● When operation is to be performed inside the safety/protection fence,
operators should have emergency stop switches available at hand so that the
unit can be stopped at any time if abnormalities occur.
● When operation is to be performed inside the safety/protection fence,
have a monitor standing by in addition to the operator(s) so that the unit can be
stopped at any time if abnormalities occur. Also, keep watch on the operation
so that a third party cannot operate the switches carelessly.
● Place a sign indicating "Operating" where it can be seen easily.
● When releasing the brake on a vertically oriented actuator, be careful that it
does not fall under its own weight, catching the operator's hand or damaging
workpieces.
* Safety/protection fence: If there is no safety/protection fence, the movable
range should be indicated.

Safety Guide
Intro-6
No. Operation Precautions
6 Trial
Operation
● When working with two or more persons, make it clear who is to be in charge
and communicate well with each other to ensure safety.
● After teaching or programming, carry out trial operation step by step before
switching to automatic operation.
● When trial operation is to be performed inside the safety/protection fence,
use the same work procedure, determined in advance, as teaching operation.
● Be sure to confirm program operation at safe speeds. Otherwise, this may lead
to accidents due to unexpected motion caused by program error, etc.
● Do not touch the terminal block or any of the various setting switches while the
equipment is live. Otherwise, this may lead to electric shock or abnormal
operation.
7 Automatic
Operation
● Check before starting automatic operation or restarting after operation stop that
there is nobody within the safety/protection fence.
● Before starting automatic operation, make sure that all peripheral equipment is
ready for automatic operation and that there is no alarm indication.
● Be sure to start automatic operation from outside the safety/protection fence.
● If the product produces abnormal heat, smoke, odor, or noise, immediately stop
it and turn OFF the power switch. Otherwise, this may lead to fire or damage to
the product.
● When a power failure occurs, turn OFF the power switch. Otherwise, this may
lead to injury or product damage due to unexpected product motion during
recovery from the power failure.
8 Maintenance
and
Inspection
● When working with two or more persons, make it clear who is to be in charge
and communicate well with each other to ensure safety.
● Perform the work outside the safety/protection fence, if possible.
If operation must be performed within the safety/protection fence, prepare
"Work Regulations" and make sure that all the workers acknowledge and
understand them well.
● When work is to be performed inside the safety/protection fence, turn OFF the
power switch as a rule.
● When operation is to be performed inside the safety/protection fence,
operators should have emergency stop switches available at hand so that the
unit can be stopped at any time if abnormalities occur.
● When operation is to be performed inside the safety/protection fence,
have a monitor standing by in addition to the operator(s) so that the unit can be
stopped at any time if abnormalities occur. Also, keep watch on the operation
so that a third party cannot operate the switches carelessly.
● Place a sign indicating "Operating" where it can be seen easily.
● For the grease for the guide or ball screw, use appropriate grease according to
the Instruction Manual for each model.
● Do not perform dielectric strength testing. Otherwise, this may lead to damage
to the product.

Safety Guide
Intro-7
No. Operation Precautions
8 Maintenance
and
Inspection
● When releasing the brake on a vertically oriented actuator, be careful that it
does not fall under its own weight, catching the operator's hand or damaging
workpieces.
● The slider or rod may be misaligned from the stop position if the servo is turned
OFF. Avoid injury or damage due to unnecessary operation.
● Be careful not to lose the cover or any removed screws, and be sure to return
the product to the original condition after maintenance and inspection work.
Otherwise, this may lead to product damage or injury due to incomplete
mounting.
* Safety/protection fence: If there is no safety/protection fence, the movable
range should be indicated.
9 Modification
and
Disassembly
● Do not modify, disassemble/assemble, or use maintenance parts not specified
on your own discretion.
10 Disposal ● When the product exceeds its useful life or is no longer needed, dispose of it
properly as industrial waste.
● When removing the actuator for disposal, avoid dropping components when
detaching screws.
● Do not put the product in a fire when disposing of it. The product may rupture or
generate toxic gases.
11 Other ● If you are equipped with a medical device such as a pacemaker, do not
approach the product or its wiring, as the device may be affected.
● See the Overseas Specifications Compliance Manual to check compliance with
overseas standards if necessary.
● For the handling of actuators and controllers, follow the dedicated instruction
manual of each unit to ensure safety.

Safety Guide
Intro-8
Precaution Indications
The safety precautions are divided into "Danger", "Warning", "Caution" and "Notice" according to
the warning level, as follows, and described in the Instruction Manual for each model.
Level Degree of risk to persons and property Symbol
Danger This indicates an imminently hazardous situation which, if the product
is not handled correctly, will result in death or serious injury. Danger
Warning This indicates a potentially hazardous situation which, if the product
is not handled correctly, could result in death or serious injury. Warning
Caution
This indicates a potentially hazardous situation which, if the product
is not handled correctly, may result in minor injury or property
damage. Caution
Notice
This indicates a situation in which, while injury is not a likely result,
the precautions should be observed in order to use the product
appropriately. Notice

Precautions for Handling
Intro-9
Precautions for Handling
1. The Safety Guide attached with the product is intended to permit safe use of
the product and thus to prevent risks and property damage. Be sure to read it
before handling the product.
2. Do not attempt any handling or operation that is not indicated in this instruction
manual.
3. Make sure to secure the actuator properly in accordance with this instruction
manual.
If the actuator is not securely fixed, this may lead to abnormal noise, vibration, breakdown or
shortened product life.
4. Make sure to observe the usage conditions and environment of the product.
Operation outside the warranty could cause decreased performance or product breakdown.
Use within the allowable range for each item.
Item Cautions
for use
Problems or breakdowns which may
occur if the allowable
range is exceeded
Speed and
acceleration/deceleration
Use within the
allowable
range
May lead to abnormal noise, vibration,
breakdown, or shortened product life.
Rod Tip Dynamic
Allowable Load Use within the
allowable
range
May lead to abnormal noise, vibration,
breakdown, or shortened product life.
In extreme cases, flaking may occur on the
guide or ball screw.
Load offset distance
Mounting a load with an overhang length
greater than the allowable values may lead
to vibration or abnormal noise.

Precautions for Handling
International Standard Compliance
Intro-10
5. If return operations are continued over a short distance, they may rapidly
degrade the film of grease.
Continuous return operation within a distance less than 30mm may cause the grease film to
degrade rapidly.
As a guideline, in every 5,000 to 10,000 cycles, have approximately 5 cycles of return operation
over a 50mm distance or more to regenerate the oil film. Continued use of the actuator in that
state may lead to breakdown.
In extreme cases, flaking may occur on the guide or ball screw.
6. Do not attempt to have rods collide with an obstacle at high speed.
This may damage the coupling or other mechanical parts.
7. Grease has been applied to the outer periphery of the rod for the rod type.
Protect the peripheral equipment if grease adhesion negatively affects them.
8. In some conditions of environment of use, postures of installation and
conditions of operation, the base oil separated from the grease may come out
of ROBO Cylinder.
It is recommended to have a protection in case the peripheral devices could
get influence of the base oil.
International Standard Compliance
The ROBO Cylinder complies with the following overseas standards.
Refer to the Overseas Standard Compliance Manual (ME0287) for more detailed information.
CE Marking RoHS Directive
{ {

Names of the Parts
Intro-11
Names of the Parts
In this manual, the actuator left/right sides and motor/opposite sides are shown as in the figure
below.
Motor Straight Type
Motor Reversing Type
アクチュエータ
ケーブルAssy
フレームカバー
フロントブラケット
エンドカバー
モータカバー
ベース
モータブラケット
リアブラケット
ロッド
先端金具
右側
左側
反モータ側 モータ側
ホールキャップ
(給油口)
ロックナット
アース線取付用タップ
Right Side
Frame Cover
Rod
Left Side
Tip Fitting
Motor Cover
Motor Bracket
End Cover
Opposite Side
of the Motor
Motor Side
Hole Cap
(Oil Supply Inlet)
Actuator Cable
Assy
Front Bracket Base Rear Bracket
Front Bracket
Tip Fitting
Hole Cap
(Oil Supply Inlet)
Actuator Cable
Assy
Base
Rear Bracket
Right Side
Motor Side
Rod
Motor Bracket
End Cover
Motor Cover
Left Side
Motor Unit Pulley Cover
Reversing Plate
Coupling Cover
Opposite Side
of the Motor
Lock Nut
Tapped hole for
Ground Line Attachment
Lock Nut
Tapped hole for
Ground Line Attachment

Names of the Parts
Intro-12

Specifications
1.1 Checking the Product ··········································· 1-1
Parts ·················································································· 1-1
How to Read the Model Nameplate ·········································· 1-2
How to Read the Model Number ·············································· 1-2
Product List ········································································· 1-3
1.2 Specifications ····················································· 1-4
Specifications ······································································ 1-4
Duty ratio ············································································ 1-108
1.3 Options ····························································· 1-110
Brake Type (Model Code: B) ··················································· 1-110
Cable Eject Direction Changed
(Model Code: CJT, CJR, CJL, CJB and CJO) ············ 1-110
Motor Reversed Direction (Model Code: ML, MR) ······················· 1-110
Reversed-home Specification (Model Code: NM) ························ 1-110
T-Slot Nut Bar (Model Code: NTBL, NTBR) ······························· 1-111
Flange Bracket (Model Code: FL) ············································ 1-112
1.4 Accessories ······················································· 1-114
Motor Cable ········································································ 1-114
Encoder Cable ····································································· 1-115
ROBO Cylinder
Chapter

1-1
1.1 Checking the Product
1. Specifications
1.1 Checking the Product
Parts
The following table shows the product configuration for the standard specification.
See the component list for the details of the enclosed components. If you find any fault or missing
parts, contact your local IAI distributor.
Actuator Accessories
Actuator Quantity 1 Motor Cable Quantity 1
Encoder Cable Quantity 1
Accessories
Cross Recessed Pan Head Screw with
Captive Washer M3×6
Quantity 2
For affixing ground cable
Cable Band Quantity 2
For clamping connector cover
* Refer to International Application Manual
(ME0287) for how to use it.
Accessories (Documents/DVD)
First Step Guide
Quantity 1
Safety Guide Quantity 1
Instruction Manual (DVD)
Quantity 1
This manual suits for next models
6
Table of contents
Other IAI Controllers manuals

IAI
IAI PCON-CB series User manual

IAI
IAI ROBO Cylinder RCS2 User manual

IAI
IAI ELECYLINDER EC-WS10 R Series User manual

IAI
IAI ROBO Cylinder RCP2 Series User manual

IAI
IAI RA Series User manual

IAI
IAI ROBO Cylinder RCP2 Series User manual

IAI
IAI RCS3 User manual

IAI
IAI RCM-P User manual

IAI
IAI X-SEL User manual

IAI
IAI RCP4 User manual
Popular Controllers manuals by other brands

Toshiba
Toshiba V Series user manual

FASAR ELETTRONICA
FASAR ELETTRONICA FE230 quick start guide

MAXIMATOR
MAXIMATOR RM350 Installation and Comissioning manual

DynaGen
DynaGen GSC400 Series Calibration utility manual

Hunter
Hunter Hydrawise HPC quick start guide

Texas Instruments
Texas Instruments DM648 DSP user guide