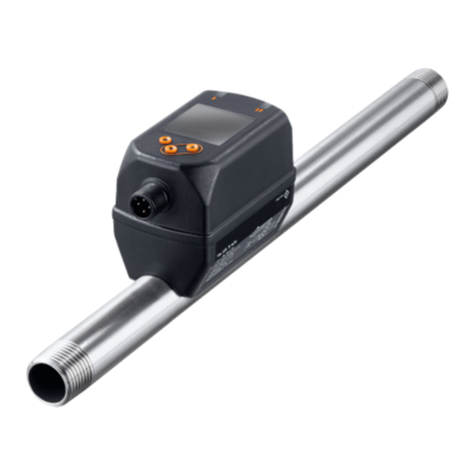
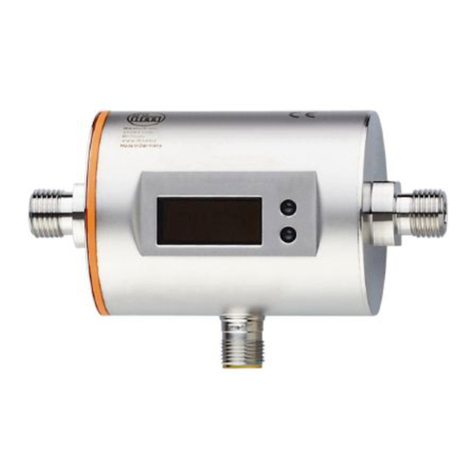
IFM SM2x00 User manual

Operating instructions
Magnetic-inductive
flow meter
SM2x00
SM9x00
SM2x01
SM9x01
80254211 / 00 11 / 2018
UK

2
Contents
1 Preliminary note���������������������������������������������������������������������������������������������������4
1�1 Symbols used ������������������������������������������������������������������������������������������������4
1�2 Warnings used�����������������������������������������������������������������������������������������������5
2 Safety instructions �����������������������������������������������������������������������������������������������5
3 Functions and features ����������������������������������������������������������������������������������������6
4 Function���������������������������������������������������������������������������������������������������������������6
4�1 Process measured signals ����������������������������������������������������������������������������6
4�2 Direction of flow ���������������������������������������������������������������������������������������������7
4�2�1 Determining the direction of flow (Fdir)�������������������������������������������������7
4�3 Consumed quantity monitoring (ImP) ������������������������������������������������������������8
4�3�1 Display and counting method of the quantity meter �����������������������������8
4�3�2 Consumed quantity monitoring via pulse output�����������������������������������9
4�3�3 Consumed quantity monitoring via preset counter �����������������������������10
4�4 Empty pipe detection �����������������������������������������������������������������������������������10
4�5 Switching function���������������������������������������������������������������������������������������� 11
4�6 Analogue function ����������������������������������������������������������������������������������������12
4�7 Frequency output�����������������������������������������������������������������������������������������14
4�8 Measured value damping (dAP) ������������������������������������������������������������������15
4�9 Start-up delay (dSt) �������������������������������������������������������������������������������������15
4�10 Low flow cut-off (LFC)��������������������������������������������������������������������������������17
4�11 Simulation ��������������������������������������������������������������������������������������������������17
4�12 IO-Link �������������������������������������������������������������������������������������������������������17
5 Installation����������������������������������������������������������������������������������������������������������18
5�1 Recommended mounting position ���������������������������������������������������������������18
5�2 Non recommended installation position�������������������������������������������������������20
5�3 Grounding����������������������������������������������������������������������������������������������������21
5�4 Installation in pipes ��������������������������������������������������������������������������������������21
6 Electrical connection������������������������������������������������������������������������������������������22
7 Operating and display elements ������������������������������������������������������������������������24
8 Menu������������������������������������������������������������������������������������������������������������������25
8�1 Main menu���������������������������������������������������������������������������������������������������26
8�1�1 Explanation of the main menu ������������������������������������������������������������27
8�2 Extended functions – Basic settings������������������������������������������������������������28

3
UK
8�2�1 Explanation extended functions (EF)��������������������������������������������������29
8�2�2 Submenu basic settings (CFG) ����������������������������������������������������������29
8�3 Extended functions – Min/max memory – Empty pipe – Simulation������������30
8�3�1 Explanation extended functions (EF)��������������������������������������������������31
8�3�2 Submenu min/max memory (MEM)����������������������������������������������������31
8�3�3 Submenu empty pipe (EPD)���������������������������������������������������������������31
8�3�4 Submenu simulation (SIM) �����������������������������������������������������������������31
9 Set-up ����������������������������������������������������������������������������������������������������������������32
10 Parameter setting ��������������������������������������������������������������������������������������������32
10�1 Parameter setting in general ���������������������������������������������������������������������33
10�1�1 Parameter setting in submenus��������������������������������������������������������33
10�1�2 Locking / unlocking ���������������������������������������������������������������������������34
10�1�3 Timeout���������������������������������������������������������������������������������������������34
10�2 Settings for volumetric flow monitoring������������������������������������������������������34
10�2�1 Switch Point monitoring of volumetric flow (OUT1) ��������������������������34
10�2�2 Switch Point monitoring of volumetric flow (OUT2) ��������������������������34
10�2�3 Analogue output flow rate (OUT2) ����������������������������������������������������34
10�2�4 Frequency signal for flow (OUT1)�����������������������������������������������������35
10�3 Settings for consumed quantity monitoring �����������������������������������������������35
10�3�1 Quantity monitoring by pulse output (OUT1) ������������������������������������35
10�3�2 Quantity monitoring by preset counter (OUT1)���������������������������������35
10�3�3 Pulse value ���������������������������������������������������������������������������������������35
10�3�4 Manual counter reset������������������������������������������������������������������������36
10�3�5 Time-controlled counter-reset�����������������������������������������������������������36
10�3�6 Deactivation of the counter reset������������������������������������������������������36
10�3�7 Counter reset using an external signal ���������������������������������������������36
10�4 Settings for temperature monitoring ����������������������������������������������������������37
10�4�1 Switch Point monitoring for temperature (OUT2) �����������������������������37
10�4�2 Analogue output temperature (OUT2) ����������������������������������������������37
10�5 User settings (optional)������������������������������������������������������������������������������38
10�5�1 Standard unit of measurement for volumetric flow ���������������������������38
10�5�2 Standard display�������������������������������������������������������������������������������38
10�5�3 Direction of flow ��������������������������������������������������������������������������������38
10�5�4 Output logic ��������������������������������������������������������������������������������������38
10�5�5 Start-up delay �����������������������������������������������������������������������������������38
10�5�6 Measured value damping �����������������������������������������������������������������39

4
1 Preliminary note
1.1 Symbols used
►Instructions
> Reaction, result
[…] Designation of keys, buttons or indications
→Cross-reference
Important note
Non-compliance may result in malfunction or interference�
Information
Supplementary note�
10�5�7 Error behaviour of the outputs ����������������������������������������������������������39
10�5�8 Activating / deactivating empty pipe detection����������������������������������39
10�5�9 Empty pipe detection switching logic������������������������������������������������39
10�5�10 Time-delay empty pipe detection����������������������������������������������������40
10�5�11 Empty pipe detection limit value �����������������������������������������������������40
10�5�12 Counting method of the totaliser�����������������������������������������������������40
10�5�13 Low flow cut-off�������������������������������������������������������������������������������40
10�6 Service functions ���������������������������������������������������������������������������������������40
10�6�1 Read min/max values �����������������������������������������������������������������������40
10�6�2 Simulation menu�������������������������������������������������������������������������������41
10�6�3 Reset all parameters to factory setting ���������������������������������������������41
11 Operation ���������������������������������������������������������������������������������������������������������41
11�1 Reading the process value ������������������������������������������������������������������������41
11�2 Changing the process value display in the RUN mode ����������������������������41
11�3 Read the set parameters ���������������������������������������������������������������������������42
12 Troubleshooting �����������������������������������������������������������������������������������������������42
13 Technical data��������������������������������������������������������������������������������������������������43
14 Factory setting �������������������������������������������������������������������������������������������������44

5
UK
1.2 Warnings used
CAUTION
Warning of personal injury�
Slight reversible injuries may result�
2 Safety instructions
• The device described is a subcomponent for integration into a system�
- The manufacturer of the system is responsible for the safety of the system�
- The system manufacturer undertakes to perform a risk assessment and to
create a documentation in accordance with legal and normative requirements
to be provided to the operator and user of the system� This documentation
must contain all necessary information and safety instructions for the operator,
the user and, if applicable, for any service personnel authorised by the manu-
facturer of the system�
• Read this document before setting up the product and keep it during the entire
service life�
• The product must be suitable for the corresponding applications and environ-
mental conditions without any restrictions�
• Only use the product for its intended purpose (→ Functions and features).
• Only use the product for permissible media (→ Technical data).
• If the operating instructions or the technical data are not adhered to, personal
injury and/or damage to property may occur�
• The manufacturer assumes no liability or warranty for any consequences
caused by tampering with the product or incorrect use by the operator�
• Installation, electrical connection, set-up, operation and maintenance of the unit
must be carried out by qualified personnel authorised by the machine operator�
• Protect units and cables against damage�

6
3 Functions and features
The unit monitors liquid media� It detects the 3 process variables volumetric flow
quantity, consumed quantity, medium temperature�
Pressure Equipment Directive (PED)
The units comply with the Pressure Equipment Directive and are designed and
manufactured for group 2 fluids in accordance with the sound engineering prac-
tice� Use of group 1 fluids on request�
Applications
Conductive liquids with the following properties:
• Conductivity: ≥ 20 µS/cm
• Viscosity: < 70 mm2/s at 40 °C; < 70 cSt at 104°F
This is a class A product�
The unit may cause radio interference in domestic areas�
►If required, take appropriate EMC screening measures�
4 Function
• The unit detects the flow based on the magnetic-inductive volumetric flow
measuring principle�
• The unit also detects the medium temperature�
• It features an IO-Link interface�
• The unit displays the current process value�
4.1 Process measured signals
The unit generates 2 output signals according to the parameter settings:
OUT1/IO-Link: 5 selection options Parameter setting
- Switching signal for volumetric flow limit value → 10.2.1
- Frequency signal for volumetric flow quantity → 10.2.4
- Pulse signal for quantity meter → 10.3.1
- Switching signal for preset counter → 10.3.2
- Switching signal for empty pipe detection → 10.5.8
OUT2: 6 selection options Parameter setting
- Switching signal for volumetric flow limit value → 10.2.2

7
UK
- Switching signal for temperature limit value → 10.4.1
- Analogue signal for volumetric flow quantity → 10.2.3
- Analogue signal for temperature → 10.4.2
- Switching signal for empty pipe detection → 10.5.8
- Input for external reset signal (InD) → 10.3.7
4.2 Direction of flow
In addition to the flow velocity and the volumetric flow quantity, the unit also de-
tects the direction of flow�
4.2.1 Determining the direction of flow (Fdir)
An arrow with the text "flow direction" on the unit indicates the positive flow direc-
tion� The flow direction can be inversed (→ 10.5.3)�
►Use the supplied label to mark the changed flow direction (new positive
direction of flow)�
Flow��� Process value display
corresponds to the marked flow direction + (positive)
against the marked flow direction - (negative)

8
4.3 Consumed quantity monitoring (ImP)
The unit has an internal mass flow meter (totaliser)� It continuously totals the
consumed quantity after the last reset� Pulse signals or a switching signal can be
used to monitor the consumed quantity�
→ 10.3.1 Quantity monitoring by pulse output (OUT1)
→ 10.3.2 Quantity monitoring by preset counter (OUT1)
4.3.1 Display and counting method of the quantity meter
Meter reading:
• The current quantity meter reading can be indicated (→ 11.2)�
• In addition, the value before the last reset is saved� This value can also be
displayed (→ 11.2)�
The meter saves the totalled volumetric flow quantity every 10 minutes�
After a power failure this value is available as the current meter reading� If a
time-controlled reset is set, the elapsed time of the set reset interval is also
saved� So the possible data loss can be at most 10 minutes�
Counter reset:
• There are different ways to reset the quantity meter�
→ 10.3.4 Manual counter reset
→ 10.3.5 Time-controlled counter-reset
→ 10.3.7 Counter reset using an external signal
• If the quantity meter is not reset by applying one of the above-mentioned
methods, an automatic reset takes place when the maximum volumetric flow
quantity that can be displayed is exceeded (overflow)�
Consideration of the direction of flow:
• The quantity meter takes account of the flow direction when totalising the
consumed quantity� The following counting methods can be defined via the
parameter [FPro] (→ 10.5.12):
[FPro] Counting method
0+ Negative flow values (against the marked direction of flow) are not taken
into consideration for totalling�
– + Negative flow values are subtracted from the consumed quantity�

9
UK
4.3.2 Consumed quantity monitoring via pulse output
OUT 1 issues a pulse signal each time the set volumetric flow quantity has been
reached (→ 10.3.3 Pulse value)�
Depending on the setting of the counting method [FPro] totalling of the volumetric
flow quantity takes into account the flow in negative direction of flow (– +) or does
not take it into account (0+) → 4.3.1�
ImpFPro = – +
Imp
FPro = 0 +
+ Q
t
t
- Q
V
+Q = volumetric flow quantity in positive direction
- Q = volumetric flow quantity in negative direction
V = absolute volumetric flow quantity (= sum of negative and positive flow)

10
4.3.3 Consumed quantity monitoring via preset counter
2 kinds of monitoring are possible which can be set via the parameter [rTo]�
[rTo] Output Meter reset
OFF
(→ 10.3.6)
OUT1 switches when the volumetric
flow quantity set with [ImPS] has
been reached�
The preset counter is only reset
- when a manual reset is made (→
10�3�4) or
- when the maximum display range
has been exceeded�
1, 2,��� h
1, 2,��� d
1, 2,��� w
(→ 10.3.5)
OUT1 switches when the volumetric
flow quantity set with [ImPS] is
reached within the set time�
The preset counter is reset auto-
matically when the time has elapsed
and counting starts again�
4.4 Empty pipe detection
The unit detects when the two electrodes are not wetted by the medium�
The empty pipe detection can be activated or deactivated (→ 10.5.8)� If it is active
and the pipe is empty, the unit reacts as follows:
> [SEnS] is indicated in the display�
> The flow is set to zero�
The empty pipe detection can be set as time-depending or not time depending)
(→ 10.5.10)�

11
UK
4.5 Switching function
OUTx changes its switching status if it is above or below the set switching limits
(flow or temperature)� Hysteresis or window function can be selected� Example of
volumetric flow monitoring:
Hysteresis function Window function
SP
rP
SP = set point
rP = reset point
HY = hysteresis
Hno = hysteresis NO (normally open)
Hnc = hysteresis NC (normally closed)
SP = upper limit
rP = lower limit
FE = window
Fno = window NO (normally open)
Fnc = window NC (normally closed)
When the hysteresis function is set, the set point [SP] is defined first and
then the reset point [rP] which must have a lower value� If only the set
point is changed, the reset point is changed automatically; the difference
remains constant�
When set to the window function, the upper limit [SP] and the lower limit
[rP] have a fixed hysteresis of 0�25 % of the final value of the measuring
range� This keeps the switching status of the output stable if the flow rate
varies slightly�

12
4.6 Analogue function
• The unit provides an analogue signal that is proportional to the flow quantity
and the medium temperature�
• The analogue signal can be provided as current or voltage signal�
• Within the measuring range, the analogue signal is 4���20 mA (current output)
or 0���10 V (voltage output)�
• If the measured value is outside the measuring range or in the event of an
internal error, the current or voltage signals indicated in Figure 1 are provided�
• The measuring range is scalable:
Analogue start point [ASP2] determines at which measured value the output
signal is 4 mA or 0 V�
Analogue end point [AEP2] determines at which measured value the output
signal is 20 mA or 10 V�
Minimum distance between [ASP2] and [AEP2] = 20 % of the final value
of the measuring range�
MAW Initial value of the measuring range For non-scaled measuring range
(= factory setting)
VMR Final value of the measuring range
ASP2 Analogue start point For scaled measuring range
AEP2 Analogue end point
Table 1: Definitions

13
UK
MEWMAW AEPASP
-120Q [% MEW]
[°C]T -40 -20 80 100 110
-130
-50
[°F]-40 -4 176 212 230-58
120
1000 130
4
3,50FOU=OFF
20
21,5
22
[mA]
0
10
11,5
12FOU=On
[V]
1
2
5
4
6
5*
6*
3
cr.UL UL OL cr.OL
Figure 1: Characteristics of the analogue output according to the standard IEC 60947-5-7�
Q: Flow (a negative flow value means flow against the marked flow direction)�
T: Temperature
UL: Below the display range
OL: Above the display range
cr�UL: Below the detection zone (error)
cr�OL: Above the detection zone (error)
FOU=On: Default setting at which the analogue signal goes to the upper final value in
case of an error�*
FOU=OFF: Default setting at which the analogue signal goes to the lower final value in
case of an error�
* The type of error is displayed: cr�UL, cr�OL, Err (→ 12)�
1
Analogue signal (voltage or current)
2
Measured value (flow or temperature)
3
Detection zone
4
Display range
5
Measuring range
5*
Analogue signal in the measuring range
with factory setting
6
Scaled measuring range
6*
Analogue signal with scaled measuring
range

14
4.7 Frequency output
The unit provides a frequency signal that is proportional to the volumetric flow�
Within the measuring range the frequency signal is between 0 and 1 kHz for the
factory setting�
The frequency signal is scalable:
FrEP = Frequency signal in Hz which is provided at OUT1 when the upper measured value
FEP is reached�
Factory setting: FrEP = 1 kHz = 100 %�
The measuring range is scalable:
FEP = Upper measured value at which OUT1 provides the frequency signal FrEP�
MEWMAW FEP
FrEP
=100 %
0 %
120 %
100 120 130 [% MEW]
130 %
OL ErrErr
1
2
5
4*
5*
4
3
FOU=OFF
FOU=On
Figure 1: Output curve frequency output
MAW = initial value of the measuring range; MEW = final value of the measuring range
1
Frequency signal
2
Volumetric flow quantity
3
Display range
4
Measuring range
4*
Frequency signal in the measuring range
with factory setting
5
Scaled measuring range
5*
Frequency signal with scaled measuring
range

15
UK
4.8 Measured value damping (dAP)
The damping time enables to set after how many seconds the output signal has
reached 63 % of the final value if the flow value changes suddenly� The set damp-
ing time stabilises the outputs, the display and the process value transfer via the
IO-Link interface� The signals [UL] and [OL] (→ 12) are defined under considera-
tion of the damping time�
4.9 Start-up delay (dSt)
The start-up delay dST influences the switching outputs of the volumetric
flow monitoring�
If the start-up delay is active (dST > 0), note: As soon as the volumetric flow quan-
tity exceeds the LFC (LFC = Low flow cut-off → 4.10), the following processes are
carried out:
> The start-up delay is activated�
> The outputs switch as programmed:ON for NO function, OFF for NC function�
After the start of the start-up delay there are 3 options:
1� The volumetric flow increases quickly and reaches the set point / good range
within dST�
> Outputs remain active�
2� The volumetric flow increases slowly and does not reach the set point /good
range within dST�
> Outputs are reset�
3� Volumetric flow quantity falls below LFC within dST�
> Outputs are reset at once; dST is stopped�

16
Example: dST for hysteresis function
Condition Reaction
1 Volumetric flow quantity Q reaches LFC dST starts, output becomes active
2 dST elapsed, Q reached SP Output remains active
3 Q below SP but above rP Output remains active
4 Q below rP Output is reset
5 Q reaches again LFC dST starts, output becomes active
6 dST elapsed, Q has not reached SP Output is reset
7 Q reaches SP Output becomes active
Example: dST for window function

17
UK
Condition Reaction
1 Volumetric flow quantity Q reaches LFC dST starts, output becomes active
2 dST elapsed, Q reached good range Output remains active
3 Q above SP (leaves good range) Output is reset
4 Q again below SP Output becomes active again
5 Q below rP (leaves good range) Output is reset again
6 Q reaches again LFC dST starts, output becomes active
7 dST elapsed, Q has not reached good
range
Output is reset
8 Q reaches good range Output becomes active
4.10 Low flow cut-off (LFC)
With this function small volumetric flow quantities can be suppressed (→ 10.5.13)�
Flows below the LFC value are evaluated by the sensor as standstill (Q = 0)�
4.11 Simulation
With this function flow and temperature values can be simulated (→ 10.6.2)�
The simulation does not have any effect on the totaliser or the current flow� The
outputs operate as previously set�
When the simulation starts, the value of the totaliser is saved and then the
simulated totaliser is set to 0� The simulated flow value then has an effect on the
simulated totaliser� When the simulation is finished, the original totaliser value is
restored�
During the simulation the original totaliser value remains saved without any
changes even if there is a real flow�
4.12 IO-Link
This unit has an IO-Link communication interface which enables direct access to
process and diagnostic data� In addition it is possible to set the parameters of the
unit during operation� Operation of the unit via IO-Link interface requires an IO-
Link capable module (IO-Link master)�
With a PC, suitable IO-Link software and an IO-Link adapter cable communication
is possible when the system is not in operation�
The IODDs necessary for the configuration of the unit, detailed information about
process data structure, diagnostic information, parameter addresses and the

18
necessary information about the required IO-Link hardware and software can be
found at www�ifm�com�
5 Installation
CAUTION
If the medium temperature is above 50 °C (122 °F) parts of the housing can
increase in temperature to over 65 °C (149 °F)�
> Risk of burns�
►Protect the housing against contact with flammable substances and
unintentional contact�
►Attach the supplied warning label to the sensor cable�
►Ensure that the system is free of pressure during installation�
►Ensure that no media can leak at the mounting location during installa-
tion�
►Avoid deposits, accumulated gas and air in the pipe system�
The unit can be installed independently of the orientation if the following is
ensured:
- No air bubbles can form in the pipe system�
- The pipes are always completely filled�
5.1 Recommended mounting position
►To ensure best possible empty pipe detection, install the unit according
to Figure 1�
Example of an optimised installation:
F
1

19
UK
►Install the unit so that the measuring pipe is always completely filled�
►Allow for laminar flow for inlet and outlet pipe lengths� Disturbances caused
by bends, valves or pipe reductions, etc� are then eliminated This applies in
particular to: Shut-off valves and control devices are not allowed directly in front
of the unit�
3 x D F
S S
1 x D
2
S = disturbance; D = pipe diameter; F = flow direction
►Install in front of or in a rising pipe:
3
F
F
4
F
F = flow direction

20
5.2 Non recommended installation position
►Avoid the following installation positions:
F
F
F
Directly in front of a falling pipe� In a falling pipe�
FF
F
At the highest point of the pipe
system�
Directly in front of the spout of the
pipe�
F
On the suction side of a pump� F = flow direction
This manual suits for next models
3
Table of contents
Other IFM Measuring Instrument manuals
Popular Measuring Instrument manuals by other brands

Wetekom
Wetekom 364489 instruction manual

SKC
SKC AIRCHEK 2000 operating instructions

TASKING
TASKING iSYSTEM iC5700 CI BlueBox Hardware user manual

Siemens
Siemens SITRANS FC620 operating instructions

General
General DAF3012M user manual

McCrometer
McCrometer Water Specialties ML04 OPERATION AND MAINTENANCE MANUAL PARTS LIST

Lafayette Instrument
Lafayette Instrument 5030P1 user manual

velocomp
velocomp AeroPod instructions

Würth
Würth ORSY-Mobil 4 installation instructions

Sealey
Sealey TP91300.V2 instructions

Universal Medical Products
Universal Medical Products 91230 User instructions

National Instruments
National Instruments FD-11613 user guide