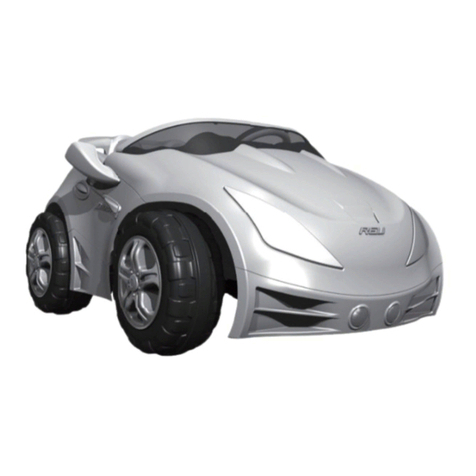
INJUSA Mercedes-Benz AMG GT User manual

PATENTED MODEL AND DESIGN © INJUSA 2016
03-16 V.1
Follow us on
User manual
Mercedes-Benz AMG GT
Ref. 717 - 7172
6V

INDUSTRIAL JUGUETERA, S.A.
AVDA. DE AZORÍN, 20
03440 IBI (ALICANTE) ESPAÑA
TEL.: 96 555 08 62 / FAX: 96 555 33 56
Congratulations
and thank you for buying your Mercedes-Benz from Injusa.
To ensure you and your child enjoy your purchase safely and
for as long as possible, we recommend you read these instruc-
tions carefully and keep them safe for future reference.
By following the instructions and recommendations provided,
you will enjoy this product properly and safely.
Should you have any questions, contact the customer service
department in your country, or contact us via our webpage web
www.injusa.com.
“Mercedes-Benz”, and the design of the product included
are subject to the intellectual property rights
owned by Industrial Juguetera, S.A., used under licence.

Content
Safety.................................................................................... 2
General warnings ............................................................. 2
Warnings about charging the battery ............................... 2
User warnings................................................................... 2
Parts...................................................................................... 3
Parts for assembly............................................................ 3
Screws.............................................................................. 3
Connections......................................................................... 4
Connect the battery to the engine .................................... 4
Charge the battery............................................................ 4
Assembly.............................................................................. 5
Batteries for sound and Mp3 ............................................ 5
Safety warnings ............................................................. 5
Assemble the mileage clock. ............................................ 6
Assemble the windscreen................................................. 7
Assemble the steering wheel............................................ 8
Assemble the rear view mirrors ........................................ 9
Assemble the backrest ..................................................... 10
Operation.............................................................................. 11
Car controls ...................................................................... 11
Remote control function.................................................... 12
Functioning without remote control................................... 13
Remote Control App ......................................................... 14
Maintenance......................................................................... 18
General............................................................................. 18
Cleaning ........................................................................... 18
Battery ............................................................................. 18
Recharging the battery.................................................... 18
Periods of inactivity ........................................................ 18
Replacing the battery...................................................... 19
Recycling the battery ...................................................... 19
Thermal fuse ................................................................. 19
Battery for sound and Mp3 ............................................... 20
Recycling.......................................................................... 20
Spare parts........................................................................... 21
Screws.............................................................................. 21
Despiece........................................................................... 22
Services, repairs.................................................................. 24

General warnings
2
WARNING. To reduce the risk of injury, adult supervision is required. Never use in
roadways, near motor vehícles, on or near steep inclines or steps, swimming pools
or other bodies of water; always wear shoes, and never allow more tan one rider.
WARNING. RISK OF FIRE. Do not bypass. Replace only with battery ref.997 6V Injusa.
User warnings
Warnings about charging the battery
• Use under the supervision of an adult. Read the instructions before using this product,
follow them carefully and retain them for future reference.
• THE VEHICLE MUST BE ASSEMBLED BY AN ADULT. Remove the assembly tools and
fixings before giving the toy to a child.
• Incorrect assembly of the steering wheel and seat could be dangerous.
• DO NOT OVERLOAD THE VEHICLE. IT IS DESIGNED FOR USE BY A CHILD.
• Do not leave the vehicle close to a heat source (radiators, etc.).
Conforms to the safety requirements of Specification F963, Injusa, Avda. Azorín nº20, Ibi, Alicante,
Spain.
• This article is only for use by children aged three and above. The maximum weight of
the child is 30kg.
• Use under the supervision of an adult.
• Make sure the vehicle is used in a large enough space that is adequate for its usage,
in other words, on a flat surface with no steps or dangerous obstacles.
• o ensure the product is used and handled safely, make sure the child knows how to
use the accelerator and the vehicle steering system correctly.
• Since the vehicle requires stability and skill to avoid falls or collisions, make sure it is
used appropriately so that it does not endanger the user or others.
• Warning. Using this item in public areas could cause an accident.
• DO NOT USE the vehicle on public roadways.
• DO NOT TAKE the vehicle into water or onto sand.
• Do not leave the vehicle close to a heat source (radiators, etc.).
• This item can only be used with a rechargeable 6V battery ref.997 made by INJUSA and
a 6V battery charger ref.992 also made by INJUSA. Only use the batteries and charger
specified by the manufacturer.
• THE CHARGER IS NOT A TOY.
• DO NOT SHORT CIRCUIT THE POWER TERMINALS.
• Only an adult who has read and understood the safety warnings should handle, charge, or
recharge the battery.
• The battery’s protective cover should be removed and replaced by an adult using an
appropriate tool, which must be kept out of the reach of children.
• When this product leaves the factory, the batteries are fully charged, but before using it for
the first time you will need to charge them again for maximum effectiveness.
• ONLY CHARGE IN A WELL-VENTILATED AREA.
Safety
3
1. Main chassis
2. Rear view mirrors
3. Windscreen
4. Mileage clock (decorative)
5. Steering wheel
6. Respaldo
Parts for assembly
Screws
WARNING
CHOKING HAZARD
Small parts.
Not for children under 3
years.
Adult assembly required because it contains
potentially hazardous sharp edges, sharp
points and small parts in its unassembled state.
Parts
1
2
5
3
4
6
M5x35mm
Ø 3,6x13 mm
(x2)
(x1)
(x7)
(x8)
Ø3,6x40mm
Tuerca M5
WARNING

4
• Only an adult who has read and understood the safety warnings should handle,
charge, or recharge the battery.
• When this product leaves the factory, the batteries are fully charged, but before using
it for the first time you will need to charge them again for maximum effectiveness.
1. Connect to the mains power supply using any 230v (EC), 230v (UK), or 120v (USA/
Mexico) plug socket, and the red charging pilot light will illuminate (showing that the
charger is working).
2. Disconnect the connector (b), and connect the charger plug (c ); the red pilot light
on the charger will switch off, indicating that the battery is charging and that everything
is working correctly. When the pilot light turns red again, the battery will be charged.
The normal time taken to recharge is 10 to 12 hours. The amount of power used by the
charger is minimal.
• IMPORTANT: Connections must be made by an adult.
1. Plug the connector (B) into the port (A), located underneath the back end of the
vehicle.
Connect the battery to the engine
Connections
1
2
B
B
x
x
C
B
A
A
A
C
C
1
Charge the battery

5
• IMPORTANT: Batteries should only be handled by an adult.
1. Remove the cover to access the sound box, with the help of a screwdriver (not
included).
2. Remove the sound box.
3. Remove the cover from the sound box to access the battery compartment, with the
help of a screwdriver (not included).
4. Insert 3 new 1.5V LR03 AAA batteries (not included), making sure they are inserted
the right way round (positive to negative, etc.).
5. Close the sound box lid and replace the sound box in the vehicle with the help of a
screwdriver (not included).
(Option available exclusively
on versions with light and
sound)
• Remove the rechargeable batteries for charging. Do not recharge non-rechargeable
batteries. Recharge under the supervision of an adult.
• Only use recommended batteries or the same type as recommended. Do not mix different
types of batteries, and do not mix new and used batteries.
• Do not throw batteries away with normal household waste. Remove used batteries and
dispose of them in the special containers.
• Batteries must be inserted the right way round (negative to positive, etc.).
• When the item will not be used for a long period of time, remove the batteries.
• No cortocircuitar los terminales de alimentación.
• Do not mix alkaline, standard (carbon-zinc), or rechargeable (nickel-cadmium) batteries.
Batteries for sound and Mp3
Safety warnings
Assembly
1
2
3
4
3 x 1,5V LR03 AAA
(Not included)

6
1. Line up the five tabs on the mileage clock with the holes on the dashboard and press
until it fits into place.
Assemble the mileage clock.
Assembly
1

7
1. Line up the tabs on the windscreen with the holes on the dashboard and the clamping
sleeves with the side holes.
2. Press to lock the windscreen in place so that the tabs are firmly anchored.
3. Insert a screw (a) into the corresponding hole on the side of the windscreen and
screw in place with the help of a screwdriver (not included).
4. Repeat operation “3” on the opposite side of the windscreen.
Assemble the windscreen
Assembly
1
2
3
a
Ø 3,6x13 mm
a
(x2)

8
1. Insert the steering wheel into the steering column that protrudes from the dashboard.
2. Line up the holes on the stem of the steering wheel with the holes on the upper part of
the steering column casing.
3. Insert screw (b) in the upper hole through the steering wheel and column.
4. Insert a nut (c) on the opposite side of the screw and adjust until the steering wheel is
fixed firmly to the column.
Assemble the steering wheel.
Assembly
1
2
3
4
M5x35mm
Tuerca M5
c
b
c
b

9
1. Line up the base of the rear view mirror with the corresponding hole on the side of the
car until it fits in place.
2. Insert screw (a) into the top of the base of the rear view mirror and fix in place with the
help of a screwdriver (not included).
3. Repeat operation “2” with the other rear view mirror.
Assemble the rear view mirrors
Assembly
a
a
Ø 3,6x13 mm
1
2
3
(x2)

10
1. Line up the base of the backrest with the hole in the seat and fit it in place.
2. Line up the central holes on the backrest with the holes in the back wall.
3. Insert screw (d) through the hole and tighten with the help of a screwdriver (not
included).
4. Repeat operation “3” with the opposite hole.
Assemble the backrest
Assembly
1
234
(x2)
Ø3,6x40mm
d
d

11
1. Steering wheel: To steer the vehicle in the direction you wish to go.
2. Plug in an Mp3 player to hear sound over the speaker. Plug in an Mp3 player to hear
sound over the speaker. (Option available exclusively on versions with light and sound).
3. Gear stick: Make the car go forwards (by moving the lever forwards) or back (by
moving the lever back).
4. Pedal: Press down on the pedal to make the car start moving. When you release the
pedal, the car will brake.
5. Front lights (LEDs*): When you press the pedal, the front lights will illuminate. (Option
available exclusively on versions with light and sound).
6. Back lights (LEDs*): When you release the pedal, the backlights will flash. (Option
available exclusively on versions with light and sound).
* The LEDs comply with current regulations.
• When this product leaves the factory, the batteries are fully charged, but before using
it for the first time you will need to charge them again for maximum effectiveness.
• Only an adult who has read and understood the security warnings should handle,
charge, or recharge the batteries.
• Use under the supervision of an adult. Read the instructions before using. Follow them
and keep them for future reference.
Car controls
Operation
1
2
3
4
5
6

12
Warning: Only an adult should make any changes to the remote control function.
1. Make sure the screw (b) and the nut (c) are inserted correctly, through the cover
on the top (d) of the radio control system, lined up with the lower hole on the steering
column, thereby locking the steering so it can be controlled via remote control.
2. Switch the remote control system to the ON position using the switch underneath the
vehicle.
3. Using the App controls, use your mobile phone to control the direction of the vehicle.
(Read the Remote Control App section).
Remote control function
Operation
M5x35mm Tuerca M5
c
c
d
b
b
1
2

13
Warning: Only an adult should make the changes required to cancel the remote control
function.
1. Slide the top cover (d) on the radio control system upwards, lining it up with the hole
above it on the steering column. Insert screw (b) and nut (c) correctly, through the cover
and the steering column, at the height of the hole indicated previously, thereby unlocking
the system. .
2. Switch the remote control system to the OFF position using the switch underneath the
vehicle.
3. Through the application control, the vehicle cannot be controlled from your mobile
phone.
Functioning without remote control
Operation
M5x35mm Tuerca M5
c
d
c
b
b
1
2

14
1. Download the iMove app onto your mobile phone. There is a free version (Lite) or a
billed version (Pro), available for Android or iOS.
2. Synch your product to your App.
2.1. Open the iMove App.
2.2. Make sure the car you wish to control is switched ON (See section “Remote
control function”, page 12).
2.3. On the iMove App you will see a pop-up window identifying the car.
2.4. Select and accept.
2.5. Pulsar el acelerador del coche. Ya estará sincronizado.
3. Using the App controls, you can use your mobile telephone to control the vehicle,
según la versión adquirida. (Consultar tablas de controles).
Remote Control App
Operation
2.1 2.3
Industrial Juguetera, S.A. hereby certifies that the type of radio-electric equipment of
the item Mercedes-Benz AMG GT ref.717-7172 and its versions, complies with Directive
2014/53/UE.
The complete text of the conformity UE declaration is available on the following Internet
website: www.injusa.com.
Lite Pro

15
Remote Control App
Operation
iMove Lite Pro
Battery
Vehicle battery charge indicator.
Warning! 20% battery remaining.
The vehicle automatically stops when there is only 5% battery
remaining. This prolongs the battery life.
Battery

16
Operation
Remote Control App
iMove Lite Pro
Controls
Variable speed control.
Variable direction control.
Cruise speed control.
Control vehicle front and backlights.

17
Operation
Remote Control App
iMove Lite Pro
Advanced controls
When switched On (Radio control activated) the vehicle will come
to an automatic safety stop when it loses signal.
When switched On (Radio control activated) the vehicle will beep
to alert that it will come to an automatic safety stop.
When switched On (Radio control activated) your mobile device will
make a sound/vibrate to alert you that the vehicle will come to an
automatic safety stop.
When switched Off (Radio control deactivated): vehicle safety
distance control. The vehicle will come to a stop after the
distance selected using the mobile device, giving a warning
sound/vibration.
When switched Off (Radio control deactivated): speed control.
Vehicle speed is selected using the mobile device.
Advanced controls

18
• WARNING! Failing to carry out the recommended checks and maintenance can cause
the user to fall out or the car to flip over.
• Regularly check the condition of the vehicle, especially all the fixtures and fastenings,
and any parts that can get worn.
• Make sure the steering works correctly.
General
Cleaning
Battery
Recharging the battery.
Maintenance
• Make sure the toy is disconnected from the charger when cleaning.
• Do not use abrasive cleaning products and do not pour water directly onto it. To clean
the vehicle, wipe over with a damp cloth. NEVER get parts of the vehicle such as the
engine, cables, fuse, batteries, or connectors wet.
• Only an adult who has read and understood the safety warnings should handle,
charge, or recharge the battery.
• The battery, charger, cables, connectors, and the chassis should be regularly
inspected to avoid potential dangers. Should any deterioration, or wear and tear be
observed, defects should be corrected before the vehicle is used.
• By following these rules, you will be able to enjoy this product for a long time. Should
you fail to observe these instructions, INJUSA cannot provide any guarantees regarding
the effectiveness of the batteries.
• Only an adult who has read and understood the safety warnings should handle,
charge, or recharge the battery.
• When you notice that the car is going considerably slower than normal, this means that
the batteries are running flat and need to be charged immediately, otherwise they will be
damaged for good (Read the section on Charging the battery).
• 144. Never leave the car inactive with a flat battery. If you know the toy will be unused
for a long period of time, you should charge the battery and disconnect it, recharging
every 5 or 6 months.
Periods of inactivity
This manual suits for next models
1
Table of contents
Other INJUSA Motorized Toy Car manuals

INJUSA
INJUSA 6025 User manual

INJUSA
INJUSA 41522 User manual

INJUSA
INJUSA 680 User manual

INJUSA
INJUSA aprilia 64900 User manual

INJUSA
INJUSA 75324 User manual

INJUSA
INJUSA 7521 User manual

INJUSA
INJUSA 412 User manual

INJUSA
INJUSA Mercedes-Benz AMG GT-S User manual

INJUSA
INJUSA 7302 User manual

INJUSA
INJUSA 753 User manual