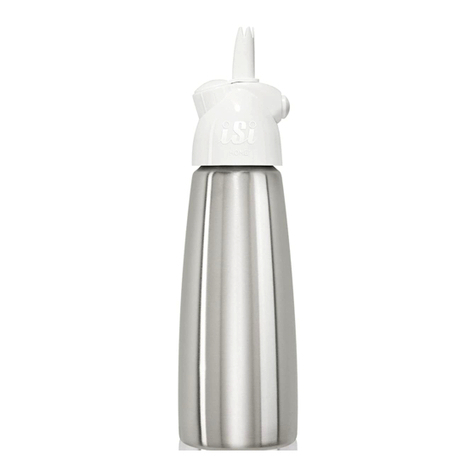
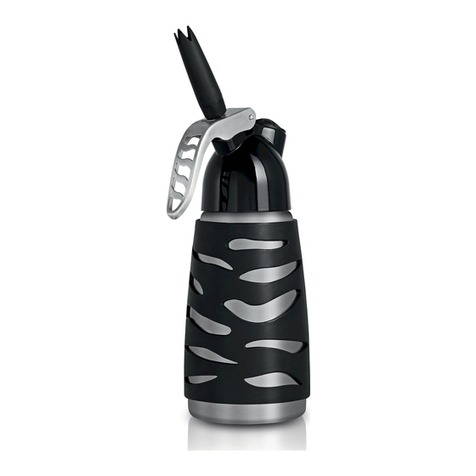
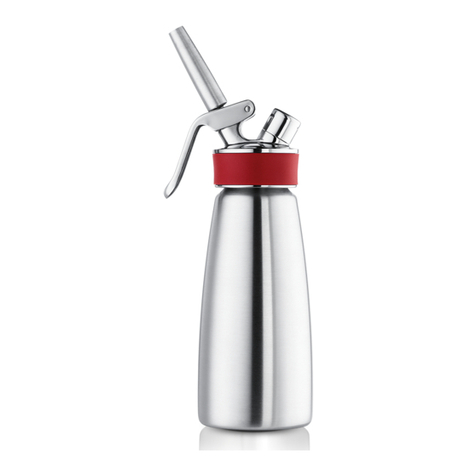
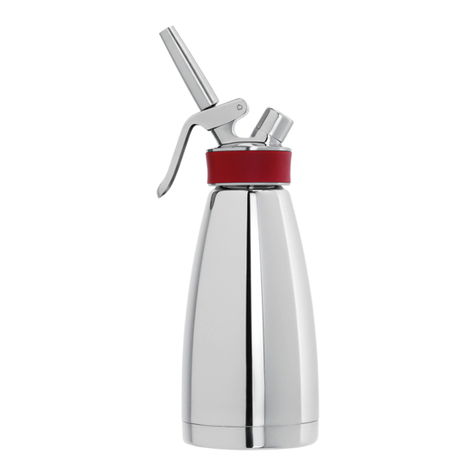
iSi CreamProfiWhip User manual

Cream
Profi
Whip.
Instructions for Use / Gebrauchsanleitung /
Notice d‘utilisation/ Istruzioni per l‘uso /
Modo de empleo / Handleiding / Bruksanvisning /
Instruções de uso / Οδηγίες χρήσης / Инструкция
по эксплуатации / Instrukcja użytkowania /
Návod k použití / Használati útmutató / Upute
za uporabu / Navodila za uporabo / Kullanma
talimatı / / 설명 / 使用说明书 /
947026405_CPW_GA_kurz.indd 1 08.11.18 17:17

3.
1.
5.
4.
Instructions for Use
Gebrauchsanleitung / Notice d‘utilisation /
Istruzioni per l’uso / Modo de empleo / Handleiding /
Bruksanvisning / Instruções de uso / Οδηγίες χρήσης /
Инструкция по эксплуатации / Instrukcja użytkowania /
Návod k použití / Használati útmutató / Upute za
uporabu / Navodila za uporabo / Kullanma talimatı /
/ 설명 / 使用说明书 /
MAX.
MAX.
MAX.
MAX. 1 L
0,5 L
2.
MAX.
947026405_CPW_GA_kurz.indd 2 08.11.18 17:17

TH
———
———
คำาแนะน ำา
คำาแนะน ำา
947026405_CPW_GA_kurz.indd 3 08.11.18 17:18

6.
8.
7.
11.10.
9.
MAX.
MAX.
MAX.
MAX.
MAX.
MAX.
> 5×
0,5 L
0.5 L 1 USPT
MAX.
0.25 L 0.5 USPT
MAX.
MAX.
1 L 1 USQT
MAX.
1×
6.–9.
1 L
0.5 L 1 USPT
MAX.
0.25 L 0.5 USPT
MAX.
MAX.
1 L 1 USQT
MAX.
2×
6.–9.
947026405_CPW_GA_kurz.indd 1 08.11.18 17:17

4. 5.
1. 2.
3.
Cleaning
Reinigung / Nettoyage / Pulizia / Limpieza / Reiniging /
Rengöring / Limpeza / Καθαρισμός /Очистка /
Czyszczenie / Čištění / Tisztítás / Čišćenje / Čiščenje /
Temizlik / / 세척 / 清洁 /
947026405_CPW_GA_kurz.indd 2 08.11.18 17:17

Expanded Drawing
Explosionszeichnung / Vue éclatée / Esploso / Vista
detallada / Opengewerkte tekening / Sprängs-
kiss / Vista explodida / Αναπτυγμένο διάγραμμα /
Покомпонентное изображение /Rysunek rozłożeniowy/
Rozložený výkres / Robbantott ábra / Znak za opas-
nost od eksplozije / Eksplozijska risba / Parça şeması /
/ 폭발성 표시 / 分解图 /
2349...
2305...
2234...
2310...
2306...
2205...
2236...
Interim Cleaning
Zwischenreinigung / Nettoyage intermédiaire / Pulizia
intermedia / Limpieza intermedia / Tussenreiniging /
Enkel rengöring / Limpeza intermediária / Ενδιάμεσος
καθαρισμός /Промежуточная очистка / Czyszczenie
pobieżne / Průběžné čištění / Közbenső tisztítás /
Čišćenje u međuvremenu / Čiščenje med delom /
Ara temizlik / / 중간 세척 / 中途清洁 /
~50 °C /
122 °F
947026405_CPW_GA_kurz.indd 3 08.11.18 17:17

Create.
New.
Taste.
947026405_CPW_GA_kurz.indd 4 08.11.18 17:17

EN
English
2
DE
Deutsch
16
FR
Français
30
IT
Italiano
44
ES
Español
50
NL
Nederlands
56
SE
Svenska
62
PT
Português
68
EL
Ελληνικά
74
RU
Русский
80
PL
Polski
86
CZ
Čeština
92
HU
Magyar
98
HR
Hrvatski
104
SI
Slovenski
110
TR
Türkçe
116
AR
122
KO
한국어" 한국어
128
ZH
中文
134
TH
140
947026405_CPW_GA_kurz.indd 1 08.11.18 17:17

2
EN
Thank you for
choosing an iSi
product.
Please read the Whipper
instructions carefully
before first-time use.
947026405_CPW_GA_kurz.indd 2 08.11.18 17:17

3
EN
Discover the
world of iSi:
Visit the iSi website and learn
more about our extensive range of
products: Our comprehensive collec-
tion of recipes from simply yummy to
creatively sophisticated combinations
offers you access to the entire culinary
world of iSi. Let yourself be inspired!
The iSi website provides detailed
product information about all iSi
Whippers/Siphons and iSi Accessories.
The detailed online instructions
provide information about first-time
use, cleaning, and troubleshooting
iSi Whippers and Siphons.
www.isi.com/culinary
www.isi.com/us/culinary
If you have any further questions please
contact info@isi.com
For the US: isinorthamerica@isi.com
947026405_CPW_GA_kurz.indd 3 08.11.18 17:17

4
Guaranteed quality:
Every iSi Whipper and Siphon is thoroughly
inspected before leaving the factory. iSi
offers a two-year warranty for materials and
machining, as long as faults are not determined
to be the result of improper use. The warranty is
effective from the date on the purchase receipt.
Register online now and we will extend your
warranty!
Enjoy the benefits of a three-year warranty for
materials and machining.
The warranty is only valid when original whipper
parts from iSi are used, as given in the list of
product components. The perfect function of
your Whipper/Siphon can only be guaranteed
if you exclusively use iSi chargers with it. No
warranty or liability claim will be upheld for
faults, damage, or consequential damage
particularly determined to be the result of
non-compliance and/or ignorance of the user
instructions and the safety information therein.
FOR U.S. ONLY:
Limited warranty, Limitations and Warning:
iSi products are thoroughly tested before they
leave the factory, and iSi warrants for a period
of two years that its products are free from de-
fects in materials and workmanship and, if used
only with other iSi products, will function as
intended. iSi’s liability in the event of a product’s
failure to meet this warranty is limited to repair
or replacement of the product or, at iSi’s option
or if iSi is unable to deliver a replacement prod-
uct, to refund the purchase price. In no event,
however, shall iSi be liable for incidental or
consequential damages. Any implied warranties
are limited to the terms of the express warran-
ties, including the two-year duration. iSi cream
whipping systems, bottles and chargers are
designed and engineered to function together
as a system and involve gas under pressure.
All iSi products and parts bear the iSi logo; iSi
recommends that only iSi parts and products
be used with iSi products, including that only iSi
947026405_CPW_GA_kurz.indd 4 08.11.18 17:17

5
chargers be used with iSi Whippers/Siphons and
that iSi chargers be used only in iSi Whippers/
Siphons. Failure to follow this recommendation
or any failure to follow the instructions for use
and care of the products invalidates this war-
ranty and all implied warranties in their entirety
as to any consequences of such failure.
WARNING: In addition, failure to follow this
recommendation or any of the instructions for
use and care constitutes misuse of iSi products
and could result in malfunction of the system
and possible personal injury and/or property
damage. In the event of any personal injury,
you should promptly seek appropriate medical
attention.
EN
Simply register online and take
advantage of the extended benefits:
www.isi.com/warranty
947026405_CPW_GA_kurz.indd 5 08.11.18 17:17

6
Material List.
Description Material
Bottle Stainless steel
Head POM, silicone,
stainless steel, nickel-
plated brass, PU
Head gasket TPE
Decorator tip PP, stainless steel
Charger holder Stainless steel,
silicone
Dispensing piston POM, NBR,
stainless steel
Technical data is subject to change without
prior notice.
Whipper Data.
Max. service
pressure PS
30 bar / 435 psig
Min. operating
temperature
0.5 L / 1 US pint:
1°C / 34°F
1 L / 1 US quart:
1°C / 34°F
Max. operating
temperature
0.5 L / 1 US pint:
24°C / 75°F
1 L / 1 US quart:
30°C / 86°F
Max. filling volume 0.5L / 1 US pint
1 L / 1 US quart
Max. number of
chargers to be used
1 iSi cream charger
(0.5 L / 1 US pint)
2 iSi cream chargers
(1 L / 1 US quart)
Usage Approved for
commercial use.
For fresh, pure cream,
and desserts.
Suitable for cold
preparations only.
947026405_CPW_GA_kurz.indd 6 08.11.18 17:17

7
EN
Safety Information.
Failure to follow this safety instructions or any
recommendation for use and care constitutes
misuse of iSi products and could result in mal-
function of the system and possible personal
injury and/or property damage.
——— Do not exceed minimum or maximum
pressure, minimum or maximum tempe-
rature, maximum filling volume, number
of chargers or usage of the iSi Whipper
shown in the Whipper Data! Do not use
for any purposes not indicated in these
instructions!
——— Please read the instructions for use care-
fully to avoid operating errors and keep a
copy on hand!
——— Do not use force when screwing on or off
the head, using the whipper and during any
operation described in these instructions!
——— Store the iSi Whipper out of the reach of
children!
——— Never store or use the iSi Whipper outside
of the min. and max. operating tempera-
tures! Do not store in a freezer!
——— Only charge a whipper that is filled!
——— Cryogenic applications (with liquid nitro-
gen, for example) are not permitted!
——— Only use a head and bottle of the same iSi
Whipper model together!
——— Never combine iSi components with
components from another brand or
manufacturer!
——— The head should always be screwed on
straight and completely tight, never
crooked or incompletely tightened!
——— Only use original iSi cream chargers!
947026405_CPW_GA_kurz.indd 7 08.11.18 17:17

8
——— When screwing on the charger, do so away
from others and keep face away from the
whipper; do not bend over the whipper!
——— The whipper is a pressure equipment. If
it is dropped or damaged (e.g., cracked or
dented), do not use again because it poses
a risk of injury! Please have the whipper
checked by the iSi service center!
——— Never unscrew the head when the
whipper is pressurized!
——— Never use the lever as a carrying handle!
——— Proper cleaning is a mandatory require-
ment in order to avoid the whipper becom-
ing blocked! Check that the iSi Whipper has
been properly cleaned before use!
——— Only dismantle the iSi Whipper for cleaning
in accordance with the illustration!
——— Before cleaning, check the material
compatibility of the cleaning solution and
disinfectant solution used!
——— Do not make any modifications to the iSi
Whipper! This will void the warranty and
exempt the company from any liability!
——— Never use more chargers than specified
and never overfill the whipper! This will
ensure that the specified maximum oper-
ating pressure is not exceeded!
——— If the pressure will not release, please
contact iSi or your service center!
NOTE: Before using the iSi Whipper for the first
time, remove the transportation lock from the
piston thread. Carry out thorough cleaning as
shown in the Cleaning illustration.
NOTE: To avoid the formation of lumps, you
should completely dissolve powdered ingredi-
ents such as sugar, etc., in some liquid before
filling. Do not use any ingredients with fruit
pulp or seeds.
947026405_CPW_GA_kurz.indd 8 08.11.18 17:17

9
Instructions for Use.
NOTE: Please observe the illustrations
“instructions for use”!
Cream/cream-based desserts should be cold
when filled. Dispense cream/cream-based
desserts from the whipper shortly before eating.
Preparation
1. Insert the head gasket into the head.
2. Insert dispensing piston into the head.
3. Screw the decorator tip onto the dispensing
piston, not too tight but enough to be secure.
4. Fill bottle with the prepared mixture.
NOTE: Please note the fill line and marking
on the bottom of the bottle. Do not overfill!
The remaining empty space is required for
optimal whipping results. Use a measuring
cup.
Equipment Setup
5. Screw the head onto the bottle so that it is
straight and tighten by hand.
6. Insert the original iSi cream charger into the
charger holder.
NOTE: Never screw on the charger when the
decorator tip is not attached to the dispens-
ing piston.
7. Screw the charger holder with the inserted
charger onto the head until you can hear
that all of the charger contents have flowed
into the whipper.
WARNING: The whipper is now pressurized!
8. Shake the whipper vigorously 6 times.
9. Unscrew the charger holder and recycle the
empty charger.
NOTE: A slight hissing noise may be heard
when removing the charger holder. This is
normal.
10.If using a 1 L iSi Whipper, repeat steps 6–9.
EN
947026405_CPW_GA_kurz.indd 9 08.11.18 17:17

10
Operation
11. For dispensing, the whipper must be held
“headfirst” (with the decorator tip facing
vertically downwards!) and the lever must
be operated gently.
NOTE: Test the consistency of the contents
when the whipper is first used. Shake the
whipper again if the consistency is still too
runny.
Cleaning.
Main Cleaning
NOTE: Please observe the illustrations on
cleaning!
1. Press the lever until the whipper is com-
pletely empty and there is no pressure left.
Remove the head from the bottle.
2. Unscrew the decorator tip. Hold on to the
dispensing piston on the plastic part on the
inside of the head. Then pull the dispensing
piston out of the head.
3. Remove the head gasket for basic cleaning.
4. Rinse product components by hand using
warm potable water along with a standard
cleaning agent and clean the dispensing
piston and decorator tip using the cleaning
brush. Completely remove any traces of fat
or egg white.
5. Then clean all individual parts in the dish-
washer as needed.
NOTE: Do not use special cleaning agents for
stainless steel, scouring agents or abrasive
sponges/brushes.
NOTE: For mechanical or manual cleaning,
make sure that you use the correct amount
of cleaning solution or combined disinfectant
and cleaning solution. The exposure time and
the selected temperature will determine the
cleaning results.
947026405_CPW_GA_kurz.indd 10 08.11.18 17:17

11
Interim Cleaning
Clean the decorator tip at regular intervals (ev-
ery 1–2 hours) during use. Remove the decorator
tip or rinse it with potable water direct on the
whipper.
Quick Cleaning
1. Press the lever until the whipper is com-
pletely empty and there is no pressure left.
Remove the head from the bottle.
2. Fill the whipper with 0.5 or 1 liter of warm
water, depending on the filling volume.
3. Set up the whipper with 1 iSi cream charger
according to “Equipment Setup” steps 5–9.
4. Press the lever as far as possible and
completely empty the iSi Whipper (hold
“headfirst”) until the whipper is free of
pressure.
5. Then carry out “Main Cleaning”.
NOTE: Quick cleaning should not be used as a
substitute for basic cleaning.
Disinfection
All product parts that come into contact with
the filling liquid can be cleaned as usual and
then disinfected. The applicable instructions
regarding the use of standard cleaning agents
and disinfectants must be observed.
Storage.
If the iSi Whipper is not going to be filled again
immediately, leave the components to air dry
in a clean place and store the iSi Whipper in a
dismantled condition. Never store the whipper
with the head screwed on!
NOTE: Observe the applicable food hygiene
regulations.
EN
947026405_CPW_GA_kurz.indd 11 08.11.18 17:17

12
Troubleshooting.
Release the pressure
Place the whipper upright, place a towel over
the decorator tip and gently operate the lever
until the pressure is gone from the iSi Whipper.
Now the head can be removed from the bottle.
If the pressure will not release, please contact
iSi or your service center.
I cannot remove the content and/or the iSi
Whipper sprays.
1. There is a blockage due to undissolved
ingredients such as sugar.
——— “Release the pressure” and then carry
out “Basic Cleaning”.
——— Make sure that powdered ingredients
are dissolved completely.
2. The cream or cream-filled preparation has
become too stiff.
——— Next time decrease the intensity and
frequency of the shaking cycles.
——— For information on the frequency
of the shaking cycles, refer to
www.isi.com/faq
3. Content is too firm due to over-cooling.
——— Leave the whipper to stand at room
temperature for around 5–10 minutes.
——— Pay attention to the operating tempera-
ture of the iSi Whipper.
4. No pressure/not enough pressure in the
device.
——— Only use original iSi cream chargers.
——— Do not reuse empty chargers. They
should be recycled.
——— Only operate the whipper “headfirst”
with a vertical decorator tip because
otherwise there could be a loss of pres-
sure.
——— Pay attention to the maximum number
of chargers to be used indicated in the
Whipper Data.
——— The head was not firmly screwed onto
the bottle by hand until it was secure.
947026405_CPW_GA_kurz.indd 12 08.11.18 17:17

13
——— The head gasket was not inserted.
“Release the pressure” and then set-up
again.
——— The decorator tip was not screwed on.
“Release the pressure” and then set-up
again.
——— The bottle neck has been damaged.
“Release the pressure.” Send the whipper
to iSi or to your service center.
5. Too many chargers were used.
——— Pay attention to the maximum number
of chargers to be used indicated in the
Whipper Data.
——— “Release the pressure” and then set-up
again.
The content being dispensed is too runny.
1. The whipper was overfilled.
——— “Release the pressure”, pour out the
excess liquid and then set-up the
whipper again.
——— Observe the maximum filling amounts.
2. The whipper was not shaken or not shaken
enough.
——— For information on the frequency of the
shaking cycles, refer to www.isi.com/faq
3. The content is not cold enough.
——— Place a filled and prepared iSi Whipper in
the refrigerator for at least 1–2 hours.
——— Keep a filled iSi Whipper cold between
uses.
4. Too few chargers were used or an unsuitable
charger was used.
——— Pay attention to the maximum number
of chargers to be used indicated in the
Whipper Data.
——— Only use original iSi cream chargers.
EN
947026405_CPW_GA_kurz.indd 13 08.11.18 17:17
Other manuals for CreamProfiWhip
3
Table of contents
Other iSi Kitchen Appliance manuals

iSi
iSi Gourmet Whip User manual

iSi
iSi Thermo Whip User manual

iSi
iSi Dessert Whip PLUS User manual

iSi
iSi Easy Whip Plus User manual

iSi
iSi Rapid Infusion Parts list manual

iSi
iSi TWIST ’N SPARKLE Application guide
iSi
iSi Soda Siphon User manual

iSi
iSi Whipper User manual

iSi
iSi Thermo XPress Whip.PLUS User manual

iSi
iSi Sodamaker Classic User manual

iSi
iSi Dessert Whip User manual

iSi
iSi CreamProfiWhip User manual
iSi
iSi Green Whip User manual

iSi
iSi Easy Whip.Plus User manual

iSi
iSi Nitro Whip User manual

iSi
iSi Creative Whip User manual

iSi
iSi Nitro Whip User manual

iSi
iSi Soda Siphon User manual
iSi
iSi Easy Whip Plus User manual
iSi
iSi Gourmet Whip User manual