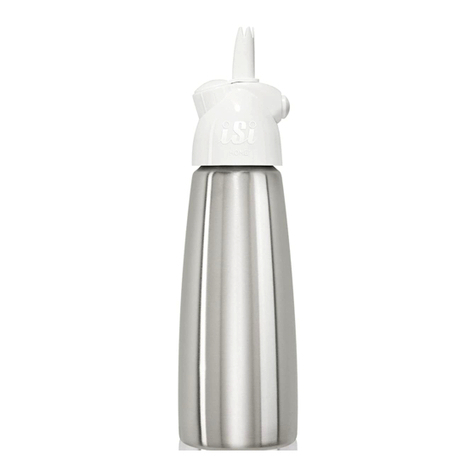
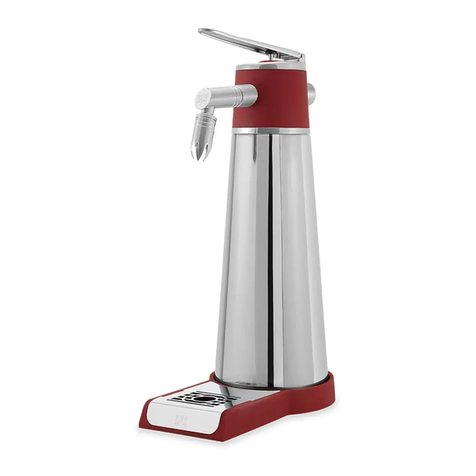
iSi (Mini) Easy Whip User manual

Deutsch
iSi Easy Whip/iSi Mini Easy Whip
Mit dem iSi (Mini) Easy Whip haben Sie sich für ein
iSi Qualitätsprodukt für den Haushalt entschieden.
Ihr iSi (Mini) Easy Whip ist ein Schlagsahnespezialist.
Mit ihm können Sie in Sekundenschnelle locker-leichte
Schlagsahne zubereiten und per Druckknopf perfekt
dosieren. Gekühlt bleibt frische Sahne im iSi (Mini) Easy
Whip bis zu 10 Tage haltbar.
ACHTUNG Der iSi (Mini) Easy Whip ist nicht für
Warmanwendungen, Suppen, Saucen,
Desserts sowie Espumas geeignet!
ACHTUNG Verwenden Sie nur original iSi Sahne-
kapseln, erkennbar am roten iSi Logo.
Produkteigenschaften
▪ Hochwertige Aluminiumflasche mit lackierter Oberflä-
che
▪ Max. Füllvolumen 0.25 Liter (Mini Easy Whip) bzw.
0.5 Liter (Easy Whip)
▪ Druckknopf für feinstes Dosieren
▪ Abnehmbare Garniertülle für hygienische Schnellreini-
gung nach jedem Gebrauch
▪ Kopfdichtung mit Innenring zur leichten Entnahme
▪ Anwenderfreundliche Reinigungsbürste
▪ Nicht spülmaschinenfest
▪ Nicht für den professionellen Einsatz in der Gastrono-
mie geeignet
2

Deutsch
Materialliste
Bezeichnung Material
Aluminiumflasche Aluminium, innen und außen
lackiert
Gerätekopf
Polybutylenterephthalat (PBT),
Polyoxymethylen (POM), Silikon,
Nitrilkautschuk (NBR), Edelstahl-
Feder
Kopfdichtung Thermoplastisches Elastomer
(TPE)
Garniertülle Polyoxymethylen (POM), Nitril-
kautschuk (NBR)
Kapselhalter Polyoxymethylen (POM)
Ersatzteile
Die Ersatzteile sind anhand der Explosionszeichnung
ersichtlich, siehe Aufschlagseite.
Bezeichnung Artikelnummer
Garniertülle 2215001
Kopfdichtung 2234001
Reinigungsbürste 2236001
Kapselhalter 2299001
3

Deutsch
Gebrauchsanleitung
HINWEIS: Vor erstmaligem Gebrauch das Gerät in die
einzelnen Produktbestandteile zerlegen. Grundreinigung
wie unter „Gründliche Reinigung“ auf Seite 7 durchführen.
VORBEREITENDE TÄTIGKEITEN
1. Garniertülle mit Lasche vom Kopf abziehen.
2. Überprüfen, ob die Kopfdichtung in den Gerätekopf
eingelegt ist.
BEFÜLLEN
3. Flasche mit Schlagsahne befüllen.
HINWEIS: Die maximale Füllmenge beträgt 0.25 bzw.
0.5 Liter. Äußere Fülllinie und Kennzeichnung am Fla-
schenboden beachten. Nicht überfüllen! Der verblei-
bende Leerraum ist für ein optimales Aufschlagergeb-
nis erforderlich. Verwenden Sie einen Messbecher.
Ihr iSi (Mini) Easy Whip wurde für Liebhaber von reiner,
unverfälschter Schlagsahne entwickelt. Sollten Sie den-
noch auf Süße nicht verzichten wollen, so empfehlen wir
Ihnen nur Zuckersirup zu verwenden. Bei Verwendung
von Zucker oder Sahnesteif diese vor dem Befüllen in
etwas Sahne durch Verrühren vollständig auflösen, um
Klümpchenbildung zu vermeiden.
INBETRIEBNAHME
4. Den Gerätekopf gerade und handfest auf die Flasche
aufschrauben.
ACHTUNG Gerätekopf niemals schief aufschrauben!
5. Original iSi Sahnekapsel wie in Abb. 5 abgebildet in
den Kapselhalter einlegen.
6. Kapselhalter mit eingelegter Kapsel auf den Gerä-
tekopf aufschrauben, bis der gesamte Kapselinhalt
hörbar eingeströmt ist.
4

Deutsch
ACHTUNG Beugen Sie sich während des Ein-
schraubens der Kapsel nicht über das
Gerät!
ACHTUNG Gerät steht nun unter Druck!
7. Gerät kräftig schütteln.
HINWEIS: Für die optimale Konsistenz von Schlag-
sahne ist die Anzahl der Schüttelzyklen wichtig. Wird
zu lang oder zu oft geschüttelt, wird der Inhalt zu fest
und kann nicht mehr restlos entnommen werden!
Schüttelhäufigkeit der nachstehenden Tabelle entneh-
men:
Sahneart Fettgehalt Schüttelhäufig-
keit je Kapsel
frische Sahne 36%
33%
3 – 4
4 – 5
Haltbarsahne 32% 5 – 6
Bei geringerem Fettgehalt (mindestens 30%) oder zu
weicher Konsistenz ggf. nachschütteln.
8. Kapselhalter abschrauben, und leere Kapsel entsor-
gen.
HINWEIS: Leises Zischen beim Abschrauben des
Kapselhalters ist systembedingt.
HINWEIS: Es wird nur 1 Kapsel für eine Füllung benö-
tigt.
9. Garniertülle am Gerätekopf aufsetzen.
BEDIENUNG
10. Zur Entnahme muss das Gerät „kopfüber“ gehalten
(Garniertülle senkrecht!), und der Knopf gefühlvoll
betätigt werden.
HINWEIS: Die erste Entnahme zum Testen der Konsi-
stenz verwenden.
5

Deutsch
Wichtige Gebrauchshinweise
ALLGEMEIN
▪ Wird das Gerät nicht senkrecht mit dem Kopf nach
unten betätigt, kann Druck verloren gehen, wodurch
ein vollständiges Entleeren des Gerätes nicht möglich
ist.
▪ Schlagsahne mit Kühlschranktemperatur einfüllen.
ACHTUNG Befülltes Gerät nie im Tiefkühlfach
oder in der Tiefkühltruhe aufbewahren!
▪ Schlagsahne möglichst kurz vor dem Verzehr dem
Gerät entnehmen.
▪ Gerät mit gereinigter Garniertülle im Kühlschrank
bereithalten.
SERVICE
▪ Ersatzteile sind einzeln und kostengünstig erhältlich.
ACHTUNG Keine Veränderungen am iSi (Mini)
Easy Whip durchführen!
▪ Für Ersatzteilbestellungen wenden Sie sich an Ihren
Fachhändler. In Österreich auch unter www.isi.at mög-
lich.
▪Zur Reparatur nur komplettes Gerät einsenden.
AUFBEWAHRUNG
Sofern der iSi (Mini) Easy Whip nicht sofort wieder
befüllt wird, Bestandteile an einem sauberen Ort an der
Luft trocknen lassen (nicht mit Tuch abreiben). iSi (Mini)
Easy Whip in demontiertem Zustand aufbewahren und
gereinigte Teile nur mit sauberen Händen anfassen.
6

Deutsch
Reinigung
ACHTUNG Vor der Reinigung ist die Materialver-
träglichkeit der eingesetzten Reini-
gungs- bzw. Desinfektionslösung zu
prüfen (siehe „Materialliste“, Seite 3)!
HINWEIS: Bei der Reinigung ist auf eine korrekte Do-
sierung der Reinigungslösung oder der kombinierten
Desinfektions- und Reinigungslösung zu achten. Die
Einwirkzeit sowie die gewählte Temperatur sind aus-
schlaggebend für das Reinigungsergebnis.
GRÜNDLICHE REINIGUNG
HINWEIS: Beachten Sie die Bildfolge auf der hinteren
Aufschlagseite!
1. Betätigen des Knopfes, bis das Gerät vollständig
entleert ist. Gerätekopf von der Flasche abschrau-
ben und Garniertülle abziehen.
2. Zur Grundreinigung die Kopfdichtung entnehmen.
3. Ventil unter fließendem warmem (max. 50 °C)
Trinkwasser von beiden Seiten durchspülen, wäh-
renddessen Knopf mehrmals fest bis auf Anschlag
(Schnappgeräusch „Klick“) drücken.
4. Produktbestandteile mit warmem (nicht heißem!)
Trinkwasser und handelsüblichem Reinigungsmittel
von Hand spülen und mit der Reinigungsbürste die
Garniertülle reinigen. Fett und Eiweißreste vollstän-
dig entfernen!
HINWEIS: Keinesfalls Scheuermittel oder kratzende
Schwämme/Bürsten verwenden.
HINWEIS: Nicht im Geschirrspüler reinigen und nicht
auskochen!
ZWISCHENREINIGUNG
Die Garniertülle kann jederzeit zur not-
wendigen Zwischenreinigung abzogen
werden.
7

Deutsch
Fehlerbehebung
ACHTUNG Unter Druck stehenden iSi (Mini) Easy
Whip nicht gewaltsam öffnen.
DRUCK ABLASSEN: Das Gerät aufrecht hinstellen,
ein Tuch über den Auslass halten, und den Knopf so
lange betätigen, bis sich kein Druck mehr im iSi (Mini)
Easy Whip befindet. Erst dann den Gerätekopf von der
Flasche schrauben.
Bei Verstopfung des Ventils den Knopf fest betätigen,
sodass ein Schnappgeräusch „Klick“ hörbar wird,
wodurch das Gas entweichen kann. Betätigen Sie
den Knopf auf diese Art nur bei Verstopfung oder zur
gründlichen Reinigung des Geräts (Seite 7).
Lässt sich der Druck nicht abbauen, Gerät an iSi oder
Servicestelle einsenden!
►Sahne kann nicht entnommen werden bzw. Gerät
spritzt
Verstopfung durch unaufgelösten Zucker
▪ „Druck ablassen“ (Seite 8) und anschließend
„Gründliche Reinigung“ (Seite 7) durchführen.
▪Sicherstellen, dass der Zucker vollständig auf-
gelöst ist. Wir empfehlen flüssigen Süßstoff zu
verwenden.
Sahne ist zu fest durch zu starke Kühlung
▪Vermeiden Sie ein Gefrieren der Sahne.
Zu steif gewordene Sahne
▪ Intensität und Häufigkeit der Schüttelzyklen bei
nächster Inbetriebnahme verringern.
▪ Schüttelhäufigkeit der Tabelle unter „Inbetrieb-
nahme“ (Seite 4) einhalten.
Kein Druck/zu wenig Druck im Gerät
▪Nur original iSi Sahnekapseln verwenden.
▪Leere Kapseln nicht wieder verwenden und sofort
entsorgen.
▪Gerät ausschließlich „kopfüber“ mit senkrechter
Garniertülle betätigen, da es sonst zu Druckver-
lust kommt.
8

Deutsch
Es wurden zu viele Kapseln verwendet
▪„Druck ablassen“ (Seite 8). Gerät erneut in Be-
trieb nehmen.
▪Für Ihren iSi (Mini) Easy Whip benötigen Sie nur 1
iSi Sahnekapsel.
►Entnommene Sahne ist zu flüssig
Gerät wurde überfüllt
▪„Druck ablassen“ (Seite 8). Überschüssigen In-
halt ausgießen. Gerät erneut in Betrieb nehmen.
▪Maximale Füllmenge siehe „Befüllen“ (Seite 4).
Gerät wurde zu wenig oder gar nicht geschüttelt
▪Schüttelhäufigkeit der Tabelle unter „Inbetrieb-
nahme“ (Seite 4) einhalten.
Sahne ist nicht kalt genug
▪Befüllten iSi (Mini) Easy Whip für mindestens 1 –
2 Stunden in den Kühlschrank legen.
Sahne hat zu geringen Fettgehalt
▪Sahne muss einen Fettgehalt von mindestens
30% haben.
Es wurde eine nicht geeignete Kapsel verwendet
▪Nur original iSi Sahnekapseln verwenden.
►Druckknopf wurde nicht betätigt, trotzdem quillt
Sahne aus der Garniertülle
Verstopfung durch unaufgelösten Zucker
▪„Druck ablassen“ (Seite 8) und anschließend
„Gründliche Reinigung“ (Seite 7) durchführen.
▪Sicherstellen, dass der Zucker vollständig auf-
gelöst ist. Wir empfehlen flüssigen Süßstoff zu
verwenden.
Entnahmeventil wurde beschädigt
▪Gerät an iSi oder Servicestelle einsenden.
►Kapselhalter lässt sich schwer aufschrauben
Verwendete Kapsel ist nicht geeignet
▪Nur original iSi Sahnekapseln verwenden.
9

Deutsch
►Sahnekapsel wird nicht aufgestochen
Verwendete Kapsel ist nicht geeignet
▪ Nur original iSi Sahnekapseln verwenden.
Kapsel wurde verkehrt eingelegt
▪Kapsel richtig einlegen (siehe Abbildungsfolge
auf der Ausschlagseite, Arbeitsschritt 5).
Aufstecheinheit wurde beschädigt
▪Gerät an iSi oder Servicestelle einsenden.
►Bei Inbetriebnahme entweicht Gas zwischen
Flasche und Kopf
Kopfdichtung fehlt
▪„Druck ablassen“ (Seite 8). Kopfdichtung in den
Kopf einlegen.
Kopfdichtung wurde beschädigt
▪„Druck ablassen“ (Seite 8). Kopfdichtung erset-
zen.
Kopf wurde nicht fest genug aufgeschraubt
▪Kopf gemäß Gebrauchsanleitung auf Flasche
handfest aufschrauben.
Flaschenkörper wurde am oberen Rand beschädigt
▪„Druck ablassen“ (Seite 8). Gerät an iSi oder
Servicestelle einsenden.
10

English
Safety instructions
▪ Never use force.
▪ Follow the safety regulations on the charger packaging.
▪ Keep chargers away from direct sunlight and tempera-
tures over 50 °C/120 °F.
▪ Store product components and chargers out of the
reach of children.
▪ Only operate the device when it’s filled.
▪ Only use the device for the purposes specified in this
instruction manual.
▪ Cryogenic applications (with liquid nitrogen, for ex-
ample) are not recommended.
▪ Only combine device heads and bottles of the same
device type.
▪ Use only iSi original accessories and replacement
parts. The use of accessories or replacement parts
from other manufacturers will void the warranty and
exempt the company from any liability.
▪ Never attach the head piece so that it is crooked.
▪ Never lean your body over the device when screwing
on the charger.
▪ Never unscrew the head when the device is under
pressure.
▪ Only use 1 iSi cream charger.
▪ Never heat the iSi (Mini) Easy Whip.
▪ Never store a filled bottle in the freezer or deep freeze
compartment.
▪ The device is a pressurized bottle. If it is dropped
or damaged, it should not be used again because it
poses a risk of injury. Please have the device checked
by an iSi service center.
▪ The iSi (Mini) Easy Whip should only be disassembled
as per the “Basic Cleaning” section, page 17.
▪ Do not make any modifications to the iSi (Mini) Easy
Whip. This will void the warranty and exempt the com-
pany from any liability.
▪ Please read the device instructions carefully to avoid
operating errors and keep a copy on hand.
11

English
iSi Easy Whip/iSi Mini Easy Whip
By choosing the iSi (Mini) Easy Whip, you have cho-
sen a quality household product from iSi.
Your iSi (Mini) Easy Whip can be used to prepare fluffy
whipped cream in seconds and it provides perfect dis-
pensing at the push of a button. Fresh whipped cream in
the iSi (Mini) Easy Whip can be stored in the refrigerator
for up to 10 days.
WARNING The iSi (Mini) Easy Whip is not suit-
able for light desserts, espumas, or
warm applications such as soups and
sauces.
WARNING Use only original iSi cream chargers,
identified by the red iSi logo.
Product features
▪ High-quality aluminum bottle with coated surface
▪ Max. filling volume 0.25 liters/1 half pint (Mini Easy
Whip) or 0.5 liters/1 pint (Easy Whip)
▪ Push-button for precise dispensing
▪ Removable decorator tip for easy and hygienic clean-
ing
▪ Head gasket with inner ring for easy removal
▪ User-friendly cleaning brush
▪ Not dishwasher safe
▪ Not suitable for professional use
12

English
List of materials
Description Material
Aluminum bottle Aluminum, coated on the interior
and exterior
Head
Polybutylene terephthalate
(PBT), polyoxymethylene (POM),
silicon, nitrile rubber (NBR),
stainless steel spring
Head gasket Thermoplastic elastomer (TPE)
Decorator tip Polyoxymethylene (POM), nitrile
rubber (NBR)
Charger holder Polyoxymethylene (POM)
Replacement parts
Replacement parts can be viewed via the exploded
diagram, see fold-out page.
Description Part number
Decorator tip 2215001
Head gasket 2234001
Cleaning brush 2236001
Charger holder 2299001
13

English
Operating instructions
NOTE: Before using for the first time, the device
should be disassembled into its individual product
components. Clean the individual components as
described in “Basic Cleaning” on page 17.
PRIOR TO FIllING
1. Remove the decorator tip from the head.
2. Make sure that the head gasket is inserted into the
head.
FIllING
3. Pour the whipping cream into the bottle.
NOTE: The maximum filling volume is 0.25 (1 half pint)
and/or 0.5 liters (1 pint). Please note the fill line and
marking on the bottom of the bottle. Do not overfill.
The remaining empty space is required for optimal
whipping results. Use a measuring cup.
Your iSi (Mini) Easy Whip is suitable for pure whipped
cream only. We recommend the use of liquid flavouring
syrups for sweetening. If you use sugar or stabilizer,
completely dissolve it in a little bit of cream before filling
the bottle in order to avoid the formation of clumps.
ChARGING
4. Screw the head on to the bottle so that it is straight
and tighten it by hand.
WARNING The head should always be screwed on
properly (never crooked).
5. Insert an original iSi cream charger into the charger
holder as shown in fig. 5.
6. Screw on the charger holder (with the charger
inserted) to the head until you can hear that all of the
charger content has released into the bottle.
14

English
WARNING Never bend over the device when
screwing on the charger.
WARNING Device is now under pressure.
7. Shake device vigorously.
NOTE: The required number of shakes is important
for optimal consistency of the whipped cream. If it is
shaken too long or too often, the contents will be too
firm and can no longer be dispensed from the bottle.
Please see the following table for shaking frequency:
Type of
cream Fat content Shaking frequency
per charger
Fresh cream 36%
33%
3 – 4
4 – 5
UHT cream 32% 5 – 6
For lower fat content (min. 30%) or if the consistency is
too light, shake more if necessary.
8. Unscrew the charger holder and dispose of the
empty charger.
NOTE: A slight hiss may be heard when removing the
charger holder. This is normal.
NOTE: Only 1 charger is required for filling.
9. Attach decorator tip to the head.
DISPENSING
10. When dispensing, the device must be held “head-
first” (decorator tip vertical!). Gently press the
button.
NOTE: Test the consistency of the contents by dis-
pensing a small amount when the device is first used.
15

English
Important instructions for use
GENERAl
▪ If the device is not operated properly with the tip in
the vertical position, the pressure may be lost and the
device may not be able to be emptied completely.
▪ Be sure to use well-chilled whipping cream for optimal
results.
WARNING Never store a filled device in the
freezer or deep freeze compartment
▪ Dispense whipped cream from the device shortly
before eating.
▪ Store the device with the cleaned decorator tip in the
refrigerator.
SERVICE
▪ Replacement parts are available individually and at an
affordable price.
WARNING Do not make any modifications to the
iSi (Mini) Easy Whip.
▪ See your specialist dealer for the availability of re-
placement parts. In Austria, you can also go to www.
isi.at.
▪Only send in the complete device for repairs.
STORAGE
If the iSi (Mini) Easy Whip will not be refilled immediately,
component parts should be left to air dry in a clean
location (do not rub with a towel). Store the iSi (Mini)
Easy Whip disassembled and only touch clean parts with
clean hands.
16

English
Cleaning
WARNING Check the material compatibility of the
cleaning/disinfectant solution used
before cleaning (see “List of materi-
als”, page 13).
NOTE: For cleaning, pay close attention to ensure that
the correct cleaning solution or combined disinfectant
and cleaning solution is used.
BASIC ClEANING
NOTE: Please follow the sequence on the back fold-
out page.
1. Press the button until the device is completely empty
and there is no pressure left. Remove the head from
the bottle and pull off the decorator tip.
2. Remove the head gasket for basic cleaning.
3. Rinse out the dispensing valve on both sides using
warm tap water (max. 50 °C/120 °F). Also press and
hold the button several times until you hear a click.
4. Clean all product components by hand using warm
(not hot) tap water along with a standard cleaning
agent. Clean the decorator tip using the cleaning
brush. Completely remove any fat and egg white
residue.
NOTE: Do not use scouring agents or abrasive
sponges/brushes.
NOTE: Do not clean in the dishwasher and do not use
boiling water.
INTERIM ClEANING
The decorator tip can be removed at
any time for cleaning – simply rinse it
with warm water.
17

English
Troubleshooting
WARNING Never use force to open an iSi (Mini)
Easy Whip that is under pressure.
RELEASE THE PRESSURE: Place the device upright,
place a towel or cloth over the tip and gently press the
button until the pressure is released from the iSi (Mini)
Easy Whip. Now the head can be removed from the
bottle.
If the valve is clogged, press the button firmly so that
a click is heard, which allows the gas to escape. Press
the button in this manner only if there is a blockage or
to thoroughly clean the device (page 17).
If the pressure won’t release, send the device to iSi or
a service center.
►The cream won’t dispense
The valve is clogged with undissolved sugar
▪ “Release the pressure” (page 18) and then carry
out “Basic Cleaning” (page 17).
▪Make sure that the sugar is dissolved completely.
To sweeten, we recommend using liquid flavour-
ing syrup.
Cream is too firm due to excessive chilling
▪Avoid freezing the cream.
The cream is too stiff
▪ Next time reduce the intensity and number of
shakes after charging.
▪ See the shaking frequency table under “Charg-
ing” (page 14).
No pressure/not enough pressure in the device
▪Only use original iSi cream chargers.
▪ Do not reuse empty chargers – dispose of them
immediately.
▪ Only operate the device “headfirst” (decorator
tip vertical) otherwise this could lead to a loss of
pressure.
18

English
Too many chargers were used
▪“Release the pressure” (page 18). Set up the
device again for use.
▪ You only need 1 iSi cream charger for your iSi
(Mini) Easy Whip.
►The dispensed cream too runny
The device was overfilled
▪“Release the pressure” (page 18). Pour out the
excess cream. Set up the device again for use.
▪See “Filling” (page 14), for max. filling volume.
The device was not shaken or it was not shaken enough
▪See the shaking frequency table under “Charg-
ing” (page 14).
Cream is not cold enough
▪Place your filled iSi (Mini) Easy Whip in the refrig-
erator for at least 1 – 2 hours prior to serving.
The fat content of the cream is too low
▪The cream must have a fat content of at least
30%.
An unsuitable charger was used
▪Only use original iSi cream chargers.
►Cream is leaking from the decorator tip
The valve is clogged with undissolved sugar
▪“Release the pressure” (page 18) and then carry
out “Basic Cleaning” (page 17).
▪Make sure that the sugar is dissolved completely.
To sweeten, we recommend using liquid flavour-
ing syrup.
The dispensing valve has been damaged
▪ Send the device to iSi or a service center.
►It is difficult to screw on the charger holder
The charger being used is not suitable
▪Only use original iSi cream chargers.
19

English
►Cream charger will not puncture
The charger being used is not suitable
▪ Only use original iSi cream chargers.
The charger was inserted backwards
▪Properly insert the charger (see sequence on the
fold-out page, step 5).
The piercing unit has been damaged
▪Send the device to iSi or a service center.
►During use, gas is leaking between the bottle and
the head
Head gasket is missing
▪“Release the pressure” (page 18). Insert head
gasket into the head.
Head gasket has been damaged
▪“Release the pressure” (page 18). Replace head
gasket.
Head was not tightened securely
▪Screw the head on to the bottle so that it is
straight and tighten it by hand as per the instruc-
tions.
The theading of the bottle head has been damaged
▪“Release the pressure” (page 18). Send the de-
vice to iSi or a service center.
20

Italiano
Avvertenze di sicurezza
▪ Non esercitare mai una forza eccessiva!
▪ Rispettare le disposizioni di sicurezza riportate sull’im-
ballaggio della capsula!
▪ Proteggere le capsule dall’esposizione ai raggi del
sole e da un riscaldamento superiore a 50 °C!
▪ Conservare l’apparecchio e le capsule lontano dalla
portata dei bambini!
▪ Mettere in funzione l’apparecchio solo dopo il riempi-
mento!
▪ Utilizzare l’apparecchio esclusivamente per gli scopi
indicati nelle presenti istruzioni d’uso!
▪ Non sono consentite applicazioni criogeniche, ad es.
con azoto liquido.
▪ Utilizzare esclusivamente calotta e bottiglia dello stes-
so tipo di apparecchio!
▪ Utilizzare esclusivamente accessori e parti di ricambio
originali iSi. L’utilizzo di parti di altri produttori può
comportare l’estinzione della garanzia e l’esclusione di
responsabilità!
▪ Non avvitare mai la calotta fuori asse!
▪ Durante l’avvitamento, non piegare la capsula sull’ap-
parecchio!
▪ Non svitare mai la calotta da un apparecchio sotto
pressione!
▪ Utilizzare solo 1 capsula N2O iSi!
▪ Non riscaldare mai iSi (Mini) Easy Whip!
▪ Non conservare mai l’apparecchio riempito nel freezer
o nel congelatore!
▪ L’apparecchio è sotto pressione! Eventuali cadute
o danneggiamenti lo rendono una fonte di pericolo,
pertanto non deve essere riutilizzato! Far controllare
l’apparecchio dal centro di assistenza iSi.
▪ Smontare iSi (Mini) Easy Whip solo conformemente al
punto “Pulizia approfondita”, pagina 27.
▪ Non apportare modifiche a iSi (Mini) Easy Whip. Que-
ste possono comportare l’estinzione della garanzia e
l’esclusione di responsabilità!
▪ Leggere e conservare accuratamente le presenti istru-
zioni d’uso per evitare errori di utilizzo!
21
Table of contents
Languages:
Other iSi Kitchen Appliance manuals

iSi
iSi CreamProfiWhip User manual

iSi
iSi Easy Whip.Plus User manual

iSi
iSi Creative Whip User manual

iSi
iSi Nitro Whip User manual

iSi
iSi Easy Whip Plus User manual

iSi
iSi Thermo XPress Whip User manual

iSi
iSi Thermo XPress Whip.PLUS User manual

iSi
iSi Whipper User manual

iSi
iSi CreamProfiWhip User manual

iSi
iSi Soda Siphon User manual

iSi
iSi CreamProfiWhip User manual

iSi
iSi Green Whip User manual

iSi
iSi Sodamaker Classic User manual

iSi
iSi Soda Siphon User manual

iSi
iSi Easy Whip Plus User manual

iSi
iSi Nitro Whip User manual

iSi
iSi Whipper User manual

iSi
iSi Gourmet Whip User manual

iSi
iSi Dessert Whip User manual
iSi
iSi Dessert Whip PLUS User manual