manuals.online logo
Brands
  1. Home
  2. •
  3. Brands
  4. •
  5. Jamara
  6. •
  7. Toy
  8. •
  9. Jamara Sole V2 Pro User manual

Jamara Sole V2 Pro User manual

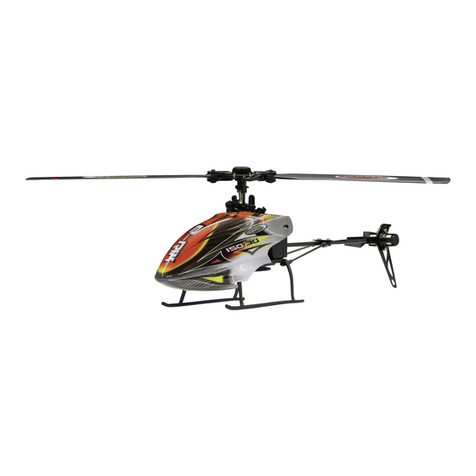
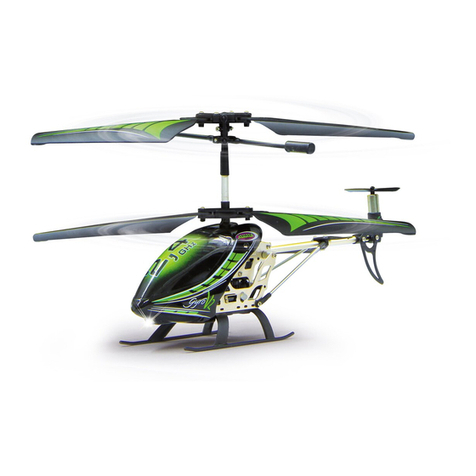
Sole V2 Pro 2,4 GHzNo. 037720
DE - Allgemeine Hinweise
Jamara e. K. übernimmt keine Haftung für Schäden, die an dem Produkt selbst oder durch dieses entstehen, sofern die-
se auf falsche Bedienung oder Handhabungsfehler zurückzuführen sind. Der Kunde allein trägt die volle Verantwortung
für die richtige Bedienung und Handhabung; dies umfasst insbesondere die Montage, den Ladevorgang, die Verwen-
dung bis hin zur Wahl des Einsatzbereiches. Bitte beachten Sie hierzu die Bedienungs- und Gebrauchsanleitung, diese
enthält wichtige Informationen und Warnhinweise.
GB - General information
Jamara e.K. is not liable for any damage caused to the product itself or through this, provided this is due to improper
operation or handling errors. The Customer alone bears the full responsibility for the proper use and handling, including
without limitation, the assembly, the charging process, the use and choice of the operation area. Please refer to the
operating and user instructions, it contains important information and warnings.
FR - Remarques générales
La société Jamara e. K. n’est pas responsable de dommages, que ce soit au niveau du modèle ou causé par celui-ci,
résultant d’une utilisation non appropriée. Seul le client est responsable concernant la mise en oeuvre et l’utilisation con-
forme du matériel; cela va de l’assemblage, en passant par la charge des accus et allant jusqu’au domaine d’utilisation.
Pour cela, veillez lire attentivement la notice d’assemblage et d’utilisation, celle-ci contient d’importantes informations
ainsi que les consignes de sécurités.
IT - Informazioni generali
Jamara e. K. non e´responsabile per danni, sostenute al prodotto stesso o attraverso questo, dovuti ad una gestione
non corretta del articolo. Solo il cliente si assume la piena responsabilità per la manutenzione e l´utilizzo corretto dello
stesso; questo include il montaggio, la ricarica, l´utilizzo, no alla scelta della aerea di applicazione. Si prega di notare e
rispettare le istruzioni d´uso, questi contengono informazioni e avvertimenti molto importanti.
ES - Información general
Jamara K. no se hace responsable de los daños causados al producto en sí o por medio de esto, a menos que esto
se debe al mal funcionamiento o errores de manejo. El cliente solo tiene la responsabilidad completa para el uso y
manejo adecuado, incluyendo, sin limitaciones, el montaje, el proceso de carga, el uso de hasta la elección de la zona
de aplicación. Por favor, consulte las instrucciones de uso y funcionamiento, contiene información y avisos importantes.
DE - Konformitätserklärung
Hiermit erklärt JAMARA e.K., dass das Modell‚ „Sole V2 Pro 2,4 GHz, No. 037720“ in Übereinstimmung mit den grund-
legenden Anforderungen und den anderen relevanten Vorschriften der Richtlinien 1999/5/EG, 2011/65/EU bendet.
Weitere Informationen nden Sie auch unter: www.jamara-shop.com/Konformitaet
GB - Certicate of Conformity
JAMARA e.K. hereby declares that „Sole V2 Pro 2,4 GHz, No. 037720“ follow the regulations and requirements as well
as any ther relivant directives of the EEC directive 1999/5/EC and 2011/65/EU.
Further information can also be found at: www.jamara-shop.com/Conformity
FR - Déclaration de conformité
Par la présente, la société Jamara e.K. déclare que ce modèle „Sole V2 Pro 2,4 GHz, No. 037720“ est conforme en tous
points avec les textes de la directive de l’union européenne sous les directives 1999/5/CE, 2011/65/EU.
Vos pourrez également trouver des informations sur notre site Internet: www.jamara-shop.com/Conformite
IT - Dichiarazione di conformita’
Jamara e. K. dichiara qui di seguito che il modello „Sole V2 Pro 2,4 GHz, No. 037720“ è in linea con le norme ed altre
rilevanti disposizioni comunitarie 1999/5/CE, 2011/65/EU.
Piu informazioni: www.jamara-shop.com/Conformita
ES - Declaración de conformidad
Por medio de la presente, la empresa Jamara e. K. declara que el modelo „Sole V2 Pro 2,4 GHz, No. 037720“ de
conformidad con los requisitos esenciales y otras disposiciones pertinentes de la Directiva 1999/5/CE, 2011/65/EU
se encuentra.
Encontrará más información en: www.jamara-shop.com/Conformidad
DE - Entsorgungshinweise
Bitte sorgen Sie für eine fachgerechte, den gesetzlichen Vorschriften entsprechende Entsorgung der
Batterien und/oder der Akkus. Bitte werfen Sie nur entladene Akkus in die Sammelboxen beim Handel
oder den Kommunen.
GB - Disposal restrictions
Please care for a environmental correct and legal way of disposing the batteries and/or accus. Please,
only throw away empty battery packs into the collect-boxes in your local shops or commune.
FR - Consignes de recyclage
Veuillez respecter les consignes de recyclage des accus et/ou piles. Veuillez ne jeter que des piles/accus vides dans
les bacs de ramassages que vous trouverez dans différents commerces ou au centre de recyclage de votre commune.
IT - Disposizioni per l‘eliminazione nel Rispetto dell‘ ambiente
Non disperdete le batterie nell‘ ambiente ma gettatele, una volta scaricate, negli appositi contenitori. Possono consi-
derarsi scariche quando il motore smette di girare. Se dovete eliminare dei componenti elettronici, eliminateli. Nelle
apposite discariche.
ES - Notas sobre el reciclado
Respete la normativa vigente sobre la eliminación de residuos, especialmente sobre baterías y pilas. Lleve a reciclar
las baterías solo si están descargadas
DE - Dieses ferngesteuerte Modell ist kein Spielzeug!
Geeignet für Personen ab 14 Jahren.
Achtung: Kinder unter 36 Monaten unbedingt fernhalten. ERSTICKUNGSGEFAHR!
Enthält verschluckbare Kleinteile.
GB - This model is not a toy!
Not suitable for people under 14 year.
Warning: Keep away necessarily children under 36 months. RISK OF SUFFOCATION!
Contains small parts which can be swallowed.
FR - Ce modèle réduit n‘est pas un jouet!
N‘est pas adapté pour les personnes de moins de 14 ans.
Attention: Garder loin nécessairement enfants de moins de 36 mois. DANGER D‘ETOUFFEMENT!
Contient de petites pièces facilement avalables.
IT - Questo modello non é un giocattolo!
Sconsiliato per persone inferiori di 14 anni.
Attenzione: Tenere lontano assolutamente i bambini inferiori ai 36 mesi. PERICOLO DI AFFOGAMENTO!
Contiene pezzi piccoli.
ES - Este modelo no es un juguete!
No apropriado para menores de 14 años.
Atención: Mantenga necesariamente lejos de niños menores de 36 meses. ASFIXIA!
Contiene piezas pequeñas.
TURBO
19/15
DE - Gebrauchsanleitung
GB - Instruction
FR - Notice
IT - Istruzione
ES - Instrucciones
DE
Achtung!
Vor dem Betrieb:
Erst den Sender und dann das Modell
einschalten.
Bei Beendigung:
Erst das Modell und dann den Sender
ausschalten.
GB
Attention!
Before operating:
Switch the transmitter on rst then
the model.
When nisished:
First switch off the model then the
transmitter.
FR
Attention!
Avant l’utilisation:
Allumez en premier l’émetteur puis
seulement votre modèle.
Après utilisation:
Arrêtez le modèle en premier puis votre
radiocommande.
IT
Attenzione!
Prima dell‘uso:
Accendete prima la trasmittente e poi
il modello.
Dopo l‘uso:
Spegnere prima il modello e poi la
trasmittente.
ES
¡Atención!
Antes del uso:
Encender primero la emisora, y después
el modelo.
Después del uso:
Apagar primero el modelo, y después
la emisora.
2
DE -
Bezeichnung der Komponenten
1. Stabilisatorstange
2. Rotorblatt
3. Heckausleger
4. Heckrotorblatt
5. Heckmotor
6. Leitwerksatz
7. Hauptrahmen
8. Landegestell
9. Kabinenhaube
10. Taumelscheibe
11. Rotorkopf
12. Hauptzahnrad
13. Ein- Ausschalter
GB -
Component Description
1. Flybar rod
2. Rotor blade
3. Tail boom
4. Tail rotor blade
5. Tail motor
6. Tail n set
7. Main frame
8. Landing skid
9. Canopy
10. Rotor head
11. Main gear
12. On/Off Switch
FR -
Désignations des différentes pièces
1. Barre de stabilisateur
2. Barre de stabilisateur
3. Tube de queue
4. Pale rotor de queue
5. Moteur de queue
6. Kit de gouvernes
7. Cadre principal
8. Patin
9. Verrière
10. Tête de rotor principal
11. Roue dentée principale
12. Interrupteur On/Off
IT -
Denominazione dei componenti
1. Barra stabilizzatrice
2. Rotore principale
3. Albero di coda
4. Pale di coda
5. Motore di coda
6. Timone
7. Telaio
8. Carello
9. Cappottina
10. Testa rotor principale
11. Corona rotore
12. Interruttore On/Off
ES -
Descripción de las diferentes partes
1. Barra estabilizadora
2. Palas rotor
3. Chasis cola
4. Palas rotor de cola
5. Motor de cola
6. Juego de timon
7. Chasis
8. Patin
9. Cabina
10. Cabeza del rotor
11. Engrenaje
12. Interruptor ON/OFF
12
13
1
2
3
4
5
6
7
9
8
11
10
DE - Fernsteuerung
1. Anfänger/Expert-Modus
2. Modus LED
3. Nicktrimmung
4. Nick/Rollhebel
5. Ein-/Ausschalter
6. Rolltrimmung
7. LCD-Display
8. Hecktrimmung
9. Gas/Heckhebel
10. Gastrimmung
11. Gasausschlag, Batteriestatus
12. Batteriefach
GB - Transmitter
1. Primary/advanced mode switch button
2. Mode LED indicator
3. Forwards and backwards trim
4. Direction control stick
5. Power switch
6. Crab trim
7. LCD Display
8. Charging lead
9. Speed control stick
10. Speed trim
11. Throttle output display
12. Battery cover
FR - Emetteur
1. Commutateur de mode
primaire/avancé
2. Indicateur LED de mode
3. Trim Nick
4. Manche Roll-/Nick
5. Interrupteur On/Off
6. Trim Roll
7. LCD-Display
8. Trim anti-couple
9. Gaz-/manche d’anti-couple
10. Trim Gaz
11. Commande gaz
12. Compartiment pour piles
IT - Trasmittente
1. Pulsante selettore di modalità
principale/avanzato
2. Indicatore della modalità LED
3. Trim Nick
4. Leva Roll/Nick
5. Interruttore
6. Trim Roll
7. Display LCD
8. Trim Coda
9. Leva Gas/Coda
10. Trim Gas
11. Passo Gas
12. Scomparto per batterie
ES - Emisora
1. Botón de cambio de modo
primario/avanzado
2. Indicador LED Mode
3. Equilibrio Nick
4. Roll/Nick palanqua
5. ON/OFF
6. Equilibrio Roll
7. LCD-Display
8. Equilibrio cola
9. Gas, palanquilla de cola
10. Equilibrio Gas
11. Desviación gas
12. Compartimiento de la batería
12
11
10
9
8
2
1
3
4
5
6
7
DE - Fernsteuerung
1. Sender aktiv
2. Batteriestatus Sender
3. Trimmung Gas
4. Gasausschlag
5. Heckausschlag
6. Nick-/Rollausschlag
7. Timmung Nick
8. Trimmung Heck
9. Trimmung Roll
GB - Transmitter
1. Transmitter active
2. Transmitter battery status
3. Trim throttle
4. Throttle end point
5. Rear end point
6. Nick-/Roll end point
7. Nick trim
8. Rear trim
9. Roll trim
FR - Radiocommande
1. Emetteur actif
2. Etat des piles de l’émetteur
3. Trim Gaz
4. Commande gaz
5. Commande anti-couple
6. Commande Nick-/Roll
7. Tim Nick
8. Trim anti-couple
9. Trim Roll
IT - Trasmittente
1. Trasmittente attivo
2. Stato batteria trasmittente
3. Trim Gas
4. Passo Gas
5. Passo coda
6. Passo Nick e Roll
7. Trim Nick
8. Trim Coda
9. Trim Roll
ES - Emisora
1. Emisora activa
2. Estado de la batería en la
emisora
3. Equilibrio Gas
4. Desviación gas
5. Desviación cola
6. Nick-/Roll desviación
7. Equilibrio Nick
8. Equilibrio cola
9. Equilibrio Roll
1 2
5
6
3 4 4 7
8 9
DE - Batterien in Sender einlegen
Auf Polarität achten.
GB - Fitting the transmitter batteries
Observe the polarity.
FR - Mise en place des piles dans l‘émetteur
Respectant la polarité.
IT - Montaggio delle pile nella trasmittente
Rispettando la polarità.
ES - Instalación de las pilas en la emisora
Preste atención a la polaridad
DE - Flugakku auaden
Achten Sie darauf, dass das Modell während des Ladevorgangs ausgeschal-
tet ist.
1. Trennen Sie die Steckverbindung zum Akku.
2. Verbinden Sie das Ladegerät mit dem Wechselstromnetz,
stecken Sie es in eine Schukosteckdose. Die grüne LED
leuchtet auf, sie zeigt Ladebereitschaft an.
3. Stecken Sie die Ausgangsleitung des Ladegeräts in die
Eingangsbuchse des Akkus (weißer Balancerstecker).
Die rote LED signalisiert, dass das Ladegerät den Akku lädt.
4. Sobald Sie wieder grün wird ist der Akku aufgeladen.
Sollte die rote LED beim Anschluss des Akkus nicht auf-
leuchten, ist der Akku bereits voll aufgeladen.
Nach etwa 60 min. ist der Ladevorgang abgeschlossen, die Flugzeit bei voll-
geladenen Akku beträgt ca. 5 - 10 Min.
Wichtige Hinweise:
Wenn sich der Akku während des Ladevorgangs erwärmt, trennen Sie ihn
bitte umgehend vom Ladegerät, damit der Akku nicht zerstört wird. Die La-
degerät balanciert die LiIon-Zellen während des Ladevorgangs. Setzen Sie
daher niemals andere Ladegeräte ein, der Akku könnte zerstört werden. Nach
einem Flug ist der Akku u.U. stark erwärmt. In diesem Fall muss der Akku
erst ca. 30 Min. lang abkühlen bevor er wieder aufgeladen wird. Bringen Sie
einen LiIon-Akku niemals mit einer offenen Flamme in Berührung, es besteht
Explosionsgefahr.
GB - Charging the ight battery
Ensure that the model is switched off whilst charging.
1. Disconnect the connector to the battery.
2. Plug the charger into the AC power. The green LED indicates
power.
3. Connect the battery with the charger. The red LED indicates
charging.
4. When the LED turns back to green the battery is fully charged. If
the red LED doesn‘t signalised red by connecting the battery
with the charger the battery is allready fully charged.
The charging process should take approx. 60 min. and should
give you approx. 5 - 10 min. ying time. Never use rechargeable
batteries in your radio control.
Note:
If the battery heats up during charging, disconnect it. Failure to do so may
destroy the battery. The built-in balancer protects the cells whilst charging, this
means that no other type charger may be used as this will damage the cells.
After ying the battery will be hot, allow it to cool for app. 30 minutes before
charging. Never allow batteries to come into contact with open re as this may
cause the batteries to explode.
FR - Charge de l‘accu de propulsion
Veillez à ce que votre modèle soit éteint tout au long de la procédure de
charge
1. Débrancher le connecteur de la batterie.
2. Branchez l’alimentation de votre chargeur sur une prise secteur.
La LED rouge s’allume, elles indiquent que le chargeur est prêt
à l’utilisation.
3. Branchez la sortie du chargeur sur la prise d’alimentation de
votre accu. La LED rouge vous indique que l’accu est en court
de charge.
4. Dès que la LED verte est allumée, cela indique que votre accu
est complètement chargé. Si la LED rouge ne devait pas
s’allumer lorsque vous branchez l’accu, cela indique que votre
accu est déjà complètement chargé.
La charge est complète après environ 60 minutes et la durée de vol est de
l‘ordre de 5 - 10 minutes.
Remarque importante: Si votre accu venait à chauffer fortement lors du
processus de charge, séparez celui-ci immédiatement du chargeur an que
l‘accu ne soit pas détruit. Le chargeur équilibre automatiquement votre accu
lors du processus de charge. De ce fait, n‘utilisez pas d‘autres chargeurs
pour recharger votre accu, cela pourrait le détruire. Après un vol, votre accu
est chaud. Dans ce cas, laissez le refroidir environ 30 minutes avant de le
recharger. N‘utilisez jamais un amme vive dans les environs immédiats de
votre accu LiIon et surtout ne rentrez pas en contact avec celui-ci, il y a dan-
ger d‘explosion.
IT - Carica della batteria di potenza
Spegnete il modello per caricarlo.
1. Scollegare il connettore dalla batteria.
2. Collegate il caricatore con la presa di casa, il LED verde si
accende.
3. Collegate la vostra batteria con il caricatore. IL LED rosso
segnala il caricamento.
4. Appena il LED diventa verde, il pacco batteria è carico.
In caso che il LED non diventa rosso appena collegato la
batterie, esse è già carica.
La ricarica é completata in 60 min‘ e la durata del volo é mediamente di
5 - 10 min.
Nota importate:
Se notate che la vostra batteria appena collegata per la ricarica riscalda
fortemente, staccatela immediatamente! Per evitarne la distruzione. Utilizzate
solamente il caricabatteria in dotazione perché lo stesso ha incorporata una
funzione di equilibratura della tensione della due celle, poiché le batterie LiIon
potrebbero caricare de due celle con tensioni diverse l‘ una dall‘ altra se non
equilibrate, danneggiandosi. Evitate perciò assolutamente l‘ uso di altri cari-
cabatterie. Lasciate raffreddare la batterie dopo un volo prima di ricaricarle.
Evitate di avvicinare amme libere alle batterie LiIon evitando assolutamente
di avvicinarle a forti fonti di carore, perché potrebbero esplodere.
6x AA
3
ES - Cargar la batería principal
Asegúrese de que el modelo esta apagado durante la carga.
1. Desconecta el conector de la batería.
2. Conecte el cargador con la fuente de alimentación, despues en
en la toma de corriente. La LED vierde brilla y indica que esta
pornta para la carga.
3. Conecte el cable del cargador en el buje de la batería. La LED
roja indica, de que la batería se esta cargando.
4. Cuando la LED cambia en el color vierde, indica que la batería
esta cargada. Si la LED roja no se enciende al conectar la
batería, signica que esta ya totalmente cargada.
Tempo de carga: 60 min., Tempo de vuelo: 5 - 10 min
Aviso importante:
Si la batería se calienta demasiado durante la carga, desconéctelas rápidamente del cargador, así evitará que se est-
ropee. El cargador se encarga de equilibrar la batería LiIon durante la carga. Por tanto, nunca debe utilizar un cargador
distinto, podría estropear la batería. Normalmente, tras volar la batería se habrá calentado. En esto casos, se debe
dehar enfriar la batería durante 30 minutos antes de bolber a cargarla. Nunca exponga una batería LiIon a una llama,
podría provocar una exprosión.
DE - Expert Modus
Der Hubschrauber hat zwei Flugmodes, für Anfänger und
für Fortgeschrittene die durch aueuchten der LED ange-
zeigt wird.
Zum umschalten in den Experten Modus drücken Sie die
Anfänger/Expert-Taste und die LED leuchtet auf. Um in
den NORMAL-Modus zurück zu schalten, drücken Sie die
Taste nochmal und die LED erlischt.
Der EXPERT-Modus bewirkt das die Servos die die
Taumelscheibe ansteuern einen weiteren Ausschlag zu-
lassen. Das Modell reagiert wesentlich aggressiver, die
Ausschläge sind wesentlich höher. Wir empfehlen Ihnen
die folgenden Flugübungen am Anfang erst im NORMAL-
Modus zu üben.
GB - Expert mode
The helicopter has two ight modes, for beginners and for
experts which is indicated by the lit LED.
To switch to expert mode press the Beginner / Expert but-
ton and the LED lights up. To switch back to the NORMAL
mode, press the button again and the LED goes out.
The EXPERT mode allow the servos, which control the
swash plate, of a higher delexion. The model reacts much
more aggressive, the defelxions are higher. We encourage
you to practice the following exercises at the beginning in
Beginner mode.
FR - Mode d`Expert
L`hélicoptère a deux modes de vol, pour les apprentis et
avancés qui sont signalés par l’éclat du LED.
Pour passer au mode d’expert appuyez sur le bouton
apprenti/avancé et le LED s’allume. Pour retrogarder en
mode normal, appuyez le bouton encore une fois et le
LED s’éteint.
Le mode d’expert provoque que les servos qui cinglent le
plateau cyclique, permets une autre déexion. Le modèle
réagit plus agressif, les déexions sont plus fortes. Au dé-
but nous vous recommandons de pratiquer les exercices
de vol suivants en mode normal.
IT - Modo esperto
L´elicottero è dotato di due modi di volo, per principianti e
avanzati, i varie modi indicati del LED acceso.
Per passare alla modalità esperta, premere il tasto prin-
cipianti/esperti nche il LED si accende. Per tornare alla
modalità normale, premere il tasto ancora nche si spegne
il LED.
La modalità esperta interferisce con un ulteriore deviazio-
ne del piatto ciclico. Il modello reagisce molto più aggres-
sivo, le deviazioni sono molto più alte. Vi consigliamo di
praticare i seguenti esercizi di volo all’inizio nella modalità
normale.
ES - Modo experto
El helicóptero tiene dos modos de vuelo, tanto para prin-
cipiante como para avanzados que se indica por el LED.
Para cambiar al modo experto, pulse el botón de principi-
ante/experto y el LED va a brillar. Para volver en el modo
normal, pulse de nuevo el botón y el LED se apaga. El
modo experto hace que los servos que controlan el pla-
to oscilante, permiten una erupción. El modelo responde
más agresivo, las erupciones son mucho más altos. Le
recomendamos a practicar los ejercios al inicio en el modo
normal.
DE - Binden/Inbetriebnahme von Sender
und Heli
Schalten Sie den Sender ein, anschließend
(zeitnach ca. 5 - 10 Sekunden) schalten Sie
den Helikopter ein und stellen ihn auf eine
ebene Fläche. Der Gasausschlag/Batte-
riestatus am Sender beginnt zu blinken und
es ertönt ein akustisches Signal. Warten Sie
bis das Lauicht und das akustische Signal
aufhört. Der Helikopter ist nun mit dem Sen-
der gebunden. Dieser Vorgang wiederholt
sich bei jeder Inbetriebnahme.
GB - Binding / initiation of the transmit-
ter and helicopter
Turn on the transmitter, then (in a timely
manner about 5 - 10 seconds), turn on the
helicopter and place it on a at surface. The
thottle/ battery status of the transmitter be-
gins to ash and you will hear a signal. Wait
until the running light and the signal stops.
The helicopter is now bound to the transmit-
ter. This process is repeated for each start.
FR - Lier et mis en marche d’émetteur et
l’hélicoptère
Allumez/mettez en marche l’émetteur,
ensuite (dans 5 - 10 secondes) mettez en
marche l’hélicoptère et posez-le sur une
surface plate. Le LED à la radiocommande
commence à clignoter et il retentit un sig-
nal sonore. Attendez jusque le scintillement
et le signal sonore nissent. Maintenant
l’hélicoptère est lié avec l’émetteur. Cela se
récupéra à chaque mise en marche.
IT - Legamento/Messa in servizio della
trasmittente
e del elicottero
Accendere la trasmittente, dopodiché
l´elicottero (ca. 5 - 10 secondi dopo) e
posizionarlo su una supercie piana. Il led
sulla trasmittente inizia a lampeggiare e si
sente un segnale acustico. Aspettare che il
LED si spegne e il segnale acustico nisca.
L´elicottero e ora legato con la trasmittente.
Questo processo viene ripetuto per ogni
avviamento.
ES - Binding/Puesta en marcha de la
emisora y helicóptero
Encender la emisora, despues (en el mismo
tiempo aprox. 5 - 10 Segundos) encender
el helicóptero y poner en una superce pla-
na. El gas/estado de batería en la emisora
comienzan a parpadear y un señal acústico
va a resonar. Esperar hasta que la luz y el
señal acústico se detiene. El helicóptero
esta bindado con la emisora. Este proceso
se ripite para cada uso.
DE - Einstellung der Taumelscheibe
1. Inspektion der Taumelscheibe:
Schalten Sie die Fernsteuerung und den Helikopter ein. Ziehen
Sie den Gasknüppel ganz zurück und stellen Sie die Gas-
,Nick-, Roll- und Hecktrimmung in die Neutralposition.
Die Servohebel und die Taumelscheibe sollten jetzt in einer
Horizontal-/Neutralen Stellung sein.
2. Einstellung der Servos und Taumelscheibe:
Sollten die Servohebel und die Taumelscheibe nicht in der
Horizontal-/Neutralen Stellung sein, kann dies mit den
folgenden Schritten eingestellt werden (Helikopter und Sender
müssen eingeschalten sein):
1. Justieren der Servos
Achten Sie darauf, dass sämtlich Trimmungen in Neutral-
stellung sind. Lösen Sie die Schrauben der Servohebel und
versetzen Sie diese in Neutralstellung (Horizontal).
Schrauben Sie die Servohebel wieder fest.
2. Justieren der Taumelscheibe
Bendet sich die Taumelscheibe nicht in Horizontaler-
Stellung, lösen Sie die Anlenkungsgestänge an der Taumel-
scheibe und schrauben diese soweit ein oder aus bis sich
die Taumelscheibe nach wiederanbringen der Anlenkungen
in Horizontaler Stellung bendet.
GB - Adjustment of swashplate
1. Inspection of the swash plate:
Turn on the remote control and the helicopter. Pull the throttle
stick all the way back and adjust the throttle,pitch , roll and rear
trimming in the neutral position. The servo arm and swashplate
should be in horizontal/ neutral position.
2. Setting the servo and swashplate:
If the servo arm and swashplate are not in horizontal/ neutral
position, then this can be set by the following steps (Helicopter
and transmitter must be turned on):
1. Adjust the servos
Make sure that all the trims (except throttle) are in neutral.
Loosen the screws on the servo arm and put it in neutral
(horizontal) position. Screw the servo bracket back on.
2. Adjust the swashplate
In case the swashplate is not in horizontal position, loosen
the linkage to the swashplate and screw them on or off until
the swashplate is in horizontal position. Afterwards tighten
the linkages.
FR - Calibrage du plateau cyclique
1. L’inspection du plateau cyclique:
Allumez/mettez en marche la télécommande et l’hélicoptère.
Retirez le levier de gaz complètement et mettez le « Trimm »
de Gaz,- Nick,- Roll et Arrière en position neutre. Les leviers
des servos devraient être en position horizontale/neutre
2. Calibrage des Servos et du plateau cyclique:
Si les leviers des servos ne seraient pas en position
horizontale/neutre, c’est peut être régler par les pas suivants
(L’hélicoptère et l’émetteur doivent être en marche.)
1. Mettre au point des Servos
Veillez à ce que tous les « Trimm» (sauf gaz) sont en
position neutre. Dénouez les vis des leviers des servos et
mettez-les en position neutre/horizontale. Revissez les leviers
des servos.
2. Mettre au point du plateau cyclique
Si le plateau cyclique n’est pas en position horizontale/
neutre, dénouez les leviers de commande au plateau,
vissez les à tel point que le plateau se trouve en position
horizontale après avoir xé les leviers de commande
IT - Impostazione del piatto ciclico
1. Ispezione del piatto ciclico:
Accendere il telecomando e l´elicottero. Tirare la leva del gas
del tutto indietro e impostare Gas – Nick -Roll e trim di coda in
posizione neutra. La leva del servo e il piatto ciclico devono
essere adesso in una posizione orizzontale/neutrale.
2. Impostazione dei servi e del piatto ciclico:
Se la leva del servo e il piatto ciclico non sono in posizione
orizzontale/neutrale, lo potete impostare tramite i seguenti
passaggi (L´elicottero e la trasmittente devono essere accese.)
1. Registrare il servo
Attenzione che tutti i trim ( a parte il gas) sono in posizione
neutra. Allentare i viti sul braccio del servo e metterlo in
posizione neutra/orizzontale e poi avvitarlo nuovamente.
2. Registrare il piatto ciclico
Se il piatto ciclico non è in posizione neutrale, allentare il
collegamento, portarlo in posizione orizzontale e dopo di
che nuovamente ssarlo.
ES - Ajuste del plato oscillante
1. Inspección del plato oscillante:
Encender la emisora y el helicóptero. Tirar la palanca de gas
todo hacia atrás y ajustar el trimm de Gas-, Nick-, Roll- y de
cola en la posición neutral. La barra de servo y el plato
oscillante deben estar en una posición horizontal-/neutral.
2. Ajuste del plato oscillante y servos:
Si la barra de servo y el plato oscillante no estan en la
posición horizontal-/neutral, esto se puede ajustar usando los
siguintes pasos: (Helicóptero y emisora deben estar
encendidos):
1. Ajustar los servos
Asegúrese, de que todos los trimms (excepto gas) estan
en la posición neutral. Aoje los tronillos de la barra der
servo y posiciónar en neutral (horizonatal)
2. Ajuste del plato oscilante
El plato oscilante no esta en la posición horizontal, aojar
las varillas en el plato oscilante y atornille dentro o fuera
hasta que el plato oscilante se encuentra en posición
horizontal.
4
DE - Trimmen der Fluglage
Je nach Ladestand des Flugakkus können Toleranzen entstehen, die es nötig
machen den Heli für einen korrekten Geradeausflug nachzutrimmen. Dafür
fliegen Sie am besten in ca 1,5 m Höhe und beobachten aufmerksam die
Fluglage!
1. Sollte sich der Hauptrotor drehen obwohl der Gasknüppel ganz
nach unten gezogen ist, können Sie mit Hilfe der Trimmung-Gas
an der Fernsteuerung den Neutralpunkt einstellen. In der Regel
sollte diese Trimmung in der Mitte stehen.
2. Dreht der Heli sich um die eigenen Achse (Heck) obwohl kein
entsprechender Befehl gegeben wurde, müssen Sie ihn mit
Hilfe der Trimmung-Heck an der Fernsteuerung in die ent-
sprechende Gegenrichtung trimmen bis er Stabil ist!
3. Fliegt der Helikopter vor- oder rückwärts obwohl kein
entsprechender Befehl gegeben wurde, müssen Sie ihn mit
Hilfe der Trimmung-Nick an der Fernsteuerung in die ent-
sprechende Gegenrichtung trimmen bis er Stabil ist!
4. Rollt der Helikopter nach links oder rechts obwohl kein
entsprechender Befehl gegeben wurde, müssen Sie ihn mit
Hilfe der Trimmung-Roll an der Fernsteuerung in die ent-
sprechende Gegenrichtung trimmen bis er Stabil ist!
GB - Trimming the attitude
Depending on the charge status of the flight batteries a tolerance can be
caused making it necessary to trim the helicopter for it to fly straight. Climb the
model to around 1,5 meter and observe it closely.
1. If the main rotor turn even though the throttle stick is pulled
right to the bottom, you can set it using the gas trim function on
the transmitter. Usually this trim should be in the middle.
2. If the Helicopter turns around its own axle (rear), even though
no signal was given to the transmitter, you must use the rear
trim on the remote control in the corresponding opposite
direction until it can hovers without turning!
3. The helicopter flies forward or backward though no such
instruction was given. You must use the Nick-Trim on the
transmitter in the opposite direction, until it is stable
4. The helicopter rolls to the left or right even though no such
instruction was given. You have to trim it using the roll on the
transmitter in the opposite direction, until it is stable!
FR - Réglage des Trims des différentes phases de vol
En fonction de l’état de charge de l’accu de vol les tolérances peuvent chan-
gées, cela nécessite de modifier le réglage des trims afin que votre hélicoptère
vol droit. Pour cela, volez à environ 1,5m du sol et observer la position de
votre modèle!
1. Si le rotor principal devait tourner alors que le manche des gaz
est en position ralenti, il faut régler le trim des gaz de la
radiocommande en position de neutre. En règle générale le trim
devrait se trouver au milieu.
2. Si l’hélicoptère tourne autour de lui (anti-couple) alors que le
manche du rotor de queue est en position centrale et que vous
n’en avez pas donné l’ordre, il faut régler le trim de l’anti-couple
dans le sens contraire du mouvement afin que votre hélicoptère
reste en position!
3. Si l’hélicoptère vol en avant ou en arrière alors que le manche
Nick est en position centrale et que vous n’en avez pas donné
l’ordre, il faut régler le trim de la fonction Nick dans le sens con
traire du mouvement afin que votre hélicoptère reste en
position!
4. Si l’hélicoptère vol à gauche ou à droite alors que le manche Roll
est en position centrale et que vous n’en avez pas donné l’ordre,
il faut régler le trim de la fonction Roll dans le sens contraire du
mouvement afin que votre hélicoptère reste en position!
IT - Trim durante il volo
Je nach Ladestand des Flugakkus können Toleranzen entstehen, die es nötig
machen den Heli für einen korrekten Geradeausflug nachzutrimmen. Secondo
la posizione del pacca batteria del modello, è possibile trimmare leggermente
l’assetto del volo dell’elicottero.
Per questo alzatelo più o meno a 1.5 mt. di quota e osservate quello che fa.
1. Nel caso che il rotore principale gira essendo la leva del gas a
posizione „0“ potete trimmare il gas. Di regola il trim dovrebbe
essere posizionate in posizione centrale.
2. Nel caso che il modello si gira su se stesso, trimmare il modello
in modo che rimane „stabile“. Il trimmaggio avviene in modo
opposto.
3. Nel caso che il modello vola in avanti oppure dietro, trimmare il
modello in modo che rimane “fermo“
4. Nel caso che il modello si muove a destra oppure sinistra,
trimmare il modello in modo opposto.
ES - Trim de la situación de vuelo
Depende del estado de carga de la batería, pueden surgir tolerancias, por lo
que es necesario trimar otravez el helicóptero para volar en línea recta. Con el
fin de hacer esto, debe despegar a una altura
de aproximadamente 1,5 metro del suelo y observar su comportamiento.
1. Si el rotor principal se gira aunque que el mando de gas está
para abajo, se puede establecer utilizando el mando de ajuste
y buscando el punto neutro. En general el ajuste debe estar en el
medio.
2. Si el helicópero se gira en su propio eje (cola) aunque no se
le dio tal orden, debe utilizar el mando de ajuste de cola en la
emisora, tienes que ajustarlo en el sentido contraio hasta que
esta estable!
3. Si el helicópero vuela hacia adelante o hacia atrás sin dar el
orden, debe utilizar el mando de ajuste NICK en la emisora,
tienes que ajustarlo en el sentido contraio haste que esta
estable.
4. Si el helicópero se rodó hacia la izquierda o derecha, aunque
no se le dio instrucción de este tipo, hay que ajustar con el
mando ROLL en la emisora, en el sentido contrario hasta que
esta estable
1 32 4
DE - Modellaktion | GB - Actions | FR - Action du modèle
IT - Modello di azioni < ES - Modelo de acción
Mode 2 | Mode 2 | Mode 2 | Modo 2 | Mode 2
- Steigen
- Ascending
- Décollage du modèle
- Salire
- Ascender
- Linken Knüppel nach vorn drücken
- Push throttle upwards, the speed of rotary
speed is quicken and then helicopter ascends.
- Poussez le manche gauche en avant
- Leva sinistra in alto
- Palanca Izquierda hacia arriba
- Sinken
- Landing
- Atterrissage du modèle
- Scender
- Descender
- Linken Knüppel nach hinten ziehen
- Push throttle downwards, the speed of
rotary speed slows down and then helicopter
descends.
- Tirez le manche gauche en arrière
- Leva sinistra a sinistra
- Palanca Izquierda hacia abajo
- Vorwärts fliegen
- Forward
- Inclinez le modèle en avant
- Abbassa il muso e va avanti
- Bajar el morro
- Rechter Knüppel nach vorne drücken
- Push control lever upwards, helicopter moves
forwards.
- Poussez le manche de droite en avant
- Leva destra in alto
- Palanca derecha hacia arriba
- Rückwärts fliegen
- Backward
- Inclinez le modèle en arrière
- Alza il muso e va indietro
- Subir el morro
- Rechter Knüppel nach hinten drücken
- Push control lever downwards, helicopter
moves backwards.
- Tirez le manche de droite en arrière
- Leva destra in basso
- Palanca derecha hacia abajo
- Nach links fliegen
- Left-side flying
- Inclinez le modèle à gauche
- Si inclina e va a sinistra
- Alabeo izquierda
- Rechter Knüppel nach links drücken
- Push the control lever to the left side,
helicopter flies to left side.
- Poussez le manche de droite à gauche
- Leva destra a sinistra
- Palanca derecha hacia izquierda
- Nach rechts fliegen
- Right-side flying
- Inclinez le modèle à droite
- Si inclina e va a destra
- Alabeo derecha
- Techter Knüppel nach rechts drücken
- Push the control lever to the right side,
helicopter flies to right side
- Poussez le manche de droite à gauche
- Leva destra a destra
- Palanca derecha hacia derecha
- Modell nach links drehen
- Turn left
- Tournez le modèle à gauche
- Girare a sinistra
- Giro a la izquierda
- Linken Knüppel nach links drücken
- Push the control lever to the left side,
helicopter head flies leftwards.
- Poussez le manche gauche à gauche
- Leva sinistra a sinistra
- Palanca izquierda hacia izquierda
- Modell nach rechts drehen
- Turn right
- Tournez le modèle à droite
- Girare a destra
- Giro a la derecha
- Linken Knüppel nach rechts drücken
- Push the control lever to the right side,
helikopter head flies rightwards.
- Poussez le manche de droite à droite
- Leva sinistra a destra
- Palanca Izquierda hacia derecha
5
DE - Problembehebung
Die LED am Heli blinkt ohne aufzuhören
1. keine Bindung
- neu binden
Der Heli reagiert nicht auf die Steuerbefehle
1. Batterien zu schwach
- neue Batterien einlegen
2. Akku nicht ganz eingeschoben
- Akku überprüfen
Der Motor reagiert nicht mehr auf den Gasbefehl
1. Akku leer
- Akku auaden
Der Motor dreht ohne Befehl weiter
1. Gas vertrimmt
- Gastrimmung einstellen
Motor läuft nicht, nur die Servos bewegen sich
1. Gas vertrimmt
- Gastrimmung einstellena
2. Gas war nicht unten beim einschalten
- Gas runter beim einschalten
3. Defekter Motor oder Kabel
- Motor tauschen Verkabelung prüfen
Der Heli vibriert stark
1. defekte Rotorblätter
- Rotorblätter tauschen
2. Defekte Rotorwelle
- Rotorwelle tauschen
3. Schrauben der Rotorblätter zu fest angezogen
- Schrauben lösen
Der Heli dreht sich unkontrolliert um die eigene Achse
1. defektes Heckrotorblatt
- Heckrotorblatt tauschen
2. defekter Heckmotor
- Heckmotor tauschen
3. Gyro wurde nicht initialisiert
- Heli neu ein/aus schalten
4. Heck vertrimmt
- Hecktrimmung einstellen
Der Heli wandert ohne Befehl vorwärts oder rückwärts
1. Nick vertrimmt
- Nicktrimmung einstellen
2. Servoanlenkung zu lang oder zu kurz
- Servoanlenkung justieren
Der Heli wandert ohne Befehl seitwärts
1. Roll vertrimmt
- Rolltrimmung einstellen
2. Servoanlenkung zu lang oder zu kurz
- Servoanlenkung justieren
GB - Troubleshooting
The LED on the helicopter is blinking constantly
1. Binding failure
- Bind helicopter with transmitter
The helicopter does not react to control commands
1. Battery is weak
- Charge the battery
2. Battery is may not be connected
- Check the battery
The motor does not react to once moving the throttle stick
1. Battery is empty
- Charge the battery
The motor is turning without giving a control command
1. Throttle trim is wrong
- Try trimming the throttle
Motor is not working only the servos are turning
1. Throttle trim is wrong
- Try trimming the throttle
2. Throttle stick was not pushed down
- Move the throttle stick right to the bottom.
3. Broken motor or cable
- Check cables or change motor
The Helicopter is vibrating more than usual
1. Broken rotor blade
- Change blades
2. Broken main shaft
- Change main shaft
3. Screws too tight
- Loosen screws
The Helicopter is turning around its own axis
1. Broken rear rotor
- Change rear rotor
2. Broken rear motor
- Change rear motor
3. Gyro is not initialised Heli
- Switch on/ off
4. Diversion trim is wrong
- Try trimming the diversion
The Helicopter is „rambling“ backwards and/ or forwards without
giving any control
1. Nick is not trimmed
- Trim the nick.
2. Servo linkage too long or too short
- Set the servo linkage
The Helicopter is „rambling“ to the side without giving any control
1. Roll is not trimmed
- Trim the roll function
2. Servo linkage too long or too short
- Set the servo linkage
FR - Problèmes et solutions
La LED de l’hélicoptère clignote continuellement
1. pas de synchronisation
- refaire une synchronisation
L’hélicoptère ne réagit pas aux ordres
1. Les piles sont trop faibles
- changez les piles
2. Accu mal mis en place
- Vériez le positionnement
Le moteur ne réagit plus aux ordres de la commande gaz
1. Accu vide
- Rechargez l’accu
Le moteur tourne sans avoir reçu d’ordre#
1. problème de trim
- repositionnez correctement le trim
Le moteur ne tourne pas uniquement les servos
1. problème de trim des gaz
- repositionnez correctement
2. la commande des gaz n’est pas tout en bas
- positionnez le manche des gaz tout en bas
3. Moteur défectueux
- vériez/changez le moteur
L’hélicoptère vibre fortement
1. pale de rotor défectueuse
- changez la pale
2. Axe de rotor défectueux
- changez l’axe
3. Visses trop serrées
- Desserrez celles-ci
L’hélicoptère tourne sur lui-même, incontrôlable
1. pale d’anti-couple défectueuse
- changez celle-ci
2. Moteur anti-couple défectueux
- changez celle-ci
3. mauvaise initialisation du gyroscope
- arrêtez et mettez en marche votre modèle
4. mauvais trim du cola
- réglage du trim cola
L’hélicoptère avance/recule sans en avoir eu l’ordre
1. mauvais trim du Nick
- réglage du trim Nick
2. commande du servo trop long longue ou trop courte
- régler la taille de celle-ci
L’hélicoptère va à droite/gauche sans en avoir eu l’ordre
1. mauvais trim du Roll
- réglage du trim Roll
2. commande du servo trop long longue ou trop courte
-régler la taille de celle-ci
IT - Problemi e soluzioni
Il LED lampeggia in continuto
1. Binding non effettuato
- Ripetere la procedura
L’elicottero non reagisce ai comandi
1. Batteria scarica
- inserire nuove Batterie
2. Manca contatto con il pacco batteria
- Controllare i contatti
Motore non reagisce ai comandi
1. Pacco batteria scarica
- Ricaricare il pacco batteria
Il Motor gira senza dando comando
1. Il modello non è trimmato
- Trimmare il gas
Motore non gira, ma reagiscano i servi
1. Gas non trimmato
- Trimmare il gas
2. La leva del Gas non era a posizione 0 mentre avete acceso il modello
- Riaccendere il modello / trasmittente e posizionare il gas a posizione 0
3. Motor oppure cavo guasto
- Cambiare il motore e/o il cavo
L’elicottero vibra
1. Pale danneggiate
- Cambiare le pale
2. Albero danneggiato
- Cambiare l’albero
3. Vite avvitate troppo duri
- Scogliere leggermente le vite
L’elicottero gira senza controllo su se stesso
1. Pala posteriore danneggiata
- Cambiare la pala posteriore
2. Motore di coda danneggiato
- Cambiare il motore di coda
3. Gyro non inizializzato
- Effettuare il binding
4. Coda non trimmato
- Trimmaggio coda
L’elicottero va in avanti e/o indietro senza dando comandi
1. Nick non trimmato
- Trimmare il Nick
2. Leva servo troppo lungo oppure corto
- Regolare la distanza delle leve
L’elicottero avanza lateralmente
1. Roll non trimmato
- Trimamre il Roll
2. Leva servo troppo lungo oppure corto
- Regolare la distanza delle leve
ES - Resolución de problemas
El LED del helicóptero parpadea sin parar
1. No hay “binding“ (combinación entre emisora y helicóptero)
- Combinar ambos de nuevo
El helicóptero no reacciona a los mandos
1. Pilas demasiado ojas
- Cambiar pilas
2. Batería no esta metida del todo / hace mal contacto
- Comprobar batería
El motor ya no reacciona al acelerador
1. El motor ya no reacciona
- Cargar batería
El motor sigue girando aunque no aceleres
1. Acelerador mal trimado
- Trimar bien el gas
El motor no funciona solamente se mueven los servos al conectar
1. Acelerador mal trimado
- Trimar bien el gas
2. El stick del acelerador no estuvo abajo del todo al encender
- Volver a conectar con el stick abajo del todo
3. Motor o cables defectuosos
- Comprobar cables, cambiar motor
El helicóptero vibra mucho
1. Palas principales defectuosas
- Cambiar palas principales
2. Eje principal defectuoso
- Cambiar eje principal
3. Los tornillos de la palas estan demasiado apretados
- Aojar tornillos un poco
El helicóptero gira sobre su propio eje sin control
1. Palas de cola defectuosas
- Cambiar palas de cola
2. Motor de cola defectuoso
- Cambiar motor de cola
3. El giróscopo no se ha inicializado correctamente
- Volver a apagar / encender el helicóptero de nuevo
4. Cola mal trimado
- Trimar bien el cola
El helicóptero se desplaza el solo hacia delante o hacia atrás
1. Cabeceo mal trimado
- Trimar bien el cabeceo
2. La varilla del servo demasiado larga o corta
- Ajustar varilla del servo
El helicóptero se desplaza el solo hacia los lados
1. Alabeo mal trimado
-Trimar bien el alabeo
2. La varilla del servo demasiado larga o corta
- Ajustar varilla del servo
6
DE - Ersatzteile
Art.-Nr. Bezeichnung
037725 Stabilisatorstange
037726 Koppelstange + Taumelsch.Anlenkung
037727 Blatthalter
037728 Rotorblatt
037729 Hauptzahnrad mit Welle
037730 Hauptrahmen (ohne Abb.)
037731 Hauptmotor (ohne Abb.)
037732 Seitenteile
037733 Leitwerksatz
037734 Heckausleger
037735 Heckrotor, komplett
037736 Servo (ohne Abb.)
037737 Taumelscheibe
037738 Akkuhalter (ohne Abb.)
037739 Landegestell
037740 Heckrotorblatt
037741 Empfangselektronik (ohne Abb.)
030439 Akku (ohne Abb.)
037744 Kabinenhaube
037745 Rotorkopf
037746 Heckmotor
037747 Sender (ohne Abb.)
037748 Taumescheibenführung
037194 Ladegerät (ohne Abb.)
GB - Spare parts
Ord. No. Designation
037725 Stabiliser bar
037726 Coupling rod + Supporto pala swash plate
037727 Rotor blades holder
037728 Rotor blades
037729 Main rotor gear w. shaft
037730 Main frame (without illustration)
037731 Main motor (without illustration)
037732 Side pieces
037733 Empennage set
037734 Tail piece
037735 Tail rotor, completely
037736 Servo
037737 Swash Plate
037738 Battery support (without illustration)
037739 Landing skid
037740 Tail rotor blade
037741 Receiver electronics (without illustration)
030439 Battery
037744 Canopy
037745 Rotor head
037746 Rear motor
037747 Transmitter (without illustration)
037748 Swash plate guide
037194 Charger (without illustration)
037745
037725
037728
037727
037748
037737
037744
037729
037739
037726
037740
037733
037734
037732
037746
FR - Pièces détachées
Réf. Désignation
037725 Barre de stabilisateur
037726 Steering linkage
037727 Support de pale
037728 Rotor principal
037729 Roue dentée principale avec axe
037730 Chasis (sans image)
037731 Moteur principal (sans image)
037732 Pièces de côté
037733 Kit de gouvernes
037734 Tube de queue
037735 Pale de rotor de queue, complètement
037736 Servo
037737 Plateau cyclique
037738 Support d‘accu (sans image)
037739 Patin
037740 Pale de rotor de queue
037741 Electronique de réception (sans image)
030439 Accu
037744 Verrière
037745 Tête de rotor principal
037746 Moteur de queue
037747 Emetteur (sans image)
037748 Guide de plateau cyclique
037194 Chargeur (sans image)
ES - Lista de repuestos
Ref. Designación
037725 Barra estabilizadora
037726 Servo vinculación
037727 Soporte de Palas
037728 Palas rotor
037729 Corona rotor principal c. arbol
037730 Chasis (no ilustrado)
037731 Motor principal (no ilustrado)
037732 Piezas laterares
037733 Juego de timon
037734 Chasis cola
037735 Rotor trasero, completamente
037736 Servo
037737 Plato oscilante
037738 Soporte bateria (no ilustrado)
037739 Patin aterrisaje
037740 Palas de los rotores de cola
037741 Electrónica recept. (no ilustrado)
030439 Batería (no ilustrado)
037744 Cabina
037745 Cabeza del rotor
037746 Motore di coda
037747 Emisora (no ilustrado)
037748 Plato oscilante
037194 Cargador (no ilustrado)
IT - Pezzi di ricambio
Cod. Designazione
037725 Barra stabilizzatrice
037726 Servo linkage
037727 Supporte pale
037728 Pale rotore principale
037729 Ruota dentata principale con albero
037730 Telaio (senza illustrazione)
037731 Motore principale (senza illustrazione)
037732 Pezzi laterale
037733 Piano di coda
037734 Albero di coda
037735 Pale rotore, completamente
037736 Servo
037737 Piatto ciclico
037738 Supporto batteria (senza illustrazione)
037739 Carrello
037740 Pale del rotore di coda
037741 Elett.p. ricevente (senza illustrazione)
030439 Batteria (senza illustrazione)
037744 Cabina
037745 Testa rotor principale
037746 Motor de cola
037747 Trasmittente (senza illustrazione)
037748 Piatto ciclico
037194 Caricatore (senza illustrazione)
7
DE - Sicherheitshinweise
• Bitte lesen Sie die Bedienungsanleitung und Sicherheitshinweise sorgfältig durch bevor Sie das Modell in
Betrieb nehmen.
• Dieses Gerät ist nicht dafür bestimmt, durch Personen (einschließlich Kinder) mit eingeschränkten physischen, sen-
sorischen oder geistigen Fähigkeiten oder mangels Erfahrung und/oder mangels Wissen benutzt zu werden, es sei
denn, sie werden durch eine für ihre Sicherheit zuständige Person beaufsichtigt oder erhielten Anweisungen, wie das
Gerät zu benutzen ist.
• Der Benutzer ist im vollem Umfang für den richtigen Umgang mit dem Modell verantwortlich.
• Achtung: Gefahr von Augenverletzungen! Halten Sie einen Sicherheitsabstand von 1 - 2 Meter um sich oder andere
vor Verletzungen zu schützen.
• Jegliche Manipulation an der Struktur des Modells ist nicht erlaubt und führt zum sofortigen Verlust der Gewährleis-
tung.
• Fliegen Sie in keiner Umgebung mit mehr als +45°C und weniger als 10°C.
• Setzen Sie das Modell keiner direkten Sonneneinstrahlung, hoher Luftfeuchtigkeit oder Staubeinwirkung aus.
• Achten Sie darauf, dass manche Teile am Modell heiß werden können.
Betrieb
• Achtung! In einigen Ländern ist es vorgeschrieben für den (Indoor-) Betrieb eines Modells eine spezielle
Modellhalterhaftpichtversicherung abzuschließen. Informationen hierzu bekommen Sie bei den Modellsportver-
bänden oder bei einer Versicherung.
• Benutzen Sie das Fluggerät niemals in der Nähe von Flughäfen, Bahnanlagen oder Straßen. Halten Sie immer
ausreichend Abstand von den gefahrenträchtigen und besonders geschützten Bereichen.
• Betreiben Sie Ihr Modell nicht in der Nähe von Funkstationen, Hochspannungsleitungen, Transformatorkästen oder
ähnlichem! Diese Einrichtungen können Funkstörungen verursachen!
• Um Unfälle zu vermeiden, iegen Sie das Modell nie in der Nähe von Personen, Tieren oder sonstigen Hindernissen.
Hände, Haare und lose Kleidung vom Rotor entfernt halten. Nicht in die Rotoren greifen!
• Setzen Sie Outdoor-Modelle nur bei gutem Wetter ein. Bei Regen, Sturm oder gar Gewitter dürfen Sie diese Modelle
nicht betreiben
• Suchen Sie ein Fluggelände, das den gesetzlichen Voraussetzungen entspricht und frei von Hindernissen wie Bäu-
men, Häusern usw. ist.
• Aus Gründen der Sicherheit und um zufriedenstellende Flugergebnisse zu erzielen, ist auf einen ausreichend großen
freien Raum (ca. 6 x 5 x 2,5 m) zu achten. Dabei muss der Raum frei von Hindernissen (Lampen, losen Gegenstän-
den, etc.) sein. Außerdem sollte kein Luftzug vorhanden sein.
• Das Modell nicht aus großen Höhen fallen oder abstürzen lassen. Dies kann die Flugeigenschaften und die Lebens-
zeit des Modells beeinträchtigen.
Akkusicherheitshinweise
Durch die hohe Energiedichte (bis zu 150Wh/kg) sind die Zellen nicht ungefährlich und bedürfen einer besonderen
Sorgfalt! Die Firma JAMARA schließt daher ausdrücklich jegliche Haftung für Schäden aus, die durch den fehlerhaften
Umgang mit den Lithium-Polymer-Zellen entstehen.
• Bei unsachgemäßer Verwendung des Akkus besteht Brand- oder Verätzungsgefahr.
• Überladen, zu hohe Ströme, oder Tiefentladen zerstört die Zelle.
• Vor mechanischer Belastung (Quetschen, Drücken, Biegen, Bohren) schützen.
• Akkus keinesfalls öffnen oder aufschneiden, nicht ins Feuer werfen, von Kindern fernhalten.
• Behandeln Sie beschädigte oder auslaufende Akkus mit äußerster Vorsicht. Es können Verletzungen oder Schäden
am Gerät entstehen.
• Akkus auf keinen Fall kurzschließen und immer auf die richtige Polung achten
• Akkus vor Hitzeeinwirkung über 65°C schützen, fern von heißen Teilen (z. B. Auspuff) montieren.
• Vor der Lagerung (z. B. im Winter) die Akkus laden - nicht im entladenen und nicht im vollgeladenen Zustand lagern!
Bei längerer Lagerzeit sollte der Ladezustand gelegentlich kontrolliert werden.
• Der Inhalt der Zelle ist schädlich für Haut und Auge.
• Nach Hautkontakt mit viel Wasser abspülen und benetzte Kleidung ablegen.
• Nach Augenkontakt mit viel Wasser abspülen und einen Arzt konsultieren.
Sollte die Zelle sich überhitzen, aufblähen, rauchen oder brennen, darf dieses nicht mehr berührt werden. Halten
Sie Sicherheitsabstand und stellen Sie geeignete Löschmittel bereit (kein Wasser Explosionsgefahr, gut trocke-
ner Sand, Feuerlöscher, Löschdecken, Salzwasser).
GB - Security instructions
• Read the instructions and security instructions carefully before using the model.
• This product is not intended for use by individuals (including children) with reduced physical, sensory or mental
capabilities or lack of experience and / or knowledge, unless they are supervised by a person responsible for their
safety and is able to give instructions about how the product should be used. Children should be supervised to ensure
that they do not play with the product.
• The User is fully responsible for the correct use of the model.
• Warning: Risk of eye injury! Keep a safe distance of 1 - 2 meters to yourself or others to protect against injury.
• The model should not be changed in any way, doing so will invalidate the guarantee.
• Do not y in temperatures above + 45° C or below 10° C.
• Protect the model from strong sunlight, moisture and dust.
• Be aware that some parts of the model may get hot.
Operating
• Attention! In some countries it is a legal requirement to carry third party indemnity insurance when operating a radio
controlled model. Please ask your local dealer, governing body or your insurance company for details.
• Never use the model near an airport, railway or roads. Always keep a safe distance from potentially hazardous and
specially protected areas.
• Do not operate your model near radio stations, power lines, transformer boxes or similar facilities! This can result in
radio interference, causing loss of control over the model.
• It must be observed that neither persons or animals or other obstacles are within the operating enviroment.
Keep hands, hair and loose clothing away from the rotor, not reach into the rotors.
• The Outdoor-model can only be own in good weather. Do not y in wind, rain or thunder storms.
• Find a place to y which complies with any laws, and is free from obstacles such as trees, houses and / or other
obstacles.
• To ensure safety and for best results, the model may only be own in a large open room (~ 6 x 5 x 2,5 m), free of
obstacles such as lights or furniture. In addition, no draft should be available.
• Do not let the model fall or crash from high height. This may affect the ight characteristics and lifetime of your model.
Safety precausions for battery
Because of the high power compactivity (up to 150 Wh/kg) the cells are quite dangerous and need special care! The
company Jamara excludes explicitly, all types of liability for damages, that can occure when using the Lithium-Polymer-
Cells indequate.
• When using the battery incorrect there is a risk of getting re or acid-injuries.
• Overcharging, too high power, or discharging at low level destroys the cell.
• Protect from mechanical stress (squeezing, pushing, bending, drilling).
• Never open or cut batteries, do not throw into re, keep away from children.
• Handle damaged or leaking battery with care. Injuries or damages to the product can occure.
• Under no circumstance short-circuit the device and always watch out for correct polarity.
• Protect batteries from heat above 65 °C , mount away from hot objects (for example exhaust pipe).
• Before storing batteries (for example in the winter) charge the battery. Do not store in fully charged or in non charged
state!
• The contents of the cell is harmfull for skin and eye.
• If the content comes into contact with skin, clean with plenty of water and take off moisted clothes.
• If the content comes into contact with the eyes, clean with plenty of water and consult a doctor.
If the cell overheats, swells, burns or smoke is coming from it, do not touch it under any circumstances. Keep
away in a safe distance and prepare adequate extinguishing agents such (No water explosion, well dry sand,
re extinguishers, re blanket, salt water).
FR - Consignes de sécurités
• Veillez lire attentivement la notice et sécurités d’utilisation avant d’utiliser!
• Ce dispositif n‘est pas destiné à être utilisé par des personnes (y compris les enfants) dont les capacités physiques,
sensorielles ou mentales ou manque d‘expérience et / ou les connaissances pour être, sauf s‘ils sont surveillés par
une personne responsable de leur sécurité ou reçu des instructions sur la façon dont l‘appareil doit être utilisé. Les
enfants doivent être surveillés pour s‘assurer qu‘ils ne jouent pas avec l‘appareil.t.
• L’utilisateur prend la responsabilité entière du correct maniement du modèle.
• Attention: Risque de blessures à l‘oeil! Distance de sécurité d‘au moins 1 à 2 mètres à eux-mêmes ou d‘autres
protègent contre les blessures.
• Manipulez les éléments endommagés avec énormément de précautions. Des brûlures acides ou des dommages sur
l‘appareil. Sont à craindre.
• Ne volez pas si l‘air ambiant fait plus de +45°C ou moins de 10°C.
• N‘exposez jamais votre modèle directement dans les rayons du soleil, ne l‘utilisez pas par temps avec humidité
relative élevée ou dans un endroit plein de poussière.
• Attention, certaines pièces de votre modèle peuvent chauffer.
Mise en marche
• Attention ! Dans quelques pays il est nécessaire de souscrire à une assurance spéciale si vous souhaitez utiliser
des modèles réduits. Pour avoir plus d‘informations à ce sujet, veillez vous adresser au club de modèles réduits le
plus proche ou un organisme d‘assurance.
• N‘utilisez jamais votre modèle volant dans les environs d‘un aérodrome ou aéroport, installations de chemins de fer
ou de routes. Gardez toujours une distance sufsante par rapport au zones de dangers ou protégées.
• N’utilisez jamais votre modèle dans les environs de stations d’émissions, lignes à haute tensions, transformateurs ou
équi valent! Ces installations peuvent provoquer des perturbations et entraîner la perte du contrôle de votre modèle
ou même du modèle lui-même!
• Aucune personne, aucun animal ou outre obstracle ne dolvent se trouter dans l‘espace de fonctionnement de
modèle. Gardez les mains, cheveux et vêtement à bonne distance des parties en rotations, pas la main dans les
rotors.
• N’utilisez votre modèle outdoor que par temps ensoleillé. Surtout pas s’il pleut, s’il y a beaucoup de vent ou lors d’un
orage.
• Choisissez un terrain répondant aux exigences des textes de lois en vigueur pour faire évoluer votre modèle et libre
de tout obstacle comme par exemple arbres ou maisons etc.
• Pour des raisons de sécurités et an de proter pleinement du plaisir en vol, veillez à toujours utiliser votre modèle
dans un endroit ayant sufsamment de place (~ 6 x 5 x 2,5 m) pour évoluer. Pour cela il est conseillé d‘avoir le moins
d‘obstacles possibles (lampes, bibelots,…) pouvant être fatal pour votre modèle. Uniquement utiliser à l‘intérieur, à
l‘abri des courants d‘air.
• Ne pas laisser tomber le modèle de hauteurs élevées; ceci pourrait limiter les qualité de vol et la durée de vie du
modèle.
Consignes de sécurité de la accu
De part leur énorme densité énergétique (jusqu‘à 150Wh/Kg), les éléments Lithium ne sont pas sans dangers et né-
cessitent un soin accu! De ce fait, la société Jamara décline toute garantie pour les dégâts qui peuvent résulter d‘une
utilisation non conforme des éléments Lithium.
• Une utilisation non conforme peut déclencher un incendie ou des brûlures acides.
• Surcharge, des courants trop élevés ou une trop grande décharge détruisent les éléments.
• Protégez les éléments contre des chocs mécaniques (pincement, pression, torsion, perçage).
• N‘ouvrez ou ne découpez en aucun cas les accus, ne les jetez pas dans le feu, et tenez les à bonne distance des
enfants.
• Manipulez les éléments endommagés avec énormément de précautions. Des brûlures acides ou des dommages sur
l‘appareil. Sont à craindre.
• Ne court-circuitez en aucun cas les accus et veillez à toujours respecter la bonne polarité.
• Protégé les accus d‘une température au-dessus de 65°C et eloignez ceux-ci de corps chauffants (par ex.: pots
d‘échappements).
• Chargez les accus avant stockage (par ex.: en hivers). Ceux-ci ne doivent pas être ni dans un état déchargé ni
pleinement chargé.
• Le contenu des éléments est très dangereux pour les yeux et peau.
• Après un contact avec la peau, rincez la zone avec beaucoup d‘eau et enlevez les vêtements touchés.
• Après un contact avec les yeux, rincez avec beaucoup d‘eau et consultez un médecin.
Si les éléments venaient à surchauffer, goner ou prendre feu, il ne surtout plus les toucher. Tenez-vous à
bonne distance de celles-ci et cherchez un extincteur adapté (Pas l‘eau (risque d’explosion), ainsi le sable sec,
extincteur, l‘eau salée).
IT - Istruzioni per la sicurezza
• Vi preghiamo di leggere attentamente le istruzioni e Istruzioni per la sicurezza prima di
usare il modello.
• Questo prodotto non è destinato ad essere utilizzato da persone (bambini compresi) con capacità
siche limitate, con limitazioni sensoriale o mentali oppure mancanza di esperienza e/o di
conoscenza. A meno che siano sorvegliate da una persona responsabile della loro sicurezza o
ricevano istruzioni su come usare il prodotto in modo corretto. Bambini devono essere
supervisionati per assicurare che non giocano con l’apparecchio.
• L’utente é responsabile in pieno per il corretto utilizzo del modello.
• Attenzione: Rischio di lesioni agli occhi! Distanza di sicurezza di 1 - 2 metri per sé o per altri protezione contro
eventuali lesioni. Vola il modello mai in prossimità di persone.
• Ogni modica alle parti di un kit ne annulleranno la garanzia.
• Non volate con temperature superiori a 45°C e meno di 10°C.
• Non usate il modello direttamente ai raggi solari, ambienti troppo umidi, polverosi o troppo soleggiati.
• Assicurarsi che alcune parti del modello possono essere caldi.
Funzionamento
• Attenzione! In molti Paesi l‘ impiego di modelli radiocomandati richiede una assicurazione obbligatoria. Informatevi
perciò presso il vostro assicuratore o presso il vostro negoziante di ducia.
• Non utilizzare mai l´unita di volo nelle vicinanze di aeroporti, ferrovie o stazioni ferroviarie e strade. Mantenere
sempre una distanza di sicurezza adeguata dalle zone potenzialmente pericolose o di alta protezione.
• Non usate il modello nelle vicinanze di stazione radio, linea di alta tensione, casse di trasformazione oppure simile.
Queste installazioni causano disturbi frequenza che portano alla perdita del controllo no alla perdita del modello!
• Nel luogo di funzionamento non devono essere presenti persone o animali né ostacoli di alcun tipo.
Tenete mani, capelli e parti svolazzanti lontane dalle pale in rotazione, non toccare i rotori.
• Evitate di volare con vento forte, pioggia o temporale.
• Volate sempre in aree libere legalmente autorizzate, lontane da case, alberi e/o altri ostacoli.
• Fate volare il vostro modello lontano da ostacoli ed in uno spazio (~ 6 x 5 x 2,5 m) abbastanza grande da evitare che
il modello possa scontrarsi con ostacoli che lo danneggerebbero. Utilizzare esclusivamente in ambiente interno privo
di correnti d‘aria.
• Non lasciate che il modello precipita di una grande altezza. Questo può inuenzare le caratteristiche di volo e la
durata del modello.
Sicurezza della batteria
Dovuto al grande carico energetico (no a 150 KW/h le batterie Litio non vanno sottovalutate e prese alla leggera, ma
richiedono una particolare cura. Per questo JAMARA e.K. declina ogni responsabilità sull‘ impiego di queste batterie e
dai danni che potrebbero derivare dal loro utilizzo.
• Un uso non appropiato di queste batterie può provocare incendi. E relative ustioni.
• I sovraccarichi ad alta intensità o le scariche profonde possono danneggiarle.
• Evitate le sollecitazioni meccaniche (schiacciare, piegare, forare.)
• Non aprite, non gettate nel fuoco e non lasciate vicino ai bambini
• Manipolate con molta attenzione le batterie danneggiate o con perdita di liquido. Possono causare danni alle
apparecchiature
• Non cortocircuitatele e vericate sempre che la polarità sia corretta.
• Vericate che non sorpassino mai i 65°C e non montatele vicino a fonti di calore ( tubi di scarico
dei motori o simili)
• Prima di metterle via per una sosta nel loro impiego, caricatele solo a metà. Non conservatele mai
a pieno carico. Durante il periodo di conservazione controllatele periodicamente.
• Il liquido contenuto nelle batterie é dannoso per la pelle e per gli occhi.
• In caso di contatto con gli occhi, lavate abbondantemente con acqua e consultate il medico
• In caso di contatto con la pelle, lavate con acqua e togliete immediatamente i vestiti che si siano
In caso che il pacco batterie si dovrebbe riscaldare troppo rapidamente, gonarsi, fumare o prendere fuco non
la prendete nelle mani e non toccatela. Mantenete und distanza di sicurezza e in caso di incendio, spegnarla
con polvere antifuoco oppure con sabbia (No, acqua, pericolo di esplosione, sabbia asciutta, estintore, coperta
anti incendio, acqua di mare).
ES - Seguridad
• Lea atentamente las instrucciones y seguridad antes de poner el modelo en funcionamiento!
• Es producto no es para personas (incluidos niños) con discapacidad física, mental y sensonriais. O ninguna
experiencia ni conocimiento, a menos que vayan acompañados de un responsable o recibir instrucciones ¿Cómo se
debe usar. Los niños deben ser supervisados para asegurarse de que no te metas con el producto.
• El usario es responsable en su totalidad para el uso correcto del modelo.
• Precaución: peligro de lesiones en los ojos! Distancia de seguridad mínima de 1-2 metros a sí mismos oa otros
protegen contra lesiones.
• Se prohíbe cualquier modicación de la estructura del modelo ya que anulará la garantía inmediatamente.
• Nunca vuele en entornos donde la temperatura sea superior a +45° o inferior a 10°C.
• No exponga el modelo a los rayos solares directos, a altos índices de humedad o entornos muy polvorientos.
• No olvide que muchas piezas del modelo pueden calentarse.
Operación
• ¡Atención! En algunos países es imprescindible suscribir una póliza de seguros especial con cobertura para la
práctica del aeromodelismo. Encontrará más información sobre esto en su club local o contactando con una
aseguradora.
• Nunca utilizar el aparato de vuelo cerca de los aeropuertos, ferrocarriles o carreteras. Mantenga siempre una
distancia segura de las áreas potencialmente peligrosas y especialmente protegida.
• No haga funcionar su modelo en las proximidades de las estaciones de radio,líneas eléctricas, cajas de
transformadores, o como! Esto signi ca que puede la interferencia de radio princi pal causa la pérda de control sobre
el modelo!
• En el entorno de funcionamiento no deben haber personas, animales ni otros obstáculos. Mantenga las manos y el
cabello lejos del rotor, no introduzca las manos en los rotores.
• Utilice el modelo outdoor solo cuando las condiciones atmosféricas sean Buenas. No debería utilizar el modelo si
llueve, hay tormentas o se prevén malas condiciones atmosféricas.
• Busque un espacio abierto, que cumpla con la normativa vigente, y libre de obstáculos como árboles, edicios y / o
otros obstáculos.
• Para garantizar la seguridad, se debe volar en las divisiones (~ 6 x 5 x 2,5 m) amplias y sin obstáculos, como
lámparas y muebles. Use el modelo sólo en un interior sin corriente de aire.
• No deje que el modelo cae desde una gran altura. Este puede afectar a las características de vuelo y la duración del
modelo.
Seguridad de la batería
¡Debido a su densidad energética (hasta 150Kw/Kg.), los elementos no son inofensivos y necesitan de unos cuidados
mínimos!. La empresa Jamara e. K., de manera explicita, declina cualquier responsabilidad sobre los daños causado o
derivados, por un manejo erróneo de las baterías Litio.
• Una utilización inapropiada conlleva riesgo de lesiones y/o incendios.
• Los elementos se dañarán por sobrecargas, corrientes muy altas, o descargas profundas.
• Proteja las baterías de golpes, dobleces, perforaciones, tensiones, etc.
• Bajo ningún concepto las abra o corte, no las arroje al fuego, manténgalas lejos del alcance de los niños.
• Si están oxidadas o pierden electrolitos, manéjelas con mucho cuidado. Pueden estropear el dispositivo o causarle
lesiones.
• Nunca las cortocircuite, respetando en todo momento la polaridad.
• No permita que se calienten a más de 65ºC, aléjelas de partes calientes (P. Ej., la salida del escape).
• Cárguelas antes de guardarlas (p.ej., en invierno) - ¡No las guarde descargada ni tampoco a plena carga!
Controle regularmente el nivel de carga durante los periodos de almacenamiento prolongados.
• El contenido de los elementos es dañino para la piel y los ojos.
• Si entra en contacto con la piel, lávese con agua y quítese la ropa usada.
• En contacto con los ojos, enjuáguese con abundante agua y visite al médico.
En caso de sobrecalentamiento de la batería, o cuando se ina, humea o empieza a quemarse, ya no debe
tocarse de ningún modo. Por favor manténga una distancia de seguridad y ponga a disposición agentes para
extinción adecuados (No hay peligro de explosión en el agua, arena seca, extintores, mantas, agua salada).
Irrtum und technische Änderungen vorbehalten. Copyright JAMARA e.K. 2015
Kopie und Nachdruck, auch auszugsweise, nur mit Genehmigung von JAMARA e. K.
All rights reserved. Copyright JAMARA e.K. 2015
Copying or reproduction in whole or part, only with the expressed permission of JAMARA e.K.
JAMARA e.K.
Inh. Manuel Natterer
Am Lauerbühl 5 - DE-88317 Aichstetten
Tel. +49 (0) 75 65/94 12-0 - Fax +49 (0) 75 65/94 12-23
[email protected] ●www.jamara.com
Service - Tel. +49 (0) 75 65/94 12-66
kundenservice@ jamara.com
DE - Servicehändler | GB - Service centre | FR - Revendeur de service | IT - Centro assistenza | ES - Servicio asistencia
Reitter Modellbau Versand
Degerfeldstrasse 11
72461 Albstadt
Tel.: 07432 9802700
Fax: 07432 2009594
E-Mail: [email protected]
Web: www.modellbauversand.de
Web: www.jamara-ersatzteile.de
Extra Trade
Lindenstraße 82
66787 Wadgassen
Tel.: 06834 9604952
Fax: 06834 9604963
E-Mail: [email protected]
Web: www.extra-trade.de
Spielwaren und Modellbau Böckle
Dr.-A.-Heinzlestr. 3
AT-6840 Götzis
Tel.: 0043 (0)5523 52220
Fax: 0043 (0)5523 522204
E-Mail: [email protected]
Web: www.modellbau-boeckle.com
Modellugshop
Am Bahndamm 6
86650 Wemding
Tel.: 07151 5002192
Fax: 07151 5002193
E-Mail: [email protected]
Web: www.bay-tec.de
D-Edition e.K.
Sailweg 7
95339 Neuenmarkt
Tel.: 09227 940777
Fax: 09227 940747
E-Mail: [email protected]
Web: www.d-edition.de
Modellbau Zentral
Servicestelle
Bresteneggstr. 2
CH-6460 Altdorf
Tel.: 0041 (0)79 4296225
E-Mail: [email protected]
Web: www.modellbau-zentral.ch
D
D
D
D
AT CH

This manual suits for next models

1

Other Jamara Toy manuals

Jamara Traffic Light-Grand User manual

Jamara

Jamara Traffic Light-Grand User manual

Jamara Fendt Former User manual

Jamara

Jamara Fendt Former User manual

Jamara Islander EP User manual

Jamara

Jamara Islander EP User manual

Jamara Bruni User manual

Jamara

Jamara Bruni User manual

Jamara Barbados Motoryacht User manual

Jamara

Jamara Barbados Motoryacht User manual

Jamara 410042 User manual

Jamara

Jamara 410042 User manual

Jamara SIAI Marchetti SF-260 User manual

Jamara

Jamara SIAI Marchetti SF-260 User manual

Jamara G230.4 Gyro User manual

Jamara

Jamara G230.4 Gyro User manual

Jamara Snow Play 460372 User manual

Jamara

Jamara Snow Play 460372 User manual

Jamara Air Trainer 46 User manual

Jamara

Jamara Air Trainer 46 User manual

Jamara P-47 Thunderbolt User manual

Jamara

Jamara P-47 Thunderbolt User manual

Jamara ASK 21 EP User manual

Jamara

Jamara ASK 21 EP User manual

Jamara Starlet 006140 User manual

Jamara

Jamara Starlet 006140 User manual

Jamara Ferrari 458 User manual

Jamara

Jamara Ferrari 458 User manual

Jamara Gee Bee Z 00 6131 User manual

Jamara

Jamara Gee Bee Z 00 6131 User manual

Jamara Mc Fizz Water Gun with Tank Backpack 2,5L User manual

Jamara

Jamara Mc Fizz Water Gun with Tank Backpack 2,5L User manual

Jamara Push Car User manual

Jamara

Jamara Push Car User manual

Jamara 460955 User manual

Jamara

Jamara 460955 User manual

Jamara Traffic Light-Grand User manual

Jamara

Jamara Traffic Light-Grand User manual

Jamara Tractor Accessories Pottinger Former User manual

Jamara

Jamara Tractor Accessories Pottinger Former User manual

Jamara 405236 User manual

Jamara

Jamara 405236 User manual

Jamara GYRO V2 User manual

Jamara

Jamara GYRO V2 User manual

Jamara Mercedes-AMG G63 User manual

Jamara

Jamara Mercedes-AMG G63 User manual

Jamara Traktor Zubehor Kipper User manual

Jamara

Jamara Traktor Zubehor Kipper User manual

Popular Toy manuals by other brands

roco 7340001 operating manual

roco

roco 7340001 operating manual

Train-Tech Sensor Signals instructions

Train-Tech

Train-Tech Sensor Signals instructions

Fisher-Price Bee-Bop Buildin Travelin' Tractor 73436 instructions

Fisher-Price

Fisher-Price Bee-Bop Buildin Travelin' Tractor 73436 instructions

marklin 37127 user manual

marklin

marklin 37127 user manual

Radica Games Sport Bass Fishin' 71014 instruction manual

Radica Games

Radica Games Sport Bass Fishin' 71014 instruction manual

Fisher-Price Imaginext N0764 instruction sheet

Fisher-Price

Fisher-Price Imaginext N0764 instruction sheet

LeapFrog Blue's Clues & You! Play & Learn Maracas Parents' guide

LeapFrog

LeapFrog Blue's Clues & You! Play & Learn Maracas Parents' guide

Mattel Barbie FASHION FEVER L6490 instructions

Mattel

Mattel Barbie FASHION FEVER L6490 instructions

MixRC T38 instruction manual

MixRC

MixRC T38 instruction manual

Conrad 2347401 operating instructions

Conrad

Conrad 2347401 operating instructions

Auhagen Two-track locomotive shed 11 332 Assembly instructions

Auhagen

Auhagen Two-track locomotive shed 11 332 Assembly instructions

Chicco Touch & Spin instruction manual

Chicco

Chicco Touch & Spin instruction manual

Tiger Electronics Find Furby 70-883 instruction manual

Tiger Electronics

Tiger Electronics Find Furby 70-883 instruction manual

Kasama Srimok 90 manual

Kasama

Kasama Srimok 90 manual

LEGO Turtles 79103 Assembly instructions

LEGO

LEGO Turtles 79103 Assembly instructions

TinkerHouse MAGLEV RAIL STARTER Build instructions

TinkerHouse

TinkerHouse MAGLEV RAIL STARTER Build instructions

Monogram KIT 5716 Assembly manual

Monogram

Monogram KIT 5716 Assembly manual

Hangar 9 Hangar 9 P-51 Mustang ARF instruction manual

Hangar 9

Hangar 9 Hangar 9 P-51 Mustang ARF instruction manual

manuals.online logo
manuals.online logoBrands
  • About & Mission
  • Contact us
  • Privacy Policy
  • Terms and Conditions

Copyright 2025 Manuals.Online. All Rights Reserved.