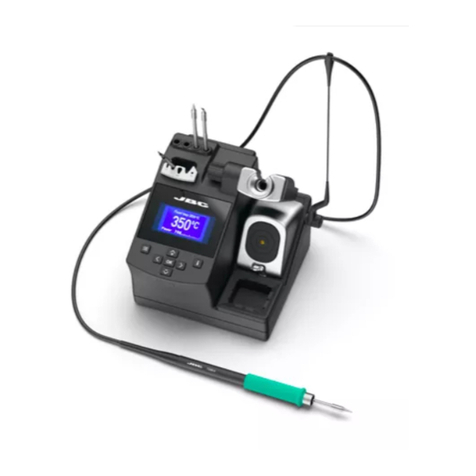
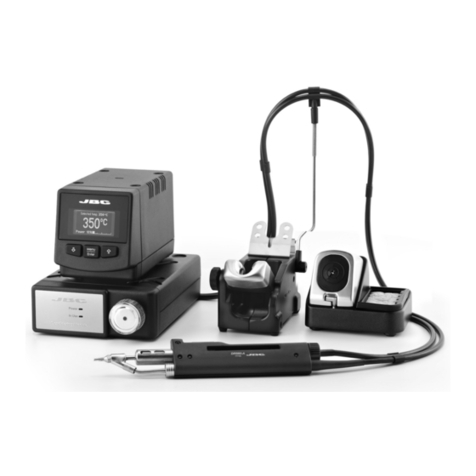
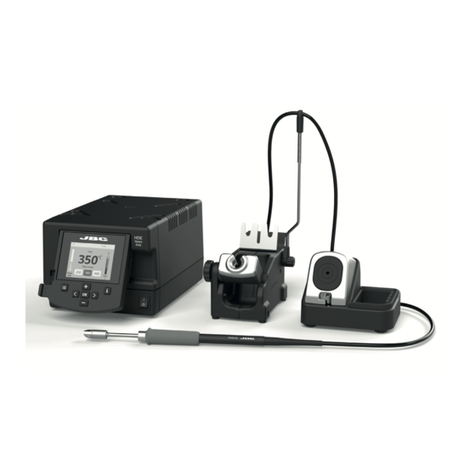
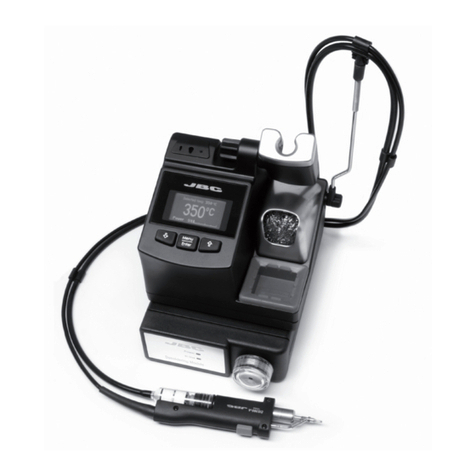
jbc CP-E User manual

www.jbctools.com
Compact
Micro Tweezers Station
Ref. CP-E
English 2
Page
Deutsch 34
Español 18
中文 48

www.jbctools.com
2 3
Packing List
The following items should be included:
Power Socket
Main switch
Fuse
Cable collector
Process
Screen
Adjustable Stand:
Intelligent Heat
Management
Equipotential connection
USB-B connector
Features
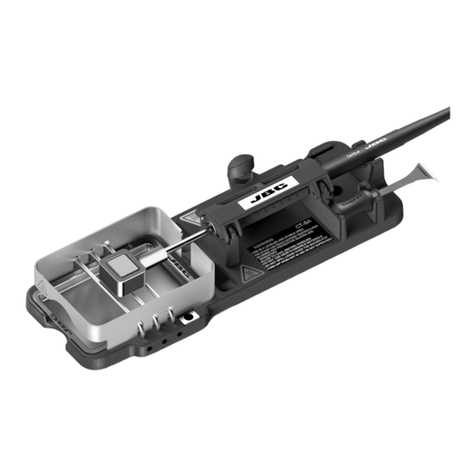
Micro Tweezers
Ref. PA120-A
Power Cord ........................................ 1 unit
Ref. 0009417 (100V/120V)
0009401 (230V)
Manual ........................ 1 unit
Ref. 0016885
Brass Wool ..................1 unit
Ref. CL6210
ww w.j bctools.c om
Sponge ........................ 1 unit
Ref. S0354
Micro Tweezers ..................................... 1 unit
Ref. PA120-A
Compact
Micro Tweezers Station
Ref. CP-E
CP Control Unit ...................................... 1 unit
Ref. CP-1E (120V)
CP-2E (230V)
CP-9E (100V)
Cartridges (x2) ................................... 1 unit
Ref. C120002
Tip Cleaner brass wool
with antisplash
membrane

www.jbctools.com
4 5
Adjustable stand Cable collector (Ref. CC3702)
Adjust the tool stand to suit
your work position.
Place the cable on the collector so that the working area is free
of cable.
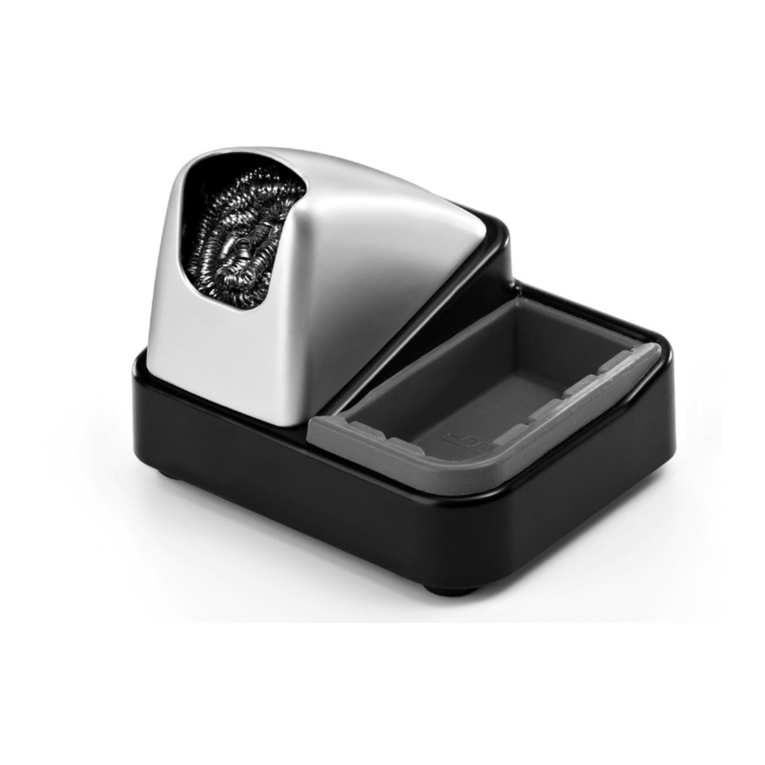
Tip Cleaner
Brass Wool
Ref. CL6210
Very effective
cleaning method.
Leaves a small layer
of solder on the tip
preventing oxidation
between cleaning
and rewetting.
Select the option to suit your needs and improve the thermal transfer of the tip.
Splashguard
Ref. 0016953
It prevents splashing of solder particles
when using the brass wool.
Antisplash Rubber
Ref. 0016954
Prevents splashing to maintain the work area
clean.
Removing the splashguard:
1. Unlock the splashguard. 2. Remove it.
Lock
More cleaning options (not supplied):
Inox Wool
Ref. CL6205
Provides a superior
cleaning of the tip.
Metal Brush
Ref. CL6220
When used carefully, it
provides a more thorough
cleaning.
Wiper
A temperature resistant receptacle
for removing excess solder by gently
tapping or wiping.
Sponge
Ref. S0354
The least harmful cleaning
method. Keep the sponge
damp with distilled water
when working to avoid tip
wear.
Tapping:
Tap gently to remove excess
solder.
Wiping:
Use the slots to remove
remaining particles.
Wiper
If the tip is very dirty,
JBC recommends first
cleaning it with the wiper
to remove excess solder.

www.jbctools.com
6 7
2. Inserting
3. Aligning 4. Fixing
Align the tip of the cartridge. Use a flat pliers
for a correct tip alignment.
Do not over-tighten the cartridge.
Changing cartridge
For a safe cartridge change, unplug the tool or turn the station off before following these guidelines:
Loosen the screw and remove the cartridge.
Use a flat pliers if still hot.
1. Removing
Important: Tighten the screw again being
careful not to over-tighten. This is necessary
for the tool to function.
Important: Insert the cartridge as far as
the mark for a correct connection.
Mark
Alignment
Compatible cartridges
CP station works with C120 cartridge range. Find the model that best suits your soldering needs
in www.jbctools.com
ø0,7 1,5mm
ø 0,2
5mm
6mm
C120-009 C120-010
C120-004 C120-001C120-005 C120-009 C120-010
USB Connector
Download the latest software from our website to improve your soldering station.
JBC Updater
www.jbctools.com/software.html
Update the station software via USB connection:
Cable USB AB
JBC
Manager
JBC
Updater
JBC Manager
www.jbctools.com/manager.html
Manage and monitor as many stations as your PC can handle by using the JBC Manager. You can
export data to another PC.
Register Settings
Create graphs of the
soldering process in real
time with power and
temperature data.
Manager Settings
Change settings for a
group of JBC stations at
the same time.
any JBC
station
USB
Hub
Cable
USB AB

Main menu
4 Counters
5
Program version
Exit
1 Reset settings
2
Station settings
3
Tool settings
4
Hibernation hours 0
5
No tool hours 0
6 Sleep cycles
0
Tool PA
Back
Back
1
Fix one temp -----
2
Temp levels set OFF
3
Sleep delay 0 min
5 Help text OFF
6 Beep ON
7
Change PIN
1 Temp unit
Celsius
2
Maximum temp 400
0
C
3
Minimum temp 200
0
C
4
Metronome ----
1
Plugged hours 0
2
Working hours 0
3
Sleep hours 0
Counters
Tool settings
Station settings
0
Selected temp.
350
o
C
Power 5%
Fixed temp.
350
o
C
Levels ºC
270 350 400
-10
4
Sleep temp 150
0
C
5
Hibernationdelay 10 min
6
Temp adjust + O
O
C
Tool PA
Back
Sleep temp 150
o
C
Sleep
Tool in the stand, no heat
Hibernation
0
c
Power 5%
350
Selected temp
350
o
C
00
cc
350 350
c
350
www.jbctools.com
8 9
Menu Screen
Original PIN: 0105
The work screen provides
useful information of tool
status in real time.
Work Screen
Control Process
Displays a specific fixed temp.
Shown when you have
selected temp. levels. The
values must be adjusted
according to the work needs.
“Temp. Adjust” parameter.
It provides a more precise
adjustment between the
selected temp and the
actual one.
Operation
The JBC Exclusive Heating System
This revolutionary technology is able to recover tip temperature extremely quickly.
This allows the user to work at a lower temperature.
As a result, tip life increases up to 5.
· Change temperature
(from 90 to 450ºC)
· Select temperature levels
· Fix one temperature
· Change Sleep temperature
· Set Sleep delay
(from 0 to 9 min or no Sleep)
· Change Hibernation delay
(from 0 to 35 min)
Long time in
the stand
1. Work
When the tool is lifted from the
stand the tip will heat up to the
selected temperature.
2. Sleep
When the tool is in the stand,
the temperature falls to the
preset sleep temperature.
3. Hibernation
After longer periods of
inactivity, the power is cut off
and the tool cools down to
room temperature.

www.jbctools.com
10 11
Tool Settings
Sleep delay
Set the time that the tool
will remain at the selected
temperature when in the
stand before entering
sleep mode. The tip tem-
perature will then drop to
the Sleep temperature.
Sleep temperature
This is the set tempera-
ture the tip reaches when
returned to the stand.
Fix one temperature
Fix a value within the
temperature range of the sta-
tion (90-450ºC/190-840ºF).
Temperature levels set
Similar to “Fix one temp”
parameter. In this case, the
user can set up to 3 values for
different power requirements.
The sleep temperatures
are set to achieve a ba-
lance between preventing
oxidation and reaching the
working temperature in a few
seconds.
Ideal for soldering more than
one component at a specific
temperature. The station will
reject any attempt to change
the temperature.
This allows a quick change
between 3 different tempe-
ratures. Set them according
to the allowed values for your
soldering applications.
Because our tools reach the
working temperature from the
deafult Sleep mode in only a
few seconds, this parameter
is preset to 0 min. Once the
tool is returned to the stand
the temperature will automati-
cally drop to the sleep tempe-
rature, extending tip life and
avoiding oxidation. Retinning
the tip before placing the tool
in the stand will protect the tip
and extend its life.
Recommendations
Parameter description Warnings
N/a
N/a
Setting these
parameters to higher
values will unnecessarily
accelerate oxidation
and shorten tip life
especially when working
with temperatures up to
450°C (840°F).
Parameters
Station Settings
Minimum temperature
Set the minimum
temperature to work
with.
Min. temp. by default is
200ºC (392ºF). This
is considered to be a
proper starting point for
leaded applications.
Maximum temperature
Set the maximum
temperature to work
with.
Max. temp by default is
400°C (750°F). This is
considered high enough
to work with most lead-
free applications.
Temperature unit
Celsius (ºC) or Fahrenheit (ºF)
Metronome
This activates a beep sound.
Frequencies vary from 1 to 50
seconds.
Help text
Activate this parameter to
receive info from the system.
Beep
Enable/disable the beep
sound of the keypad.
Change pin
Change the default security
PIN number (0105).
Recommendations
Parameter description
The PIN must be entered
every time a parameter is
changed.
Useful for setting a work rate
in repetitive jobs. The beep
lets you know the length of
time the tip must be in con-
tact with the soldering joint.
N/a
N/a
N/a
Warnings
The station temperature
range is 90-450ºC
(190-840ºF). Change the
temperature limits when
working with less common
applications such as low /
high melting point solde-
ring (HMP) or plastics (e. g.
riveting).
N/a
N/a
N/a
N/a
In most cases,
working with temperatures
over 400°C (750°F) can
damage the PCB and its
components. Even in short
time periods of tip contact
with the soldering joint, the
flux may not work properly
and could seriously reduce
tip life.
If the solder joint requires
more power (e.g. multila-
yered or high dissipation
boards), JBC strongly
recommends using other
aids like preheaters.
Should you wish to modify the locked parameters ( ), please fill in the form on
www.jbctools.com/en/form and JBC will contact you. Be careful when using these parameters
as they may reduce the tip life if not used properly. Please follow the recommended guidelines:

www.jbctools.com
12 13
Before carrying out maintenance, always allow the equipment to cool.
- Clean the station screen with a glass cleaner
or a damp cloth. Clean
periodically
- Use a damp cloth to clean the casing and
the tool. Alcohol can only be used to clean
the metal parts.
- Periodically check that the metal parts of
the tool and stand are clean so that the
station can detect the tool status.
- Maintain tip surface clean and tinned prior
to storage in order to avoid tip oxidation.
Rusty and dirty surfaces reduce heat
transfer to the solder joint.
- Periodically check all cables and tubes.
Maintenance
1. Pull off the fuse holder and remove the
fuse. If necessary use a tool to lever it off.
2. Press the new fuse into the fuse holder
and replace it in the station.
- Replace a blown fuse as follows:
- Replace any defective or damaged pieces. Use original JBC spare parts only.
- Repairs should only be performed by a JBC authorized technical service.
Hibernation Delay
Set the time the tool will
remain at Sleep tempe-
rature before entering
the Hibernation mode.
At this time, the power
supply is cut off and
the tip remains at room
temperature.
Temp Adjustment
It provides a more preci-
se adjustment between
the selected temperature
and the actual one.
This function completely
protects the tip from oxida-
tion during long periods of
inactivity while the tool is in
the stand.
Retinning the tip before pla-
cing the tool in the stand also
helps prevent oxidation and
extends the life of the tip.
Set values within ±50°C
(± 90°F) to achieve zero error.
JBC strongly recommends
the use of TID-A or TIA-A
Thermometers to obtain
precise readings.
Tool Settings
RecommendationsParameter description Warnings
Increasing the default
value will accelerate oxi-
dation and shorten the tip
life.
When the user chan-
ges the cartridge type, the
parameter should be reset to
0°C/F or to the value needed
for this cartridge. E.g. If a
correction of +20°C (+36°F)
is set for the C245966 (thick
type) and then the user
changes the cartridge for a
C245030 (which is thinner)
without resetting, they would
be working at a temperature
of +20°C (+36°F) lower for
the C245030 which does
not need any temperature
adjustment.

www.jbctools.com
14 15
Specifications
CP-1E 120V 50/60Hz. Input fuse: 2A. Output: 23,5V. Control Unit model: CP-1E
CP-2E 230V 50/60Hz. Input fuse: 1A. Output: 23,5V. Control Unit model: CP-2E
CP-9E 100V 50/60Hz. Input fuse: 2A. Output: 23,5V. Control Unit model: CP-9E
- Weight: 2.7 Kg (5.95 lb)
- Dimensions: 150 x 175 x 145 mm
- Output Peak Power: 80W
- Temperature Range: 90-450°C (190°-840°F) (±5%)
- Tip to ground resistance: <2 ohms
- Tip to ground voltage: <2mV RMS
- Ambient operating temp: 10-40 ºC / 50-104 ºF
- USB connector station-PC
Complies with CE standards
ESD protected housing “skin effect”
It is imperative to follow safety guidelines to prevent electric
shock, injury, fire or explosion.
- Do not use the units for any purpose other than soldering or rework. Incorrect use may cause fire.
- The power cord must be plugged into approved bases. Be sure that it is properly grounded
before use. When unplugging it, hold the plug, not the wire.
- Do not work on electrically live parts.
- The tool should be placed in the stand when not in use in order to activate the sleep mode.
The soldering tip, the metal part of the tool and the stand may still be hot even when the station is
turned off. Handle with care, including when adjusting the stand position.
- Do not leave the appliance unattended when it is on.
- Do not cover the ventilation grills. Heat can cause inflamable products to ignite.
- Use a “non residue” classified flux and avoid contact with skin or eyes to prevent irritation.
- Be careful with the fumes produced when soldering.
- Keep your workplace clean and tidy. Wear appropriate protection glasses and gloves when
working to avoid personal harm.
- Utmost care must be taken with liquid tin waste which can cause burns.
- This appliance can be used by children over the age of eight and also persons with reduced
physical, sensory or mental capabilities or lack of experience provided that they have been given
adequate supervision or instruction concerning use of the appliance and understand the hazards
involved. Children must not play with the appliance.
- Maintenance must not be carried out by children unless supervised.
Safety

www.jbctools.com
16 17
Estación con Micro pinza
Ref. CP-E

www.jbctools.com
18 19
Recogecable
Limpiador
de puntas
Pantalla de
control
Soporte Ajustable:
Gestión inteligente
del calor
Power Cord
Cable de Red ....................................... 1 unidad
Ref. 0009417 (100V/120V)
0009401 (230V)
Manual ................... 1 unidad
Ref. 0016885
Brass Wool
Lana de latón ............ 1 unidad
Ref. CL6210
ww w.j bctools.c om
Sponge
Esponja ...................... 1 unidad
Ref. S0354
Compact
Micro Tweezers Station
Ref. CP-E
Cartridges (x2)
Cartuchos (x2) ................................ 1 unidad
Ref. C120002
Micro Tweezers
Micro pinza
Ref. PA120-A
Micro Tweezers
Micro pinza .......................................... 1 unidad
Ref. PA120-A
Entrada de Red
Interruptor de red
Fusible
Conexión Equipotencial
Conector USB-B
CaracterísticasComposición
Los siguientes artículos deben estar incluidos:
CF Control Unit
Unidad de Control CP ........................ 1 unidad
Ref. CP-1E (120V)
CP-2E (230V)
CP-9E (100V)

www.jbctools.com
20 21
Soporte Ajustable Recogecable (Ref. CC3702)
Ajuste el soporte de la herra-
mienta para adaptarlo a su
posición de trabajo.
Coloque el cable en el recogedor para mantener ordenada su
área de trabajo.
Limpiador de puntas
Brass Wool
Lana de latón
Ref. CL6210
Método muy eficaz.
Deja una pequeña
capa de estaño
en la punta para
prevenir la oxidación
entre la limpieza y la
rehumectación.
Elija la opción que se ajuste mejor a sus necesidades y mejore la transferencia térmica de la punta.
Splashguard Protector anti-salpicaduras
Ref. 0016953
Protege la estación de las salpicaduras
cuando se utiliza
la lana de latón.
Antisplash Rubber
Membrana protectora
Ref. 0016954
Protege el área de trabajo de salpicaduras en
el momento de limpiar la punta.
Si necesita extraer el protector anti-salpicaduras, siga los siguientes pasos:
1. Gire el pomo. 2. Retire el protector anti-salpicaduras.
Pomo
Otras opciones de limpieza (no incluidas):
Inox Wool
Lana inoxidable
Ref. CL6205
Proporciona una
limpieza superior de la
punta.
Metal Brush
Cepillo de metal
Ref. CL6220
Si se usa con cuidado,
proporciona una limpieza
más profunda.
Wiper Limpiador
Receptáculo resistente a la temperatura
que permite que se pueda eliminar el
exceso de soldadura golpeando
suavemente o limpiando.
Sponge Esponja
Ref. S0354
El método de limpieza menos
dañino. Mantenga la esponja
húmeda con agua destilada
cuando trabaje para evitar el
desgaste de la punta.
Golpeteo:
Sacuda ligeramente los
cartuchos para soltar el
exceso de estaño.
Limpieza:
Utilice las ranuras para
eliminar las partículas
adheridas a la punta.
Wiper Limpiador
Antes de utilizar la lana
se recomienda eliminar el
exceso de estaño acumulado
en la punta con el limpiador.

www.jbctools.com
22 23
Cambio de cartucho
Para un cambio de cartucho seguro, desconecte la herramienta o apague la estación antes de seguir
los siguientes pasos:
2. Inserte
3. Alinee 4. Fije
Alinee la punta del cartucho. Use unos
alicates planos para una correcta alineación
de la misma. No sobreapriete el cartucho.
Afloje el tornillo y retire el cartucho.
Use unos alicates planos si todavía está
caliente.
1. Retire
Importante: Apriete el tornillo de nuevo y
tenga cuidado de no apretarlo en exceso.
Esto es necesario para que la herramienta
funcione.
Importante: Inserte el cartucho hasta la
marca para una correcta conexión.
Marca
Alineación
Cartuchos compatibles
Las estaciones CP funcionan con cartuchos C120. Encuentre el modelo que mejor se adapte a sus
necesidades en www.jbctools.com
ø0,7 1,5mm
ø 0,2
5mm
6mm
C120-009 C120-010
C120-004 C120-001C120-005 C120-009 C120-010
Conector USB
Descargue los últimos softwares y actualizaciones en nuestra web para mejorar su estación.
www.jbctools.com/software.html
Actualice el programa (software) a través de la conexión USB:
Cable USB AB
JBC Manager · Gestor JBC
JBC Updater · Actualizador JBC
Register Settings
Configuración de registro
Obtenga gráficos del proceso
de soldadura con datos de
temperatura y potencia en
tiempo real.
Manager Settings
Configuración del gestor
Edite parámetros o gestione
un grupo de estaciones JBC
al mismo tiempo.
cualquier
estación JBC
USB
Hub
Cable
USB AB
www.jbctools.com/manager.html
Gestione y monitorice tantas estaciones como su ordenador permita utilizando el JBC Manager
(Gestor JBC). Puede exportar los datos a otros PCs.
JBC
Manager
JBC
Updater

Main menu
4 Counters
5
Program version
0
Selected temp.
350
o
C
Power 5%
Fixed temp.
350
o
C
Levels ºC
270 350 400
Exit
1 Reset settings
2
Station settings
3
Tool settings
4
Hibernation hours 0
5
No tool hours 0
6 Sleep cycles
0
4
Sleep temp 150
0
C
5
Hibernationdelay 10 min
6
Temp adjust + O
O
C
Tool PA
Tool PA
BackBack
1
Fix one temp -----
2
Temp levels set OFF
3
Sleep delay 0 min
1
Plugged hours 0
2
Working hours 0
3
Sleep hours 0
Counters
Tool settings
-10
Back
5 Help text OFF
6 Beep ON
7
Change PIN
1 Temp unit
Celsius
2
Maximum temp 400
0
C
3
Minimum temp 200
0
C
4
Metronome ----
Station settings
-10
Sleep temp 150
o
C
Sleep
Tool in the stand, no heat
Hibernation
0
Power 5%
Selected temp
350
o
C
00
cc
350 350
c
350
c
350
www.jbctools.com
24 25
Pantalla de menú
PIN original: 0105
Proporciona información
útil del estado de la
herramienta en tiempo real.
Se muestra cuando se fija una
temperatura específica.
Se muestra cuando se activan
los niveles de temperatura.
Los valores se deben ajustar
según necesidad.
Se muestra cuando se utiliza
“Temp. Adjust”, un ajuste más
preciso entre la temperatura
seleccionada y la real.
Pantalla de trabajo
Control del proceso
3. Hibernación
Tras largos períodos de
inactividad, se corta el
suministro de energía y
la punta se enfría hasta
temperatura ambiente.
Funcionamiento
El Exclusivo Sistema Calefactor de JBC
Esta tecnología revolucionaria es capaz de recuperar la temperatura extremadamente rápido.
Esto permite al usurio trabajar con temperaturas más bajas.
Y como resultado, la vida de la punta puede incrementarse hasta 5 veces.
1. Trabajo
Cuando se levanta la
herramienta del soporte, la
punta se calentará hasta la
temperatura seleccionada.
2. Sleep
Cuando la herramienta está
en el soporte, la temperatura
se reduce a la temperatura de
Sleep predefinida.
· Cambie la temperatura
(de 90 a 450ºC)
· Seleccione niveles de
temperatura
· Fije una temperatura
· Cambie la temp. de Sleep
· Retrase el tiempo de
entrada al modo Sleep
(de 0 a 9 min o no Sleep)
· Retrase el tiempo de
entrada al modo Hibernación
(de 0 a 35 min)
Largos períodos
en el soporte

www.jbctools.com
26 27
Configuración de la Herramienta (Tool Settings)
Retraso de Sleep
Configure el tiempo que
la herramienta perma-
necerá a la temperatura
seleccionada en el sopor-
te antes de entrar en el
modo Sleep.
Tras agotarse el tiempo,
la temperatura de la
punta caerá hasta el valor
de Sleep.
Temperatura de Sleep
Es la temperatura que
la herramienta tendrá
cuando descanse en el
soporte.
Fijar una temperatura
Fije un valor dentro del rango
de temperatura de la estación
90-450ºC (190-840ºF).
Niveles de temperatura
Similar al parámetro “Fijar una
temperatura”. En este caso se
pueden configurar 3 valores
de temperatura.
Las temperaturas de Sleep
están preconfiguradas para
conseguir un compromiso en-
tre la prevención de oxidación
y la disposición para alcanzar
la temperatura de trabajo en
pocos segundos.
Ideal para trabajos en los que
se deben soldar más de un
componente a una tempera-
tura específica. La estación
queda protegida por PIN y
deniega cualquier intento de
cambio de temperatura.
Permite conmutar entre dife-
rentes unidades de tempera-
tura definidas por el usuario.
Puede configurar hasta 3
temperaturas en función de
cada aplicación.
Dado que nuestras herra-
mientas pueden alcanzar la
temperatura de trabajo desde
la temperatura de Sleep en
pocos segundos, este pará-
metro viene preconfigurado a
0 min. Una vez la herramienta
se coloque en el soporte, la
temperatura de la punta cae
automáticamente al valor de
Sleep, hecho que alarga su
vida útil y reduce la oxidación.
Restañar la punta antes de
colocar la herramienta en el
soporte también ayudará a
proteger su recubrimiento y
garantizar su larga duración.
RecomendacionesDescripción del parámetro Advertencias
N/a
N/a
Configurar este
parámetro con valores
más altos acelerará
innecesariamente la
oxidación y acortará la
vida de la punta,
especialmente cuando se
trabaje con temperaturas
de hasta 450°C (840°F).
Parámetros
Configuración de la estación (Station Settings)
Temperatura mínima
Seleccione la temperatu-
ra mínima de trabajo.
Configurado por defecto
a 200ºC ya que se consi-
dera un valor adecuado
para empezar a soldar
con la mayoría de aplica-
ciones con plomo.
Temperatura máxima
Seleccione la temperatu-
ra máxima de trabajo.
Configurado por defecto
a 400°C (750°F) ya que
se considera un valor su-
ficiente para trabajar con
la mayoría de aplicacio-
nes sin plomo.
Unidad de temperatura
Celsius (ºC) o Fahrenheit (ºF)
Metrónomo
Permite activar un sonido
beep para repetirlo entre
1 y 50 segundos.
Texto de ayuda
Actívelo para recibir informa-
ción de la estación.
Beep
Active el sonido del teclado.
Cambie el PIN
Permite modificar el código
PIN de seguridad (0105).
Recomendaciones
Descripción del parámetro
La estación requiere entrar el
PIN cada vez que el usuario
entra en el menú para modifi-
car cualquier parámetro.
Ideal para trabajos repetitivos
ya que marca el ritmo de
trabajo a seguir. El sonido es-
tablece el tiempo de contacto
de la punta con la soldadura.
N/a
N/a
N/a
Advertencias
El rango de temperatura de
la estación es 90-450ºC
(190-840ºF). Modifique los
límites de temperatura cuan-
do trabaje con aplicaciones
menos comunes como son
las soldaduras con bajos /
altos puntos de fusión o los
plásticos (p. ej. riveting).
N/a
N/a
N/a
N/a
En general, trabajar
con temperaturas por
encima de 400°C (750°F)
puede dañar el PCB y los
componentes. Incluso en
tiempos cortos de con-
tacto de la punta con la
soldadura, el flux podría no
funcionar correctamente y
reducir la vida de la punta.
En este caso la soldadura
requiere más potencia (p.
ej. PCBs multicapa o de
gran disipación). JBC re-
comienda utilizar la ayuda
del precalentador.
Si desea activar los parámetros bloqueados ( ), rellene el formulario que encontrará en
www.jbctools.com/en/form y JBC contactará con usted. Tenga en cuenta que un uso indebido
de los parámetros puede reducir la vida de la punta. Por favor, siga las siguientes indicaciones:

www.jbctools.com
28 29
Mantenimiento
- Compruebe periódicamente que las partes
metálicas de la herramienta y el soporte
están limpias así la estación puede
detectar el estado de la herramienta y
activar los modos Sleep o Hibernation.
- Mantenga limpia y estañada la superfície
de la punta para evitar la oxidación. Las
superfícies sucias reducen la transferencia
térmica a la soldadura.
- Revise la conexión de cables y/o tubos.
Limpie
periódicamente
Antes de almacenar o de su mantenimiento, desconecte el equipo y déjelo enfriar.
- Use un paño húmedo para limpiar la pantalla
del equipo, la carcasa y la herramienta.
Solamente utilice alcohol para las
partes metálicas.
1. Retire el fusible tirando de la tapa negra.
Si fuera necesario, utilice una palanca.
2. Coloque el nuevo fusible en su sitio
presionando ligeramente.
- Cambie el fusible fundido de acuerdo a las siguientes instrucciones:
- Cambie cualquier pieza defectuosa o dañada. Utilice solamente recambios originales de JBC.
- Cualquier reparación sólo podrá ser realizado por un servicio técnico oficial JBC.
Retraso de Hibernación
Configure el tiempo que
la herramienta permane-
cerá en temperatura de
Sleep antes de entrar al
modo de Hibernación.
Configurado por defecto
a 10 min.
Tras agotarse el tiempo,
la estación cortará el
suministro de energía y
la punta se enfriará hasta
temperatura ambiente.
Ajuste de temperatura
Permite un ajuste más
preciso entre la tempe-
ratura seleccionada en la
estación y la temperatura
real en la punta.
Esta función protege com-
pletamente la punta de la
oxidación durante largos
períodos de inactividad. Es
decir mientras la herramienta
permanezca en el soporte.
Restañar la punta antes de
colocar la herramienta en el
soporte también ayudará a
proteger su recubrimiento y
garantizar su larga duración.
El usuario puede ajustar valo-
res dentro del intervalo ±50°C
(±90°F) hasta conseguir error
cero. JBC recomienda usar
los termómetros TID-A o
TIA-A para obtener lecturas
más fiables.
Configuración de la Herramienta (Tool Settings)
RecomendacionesDescripción del parámetro Advertencias
Configurar este
parámetro con valores
más altos que el valor de
fábrica acelerará
innecesariamente la
oxidación y acortará la
vida de la punta.
Cuando se cambie de
modelo de cartucho, se
debe resetear este pará-
metro a 0°C/F o ajustarlo
al cartucho a utilizar.
P. ej. Si se establece una
corrección de +20°C
(+36°F) para el modelo
C245966 (grueso) y el
usuario cambia el cartu-
cho por un C245030 (más
fino) sin resetear, el usuario
estaría trabajando a 20°C
(+36°F) de temperatura
más baja cuando el mo-
delo C245030 no necesita
ningún ajuste de tempe-
ratura.

www.jbctools.com
30 31
Especificaciones
CP-1E 120V 50/60Hz. Fusible de entrada: 2A. Salida: 23,5V. Unidad de Control: CP-1E
CP-2E 230V 50/60Hz. Fusible de entrada: 1A. Salida: 23,5V. Unidad de Control: CP-2E
CP-9E 100V 50/60Hz. Fusible de entrada: 2A. Salida: 23,5V. Unidad de Control: CP-9E
- Peso: 2,7 Kg (5.95 lb)
- Dimensiones: 150 x 175 x 145 mm
- Potencia máxima: 80W
- Rango de temperatura: 90-450 °C (190-840 °F) (±5%)
- Estabilidad de temperatura en reposo: ±1.5 ºC (±3 ºF)
- Resistencia punta a tierra: <2 ohms
- Tensión en punta: <2mV RMS
- Temperatura ambiente de trabajo: 10-40 ºC / 50-104 ºF
- Conector USB estación-PC
Cumple con las normativas CE.
Seguridad ESD
Seguridad
- No utilice el equipo para otros fines que no sea la soldadura o reparación. El uso incorrecto
puede causar fuego.
- El cable de red debe enchufarse en bases homologadas. Asegúrese de que está conectado a
tierra correctamente antes de su uso. Al desenchufarlo, tire del conector, no del cable.
- No trabaje con tensión.
- La herramienta debe permanecer en el soporte cuando no está en uso con el fin de activar el modo
de Sleep. El cartucho, la parte metálica de la herramienta y el soporte puede estar caliente incluso
cuando la estación está apagada. Manipule con cuidado, incluso cuando ajuste la posición del
soporte.
- No deje el aparato desatendido cuando esté en funcionamiento.
- No cubra las rejillas de ventilación. El calor puede causar que los productos inflamables se enciendan.
- Utilice un flux clasificado como “non residue” y evite el contacto con la piel y los ojos para evitar
que se irriten.
- Tenga cuidado con el humo producido al trabajar.
- Mantenga su lugar de trabajo limpio y ordenado. Use gafas y guantes de protección adecuados.
Así evitará cualquier daño.
- Tenga cuidado con los restos de estaño líquido. En contacto con la piel, puede causar quemaduras.
- Este aparato puede ser utilizado por personas a partir de 8 años y también por aquellas
personas con movilidad reducida o capacidades físicas, sensoriales o mentales limitadas o
con falta de experiencia y conocimientos siempre y cuando reciban supervisión o instrucciones
relativas al uso del aparato de una manera segura y entiendan los riesgos que implica. Los niños
no deben jugar con el aparato.
- Los niños no deberán realizar tareas de mantenimiento sin supervisión.
Es necesario cumplir estas normas de seguridad para prevenir cualquier
choque eléctrico, heridas, fuego o explosiones.

www.jbctools.com
32 33
Station mit
Mikro-Entlötpinzette
Ref. CP-E

www.jbctools.com
34 35
Kabelausleger
Spitzenreinigungssystem
Prozess-
Steuerung
Verstellbare Abla-
ge: Intelligentes
Hitzemanagement
Power Cord
Netzkabel................................................ 1 Einheit
Ref. 0009417 (100V/120V)
0009401 (230V)
Handbuch ...................1 Einheit
Ref. 0016885
Brass Wool
Messingwolle ............ 1 Einheit
Ref. CL6210
ww w.j bctools.c om
Sponge
Schwamm .................. 1 Einheit
Ref. S0354
Compact
Micro Tweezers Station
Ref. CP-E
Cartridges (x2)
Kartuschen (x2) ............................... 1 Einheit
Ref. C120002
Micro Tweezers
Mikro-Entlötpinzette
Ref. PA120-A
Micro Tweezers
Mikro-Entlötpinzette ........................... 1 Einheit
Ref. PA120-A
Netzsteckdose
Hauptschalter
Sicherung
Potenzialausgleichsbuchse
USB-B-Anschluss
MerkmalePackliste
Die folgenden Artikel sollten enthalten sein:
CP Control Unit
CP Steuereinheit .................................. 1 Einheit
Ref. CP-1E (120V)
CP-2E (230V)
CP-9E (100V)

www.jbctools.com
36 37
Verstellbare Ablage Kabelausleger (Ref. CC3702)
Stellen Sie die Werkzeugablage
passend auf Ihre Arbeitsposi-
tion ein.
Fixieren Sie das Kabel am Aufleger und und stellen ihn so ein,
um Kabelsalat zu vermeiden.
Spitzenreinigungssystem
Wählen Sie die Option aus, die am besten Ihre Reinigungsbedürfnisse erfüllt.
Brass Wool
Messingwolle
Ref. CL6210
Sehr wirksame
Reinigungsmethode.
Lässt eine dünne
Lotschicht auf der
Spitze, wodurch die
Oxidation
zwischen Reinigung
und Rückfeuchten
vermieden wird.
Weitere Optionen für den Spritzschutz (nicht im Lieferumfang enthalten):
Inox Wool
Edelstahlwolle
Ref. CL6205
Sorgt für eine bessere
Reinigung an der Spitze.
Metal Brush
Metallbürste
Ref. CL6220
Bei sorgfältiger
Benutzung sorgt sie
für eine gründlichere
Reinigung.
Sponge Schwamm
Ref. S0354
Die schonendste Reinigungs-
methode. Halten Sie den
Schwamm bei der Arbeit mit
destilliertem Wasser feucht, um
Spitzenverschleiß zu vermeiden.
Abklopfen:
Klopfen Sie vorsichtig ab,
um überschüssiges Lot zu
entfernen.
Abstreifen:
Benutzen Sie die
Aussparungen, um noch
vorhandene Partikel
abzustreifen.
Spitzenabstreifer
Splashguard
Spritzschutz
Ref. 0016953
Verhindert Lötmittelspritzer beim Einsatz von
Messinggeflecht.
Antisplash Rubber
Schutzmembran
Ref. 0016954
Vermeidet Spritzer, um den Arbeitsbereich
sauber zu halten.
Wenn Sie den Spritzschutz entfernen müssen, befolgen Sie folgende Schritte:
1. Entriegeln Sie den Spritzschutz. 2. Nehmen Sie ihn heraus.
Wiper
Spitzenabstreifer
Ein temperaturbeständiger Behälter ermöglicht es dem Werker,
durch vorsichtiges Abklopfen oder Abstreifen überschüssiges Lot zu
entfernen.
Falls die Spitze stark
verschmutzt sein sollte,
wird empfohlen, mit
dem Spitzenabstreifer
das überflüssige Zinn zu
entfernen.

www.jbctools.com
38 39
Wechsel der Kartusche
Für einen sicheren Wechsel der Kartusche, den Netzstecker des Werkzeugs ziehen oder die Station
ausschalten, bevor die folgenden Anweisungen befolgt werden.
2. Einsetzen
3. Ausrichten 4. Fixieren
Ausrichten sie die Spitze der Kartusche.
Benutzen Sie eine Flachzange, um die Spitze
korrekt auszurichten. Sorgfältig darauf
achten, dass die Kartuschen nicht überdreht
wird.
Die Schraube lockern und die Kartusche
herausnehmen. Falls noch heiß, eine
Flachzange verwenden.
1. Entfernen
Wichtig: Die Schraube wieder festziehen,
dabei darauf achten, sie nicht zu fest
anzuziehen. Dies ist notwendig, damit das
Werkzeug betrieben werden kann.
Wichtig: Die Kartusche für einen korrekten
Anschluss bis zu der Markierung einschie-
ben.
Markierung
Ausrichtung
Kompatible Kartuschen
Die CP-Stationen arbeiten mit dem Kartuschen-Sortiment C120. Finden Sie das passende Modell für
Ihren Lötbedarf unter www.jbctools.com
ø0,7 1,5mm
ø 0,2
5mm
6mm
C120-009 C120-010
C120-004 C120-001C120-005 C120-009 C120-010
USB-Anschluss
Laden Sie die neueste Software von unserer Website herunter, um Ihre Lötstation zu verbessern.
www.jbctools.com/software.html
Aktualisieren Sie die Stations-Software über USB-Verbindung:
Kabel USB AB
JBC Manager
JBC Updater
Register Settings
Erstellen Sie Grafiken des
Lötprozesses in Echtzeit mit
Leistungs- und Temperatur-
daten.
Manager Settings
Ändern Sie Einstellungen für
eine Gruppe von
JBC-Stationen gleichzeitig.
jede JBC
Station
USB
Hub
Cable
USB AB
www.jbctools.com/manager.html
Verwalten und überwachen Sie mit dem JBC Manager an einen PC angeschlossene Stationen:
JBC
Manager
JBC
Updater
Table of contents
Languages:
Other jbc Soldering Gun manuals
Popular Soldering Gun manuals by other brands

Weller
Weller EC2002M operating instructions

Pace
Pace 5050-0552 Operation and maintenance manual

Taiyo Electric
Taiyo Electric Goot RX-852AS Operation manual

Weller
Weller WXP?65 Translation of the original instructions

Weller
Weller WXsmart Translation of the original instructions

Weller
Weller WSD 130 operating instructions