Thank you for purchasing this Jester floor lamp.
Please read the instructions carefully before use to ensure safe and satisfactory
operation of this product.
Please keep these instructions for future reference.
Warnings!
This fitting should be fitted in accordance with IEE Regulations and the Building
Regulations. If in any doubt, or where required by law, consult a competent
person who is registered with an electrical self-certification scheme. Further
information is available online or from your Local Authority.
To prevent electric shock switch off at the mains supply before installing or
maintaining this fitting. Ensure other persons cannot restore the electricity supply
without your knowledge.
If you are in any doubt, please consult a qualified electrician.
Always use the correct type and wattage bulb. Never exceed the wattage stated.
Caution! The bulb and surrounding parts can become hot during use.
Do not cover. Keep away from curtains, bedding etc.
Always route mains cable so it does not present a hazard (entrapment, tripping etc.);
ensure that there are no twists or snags in the cable.
Plug into the mains supply; switch on using the inline cord switch provided.
If moving this lamp, always carry by holding the stand part (and not the bubble glass.)
Important! If the external flexible cable or cord of this floor lamp is damaged, it shall
be exclusively changed by the manufacturer, their service agent or a similarly
qualified person.
Care Instructions
We recommend cleaning with a soft dry cloth.
Do not use abrasive materials as these will damage the finish.
Replace bulbs from John Lewis or established brand of the same type and compatibility.
Indoors use only.
Parts list
Qty Qty
A 5 D 1
B 1 E 1
C 1
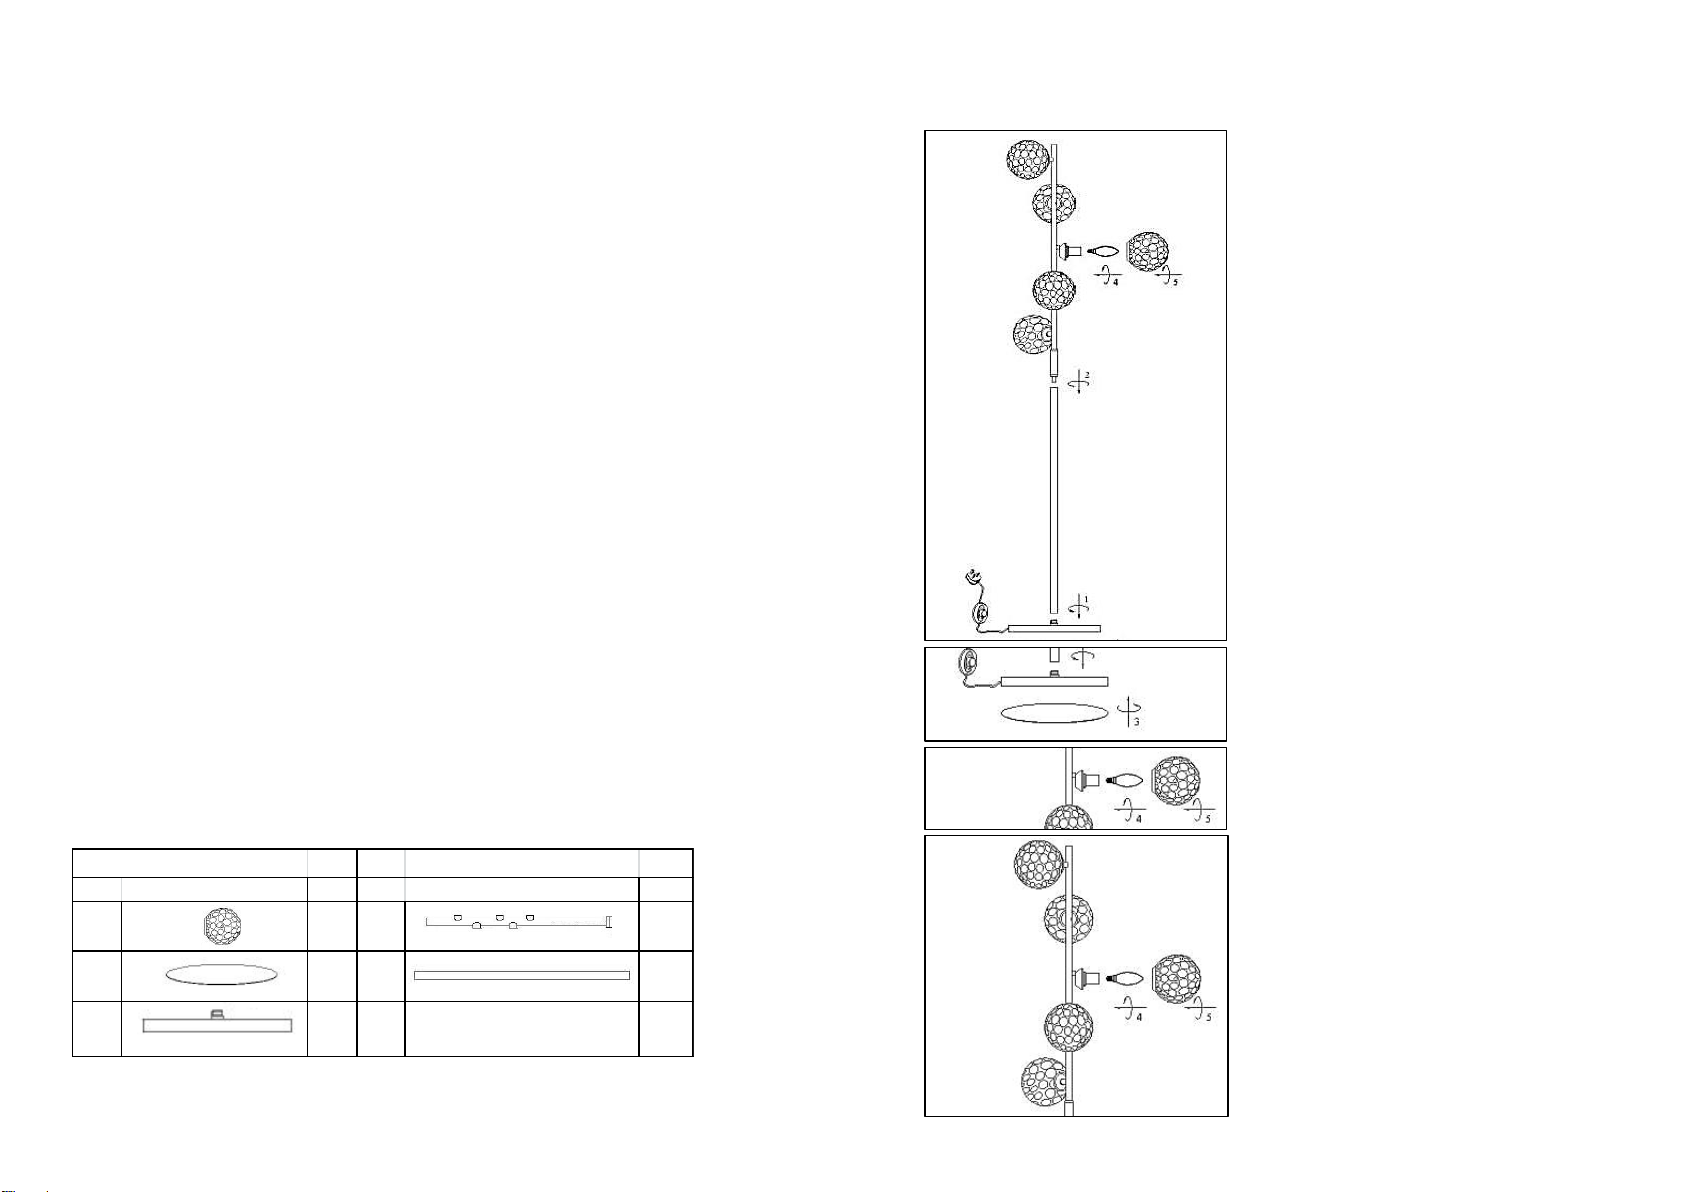
Carefully unpack the carton, making
sure all parts are present before
assembly. Place lamp on a flat surface
Step 1
Place the lower stem ①onto the top
of the base, and then secure tightly.
Place the top stem with lamp holders
② onto the top of lower stem, and
then secure tightly.
Step 2
Place the velvet pad ③under the base
in right position.
Step 3
Attach the correct type and wattage
bulb to the lamp holder ④(bulbs not
included).
The maximum power indicated must
not be exceeded.
Step 4
Place the glass shade ⑤over lamp
holder and then secure tightly.
Insert the plug into the power supply
and turn on the switch.


