manuals.online logo
Brands
  1. Home
  2. •
  3. Brands
  4. •
  5. John Lewis
  6. •
  7. Outdoor Light
  8. •
  9. John Lewis Stowe Wall light User manual

John Lewis Stowe Wall light User manual

Other John Lewis Outdoor Light manuals

John Lewis Ahead User manual

John Lewis

John Lewis Ahead User manual

John Lewis SALSA User manual

John Lewis

John Lewis SALSA User manual

John Lewis 706 03249 User manual

John Lewis

John Lewis 706 03249 User manual

John Lewis ZENA TWIST User manual

John Lewis

John Lewis ZENA TWIST User manual

John Lewis Darlington User manual

John Lewis

John Lewis Darlington User manual

John Lewis DOME TABLE LAMP User manual

John Lewis

John Lewis DOME TABLE LAMP User manual

John Lewis 70684118 User manual

John Lewis

John Lewis 70684118 User manual

John Lewis BANKERS TABLE LAMP User manual

John Lewis

John Lewis BANKERS TABLE LAMP User manual

John Lewis Mitch Duo Touch Table User manual

John Lewis

John Lewis Mitch Duo Touch Table User manual

John Lewis TULIP User manual

John Lewis

John Lewis TULIP User manual

John Lewis Bubble Solar stake User manual

John Lewis

John Lewis Bubble Solar stake User manual

John Lewis Cara User manual

John Lewis

John Lewis Cara User manual

John Lewis MICROPLEAT 706 03250 User manual

John Lewis

John Lewis MICROPLEAT 706 03250 User manual

John Lewis Tom Floor lamp User manual

John Lewis

John Lewis Tom Floor lamp User manual

John Lewis Francesca Floor Lamp User manual

John Lewis

John Lewis Francesca Floor Lamp User manual

John Lewis MUSHROOM LED TOUCH User manual

John Lewis

John Lewis MUSHROOM LED TOUCH User manual

John Lewis Zella User manual

John Lewis

John Lewis Zella User manual

John Lewis Harmony User manual

John Lewis

John Lewis Harmony User manual

John Lewis Isabel User manual

John Lewis

John Lewis Isabel User manual

John Lewis 70684119 User manual

John Lewis

John Lewis 70684119 User manual

John Lewis IL4248 User manual

John Lewis

John Lewis IL4248 User manual

John Lewis HARMONY User manual

John Lewis

John Lewis HARMONY User manual

John Lewis POTTER User manual

John Lewis

John Lewis POTTER User manual

John Lewis Emilia Large User manual

John Lewis

John Lewis Emilia Large User manual

Popular Outdoor Light manuals by other brands

Kichler Lighting HELEN 37536 instructions

Kichler Lighting

Kichler Lighting HELEN 37536 instructions

Thorn OXANE L installation instructions

Thorn

Thorn OXANE L installation instructions

esotec Solar Globe Light multicolor 20 operating instructions

esotec

esotec Solar Globe Light multicolor 20 operating instructions

mitzi HL200201 ELLIS Assembly and mounting instructions

mitzi

mitzi HL200201 ELLIS Assembly and mounting instructions

HEPER TILA S AFX 3 Module Installation & maintenance instructions

HEPER

HEPER TILA S AFX 3 Module Installation & maintenance instructions

Designplan TRON 180 installation instructions

Designplan

Designplan TRON 180 installation instructions

Sealey LED37 instructions

Sealey

Sealey LED37 instructions

nordlux VEJERS Mounting instruction

nordlux

nordlux VEJERS Mounting instruction

SImx ELITE LED LHTC637 installation instructions

SImx

SImx ELITE LED LHTC637 installation instructions

GEV CAROLINE 10833 manual

GEV

GEV CAROLINE 10833 manual

WE-EF PFL540 LED Installation and maintenance instructions

WE-EF

WE-EF PFL540 LED Installation and maintenance instructions

HEPER DOGO Side LW6048.585-US Installation & maintenance instructions

HEPER

HEPER DOGO Side LW6048.585-US Installation & maintenance instructions

BEGA 84 253 Installation and technical information

BEGA

BEGA 84 253 Installation and technical information

HEPER LW8034.003-US Installation & maintenance instructions

HEPER

HEPER LW8034.003-US Installation & maintenance instructions

HEPER MINIMO Installation & maintenance instructions

HEPER

HEPER MINIMO Installation & maintenance instructions

LIGMAN BAMBOO 3 installation manual

LIGMAN

LIGMAN BAMBOO 3 installation manual

Maretti TUBE CUBE WALL 14.4998.04 quick start guide

Maretti

Maretti TUBE CUBE WALL 14.4998.04 quick start guide

Maxim Lighting Carriage House VX 40428WGOB installation instructions

Maxim Lighting

Maxim Lighting Carriage House VX 40428WGOB installation instructions

manuals.online logo
manuals.online logoBrands
  • About & Mission
  • Contact us
  • Privacy Policy
  • Terms and Conditions

Copyright 2025 Manuals.Online. All Rights Reserved.

Recommended bulb (not included)
1 x 6W
ES LED Energy efficient classic GLS
or
1 x 28W
ES Eco Halogen classic GLS
When changing a bulb, always switch off at the mains and allow the bulb to cool before handling.
Dispose of used bulbs carefully.Do not exceed the rated power stated or use a different shape bulb
from that indicated on the fitting.
John Lewis Partnership
171 Victoria Street
London SW1E 5NN
johnlewis.com
Made in China 20/09/2017
We have taken great care to ensure that this product reaches you in perfect condition.
However, should any parts be damaged or missing please contact the Product Helpline on
(01202) 690945.
This symbol indicates that this product should not be treated as normal household waste
and it should be recycled. John Lewis do not operate instore take back, but as members of the
Distributor Trade Back scheme have funded the development and upgrade of recycling facilities
across the UK. Please take it to your nearest collection facility or for further details contact your
local council or visit www.recycle-more.co.uk.
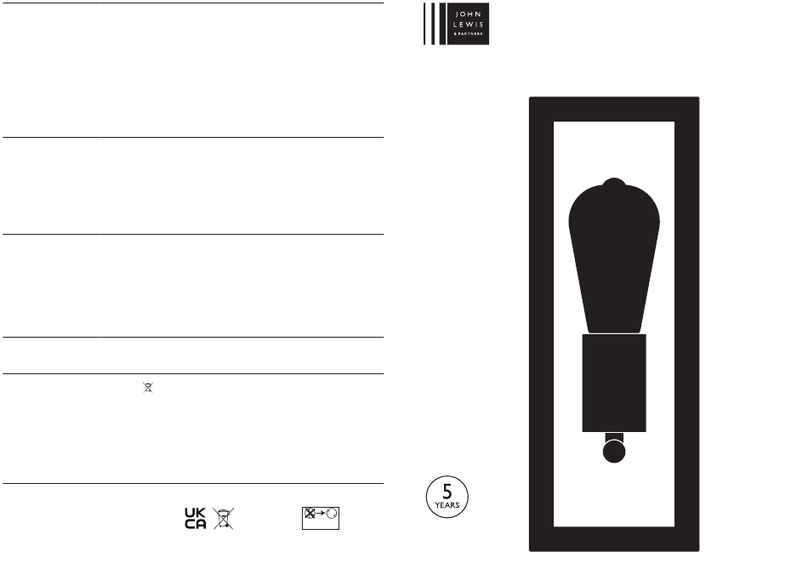
User manual
Stowe
Wall light
Specifications
Max. power: 40W
Voltage: 240V, 50Hz
IP rating: IP44
Weight: 1.16kg
Please keep these instructions for future reference.
In some cases, surface corrosion may arise after installation. This is normally caused by tiny iron
particles left behind after the brushing process when finishing.
Wash and dry as detailed above.Then wipe over with a soft cloth soaked with a protective oil.
If the product is subject to extreme environmental conditions such as marine locations, and
industrial pollution these maintenance procedures should be carried out four times a year. For
severe corrosion, non-abrasive cream cleaners or proprietary stainless steel cleaners should be
used to remove the corrosion.
Care instructions continued
Thank you for purchasing this Stowe wall light. Please read the instructions carefully before use to
ensure safe and satisfactory operation of this product.
Warnings!
This is a Class 1 product and must be earthed.
Please read these instructions carefully before commencing any work. It is recommended that this
fitting is installed by a qualified electrician.
Install in accordance with the IEE Wiring regulations and the Building Regulations.
To prevent electric shock switch off at mains supply before installing or maintaining this fitting.
Ensure other persons cannot restore the electrical supply without your knowledge.
If you are in any doubt, please consult a qualified electrician.
This light fitting should be connected to a 5 amp fused circuit.
If replacing an existing fitting, make a note of the connections.
This product has special protection against the ingress of water, and is rated IP44. If
the plastic shade is broken or cracked it must be replaced, please consult your retailer.
This product is suitable for installation on surfaces with normal flammability e.g. wood,plasterboard,
masonry. It is not suitable for use on highly flammable surfaces (e.g. polystyrene, textiles).
For your safety, always switch off the supply before changing lightbulbs, cleaning or removing shades.
Always take care when handling lightbulbs to avoid injury in case of breakage.
Assembly
Carefully unpack the carton, making sure all the parts are present before assembly.
Parts list
Light
fitting 1
Screws 2
Wall
plugs 2
A
B
Fig. 1
Step 5
Having identified the household wiring
from your existing light fitting, connect to
the connection block inside the product as
shown.
Check that....
•Ensure wiring connections are tight.
•Ensure earth wire is correctly fitted to the earth connection.
•Make sure the incoming mains cable is kept away from the heat of the lamp and that the grommet
is still in place to maintain the IP rating.
Care instructions
Do not use solvents or abrasive cleaners as these could damage the finish.Wash plastic parts with
a damp cloth. Do not use abrasive materials as these will damage the finish.
In normal circumstances, stainless steel is very resistant to corrosion. Some maintenance is still
required to preserve the high quality appearance:
Wash the product with warm soapy water, removing all surface deposits. Rinse with clean water
and dry with a soft cloth. (Continued overleaf)
Step 1
Remove the finials (A) from the front of the product and lift
the light fitting body away from the wall back. Keep the finials
and rubber washers (B) in a safe place for refitting later. See.
Fig. 1.
Step 2
Using the wall back as a template, mark the position of the mounting holes. Drill holes and fit
supplied wall plugs (suitable for masonry only - for other surfaces use appropriate fixings). Make
sure the wall back is correctly oriented with the drain hole at the base.Take care not to damage
any wiring or pipes when drilling the holes.
Step 3
Carefully pierce a small hole in the rubber gasket in the centre of the mounting box to allow the
cable to pass through. Feed the incoming mains supply cable through the grommet entry hole.
Fig. 2
Step 6
Place the light fitting over the threads of the securing screws and refit the
finials to secure. Make sure the rubber seal is in place to maintain the IP
rating and ensure the fitting is correctly oriented - lampholder must point
upwards. See Fig. 2.
Step 7
Fit the recommended bulb as per the details overleaf.To access the
bulb, undo the 2 screws under the shade and keep safe for refitting
later. Lift off the metal frame - ensure seal is in place around all
4 corners to ensure ingress protection. Screw the bulb into the
lampholder. Refit the metal frame with the 2 screws set aside earlier.
Screw the stem (E) onto the underside of the shade. See Fig. 3.
Step 8
Replace fuse or circuit breaker and switch on.Your light is now ready
for use.
Step 4
Secure the wall back to the wall using the screws and fixings supplied. Ensure the wall is capable of
holding the weight of the product.