LED driver replacement
Obtain suitable replacement driver - ensuring all technical specications match the existing item. Disconnect the
old driver from the connector on the cable. Re connect the new driver.
Product assembly
Step 1
Carefully unpack the carton, making sure all the parts are
present before assembly.
Decide on the position of the light tting. This needs
to be where the product can be mounted to a suitable
surface to support the product weight and where the
plug can reach a mains outlet socket.
Step 2
Remove the two side screws (A) at the back of
the product to separate the mounting bracket (B).
Use the mounting bracket as a template to mark the
screw holes. Make the screw holes and t the wall plugs,
taking care not to damage concealed wiring and pipes.
Step 3
Secure the mounting bracket to the wall using the
appropriate screws (C).
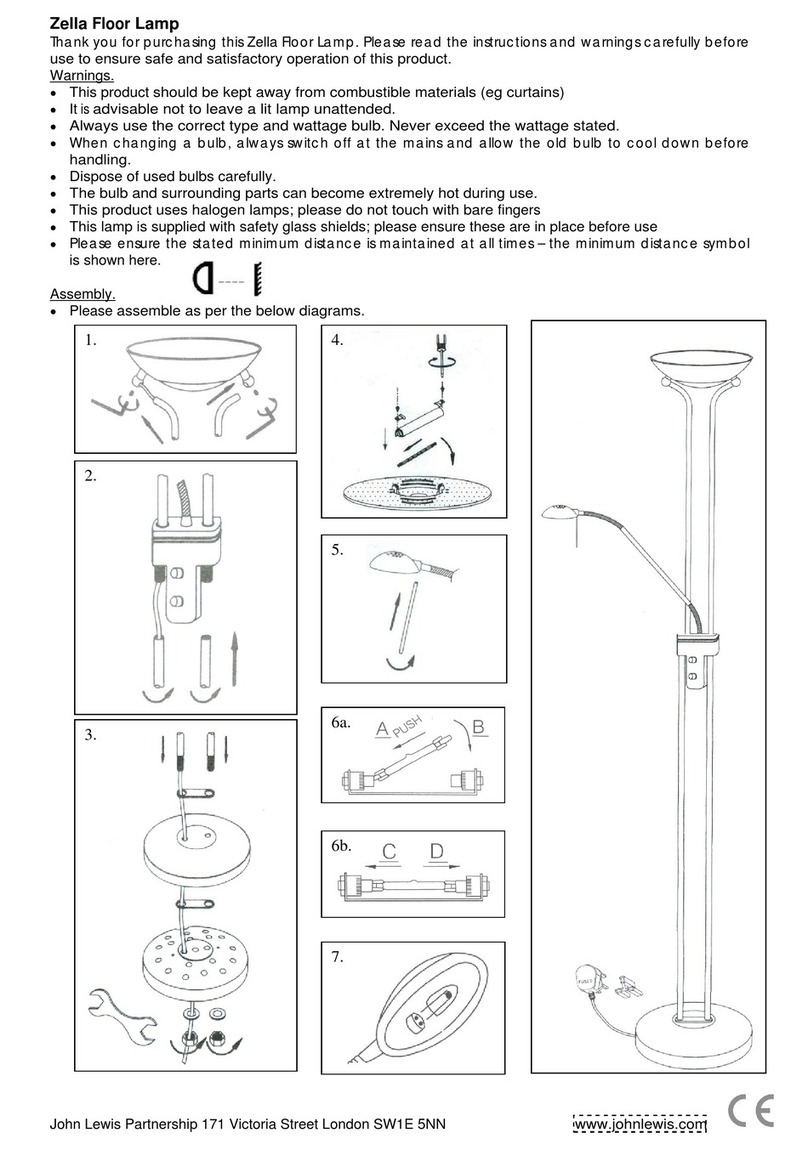
Getting started Thank you for purchasing this John Lewis & Partners product. For your safety, and to
make sure everything is working properly, please read the instructions carefully before use.
Warnings This product is only suitable for connection to a 240V~50Hz supply in accordance
with current IEE Wiring Regulations. It is for indoor use only, and not suitable for
a bathroom location.
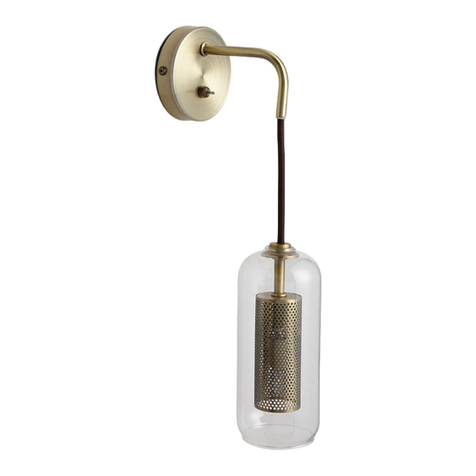
This plug-in wall light is designed for easy installation to a wall or other stable vertical
surface. No electrical wiring is required, but xing holes need to de drilled into the
mounting surface.
This product is Class 3 (low voltage) and uses a plug-in transformer. Under no
circumstances must this be replaced by a standard 13amp UK type plug. This will
cause a safety hazard.
If the mains cable becomes damaged it must only be replaced by a technically
competent, qualied person. In the case of a Class III rated product, a new cable set
may be available - please check with your retailer.
Do not plug into the mains until your lamp is fully assembled. If you are in any doubt
about your competence please consult a qualied electrician. If any modication is
made it will invalidate the warranty and may render the product unsafe.
When moving or cleaning, always switch off at the mains and allow the LEDs
to cool before handling.
Important: Children can become entangled in loose cables. Ensure excessive loops
of cable are secured against the wall using retaining clips or otherwise tidied away.
Guide to wall
mounting & xings
KEY INFORMATION
Different wall materials require different types of screws / xings. Please ensure you
use the correct screws / xings for your type of walls and seek professional advice
if you are not sure.
Failure of the product due to incorrect xings is the responsibility of the installer.
Important: When drilling into the walls always check that there are no hidden wires
and pipes etc. Take care when drilling on glazed tile surfaces in case of drill slips.
FIXINGS
Use the relevant type of wall plug, depending on if your walls are made of brick,
breezeblock, concrete, stone or wood:
Parts list
Step 4
Ret the tting onto the mounting bracket and secure
with the screws removed in Step 2. Take care not to
trap the exible cable.
IMPORTANT: Children can become entangled in
loose cables. Ensure excessive loops of cable are secured
against the wall using the supplied retaining clips (D).
Step 5
Connect the driver to the product (E).
Plug in the LED driver.
Your lamp is now ready for use.
A
C
B
D
NOTE: The angle of the shade can be adjusted
up and down as needed.
E
Description Image Qty Description Image Qty
Light
tting
x 1 Retaining
clips
x 2
General purpose wall plug
Suitable for solid,
masonary walls.
Plasterboard wall plug
For light loads on to
plasterboard partitions.
Cavity xing wall plug
For plasterboard partitions
or hollow wooden doors.
