manuals.online logo
Brands
  1. Home
  2. •
  3. Brands
  4. •
  5. JUKI
  6. •
  7. Sewing Machine Accessories
  8. •
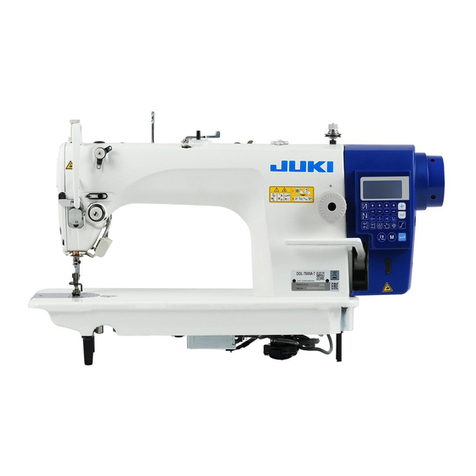
  9. JUKI AK84 User manual

JUKI AK84 User manual

取扱説明書
INSTRUCTION MANUAL
No.06
29113305
自動押え上げ装置(窓板取り付けタイプ)
Auto lifter (Window-plate-mounting type)
AK84•85•86•87
安全に使用していただくために使用前に、必ずこの取扱説明書をお読みください。
また、いつでもすぐに読めるように、この取扱説明書を保管してください。

 

 

CAUTION :
This Instruction Manual is intended for the AK84 • 85 • 86 • 87. Read and fully understand the instructions
given under "IMPORTANT SAFETY INSTRUCTIONS" in the Instruction Manual for the Machine (Sewing
machine/Automatic machine) before putting the machine into service when this device is installed to the
Machine (Sewing machine/Automatic machine). In addition, to emphasize the AK84 • 85 • 86 • 87, some illus-
trations of the Machine (Sewing machine/Automatic machine) are simplied. Also, illustrations of the safety
devices are partially omitted.
Read safety instructions carefully and understand them before using.
Retain this Instruction Manual for future reference.
– 1 –
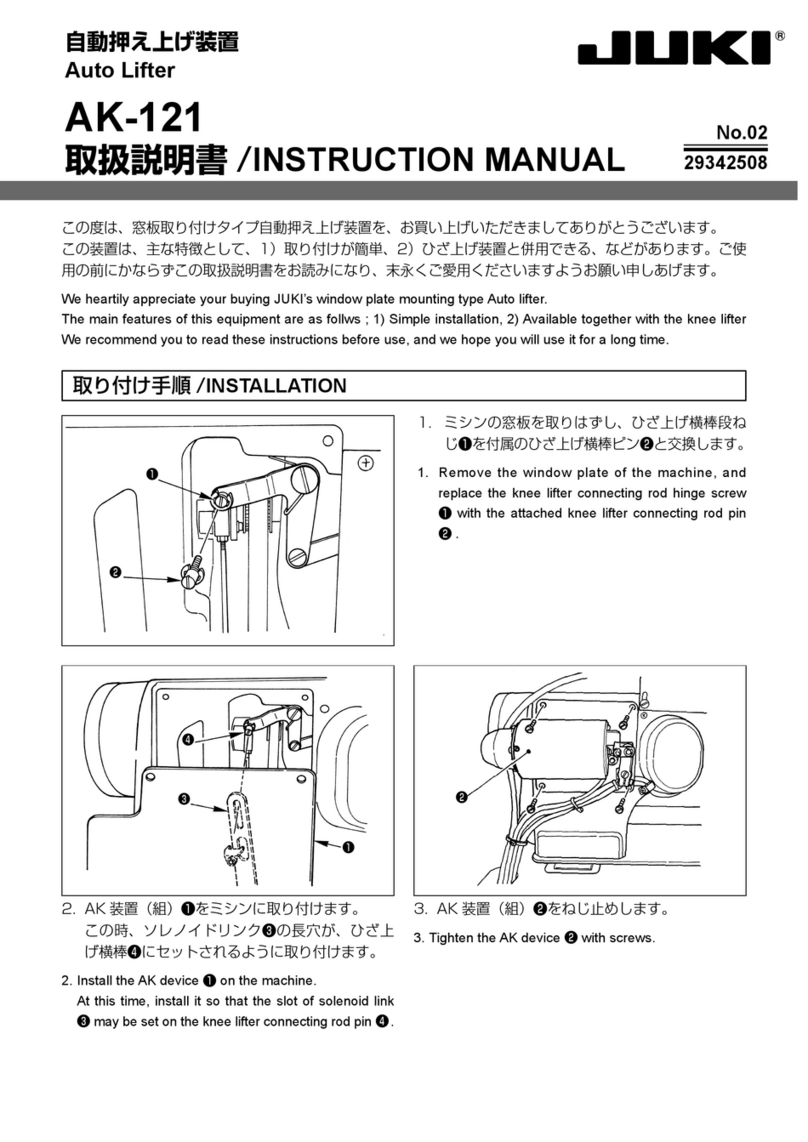
1. ミシンの窓板を取り外し、膝上げ横棒段ねじと膝上
げリンク段ねじを付属の膝上げ横棒ピン󰿿と段ねじ
󱀀に交換し、膝上げリンクばね󱀁を図のように取り
付けます。
1. Remove the window plate of the machine, and replace
the knee-lifter-connecting rod hinge screw and the
knee-lifter link hinge screw with knee-lifter-connnect-
ing rod pin 󰿿and hinge screw 󱀀supplied with the
machine. Then, attach the knee-lifter link spring 󱀁as
illustrated.
󰿿
󱀁
󱀀
この度は、窓板取り付けタイプ自動押え上げ装置を、お買い上げいただきましてありがとうございます。
この装置は、主な特徴として、1) 取り付けが簡単、2) 膝上げ装置と併用できる、などがあります。ご使用の前に
必ずこの取扱説明書をお読みになり、末永くご愛用くださいますようお願い申し上げます。
Congratulations on your purchase of a JUKI's window-plate-mounting type Auto lifter.
The main features of this device are as follows: 1) Simple installation, 2) Usable in combination with the knee lifter.
Please read these instructions to assure long-term satisfactory usage.
󰿿
󱀁
󱀀󱀁
󰿿󱀂
2. DLU-5490N-7 など、窓板部にボスのあるミシン
は、付属のパイプ支えに交換します。
2. For the pipe support of the machine having a boss in
the window plate, such as DLU-5490N-7, etc., replace
it with the attached pipe support.
3. 本装置の窓板(組)󰿿から座金󱀀とナット󱀁を取り
外します。
3. Remove washers 󱀀and nuts 󱀁from the window plate
asm. 󰿿.
4. 窓板(組)󰿿をミシンに取り付けます。
この時、ソレノイドリンク󱀁の長穴が、膝上げ横棒
ピン󱀂にセットされるように取り付けます。
4. Install the window plate asm. 󰿿on the machine.
At this time, install it so that the slot of solenoid link 󱀁
is set on the knee lifter connecting rod pin 󱀂.
 / INSTALLATION
– 2 –
6. ソレノイド(組)󱀀を取り付けます。
6. Install solenoid asm. 󱀀.
7. 図のように、フライバック抵抗(組)をテーブルの
下面に取り付けます。(AK86,AK87 の場合)
7. As shown in the gure, install the y back resistance
(asm.) under the table (in case of AK86 and AK87).
󱀀
5. CP-170,IP-110 などの窓板取り付けタイプのコ
ントロールパネルをご使用の場合は、パネルブラ
ケット補助板󰿿を取り付けます。補助板の止めねじ
󱀀は、補助板に同梱のねじを使用します。コントロー
ルパネルと補助板の取り付けには、窓板から外した
ねじを使用します。コントロールパネル同梱のねじ
は使用しません。
(次項のソレノイド ( 組 ) を取り付けた後でも、補
助板の取り付けは可能です。その際は、ソレノイド
先端のカバーを外してください。)
5. When using the control panel of the window plate
mounting type, such as CP-170, IP-110, etc., install
panel bracket auxiliary plate 󰿿. For setscrews 󱀀of
the auxiliary plate, use the screws packed together
with auxiliary plate. For installing the control panel and
the auxiliary plate, use the screws removed from the
window plate. The screws packed together with the
control panel are not used.
(It is possible to install the auxiliary plate even after in-
stalling the solenoid asm. of the next item. At this time,
remove the cover located at the tip of the solenoid.)
󱀀󰿿
󱀀

Cord connecting diagram
– 3 –
 / ADJUSTING THE AUTO-LIFTER STROKE
押えを下げ、針板と密着させます。ソレノイドを矢印
の方向へ押し付けた状態で、ドライバー 󱤨でソレノイ
ド軸を左へ回し、六角棒スパナ 󱤩で抱きねじを締めま
す。
     


Lower the presser foot and make it come in close con-
tact with the throat plate. In the state that the solenoid is
pressed in the direction of the arrow, turn the solenoid
shaft counterclockwise with screwdriver 󱤨and tighten the
screw with hexagonal wrench key 󱤩.
Proper tightening torque is 3.4 to 5.9 N•m.
Excessive tightening may damage the sole-
noid arm. So, be careful.
󱤨󱤩
 / CONNECTING THE CORDS
1. AK ソレノイドのコードをテーブル穴を通してから、コントロールボックスのコネクタに接続します。
2. コネクタの接続は、コントロールボックスの取扱説明書を参照ください。
1. Pass the cord of AK solenoid through the table hole and connect it to the connector of the control box.
2. For the connection of the connector, refer to the Instruction Manual for the control box.
 / SETTING THE CONTROL BOX
自動押え上げ装置を動作させるために、コントロールボックスの設定が必要です。
設定方法については、コントロールボックスの取扱説明書を参照ください。
It is necessary to set the control box to actuate the auto-lifter device.
For the setting procedure, refer to the Instruction Manual for the control box.
 / SPECIFICATIONS
○ 押え上昇量 9mm(標準)
○ 最大押え圧 88N
※ 電源電圧 100% 時
◦Presserfootliftingamount:Standard9mm
◦Max.presserfootpressure:88N
* Line voltage : At 100%
AK 装置(組)
AK device (asm.)
フライバック抵抗(組)
Fly-back resistance (asm.)
膝スイッチ(組)
Knee-switch (asm.)
AK84 〇 〇
AK85 〇
AK86 〇 〇 〇
AK87 〇 〇
Copyright © 1999-2010 JUKI CORPORATION
• 本書の内容を無断で転載、複写することを
禁止します。
• All rights reserved throughout the world.
この製品の使い方について不明な点がありましたらお求めの販売店又は当社営業所にお問い合わせください。

Please do not hesitate to contact our distributors or agents in your area for further information when necessary.
*
The description covered in this instruction manual is subject to change for improvement of the
commodity without notice.
10 · 11 Printed in Japan
SEWING MACHINERY BUSINESS UNIT
2-11-1, TSURUMAKI, TAMA-SHI,
TOKYO, 206-8551, JAPAN
PHONE : (81)42-357-2371
FAX : (81)42-357-2274
http://www.juki.com

〒 206-8551 東京都多摩市鶴牧 2-11-1
TEL.
042-357-2371(ダイヤルイン)
FAX.
042-357-2274
http://www.juki.co.jp

This manual suits for next models

3

Other JUKI Sewing Machine Accessories manuals

JUKI DDL-7000A-7 Series User manual

JUKI

JUKI DDL-7000A-7 Series User manual

JUKI DLU-5494N-7/IP-110C User manual

JUKI

JUKI DLU-5494N-7/IP-110C User manual

JUKI MP-G20R-TH User manual

JUKI

JUKI MP-G20R-TH User manual

JUKI PS-800SB-2850 Series User manual

JUKI

JUKI PS-800SB-2850 Series User manual

JUKI AE-9 User manual

JUKI

JUKI AE-9 User manual

JUKI IP-200 User guide

JUKI

JUKI IP-200 User guide

JUKI IP-420 User manual

JUKI

JUKI IP-420 User manual

JUKI AK-121 User manual

JUKI

JUKI AK-121 User manual

JUKI IP-410 User manual

JUKI

JUKI IP-410 User manual

JUKI MP-G10-TH User manual

JUKI

JUKI MP-G10-TH User manual

JUKI SC-510 Original instructions

JUKI

JUKI SC-510 Original instructions

JUKI MP-G50-TE User manual

JUKI

JUKI MP-G50-TE User manual

JUKI PS800-8045 User manual

JUKI

JUKI PS800-8045 User manual

JUKI JaNets JT Simple User manual

JUKI

JUKI JaNets JT Simple User manual

Popular Sewing Machine Accessories manuals by other brands

Brother PR-620 installation manual

Brother

Brother PR-620 installation manual

SewingMachinesPlus QM29006 installation instructions

SewingMachinesPlus

SewingMachinesPlus QM29006 installation instructions

IntelliQuilter HQ-AVANTE 03.25.16 Installation

IntelliQuilter

IntelliQuilter HQ-AVANTE 03.25.16 Installation

ZOJE 1900B user manual

ZOJE

ZOJE 1900B user manual

handi quilter Sixteen P-Pod manual

handi quilter

handi quilter Sixteen P-Pod manual

Brother MD-600 Series product manual

Brother

Brother MD-600 Series product manual

Brother PR-600/600C user guide

Brother

Brother PR-600/600C user guide

Brother WT10 quick start guide

Brother

Brother WT10 quick start guide

Husqvarna VIKING Do All Quilters Hoop manual

Husqvarna

Husqvarna VIKING Do All Quilters Hoop manual

manuals.online logo
manuals.online logoBrands
  • About & Mission
  • Contact us
  • Privacy Policy
  • Terms and Conditions

Copyright 2025 Manuals.Online. All Rights Reserved.