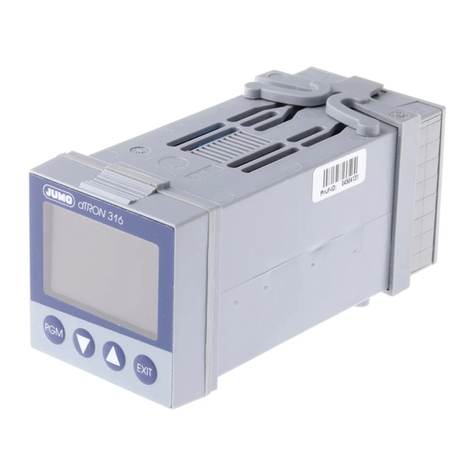
JUMO dTRON 304 User manual

JdTRON 304
JdTRON 308
JdTRON 316
Compact Controller
with program function
B 70.3041.1
Operating Instructions
06.05
JUMO dTRON 316 JUMO dTRON 308
JUMO dTRON 308 JUMO dTRON 304


Contents
1 Preface ............................................................... 3
1.1 Scope of delivery ..................................................................... 3
2 Identifying the instrument version ................... 4
3 Mounting ............................................................ 5
3.1 Preparation ............................................................................... 5
3.2 Fitting in position, Type 703042/43/44 .................................... 5
3.3 Fitting in position, Type 703041 ............................................... 5
4 Electrical connection ........................................ 6
4.1 Connection diagram for Type 703041 ..................................... 6
4.2 Connection diagram for Type 703042/43/44 ........................... 7
5 Displays and keys ............................................. 8
6 Operation ........................................................... 9
6.1 Level concept ........................................................................... 9
6.2 Level inhibit ............................................................................ 10
6.3 Entering values ....................................................................... 10
6.4 Entering times ........................................................................ 11
6.5 Operation of the fixed-setpoint controller .............................. 12
6.6 Operation of the program controller ...................................... 13
7 Operator level “OPr” ....................................... 14
8 Parameter level “PArA” .................................. 15
9 Configuration level “ConF” ............................ 16
9.1 Analog inputs “InP” ................................................................ 16
9.2 Controller “Cntr” ..................................................................... 17
9.3 Generator “Pro” ...................................................................... 17
9.4 Outputs “OutP” ...................................................................... 18
9.5 Display “diSP” ........................................................................ 19
10 Autotuning ....................................................... 20
11 Alarms .............................................................. 21
≤
Ω
Ω Ω

1 Preface
3
1 Preface
1.1 Scope of delivery
- 1 controller
- seal
- mounting brackets
- brief operating instructions
- 1 CD with comprehensive operating instructions and
setup program as a demo version
HThese brief operating instructions only cover those actions that are
essential for starting up the controller.
Gray
rastering
The factory settings for the instrument as delivered are shown on a
gray background.
vThe complete configuration options can be found in the
comprehensive Operating Manual B 70.3041.0 on the CD, or can be
downloaded from http://www.jumo.net

2 Identifying the instrument version
4
2 Identifying the instrument version
Meaning of the number code on the nameplate:
Basic type
703041 JUMO dTRON 316, 48mm x 48mm format
incl. 1 analog input, 2 relay outputs and 2 binary inputs or 2 logic outputs
703042 JUMO dTRON 308, 48mm x 96mm format (portrait format)
incl. 1 analog and 2 binary inputs, 2 relays and 2 logic outputs
703043 JUMO dTRON 308, 96mm x 48mm format (landscape format)
incl. 1 analog and 2 binary inputs, 2 relays and 2 logic outputs
703044 JUMO dTRON 304, 96mm x 96mm format
incl. 1 analog and 2 binary inputs, 2 relays and 2 logic outputs
Basic type extensions
1 Basic type 1
8 Standard, with factory settings
9 Programming to customer specification
Logic outputs (2 are available as standard)
1 0 / 12V
2 0 / 18V
Type of option slots
0 not used
1 Analog input 2 (universal)
2 Relay (changeover)
3 2 relays (n.o. make contacts)
4 Analog output
5 2 binary inputs
6 Solid-state relay 1A
7 RS422/485 interface
8 Profibus-DP interface
Supply
23 110 — 240V AC -15/+10%, 48 — 63Hz
2 5 20 — 53V AC/DC, 48 — 63Hz
703041/ 181–000–23/ 000, 000
Extra codes
000none
2 1 4 Math and logic module
2 1 7 Ratio controller
2 1 8 Difference controller
2 1 9 Humidity controller

3 Mounting
5
3 Mounting
3.1 Preparation
3.2 Fitting in position, Type 703042/43/44
hFit the seal that is supplied onto the instrument
body.
hInsert the controller from the front into the panel
cut-out.
hFrom behind the panel, slide the mounting
brackets into the guides on the sides of the
housing.
The flat faces of the mounting brackets must lie
against the housing.
hPush the mounting brackets up to the back of
the panel, and tighten them evenly with a
screwdriver.
3.3 Fitting in position, Type 703041
hFit the seal that is supplied onto the instrument
body.
hInsert the controller from the front into the panel
cut-out.
hFrom the back of the panel, push the mounting
frame onto the instrument body and press it
against the back of the panel, compressing the
springs, until the latches snap into the notches
provided and it is firmly fixed in position.
Type dTRON Panel cut-out
703041 316, in 48mm x 48mm format 45 +0.6 x 45 +0.6mm
703042/43 308, in 48mm x 96mm format
(portrait)/(landscape)
45 +0.8 x92 +0.8 mm
703044 304, in 96mm x 96mm format 92+0.8 x 92 +0.8mm

4 Electrical connection
6
4 Electrical connection
4.1 Connection diagram for Type 703041
5
6
7
8
6
7
8
1
1
2
3
4
1
2
2
3
4
8
3
4
6
7
3
5
L1(L+)
N(L-)

4 Electrical connection
7
4.2 Connection diagram for Type 703042/43/44
1
1
2
3
4
2
1
2
3
4
5
6
7
8
6
7
8
9
10
9
10
11
12
3
4
L1(L+)
5
6
8
9
11
12
13
15
16
17
N(L+)

5 Displays and keys
8
5 Displays and keys
Different values can also be visualized on the display.
vsee the comprehensive operating manual on the CD
(1) 7-segment display (factory setting: process value)
four-digit, red, decimal place is configurable
(automatic adjustment on display overflow)
(2) Active setpoint (factory setting: SP1)
SP1, SP2, SP3, SP4 (SP=setpoint); green;
(3) 7-segment display (factory setting: setpoint)
four-digit, green, decimal place is configurable; also used for operator
prompting (display of parameter and level symbols)
(4) Keys
(5) Indication
yellow, for
- switch status of the
binary outputs 1—6
- ramp/program function is active
- manual operation is active
(6) 16-segment display + dim. units
two-digit, green; for the unit °C/°F and symbols for h, min, %
PGM EXIT
(1)
(3)
(2) (6)
(4)
(5)

6 Operation
9
6 Operation
6.1 Level concept
The diagram below shows the three instrument levels.
HTime-out
If no key is pressed for 30sec, the instrument returns to normal display.

6 Operation
10
6.2 Level inhibit
The access to the individual levels can be inhibited by entering a code number.
hPress Pand Dsimultaneously for >5sec to enter the code.
hAlter code with P(display blinks)
hEnter code with Iand D
hReturn to normal display with Xor automatically after approx. 30sec
6.3 Entering values
When entries are made within the levels, the parameter symbol is shown in the
lower display.
hSelect parameter with Ior D
hChange to the entry mode with P(lower display blinks)
hAlter value with Iand D
The value alters dynamically with the duration of the key stroke.
hAccept the setting with Por automatically after 2sec
hor
hCancel entry with X.
The value is not accepted.
Code Operator level Parameter level Configuration level
0 enabled enabled enabled
1 enabled enabled inhibited
2 enabled inhibited inhibited
3 inhibited inhibited inhibited
ID/P
IIIIIIIIIIII
I
I
I
III
I
I
I
I I I I I I I I I I I I I
I
I
I
III
I
I
I
I
D
Select parameter Alter parameter

6 Operation
11
6.4 Entering times
When entering times (e.g. time of timer), the time unit is shown in addition.
The highest time unit of the display is shown for the unit.
For example, if “h” is shown for the hour, then the time format for the value is
hh:mm.
hSelect parameter with Ior D
hChange to the entry mode with P(lower display blinks)
hAlter value with Iand D
The value alters dynamically with the duration of the key stroke.
hAccept the setting with Por automatically after 2sec
or
hCancel entry with X.
The value is not accepted.
ID/
PI
D
IIIIIIIIIIII
I
I
I
III
I
I
I
I I I I I I I I I I I I I
I
I
I
III
I
I
I
Select
parameter
Alter
parameter

6 Operation
12
6.5 Operation of the fixed-setpoint controller
HThe fixed-setpoint controller will only function if
- the fixed-setpoint controller function has been configured ( Fnct = 0)
hAlter the present setpoint
with Iand D
The value is accepted
automatically.
The controller output appears in the
lower display. The hand symbol and the
unit “%” light up in addition.
hAlter the output with Iand D
In the case of a modulating controller,
the actuator is opened or closed using
the keys.
The output entry on a changeover is
configurable.
hReturn to the normal display with X
(press for more than 2 seconds)
Normal display Manual mode

6 Operation
13
6.6 Operation of the program controller
The program is canceled in the event of a power failure.
HThe program controller will only function if
- the program controller function has been configured ( Fnct = 1 ...4)
- the program setpoints (SPP1 ... SPP8) and
segment times (tP 1 ... tP 8) have been entered
Normal display Program is running
(the symbol for ramp appears)
Program pause
hAlter the present
setpoint with Iand D
The controller controls to
the present setpoint.
(The value is accepted
automatically after 2 sec.)
When the program is
paused, the lower display
blinks.
Alter setpoint

7 Operator level “OPr”
14
7 Operator level “OPr”
Process data ProC
User data USEr (through the setup program only)
Any parameter (up to eight) can be displayed and edited here by using the setup
program.
Program data Pro (only with program controller/generator)
A program with up to eight segments is defined here, via the segment setpoints
SPP1...SPP8 and segment times tP 1...tP 8.
Symbol Meaning
SP 1 Setpoint 1 (editable)
SP 2 Setpoint 2 (editable)
SP 3 Setpoint 3 (editable)
SP 4 Setpoint 4 (editable)
SPr Ramp setpoint (only if configured)
InP1 Measurement of analog input 1
InP2 Measurement of analog input 2 (only if available)
F1 Calculated result of math formula 1 (only if available)
F2 Calculated result of math formula 2 (only if available)
yOutput
trun Program run time (only with program controller/generator)
trES Residual program time (only with program controller/generator)
t1 Timer: time 1 (only if configured)
t2 Timer: time 2 (only if configured)

8 Parameter level “PArA”
15
8 Parameter level “PArA”
Two parameter sets, PAr1 und PAr2, can be stored.
Parameter Symbol Value range Factory setting
Proportional band 1a
a. with Pb1/2=0, the controller structure is not effective; depending on the display configuration,
these values are shown with the corresponding decimal places
Pb 1 0 ... 9999°C/°F 0°C/°F
Proportional band 2b
b. for controller output 2 (with 3-state controllers)
Pb 2 0 ... 9999°C/°F 0°C/°F
Derivative timec
c. with dt=0, the controller has no differential action (e. g. PI controller)
dt 0 ... 9999s 80s
Reset timed
d. with rt=0, the controller has no integral action (e. g. PD controller)
rt 0 ... 9999s 350s
Actuator time tt tt 5 ... 3000s 60s
Cycle time 1 CY 1 0.0 ... 999.9s 20s
Cycle time 2 CY 2 0.0 ... 999.9s 20s
Contact spacing db 0.0 ... 999.9°C/°F 0°C/°F
Switching differential 1e
e. for controllers with Pb1/2=0
HYS1 0.0 ... 999.9°C/°F 1°C/°F
Switching differential 2 HYS2 0.0 ... 999.9°C/°F 1°C/°F
Working point y0 -100 ... +100% 0%
Output limiting (max.) y1 0 ... 100% 100%
Output limiting (min.) y2 -100 ... +100% -100%

9 Configuration level “ConF”
16
9 Configuration level “ConF”
Depending on the equipment level of the instrument, individual parameters or
groups of parameters are switched out of display.
Analog selector
With some parameters, you can choose from a series of analog signals. The list
below gives you an overview of the selection options.
0 no function
1 Analog input 1
2 Analog input 2
3 Process value (controller)
4 Setpoint (controller)
5 Ramp end value
6 Program setpoint
13 Controller output level
14 Controller output 1
15 Controller output 2
9.1 Analog inputs “InP”
rInP1 Analog input 1 r
rInP2Analog input 2 r
Parameter Symbol Value range
Sensor type SEnS 0...1...11
Linearization Lin 0...1...18
Measurement offset OFFs -1999...0...+9999
Display start SCL -1999...0...+9999
Display end SCH -1999...100...+9999
Factory settings are shown bold.
Sensor type
0no function 6Heater current 0—50mA AC
1Resistance thermometer in
3-wire circuit
7 0 — 20mA
2Resistance thermometer in
2-wire circuit
8 4 — 20mA
3Resistance thermometer in
4-wire circuit
9 0 — 10V
4Thermocouple 10 2 — 10V
5Resistance transmitter 11 0 — 1V

9 Configuration level “ConF”
17
rIn12 Analog input 1 and 2 general r
9.2 Controller “Cntr”
9.3 Generator “Pro”
Linearization
0 Linear 10 Thermocouple type U
1Pt100 11 Thermocouple type L
2Pt500 12 Thermocouple type K
3 Pt1000 13 Thermocouple type S
4 KTY11-6 14 Thermocouple type R
5Thermocouple type C 15 Thermocouple type B
6Thermocouple type D 16 Thermocouple type N
7Thermocouple type E 17 Thermocouple W3Re-W26Re
8Thermocouple type T 18 customized linearization
9Thermocouple type J
Parameter Symbol Value range
Temperature unit Unit 0... 1 (0=°C, 1=°F)
Sampling cycle time CycL 0... 3 (0=50ms; 1=90ms; 2=150ms;
3=250ms)
Factory settings are shown bold.
Parameter Symbol Value range
Controller type CtyP 0 no function
1 Two-state controller
2, 3 Three-state, modulating controller
4 Continuous controller
Control action CAct 0...1
(0=direct (cooling); 1=inverse (heating))
Factory settings are shown bold.
Parameter Symbol Value range
Function Fnct 0 Fixed-setpoint controller
1 Ramp function
2 Program controller
3 Program generator
4 Hot-channel controller
Factory settings are shown bold.

9 Configuration level “ConF”
18
9.4 Outputs “OutP”
Numbering of the outputs
Standard: Relay 1 = output 1; relay 2 = output 2; logic output 1 = output 3;
logic output 2 = output 4
rAnalog outputs OutA rOutput 5—7 Out5...Out7 r
Slot Plug-in board with
1 analog output
Plug-in board with
1 binary output
Plug-in board with
2 binary outputs
Option 1 Output 5 Output 5 Output 5+8
Option 2 Output 6 Output 6 Output 6+9
Option 3 Output 7 Output 7 Output 7+10
Parameter Symbol Value range
Function Fnct Analog selector
switched off
Signal type SiGn 0... 2... 3 (0 = 0—10V; 1 = 2—10V;
2 = 0—20mA; 3 = 4—20mA)
Zero point OPnt -1999...0...+9999
End value End -1999...100...+9999
Factory settings are shown bold.

9 Configuration level “ConF”
19
rBinary outputs OutL rOutput 1—10 Out1 ...Out0 r
9.5 Display “diSP”
r
Function
0 no function 16 Limit comparator 4
1 Controller output 1 17 Control contact 1
2 Controller output 2 18 Control contact 2
3- not used 19 Control contact 3
4- not used 20 Control contact 4
5Binary input 1 21 Logic formula 1
6Binary input 2 22 Logic formula 2
7Binary input 3 23 Timer 1 active
8Binary input 4 24 Timer 2 active
9Binary input 5 25 “Program active” signal
10 Binary input 6 26 Program end signal
11 Binary input 7 27 Tolerance limit signal
12 Binary input 8 28 Manual mode on/off
13 Limit comparator 1 29 Binary marker
14 Limit comparator 2 30 Address value (setup)
15 Limit comparator 3 31 always “active”
Parameter Symbol Value range
Decimal point dEcP 0... 2 (0 = no decimal place; 1 = one;
2 = two))
Brightness BriG 0...5 (0 = bright)
Factory settings are shown bold.
Other manuals for dTRON 304
2
This manual suits for next models
2
Table of contents
Other JUMO Controllers manuals

JUMO
JUMO DICON 401 User manual

JUMO
JUMO AQUIS 500 pH User manual

JUMO
JUMO 709062/8-01-50 User manual

JUMO
JUMO iTRON04 User manual

JUMO
JUMO IMAGO 500 User manual

JUMO
JUMO diraTRON Series User manual

JUMO
JUMO dTRON 304 User manual

JUMO
JUMO DICON touch User manual

JUMO
JUMO TYA S201 User manual

JUMO
JUMO dTRON 304 User manual

JUMO
JUMO IMAGO F3000 User manual

JUMO
JUMO AQUIS 500 AS User manual

JUMO
JUMO DICON touch User manual

JUMO
JUMO AQUIS 500 RS User manual

JUMO
JUMO IMAGO F3000 User manual

JUMO
JUMO DICON touch User manual

JUMO
JUMO IMAGO 500 User manual

JUMO
JUMO dTRANS pH 02 User manual

JUMO
JUMO eTron M 100 User manual

JUMO
JUMO TYA S202 User manual