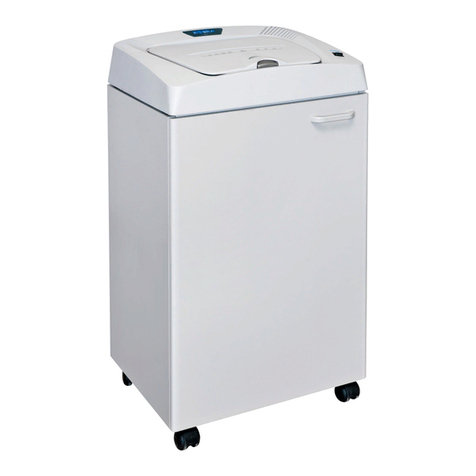
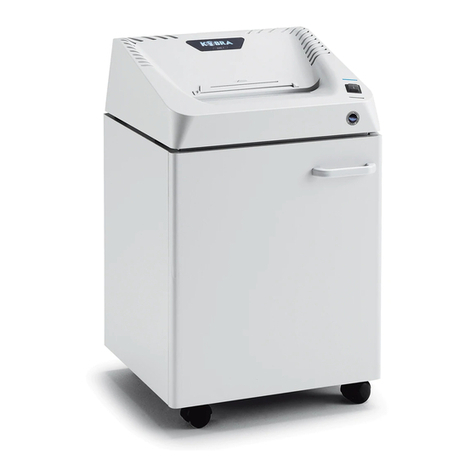
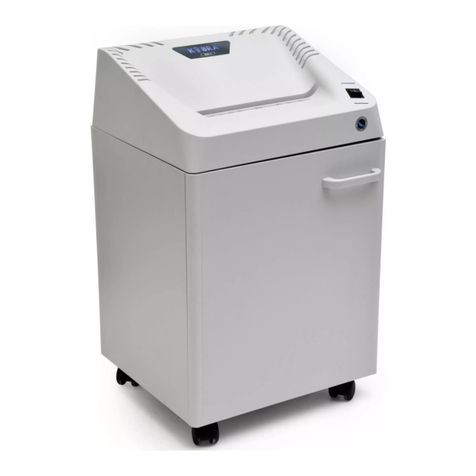
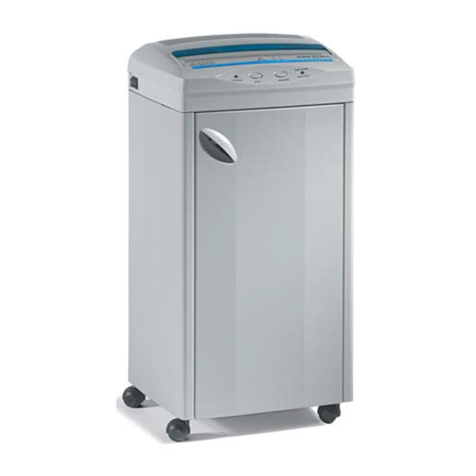
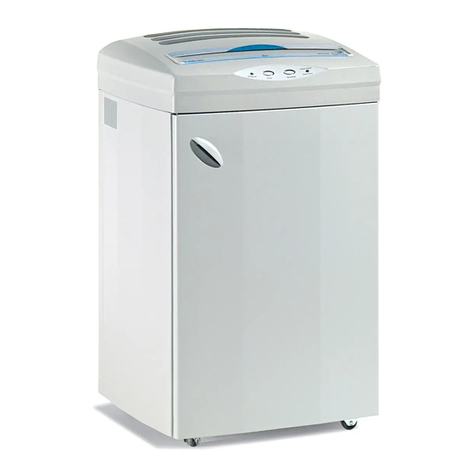
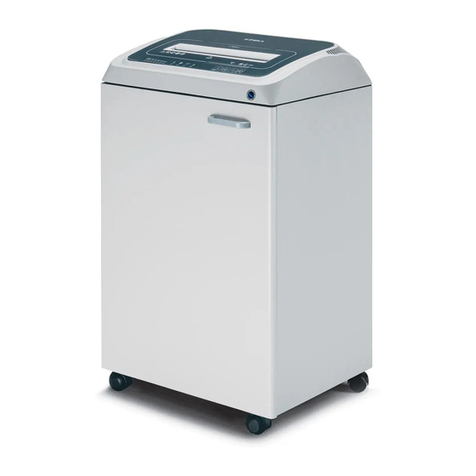
Kobra 430TS User manual

Kobra 430TS
Distruggidocumenti Libretto D’istruzioni
Shredder Operating Instructions
Schriftgutvernichter Betriebsanleitung
Destructor De Documentos Instrucciones De Manejo
Destructeur De Documents Mode D’emploi
Уничтожитель Бумаг ИНСТРУКЦИЯ ПО ЭКСПЛУАТАЦИИ

1
1. AVVERTENZE - IMPORTANTE
PRIMA DELLA MESSA IN MARCIA DELL’APPARECCHIO BISOGNA LEGGERE ATTENTAMENTE LE
ISTRUZIONI SULL’USO E LE SEGUENTI AVVERTENZE
-Prima di collegare l’apparecchio fare attenzione che il voltaggio e la frequenza di rete corrispondano ai dati della
targhetta posta sulla macchina
SCOLLEGARE LA SPINA DI ALIMENTAZIONE DELLA RETE ELETTRICA NEI SEGUENTI CASI:
-PRIMA DI CAMBIARE O VUOTARE IL SACCHETTO DI RACCOLTA CARTA
-PRIMA DI EFFETTUARE OPERAZIONI DI MANUTENZIONE E RIPARAZIONE
O INTERVENIRE SULLE PARTI INTERNE DELLA MACCHINA
CONSULTARE IL MANUALE
ATTENZIONE!
PRECAUZIONI DI SICUREZZA
TENERE LONTANO
DALL’IMBOCCO CRAVATTE O ALTRI PENDENTI
NON METTERE LE MANI NELL’IMBOCCO DEL
GRUPPO DI TAGLIO
NON LASCIARE UTILIZZARE L’APPARECCHIO
AI BAMBINI
TENERE LONTANO DALL’IMBOCCO
CAPELLI LUNGHI
NON USARE PRODOTTI O LUBRIFICANTI AD
AEREOSOL
1. WARNINGS - IMPORTANT
BEFORE TURNING ON THE DEVICE FIRST CAREFULLY READ THE INSTRUCTIONS FOR USE AND THE
FOLLOWING WARNINGS
-Before plugging in the device make sure that the voltage and grid frequency are the same as those on the label
on the machine
UNPLUG THE POWER CABLE IN THE FOLLOWING CASES:
-BEFORE CHANGING OR EMPTYING THE WASTE PAPER BAG
-BEFORE CARRYING OUT ANY MAINTENANCE OR REPAIRS
OR TOUCHING INTERNAL PARTS OF THE MACHINE
REFER TO THE OPERATING INSTRUCTIONS
WARNING!
SAFETY PRECAUTIONS
KEEP NECK TIES OR OTHER DANGLING
OBJECTS AWAY FROM THE THROAT
DO NOT PUT YOUR HANDS IN THE THROAT
AND THE CUTTING KNIVES
DO NOT ALLOW CHILDRENTO OPERATE THE
DEVICE
KEEP LONG HAIR AWAY FROM THE THROAT
DO NOT USE AEROSOL PRODUCTS OR
LUBRICANTS
1. HINWEISE - WICHTIG
VOR DER INBETRIEBNAHME DES GERÄTES MÜSSEN DIE BEDIENUNGSANWEISUNGEN UND DIE
FOLGENDEN HINWEISE AUFMERKSAM DURCHGELESEN WERDEN
-Vor dem Anschliessen des Gerätes darauf achten, dass die Spannung und die Netzfrequenz den Daten auf dem
Schild an der Maschine entspricht
IN FOLGENDEN FÄLLEN DEN NETZSTECKER VON STROMNETZ NEHMEN:
-VOR DEM AUSTAUSCHEN ODER LEEREN DES PAPIERSAMMELBEUTELS
-VOR DEM AUSFÜHREN VON WARTUNGS- ODER REPARATURARBEITEN
ODER VOR DEM EINGREIFEN AN INNENLIEGENDEN TEILEN DER MASCHINE
HA DAS HANDBUCH KONSULTIEREN
ACHTUNG!
SCHUTZVORKEHRUNGEN
KRAVATTEN UND ANDERE HÄNGENDE TEILE
VON DER EINGABEÖFFNUNG ENTFERNT
HALTEN
NICHT DIE HÄNDE IN DIE ÖFFNUNG DER
SCHNEIDGRUPPE STECKEN
DAS GERÄT NICHT VON KINDERN
BENUTZEN LASSEN
LANGE HAARE VON DER EINGABEÖFFNUNG
ENTFERNT HALTEN
KEINE PRODUKTE ODER SCHMIERMITTEL MIT
AEREOSOL VERWENDEN

2
1. ADVERTENCIAS - IMPORTANTE
ANTES DE PONER EN MARCHA EL APARATO, ES NECESARIO LEER ATENTAMENTE LAS
INSTRUCCIONES DE USO Y LAS SIGUIENTES ADVERTENCIAS
-Antes de enchufar el aparato controle que el voltaje y la frecuencia de la red correspondan con los datos de la
placa colocada en la máquina
DESENCHUFE LA CLAVIJA DE ALIMENTACIÓN DE LA RED ELÉCTRICA EN LOS SIGUIENTES CASOS:
-ANTES DE CAMBIAR O VACIAR LA BOLSA DE RECOGIDA DE PAPEL
-ANTES DE EFECTUAR OPERACIONES DE MANTENIMIENTO Y REPARACIÓN
O DE INTERVENIR EN LAS PARTES INTERNAS DE LA MÁQUINA
CONSULTAR EL MANUAL
¡ATENCIÓN!
PRECAUCIONES DE SEGURIDAD
MANTENER ALEJADOS
DE LA EMBOCADURA, CORBATAS UOTROS
COLGANTES
NO INTRODUCIR LAS MANOS POR LA
EMBOCADURA DEL
GRUPO DE CORTE
NO PERMITA QUE LOS NIÑOS
UTILICEN EL APARATO
MANTENER EL CABELLO LARGO ALEJADO
DE LA EMBOCADURA
NO UTILIZAR PRODUCTOS O LUBRICANTES DE
AEROSOL
1. ATTENTION - IMPORTANT
LISEZ ATTENTIVEMENT LES INSTRUCTIONS SUIVANTES AVANT DE METTRE LA MACHINE EN MARCHE.
-Vèrifier si la tension èlectrique et la Frèquence indiquèes sur la plaque du constructeur placèe sous la machine
sont les memes que votre alimentation èlectrique.
DEBRAMCHER LA PRISE ELECTRIQUE DE LA MACHINE:
-AVANT DE CHANGER OU DE VIDER LE SAC
-AVANT CHAQUE MAINTENANCE OU REPARATION
-AVANT D’OUVRIR LA MACHINE EN CAS DE REPARATION
SE REFERER AU MODE D’EMPLOI
ATTENTION!
MESURES DE SÉCURITÉ
TENIR ELOIGNES DE LA FENTE
D’INTRODUCTION LES CRAVATES OU AUTRES
OBJETS PENDANTS
NE PAS METTRE LES MAINS DANS LA FENTE
D’INTRODUCTION OU LE BLOC DE COUPE
NE PAS AUTORISER LES ENFANTS A SE
SERVIR DE L’APPAREIL
TENIR ELOIGNES DE LA FENTE
D’INTRODUCTION LES LONGS CHEVEUX
NE PAS UTILISER D’AEROSOLS
1.ВНИМАНИЕ
ВНИМАТЕЛЬНО ПРОЧТИТЕ СЛЕДУЮЩИЕ ИНСТРУКЦИИ ПЕРЕД НАЧАЛОМ
ЭКСПЛУАТАЦИИ ШРЕДЕРА:
- Проверьте, чтобы напряжение ичастота Вашей электрической сети соответствовали
значениям, указанным на наклейке на аппарате;
ОТСОЕДИНЯЙТЕ ШНУР ПИТАНИЯ ВСЛЕДУЮЩИХ СЛУЧАЯХ:
Перед тем как опустошить корзину для отходов ;
- Перед снятием режущего БЛОКА сКОРПУСА ШРЕДЕРА;
- Перед каждой переустановкой или сервисной операцией ;
- Перед разборкой для ремонта .
ВНИМАТЕЛЬНО ПРОЧИТАЙТЕ ИНСТРУКЦИЮ
ПО ЭКСПЛУАТАЦИИ
внимание!
меры предосторожности
избегайте попадания вприёмный
слот галстуков, ювелирных
украшений итд.
избегайте попадания вприёмный
пальцев рук
запрещается использование
уничтожителя детьми
избегайте попадания в
приёмный слот длинных волос
не используйте аэрозольные смазки

3
2. TAV. A/ ABB. A / TABLA A / РИС. A
1
2
3
4
4
6
5

4
UTILIZZO IN SICUREZZA
Il costruttore declina ogni responsabilità per eventuali danni a persone e/o cose, causati dalla non osservanza di quanto è riportato
nel manuale di uso e manutenzione.
I distruggi carta Kobra sono stati progettati e costruiti con protezioni meccaniche e dispositivi di sicurezza atti a proteggere
l’operatore da possibili danni fisici.
È tassativamente vietato modificare o rimuovere i ripari, i dispositivi di sicurezza e le etichette di attenzione, nel caso l’operatore
decida di apportare modifiche è da intendersi sotto la propria responsabilità, declinando sin da ora il costruttore da eventuali danni
fisici causati da un utilizzo improprio, le attrezzature sono considerate conformi alla normativa solo se non modificate, le Norme
comportamentali sui luoghi di lavoro sono a carico dell’acquirente e tutte le operazioni di manutenzione ordinaria e straordinaria non
prevista dalla garanzia, sono da considerare sotto la propria responsabilità.
Il Costruttore garantisce il pieno rispetto delle normative vigenti in materia di rischio elettrico e rischio meccanico.
Rischi residui
L’attrezzatura deve essere utilizzata da personale formato preventivamente.
Un mezzo “intrinsecamente”sicuro non esiste, così come non esiste il lavoratore che, con l’attenzione può “sempre”evitare
l’incidente. Pertanto, NON sottovalutate i rischi connessi all’uso della macchina e concentratevi sul lavoro che state svolgendo onde
evitare anche danni materiali.
Rischi connessi all’uso della macchina
Nonostante i distruggi carta non siano da considerare attrezzature particolarmente pericolose, occorre non sottovalutare i rischi
connessi all’uso della attrezzatura stessa, seppur il costruttore con l’applicazione di tutti i dispositivi di sicurezza per un uso sicuro
della macchina, ne garantisce la conformità.
La formazione verbale all’utilizzo della attrezzatura, ad ogni operatore che viene incaricato sia per l’uso sia per la manutenzione, non
declina anche la lettura del libretto di uso e manutenzioni.
Rischi elettrico
I lavori all’impianto elettrico della macchina devono essere eseguiti solo ed esclusivamente da personale specializzato ed autorizzato
dal costruttore, se la manutenzione verrà affidata a personale esterno sarà necessario appurare che l’operatore abbia una
formazione specifica sulle manutenzioni di attrezzature ed impianti elettrici, dovrà conoscere dove sono posizionate, le linee
dell’alimentazione elettrica e mantenere una certa distanza da esse, dovrà rilasciare a fine lavori un certificato di conformità.
I lavori sotto tensione sono vietati.
Gli addetti all’utilizzo del distruggi carta, salvo non abbiamo effettuato specifica formazione, non DEVONO effettuare nessuna
manutenzione. Non modificate, in nessun modo, l’impianto elettrico della macchina. Qualsiasi tentativo a tale riguardo, può
compromettere il funzionamento dei dispositivi elettrici provocando, in tal modo, malfunzionamenti o incidenti.
Avvertimenti
·Se sentite dei rumori insoliti o avvertire qualcosa di strano, spegnete il distruggi carta e date immediatamente
comunicazione al responsabile che provvederà ad avviare la procedura di manutenzione.
·Non intervenite mai durante il funzionamento del distruggi carta su organi in movimento.
·Durante tutte le fasi si raccomanda la massima cautela in modo da evitare danni a persone, cose o alla macchina stessa.
·Terminato il lavoro, pulite l’area di lavoro e ad attrezzatura spenta, provvedete a rimuovere materiale superfluo.
·Prima dello spegnimento della attrezzatura controllate la sua efficienza per evitare che altri operatori si trovino una
macchina non perfettamente funzionante al successivo utilizzo.
·Verificate che i tecnici utilizzino solo ricambi originali.
·I distruggi carta hanno prestazioni ben definite, non chiedete all’attrezzature lavori per i quali non è stata progettata.
·Quando il distruggi carta rimarrà inattivo per lunghi periodi, disinserite il cavo di alimentazione dalla rete elettrica.
·I posti di lavoro vanno mantenuti puliti ed ordinati, il disordine è causa di incidenti ed infortuni.

5
3. IMBALLO E INSTALLAZIONE
La lettura di questo manuale Vi permetterà di ottenere le migliori
prestazioni dal Vs KOBRA 430TS.
PREMESSA
La macchina viene fornita imballata sopra un bancale di legno
per garantirne l’integrità durante il trasporto.
Munirsi di:
- Tenaglia o forbici
- Martello
- Chiave esagonale da 13
- Chiave brugola da 5mm
IMBALLO Tav.A
Con le tenaglie oforbici tagliare la reggia (1) e rimuovere il
cartone (2) dal bancale (3).
Ora il Vostro distruggi documenti si presenta solidale al bancale
tramite la reggia di sicurezza (4) e le staffe per il trasporto (5).
Tagliare la reggia di sicurezza (4) e rimuovere le staffe (5) per il
trasporto svitando le viti come indicato utilizzando la chiave a
brugola da 5mm.
Fissare gli scivoli (6) al bancale come rappresentato in figura.
La manovra di discesa della K430TS è consigliabile venga
effettuata almeno da due persone.
Ora è possibile iniziare la fase di discesa del Vs. distruggi
documenti K430TS spingendolo dal bancale.
INSTALLAZIONE
Per apparecchi con presa scollegabile,utilizzare una presa
facilmente accessibile e nelle vicinanze dell’apparecchio stesso.
Effettuata la manovra di discesa del Vostro distruggi
documenti,aprite la porta anteriore della macchina e togliete il
carrello raccolta carta. Il carrello raccolta carta può essere
modificato da sacchetto doppio a sacchetto unico, togliendo i
braccetti (7).
7
Inserire il sacchetto dato in dotazione e ssicurarsi che il
sacchetto ribordi almeno 20/30cm sopra il telaio.
Inserire il carrello di raccolta carta corredato di sacchetto
all’interno della macchina quindi chiudere la porta.
La barra di sicurezza(G) deve essere fissata alla macchina
tramite gli appositi volantini ed è un elemento di sicurezza che
garantisce l’adeguata distanza dell’operatore dai coltelli di taglio
oltre a facilitare lo spostamento della macchina.
3.1 COLLEGAMENTO ELETTRICO
Il distruggi documenti K430TS viene fornito completamente
cablato e corredato di cavo quadripolare+terra per le versioni
380-415V,mentre viene fornito con cavo tripolare+terra,per le
versioni 220V (USA,CANADA,GIAPPONE),a tale cavo occorre
collegare una spina a norme e normalmente in uso nel paese
dove verrà istallato l’apparecchio.
Collegate il cavo di alimentazione del Vostro distruggi documenti
alla rete elettrica.
Sul fianco laterale sx del Vostro apparecchio è presente un
interruttore generale (8), spostate la leva dalla posizione “0”alla
posizione “1”e verificate che la spia led (9) sul pannello di
comando sia accesa, premere il pulsante FORWARD (10) sul
pannello di comando e visivamente controllate che il tappeto (11)
e i coltelli di taglio avanzino nella direzione come indicato in
figura.
10
8
9
11
Se la direzione dell’avanzamento del tappeto e il senso di
rotazione dei coltelli di taglio risultano contraria a quella indicata
in figura,far modificare da un ELETTRICISTA QUALIFICATO la
sequenza dei cavi R-S-T sulla presa del cavo di alimentazione
del Vostro apparecchio.

6
4. PANNELLO DI COMANDO
Il Vostro distruggi documenti K430TS è dotato di pulsantiera con
tecnologia TOUCH SCREEN.Le funzioni della macchina
vengono attivate con il solo sfioramento del relativo comando sul
pannello di controllo.
1012131416159
17
FORWARD:
(10)
sfiorando il tasto FORWARD la
macchina avvia il gruppo di taglio
e il tappeto di alimentazione.
STOP :
(12)
sfiorando il tasto STOP
l’apparecchio si arresta
immediatamente.
REVERSE:
(13)
sfiorando il tasto REVERSE
l’apparecchio esegue una
retromarcia del gruppo di taglio.
OIL:
(14)
segnala la mancanza di olio.
Per sostituire la tanica olio vedi
paragrafo “SOSTITUZIONE
CONTENITORE OLIO”.
STOP :
(17)
in caso di emergenza premendo
il tasto STOP si arrestano tutte le
funzioni della macchina.
STAND-BY :
(9)
il led si illumina quando il
distruggi documenti è acceso
SACCO PIENO :
(15)
il led si illumina quando il
sacco raccolta carta è pieno
bloccando il funzionamento.
PORTA APERTA:
(16)
il led si illumina quando la porta
anteriore o posteriore è aperta
bloccando il funzionamento della
macchina.
5. USO DELL’APPARECCHIO
Dopo aver collegato l’apparecchio alla rete elettrica,ruotare
l’interruttore generale (8) posto sul fianco laterale sx
dell’apparecchio dalla posizione “0”alla posizione “1”si accende
il led (9).
Ora il Vostro distruggi documenti K430TS è acceso in posizione
di stand-by.
Premere il tasto FORWARD (10) quindi appoggiare il materiale
da distruggere sul tappeto di alimentazione (11) , il materiale
verrà trasportato automaticamente all’interno del gruppo di taglio
per la distruzione.
8
11
9
10
12
In caso di una quantità eccessiva di carta introdotta,la macchina
si blocca ed esegue per qualche secondo una retromarcia per
liberare i coltelli di taglio dopo di chè la macchina si arresta.
Premere il tasto REVERSE affinché la carta arrivi all’esterno
dell’imbocco e a portata dell’operatore, quindi rilasciare il
pulsante REVERSE.
Successivamente introdurre una quantità minore di carta , quindi
premere il tasto FORWARD (10) per continuare la distruzione
del materiale.
A distruzione ultimata per arrestare la macchina premere il tasto
STOP (12) posto sul pannello di comando.
Per spegnere l’apparecchio ruotare l’interruttore generale (8)
dalla posizione “1”alla posizione “0”.
6. FUNZIONI AUTOMATICHE
Il distruggi documenti K430TS è dotato delle seguenti funzioni
automatiche:
-STOP AUTOMATICO: in caso di sacco pieno o porta aperta
segnalato dai led sul pannello di comando.
-RITORNO AUTOMATICO: antiintasamento che in caso di
inserimento accidentale di una quantità superiore di
carta rispetto alla capacità massima del modello
interrompe la corrente al motore elettrico e
successivamente esegue per qualche secondo la
retromarcia per liberare i rulli di taglio.
-SALVAMOTORE: che interrompe il funzionamento della
macchina in caso di surriscaldamento, segnalato
contemporaneamente dai led 9-15-16 lampeggianti sul
pannello di comando.
(in caso di intervento del salvamotore, lasciare
riposare la macchina per almeno 10/15 minuti).
Allo spegnimento dei LED lampeggianti si può
riprendere la distruzione.

7
SISTEMA DI OLIATORE AUTOMATICO
“AUTOMATIC OILER”
SOSTITUZIONE CONTENITORE OLIO
Led (14) lampeggiante,segnala la mancanza di olio, quindi
sostituire il contenitore olio come segue.
Aprire la porta frontale, estrarre il contenitore vuoto dalla sua
sede, svitare il tappo (12) in testa al contenitore e sfilarne il
tubetto (13).
Munirsi di un nuovo contenitore olio,svitare il tappo sigillo ed
eliminarlo,inserirvi al suo interno il tubetto olio (13) e serrare a
fondo il tappo (12).
Riposizionare il nuovo contenitore olio nella sua sede e
richiudere la porta.
12
13
Ora il Vostro distruggi documenti è nuovamente pronto e con
gruppo di taglio lubrificato.
ATTENZIONE!!!! Il led luminoso OIL posto sul pannello di
comando potrebbe,durante i primi minuti di funzionamento,
dopo la sostituzione contenitore olio continuare a
lampeggiare, fino a che il tubetto di mandata olio non è
ancora completamente pieno.
7. CURA E MANUTENZIONE
Prima di effettuare operazioni di manutenzione e
riparazioni o di intervenire sulle parti interne della
macchina, scollegare la spina di alimentazione della rete
elettrica.
Il distruggi documenti KOBRA 430TS non ha bisogno di
manutenzione particolare.
Comunque è buona norma sostituire il contenitore olio non
appena segnalato dal led luminoso OIL posto sul pannello di
comando,per garantire efficienza e durata nel tempo del
gruppo di taglio.
7.1 VERIFICA TENSIONAMENTO
CATENA
- Rimuovere la copertura superiore della macchina.
- Verificare che la catena abbia un movimento compreso tra 4-10mm.
7.2 TENSIONAMENTO CATENA
Se occorre tensionare la catena:
- Rimuovere la copertura superiore della macchina.
- Allentare i dadi (1) e spingere il motore avvitando le viti (2) quindi
verificate che la catena abbia un movimento che risulti di 4-10mm.
(VEDI PARAGRAFO 7.1).
- Serrare nuovamente i dadi (1).
- Riposizionare la copertura superiore della macchina.
1
1
2
2
7.3 INGRASSAGGIO CATENA E
INGRANAGGI DI TRASCINAMENTO
- Rimuovere la copertura superiore della macchina.
- Ingrassare con grasso lubrificante tipo K2K secondo norma
DIN 51502/DIN51825, catena e ingranaggi di trascinamento.
- Riposizionare la copertura superiore della macchina.

8
7.4 TENSIONAMENTO TAPPETO DI
ALIMENTAZIONE
Il tappeto di alimentazione deve avere sempre un tensionamento
corretto per evitare slittamenti durante il funzionamento.
Per tensionare il tappeto di alimentazione:
12 3
12 3
-Allentare i dadi esagonali (1) posti sul lato destro e sinistro del
supporto tappeto alimentatore.
-Allentare i controdadi (2) delle viti di serraggio (3).
-Tensionare il tappeto in modo uniforme usando le viti di
serraggio (3).
ATTENZIONE! Tensionare il tappeto finchè non cessa lo
slittamento.
Non eccedere con il tensionamento poiché si possono
danneggiare i cuscinetti del rullo tappeto alimentatore.
-Serrare i dadi esagonali (1) e i dadi di bloccaggio (2).
È necessario che il tappeto di alimentazione ruoti in linea:
Accendere l’apparecchio e farlo funzionare a vuoto per 10
minuti.
Durante questo tempo il tappeto di alimentazione deve ruotare
allineato.
Se dovesse scivolare verso il bordo destro o sinistro è
necessario modificare l’allineamento del tappeto stesso.
(vedi paragrafo 7.4).
7.5 VERIFICA USURA TAPPETO DI
ALIMENTAZIONE
La superficie del tappeto di alimentazione può usurarsi dopo
lunghi periodi di utilizzo.
Se sulla superficie del tappeto di alimentazione si dovessero
intravedere dei filamenti di tessuto,il tappeto di alimentazione
deve essere sostituito.
Si prega di rivolgersi al rivenditore Kobra a Voi piu’vicino.
7.6 PULIZIA TAPPETO DI
ALIMENTAZIONE
Usate solo un panno morbido con acqua e sapone per la pulizia.
Non usate prodotti abrasivi,liquido detergente,petrolio o solventi.

9
8. ANOMALIE
Se avete problemi col Vostro distruggi documenti, controllate i sintomi qui di seguito descritti.
Se non riuscite a risolvere il problema in questo modo,contattare il rivenditore KOBRA più vicino.
Non accedere alle parti interne del
distruggi documenti per tentare di ripararlo.Potreste esporvi a gravi scariche
elettriche o pericoli meccanici inoltre invalidare la Vostra garanzia.
PROBLEMA COME SI MANIFESTA CAUSA AZIONE
Il distruggi documenti non si avvia
-Non si accende il led (9)
-Si accende il led (15)
-Si accende il led (16)
-Si accendono
contemporaneamente i led
(9-15-16)
-Interruttore (8) in
posizione “0”
-Cavo di alimentazione
non collegato
-Mancanza di tensione di
alimentazione
-Sacco pieno
-Porta non correttamente
chiusa
-Motore in protezione
termica
- Posizionare l’interruttore
in posizione “1”
-Verificare se l’inserimento
della spina sulla presa di
alimentazione è corretta.
-Verificare se presente la
tensione sulla presa.
-Vuotare il sacco
-Chiudere la porta
-Attendere 15 minuti per il
raffreddamento del
motore.
Riduzione sensibile della capacità
di taglio
-Capacità ridotta rispetto
alla capacità rilevata con
gruppo oliato
-Mancanza di
lubrificazione sul gruppo
di taglio.
-Sostituire il contenitore
olio vuoto con uno pieno
-Lubrificare inizialmente i
coltelli di taglio
manualmente inserendo
piu’fogli cosparsi di olio.

10
3. PACKAGING AND INSTALLATION
Reading this manual will allow get the best performance from
your KOBRA 430TS.
INTRODUCTION
The machine is delivered wrapped on a wooden pallet to ensure
it is not damaged during transport.
You will need:
oPliers or scissors
oHammer
oHex key 13
oAllen key 5mm
PACKAGING TAV.A
Use the pliers or scissors to cut the straps (1) and remove the
cardboard (2) from the pallet (3).
Now your shredder is attached to the pallet by means of the
safety strapping (4) and transport bars (5).
Cut the safety strapping (4) and remove the transport bars (5) by
unscrewing the screws as indicated using a 5mm Allen key.
Fix the slides (6) to the pallet as shown in the diagram.
It is advisable that at least two people manoeuvre the K430TS
off the pallet.
Now you can start to push your K430TS shredder off the pallet.
INSTALLATION
For devices which can be unplugged, use an easily accessible
socket in the vicinity of the device. Once the shredder has been
taken off the pallet, open the front door and take out the waste
paper trolley. The waste paper trolley can be modified from
double bags to single bags by simply removing the brackets (7).
7
Insert the bag which comes with the shredder and make sure
that the edges come out at least 20/30cm above the frame.
Slide the waste paper bin trolley fitted with the bag into the
machine and close the door.
The safety bar (G) must be fixed to each side of the front
through its four knobs as shown in the picture above before
operating the machine. The safety bar keeps the operator at
distance from the cutting knives and allows easy moves of the
machine
3.1 CONNECTING TO THE POWER
SUPPLY
The K430TS shredder comes fully wired and with its own four-
pole cable+earth for the 380-415V version, while it comes with a
three-pole cable+earth for the 220V version
(USA,CANADA,JAPAN), and this cable must be connected to a
standard plug of the kind normally used in the country where the
device is to be installed.
Connect the power cable of your shredder to the mains.
On the left-hand side of your device there is a main switch (8),
move the lever from “0”to “1”and check that the led (9) on the
control panel is on, press the FORWARD button (10) on the
control panel and visually check that the conveyor (11) and
cutting knives move in the direction shown in the diagram.
10
8
9
11
If the conveyor is moving and the knives are rotating in the
opposite direction to that indicated in the diagram, have a
QUALIFIED ELECTRICIAN modify the sequence of the R-S-T
cables on the power cable of your device.

11
4. CONTROL PANEL
Your K430TS shredder has a high tech TOUCH SCREEN control
panel. Simple touch the control on the panel in order to activate
the functions of the machine.
1012131416159
17
FORWARD:
(10)
touch the FORWARD button and the
machine starts the cutting knives and
feeder conveyor.
STOP :
(12)
touch the STOP button and the
machine stops immediately.
REVERSE:
(13)
touch the REVERSE button and the
device puts the cutting knives into
reverse.
OIL:
(14)
warns that oil has run out.
To replace the oil tank see paragraph
“REPLACING OIL CONTAINER”.
STOP :
(17)
in case of emergency, press the STOP
button to stop all functions of the
machine.
STAND-
BY :
(9)
the led comes on when the
shredder is on
BAG FULL
:
(15)
the led comes on when the waste
paper bag is full and stops the
machine.
OPEN
DOOR:
(16)
the led comes on when the front or
rear door is open and stops the
machine .
5. USING THE DEVICE
When the device has been connected to the mains, turn the
main switch (8) located on the left side of the device from “0”to
“1”and the led (9) comes on.
Now your K430TS shredder is on stand-by.
Press the FORWARD button (10) and place the material to be
shredded on the feeder conveyor (11), the material will be
automatically carried to the cutting knives for shredding.
8
11
9
10
12
If too much paper is introduced, the machine will stop and go into
reverse for a few seconds to free the cutting knives. The
machine will then stop.
Press REVERSE so the paper comes out of the throat within
reach of the operator, then release the REVERSE button.
Now introduce a smaller quantity of paper, then press
FORWARD (10) to continue shredding.
When shredding has finished, press STOP (12) on the control
panel to halt the machine.
To switch off the device, turn the main switch (8) from “1”to “0”.
6. AUTOMATIC FUNCTIONS
The K430TS shredder has the following automatic functions:
- AUTOMATIC STOP: if the waste bag is full or the door is open
indicated by the led on the control panel.
- AUTOMATIC RETURN: anti-jamming feature which cuts off
power to the electric motor if too much paper is inserted
for the maximum capacity of the machine, then puts the
machine into reverse for a few seconds to free the cutting
rollers.
- MOTOR SAVER: which switches the machine off if it overheats
and leds 9-15-16 on the control panel start flashing.
(If the motor saver comes on, let the machine cool down
for at least 10/15 minutes).
When flashing LEDs go off you can start shredding again.

12
AUTOMATIC OILER SYSTEM
REPLACING OIL CONTAINER
Led (14) flashes to warn that the shredder has run out of
oil and the oil container must be replaced as follows.
Open the door on the front, take the empty container out of its
housing, unscrew the lid (12) on top of the container and slide
out the tube (13).
Take a new oil container, unscrew the seal cap, insert it into
the oil tube (13) and screw the lid firmly back on (12).
Replace the new oil container and close the door.
12
13
Now your shredder is ready again and the cutting knives are
oiled.
WARNING!!!! The OIL led on the control panel might continue
flashing for a few minutes after the oil container is replaced
until the oil feeder tube is completely full.
7. CARE AND MAINTENANCE
Before doing any maintenance or repairs or touching the
internal parts of the machine, unplug the cable from the
power supply.
The KOBRA 430TS shredder does not need any particular
maintenance.
Nonetheless it is advisable to replace the oil container as
soon as the OIL led on the control panel lights up to ensure
long life and efficient functioning of the cutting knives.
7.1 CHECKING CHAIN TENSION
- Remove the cover on the top of the machine.
- Check that the chain has between 4-10mm of movement.
7.2 TENSIONING CHAIN
if the chain needs to be tensioned:
- Remove the top cover of the machine.
- Loosen the nuts (1) and push the motor by
tightening the screws (2)
then
Check that the chain has a movement of between 4-10mm.
(SEE PARAGRAPH 7.1).
- Tighten the nuts again (1).
- Replace the cover on the top of the machine.
1
1
2
2
7.3 GREASING CHAIN AND DRIVE GEARS
- Remove the top cover of the machine.
- Grease the chain and drive gears with a lubricant grease like K2K in
compliance with DIN 51502/DIN51825.
- Replace the cover on the top of the machine.

13
7.4 TENSIONING THE FEEDER
CONVEYOR
The feeder conveyor must always have the proper tension to
avoid slippage during operation.
To tension the feeder conveyor:
12 3
12 3
-Loosen the hex nuts (1) on the right and left sides of the feeder
conveyor frame.
-Loosen the lock nuts (2) on the tightening screws (3).
-Put uniform tension on the conveyor using the tightening screws
(3).
WARNING! Tension the conveyor until there is no more
slippage.
Do not overdo tensioning as this can damage the bearings in the
feeder conveyor belt.
-Tighten the hex nuts (1) and lock nuts (2).
The feeder conveyor must rotate in line:
Switch on the machine and let it run empty for 10 minutes.
During this time the feeder conveyor must roll in a straight line.
If it slips towards the right or left side, the alignment of the
conveyor must be modified.
(see paragraph 7.4).
7.5 CHECK WEAR AND TEAR ON FEEDER
CONVEYOR
The surface of the feeder conveyor can wear out after long
periods of use.
If filaments of fabric become visible on the surface of the feeder
conveyor, then it must be replaced.
Please contact your nearest Kobra dealer.
7.6 CLEANING FEEDER CONVEYOR
Only use a soft cloth with soap and water for cleaning.
Do not use abrasive products, detergents, petroleum or solvents.

14
8. TROUBLESHOOTING
If you have problems with your shredder, check the symptoms described below.
If you are unable to solve the problem this way, contact your nearest KOBRA dealer.
Do not touch the internal parts of the shredder to try to repair it. You could risk serious electrical shock or
mechanical dangers as well as invalidating your guarantee.
PROBLEM SYMPTOMS CAUSE ACTION
The shredder does not start
- led (9) does not come on
-led (15) comes on
- led (16) comes on
-leds come on together
(9-15-16)
-Switch (8) at “0”
-Power cable not
connected
-No electrical power
-Bag full
-Door not closed properly
-Motor in overheating
protection mode
- Turn switch to “1”
- Check plug is properly
inserted into the socket
-Check socket is switched
on
-Empty bag
-Close the door
-Wait 15 minutes for the
motor to cool down
Significant reduction in shredding
capacity
-Capacity reduced
compared with shredding
capacity noted when
cutting knives are oiled
-
Cutting knives need to be
lubricated
-Replace the empty oil
container with a full one
-Lubricate the cutting
knives manualy by
inserting several sheets of
paper sprinkled with oil

15
3. VERPACKUNG UND INSTALLIERUNG
Das Lesen dieses Handbuches erlaubt es, die besten Leistun-
gen mit Ihrem KOBRA 430TS zu erzielen.
VORAUSSETZUNG
Die Maschine wird verpackt auf einer Holzpalette geliefert, um
die Unversehrtheit während des Transportes zu garantieren.
Sich versehen mit:
- Kneifzange oder Schere
- Hammer
- 13er Sechskantschlüssel
- Steckschlüssel von 5mm
VERPACKUNG Abb.A
Mit den Zangen oder Scheren die Bänder durchschneiden (1)
und den Karton (2) von der Palette (3) entfernen.
Nun zeigt sich Ihr Aktenvernichter mit einem Sicherheitsband (4)
und Transportbügeln (5) fest mit der Palette verbunden.
Das Sicherheitsband (4) durchschneiden und die Transportbügel
(5) abnehmen, indem die Schrauben mit Hilfe des Steckschlüs-
sels von 5mm herausgedreht werden.
Die Gleitplanken (6) wie in der Abbildung an der Palette
befestigen.
Das Herunterschieben des K430TS sollte von wenigstens zwei
Personen vorgenommen werden.
Nun ist es möglich, Ihren Aktenvernichter K430TS herunter-
zulassen, indem er von der Platte geschoben wird.
INSTALLIERUNG
Für Geräte mit herausziehbarem Stecker eine leicht zugängliche
Steckdose in der Nähe des Gerätes selbst benutzen.
Nach dem Abladen Ihres Aktenvernichters die vordere Tür der
Maschine öffnen und den Papiersammelwagen herausnehmen.
Der Papiersammelwagen kann durch Abnahme der Haltearme
(7) vom Typ für Doppelbeutel zum Typ für Einzelbeutel verändert
werden.
7
Den mitgelieferten Beutel einsetzen und sich vergewissern, dass
der Beutel wenigstens 20/30cm über den Rahmen hervorsteht.
Den mit dem Beutel versehenen Papiersammelwagen in die
Maschine einsetzen und die Tür schliessen.
Vor dem Arbeiten mit dem Gerät muss der Schutzbügel (G)
vorne an beiden Seiten durch die 4 Hebel befestigt werden, wie
oben in der Abbildung gezeigt. Mit diesem Schutzbügel wird der
Abstand zwischen den Schneidmessern und dem Bediener
gewährleistet und ermöglicht ein einfaches Bewegen des
Gerätes.
3.1 ELEKTRISCHER ANSCHLUSS
Der Aktenvernichter K430TS wird komplett verkabelt und mit
einem vierpoligen Kabel + Erde für die Ausführungen 380-415V
geliefert, während er für die Ausführungen 220V (USA,
KANADA, JAPAN) mit einem dreipoligen Kabel + Erde geliefert
wird, an dieses Kabel muss ein genormter Stecker angeschlos-
sen werden, wie er normalerweise in dem Bestimmungsland
benutzt wird, in welchem das Gerät installiert wird.
Das Kabel Ihres Aktenvernichters an das Stromnetz anschlies-
sen.
An der linken Seite Ihres Gerätes befindet sich ein Hauptschalter
(8); den Hebel aus der Position “0”in die Position “1”stellen und
prüfen, ob die Leuchtanzeige (9) auf dem Bedienfeld aufleuchtet,
die Taste FORWARD (10) auf dem Bedienfeld drücken und eine
Sichtkontrolle vornehmen, ob das Band (11) und die Schneid-
messer in der in Abbildung angezeigten Richtung vorlaufen.
10
8
9
11
Wenn die Vorlaufrichtung des Bandes und die Drehrichtung der
Schneidmesser entgegengesetzt zu der in Abbildung gezeigten
Richtung verlaufen, muss von einem ELEKTROFACHMANN die
Reihenfolge der Anschlüsse R-S-T an dem Speisungskabel
Ihres Gerätes geändert werden.

16
4. BEDIENFELD
Ihr Aktenvernichter K430TS ist mit einem Tastenfeld mit TOUCH
SCREEN-Technogie versehen. Die Funktionen der Maschine
werden nur durch das leichte Berühren der entsprechenden
Befehlstaste auf dem Bedienfeld aktiviert.
1012131416159
17
FORWARD:
(10)
Berühren der Taste FORWARD,
die Maschine setzt die Schneid-
Gruppe und das Zuführband
in Bewegung
.
STOP :
(12)
Berühren der Taste STOP, das
Gerät
hält unverzüglich an.
REVERSE:
(13)
Berühren der Taste REVERSE,
das Gerät führt einen Rücklauf
der Schneidgruppe aus.
OIL:
(14)
Zeigt das Fehlen von Öl an.
Zum Austauschen des
Ölbehälterss. Abschnitt
“AUSTAUSCH DES
ÖLBEHÄLTERS”.
STOP :
(17)
Im Falle des Notzustandes die
Taste STOP drücken. Alle
Funktionen der Maschine werden
angehalten.
STAND-
BY :
(9)
Die Led leuchtet auf, wenn der
Aktenvernichter eingeschaltet ist
BEUTEL
VOLL :
(15)
Die Led leuchtet auf, wenn der
Papiersammelbeutel voll ist und
blockiert den Betrieb.
ÜR OFFEN :
(16)
Die Led leuchtet auf, wenn die
vordere oder hintere Tür offen
ist und blockiert den Betrieb der
Maschine
5. BENUTZUNG DES GERÄTES
Nach dem Anschliessen des Gerätes an das Stromnetz den
Hauptschalter (8) an der linken Seite des Gerätes aus der Posi-
tion “0”in die Position “1”stellen, die Led (9) leuchtet auf.
Nun ist Ihr Aktenvernichter K430TS eingeschaltet und befindet
sich in Stand-by.
Die Taste FORWARD (10) drücken und das zu vernichtende
Material auf das Zuführband (11) legen, das Material wird
automatisch zum Zerkleinern in die Schneidgruppe transportiert.
8
11
9
10
12
Im Falle einer übermässigen Menge an eingegebenem Papier
blockiert die Maschine und führt für ein paar Sekunden einen
Rücklauf aus, um die Schneidmesser zu befreien. Danach hält
die Maschine an.
Die Taste REVERSE drücken bis das Papier aus der Eingabe-
öffnung austritt und für den Bediener greifbar ist, dann die Taste
REVERSE loslassen.
Anschliessend eine geringere Menge an Papier eingeben und
die Taste FORWARD (10) drücken, um mit dem Zerkleinern des
Materials fortzufahren.
Nach beendeter Zerkleinerung wird zum Anhalten der Maschine
die Taste STOP (12) gedrückt, angeordnet auf dem Bedienfeld.
Zum Abschalten des Gerätes den Hauptschalter (8) aus der
Positon “1”in die Position “0”stellen.
6. AUTOMATISCHE FUNKTIONEN
Der Aktenvernichter K430TS ist mit folgenden automatischen
Funktionen ausgestattet:
-STOP-AUTOMATIK: Im Falle des vollen Beutels oder offenen
Tür, angezeigt durch die Leds auf dem
Bedienfeld
-AUTOMATISCHER
RÜCKLAUF : Bei Verstopfung oder zufälligem Eingeben einer
grösseren Papiermenge im Verhältnis zur
Höchstkapazität des Modells wird die Stromzu-
fuhr zum Motor unterbrochen und danach für
einige Sekunden der Rücklauf ausgeführt, um
die Schneidmesser zu befreien.
-Motorschutz: Dieser unterbricht den Betrieb der Maschinen
im Falle der Überhitzung, angezeigt gleichzeitig
durch die blinkenden Led's 9-15-16 auf dem
Bedienfeld. (Beim Auslösen des Motorschutzes
die Maschine wenigstens für 10/15 Minuten
ruhen lassen). Beim Verlöschen der blinkenden
Leds kann das Zerkleinern wiederaufgenommen
werden.

17
AUTOMATISCHES ÖLERSYSTEM
“AUTOMATIC OILER”
AUSTAUSCH DES ÖLBEHÄLTERS
Die blinkende Led (14) zeigt das Fehlen von Öl an, folglich
wird der Behälter wie nachstehend ausgetauscht.
Die vordere Tür öffnen, den leeren Behälter aus seinem Sitz
nehmen, den Verschluss (12) oben am Behälter abschrauben
und das Rohr (13) herausziehen.
Einen neuen Ölbehälter nehmen, den Siegelverschluss
abschrauben und entsorgen, das Ölrohr (13) einsetzen und den
Verschluss (12) fest anziehen.
Den Ölbehälter wieder in seinen Sitz einsetzen und die Tür
schliessen.
12
13
Nun ist Ihr Aktenvernichter mit einer gut geschmierten
Schneidgruppe wieder betriebsbereit.
ACHTUNG!!!! Die den Ölstand anzeigende Led auf dem
Bedienfeld könnte während der ersten Betriebsminuten nach
dem Austausch des Ölbehälters noch blinken, und zwar bis das
Ölauslassrohr noch nicht vollständig gefüllt ist.
7. PFLEGE UND WARTUNG
Vor dem Ausführen von Wartungs- und Reperaturarbeiten
oder vor dem Eingriff an den innenliegenden Teilen der
Maschine den Stecker für die Stromzufuhr aus der
Steckdose ziehen.
Der Aktenvernichter KOBRA 430TS erfordert keine besondere
Wartung.
Auf jeden Fall sollte der Ölbehälter ausgetauscht werden, sobald
die Led OIL auf dem Bedienfeld dies signalisiert, um die
Leistungsfähigkeit und Lebensdauer der Schneidgruppe zu
gewährleisten.
7.1 PRÜFEN DER KETTENSPANNUNG
- Die obere Abdeckung von der Maschine entfernen.
- Prüfen, ob die Kette eine Bewegung zwischen 4-10 mm hat.
7.2 SPANNEN DER KETTE
Falls notwendig, die Kette spannen:
- Die obere Abdeckung von der Maschine entfernen.
- Die Muttern (1) lösen und den Motor durch Anziehen der
Schrauben
(2) verschieben, folglich prüfen, ob die Kette eine Bewegung
zwischen 4-10mm hat.
((S. ABSCHN. 7.1).
- Die Muttern (1) wieder festziehen.
- Die obere Abdeckung der Maschine wieder aufsetzen.
1
1
2
2
7.3 EINFETTEN DER KETTE UND
DER MITNEHMERGETRIEBE
- Die obere Abdeckung von der Maschine entfernen.
- Mit Schmierfett vom Typ K2K nach DIN 51502/DIN51825
die Kette und die Mitnehmergetriebe schmieren.
- Die obere Abdeckung der Maschine wieder aufsetzen.

18
7.4 SPANNEN DES ZUFÜHRBANDES
Das Zuführband muss immer eine korrekte Spannung haben, um
das Rutschen während des Betriebes zu vermeiden.
Zum Spannen des Zuführbandes:
12 3
12 3
-Die Sechskantschrauben (1) rechts und links der Halterung des
Zuführbandes lösen.
-Die Gegenmuttern (2) der Spannschrauben (3) lockern.
-Das Zuführband gleichmässig spannen und dazu die Spann-
schrauben (3) benutzen.
ACHTUNG! Das Band solange spannen bis es nicht mehr
rutscht.
Nicht übermässig spannen, da sonst die Polster der Rolle für das
Zuführband beschädigt werden können.
-Die Sechskantschrauben (1) und die Gegenmuttern (2) wieder
anziehen.
Es ist wichtig, dass das Zuführband gut ausgerichtet läuft:
Das Gerät einschalten und für 10 Min. im Leerlauf arbeiten
lassen.
Während dieser Zeit muss das Zuführband ausgerichtet laufen.
Sollte es zum rechten oder linken Rand hin tendieren, ist ein
Ausrichten des Zuführbandes selbst erforderlich.
(s. Abschn. 7.4).
7.5 ÜBERPRÜFUNG VERSCHLEISS DES
ZUFÜHRBANDES
Die Oberfläche des Zuführbandes kann nach langen Betriebs-
zeiten verbraucht sein.
Wenn an der Oberfläche des Zuführbandes Gewebefäden
sichtbar werden sollten, muss das Zuführband ausgetauscht
werden.
Es wird gebeten, sich an den nächstliegenden Vertragshändler
von Kobra zu wenden.
7.6 REINIGUNG DES ZUFÜHRBANDES
Verwenden Sie zur Reinigung nur ein weiches Tuch mit Wasser
und Seife. Keine abreibenden Produkte, Reinigungsflüssigkeiten,
Petroleum oder Lösungsmittel verwenden

19
8. FUNKTIONSST
Ö
RUNGEN
Wenn Sie Probleme mit Ihrem Aktenvernichter haben, prüfen Sie auf nachstehend beschriebene
Symptome.
Können Sie das Problem so nicht lösen, kontaktieren Sie den Vertragshändler KOBRA in Ihrer Nähe.
Nicht an die innenliegenden Teile des Aktenvernichters gehen, um diesen zu reparieren. Sie könnten
schwere Stromschläge oder mechanische Gefahren riskieren und ausserdem die Garantie ungültig
machen.
PROBLEM SYMPTOME URSACHE EINGRIFF
Der Aktenvernichter läuft
nicht an
-Die Led (9) leuchtet nicht
-Die Led (15) leuchtet
-Die Led (16) leuchtet
-Die Leds (9-15-16) leuchten
gleichzeitig auf
-Schalter (8) auf
Position “0”
-Speisungskabel nicht
angeschlossen
-Fehlende Spannung
-Beutel voll
-Tür nicht korrekt
geschlossen
-Motor in
Überhitzungsschutz
- Den Schalter auf Position
“1”stellen
-Ptüfen, ob der Stecker
korrekt in die Steckdose
eingesetzt ist.
-Vorhandensein von
Spannung an der Steckdose
prüfen.
-Beutel leeren
-Tür schliessen
-Motor 15 Minuten
abkühlen lassen.
Erhebliche Verringerung der
Schneidkapazität
-Verringerte Kapazität im
Verhältnis zu der mit geölter
Schneidgruppe festgestellten
Kapazität
-Fehlen von ausreichender
Schmierung an der
Schneidgruppe.
-Leeren Ölbehälter gegen
einen vollen austauschen
-Zu Anfang die Schneid-
messer schmieren, indem
mehrere, mit Öl getränkte
Bögen eingeführt werden.
Table of contents
Languages:
Other Kobra Paper Shredder manuals