1152996-X2-B 2
1152996-X2-B 3
CARE AND CLEANING
For best results, keep the following in mind when
caring for your product:
•Always test your cleaning solution on an
inconspicuous area before applying to the entire
surface.
•Wipe surfaces clean and rinse completely with
water immediately after applying cleaner. Rinse and
dry any overspray that lands on nearby surfaces.
•Do not allow cleaners to soak on surfaces.
•Use a soft, dampened sponge or cloth. Never use
an abrasive material such as a brush or scouring
pad to clean surfaces.
•The ideal cleaning technique is to rinse thoroughly
and blot dry any water from the surface after each
use.
การดูแลรักษาและทําความสะอาด
เพื่อการดูแลรักษาและทําความสะอาดผลิตภัณฑของทาน
อยางมีประสิทธิภาพ โปรดปฏิบัติตามคําแนะนําดังนี้
• ทดสอบน้ำยาทําความสะอาดกับพื้นผิวผลิตภัณฑในบริเวณ
ที่ไมเปนที่สังเกตกอนใชนํ้ายาทําความสะอาด
• หลังจากที่ใชนํ้ายาทำความสะอาด เช็ดทำความสะอาดและ
ลางนํ้าออกทันที จากนั้นเช็ดใหแหง
• หามแชนํ้ายาทำความสะอาดบนพื้นผิวผลิตภัณฑ
• ใชฟองนํ้าหรือผานุมทำความสะอาดพื้นผิวผลิตภัณฑ หามใช
วัสดุหยาบ เชน แปรงหรือแผนขัด
• ขอแนะนำในการดูแลพื้นผิวผลิตภัณฑคือ ลางนํ้าสะอาดใหทั่ว
และเช็ดคราบนํ้าบนพื้นผิวผลิตภัณฑหลังจากการใชงานทุกครั้ง
การรับประกันสินคา LIMITED WARRANTY
Kohler (Thailand) Public Company Limited warrants to the original
products, which are purchased from authorized distributors and dealers
within Kingdom of Thailand only, to be free of defects in material and
workmanship.
Within the below mentioned periods from the date of purchase,
Kohler(Thailand) Public Company Limited will at its election, repair,
replace or make appropriate adjustment where company’s inspection
disclose any such defect occurring in normal usage and maintenance but
is not responsible for labor charges, removal charges, installation, or
other incidental or consequential costs. In no event shall the liability of
Kohler(Thailand) Public Company Limited exceed the purchase price
of the product. This warranty applies only to Kohler Faucets installed in
Thailand.
• Ceramic Valve(leak/drip)
- Lifetime Limited Warranty* for residential use
- and Five (5) Years for commercial use
• Finish Five(5) Years
• Fitting Five(5) Years
• Automatic faucet One(1) Year
• Hygiene spray(leak/drip Five(5) Years for selected models
from hygiene spray body) only
• Shower Five(5) Years
• Bathroom accessories Five(5) Years
This limited warranty DOES NOT COVER the defect or damage caused by
accident, natural disasters such as fire, flood, or earthquake, misuse or
abuse of products. Improper care and cleaning will avoid the warranty.
Consumers are responsible for the cost of service parts and service fee
for such cases.
To ensure continuous product quality and performance, as well as
product durability and lifetime, without any damage to the product,
consumers should purchase and use only genuine service parts and
after-sales services from Kohler (Thailand) Public Company Limited or
company’s authorized service centers, distributors, or dealers only.
*KOHLER® Faucet Lifetime Limited Warranty
Kohler (Thailand) warrants its faucets manufactured after January 1,
1997, to be leak and drip free during normal residential use for as long as the
original consumer purchaser owns his or her home. If the faucet should
leak or drip during normal use, Kohler (Thailand) will, free of charge;
replace
the new cartridge necessary to put the faucet in good working
condition.
Kohler (Thailand) also warrants all other aspects of the faucet or
accessories (“Faucet”)**to be free of defects in material and workmanship
during normal residential use for as long as the original consumer
purchaser owns his or her home. If a defect is found in normal residential
use, Kohler (Thailand) will, at its election, repair, provide a replacement
part or product, or make appropriate adjustment. Damage to a product
caused by accident, misuse, or abuse is not covered by this warranty.
Improper care and cleaning will also void the warranty.
Proof of purchase (original sales receipt) must be provided to
Kohler(Thailand) with all warranty claims. Kohler (Thailand) is not
responsible for labor charges, installation, or other incidental or
consequential costs. In no event shall the liability of Kohler (Thailand)
exceed the purchase price of the Faucet.
Important: Never use cleaners containing abrasive cleansers, ammonia,
bleach, acids, waxes, alcohol, solvents or other products not
recommended for chrome. This will void the warranty.
To obtain warranty service, please contact your dealers or contact the
KOHLER (Thailand) Call Center, together with proof of purchase at;
Call Center
KOHLER (Thailand) Public Company Limited
16th Floor, Jasmine City Building
2 Soi Sukhumvit 23, Sukhumvit Road,
Wattana, Bangkok 10110
Tel: 02204-6222 Fax: 0-2204-6224
COPYRIGHT ©2012 BY KOHLER (THAILAND) PUBLIC COMPANY
LIMITED
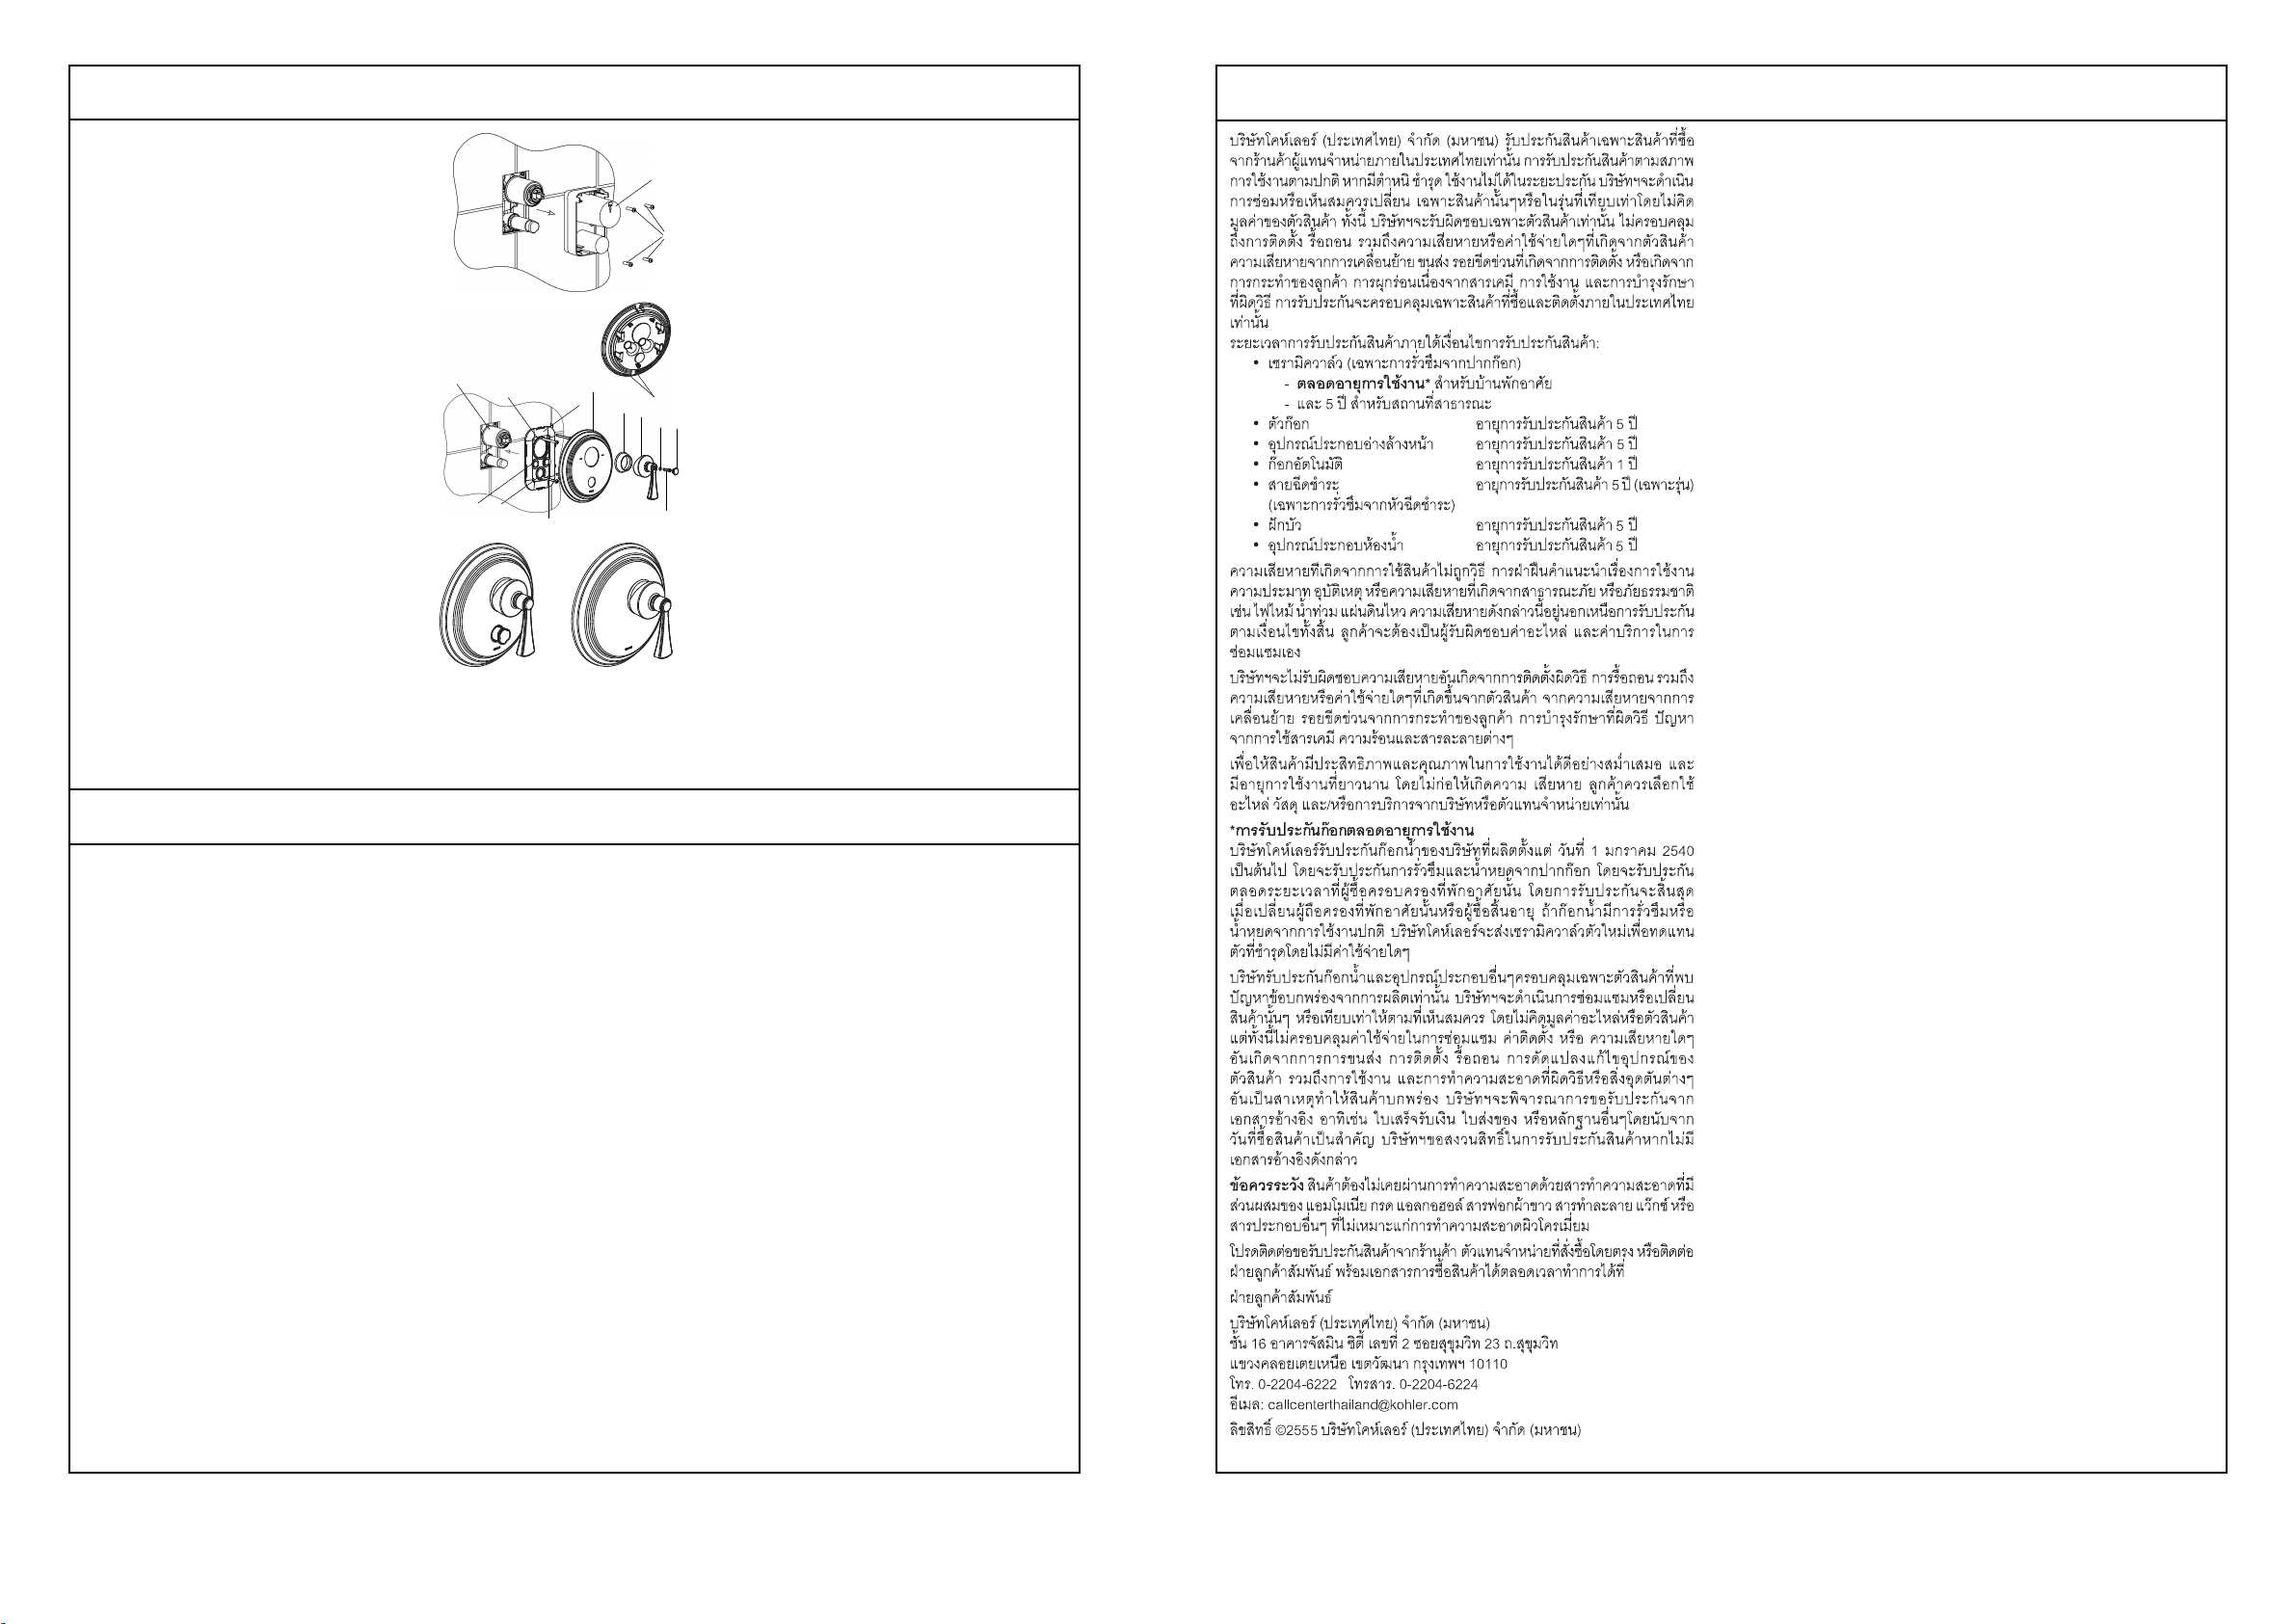
INSTALLATION
NOTE: Install valve 880X according to the
rough-in dimensions of 8146X-4, Install
valve 882X according to the rough-in
dimensions of 6220X-4.
Loosen the screws(1), and remove the
plastic guard(2) after completed the
finished wall.
Slide the cover kit(3) onto the valve(4) with
the plugs(5) facing outside(NOTE: Don’t
squeeze out the rings 6,7). Push it against
the wall. Secure it with the screws(8). Slide
the faceplate(9) onto the valve with slots
(10) downwards. Push it against the wall.
Screw the bonnet(11) on the valve. Install
the handle(12) on the valve stem. Secure
the handle by the screw(13) with the
washer(14). Press plug button(15) to the
hole.
The illustration shown is the correct
position of the handle in the closed
position.
2
1
3
7
56
4
14
910
12
11
13
8
15
การติดตั้ง
ขอสังเกต ติดตั้งวาลวรุน 880X อางอิงจาก
ระยะการติดตั้ง 8146X-4 ติดตั้งวาลวรุน 882X
อางอิงจากระยะการติดตั้ง 6220X-4
คลายสกรู(1) และถอดฝาครอบพลาสติก(2)
หลังจากติดตั้งเขากับผนังเรียบรอยแลว
สวมชุดฝาครอบวาลว(3) เขากับวาลว(4) โดยหัน
หัวปลั๊ก(5) อยูดานนอก (ขอสังเกต หามถอด
แหวนยาง 6,7) ออก ดันฝาครอบวาลวชิดเขาผนัง
และขันใหแนนดวยสกรู(8) จากนั้นสวมฝาครอบ
ตัวนอก(9) เขากับวาลว โดยใหรอง(10)
อยูดานลาง แลวดันใหชิดเขาผนัง สวมฝาคอบ(11)
เขากับวาลว จากนั้นติดตั้งกานโยก(12)
เขากับวาลว ขันกานโยกดวยสกรู(13)
พรอมแหวนรอง(14) กดปุมปด(15) เขากับรู
กานโยกในตำแหนงปด ดังภาพแสดง


