manuals.online logo
Brands
  1. Home
  2. •
  3. Brands
  4. •
  5. L.L.Bean
  6. •
  7. Indoor Furnishing
  8. •
  9. L.L.Bean North Haven Queen Bed User manual

L.L.Bean North Haven Queen Bed User manual

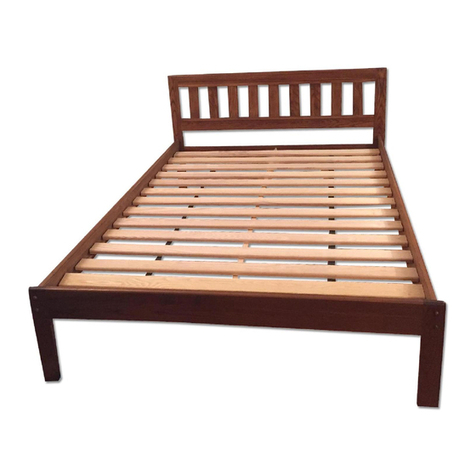
North Haven Queen Bed
1 of 4
0GSX5082109
Thank you for purchasing our North Haven Queen bed. Assembly of this product requires a phillips screwdriver.
We have found it helpful to have a second person present in at least one step of the assembly.
1 of 4
0GSX5082109
Lay out parts on a non-abrasive surface to avoid scratching finish.
BED SLATS
1
E
A
HEADBOARD
1
B
FOOTBOARD
1
C
SIDE RAILS
2
D
SUPPORT BLOCK
2
NO. DRAWING DESCRIPTION QTY.
30
30mm WOOD SCREWS
1
HEX WRENCH
9
BARREL NUTS
I
QTY.DESCRIPTION
DRAWING
NO.
HEX BOLTS 9
J
K
L
LEVELER
1
M
2 of 4
0GSX5082109
STEP 1
STEP 2
Identify and count hardware using box above.
The Cottage bed has been packaged in two boxes as follows:
Box 1 - headboard, footboard, slats and hardware
Box 2 - side rails, (and for queen beds - center support rail)
STEP 3
Read through these instructions thouroughly before beginning assembly. We have found this to be a great value
when first assembling this product. Assembly of this product requires a Phillips screwdriver or an electric drill.
W h f d it h l f l t h d t i t l t t f th bl
Identify and count all parts using diagram above. Wooden pieces should be placed on a non-abrasive surface
(like the carton or carpet) to prevent damage to the finish.
F
CENTER SUPPORT LEG
1
G
CENTER SUPPORT RAIL
1
FINIALS
4
H
MUSHROOM PLUGS
8
N
O
50mm WOOD SCREWS
8
W
e
h
ave
f
oun
d
i
t
h
e
l
p
f
u
l
to
h
ave a secon
d
person present
i
n at
l
east one step o
f
t
h
e assem
bl
y.
2 of 4
0GSX5082109
STEP 4
Make sure the large counter-bored holes in the headboard (A) and footboard (B) are facing outside in order to
insert the Hex Bolts (I). Insert the hex bolts (I) through two of the counter-bored holes in the posts of the
heaadboard and place the barrel nuts (J) into the holes in the inside of the side rails (C). The cleat on the inside
of the side rail (C) should allow more room on top of the cleat than below. Tighten the hex bolts (I) with the
enclosed hexwrench (K). Do not tighten hex bolts (J) until all hardware is in place. Attach both side rails (C)
to the headboard (A) and then repeat the procedure with the footboard (B). Now make sure that all hex bolts (J)
are tight by using the hex wrench (K).
Note: If using only mattress', please use the upper two holes on the headboard and footboard. If using
mattress and box spring, please use lower two holes on the headboard and footboard.
IL
3 of 4
0GSX5082109
STEP 5
Attach the support blocks (D) to the headboard (A) and footboard (B) using wood screws (O). Please make sure
that the cut-out is facing up. Set the center support rail (G) into the support blocks (D).
Insert mushroom plugs (N) in holes of the headboard (A) and footboard (B) to cover holes and gently tap into
p
lace. If mushroom plug (N) is loose, please use rubber cement (not included) to attach. Do not use wood glue,
as you will not be able to remove plugs when disassembling.
N
M
3 of 4
0GSX5082109
STEP 6
STEP 7
STEP 8
CARE: Clean with mild soap and wipe dry.
Attach the finials (H) by screwing them into the top of the headboard (A) and footboard (B) posts.
Lay out bed slats (E) on top of side rails (C) with counter-bored holes in the bed slats (E) facing up. Evenly
space bed slats (E) over the cleat on the side rail (C) using the webbing. Pull all the slats to one side rails so
they are all touching the side rail, then attach the slats to that side rail using the 30 mm wood screws (L). On
the other side rail, push in the side rail until the slats are snug against the side rail, then attach the slats using the
30 mm wood screws (L). It is easiest to start with the middle slat on the second side.
Assembly of Center Support System for Queen size beds. Attach center support leg (F) to center support rail
(G) by inserting hex bolt (J) through hole in support rail (G) into threaded insert in top of support leg (F).
Tighten the hex bolt with the hex wrench (K). Attach leveler (M) to bottom of support leg (F).
Attach the support blocks (D) to the headboard (A) and footboard (B) using 50 mm wood screws (O). Please
make sure that the cut-out is facing up. Set the center support rail (G) into the support blocks (D). Adjust
leveler (M) as needed.
4 of 4
0GSX5082109
www.llbean.com
Product Support 1 800 341 4341
4 of 4
0GSX5082109

Other L.L.Bean Indoor Furnishing manuals
L.L.Bean CLASSIC PORCH ROCKER CCK1 User manual

L.L.Bean

L.L.Bean CLASSIC PORCH ROCKER CCK1 User manual

L.L.Bean OTNQ9 User manual

L.L.Bean

L.L.Bean OTNQ9 User manual

L.L.Bean Mission Futon User manual

L.L.Bean

L.L.Bean Mission Futon User manual

L.L.Bean FARMHOUSE TABLES User manual

L.L.Bean

L.L.Bean FARMHOUSE TABLES User manual

L.L.Bean HOME MORRIS CHAIR FOOTREST User manual
L.L.Bean

L.L.Bean HOME MORRIS CHAIR FOOTREST User manual

L.L.Bean OTNR4 User manual

L.L.Bean

L.L.Bean OTNR4 User manual

L.L.Bean MISSION MORRIS 7556 User manual

L.L.Bean

L.L.Bean MISSION MORRIS 7556 User manual

L.L.Bean Lakeside Spooled End Table User manual

L.L.Bean

L.L.Bean Lakeside Spooled End Table User manual

L.L.Bean Rangeley Bed User manual

L.L.Bean

L.L.Bean Rangeley Bed User manual

L.L.Bean MISSION COFFEE TABLE User manual

L.L.Bean

L.L.Bean MISSION COFFEE TABLE User manual

L.L.Bean MISSION ENTERTAINMENT STAND User manual

L.L.Bean

L.L.Bean MISSION ENTERTAINMENT STAND User manual

L.L.Bean OTNQ1 User manual

L.L.Bean

L.L.Bean OTNQ1 User manual

L.L.Bean Backyard Bistro Table User manual

L.L.Bean

L.L.Bean Backyard Bistro Table User manual

L.L.Bean Mission Corner Desk User manual

L.L.Bean

L.L.Bean Mission Corner Desk User manual

L.L.Bean MISSION FIRESIDE BENCH User manual

L.L.Bean

L.L.Bean MISSION FIRESIDE BENCH User manual

L.L.Bean Painted Cottage Work Desk User manual

L.L.Bean

L.L.Bean Painted Cottage Work Desk User manual

L.L.Bean MISSION UNDER WINDOW BOOKCASE User manual

L.L.Bean

L.L.Bean MISSION UNDER WINDOW BOOKCASE User manual

L.L.Bean ADIRONDACK BISTRO TABLE 30" User manual

L.L.Bean

L.L.Bean ADIRONDACK BISTRO TABLE 30" User manual

L.L.Bean OTNR6 User manual

L.L.Bean

L.L.Bean OTNR6 User manual
L.L.Bean Mission Two Drawer Desk User manual
L.L.Bean

L.L.Bean Mission Two Drawer Desk User manual

L.L.Bean OTNQ3 User manual

L.L.Bean

L.L.Bean OTNQ3 User manual

L.L.Bean HOME OTNR2 User manual

L.L.Bean

L.L.Bean HOME OTNR2 User manual

L.L.Bean All-Weather Presidential Rocker User manual

L.L.Bean

L.L.Bean All-Weather Presidential Rocker User manual

L.L.Bean ROUND ADIRONDACK TABLE User manual
L.L.Bean

L.L.Bean ROUND ADIRONDACK TABLE User manual

Popular Indoor Furnishing manuals by other brands

EVA king timber bed frame Guide

EVA

EVA king timber bed frame Guide

Mainstays D2118.0001-MP manual

Mainstays

Mainstays D2118.0001-MP manual

Santalucia Mobili HOMY Night Series manual

Santalucia Mobili

Santalucia Mobili HOMY Night Series manual

Verco V Smart operating instructions

Verco

Verco V Smart operating instructions

Homelegance 1525K-1EK Assembly instruction

Homelegance

Homelegance 1525K-1EK Assembly instruction

DREAMS Louis Chrome Bed Double Assembly instructions

DREAMS

DREAMS Louis Chrome Bed Double Assembly instructions

Kvik MU836 quick start guide

Kvik

Kvik MU836 quick start guide

Emmezeta BUGS821B Assembling Instruction

Emmezeta

Emmezeta BUGS821B Assembling Instruction

MID.YOU FRTS711 Assembling Instruction

MID.YOU

MID.YOU FRTS711 Assembling Instruction

meubar KWADRO DR6 Assembly instruction

meubar

meubar KWADRO DR6 Assembly instruction

Whittier Wood 1122GACb Assembly instructions

Whittier Wood

Whittier Wood 1122GACb Assembly instructions

Rauch AD654.081B Assembly instructions

Rauch

Rauch AD654.081B Assembly instructions

Kvik T531T quick start guide

Kvik

Kvik T531T quick start guide

Cooper Lighting IRIS 931 Specification sheet

Cooper Lighting

Cooper Lighting IRIS 931 Specification sheet

Martha Stewart Living Seal Harbor 26SG installation manual

Martha Stewart Living

Martha Stewart Living Seal Harbor 26SG installation manual

Tech Craft SWBL60 Assembly instructions

Tech Craft

Tech Craft SWBL60 Assembly instructions

Sealey APMSV01 quick start guide

Sealey

Sealey APMSV01 quick start guide

Bob's Furniture D-1760-8-SV Assembly instruction

Bob's Furniture

Bob's Furniture D-1760-8-SV Assembly instruction

manuals.online logo
manuals.online logoBrands
  • About & Mission
  • Contact us
  • Privacy Policy
  • Terms and Conditions

Copyright 2025 Manuals.Online. All Rights Reserved.