28
1.2 Work display
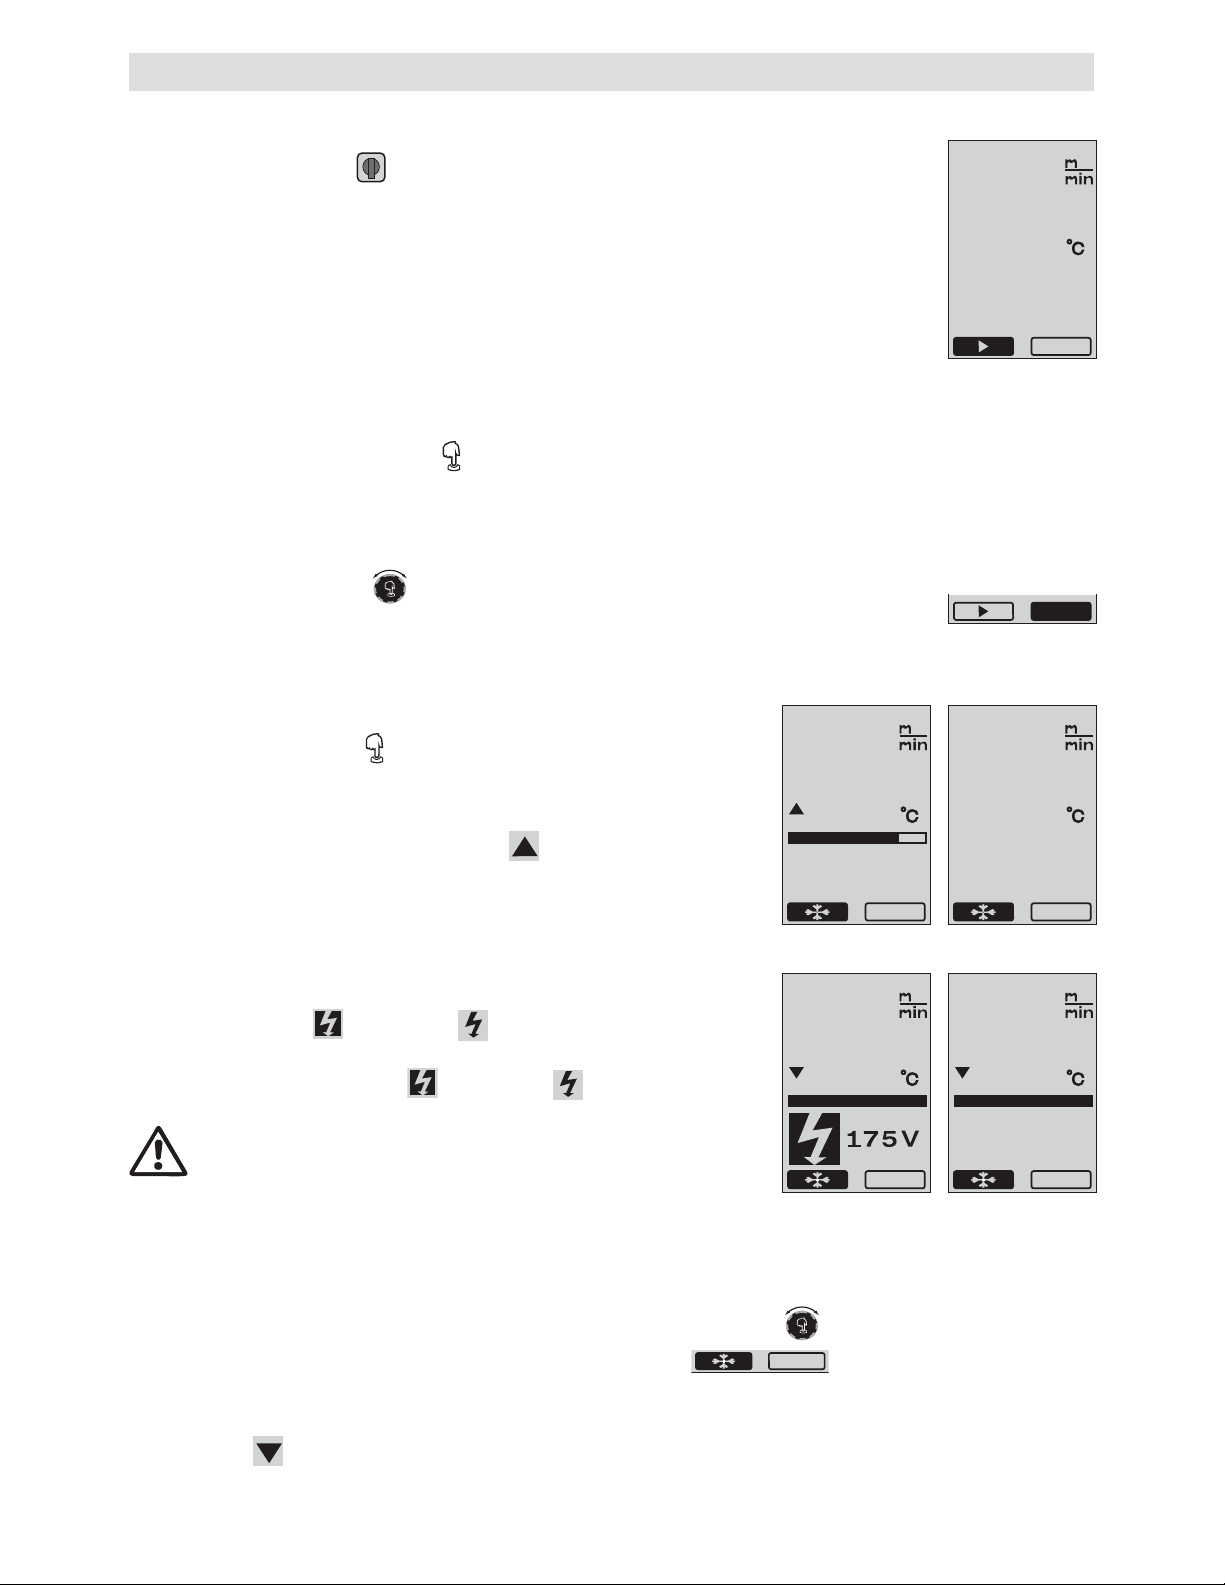
• Pressing the e-Drive starts the heating and blower and the Setpoint
Value display changes to the Work display.
• When the welding nozzle (9) is heating up, this is indicated on the
display (5) with a progress bar, arrow (up) and the actual value of
the welding temperature (flashing) (Fig. 5).
Once the setpoint value of the welding temperature is reached,
the arrow and progress bar will no longer be displayed (Fig. 6).
• If the mains voltage is outside (+/- 15%) the specified nominal
voltage, the symbol will be displayed alternately with the measured
undervoltage /overvoltage and the set air volume. If the air
volume is 100 %, the symbol will be displayed flashing with the
measured undervoltage /overvoltage (Fig. 7).
(Only possible with VARIANT T1 230 V~).
Undervoltage/Overvoltage can affect the welding results!
• If no button is pressed after a definite time (welding nozzle (9)
NOT in welding position), the Standby menu will be displayed
(Section 1.9 Standby).
• If the welding nozzle (9) is in the parked position, the menus Cool Down (Section 1.8 Cooling) or Profiles
(Section 1.7 Selecting Profiles) can be selected by turning the e-Drive .
•
If the welding nozzle (9) is swivelled in, the two menu items will disappear on the display (5)
and can no longer be selected
.
• While the welding nozzle (9) is cooling down, this is indicated with a filled out progress bar,
arrow (down) and flashing actual value of the welding temperature on the display (5) (Fig. 8)
.
Profile
620
6.0
Profile
80
%
520
6.0
Profile
620
6.0
Profile
80
%
520
6.0
1. Work Mode
1.1 Setpoint Value Display (after switching on the device)
Main switch (3) ON
• After switching on the device, the values last set appear on the display (5) (Fig. 3).
• The heating, blower and drive are switched off in this menu.
• Here the user can perform all settings described in the following sections using the
controls (4).
• If, however, the heating element temperature is greater than 80°C when switching on,
the display will immediately change to the Cool Down mode (Section 1.8 Cooling)
in which the blower is always operated at full power, thus cooling down the
welding nozzle (9). You can change back to the Work Mode from this mode at any
time by pressing the e-Drive .
• If the heating element temperature reaches 60°C during cooling, the blower will
continue to operate for 2 minutes and then switch off automatically. The display (5)
changes back to the Setpoint Value display (Fig. 3).
•
Turning the e-Drive to Profiles allows various welding profiles to be selected
(Fig. 4; Section 1.7 Selecting Profiles)
.
Profile
80
%
620
6.0
(Fig. 3)
(Fig. 4)
ON
(Fig. 5)
(Fig. 7)
(Fig. 6)
(Fig. 8)