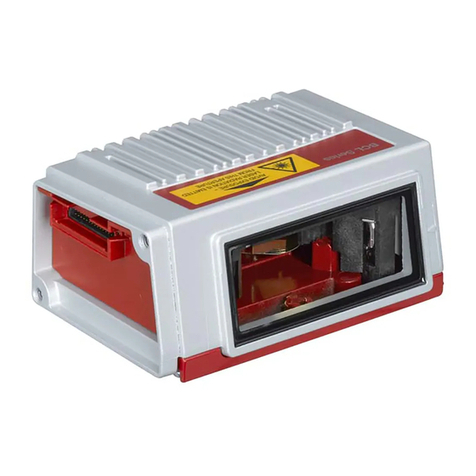
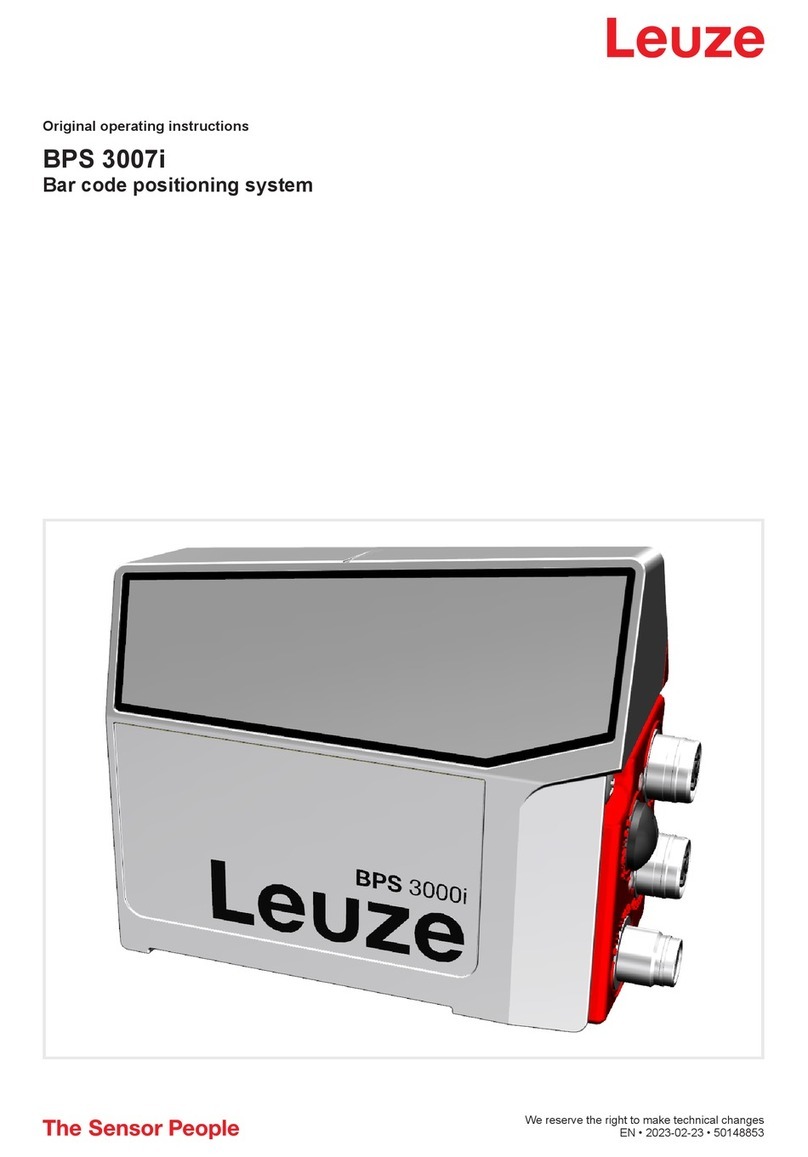
Leuze BPS 34 User manual

BPS 34
Bar code positioning system - PROFIBUS DP
Original operating instructions
EN • 2021-01-08 • 50105437
We reserve the right to make technical changes

Leuze electronic GmbH + Co. KG BPS 34 2
© 2021
Leuze electronic GmbH & Co. KG
In der Braike 1
D-73277 Owen / Germany
Phone: +49 7021 573-0
Fax: +49 7021 573-199
http://www.leuze.com

Leuze electronic GmbH + Co. KG BPS 34 3
1 General information . . . . . . . . . . . . . . . . . . . . . . . . . . . . . . . . . . . . . . . . . . . . . . . 5
1.1 Explanation of symbols . . . . . . . . . . . . . . . . . . . . . . . . . . . . . . . . . . . . . . . . . . . . . . . . . . . . 5
1.2 Declaration of Conformity . . . . . . . . . . . . . . . . . . . . . . . . . . . . . . . . . . . . . . . . . . . . . . . . . . 5
2 Safety . . . . . . . . . . . . . . . . . . . . . . . . . . . . . . . . . . . . . . . . . . . . . . . . . . . . . . . . . . 6
2.1 Intended use . . . . . . . . . . . . . . . . . . . . . . . . . . . . . . . . . . . . . . . . . . . . . . . . . . . . . . . . . . . . 6
2.2 Foreseeable misuse . . . . . . . . . . . . . . . . . . . . . . . . . . . . . . . . . . . . . . . . . . . . . . . . . . . . . . 7
2.3 Competent persons . . . . . . . . . . . . . . . . . . . . . . . . . . . . . . . . . . . . . . . . . . . . . . . . . . . . . . . 7
2.4 Exemption of liability . . . . . . . . . . . . . . . . . . . . . . . . . . . . . . . . . . . . . . . . . . . . . . . . . . . . . . 7
2.5 Laser safety notices. . . . . . . . . . . . . . . . . . . . . . . . . . . . . . . . . . . . . . . . . . . . . . . . . . . . . . . 8
3 Fast commissioning steps at a glance . . . . . . . . . . . . . . . . . . . . . . . . . . . . . . . . . 9
4 Technical data of BPS 34. . . . . . . . . . . . . . . . . . . . . . . . . . . . . . . . . . . . . . . . . . 12
4.1 General specifications BPS 34 . . . . . . . . . . . . . . . . . . . . . . . . . . . . . . . . . . . . . . . . . . . . . 12
4.2 Dimensioned drawings . . . . . . . . . . . . . . . . . . . . . . . . . . . . . . . . . . . . . . . . . . . . . . . . . . . 13
4.3 Electrical connection . . . . . . . . . . . . . . . . . . . . . . . . . . . . . . . . . . . . . . . . . . . . . . . . . . . . . 14
4.3.1 PWR IN - voltage supply and switching input/output. . . . . . . . . . . . . . . . . . . . . . . . . . . 15
4.3.2 DP IN - PROFIBUS DP incoming . . . . . . . . . . . . . . . . . . . . . . . . . . . . . . . . . . . . . . . . . 16
4.3.3 DP OUT - PROFIBUS DP outgoing . . . . . . . . . . . . . . . . . . . . . . . . . . . . . . . . . . . . . . . 16
4.3.4 SW IN/OUT – Switching input/switching output. . . . . . . . . . . . . . . . . . . . . . . . . . . . . . . 17
4.3.5 BPS 34 reading field curve . . . . . . . . . . . . . . . . . . . . . . . . . . . . . . . . . . . . . . . . . . . . . . 18
5 Connection units MS 34 ... . . . . . . . . . . . . . . . . . . . . . . . . . . . . . . . . . . . . . . . . . 19
5.1 MS 34 103 and MS 34 105 modular connector hoods . . . . . . . . . . . . . . . . . . . . . . . . . . . 19
5.1.1 General information. . . . . . . . . . . . . . . . . . . . . . . . . . . . . . . . . . . . . . . . . . . . . . . . . . . . 19
5.1.2 Technical data of the connection units . . . . . . . . . . . . . . . . . . . . . . . . . . . . . . . . . . . . . 19
5.1.3 Dimensioned drawings . . . . . . . . . . . . . . . . . . . . . . . . . . . . . . . . . . . . . . . . . . . . . . . . . 20
5.1.4 Electrical connection . . . . . . . . . . . . . . . . . . . . . . . . . . . . . . . . . . . . . . . . . . . . . . . . . . . 20
5.1.5 Description of the LED states . . . . . . . . . . . . . . . . . . . . . . . . . . . . . . . . . . . . . . . . . . . . 20
6 Bar code tape. . . . . . . . . . . . . . . . . . . . . . . . . . . . . . . . . . . . . . . . . . . . . . . . . . . 22
6.1 General information . . . . . . . . . . . . . . . . . . . . . . . . . . . . . . . . . . . . . . . . . . . . . . . . . . . . . . 22
6.2 Technical data of the bar code tape . . . . . . . . . . . . . . . . . . . . . . . . . . . . . . . . . . . . . . . . . 22
6.3 Mounting the bar code tape. . . . . . . . . . . . . . . . . . . . . . . . . . . . . . . . . . . . . . . . . . . . . . . . 23
6.4 Control bar codes . . . . . . . . . . . . . . . . . . . . . . . . . . . . . . . . . . . . . . . . . . . . . . . . . . . . . . . 25
6.4.1 Controllable functions . . . . . . . . . . . . . . . . . . . . . . . . . . . . . . . . . . . . . . . . . . . . . . . . . . 26
6.5 Repair kit . . . . . . . . . . . . . . . . . . . . . . . . . . . . . . . . . . . . . . . . . . . . . . . . . . . . . . . . . . . . . . 27
7 Mounting . . . . . . . . . . . . . . . . . . . . . . . . . . . . . . . . . . . . . . . . . . . . . . . . . . . . . . 29
7.1 Mounting the BPS 34. . . . . . . . . . . . . . . . . . . . . . . . . . . . . . . . . . . . . . . . . . . . . . . . . . . . . 29
7.2 Device arrangement . . . . . . . . . . . . . . . . . . . . . . . . . . . . . . . . . . . . . . . . . . . . . . . . . . . . . 30
7.3 Mounting the bar code tape. . . . . . . . . . . . . . . . . . . . . . . . . . . . . . . . . . . . . . . . . . . . . . . . 31
8 Device parameters and interfaces . . . . . . . . . . . . . . . . . . . . . . . . . . . . . . . . . . . 33
8.1 PROFIBUS . . . . . . . . . . . . . . . . . . . . . . . . . . . . . . . . . . . . . . . . . . . . . . . . . . . . . . . . . . . . 33
8.1.1 General information. . . . . . . . . . . . . . . . . . . . . . . . . . . . . . . . . . . . . . . . . . . . . . . . . . . . 33
8.1.2 Electrical connection . . . . . . . . . . . . . . . . . . . . . . . . . . . . . . . . . . . . . . . . . . . . . . . . . . . 33
8.1.3 PROFIBUS address . . . . . . . . . . . . . . . . . . . . . . . . . . . . . . . . . . . . . . . . . . . . . . . . . . . 35
8.1.4 General information on the GSD file . . . . . . . . . . . . . . . . . . . . . . . . . . . . . . . . . . . . . . . 35
8.1.5 Structure of the GSD modules . . . . . . . . . . . . . . . . . . . . . . . . . . . . . . . . . . . . . . . . . . . 35
8.1.6 Overview of the GSD modules . . . . . . . . . . . . . . . . . . . . . . . . . . . . . . . . . . . . . . . . . . . 36
8.1.7 Detailed description of the modules . . . . . . . . . . . . . . . . . . . . . . . . . . . . . . . . . . . . . . . 40
Leuze electronic GmbH + Co. KG BPS 34 4
9 Diagnostics and troubleshooting . . . . . . . . . . . . . . . . . . . . . . . . . . . . . . . . . . . . 69
9.1 General causes of errors . . . . . . . . . . . . . . . . . . . . . . . . . . . . . . . . . . . . . . . . . . . . . . . . . . 69
9.2 Error on the PROFIBUS . . . . . . . . . . . . . . . . . . . . . . . . . . . . . . . . . . . . . . . . . . . . . . . . . . 69
10 Type overview and accessories . . . . . . . . . . . . . . . . . . . . . . . . . . . . . . . . . . . . . 71
10.1 Type overview: BPS 34 . . . . . . . . . . . . . . . . . . . . . . . . . . . . . . . . . . . . . . . . . . . . . . . . . . . 71
10.2 Accessories - Modular connector hoods . . . . . . . . . . . . . . . . . . . . . . . . . . . . . . . . . . . . . . 71
10.3 Accessories - Termination . . . . . . . . . . . . . . . . . . . . . . . . . . . . . . . . . . . . . . . . . . . . . . . . . 71
10.4 Accessories – Connectors . . . . . . . . . . . . . . . . . . . . . . . . . . . . . . . . . . . . . . . . . . . . . . . . . 71
10.5 Accessories – Mounting device . . . . . . . . . . . . . . . . . . . . . . . . . . . . . . . . . . . . . . . . . . . . . 71
10.6 Accessories - Ready-made cables for voltage supply. . . . . . . . . . . . . . . . . . . . . . . . . . . . 72
10.6.1 Contact assignment of PWR IN connection cable. . . . . . . . . . . . . . . . . . . . . . . . . . . . . 72
10.6.2 Technical data of voltage supply cable . . . . . . . . . . . . . . . . . . . . . . . . . . . . . . . . . . . . . 72
10.6.3 Order codes for voltage supply cables . . . . . . . . . . . . . . . . . . . . . . . . . . . . . . . . . . . . . 72
10.7 Accessories - Ready-made cables for PROFIBUS connection . . . . . . . . . . . . . . . . . . . . . 72
10.7.1 General . . . . . . . . . . . . . . . . . . . . . . . . . . . . . . . . . . . . . . . . . . . . . . . . . . . . . . . . . . . . . 72
10.7.2 Contact assignment for PROFIBUS connection cable KB PB…. . . . . . . . . . . . . . . . . . 73
10.7.3 Technical data of PROFIBUS connection cable . . . . . . . . . . . . . . . . . . . . . . . . . . . . . . 73
10.7.4 Order codes for PROFIBUS connection cables . . . . . . . . . . . . . . . . . . . . . . . . . . . . . . 73
10.8 Type overview: Bar code tape . . . . . . . . . . . . . . . . . . . . . . . . . . . . . . . . . . . . . . . . . . . . . . 74
10.8.1 Standard bar code tapes . . . . . . . . . . . . . . . . . . . . . . . . . . . . . . . . . . . . . . . . . . . . . . . . 74
10.8.2 Special tapes. . . . . . . . . . . . . . . . . . . . . . . . . . . . . . . . . . . . . . . . . . . . . . . . . . . . . . . . . 74
10.8.3 Twin tapes . . . . . . . . . . . . . . . . . . . . . . . . . . . . . . . . . . . . . . . . . . . . . . . . . . . . . . . . . . . 75
10.8.4 Repair tapes . . . . . . . . . . . . . . . . . . . . . . . . . . . . . . . . . . . . . . . . . . . . . . . . . . . . . . . . . 75
10.8.5 Control label . . . . . . . . . . . . . . . . . . . . . . . . . . . . . . . . . . . . . . . . . . . . . . . . . . . . . . . . . 75
11 Maintenance. . . . . . . . . . . . . . . . . . . . . . . . . . . . . . . . . . . . . . . . . . . . . . . . . . . . 76
11.1 General maintenance information . . . . . . . . . . . . . . . . . . . . . . . . . . . . . . . . . . . . . . . . . . . 76
11.2 Repairs, servicing . . . . . . . . . . . . . . . . . . . . . . . . . . . . . . . . . . . . . . . . . . . . . . . . . . . . . . . 76
11.3 Disassembling, packing, disposing . . . . . . . . . . . . . . . . . . . . . . . . . . . . . . . . . . . . . . . . . . 76
12 Appendix . . . . . . . . . . . . . . . . . . . . . . . . . . . . . . . . . . . . . . . . . . . . . . . . . . . . . . 77
12.1 EC Declaration of Conformity . . . . . . . . . . . . . . . . . . . . . . . . . . . . . . . . . . . . . . . . . . . . . . 77

General information
Leuze electronic GmbH + Co. KG BPS 34 5
1 General information
1.1 Explanation of symbols
The symbols used in this technical description are explained below.
1.2 Declaration of Conformity
The bar code positioning system BPS 34, the modular connector hood MS 34 103/MS 34 105, and the
optional modular service display MSD 1 101 have been developed and manufactured in accordance with
the applicable European standards and directives.
The devices of the BPS 34 series without integrated heating also fulfill the cUL requirements (Underwriters
Laboratory Inc.) for the USA and Canada.
The manufacturer of the product, Leuze electronic GmbH + Co. KG in D-73277 Owen, possesses a certi-
fied quality assurance system in accordance with ISO 9001.
ATTENTION!
This symbol precedes text messages which must strictly be observed. Failure to observe the
provided instructions could lead to personal injury or damage to equipment.
ATTENTION LASER!
This symbol warns of possible danger caused by hazardous laser radiation.
NOTE
This symbol indicates text passages containing important information.
NOTE
A copy of all declarations of conformity available for the product can be found in the appendix
of this handbook (see chapter 12.1 "EC Declaration of Conformity" on Page 77).

Safety
Leuze electronic GmbH + Co. KG BPS 34 6
2 Safety
The bar code positioning systems of the BPS 34 series and the MS 34 10x modular connector hoods have
been developed, produced and tested subject to the applicable safety standards. They correspond to the
state of the art.
2.1 Intended use
Bar code positioning systems of the BPS 34 series are optical measuring systems which use visible red
laser light to determine the position of the BPS relative to a permanently mounted bar code tape.
The modular connector hoods MS 34 103/MS 34 105 are intended for the easy connection of bar code
positioning systems of type BPS 34 in a PROFIBUS system.
Areas of application
The BPS 34 bar code positioning systems are designed for the following areas of application:
• High-bay storage devices: Positioning in the travel and lifting axes
• Crane bridges and trolleys
• Side-tracking skates
• Electrical monorail systems
•Elevators
CAUTION
Use only approved bar code tapes!
The bar code tapes approved by Leuze and listed as accessories are an essential part of the
measurement system.
Bar code tapes not approved by Leuze are not allowed.
The use of such bar code tapes is contrary to the intended use.
CAUTION
Observe intended use!
Only operate the device in accordance with its intended use. The protection of personnel and
the device cannot be guaranteed if the device is operated in a manner not complying with its
intended use.
Leuze electronic GmbH + Co. KG is not liable for damages caused by improper use.
Read the technical description before commissioning the device. Knowledge of this technical
description is an element of proper use.
NOTE
Comply with conditions and regulations!
Observe the locally applicable legal regulations and the rules of the employer's liability insur-
ance association.
ATTENTION!
For UL applications, use is only permitted in Class 2 circuits in accordance with the NEC
(National Electric Code).

Safety
Leuze electronic GmbH + Co. KG BPS 34 7
2.2 Foreseeable misuse
Any use other than that defined under "Intended use" or which goes beyond that use is considered
improper use.
In particular, use of the device is not permitted in the following cases:
• in rooms with explosive atmospheres
• as stand-alone safety component in accordance with the machinery directive 1
• for medical purposes
2.3 Competent persons
Connection, mounting, commissioning and adjustment of the device must only be carried out by competent
persons.
Prerequisites for competent persons:
• They have a suitable technical education.
• They are familiar with the rules and regulations for occupational safety and safety at work.
• They are familiar with the technical description of the device.
• They have been instructed by the responsible person on the mounting and operation of the device.
Certified electricians
Electrical work must be carried out by a certified electrician.
Due to their technical training, knowledge and experience as well as their familiarity with relevant stan-
dards and regulations, certified electricians are able to perform work on electrical systems and indepen-
dently detect possible dangers.
In Germany, certified electricians must fulfill the requirements of accident-prevention regulations BGV A3
(e.g. electrician foreman). In other countries, there are respective regulations that must be observed.
2.4 Exemption of liability
Leuze electronic GmbH + Co. KG is not liable in the following cases:
• The device is not being used properly.
• Reasonably foreseeable misuse is not taken into account.
• Mounting and electrical connection are not properly performed.
• Changes (e.g., constructional) are made to the device.
1. Use as safety-related component within the safety function is possible, if the component combination is designed correspondingly by the machine manufacturer.
NOTE
Do not modify or otherwise interfere with the device!
Do not carry out modifications or otherwise interfere with the device.
The device must not be tampered with and must not be changed in any way.
The use of a bar code tape not approved by Leuze is equivalent to an intervention in or
change to the device/measurement system.
The device must not be opened. There are no user-serviceable parts inside.
Repairs must only be performed by Leuze electronic GmbH + Co. KG.

Safety
Leuze electronic GmbH + Co. KG BPS 34 8
2.5 Laser safety notices
Figure 2.1: Laser apertures, laser warning and information signs
ATTENTION, LASER RADIATION – CLASS 2 LASER PRODUCT
Do not stare into beam!
The device satisfies the requirements of IEC 60825-1:2014 (EN 60825-1:2014) safety regula-
tions for a product of laser class 2 as well as the U.S. 21 CFR 1040.10 regulations with devia-
tions corresponding to "Laser Notice No. 56" from May 8, 2019.
Never look directly into the laser beam or in the direction of reflected laser beams!
If you look into the beam path over a longer time period, there is a risk of injury to the retina.
Caution: Opening the device can lead to dangerous exposure to radiation
Do not point the laser beam of the device at persons!
Interrupt the laser beam using a non-transparent, non-reflective object if the laser beam is
accidentally directed towards a person.
When mounting and aligning the device, avoid reflections of the laser beam off reflective
surfaces!
CAUTION! Use of controls or adjustments or performance of procedures other than specified
herein may result in hazardous light exposure.
Observe the applicable statutory and local laser protection regulations.
The device must not be tampered with and must not be changed in any way.
There are no user-serviceable parts inside the device.
Repairs must only be performed by Leuze electronic GmbH + Co. KG.
NOTE
Affix laser information and warning signs!
Laser information and warning signs are attached to the device (see Figure 2.1):
ALaser aperture
BLaser warning sign
CLaser information sign with laser parameters
B
B
C
A

Fast commissioning steps at a glance
Leuze electronic GmbH + Co. KG BPS 34 9
3 Fast commissioning steps at a glance
Description of the BPS 34 functions
The BPS 34 uses visible red laser light to determine its position relative to the bar code tape. This essen-
tially takes place in three steps:
1. Reading a code on the bar code tape
2. Determining the position of the read code in the scanning area of the scanning beam
3. Calculating the position to within a millimeter using the code information and the code position rela-
tive to the device's center.
The position value is then output via the interface.
Mechanical design
Mounting the bar code tape
The bar code tape is to be affixed without tension to a dust- and grease-free mounting surface.
Chapter 6.3 on Page 23
Mounting the BPS 34 device
There are 2 different types of mounting arrangements for the BPS34:
1. Using 4 M4x6 screws on the rear of the device.
2. Using a mounting device (BT 56) on the dovetail fastening grooves.
Figure 3.1: Beam exit and device arrangement of the BPS 34
Chapter 7.1 on Page 29
NOTE
Below you will find a short description for the initial commissioning of the bar code positioning
system BPS 34. Detailed explanations of all listed points can be found throughout the
handbook.
NOTE
The installation dimensions listed in the following figure must absolutely be adhered to.
Optically, it must be ensured that the scanner has an unobstructed view of the bar code tape
at all times. Chapter 7.2 on Page 30
NOTE
During mounting, the following angles of inclination must be taken into account in the vertical
axis:
10° for a tape height of 47mm,
7° for a tape height of 30mm and
5° for a tape height of 25mm;
the working range of the reading field curve must also be taken into account.
10°
103 ± 2
10°
* **
**
Reading distance
Beam exit
all dimensions
in mm
Bar code tape
Center of the scanning beam
(device center, output position value)
Scanning beam
10° pitch
in the
vertical axis
(dependent on
the tape height,
see notes)

Fast commissioning steps at a glance
Leuze electronic GmbH + Co. KG BPS 34 10
Connecting the voltage supply and PROFIBUS
The BPS 34, in combination with an MS 34 103 or MS 34 105, is connected via M12 connectors.
Connecting the voltage supply
The voltage supply is connected via the PWR IN M12 connection.
Figure 3.2: BPS 34 with MS 34 103/MS 34 105 – PWR IN connection
Connecting the PROFIBUS
The PROFIBUS is connected via DP IN or, in the case of a continuing network, via DP OUT. If DP OUT is
not used, the PROFIBUS must be terminated at this point with an M12 terminator plug (see chapter 10.3
"Accessories - Termination").
Figure 3.3: BPS 34 with MS 34 103/MS 34 105 – DP IN and DP OUT connections
ATTENTION!
For the position calculation, the scanning beam of the BPS 34 must be incident on the bar code
tape without interruption. Ensure that the scanning beam is always incident on the bar code
tape when the system is moving.
Socket
(A-coded)
Socket
(A-coded)
Socket
(B-coded)
Connector
(B-coded)
Connector
(A-coded)
PWR IN
SWIN
SWOUT
3
2
1
4
GND VIN
PE
SW IN/OUT
1
2
3
4
VOUT
PE
SWIN
SWOUT
GND
DP IN
GND 3
2
1
4
PE
A (N)
B (P)
VCC
DP OUT
VCC 1
2
3
4
A (N)
B (P)
GND
PE
1
23
4
MSD
5
6
7
/SERV
VIN TXD
RXD
SCL
SDA
GND
/INT
Socket
(A-coded)
Socket
(A-coded)
Socket
(B-coded)
Connector
(B-coded)
Connector
(A-coded)
DP IN
GND 3
2
1
4
PE
A (N)
B (P)
VCC
DP OUT
VCC 1
2
3
4
A (N)
B (P)
GND
PE
PWR IN
SWIN
SWOUT
3
2
1
4
GND VIN
PE
SW IN/OUT
1
2
3
4
VOUT
PE
SWIN
SWOUT
GND
1
23
4
MSD
5
6
7
/SERV
VIN TXD
RXD
SCL
SDA
GND
/INT

Fast commissioning steps at a glance
Leuze electronic GmbH + Co. KG BPS 34 11
Setting the PROFIBUS address
The PROFIBUS address must be set in the MS 34 10x connector plug hood. The correct address setting
on the PROFIBUS network is indicated by the green LED on the MS 34 10x.
Figure 3.4: View of the inside of the MS 34
PROFIBUS manager
Install the GSD file associated with the BPS 34… in the PROFIBUS manager of your control. Activate the
desired modules (at least module 1 - position value).
Figure 3.5: Example PROFIBUS manager
Store the slave address for the BPS 34 in the PROFIBUS manager. Ensure that the address is the same
as the address configured in the device.
Connecting the switching input/switching output to the BPS 34
The switching input/switching output is connected via SW IN/OUT.
Figure 3.6: BPS 34 with MS 34 103/MS 34 105 – SW IN/OUT connection
Slide switch for the hundreds (marked with 102)
Rotary switch for the tens (marked with 101)
Rotary switch for the single digits (marked with 100)
Connection plug to the BPS 34
Position of the slide
switches:
Top address
100 - 126
Bottom address
1 - 99
Socket
(A-coded)
Socket
(A-coded)
Socket
(B-coded)
Connector
(B-coded)
Connector
(A-coded)
SW IN/OUT
1
2
3
4
VOUT
PE
SWIN
SWOUT
GND
PWR IN
SWIN
SWOUT
3
2
1
4
GND VIN
PE
DP IN
GND 3
2
1
4
PE
A (N)
B (P)
VCC
DP OUT
VCC 1
2
3
4
A (N)
B (P)
GND
PE
1
23
4
MSD
5
6
7
/SERV
VIN TXD
RXD
SCL
SDA
GND
/INT

Technical data of BPS 34
Leuze electronic GmbH + Co. KG BPS 34 12
4 Technical data of BPS 34
4.1 General specifications BPS 34
Table 4.1: General specifications
Optical data
Light source Laser diode
Beam deflection Via rotating polygon wheel
Reading distance See reading field (Figure 4.3.5)
Optical window Glass with scratch-resistant indium coating
Laser class 2 acc. to IEC 60825-1:2014
Wavelength 655 nm
Max. output power (peak) 1.8 mW
Impulse duration 120 µs
Measurement data
Reproducibility (3 sigma) ±1 mm
Response time 16 ms (configurable)
Output time 2 ms
Basis for contouring error calculation 7 ms
Working range 90 … 170 mm
Max. traverse rate 10 m/s
Electrical data
Interface type PROFIBUS DP, up to 12 MBd
Service interface RS 232 with default data format,
9600 Bd, 8 data bits, no parity, 1 stop bit
Switching input / switching output 1 switching input, 1 switching output, each is programmable
Green LED Device ready (power on) and bus O.K.
Operating voltage Without optics heating: 10 … 30 V DC
With optics heating: 22 … 26 V DC a)
a) To ensure consistent heat emission
Power consumption Without optics heating: 5 W
With optics heating: max. 30 W
Mechanical data
Degree of protection IP 65 b)
b) With MS 34 10x plugged in and M12 connectors/caps screwed into place
Weight Without optics heating: 400 g
With optics heating: 480 g
Dimensions (H x W x D) Without optics heating: 120 x 90 x 43 mm
With optics heating: 120 x 90 x 52 mm
Housing Diecast aluminum
Environmental data
Operating temperature range Without optics heating: 0°C … +40 °C
With optics heating: -30°C … +40 °C
High temperature version: 0°C … +50 °C
Storage temperature range -30 °C … +60 °C
Air humidity max. 90% rel. humidity, non-condensing
Vibration IEC 60068-2-6, test Fc
Shock IEC 60068-2-27, test Ea
Continuous shock IEC 60068-2-29, test Eb
Electromagnetic compatibility EN 55022, EN 55024, EN 61000-4-2, -3, -4 and -6,
EN 61000-6-2 and -3 1)
Bar code tape
Max. length (measurement length) 10000 m
Ambient temperature -40 °C … +120 °C
Mech. properties Scratch and wipe resistant, UV resistant,
moisture resistant, partly chemical resistant

Technical data of BPS 34
Leuze electronic GmbH + Co. KG BPS 34 13
4.2 Dimensioned drawings
BPS 34 SM 100 / BPS 34 SM 100 H / BPS 34 SM 100 HT
Figure 4.1: BPS 34 dimensioned drawing
MS 34 103 / MS 34 105
Figure 4.2: Dimensioned drawing MS 34 103 / MS 34 105
NOTE
The warm-up time before devices with integrated heating are ready for operation is approx.
30min. (depending on the environmental conditions).
For devices with integrated heating (…H models), window heating is in constant operation.
Regulation of device-internal heating is temperature dependent.
Top view
(without heat-
ing)
Rear view
all dimensions in mm
Top view
(with heating)
MS 34 105MS 34 103
A = BPS 34
all dimensions in mm
Note!
The MSD and SW IN/OUT connections are sealed
with caps upon delivery.

Technical data of BPS 34
Leuze electronic GmbH + Co. KG BPS 34 14
4.3 Electrical connection
The BPS 34 can be connected via the MS 34 103/MS 34 105 using M12 connectors. For the locations of
the individual device connections, please refer to the device detail shown in Figure 4.3.
The corresponding mating connectors and ready-made cables are available as accessories for all connec-
tions. For additional information, refer to Chapter 10 starting on Page 71.
Figure 4.3: Pin assignment of the BPS 34 with MS 34 103 / MS 34 105
ATTENTION!
Connection of the device and cleaning must only be carried out by a qualified electrician.
If faults cannot be cleared, the device should be switched off and protected against accidental
use.
Before connecting the device, be sure that the supply voltage agrees with the value printed on
the name plate.
The power supply unit for the generation of the supply voltage for the BPS 34 and the respec-
tive connection units must have a secure electrical insulation through double insulation and
safety transformers according to EN 60742 (corresponds to IEC 60742).
Be sure that the protective conductor is connected correctly. Fault-free operation is only guar-
anteed when the device is properly earthed.
ATTENTION!
Degree of protection IP 65 is achieved only if the connectors and caps are screwed into place!
PWR IN = Voltage supply
DP IN = PROFIBUS IN
DP OUT = PROFIBUS OUT
MSD = Modular service display (can no longer be delivered)
SW IN/OUT = Switching input/output (MS 34 105 only)
Note!
The MSD and SW IN/OUT connections are sealed with caps upon delivery.
Socket
(A-coded)
Socket
(A-coded)
Socket
(B-coded)
Connector
(B-coded)
Connector
(A-coded)
1
23
4
DP IN
SW IN/OUT
PWR IN
1
2
3
4
VOUT
SWIN
GND
SWOUT
PE
3
2
1
4
GND VIN
PE
DP OUT
MSD
SWIN
SWOUT
3
2
1
4
GND
VCC
PE
1
2
3
4
A (N)
B (P)
A (N)
B (P)
VCCGND
PE
5
6
7
/SERV
VIN TXD
RXD
SCL
SDA
GND
/INT
all dimensions in mm

Technical data of BPS 34
Leuze electronic GmbH + Co. KG BPS 34 15
4.3.1 PWR IN - voltage supply and switching input/output
Figure 4.4: Pin assignment - PWR IN
Connecting the functional earth PE
BPS 34 with MS 34 103/MS 34 105 connector hood:
Connect PE to PIN 5 of the M12 connector PWR IN for voltage supply!
ATTENTION!
For devices with integrated heating, the supply voltage must be wired with a minimum 0.5 mm2
(recommended 0.75mm2) core cross section. It is not possible to loop the supply voltage
through to other loads!
NOTE
Cables with a wire cross section of 0.5 mm² or 0.75 mm² are not available as ready-made
cables from Leuze electronic.
PWR IN (5-pin connector, A-coded)
Pin Name Comment
1VIN
Positive supply voltage
Without optics heating: +10 … +30VDC
With optics heating: +22 … +26VDC
2SWOUTSwitching output
3GNDNegative supply voltage 0VDC
4SWINSwitching input
5PEFunctional earth
Thread PE Functional earth (housing)
PWR IN
SWIN
SWOUT
3
2
1
4
GND VIN
PE
M12 connector
(A-coded)
NOTE
Programming of the switching input/switching output is performed via module 7 (Switching
input) and module 8 (Switching output). For further information, see also Chapter 8.1.7.7,
Page 45 et seq.
NOTE
The switching input/switching output of the PWR IN plug connection is identical to the SWIN
switching input and SWOUT switching output of the SW IN/OUT plug connection on the
MS 34 105.
ATTENTION!
Degree of protection IP 65 is achieved only if the connectors and caps are screwed into place!

Technical data of BPS 34
Leuze electronic GmbH + Co. KG BPS 34 16
4.3.2 DP IN - PROFIBUS DP incoming
Figure 4.5: Pin assignment - DP IN
4.3.3 DP OUT - PROFIBUS DP outgoing
Figure 4.6: Pin assignment - DP IN
DP IN (5-pin plug, B-coded)
Pin Name Comment
1VCC 5VDC for bus termination
2A (N)Receive/transmit data A-line (N)
3GNDFunctional earth for bus termination
4B (P)Receive/transmit data B-line (P)
5PEFunctional earth
Thread PE Functional earth (housing)
DP IN
GND 3
2
1
4
PE
A (N)
B (P)
VCC
M12 connector
(B-coded)
ATTENTION!
Degree of protection IP 65 is achieved only if the connectors and caps are screwed into place!
DPOUT (5-pin socket, B-coded)
Pin Name Comment
1VCC5VDC for bus termination
2A (N)Receive/transmit data A-line (N)
3GNDFunctional earth for bus termination
4B (P)Receive/transmit data B-line (P)
5PEFunctional earth
Thread PE Functional earth (housing)
DP OUT
VCC 1
2
3
4
A (N)
B (P)
GND
PE
M12 socket
(B-coded)
ATTENTION!
Degree of protection IP 65 is achieved only if the connectors and caps are screwed into place!
NOTE
If the PROFIBUS is not connected to another participant via the MS 34 10x, the DP OUT
connection must be fitted with a TS 02-4-SA terminator plug for the purpose of bus termination.
For further information, see also Chapter 10.3 on Page 71.

Technical data of BPS 34
Leuze electronic GmbH + Co. KG BPS 34 17
4.3.4 SW IN/OUT – Switching input/switching output
Figure 4.7: Pin assignment SW IN/OUT
SW IN/OUT (5-pin socket, A-coded)
Pin Name Comment
1VOUT
Supply voltage for sensor system
(VOUT identical to VIN at PWR IN)
Without optics heating: +10 … +30VDC
With optics heating: +22 … +26VDC
2SWOUTSwitching output
3GNDSupply voltage for sensors 0VDC
4SWINSwitching input
5PEFunctional earth
Thread PE Functional earth (housing)
SW IN/OUT
1
2
3
4
VOUT
PE
SWIN
SWOUT
GND
M12 socket
(A-coded)
ATTENTION!
Degree of protection IP 65 is achieved only if the connectors and caps are screwed into place!
NOTE
Programming of the switching input/switching output is performed via module 7 (Switching
input) and module 8 (Switching output). For further information, see also Chapter 8.1.7.7,
Page 45 et seq.
NOTE
The switching input/switching output of the PWR IN plug connection is identical to the SWIN
switching input and SWOUT switching output of the SW IN/OUT plug connection on the
MS 34 105.
ATTENTION!
If you use a sensor with a standard M 12 connector, please note the following:
Only use sensors on which the switching output does not lie on pin 2, i.e. only sensor cables
on which pin 2 is not assigned. Otherwise, the switching output is not protected against
feedback on the switching input. If the inverted sensor output lies on pin 2, for example,
erroneous behavior of the switching output will result!

Technical data of BPS 34
Leuze electronic GmbH + Co. KG BPS 34 18
Connecting the switching input / switching output
The BPS 34 is provided with a switching input and a switching output. The connection is performed as
shown in Figure 4.8:
Figure 4.8: Connecting the switching input / switching output of the BPS 34
4.3.5 BPS 34 reading field curve
Figure 4.9: BPS 34 reading field curve
SWIN4
V OUT1
GND3
PE5
SW OUT2
max.
100 mA
GND IN3
V IN1
A
Sensor
SW IN/OUT connector
PWR plug
-80
-60
-40
-20
0
20
40
60

80
025 75 125 17550 100 17090 150 200 250
225
Reading distance [mm]
Reading field width [mm]
Working range
BPS 34

Connection units MS 34 ...
Leuze electronic GmbH + Co. KG BPS 34 19
5 Connection units MS 34 ...
5.1 MS 34 103 and MS 34 105 modular connector hoods
A modular connector hood of type MS 34 103 or MS 34 105 is part of every BPS 34. The two connector
hoods are used to connect the BPS 34 to the PROFIBUS. For this, they feature one DP IN and one
DP OUT connection each, as well as switches for address setting.
If only the connection to the PROFIBUS is intended, type MS 34 103 is sufficient.
If, in addition, a switching input/output or modular service display are to be connected, an MS 34 105 is
required. Although switching input and output are available on the PWR IN voltage supply connector, the
switching input of the MS 34 105 has the advantage that a standard sensor connector can be used.
5.1.1 General information
The modular connector hoods with integrated connectors are necessary accessories for connecting a
BPS 34 in a PROFIBUS system. On the MS 34 10x, the PROFIBUS is connected, the PROFIBUS address
set and the BPS 34 supplied with voltage.
MS 34 103
The MS 34 103 offers the following interfaces:
• PROFIBUS incoming DP IN
• PROFIBUS outgoing DP OUT
• Voltage supply PWR IN with switching input and switching output
MS 34 105
In addition to the MS 34 103, the MS 34 105 offers the following interfaces:
•For the MSD modular service display (can no longer be delivered)
• M12 connection for switching input and switching output SW IN/OUT
5.1.2 Technical data of the connection units
Mechanical data
Degree of protection IP 65 a)
a) With M12 connectors/caps screwed into place
Weight 160g
Dimensions (H x W x D) 38 x 90 x 39 mm
Housing Diecast zinc

Connection units MS 34 ...
Leuze electronic GmbH + Co. KG BPS 34 20
5.1.3 Dimensioned drawings
Figure 5.1: Dimensioned drawing MS 34 103 / MS 34 105
5.1.4 Electrical connection
5.1.5 Description of the LED states
MS 34 103 / MS 34 105
A status LED is located between the M12 connectors DP IN and DP OUT on the modular connector hood.
It indicates the state of the PROFIBUS connection.
MS 34 105MS 34 103
A = BPS 34
all dimensions in mm
Note!
The MSD and SW IN/OUT
connections are sealed with caps
upon delivery.
Electrical data
Interface type PROFIBUS DP, up to 12MBd
Switching input / switching output 1 switching input, 1 switching output, each is programmable
Operating voltage Without optics heating: 10 … 30VDC
With optics heating: 22 … 26VDC
Power consumption Without optics heating: 5W
With optics heating: max. 30W
State Meaning
Off Voltage off or device not yet recognized by the PROFIBUS 2)
Green, flashing Initialization of the device, establishing the PROFIBUS
communication
Green, continuous light Data operation
Table of contents
Other Leuze Barcode Reader manuals

Leuze
Leuze BPS 338i User manual

Leuze
Leuze BCL 900i User manual

Leuze
Leuze CR 100 User manual

Leuze
Leuze BCL 608i SM 102 User manual

Leuze
Leuze IT 3800g User manual

Leuze
Leuze it 1452g User manual

Leuze
Leuze BPS 3007i User manual

Leuze
Leuze BPS 3048i User manual

Leuze
Leuze BCL 8 User manual

Leuze
Leuze BCL 208i User manual

Leuze
Leuze BPS 8 User manual

Leuze
Leuze HS 6578 User manual

Leuze
Leuze BCL 92 User manual

Leuze
Leuze BCL 92 User manual

Leuze
Leuze BCL 648i User manual

Leuze
Leuze BCL604i User manual

Leuze
Leuze IT 6320 DPM Setup guide

Leuze
Leuze HS 6508 User manual

Leuze
Leuze BPS 348i User manual

Leuze
Leuze DCR 55 User manual