manuals.online logo
Brands
  1. Home
  2. •
  3. Brands
  4. •
  5. Leviton
  6. •
  7. Batteries Charger
  8. •
  9. Leviton EVR-GREEN EVK05-M User manual

Leviton EVR-GREEN EVK05-M User manual

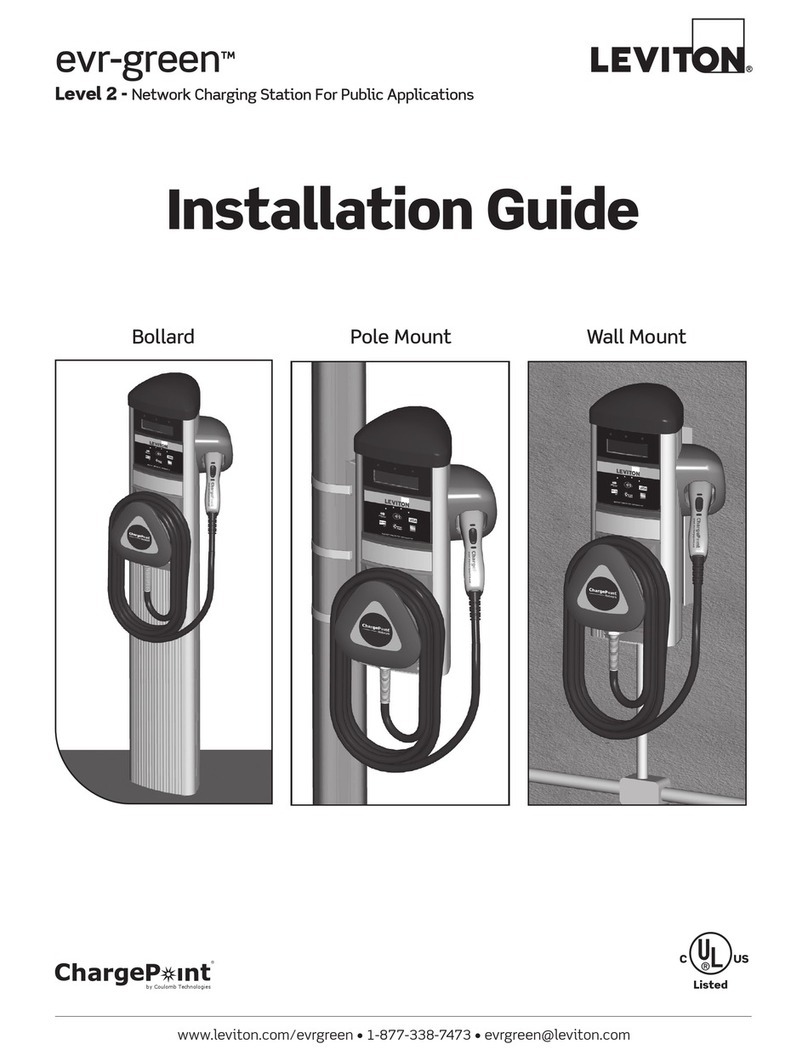
EVR-GREEN™ CHARGING STATION
PRE-WIRE KIT INSTALLATION INSTRUCTIONS
Cat. No. EVK05-M
WARNINGS AND CAUTIONS:
• INSTALLATIONANDSERVICEMUSTBEPERFORMEDBYANELECTRICIAN.
• CONNECTTOA120/208VAC,60HZORA120/240VAC,60HZDEDICATEDBRANCHCIRCUIT.
• IMPORTANT:SAVEFORLOCALELECTRICALINSPECTOR’SUSE.
• READANDSAVETHESEINSTRUCTIONSFORFUTUREREFERENCE.
• IFTHEINFORMATIONINTHISINSTRUCTIONSHEETISNOTFOLLOWEDEXACTLY,A FIRE OR ELECTRICAL SHOCK MAY
RESULT CAUSING PROPERTY DAMAGE, PERSONAL INJURY OR DEATH.
PK-93765-10-00-0B-M
Page1of3
LIMITED 3 YEAR WARRANTY AND EXCLUSIONS
Leviton warrants to the original consumer purchaser and not for the benet of anyone else that this product at the time of its sale by Leviton is free of defects in materials
and workmanship under normal and proper use for three years from the purchase date. Leviton’s only obligation is to correct such defects by repair or replacement, at its option,
if within such three year period the product is returned prepaid, with proof of purchase date, and a description of the problem to Leviton Mfg. Co., Inc. 201 North Service Road,
Melville, N.Y. 11747. This warranty excludes and there is disclaimed liability for labor for removal of this product or reinstallation. This warranty is void if this product is installed
improperly or in an improper environment, overloaded, misused, opened, abused, or altered in any manner, or is not used under normal operating conditions or not in accordance
withanylabelsorinstructions.There are no other or implied warranties of any kind, including merchantability and fitness for a particular purpose, but if any implied warranty
is required by the applicable jurisdiction, the duration of any such implied warranty, including merchantability and tness for a particular purpose, is limited to three years. Leviton
is not liable for incidental, indirect, special, or consequential damages, including without limitation, damage to, or loss of use of, any equipment, lost sales or profits or
delay or failure to perform this warranty obligation. The remedies provided herein are the exclusive remedies under this warranty, whether based on contract, tort or otherwise.
For more information call 1-877-338-7473 or visit www.leviton.com/evrgreen
ThankyouforpurchasingtheEvr-GreenTMChargingStationPre-Wire
Kit.Thisinstallationsheetincludesthelatestinformationatthetime
ofprinting.Thispre-wirekitisintendedforusewithCatNo.EVB32,
EVB45,EVB55,EVB30andEVB40-SPT.Twouniquetemplates
areprovidedwithinthisbox.Onetemplateisintendedforuseinthe
InstallationofEVB55,EVB40,andEVB30PlasticChargingStations.
TheothertemplateisintendedforusewithEVB45andEVB32Metal
ChargingStations.ENSURETHATTHECORRECTTEMPLATE
ISUSEDPRIORTOBEGINNINGINSTALLATION.Foradditional
informationonusingthisPre-WireKitwithotherLevitonEVSE
products,pleasevisitleviton.com/evrgreen.Levitonreservesthe
righttomakechangestothisproductwithoutfurthernotice.Changes
ormodicationstothisproductbyotherthananauthorizedservice
providercouldvoidtheproductwarranty.Ifyouhavequestionsabout
theuseofthisproduct,contactyourcustomerservicerepresentative.
RefertotheCustomerSupportsectionlocatedinthisguide.
Important Notes to the Installer:
• Readallinstructionscontainedintheseinstallationinstructions
beforeinstallingthepre-wirekit.
• Theinstallerisresponsibleforverifyingthatthewallstructure/
surfacewillsafelysupportatotalloadof200lbs.
• Observeallgoverningcodesandordinances.
• Ensuretheappropriatetemplateisusedfortheinstallation.
• Besuretoleavetheseinstructionswiththeconsumer.
Important Notes to the Consumer:
• Keeptheseinstructionswithyourowner’sguideforfuture
reference.
• Ensureyourpre-wirekitisinstalledproperlybyanelectricianor
servicetechnician.
INTRODUCTION
Gathertherequiredtoolsandpartsbeforestartinginstallation.Be
suretofollowmanufacturer’sinstructionsforuseofanytoolsorparts
usedforthisinstallation.
Tools:
• Drill • Studnder
• 3/16"Drillbit • #2and#3Phillips
screwdriver
• Measuringtape • Level
• Utilityknife • Wirecutters/strippers
• Scratchawl • Keyholesaw
Evr-Green Pre-Wire Kit (includes):
• NEMA6-50Rreceptacle • Electricalbox
• Mountingbracket • Safetycover
• Mountinghardware • Mountingtemplate
Note: The safety cover will not be used in the Installation of the
EVB55, EVB40 or EVB30 applications.
Additional parts (not included):
• Copperelectricalcable• Circuitbreaker
 (appropriateforcircuit) 40Afor30AChargingStation,
 50Afor40AChargingStation)
TOOLS & PARTS REQUIRED
TheChargingStationshouldbelocatedincloseproximitytothe
electricvehicle’sparkinglocation.TheChargingStationmustconnect
totheElectricVehicleviaachargeconnectorandcord.NOTE:The
pathfromChargingStationtoElectricVehicleshouldbefreefrom
obstacles,andbewithintherangeoftheEVcord(18or25Feet
StandardLength).
TherecommendedmountingheightoftheChargingStationisnot
toexceed48inches,butnotlessthan42inches.Thisprovides
convenientaccessandoperationoftheEVSE,andmeetsADA
requirementsforaccess.NOTE:TheEVSEenclosureexceeds
thesizeofthemountingbracket.TheareasurroundingtheEVSE
enclosureshouldbefreefromobstruction(see appropriate
mounting template for required clearance limits).
MOUNTING LOCATION
SelectalocationthatissuitableformountingtheChargingStation
basedonthecriteriapresentedintheMOUNTING LOCATION
section.Thekitcanbeinstalledonbothstudwallandsolidwall
construction.Forstudwalls,itcanbemountedtobarestudsorwalls
withdrywall.
Formetalstudorsolidwallapplications,youwillneedtoprocure
wallanchorsformountingbracket,capableofsupportingamaximum
allowableloadof200lbs.Forsolidwallapplicationsyouwillalso
needtoprocureasurfacemountelectricalboxandappropriatewall
anchors.
Thekitcontainscomponentsforcordconnectedchargingstations.
PRE-WIRE KIT INSTALLATION
Page2of3
1.
Locateawallstudintheareainwhichthechargingstationwillbe
installed.
2.
Measure48”upfromtheoorandplaceamarkhorizontally
centeredonthestudthatwillbeusedformountingthebracket
andreceptaclewallbox.
3. Positionandafxthemountingtemplateonthewall,aligningthe
positioningmarksofthetemplatewiththemark(s)onthewall.
Ensurethetemplateislevelbeforeproceeding(see Figure 2).
4. Markthebracketmountingholelocationsandthemounting
locationfortheelectricalbox.Forbarestuds,markthelocation
foraligningthetopoftheelectricalbox.Forstuddedwallswith
drywall,markallfourcornersofelectricalboxlocation.
STUD WALL INSTALLATION
Twotemplatesareprovidedtoproperlylocatethemountingbracket
andreceptaclewallbox.Usingtheappropriatetemplateand
followingtheinstructionsbelowwillensureproperinstallation.
NOTE: Thereceptaclewallboxandmountingbracketmustsharethe
sameverticalwallstud(Figure 1 shows the correct Placement for
EVB32, EVB45, and EVB40-SPT Installation).
48"
Wall stud
Drywall
12"
Two gang
electrical box
Mounting
bracket
Figure 1
EVB32, EVB45,
EVB40-SPT
Installation
Shown
ElectricVehicle Charger Level 2 - InstallationT
emplate
Scale:1 to 1
Ref.Cat.No.: EVK05
PartNo. DG-001-EVK05-20A© 2011 LevitonMfg.Co., Inc.
EVK05
mounting
bracket
Mounting
screws
Receptacle
Safety cover
Pilot holes
for mounting
screws
EVK05
mounting
template
Center line
for wall stud
Wall stud
Two gang
electrical box
Drywall
48"
Cut out
for two
gang
electrical
box
NOTE:The safety cover will not be used
in the EVB55, EVB40, and EVB30 application
Figure 2
EVB32,
EVB45,
EVB40-SPT
Installation
Shown
9. Turnonthecircuitbreakeratthemainpanelandtestreceptacle
toensurepowerispresent.
10.Installthesafetycoverusingscrewsprovided.NOTE:The
hingedsideofthesafetycoverwillbeatthebottomofthecover.
Thesafetycovercanbelockedusingapadlockwithashackle
diameterof3/16"andheightof2-1/2",suchasMasterLock®
LaminatedPadlockNo.7LJ*.
5. Removethetemplate.Forwoodstuds,drilltwo3/16"diameter
pilotholes,2-1/2"deep,asindicatedforthemountingbracket.
Formetalstuds,followmanufacturer’sinstructionsforwallanchor
installation.
6.
Securethemountingbrackettothestud/wallusingthetwo#14x
2-1/2"L
woodscrewsprovided.Turnthe"top"screwintothepilotholeand
drivein
untilapproximately1/2"lengthremains.Hookthebracketontothe
screwusingthekeyholeslot.Secureinplacebyinstallingremaining
screwandtighteningrstscrew.
7.
RunanindividualcircuitaspertheNationalElectricCodeandlocal
buildingcodes.Installtheelectricalbox.Forbarestudapplications,
alignthetopoftheelectricalboxwiththemarkonthestud.For
drywallapplications,usekeyholesawtocutthedrywallopening
fortheelectricalbox.Positionthefaceoftheboxushwiththe
studface(forbarestudapplication)orushtodrywall(fordrywall
application).Securetheelectricalboxtothestudwiththescrews
provided.
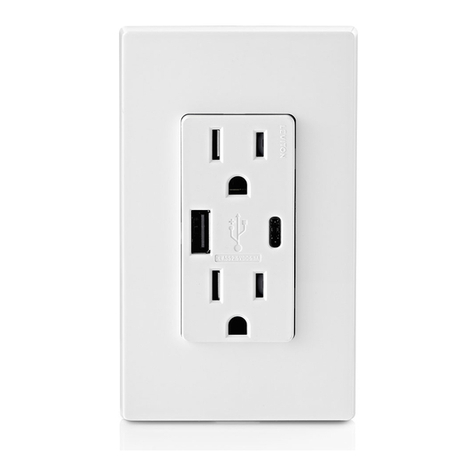
 TheEVK05serieskitincludesaNEMA6-50receptacleforcord-
connectedchargingstations.Wireterminalsacceptupto#4AWG
copperorcoppercladconductors.
WARNING: TO AVOID FIRE, SHOCK, OR DEATH TURN OFF
POWER
ATCIRCUITBREAKERORFUSEANDTESTTHATPOWERIS
OFFBEFOREWIRING!
CAUTION:USETHISDEVICEWITHCOPPER OR COPPER
CLAD
WIRE ONLY.
8. Removeinsulationper"stripgage"ondevice.Connectthe
receptacletotheelectricalwiringasperFigure 3.
 Securethereceptacletotheelectricalboxusingthescrews
provided.
NOTE:Receptaclegroundopeningmustbeonbottom(see
Figure 3).
G
G
240V
Equipment
Ground
6-50R
Figure 3
EVB32,
EVB45,
EVB40-SPT
Installation
Shown
Page3of3 PK-93765-10-00-0B-M©2012LevitonMfg.Co.,Inc.
SOLID WALL INSTALLATION
Formountingtosolidwalls,suchasconcrete,brick,cinderblock,etc.,
additionalmaterialswillberequired.Youwillneedtoprocureanchors
forthebracketsuitableforthesubstratetowhichitwillbemounted.
Additionally,asurfacemountelectricalbox,electricalconduitand
applicablemountinghardwarewillberequired.
NOTE:
•SolidWallinstallationisNOTrecommendedfortheEVB55,
EVB30.
•SolidWallinstallationfortheEVB40requiresVersionEVB40-SPT.
•ForSolidwallInstallationoftheEVB32andEVB45,pleasesee
belowinstructions.
Installation:
1. Locatethewallareainwhichthechargingstationwillbe
installed.
2. Measure48”upfromtheoorandplaceamarkonthewall.
3. Positionandafxthemountingtemplateonthewall,aligningthe
positioningmarksofthetemplatewiththemark(s)onthewall.
Ensurethetemplateislevelbeforeproceeding(see Figure 4).
4. Markthemountinglocationforthereceptacleelectricalbox.
5. Removethetemplate.Installwallanchorsforbracketand
electricalboxaspermanufacturer’sinstructions.
6. Securethemountingbrackettothewall.Turnthe"top"screwinto
theanchoranddriveinuntilapproximately1/2"lengthremains.
Hookthebracketontothescrewusingthekeyholeslot.Secure
inplacebyinstallingremainingscrewandtighteningrstscrew.
7.
RunanindividualcircuitaspertheNationalElectricCodeandlocal
buildingcodes(a40Abreakerisrequiredfor30AChargingStations,
50Abreakerfor40AChargingStations).Installtheelectricalbox.
Useappropriatewallanchorstomountsurfaceelectricalboxinthe
locationindicatedbythetemplate.TheEVK05serieskitincludes
aNEMA6-50receptacle.
Wireterminalsacceptupto#4AWG
copperorcoppercladconductors
.
WARNING: TO AVOID FIRE, SHOCK, OR DEATH TURN OFF
POWER
ATCIRCUITBREAKERORFUSEANDTESTTHATPOWERIS
OFFBEFOREWIRING!
CAUTION:
USETHISDEVICEWITHCOPPER OR COPPER CLAD
WIRE ONLY.
8. Removeinsulationper"stripgage"ondevice.Connectthe
receptacle
totheelectricalwiringasperFigure 3.
 Securethereceptacletotheelectricalboxusingthescrews
provided.
NOTE:Receptaclegroundopeningmustbeonbottom(see
Figure 3).
9. Turnonthecircuitbreakeratthemainpanelandtestreceptacle
toensurepowerispresent.
10.ForEVB32,EVB45andEVB40-SPT,Installthesafetycover
usingscrewsprovided.
NOTE:Thehingedsideofthesafetycoverwillbeatthebottom
ofthecover.Thesafetycovercanbelockedusingapadlock
withashacklediameterof3/16”andheightof2-1/2”,suchas
MasterLock®LaminatedPadlockNo.7LJ*.
* MasterLockisaregisteredtrademarkofMasterLockCompany,
LLC.
ElectricVehicle Charger Level 2 - InstallationTemplate
Scale:1 to 1
Ref.Cat.No.:EVK05
PartNo. DG-001-EVK05-20A© 2011 Leviton Mfg.Co., Inc.
Solid Wall Installation
Figure 4
EVK05
mounting
bracket
Location
for mounting
bracket wall
anchors
EVK05
mounting
template
Location
for two gang
electrical box
(surface mount)
48" Mounting
screws
Receptacle
Safety
cover
Two gang
electrical box
(surface mount) CUSTOMER SUPPORT
Callourcustomersupporthotlineat1-877-338-7473,24hoursa
day.Ifyourcallismadeafterbusinesshoursoronweekends,please
leaveyourname,telephonenumberandabriefdescriptionofthe
problem.ATechnicalServiceRepresentativewillcallbackatthe
earliestopportunity.
Manyquestionsandanswerscanalsobefoundinourknowledge
basecommunity.Justgotoleviton.comandclickonthe
Knowledgebaselink,orgodirectlytohttp://communities.leviton.
com/community/knowledgebaseforums/evr-green.

Other Leviton Batteries Charger manuals

Leviton USB4P-T Configuration guide

Leviton

Leviton USB4P-T Configuration guide

Leviton Evr-Green EVC11-300 User manual

Leviton

Leviton Evr-Green EVC11-300 User manual

Leviton EVR30 User manual

Leviton

Leviton EVR30 User manual

Leviton T5830-T User manual

Leviton

Leviton T5830-T User manual

Leviton evr-green User manual

Leviton

Leviton evr-green User manual

Leviton EVBL2 Series User manual

Leviton

Leviton EVBL2 Series User manual

Leviton Evr-Green DC User manual

Leviton

Leviton Evr-Green DC User manual

Leviton EC32A User manual

Leviton

Leviton EC32A User manual

Leviton ChargePoint evr-green 4000 User manual

Leviton

Leviton ChargePoint evr-green 4000 User manual

Leviton T5637 User manual

Leviton

Leviton T5637 User manual

Leviton T5830 User manual

Leviton

Leviton T5830 User manual

Leviton evr-green EV320 User manual

Leviton

Leviton evr-green EV320 User manual

Leviton EV48G User manual

Leviton

Leviton EV48G User manual

Leviton evr-green EVR40-B2C User manual

Leviton

Leviton evr-green EVR40-B2C User manual

Leviton evr-green 320 User manual

Leviton

Leviton evr-green 320 User manual

Leviton Duplex T5635 User manual

Leviton

Leviton Duplex T5635 User manual

Leviton T5630 User manual

Leviton

Leviton T5630 User manual

Leviton Evr-Green DC User manual

Leviton

Leviton Evr-Green DC User manual

Leviton EVB32 User manual

Leviton

Leviton EVB32 User manual

Leviton T5832 User manual

Leviton

Leviton T5832 User manual

Leviton T5633 User manual

Leviton

Leviton T5633 User manual

Leviton EVPED User manual

Leviton

Leviton EVPED User manual

Leviton USB4P User manual

Leviton

Leviton USB4P User manual

Leviton EVB16 User manual

Leviton

Leviton EVB16 User manual

Popular Batteries Charger manuals by other brands

Tellur TLL151331 user guide

Tellur

Tellur TLL151331 user guide

Volonic VALET 3 user manual

Volonic

Volonic VALET 3 user manual

Milwaukee MXFCP203 Original instructions

Milwaukee

Milwaukee MXFCP203 Original instructions

KUSSMAUL EURO CHARGER 1 Installation guide & manual

KUSSMAUL

KUSSMAUL EURO CHARGER 1 Installation guide & manual

Bosch Professional AL 1814 CV Original instructions

Bosch

Bosch Professional AL 1814 CV Original instructions

Kingston Technology MLW221 Getting started

Kingston Technology

Kingston Technology MLW221 Getting started

Blue Sea Systems Battery LINK 7606 user manual

Blue Sea Systems

Blue Sea Systems Battery LINK 7606 user manual

West Mountain Radio Battery Box user guide

West Mountain Radio

West Mountain Radio Battery Box user guide

Solio Anatomy instruction manual

Solio

Solio Anatomy instruction manual

Hama QI-FC15 operating instructions

Hama

Hama QI-FC15 operating instructions

Varta 57076 manual

Varta

Varta 57076 manual

Simply BTC-4010 instruction manual

Simply

Simply BTC-4010 instruction manual

Alber PSC-10A user guide

Alber

Alber PSC-10A user guide

Drill Master 68420 Owner's manual & safety instructions

Drill Master

Drill Master 68420 Owner's manual & safety instructions

XS Power IntelliCHARGER user guide

XS Power

XS Power IntelliCHARGER user guide

Alpha Technologies PE6500/50 user manual

Alpha Technologies

Alpha Technologies PE6500/50 user manual

Sealey BSCU25.V2 quick start guide

Sealey

Sealey BSCU25.V2 quick start guide

Somogyi home MW 8168GS instruction manual

Somogyi

Somogyi home MW 8168GS instruction manual

manuals.online logo
manuals.online logoBrands
  • About & Mission
  • Contact us
  • Privacy Policy
  • Terms and Conditions

Copyright 2025 Manuals.Online. All Rights Reserved.