ENG
2.7 Low Battery
SECTION 2.7
When the battery is in seriously low condition, Lockly Guard will make continuous beeping
sounds in addition to the flashing low battery icon on the touch screen. You should replace
batteries immediately to avoid your smart lock from shutting down.
When your smart lock low-battery warning alert finally dies, you will have 3 chances to
unlock your smart lock either by a password, APP or fingerprint. If the unlock was successful,
the low-battery warning alert will be on for 1 minute. After which, the smart lock will go to
dead-battery mode and will lock auto lock in 5 seconds and the screen will display a
low-battery icon.
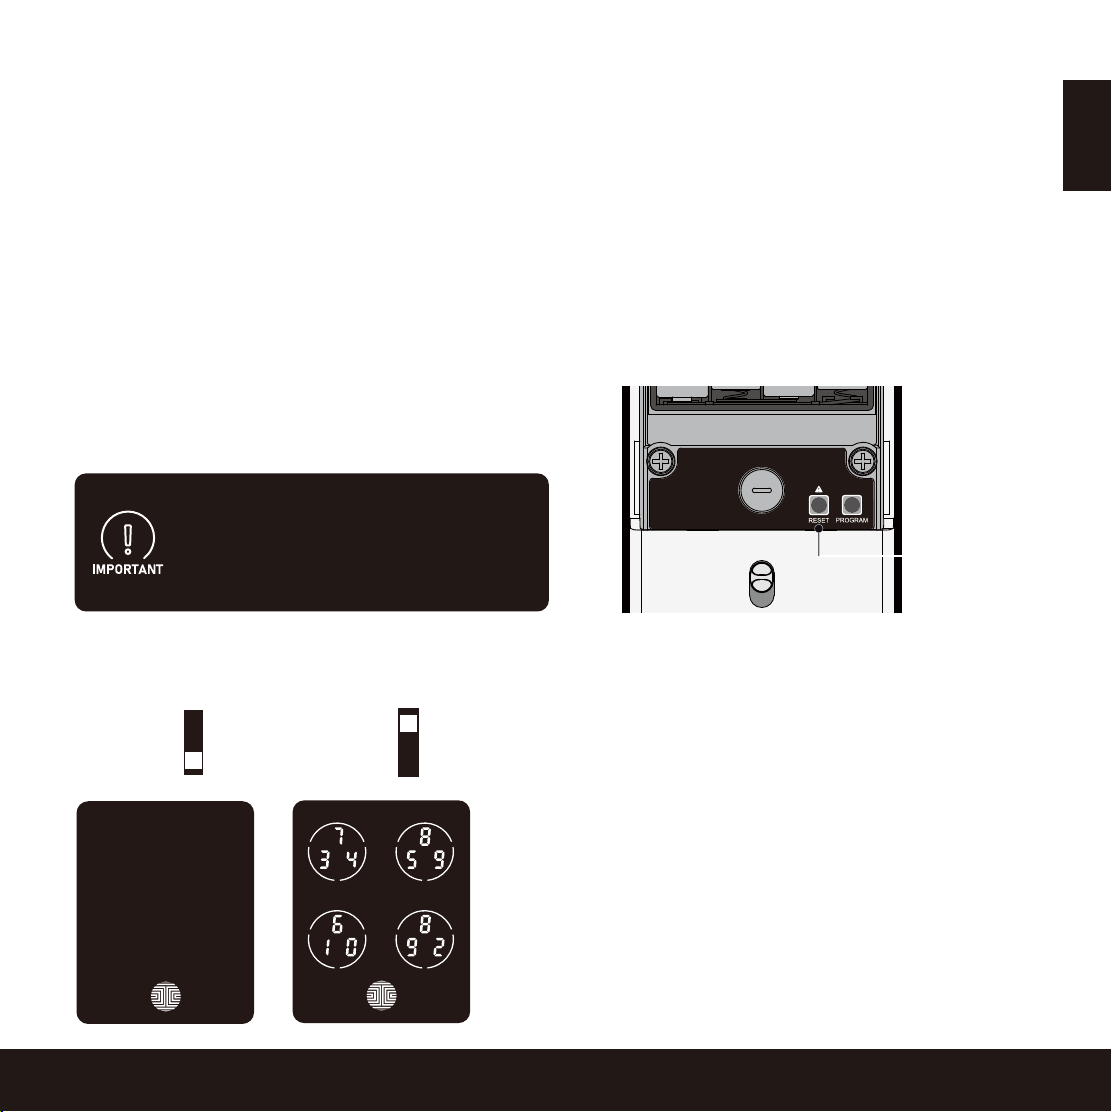
Dead Battery
Condition Indicator Solution
Low Battery
Battery Icon on the display keypad
will light up to indicate low battery .
At the same time, Lockly logo on
the interior panel will flash red to
reminder users that battery is low.
Replace batteries immediately
to avoid battery failure. Lockly
Guard can still operate up to 300
cycles in low battery condition.
When there is no display and
sounds; and screen is non-functional.
Replace batteries immediately.
Supplied physical backup keys
can be used to unlock the door.
Alternatively, use a 9V battery
as shown below to temporarily
activate the lock.
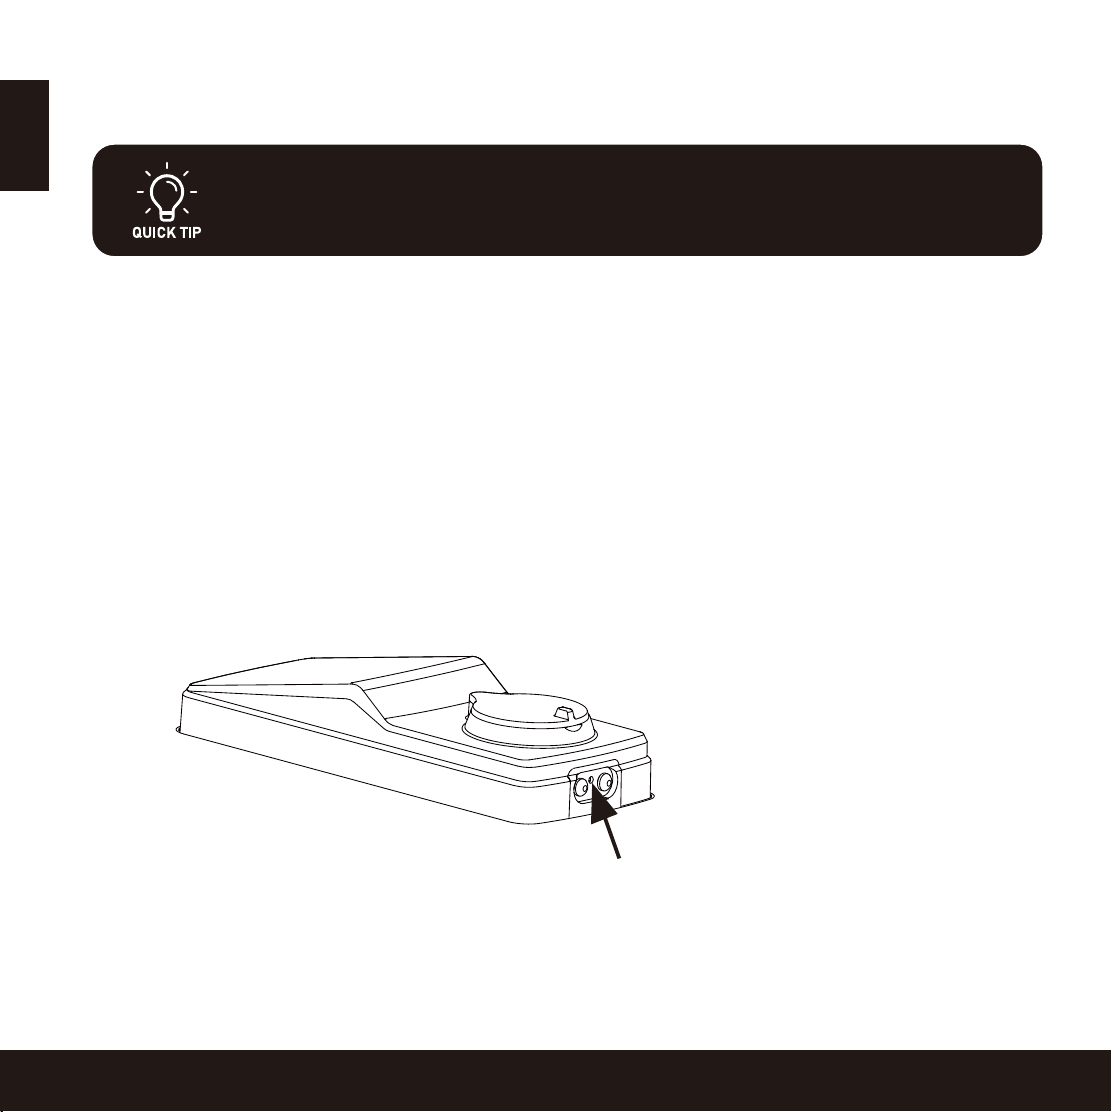
Your Lockly Guard will automatically detect
battery polarity. So hold your 9V battery lead
in place against bottom of the Lockly Guard to
temporarily activate the screen to enter your
Access Code. Be sure to hold the 9V battery
against the contact points located at the
bottom of the lock until you have successfully
unlocked your door with your Access Code.
Once unlocked, batteries should be replaced
immediately.
7
-
+
9V Alkaline Battery