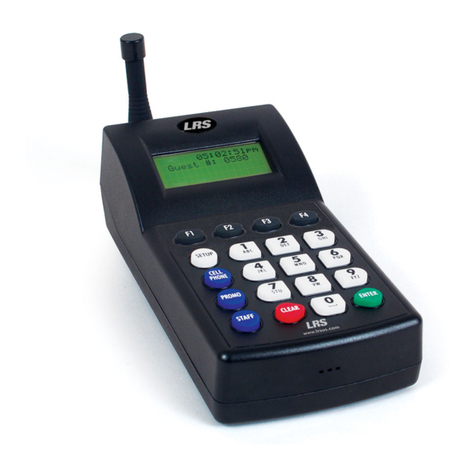
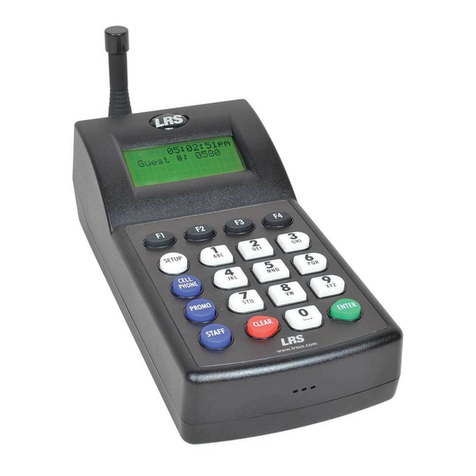
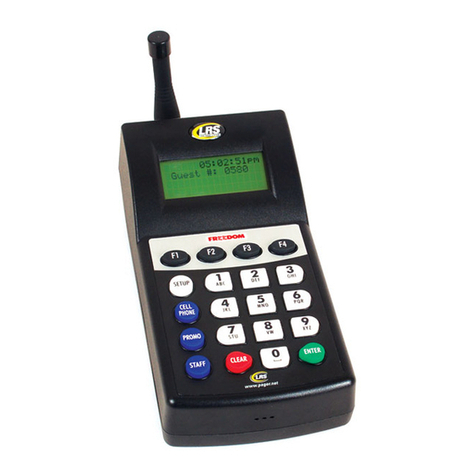
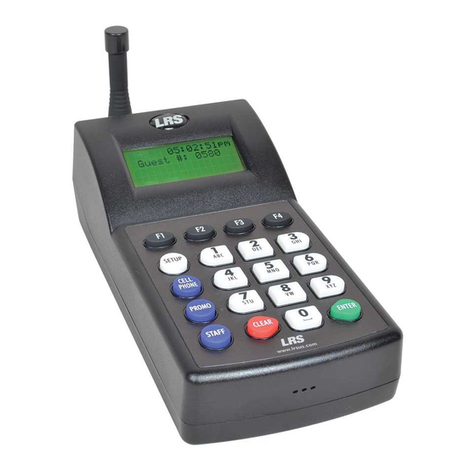
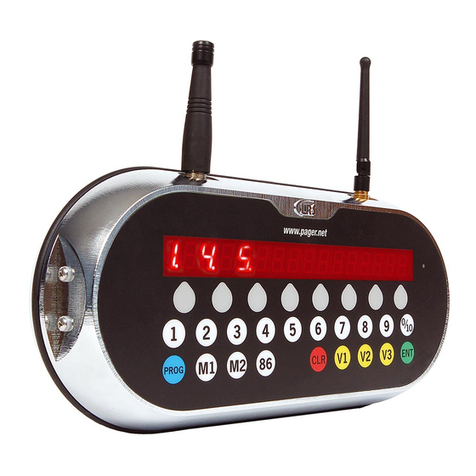
LRS T7503 User manual

800.437.4996 • www.pag r.n t


a
b
c
d
e
f
g
h
i
j
k
l
m
n
o
p
q
r
s
t
u
w
y
v
x
z
]
Wait
Resume
Hold
Seat
Page
Wait
List
LongRangeSystems
www.pager.net
!
Name
Sz
Pgr
Q
W
Ann
Bob
Dave
1
1
1
M
4
0
0
0
1
4
4
6
6
22
2
2
3
5
7
8
9
1
1
2
33
4
7
ManagerManagerManager
pm
Table Status
Open:
.........
:
T7503
Paging System Transmitter
U S E R M A N U A L
IInnssttaallllaattiioonn,, WWaarrrraannttyy aanndd SSeerriiccee IInnffoorrmmaattiioonn
Long Range Systems, Inc.
44555500 EExxcceell PPaarrkkwwaayy,, SSuuiittee 220000
AAddddiissoonn,, TTXX 7755000011
Thank you for choosing Long Range Systems to provi e your on-premise paging solution. Please
familiarize yourself an your staff with the contents of this instruction in or er to properly operate
an maintain your system. For help operating your system or for any service problems, please
call: (800) 437-4996. Keep this instruction in a safe place available to managers an key staff.


1T7503 Us r Manual
Contects
Chapt r 1: Th T7503............................................................................................ 3
Keyboar Description....................................................................... 3
Main Keypa .............................................................................. 3
Secon ary Keypa ..................................................................... 4
Operation Mo es....................................................................... 4
Access Co e ...................................................................................... 4
Chapt r 2: Installation and S tup...................................................................... 5
Basic Installation............................................................................... 5
SD Car .............................................................................................. 5
Connecting to the Internet with Optional Cell Phone Paging ....... 6
POS Printer ........................................................................................ 6
Chapt r 3: S tting M nu Options ...................................................................... 7
Anti-Theft........................................................................................... 7
Auto-locate ........................................................................................ 7
Transmit Power ................................................................................. 8
Assigning Managers to Buttons ...................................................... 8
A ing or Enabling Seating Preferences........................................ 8
Smoking Preferences ................................................................ 8
Table Preferences....................................................................... 8
Special Nee s Options.............................................................. 9
Sen ing Messages............................................................................ 9
A ing or E iting Custom Messages.............................................. 10
Chapt r 4: Waitlist Mod Op ration ................................................................. 11
A ing a Party to the Waitlist .......................................................... 11
A ing a Reservation ....................................................................... 12
Paging a Party ................................................................................... 13
Seating a Party.................................................................................. 14
Paging a Manager............................................................................. 14
Chapt r 5: Simplifi d Paging Mod .................................................................. 15
Paging ................................................................................................ 15
Table Status....................................................................................... 16
Chapt r 6: T901 and Tabl Manag m nt .......................................................... 17
Chapt r 7: Programming Pag rs........................................................................ 17
Chapt r 8: R placing th T7503 ......................................................................... 19
Chapt r 9: Fax Back............................................................................................. 19

Long Range Systems 2
Chapt r 10: Troubl shooting............................................................................... 20
Why oes the Display show nothing?............................................. 20
Why o the Pagers not Receive Pages?.......................................... 20
Why o the Battery Powere Pagers Not Receive Pages?............ 21
How o I connect a USB Mouse? .................................................... 21
Why is Cell Phone Paging not working?......................................... 21
Chapt r 11: Syst m Sp cifications ................................................................... 22
Transmitter ........................................................................................ 22
Battery Powere Pagers................................................................... 22
Rechargeable Pagers........................................................................ 22
Chapt r 12: S rvic Qu stions and Answ rs.................................................. 23
Warranty ................................................................................................................ 24

3T7503 Us r Manual
CHAPTER 1: THE T7503
K yboard D scription
Before using the T7503, please rea the following escriptions. Note that
uring any functions that the isplay changes, the keys may perform iffer-
ent functions, an only the lighte keys are enable .
Main K ypad
M K ys - The M (function) keys are the first row of keys un er the isplay.
The operations of the keys change epen ing upon function on the
screen (e.g., in the Wait List function, the M keys are use to page the
managers).
Numb r K ys - 1 through 0 are use to enter numbers such as the pager
number or the selection in the setup menus.
Alpha Function - When entering text (e.g., guest’s names), all the keys
change to alpha characters ( isplaye on each key).
Staff K y - Use to page staff (or server) pagers.
S tup K y - Selects the setup menu to change operating functions (e.g.,
system i entification co e).
Info K y - Shows information for parties on the waiting list.
Edit K y - Enables up ating of wait list information, an setup functions.
Exit K y - Cancels a process an returns the system to a previous state.
BKSP K y - Backs the entry cursor to un o the last keystroke(s).
M1 M2 M3 M4
STAFF
SETUP
INFO
EDIT
EXIT
PgUp
PgDn
Remove
BKSP
ENTER
ABC
D
EFGH
IJKL
123
MNOP
QRST
0
UV
WX
YZ
WAIT
AFFILIATE
HOLD
SEAT
456
789

Long Range Systems 4
Ent r K y - Completes a task.
Wait K y - Opens the wait list entry function.
R s rv K y - Opens reservation win ow.
Hold K y - Enables the table hol function.
S at K y - Enables the guest seating function
S condary K ypad
Al rt K y (unmarke ) – Lights to show that tables are
available for seating an blinks when attention is
nee e .
Pag K y – Use to page guest/staff pagers.
TBL Stat K y – Enables the table status e it function.
Wait List K y – Returns the system to the wait list function.
NOTE: this is the efault function.
Op ration Mod s
There are two ways to configure a T7503: Simplifie Paging an Waitlist
Operation.
Simplifi d Paging: This mo e is use for simple paging of guests using
pagers or cell phones, an also shows a list of tables
available for seating.
Waitlist: Waitlist Mo e will isplay any guests waiting to be seate , an a
list of tables available for seating.
Acc ss Cod
The Access Co e is a 5 igit co e use to enter certain higher level menus.
The efault co e is 5 – 6 – 7 – 8 – 9.
To change the Access Co e, contact LRS.
SECONDARY
KEYPAD
Page
TBL Stat
Wait
List

5T7503 Us r Manual
CHAPTER 2: IN TALLATION AND ETUP
Basic Installation
Caution: Do not mount the transmitter near any large metal objects.
1) Un-wrap all system components.
2) Put T7503 in a location with easy access to a stan ar 110/220V
outlet.
3) Twist the 3” antenna onto the silver connector locate at the rear
of the transmitter.
4) Plug the transmitter 10V AC power supply into a stan ar
110/220V outlet, an connect the barrel en into the port locate
on the rear of the transmitter.
5) After 1 minute, the T7503 keyboar lights will stop chasing.
Enter the current Time an Date (US Format HH:MM am/pm, an
MM/DD/YY.)
6) Optional: Plug an Ethernet cable into the LAN port to connect to
a network.
SD Card
The SD Car can be use to backup a T7503 or to transfer the information
from an ol T7503 onto a new/replacement T7503.
If the SD Car is remove or missing, the car can be inserte into the slot
on the right si e of the transmitter.
After it is inserte , a pop-up win ow will show that a New Car is etecte ,
an will give options to select to use as a Live Backup or to Clone T7503
from the SD Car if the car is transferre from one T7503 to another.

Long Range Systems 6
Conn cting to th Int rn t with Optional C ll Phon Paging
The T7503 can connect to the internet using the LAN Port an page a cus-
tomer’s cell phone that their table is rea y.
This option must be enable by LRS. Please contact your local representa-
tive.
POS Print r
A Printer will print a Seating Chit with the customer’s Name, Table Number,
Pager Number, an any Preferences
To s t up a print r:
1) On T7503, press SETUP.
2) Enter access co e an press ENTER.
3) Select DEVICES.
4) Select PRINTER.
5) Select PRINTER ADDRESS an press ENTER.
6) Enter the printer’s IP A ress an press ENTER.
7) Press EXIT an accept changes.
8) Place the POS Printer near the T7503.
9) Connect an Ethernet cable from the printer to LAN port of T7503 or
connect to Ethernet Hub.
10) Connect power to printer.

7T7503 Us r Manual
CHAPTER 3: ETTING MENU OPTION
Anti-Th ft
Theft eterrent is use to alert staff an guests that they are leaving the
premises while still carrying the coaster/pager.
Wh n Activat d:
• The transmitter sen s a signal to the coaster/pager, an if the sig-
nal is not receive , the coaster/pager will emit a continuous beep
soun until it is returne to the charging unit or back in range.
• The LED screen on the alpha/text pagers will isplay “OUT OF
RANGE”.
1) Press SETUP.
2) Enter access co e an press ENTER.
3) Select PAGERS.
4) Select ANTI-THEFT.
5) Select ON to turn on Anti-theft, or OFF to turn off Anti-theft.
6) Press EXIT an accept the changes.
Auto-locat
Auto Locate sen s a signal to ALL coasters/pagers at a preset time. The
pagers will beep so that staff can locate them, coasters will flash an beep.
Example: If closing at 11:30PM, the transmitter can be set to auto locate at
12:30AM, causing all missing coasters/pagers to beep at that time.
Wh n activat d:
• A signal is sent out to ALL coaster/ pagers.
• Pagers will Beep or Flash until returne to charging unit or the
batteries are remove .
1) Press SETUP.
2) Enter access co e an press ENTER.
3) Select PAGERS.
4) Select AUTO-LOCATE.
5) Press M1 to enable Auto-Locate.
6) Enter a time for Auto-Locate to sen the locate signal to all pagers.
7) Press EXIT an accept the changes.

Long Range Systems 8
Transmit Pow r
1) Press SETUP.
2) Enter access co e an press ENTER.
3) Select PAGERS.
4) Select TRANSMIT POWER
5) Enter a power level from 0 to 31 an press ENTER.
6) Press EXIT an accept the changes.
Assigning Manag rs to Buttons
This feature is use to e it which buttons are assigne to alert a manager
pager.
1) Press SETUP.
2) Enter access co e an press ENTER.
3) Select PAGERS.
4) Select either
- M1 ASSIGNMENT
- M2 ASSIGNMENT
- M3 ASSIGNMENT
5) Enter the new manager pager number an press ENTER.
6) Press EXIT an accept the changes.
Adding or Enabling S ating Pr f r nc s
Smoking Pr f r nc s
1) Press SETUP.
2) Enter access co e an press ENTER.
3) Select WAITLIST SETTINGS.
4) Select SMOKING.
5) Select ON to turn on Smoking Preferences, or OFF to turn off
6) Press EXIT an accept the changes.
Tabl Pr f r nc s
When a patron is a e to the Waitlist or Reservation, a Table Preference
can also be set such as a Booth, Win ow Seat, Patio, Bar, an so on.
To turn on Tabl Pr f r nc s
1) Press Setup.
2) Enter access co e an press ENTER.
3) Select WAITLIST SETTINGS.

9T7503 Us r Manual
4) Select TABLE PREFERENCES.
5) Select ON to turn on Table Preferences.
6) Press EXIT an accept the changes.
To dit or cr at Tabl Pr f r nc s:
1) Press Setup.
2) Enter access co e an press ENTER.
3) Select WAITLIST SETTINGS.
4) Select EDIT TABLE PREFERENCES.
5) Select to A or E it a preference.
6) Type in the text of the preferences an press ENTER.
7) Press EXIT an accept the changes.
Sp cial N ds Options
Some customers may have a unique nee before they can be seate . Some
Special Nee s can inclu e Close to Door, High Chair, an so on.
To turn on Sp cial N ds:
1) Press Setup.
2) Enter access co e an press ENTER.
3) Select WAITLIST SETTINGS.
4) Select SPECIAL NEEDS.
5) Select ON to turn on Special Nee s.
6) Press EXIT an accept the changes.
To dit or cr at Sp cial N ds:
1) Press Setup.
2) Enter access co e an press ENTER.
3) Select WAITLIST SETTINGS.
4) Select EDIT SPECIAL NEEDS.
5) Select to A or E it a special nee .
6) Type in the text of the special nee an press ENTER.
7) Press EXIT an accept the changes.
S nding M ssag s
The transmitters use a set of pre-canne messages when paging staff
text/alpha pagers. These messages are built in using co es 000 to 076 an
cannot be e ite .

Long Range Systems 10
Exampl : Sen a message to call extension 123
• From Preset Message Table choose – 006 (Call Ext)
• Enter co e 0-0-6-1-2-3 (Displays: CALL EXT 123)
Cod M ssag
Adding or Editing Custom M ssag s
These messages will be store at 077 to 099.
Example: Sen a custom message “Customer Service 123” store at 079
• Enter co e 0-7-9-1-2-3 (Displays: Customer Service 123)
To cr at a custom m ssag that can b nt r d whil paging:
1) Press SETUP.
2) Enter access co e an press ENTER.
3) Select SYSTEM TOOLS.
4) Select ADD/EDIT CUSTOM MESSAGES.
5) Highlight Create New Message or a current message an press
ENTER.
6) Type in the message an press ENTER.
7) Press EXIT an accept the changes.
000 Phone Call
001 Sales Call
002 Manager
003 Customer
004 Room
005 Visitor
006 call Ext
007 MTG Room
008 Lane
009 Aisle
010 Voi
011 Stamps
012 Change
013 Station
014 Machine
015 Operator
016 Emergency
017 XX Minutes
018 Tee
019 Pro Shop
020 Starter
021 Service
rive
022 Showroom
023 Parke Call
024 Voice Mail
025 Dressing
room
026 Price check
027 Department
028 Cashier
029 Office
030 Table
031 Winner
032 Pickup
033 Dock
034 You have
mail
035 Table rea y
036 No special
037 Hole
038 Kitchen
039 Bar
040 Door
041 Survey
042 T-nnn Q-mm
043 Break
044 Fire
045 Unit
046 Win ow
047 Nurse
048 Register
049 Owner
050 Check
051 Drink
052 Foo
053 Service
054 Seat
055 Booth
056 Lobby
057 Help
058 Restroom
059 Valet
060 Car
061 Bus
062 Bay
063 Low battery
064 Error
065 Exit
066 Fax
067 host
068 Space
069 Location
070 Nursery
071 Teller
072 Officer
073 Buffet
074 Diaper
change
075 Chil crying
076 To nursery

11 T7503 Us r Manual
CHAPTER 4: WAITLI T MODE OPERATION
Waitlist Mo e will isplay any guests waiting to be seate , an a list of ta-
bles available for seating.
Adding a Party to th Waitlist
1) Press the WAIT key.
2) At the Make Walk-In Wizar :
• Enter the Guest’s Party Size an press ENTER.
• Enter the Quote Wait Time an press ENTER.
If require , select preferences (e.g. Smoking, Table/Booth/Patio)
• Enter the Name of the party an press ENTER.
• Enter the Guest Pager if han ing out an on-premise pager or Mo-
bile Phone to use the guest’s cell phone as a pager an press
ENTER.
3) When all fiel s are entere , press ENTER for Finishe .
1) Entering a Party Size 2) Entering the Quote Wait

Long Range Systems 12
3) Selecting the Preferences 4) Entering the Party Name
5) Entering Guest’s Phone Number 6) Entering Assigne Pager Number
for Paging
Adding a R s rvation
1) Press the RESERVE button.
2) Enter the party size an press ENTER.
3) Enter the ate an time of the reservation an press ENTER.
4) As require , select preferences.
5) Enter the party name an press ENTER.
6) Enter the phone number for the party an press ENTER for Finishe .

13 T7503 Us r Manual
Paging a Party
1) Select a party from the waitlist by pressing ENTER.
2) Select an open table.
3) Guest will now be page an their table number will next to the
party’s name.
Step 1: Selecting a Guest to Page
Step 2: Selecting an Open Table
Step 3: View of Page Guest with Table Assignments

Long Range Systems 14
S ating a Party
To seat a party, highlight the party from the waitlist an press SEAT. The
party will now be remove from the waitlist.
Paging a Manag r
1) To page a manager, use the M1, M2, an M3 keys.
2) Type in a 3 igit co e for a preset message or press M1 to write a
free form message.
3) Press ENTER to sen the page.
Paging an Alpha-numeric Paging an SP4
Manager Pager Manager Pager

15 T7503 Us r Manual
CHAPTER 5: IMPLIFIED PAGING MODE
The Simplifie Paging Mo e will isplay a line for paging Guest Pagers or
Cell Phones, an a list of tables available for seating.
Paging
Paging a Pag r
In the Guest Pager/Phone section, type the Pager Number an press ENTER.
This will let the guest know that their table is rea y.
Press the PAGE button to switch from the Table Status section back to Paging
Paging a C ll Phon
In the Guest Pager/Phone section, type the Phone Number of the Guest an
press ENTER. The number will be save as a pager number between 501
an 699.
When rea y to page the Guest, type the Pager Number, an the Guest’s Cell
Phone will be calle to alert them that their table is rea y.

Long Range Systems 16
Tabl Status
This section will show tables that are available as a table number in the
Open, Bus, or Hol lists. Tables on this list can be a e an remove from
the T7503 keypa by pressing the TBL STAT button. When tables are avail-
able, the ALERT key on the keypa is lit.
Table of contents
Other LRS Transmitter manuals

LRS
LRS T7400A User manual

LRS
LRS T9601 User manual

LRS
LRS Freedom TX-7471 User manual

LRS
LRS T74C232 User manual

LRS
LRS TX-9601 User manual

LRS
LRS TX-9560MT User manual

LRS
LRS Freedom User manual

LRS
LRS Butler II TX-1605-5 Owner's manual

LRS
LRS Butler XP Operating instructions

LRS
LRS TX-7471-C232 User manual