ROUTINE TEST RECORD
Type Test Year 1 Year 2 Year 3 Year 4 Year 5
Signed Date Signed Date Signed Date Signed Date Signed Date
Functional 1
Functional 2
Functional 3
Functional 4
Functional 5
Functional 6
Functional 7
Functional 8
Functional 9
Functional 10
Functional 11
3hr Duration 12
Installation Engineers Contact Details: Luminaire Reference / Location
Name: Tel:
Luminaire Details: Full Recharge Duration 24 Hours Emergency Duration 3 Hours Lamp Type LED
Eyebrook Lens Downlights
The light source of this unit is not
replaceable; when the light source
reaches its end of life the whole
luminaire shall be replaced.
Disposal of Electronic Equipment
WEEE Directive 2002/96/EC This
product falls within the scope of
the Waste Electrical & Electronic
Equipment Directive (WEEE), which
means the product should not be
disposed of as normal household
waste. Please recycle where
facilities exist or check with your
Local Authority.
RoHS – All components and
materials used in this product are
RoHS 2002/95/EC compliant.
Specicationsmaychangefrom
time to time. The information
containedinthisleaetisfor
guidance only and should not be
considered as always accurate
and should be treated as
not representative.
This luminaire is warranted for a
period of 5 years from the date of
purchase. The backup battery
pack in the emergency version
is warranted for a period of 12
months. The warranty could be
invalidatedshouldthelighttting
not be installed according to these
instructions, outside the scope of
thespecicationortheproduct
has been altered or tampered with
in any way. Please see website for
terms and conditions.
Standard -20 to +45ºC
Emergency 0 to +30ºC
Technical Helpline: +44 (0)1507 328031
DISPOSAL
WARRANTY
PRODUCT TEMP SPECIFICATION
Part No. Description Watts L(mm) W(mm) H(mm) Hole Cut Out
430206 4” 13W 145 145 78 130mm
430207 6” 18W 172 172 90 155mm
430208 6” 25W 172 172 90 155mm
430209 6” 35W 172 172 90 155mm
EYEBROOK LENS DIMENSIONS
L (mm)
H (mm)
W (mm)
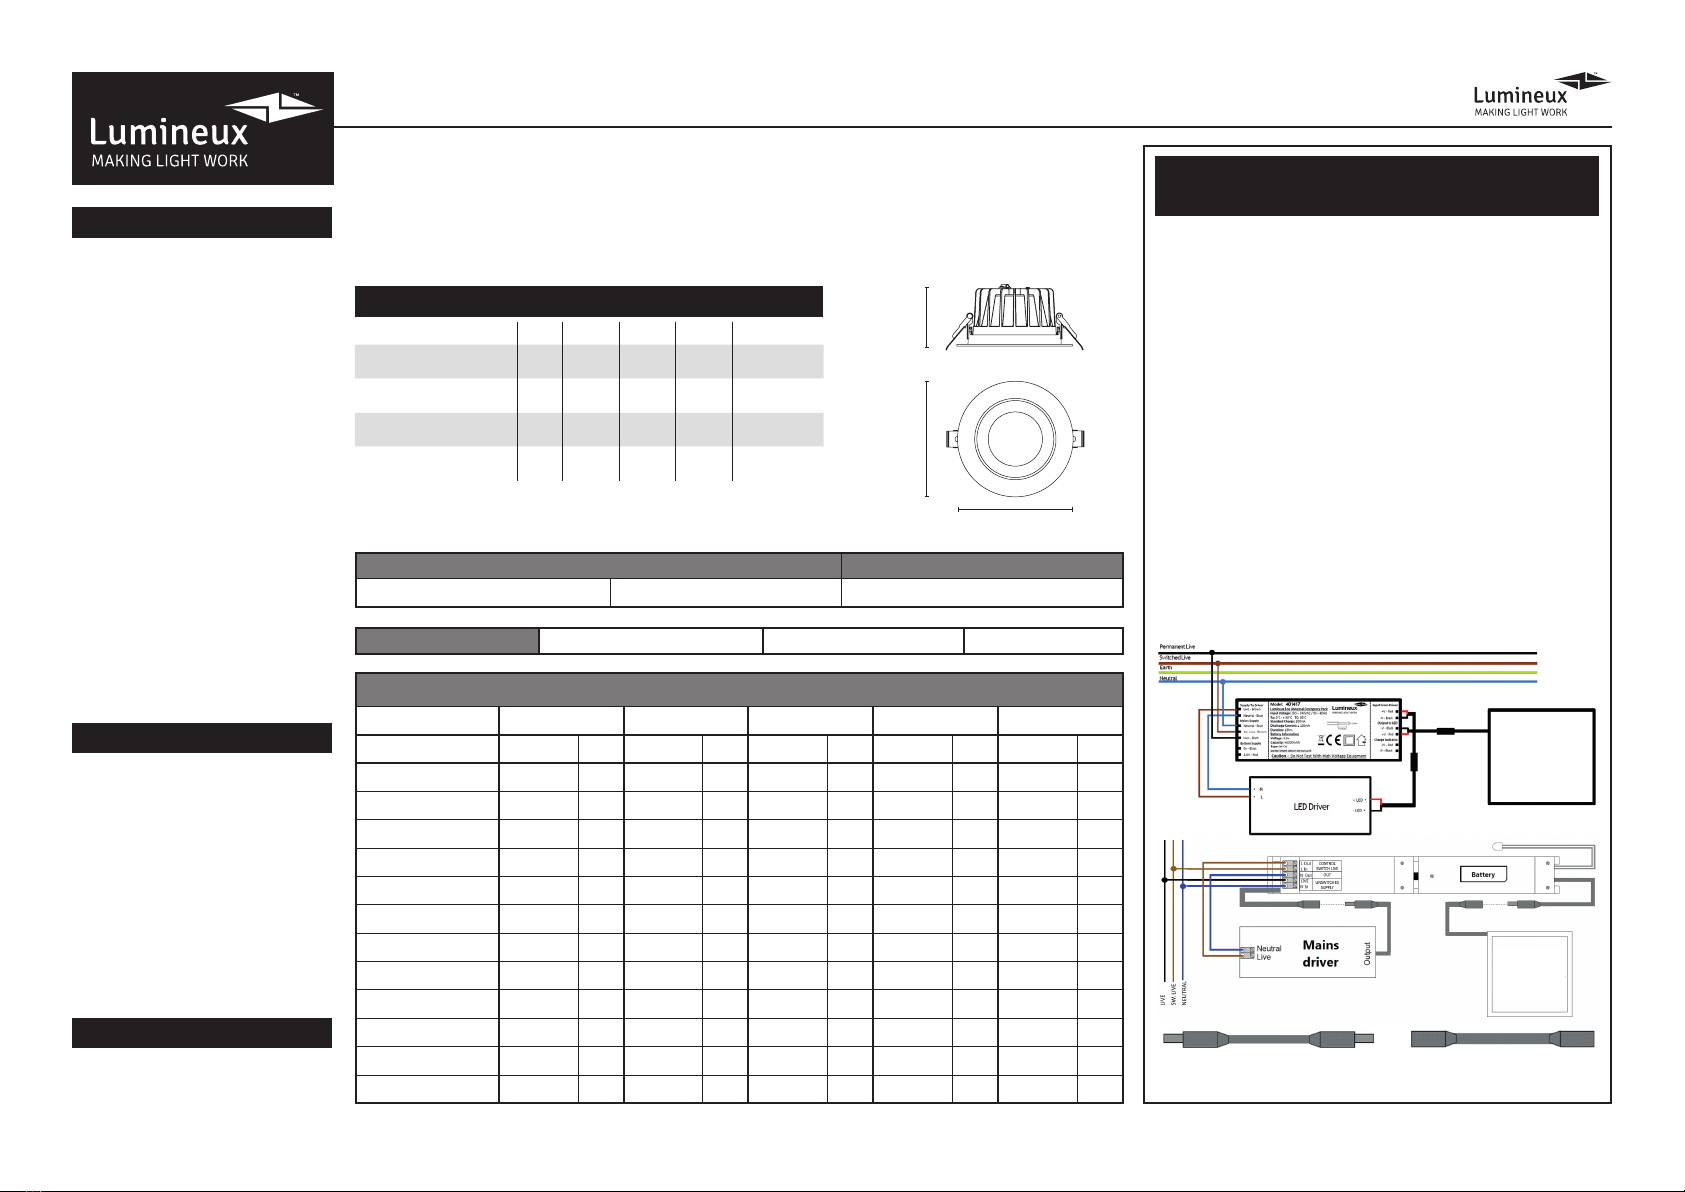
1. TheinstallationofanemergencyttingMUSTBE
CONNECTED AS SHOWN in diagrams below.
2. For the emergency unit to operate correctly the permanent
live feed must not be interrupted. Note: Ensure no lighting
controls are on the permanent Live feed, such as PIR’s or
SWITCHES, failing to observe this will reduce the batteries
lifetime of the emergency pack considerably.
3. After switching on an emergency equipped unit, the LED
indicator should illuminate this is to indicate battery
charging.
4. Should power to an emergency equipped unit be
disrupted or isolated, the indicating LED will switch off,
triggering the emergency function illuminating the LED’s
5. The backup battery must be charged for 24 hours before
a full duration test.
Wiring instructions for units equipped
an with EMERGENCY function
If the LED Driver & Downlight jack leads do not match the gender as in
diagram, please use provided gender changing leads to correct.
Light
Light
Emergency lighting luminaries must be installed and
maintained in accordance with the emergency lighting
standard BS 5266-1
Revision 2


