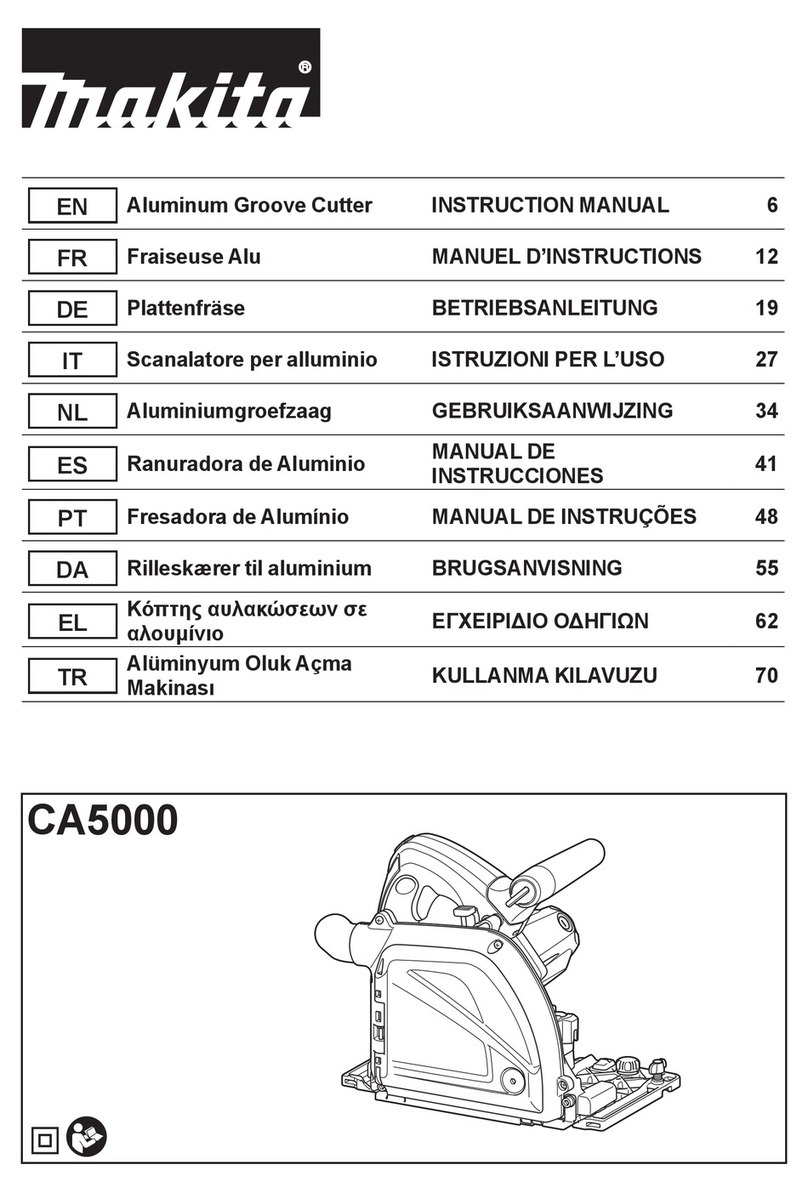
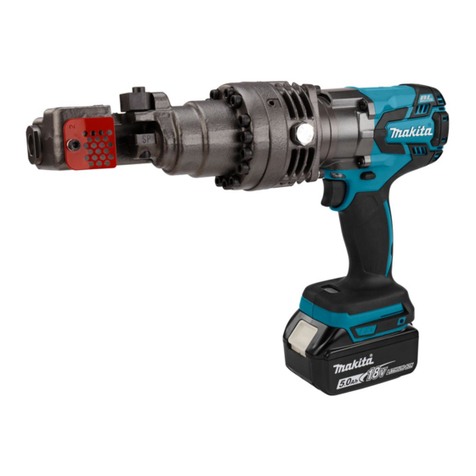
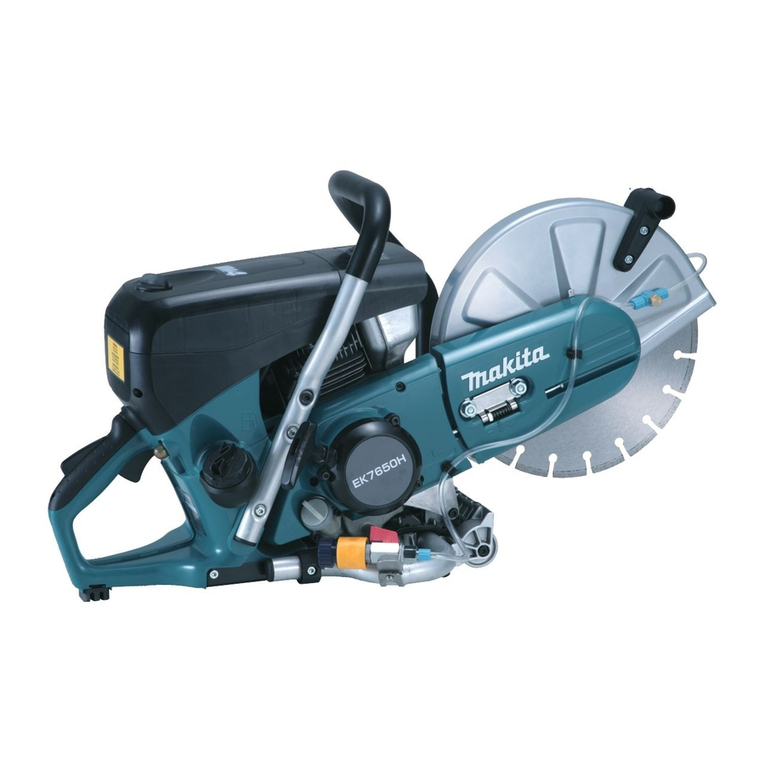
Makita DCS553 User manual

DCS553
EN Cordless Metal Cutter INSTRUCTION MANUAL 6
SL Brezžični rezalnik kovin NAVODILA ZA UPORABO 15
SQ Prerësi i metalit me bateri MANUALI I PËRDORIMIT 24
BG Акумулаторна резачка на
метал РЪКОВОДСТВО ЗА
ЕКСПЛОАТАЦИЯ 34
HR Bežični rezač metala PRIRUČNIK S UPUTAMA 45
МК Безжичен алат за сечење
метал УПАТСТВО ЗА УПОТРЕБА 54
SR Бежични секач метала УПУТСТВО ЗА УПОТРЕБУ 65
RO Maşină de tăiat metal fără r MANUAL DE INSTRUCŢIUNI 75
UK Акумуляторний різак по
металу ІНСТРУКЦІЯ З
ЕКСПЛУАТАЦІЇ 85
RU Аккумуляторная Пила По
Металлу РУКОВОДСТВО ПО
ЭКСПЛУАТАЦИИ 96

1
2
3
Fig.1
1
Fig.2
1
2
Fig.3
1
2
Fig.4
1
Fig.5
1
3
2
Fig.6
1
2
3
Fig.7
1
Fig.8
2

1
2
Fig.9
Fig.10
2
1
3
Fig.11
2
1
Fig.12
Fig.13
1
2
Fig.14
1
2
Fig.15
1
Fig.16
3

1
2
3
4
Fig.17
1
2
3
45
Fig.18
1
2
3
Fig.19
Fig.20
Fig.21
1
2
33
Fig.22
1
2
Fig.23
4

1
Fig.24
5

6ENGLISH
ENGLISH (Original instructions)
SPECIFICATIONS
Model: DCS553
Blade diameter 136 mm - 150 mm
Max. Cutting depth
(with 150 mm diameter blade)
57.5 mm
No load speed 4,200 min-1
Rated voltage D.C. 18 V
Overall length 267 mm
Net weight 2.8 - 3.1 kg
•
Due to our continuing program of research and development, the specications herein are subject to change without notice.
• Specications may dier from country to country.
• The weight may dier depending on the attachment(s), including the battery cartridge. The lightest and heavi-
est combination, according to EPTA-Procedure 01/2014, are shown in the table.
Applicable battery cartridge and charger
Battery cartridge BL1815N / BL1820 / BL1820B / BL1830 / BL1830B / BL1840 /
BL1840B / BL1850 / BL1850B / BL1860B
Charger DC18RC / DC18RD / DC18RE / DC18SD / DC18SE / DC18SF /
DC18SH
•
Some of the battery cartridges and chargers listed above may not be available depending on your region of residence.
WARNING: Only use the battery cartridges and chargers listed above. Use of any other battery cartridges
and chargers may cause injury and/or re.
Intended use
The tool is intended for cutting in mild steel. With appro-
priate Makita genuine saw blades, ber-cement board
and wood can also be sawed.
Noise
The typical A-weighted noise level determined accord-
ing to EN62841-2-5:
Sound pressure level (LpA) : 103 dB(A)
Sound power level (LWA) : 114 dB (A)
Uncertainty (K) : 3 dB(A)
NOTE:
The declared noise emission value(s) has been
measured in accordance with a standard test method
and may be used for comparing one tool with another.
NOTE:
The declared noise emission value(s) may
also be used in a preliminary assessment of exposure.
WARNING: Wear ear protection.
WARNING:
The noise emission during actual
use of the power tool can dier from the declared
value(s) depending on the ways in which the tool is
used especially what kind of workpiece is processed.
WARNING:
Be sure to identify safety measures
to protect the operator that are based on an estima-
tion of exposure in the actual conditions of use (tak-
ing account of all parts of the operating cycle such
as the times when the tool is switched o and when
it is running idle in addition to the trigger time).
Vibration
The vibration total value (tri-axial vector sum) deter-
mined according to EN62841-2-5:
Work mode: cutting metal
Vibration emission (ah,M) : 2.5 m/s2or less
Uncertainty (K) : 1.5 m/s2
Work mode: cutting wood
Vibration emission (ah,W) : 2.5 m/s2or less
Uncertainty (K) : 1.5 m/s2
NOTE: The declared vibration total value(s) has been
measured in accordance with a standard test method
and may be used for comparing one tool with another.
NOTE: The declared vibration total value(s) may also
be used in a preliminary assessment of exposure.
WARNING: The vibration emission during
actual use of the power tool can dier from the
declared value(s) depending on the ways in which
the tool is used especially what kind of workpiece
is processed.
WARNING: Be sure to identify safety mea-
sures to protect the operator that are based on an
estimation of exposure in the actual conditions of
use (taking account of all parts of the operating
cycle such as the times when the tool is switched
o and when it is running idle in addition to the
trigger time).

7ENGLISH
EC Declaration of Conformity
For European countries only
The EC declaration of conformity is included as Annex A
to this instruction manual.
SAFETY WARNINGS
General power tool safety warnings
WARNING: Read all safety warnings, instruc-
tions, illustrations and specications provided
with this power tool. Failure to follow all instructions
listed below may result in electric shock, re and/or
serious injury.
Save all warnings and instruc-
tions for future reference.
The term "power tool" in the warnings refers to your
mains-operated (corded) power tool or battery-operated
(cordless) power tool.
Cordless Metal Cutter safety
warnings
Cutting procedures
1. DANGER: Keep hands away from cutting
area and the blade. Keep your second hand
on auxiliary handle, or motor housing. If both
hands are holding the saw, they cannot be cut by
the blade.
2. Do not reach underneath the workpiece. The
guard cannot protect you from the blade below the
workpiece.
3. Adjust the cutting depth to the thickness of
the workpiece. Less than a full tooth of the blade
teeth should be visible below the workpiece.
4. Never hold the workpiece in your hands or
across your leg while cutting. Secure the
workpiece to a stable platform. It is important to
support the work properly to minimise body expo-
sure, blade binding, or loss of control.
5. Hold the power tool by insulated gripping
surfaces, when performing an operation where
the cutting tool may contact hidden wiring.
Contact with a “live” wire will also make exposed
metal parts of the power tool “live” and could give
the operator an electric shock.
6. When ripping, always use a rip fence or
straight edge guide. This improves the accuracy
of cut and reduces the chance of blade binding.
7. Always use blades with correct size and shape
(diamond versus round) of arbour holes.
Blades that do not match the mounting hardware
of the saw will run o-centre, causing loss of
control.
8. Never use damaged or incorrect blade wash-
ers or bolt. The blade washers and bolt were
specially designed for your saw, for optimum
performance and safety of operation.
Kickback causes and related warnings
— kickback is a sudden reaction to a pinched,
jammed or misaligned saw blade, causing an
uncontrolled saw to lift up and out of the workpiece
toward the operator;
— when the blade is pinched or jammed tightly by the
kerf closing down, the blade stalls and the motor
reaction drives the unit rapidly back toward the
operator;
— if the blade becomes twisted or misaligned in the
cut, the teeth at the back edge of the blade can
dig into the top surface of the workpiece causing
the blade to climb out of the kerf and jump back
toward the operator.
Kickback is the result of saw misuse and/or incorrect
operating procedures or conditions and can be avoided
by taking proper precautions as given below.
1. Maintain a rm grip with both hands on the
saw and position your arms to resist kickback
forces. Position your body to either side of the
blade, but not in line with the blade. Kickback
could cause the saw to jump backwards, but
kickback forces can be controlled by the operator,
if proper precautions are taken.
2. When blade is binding, or when interrupting a
cut for any reason, release the trigger and hold
the saw motionless in the material until the
blade comes to a complete stop. Never attempt
to remove the saw from the work or pull the
saw backward while the blade is in motion
or kickback may occur. Investigate and take
corrective actions to eliminate the cause of blade
binding.
3. When restarting a saw in the workpiece, centre
the saw blade in the kerf so that the saw teeth
are not engaged into the material. If a saw blade
binds, it may walk up or kickback from the work-
piece as the saw is restarted.
4. Support large panels to minimise the risk of
blade pinching and kickback. Large panels tend
to sag under their own weight. Supports must be
placed under the panel on both sides, near the line
of cut and near the edge of the panel.
5. Do not use dull or damaged blades.
Unsharpened or improperly set blades produce
narrow kerf causing excessive friction, blade
binding and kickback.
6. Blade depth and bevel adjusting locking levers
must be tight and secure before making the
cut. If blade adjustment shifts while cutting, it may
cause binding and kickback.
7. Use extra caution when sawing into existing
walls or other blind areas. The protruding blade
may cut objects that can cause kickback.
8. ALWAYS hold the tool rmly with both hands.
NEVER place your hand, leg or any part of your
body under the tool base or behind the saw,
especially when making cross-cuts. If kickback
occurs, the saw could easily jump backwards over
your hand, leading to serious personal injury.
9. Never force the saw. Push the saw forward at a
speed so that the blade cuts without slowing.
Forcing the saw can cause uneven cuts, loss of
accuracy, and possible kickback.

8ENGLISH
Lower guard function
1. Check the lower guard for proper closing
before each use. Do not operate the saw if the
lower guard does not move freely and close
instantly. Never clamp or tie the lower guard
into the open position. If the saw is accidentally
dropped, the lower guard may be bent. Raise the
lower guard with the retracting handle and make
sure it moves freely and does not touch the blade
or any other part, in all angles and depths of cut.
2.
Check the operation of the lower guard spring. If
the guard and the spring are not operating prop-
erly, they must be serviced before use. Lower
guard may operate sluggishly due to damaged
parts, gummy deposits, or a build-up of debris.
3. The lower guard may be retracted manually
only for special cuts such as “plunge cuts”
and “compound cuts”. Raise the lower guard
by the retracting handle and as soon as the
blade enters the material, the lower guard
must be released. For all other sawing, the lower
guard should operate automatically.
4. Always observe that the lower guard is cover-
ing the blade before placing the saw down on
bench or oor. An unprotected, coasting blade
will cause the saw to walk backwards, cutting
whatever is in its path. Be aware of the time it
takes for the blade to stop after switch is released.
5. To check lower guard, open lower guard by
hand, then release and watch guard closure.
Also check to see that retracting handle does
not touch tool housing. Leaving blade exposed
is VERY DANGEROUS and can lead to serious
personal injury.
Additional safety warnings
1. Do not stop the blades by lateral pressure on
the saw blade.
2. Do not attempt to remove cut material when
blade is moving. Wait until blade stops before
grasping cut material. Blades coast after turn o.
3. Place the wider portion of the saw base on
that part of the workpiece which is solidly
supported, not on the section that will fall o
when the cut is made. If the workpiece is short
or small, clamp it down. DO NOT TRY TO HOLD
SHORT PIECES BY HAND!
4. Never attempt to make a cut with the tool held
upside down in a vise. This is extremely dan-
gerous and can lead to serious accidents.
5. Wear safety goggles and hearing protection
during operation.
6. Do not use any abrasive wheels.
7. Only use the saw blade with the diameter that
is marked on the tool or specied in the man-
ual. Use of an incorrectly sized blade may aect
the proper guarding of the blade or guard opera-
tion which could result in serious personal injury.
8. Always use the saw blade intended for cutting
the material that you are going to cut.
9.
Only use the saw blades that are marked with a speed
equal or higher than the speed marked on the tool.
10. Before setting the tool down after completing a
cut, be sure that the guard has closed and the
blade has come to a complete stop.
11.
Some material contains chemicals which may be
toxic. Take caution to prevent dust inhalation and
skin contact. Follow material supplier safety data.
12. Wear a dust mask and hearing protection when
use the tool.
13. (For European countries only)
Always use the blade which conforms to
EN847-1, when cutting wood or like.
SAVE THESE INSTRUCTIONS.
WARNING: DO NOT let comfort or familiarity
with product (gained from repeated use) replace
strict adherence to safety rules for the subject
product. MISUSE or failure to follow the safety
rules stated in this instruction manual may cause
serious personal injury.
Important safety instructions for
battery cartridge
1.
Before using battery cartridge, read all instruc-
tions and cautionary markings on (1) battery
charger, (2) battery, and (3) product using battery.
2. Do not disassemble or tamper the battery
cartridge. It may result in a re, excessive heat,
or explosion.
3. If operating time has become excessively
shorter, stop operating immediately. It may
result in a risk of overheating, possible burns
and even an explosion.
4.
If electrolyte gets into your eyes, rinse them out
with clear water and seek medical attention right
away. It may result in loss of your eyesight.
5. Do not short the battery cartridge:
(1) Do not touch the terminals with any con-
ductive material.
(2) Avoid storing battery cartridge in a con-
tainer with other metal objects such as
nails, coins, etc.
(3)
Do not expose battery cartridge to water or rain.
A battery short can cause a large current ow, over-
heating, possible burns and even a breakdown.
6. Do not store and use the tool and battery car-
tridge in locations where the temperature may
reach or exceed 50 °C (122 °F).
7. Do not incinerate the battery cartridge even if
it is severely damaged or is completely worn
out. The battery cartridge can explode in a re.
8. Do not nail, cut, crush, throw, drop the battery
cartridge, or hit against a hard object to the
battery cartridge. Such conduct may result in a
re, excessive heat, or explosion.
9. Do not use a damaged battery.
10.
The contained lithium-ion batteries are subject to
the Dangerous Goods Legislation requirements.
For commercial transports e.g. by third parties,
forwarding agents, special requirement on pack-
aging and labeling must be observed.
For preparation of the item being shipped, consulting an
expert for hazardous material is required. Please also
observe possibly more detailed national regulations.
Tape or mask o open contacts and pack up the
battery in such a manner that it cannot move
around in the packaging.
9ENGLISH
11. When disposing the battery cartridge, remove
it from the tool and dispose of it in a safe
place. Follow your local regulations relating to
disposal of battery.
12. Use the batteries only with the products
specied by Makita. Installing the batteries to
non-compliant products may result in a re, exces-
sive heat, explosion, or leak of electrolyte.
13. If the tool is not used for a long period of time,
the battery must be removed from the tool.
14. During and after use, the battery cartridge may
take on heat which can cause burns or low
temperature burns. Pay attention to the han-
dling of hot battery cartridges.
15. Do not touch the terminal of the tool imme-
diately after use as it may get hot enough to
cause burns.
16. Do not allow chips, dust, or soil stuck into the
terminals, holes, and grooves of the battery
cartridge. It may result in poor performance or
breakdown of the tool or battery cartridge.
17. Unless the tool supports the use near
high-voltage electrical power lines, do not use
the battery cartridge near high-voltage electri-
cal power lines. It may result in a malfunction or
breakdown of the tool or battery cartridge.
18. Keep the battery away from children.
SAVE THESE INSTRUCTIONS.
CAUTION: Only use genuine Makita batteries.
Use of non-genuine Makita batteries, or batteries that
have been altered, may result in the battery bursting
causing res, personal injury and damage. It will
also void the Makita warranty for the Makita tool and
charger.
Tips for maintaining maximum
battery life
1. Charge the battery cartridge before completely
discharged. Always stop tool operation and
charge the battery cartridge when you notice
less tool power.
2. Never recharge a fully charged battery car-
tridge. Overcharging shortens the battery
service life.
3. Charge the battery cartridge with room tem-
perature at 10 °C - 40 °C (50 °F - 104 °F). Let
a hot battery cartridge cool down before
charging it.
4. When not using the battery cartridge, remove
it from the tool or the charger.
5. Charge the battery cartridge if you do not use
it for a long period (more than six months).
FUNCTIONAL DESCRIPTION
CAUTION: Always be sure that the tool is
switched o and the battery cartridge is removed
before adjusting or checking function on the tool.
Installing or removing battery
cartridge
CAUTION: Always switch o the tool before
installing or removing of the battery cartridge.
CAUTION: Hold the tool and the battery car-
tridge rmly when installing or removing battery
cartridge. Failure to hold the tool and the battery
cartridge rmly may cause them to slip o your hands
and result in damage to the tool and battery cartridge
and a personal injury.
► Fig.1: 1. Red indicator 2. Button 3. Battery cartridge
To remove the battery cartridge, slide it from the tool
while sliding the button on the front of the cartridge.
To install the battery cartridge, align the tongue on the
battery cartridge with the groove in the housing and slip
it into place. Insert it all the way until it locks in place
with a little click. If you can see the red indicator on the
upper side of the button, it is not locked completely.
CAUTION: Always install the battery cartridge
fully until the red indicator cannot be seen. If not,
it may accidentally fall out of the tool, causing injury to
you or someone around you.
CAUTION: Do not install the battery cartridge
forcibly. If the cartridge does not slide in easily, it is
not being inserted correctly.
Tool / battery protection system
The tool is equipped with a tool/battery protection sys-
tem. This system automatically cuts o power to the
motor to extend tool and battery life. The tool will auto-
matically stop during operation if the tool or battery is
placed under one of the following conditions.
Overload protection
When the tool/battery is operated in a manner that
causes it to draw an abnormally high current, the tool
automatically stops. In this situation, turn the tool o
and stop the application that caused the tool to become
overloaded. Then turn the tool on to restart.
Overheat protection
When the tool/battery is overheated, the tool stops
automatically, and the battery indicator blink about 60
seconds. In this situation, let the tool cool down before
turning the tool on again.
On Blinking

10 ENGLISH
Overdischarge protection
When the battery capacity becomes low, the tool stops
automatically. If the product does not operate even
when the switches are operated, remove the batteries
from the tool and charge the batteries.
Releasing protection lock
When the protection system works repeatedly, the tool
is locked and the battery indicator shows the following
state.
Blinking O
In this situation, the tool does not start even if turning
the tool o and on. To release the protection lock,
remove the battery, set it to the battery charger and wait
until the charging nishes.
Indicating the remaining battery
capacity
When you pull the switch trigger, the battery indicator
shows the remaining battery capacity.
► Fig.2: 1. Battery indicator
The remaining battery capacity is shown as the follow-
ing table.
Battery indicator status Remaining
battery
capacity
On O Blinking
50% to 100%
20% to 50%
0% to 20%
Charge the
battery
Indicating the remaining battery
capacity
Only for battery cartridges with the indicator
► Fig.3: 1. Indicator lamps 2. Check button
Press the check button on the battery cartridge to indi-
cate the remaining battery capacity. The indicator lamps
light up for a few seconds.
Indicator lamps Remaining
capacity
Lighted O Blinking
75% to 100%
50% to 75%
25% to 50%
0% to 25%
Charge the
battery.
The battery
may have
malfunctioned.
NOTE: Depending on the conditions of use and the
ambient temperature, the indication may dier slightly
from the actual capacity.
NOTE: The rst (far left) indicator lamp will blink when
the battery protection system works.
Switch action
WARNING: Before installing the battery car-
tridge into the tool, always check to see that the
switch trigger actuates properly and returns to
the "OFF" position when released.
WARNING: NEVER defeat the lock-o button
by taping down or some other means. A switch with
a negated lock-o button may result in unintentional
operation and serious personal injury.
WARNING: NEVER use the tool if it runs when
you simply pull the switch trigger without press-
ing the lock-o button. A switch in need of repair
may result in unintentional operation and serious
personal injury. Return tool to a Makita service center
for proper repairs BEFORE further usage.
To prevent the switch trigger from being accidentally
pulled, a lock-o button is provided. To start the tool,
depress the lock-o button and pull the switch trigger.
Release the switch trigger to stop.
► Fig.4: 1. Switch trigger 2. Lock-o button
NOTICE: Do not pull the switch trigger hard
without pressing in the lock-o button. This can
cause switch breakage.
CAUTION: The tool starts to brake the cir-
cular saw blade rotation immediately after you
release the switch trigger. Hold the tool rmly to
respond the reaction of the brake when releasing
the switch trigger. Sudden reaction can drop the tool
o your hand and can cause a personal injury.

11 ENGLISH
Automatic speed change function
This tool has "high speed mode" and "high torque mode".
The tool automatically changes the operation mode
depending on the work load. When the work load is low,
the tool will run in the "high speed mode" for quicker cut-
ting operation. When the work load is high, the tool will run
in the "high torque mode" for powerful cutting operation.
► Fig.5: 1. Mode indicator
The mode indicator lights up in green when the tool is
running in "high torque mode".
If the tool is operated with excessive load, the mode
indicator will blink in green. The mode indicator stops
blinking and then lights up or turns o if you reduce the
load on the tool.
Mode indicator status Operation
mode
On O Blinking
High speed
mode
High torque
mode
Overload
alert
Adjusting depth of cut
CAUTION: After adjusting the depth of cut,
always tighten the lever securely.
Loosen the lever and move the base up or down. At the
desired depth of cut, secure the base by tightening the lever.
For cleaner, safer cuts, set cut depth so that no more
than one blade tooth projects below workpiece. Using
proper cut depth helps to reduce potential for danger-
ous KICKBACKS which can cause personal injury.
► Fig.6: 1. Lever 2. Loosen 3. Tighten
Sighting
Place the alignment line of the base on your intended
cutting line on the workpiece.
► Fig.7: 1. Alignment line 2. Cutting line 3. Base
Lighting the lamp
CAUTION: Do not look in the light or see the
source of light directly.
To turn on the lamp without running the tool, pull the
switch trigger without pressing the lock-o button.
To turn on the lamp with the tool running, press and hold
the lock-o button and pull the switch trigger.
The lamp goes out 10 seconds after releasing the
switch trigger.
► Fig.8: 1. Lamp
NOTE: Use a dry cloth to wipe the dirt o the lens of
the lamp. Be careful not to scratch the lens of lamp, or
it may lower the illumination.
Dust box
WARNING:
Do not operate the tool without the
dust box. Direct contact with the circular saw blade and
scattered saw dust may cause serious personal injury.
CAUTION:
Do not touch saw dust and the dust
box with bare hands immediately after the operation.
They may be extremely hot and could burn your skin.
CAUTION:
Do not cut the material on which thin-
ner, gasoline, grease, or other chemicals are applied.
The saw dust of such materials can damage the dust box
and result in breakage which can cause personal injury.
CAUTION: Wear eye protection or goggle
when emptying the dust box.
Saw dust is collected into the dust box. Frequently dump the
saw dust in the dust box to avoid its thermal deformation.
Push the lever on the dust box to open the lid. Dump
the saw dust while the rear of the tool faces downward.
► Fig.9: 1. Lid 2. Lever
► Fig.10
Dust box assembly with inner cover
Optional accessory
Dust box assembly with inner cover avoids its deforma-
tion from the hot saw dust during continuous operation.
Use the hex wrench to loosen the bolt and remove the
original dust box.
► Fig.11: 1. Bolt 2. Hex wrench 3. Original dust box
To attach the dust box assembly with inner cover, follow
the removal procedure in reverse.
NOTICE:
Dispose the saw dust before it accumulates
over the upper end of the inner cover. Failure to do so
may cause thermal deformation of the dust box assembly.
► Fig.12:
1. Inner cover 2. Upper end of the inner cover
Hook
Optional accessory
CAUTION: Always remove the battery when
hanging the tool with the hook.
CAUTION:
Never hook the tool at high locations or
on the surfaces where the tool may lose the balance and fall.
CAUTION: Do not pull the tool downward
when it is hooked.
CAUTION: Always fold the hook when operat-
ing the tool.
The hook is convenient for hanging the tool temporarily.
► Fig.13
Attach the hook with the screws as illustrated.
► Fig.14: 1. Hook 2. Screw
To use the hook, simply turn the hook until it snaps into
the open position.
When not in use, always turn the hook until it snaps into
the closed position.
► Fig.15: 1. Open position 2. Closed position

12 ENGLISH
Electric brake
This tool is equipped with an electric blade brake. If the tool con-
sistently fails to quickly stop the circular saw blade after switch
lever release, have tool serviced at a Makita service center.
CAUTION: The blade brake system is not a
substitute for blade guard. NEVER USE TOOL
WITHOUT A FUNCTIONING BLADE GUARD.
SERIOUS PERSONAL INJURY CAN RESULT.
ASSEMBLY
CAUTION: Always be sure that the tool is
switched o and the battery cartridge is removed
before carrying out any work on the tool.
Hex wrench storage
When not in use, store the hex wrench as shown in the
gure to keep it from being lost.
► Fig.16: 1. Hex wrench
Installing or removing the circular
saw blade
CAUTION: Use only the Makita wrench to
install or remove the circular saw blade.
CAUTION: When installing the circular saw
blade, be sure to tighten the bolt securely.
CAUTION:
Be sure the circular saw blade is
installed with teeth pointing up at the front of the tool.
► Fig.17:
1. Shaft lock 2. Hex wrench 3. Tighten 4. Loosen
To remove the circular saw blade, press the shaft lock
fully so that the circular saw blade cannot revolve and
use the hex wrench to loosen the hex bolt. Then remove
the hex bolt, outer ange and circular saw blade.
► Fig.18: 1. Hex bolt 2. Outer ange 3. Circular saw
blade 4. Inner ange 5. Cup washer
To install the circular saw blade, follow the removal
procedure in reverse.
WARNING: BE SURE TO TIGHTEN THE HEX
BOLT SECURELY. Also be careful not to tighten
the bolt forcibly. Slipping your hand from the hex
wrench can cause a personal injury.
WARNING:
If the inner ange is removed, be sure
to install it on the spindle. When installing, choose a
correct side on which protrusion ts into the circular
saw blade hole perfectly. Mounting the circular saw blade
on the wrong side can result in the dangerous vibration.
Blade guard cleaning
When changing the circular saw blade, make sure to
also clean the upper and lower guards of accumulated
metal chips as discussed in the Maintenance section.
Such eorts do not replace the need to check lower
guard operation before each use.
Lid for vacuum cleaner
Optional accessory
WARNING: Do not use the vacuum cleaner for
metal cutting. Vacuumed spark may cause injuries,
malfunctions or res.
When you wish to perform clean cutting operation, connect a
Makita vacuum cleaner to your tool by using lid for vacuum cleaner.
Press the lever to open the lid of dust box, open the
hinge by a screwdriver and remove the lid. Attach the lid
for vacuum cleaner to the tool and close it. Remove the
cap and connect the hose of the vacuum cleaner.
► Fig.19: 1. Lid 2. Lid for vacuum cleaner 3. Cap
► Fig.20
OPERATION
This tool is intended to cut mild steel. With appropriate Makita
genuine saw blades, following materials can also be sawed:
• Fiber-cement board
• Wood
Refer to our website or contact your local Makita dealer for the
correct circular saw blades to be used for the material to be cut.
CAUTION: Always wear eye protection or
goggle before operation.
CAUTION: Be sure to move the tool forward
in a straight line gently. Forcing or twisting the tool
will result in overheating the motor and dangerous
kickback, possibly causing severe injury.
CAUTION:
Never twist or force the tool in the
cut. This may cause motor overload and/or a danger-
ous kickback, resulting in serious injury to the operator.
CAUTION: Always use the circular saw blades
appropriate for your job. The use of inappropriate
circular saw blades may cause a poor cutting perfor-
mance and/or present a risk of personal injury.
CAUTION: Do not use a deformed or cracked
circular saw blade. Replace it with a new one.
► Fig.21
Hold the tool rmly. The tool is provided with both a front
grip and rear handle. Use both to best grasp the tool. If
both hands are holding the tool, they cannot be cut by
the circular saw blade. Set the base on the workpiece
to be cut without the circular saw blade making any
contact. Then turn the tool on and wait until the circular
saw blade attains full speed. Now simply move the tool
forward over the workpiece surface, keeping it at and
advancing smoothly until the cutting is completed.
To get clean cuts, keep your cutting line straight and your
speed of advance uniform. If the cut fails to properly follow
your intended cut line, do not attempt to turn or force the
tool back to the cut line. Doing so may bind the circular saw
blade and lead to dangerous kickback and possible serious
injury. Release switch, wait for the circular saw blade to
stop and then withdraw tool. Realign tool on new cut line,
and start cut again. Attempt to avoid positioning which
exposes operator to chips and particles being ejected from
the tool. Use eye protection to help avoid injury.

13 ENGLISH
The sight grooves in the base makes it easy to check
the distance between the front edge of the circular saw
blade and the workpiece whenever the circular saw
blade is set to the maximum depth of cut.
► Fig.22: 1. Cutting line 2. Base 3. Sight grooves
CAUTION: Do not stack materials when cut-
ting them.
CAUTION: Do not cut hardened steel, wood,
plastics, concrete, tile, etc. Cut only mild steel,
aluminum and stainless steel with a suitable
circular saw blade.
CAUTION: Do not touch the circular saw
blade, workpiece or cutting chips with bare hands
immediately after cutting. They may be extremely
hot and could burn your skin.
CAUTION: If the tool is operated continuously
until the battery cartridge has discharged, allow
the tool to rest for 15 minutes before proceeding
with a fresh battery.
Rip fence (Guide rule)
Optional accessory
CAUTION: Make sure that the rip fence is
securely installed in the correct position before
use. Improper attachment may cause dangerous
kickback.
► Fig.23: 1. Rip fence (Guide rule) 2. Clamping screw
The handy rip fence allows you to do extra-accurate
straight cuts. Simply slide the rip fence up snugly
against the side of the workpiece and secure it in posi-
tion with the clamping screw on the front of the base. It
also makes repeated cuts of uniform width possible.
Lanyard (tether strap) connection
Safety warnings specic for use at height
Read all safety warnings and instructions. Failure
to follow the warnings and instructions may result in
serious injury.
1.
Always keep the tool tethered when working "at
height". Maximum lanyard length is 2 m (6.5 ft).
The maximum permissible fall height for lan-
yard (tether strap) must not exceed 2 m (6.5 ft).
2. Use only with lanyards appropriate for this tool
type and rated for at least 4.0 kg (8.8 lbs).
3. Do not anchor the tool lanyard to anything on
your body or on movable components. Anchor
the tool lanyard to a rigid structure that can
withstand the forces of a dropped tool.
4. Make sure the lanyard is properly secured at
each end prior to use.
5. Inspect the tool and lanyard before each use
for damage and proper function (including
fabric and stitching). Do not use if damaged or
not functioning properly.
6. Do not wrap lanyards around or allow them to
come in contact with sharp or rough edges.
7. Fasten the other end of the lanyard outside
the working area so that a falling tool is held
securely.
8. Attach the lanyard so that the tool will move
away from the operator if it falls. Dropped tools
will swing on the lanyard, which could cause injury
or loss of balance.
9. Do not use near moving parts or running
machinery. Failure to do so may result in a crush
or entanglement hazard.
10. Do not carry the tool by the attachment device
or the lanyard.
11. Only transfer the tool between your hands
while you are properly balanced.
12. Do not attach lanyards to the tool in a way that
keeps guards, switches or lock-os from oper-
ating properly.
13. Avoid getting tangled in the lanyard.
14. Keep lanyard away from the cutting area of the
tool.
15. Use multi-action and screw gate type cara-
bineers. Do not use single action spring clip
carabineers.
16. In the event the tool is dropped, it must be
tagged and removed from service, and should
be inspected by a Makita Factory or Authorized
Service Center.
► Fig.24: 1. Hole for lanyard (tether strap)
MAINTENANCE
CAUTION: Always be sure that the tool is
switched o and the battery cartridge is removed
before attempting to perform inspection or
maintenance.
CAUTION: Clean out the upper and lower
guards to ensure there is no accumulated metal
chips which may impede the operation of the
lower guarding system. A dirty guarding system
may limit the proper operation which could result in
serious personal injury. When using compressed
air to blow metal chips out of the guards, wear a
proper eye and breathing protection.
CAUTION: After each use, clean up the inside
of the dust box and wipe o the saw dust on the
tool. Fine metallic dust may come inside the tool and
cause malfunction or a re.
NOTICE: Never use gasoline, benzine, thinner,
alcohol or the like. Discoloration, deformation or
cracks may result.
To maintain product SAFETY and RELIABILITY,
repairs, any other maintenance or adjustment should
be performed by Makita Authorized or Factory Service
Centers, always using Makita replacement parts.

14 ENGLISH
Inspecting the circular saw blade
• Check the circular saw blade carefully for
cracks or damage before and after each use.
Replace a cracked or damaged circular saw
blade immediately.
• Replace with a new circular saw blade as soon
as it no longer cuts eectively. Continuing to
use a dull circular saw blade may cause a danger-
ous kickback and/or motor overload.
• Circular saw blades for metal cutter cannot be
re-sharpened.
OPTIONAL
ACCESSORIES
CAUTION: These accessories or attachments
are recommended for use with your Makita tool
specied in this manual. The use of any other
accessories or attachments might present a risk of
injury to persons. Only use accessory or attachment
for its stated purpose.
If you need any assistance for more details regard-
ing these accessories, ask your local Makita Service
Center.
• Carbide-tipped circular saw blades
• Rip fence (Guide rule)
• Clamping screw
• Hook
• Hex wrench
• Safety goggles
• Lid for vacuum cleaner
• Dust box assembly with inner cover
• Makita genuine battery and charger
NOTE: Some items in the list may be included in the
tool package as standard accessories. They may
dier from country to country.

15 SLOVENŠČINA
SLOVENŠČINA (Originalna navodila)
TEHNIČNI PODATKI
Model: DCS553
Premer rezila 136 mm – 150 mm
Maksimalna globina reza
(z rezilom premera 150 mm)
57,5 mm
Hitrost brez obremenitve 4.200 min-1
Nazivna napetost D.C. 18 V
Celotna dolžina 267 mm
Neto teža 2,8 - 3,1 kg
•
Ker nenehno opravljamo raziskave in razvijamo svoje izdelke, se lahko tehnični podatki v tem dokumentu spremenijo brez obvestila.
• Tehnični podatki se lahko razlikujejo od države do države.
• Teža se lahko razlikuje glede na priključke, vključno z akumulatorsko baterijo. Najlažja in najtežja kombinacija v
skladu s postopkom EPTA 01/2014 sta prikazani v preglednici.
Uporabna akumulatorska baterija in polnilnik
Baterijski vložek BL1815N / BL1820 / BL1820B / BL1830 / BL1830B / BL1840 /
BL1840B / BL1850 / BL1850B / BL1860B
Polnilnik DC18RC / DC18RD / DC18RE / DC18SD / DC18SE / DC18SF /
DC18SH
• Nekatere zgoraj navedene akumulatorske baterije in polnilniki morda v vaši državi prebivališča niso na voljo.
OPOZORILO: Uporabljajte le zgoraj navedene akumulatorske baterije in polnilnike. Uporaba drugih
akumulatorskih baterij in polnilnikov lahko povzroči telesne poškodbe in/ali požar.
Predvidena uporaba
Orodje je namenjeno za rezanje v mehko jeklo. Z
ustreznimi originalnimi rezili žage Makita lahko žagate
tudi mavčne plošče in les.
Hrup
Običajna A-ovrednotena raven hrupa v skladu z EN62841-2-5:
Raven zvočnega tlaka (LpA): 103 dB (A)
Raven zvočne moči (LWA): 114 dB (A)
Odstopanje (K): 3 dB (A)
OPOMBA: Navedene vrednosti oddajanja hrupa so
bile izmerjene v skladu s standardnimi metodami
testiranja in se lahko uporabljajo za primerjavo orodij.
OPOMBA:
Navedene vrednosti oddajanja hrupa se
lahko uporabljajo tudi pri predhodni oceni izpostavljenosti.
OPOZORILO: Uporabljajte zaščito za sluh.
OPOZORILO: Oddajanje hrupa med dejansko
uporabo električnega orodja se lahko razlikuje od
navedenih vrednosti, odvisno od načina uporabe
orodja in predvsem vrste obdelovanca.
OPOZORILO: Upravljavec mora za lastno
zaščito poznati varnostne ukrepe, ki temeljijo
na oceni izpostavljenosti v dejanskih pogojih
uporabe (poleg časa proženja je treba upoštevati
celoten delovni cikel, vključno s časom, ko je
orodje izklopljeno, in časom, ko deluje v prostem
teku).
Vibracije
Skupne vrednosti vibracij (vektorska vsota treh osi) v
skladu z EN62841-2-5:
Delovni način: rezanje kovine
Emisije vibracij (ah, M): 2,5 m/s2 ali manj
Odstopanje (K): 1,5 m/s2
Delovni način: rezanje lesa
Emisije vibracij (ah, W): 2,5 m/s2 ali manj
Odstopanje (K): 1,5 m/s2
OPOMBA: Navedene skupne vrednosti oddajanja
vibracij so bile izmerjene v skladu s standardnimi
metodami testiranja in se lahko uporabljajo za primer-
javo orodij.
OPOMBA: Navedene skupne vrednosti oddajanja
vibracij se lahko uporabljajo tudi pri predhodni oceni
izpostavljenosti.
OPOZORILO: Oddajanje vibracij med
dejansko uporabo električnega orodja se lahko
razlikuje od navedenih vrednosti, odvisno
od načina uporabe orodja in predvsem vrste
obdelovanca.
OPOZORILO: Upravljavec mora za lastno
zaščito poznati varnostne ukrepe, ki temeljijo
na oceni izpostavljenosti v dejanskih pogojih
uporabe (poleg časa proženja je treba upoštevati
celoten delovni cikel, vključno s časom, ko je
orodje izklopljeno, in časom, ko deluje v prostem
teku).

16 SLOVENŠČINA
Izjava o skladnosti ES
Samo za evropske države
Izjava ES o skladnosti je vključena v dodatku A, ki je
priložen tem navodilom za uporabo.
VARNOSTNA OPOZORILA
Splošna varnostna opozorila za
električno orodje
OPOZORILO:
Preberite vsa varnostna opozo-
rila in navodila s slikami in tehničnimi podatki, ki so
dobavljeni skupaj z električnim orodjem. Ob neupo-
števanju spodaj navedenih navodil obstaja nevarnost
električnega udara, požara in/ali hudih telesnih poškodb.
Shranite vsa opozorila in navo-
dila za poznejšo uporabo.
Izraz „električno orodje“ v opozorilih se nanaša na vaše
električno orodje (s kablom) ali baterijsko električno
orodje (brez kabla).
Varnostna opozorila za uporabo
brezžične krožne žage
Postopki rezanja
1. NEVARNOST: Ne približujte rok območju
rezanja in rezilu. Drugo roko imejte na pomož-
nem ročaju ali ohišju motorja. Če držite žago z
obema rokama, ju rezilo ne more poškodovati.
2. Ne segajte pod obdelovanca. Ščitnik vas pod
obdelovancem ne more varovati pred rezilom.
3. Prilagodite globino rezanja debelini obdelo-
vanca. Pod obdelovancem ne sme biti vidna več
kot ena dolžina zobca.
4.
Med rezanjem nikoli ne držite obdelovanca v
rokah ali prek nog. Pritrdite obdelovanec na
stabilno podlago. Pomembno je, da je obdelovanec
ustrezno podprt, da zmanjšate izpostavljenost telesa
ter možnost zagozditve rezila ali izgube nadzora.
5.
Če obstaja nevarnost, da bi z rezalnim orodjem
prerezali skrito električno napeljavo, držite ele-
ktrično orodje za izolirane držalne površine. Ob
stiku z vodniki pod napetostjo dobijo napetost vsi
neizolirani kovinski deli električnega orodja, zaradi
česar lahko upravljavec utrpi električni udar.
6. Med vzporednim rezanjem vedno uporabite
vzporedni prislon ali vodilo z ravnim robom. S
tem boste izboljšali natančnost reza in zmanjšali
možnost zagozditve rezila.
7. Vedno uporabljajte rezila prave velikosti in
oblike osnih lukenj (diamantna ali krožna).
Rezila, ki jih ni mogoče ustrezno namestiti na
orodje, bodo delovala ekscentrično, kar bo
povzročilo izgubo nadzora.
8.
Nikoli ne uporabljajte poškodovanih ali nepravil-
nih tesnil ali vijakov rezila. Tesnila in vijaki rezila
so bila posebej narejena za vašo žago, da zagoto-
vijo optimalno učinkovitost in varnost pri delu.
Vzroki za povratni udarec in s tem povezana opozorila
— povratni udarec je nenadna reakcija pri stisnje-
nem, zagozdenem ali neporavnanem žaginem
listu, ki povzroči nenadzorovan dvig žage iz obde-
lovanca proti upravljavcu;
— če je rezilo stisnjeno ali trdno zagozdeno v zapi-
rajoči se špranji, se ustavi in reakcija motorja hitro
vrže enoto nazaj proti upravljavcu;
— če se rezilo med rezom zvije ali je napačno
poravnano, se lahko zobci na zadnjem robu rezila
zataknejo v zgornjo površino obdelovanca, kar
povzroči, da se rezilo dvigne iz zareze in udari
proti upravljavcu.
Povratni udarec je posledica nestrokovnega ravnanja
z žago in/ali neugodnih okoliščin. Preprečite ga lahko z
upoštevanjem spodaj navedenih opozoril.
1. Trdno držite žago z obema rokama in name-
stite roki, da se uprete silam povratnega
udarca. Namestite telo na katero koli stran
rezila in ne poravnano z rezilom. Povratni uda-
rec lahko povzroči skok žage nazaj, vendar lahko
sile povratnega udarca upravljavec nadzoruje, če
izvede pravilne varnostne ukrepe.
2.
Ko se rezilo zatakne ali če iz katerega koli raz-
loga prekinete z rezanjem, spustite sprožilnik
in negibno držite žago v materialu, dokler se
rezilo popolnoma ne ustavi. Nikoli ne skušajte
odstraniti žage iz obdelovanca in je ne posku-
šajte povleči nazaj, dokler se žaga premika. V
nasprotnem primeru lahko pride do povratnega
udarca. Preverite in odpravite vzrok oviranja rezila.
3. Kadar ponovno zaganjate žago v obdelovancu,
poravnajte žagin list v špranji, tako da žagini
zobci niso zagozdeni v materialu. Če se žagin
list zagozdi, se lahko premakne ali udari iz obdelo-
vanca, ko znova zaženete žago.
4.
Pod velike plošče postavite podporo, da zmanj-
šate možnost zagozdenja rezila ali povratnega
udarca. Velike plošče se lahko zaradi lastne teže
povesijo. Podpore je treba postaviti pod ploščo na
obeh straneh v bližini linije reza in blizu roba plošče.
5. Ne uporabljajte topih ali poškodovanih rezil.
Nenabrušena ali nepravilno nastavljena rezila
naredijo ozko špranjo, kar povzroči čezmerno
trenje, zagozdenje rezila in povratni udarec.
6. Ročici za nastavljanje globine reza in prila-
goditev poševnosti morata biti trdno in varno
pritrjeni pred začetkom rezanja. Če se prilago-
jeni položaj rezila med rezanjem spremeni, lahko
povzroči oviranje in povratni udarec.
7. Bodite še posebej previdni, kadar režete v
obstoječe stene ali druga slepa območja.
Rezilo lahko prereže predmete, ki lahko povzročijo
povratni udarec.
8.
VEDNO trdno držite orodje z obema rokama.
NIKOLI ne polagajte rok, nog ali katerega koli
drugega dela telesa pod osnovno ploščo orodja
ali za žago, zlasti kadar izvajate prečne reze. V
primeru povratnega udarca lahko žaga odskoči nazaj
preko vaše roke in povzroči hude telesne poškodbe.
9. Nikoli ne pritiskajte žage. Potisnite žago naprej
s hitrostjo, pri kateri rezilo reže brez upočas-
njevanja. Pritiskanje na žago lahko povzroči
neravne reze, nenatančnost in morebiten povratni
udarec.

17 SLOVENŠČINA
Funkcija ščitnika
1.
Pred vsako uporabo preverite, če se spodnji ščit-
nik pravilno zapira. Ne uporabljajte žage, če se
spodnji ščitnik ne premika prosto in se ne zapira.
Nikoli ne pritrjujte ali privezujte spodnjega ščit-
nika v odprtem položaju. Če vam žaga po nesreči
pade, se lahko spodnji ščitnik zvije. Dvignite spodnji
ščitnik z zategovalno ročico in se prepričajte, da se
prosto premika in se ne dotika rezila ali katerega koli
dela pri vseh kotih in globinah reza.
2. Preverite delovanje vzmeti spodnjega ščitnika.
Če ščitnik in vzmet ne delujeta pravilno, ju je
treba pred uporabo servisirati. Spodnji ščitnik
lahko deluje počasi zaradi poškodovanih delov,
ostankov gume ali nabranih ostružkov.
3. Spodnji ščitnik lahko ročno odmaknete samo
pri posebnih rezih, kot so „ugreznjeni rezi“
in „sestavljeni rezi“. Dvignite spodnji ščitnik,
tako da povlečete ročico, ko pa rezilo vstopi
v material, je treba spodnji ščitnik spustiti. Pri
vseh drugih načinih žaganja mora spodnji ščitnik
delovati samodejno.
4. Preden odložite žago na mizo ali tla, vedno
pazite, da spodnji ščitnik pokriva rezilo.
Nezaščiteno rezilo v prostem teku bo povzročilo
premik žage nazaj, ki bo rezala vse, kar ji bo
napoti. Upoštevajte čas, ki je potreben za zausta-
vitev rezila, ko izpustite stikalo.
5. Delovanje spodnjega ščitnika preverite tako,
da ga ročno odprete, izpustite in opazujete
zapiranje. Prav tako se prepričajte, da se
zategovalna ročica ne dotika ohišja orodja.
Odlaganje orodja z nezaščitenim rezilom je
ZELO NEVARNO in lahko povzroči hude telesne
poškodbe.
Dodatna varnostna opozorila
1. Ne zaustavljajte rezila z bočnim pritiskom na
žagin list.
2. Ne poskušajte odstraniti odrezanega mate-
riala, medtem ko se rezilo premika. Preden
primete rezan material, počakajte, da se rezilo
ustavi. Rezilo je po izklopu v prostem teku.
3. Širši del podstavka žage postavite na tisti
del obdelovanca, ki je trdno podprt, in ne
na del, ki bo po končanem rezu odpadel. Če
je obdelovanec kratek ali majhen, ga pritr-
dite. NE POSKUŠAJTE DRŽATI KRATKEGA
OBDELOVANCA V ROKI!
4. Nikoli ne poskušajte izvesti reza z orodjem,
tako da ga vpnete v primež obrnjenega na
glavo. To je izjemno nevarno in lahko povzroči
hudo nesrečo.
5.
Med uporabo nosite zaščitna očala in zaščito za sluh.
6. Ne uporabljajte abrazivnih plošč.
7.
Uporabljajte le rezila žage s premerom, ki je
označen na orodju ali naveden v priročniku.
Uporaba rezila nepravilne velikosti lahko vpliva na
ustrezno zaščito rezila ali delovanje ščitnika, zaradi
česar lahko pride do hudih telesnih poškodb.
8. Vedno uporabljajte žagin list, ki je namenjen
rezanju izbranega materiala.
9. Uporabljajte le žagine liste, ki so označeni s
hitrostjo, ki je enaka ali višja od hitrosti, ozna-
čene na orodju.
10. Pred odložitvijo orodja po končanem rezu se
prepričajte, da se je ščitnik zaprl in se je rezilo
popolnoma ustavilo.
11. Nekateri materiali vsebujejo kemikalije, ki so
lahko strupene. Bodite previdni ter preprečite
vdihavanje prahu in stik s kožo. Upoštevajte
varnostne podatke dobavitelja materiala.
12. Med uporabo orodja nosite protiprašno masko
in zaščito za sluh.
13. (Samo za evropske države)
Pri rezanju lesa ali podobnega materiala vedno
uporabljajte rezilo, ki je skladno s standardom
EN847-1.
SHRANITE TA NAVODILA.
OPOZORILO: NE dovolite, da bi zaradi udob-
nejšega dela ali znanja o uporabi izdelka (prido-
bljenega z večkratno uporabo) opustili strogo
upoštevanje varnostnih zahtev v okviru pravilne
uporabe orodja. ZLORABA ali neupoštevanje var-
nostnih zahtev v teh navodilih za uporabo lahko
povzroči resne telesne poškodbe.
Pomembna varnostna navodila za
akumulatorsko baterijo
1. Pred uporabo baterijskega vložka preberite
vsa navodila in opozorilne oznake na (1) pol-
nilniku akumulatorja, (2) akumulatorju in (3)
izdelku, ki uporablja akumulator.
2. Ne razstavljajte ali spreminjajte akumulatorske
baterije. S tem lahko povzročite požar, preko-
merno vročino ali eksplozijo.
3. Če se je čas delovanja občutno skrajšal, takoj
prenehajte uporabljati orodje. V nasprotnem
primeru lahko pride do pregretja, morebitnih
opeklin in celo eksplozije.
4. Če pride elektrolit v stik z očmi, jih sperite s
čisto vodo in takoj poiščite zdravniško pomoč.
Posledica je lahko izguba vida.
5. Ne povzročite kratkega stika baterijskega
vložka:
(1) Ne dotikajte se priključkov s kakršnim
koli prevodnim materialom.
(2) Izogibajte se shranjevanju baterijskega
vložka v vsebniku z drugimi kovinskimi
predmeti kot so žeblji, kovanci itn.
(3) Ne izpostavljajte baterijskega vložka vodi
ali dežju.
Kratek stik akumulatorja lahko povzroči velik
električni tok, pregrevanje, morebitne opekline
in celo okvaro.
6. Ne shranjujte in uporabljajte orodja in akumu-
latorske baterije na mestih, kjer lahko tempera-
tura doseže ali preseže 50 °C (122 °F).
7. Ne sežigajte baterijskega vložka, tudi če je
hudo poškodovan ali v celoti izpraznjen.
Baterijski vložek lahko v ognju eksplodira.
8. Ne pribijajte, režite, drobite, mečite, spuščajte
akumulatorske baterije oziroma ne udarjajte
z akumulatorsko baterijo po trdem predmetu.
Takšno ravnanje lahko povzroči požar, preko-
merno vročino ali eksplozijo.
9. Ne uporabljajte poškodovanih akumulatorjev.

18 SLOVENŠČINA
10. Priložene litij-ionske baterije ustrezajo zahte-
vam zakonodaje v zvezi z nevarnim blagom.
Za komercialne prevoze, npr. tiste, ki jih opravljajo
tretje stranke in carinski posredniki, je treba upoštevati
posebne zahteve v zvezi z embalažo in označevanjem.
Med postopkom priprave na odpremo izdelka se je
treba posvetovati s strokovnjakom za nevarne snovi. Pri
tem upoštevajte tudi podrobnejše nacionalne predpise.
Odprte stike oblepite z lepilnim trakom ali jih dru-
gače zaščitite, baterijo pa zapakirajte tako, da se v
embalaži ne more premikati.
11. Ko odstranjujete akumulatorsko baterijo, jo
vzemite iz orodja in varno zavrzite. Upoštevajte
lokalne uredbe glede odlaganja baterije.
12. Baterije uporabljajte le z izdelki, ki jih določi
Makita. Če namestite baterije v neskladne izdelke,
lahko pride do požara, pregrevanja, eksplozije ali
puščanja elektrolita.
13. Če orodja dlje časa ne uporabljate, morate iz
njega odstraniti baterijo.
14. Med uporabo in po uporabi lahko akumu-
latorska baterija postane vroča in povzroči
opekline. Z vročimi akumulatorskimi baterijami
ravnajte pazljivo.
15.
Ne dotikajte se priključka orodja takoj po uporabi,
ker se lahko dovolj segreje, da povzroči opekline.
16.
Ne dovolite, da bi se v priključke, odprtine in utore
akumulatorske baterije zlepili ostružki, prah ali
zemlja. Umazanija lahko povzroči slabše delovanje ali
okvaro orodja oziroma akumulatorske baterije.
17. Razen če orodje podpira uporabo v bližini
visokonapetostnih električnih vodov, akumula-
torske baterije ne uporabljajte v bližini visoko-
napetostnih električnih vodov. Takšna uporaba
lahko povzroči motnje v delovanju ali okvaro
orodja oziroma akumulatorske baterije.
18. Baterijo hranite izven dosega otrok.
SHRANITE TA NAVODILA.
POZOR: Uporabljajte le originalne baterije
Makita. Če uporabljate neoriginalne baterije Makita
ali baterije, ki so bile spremenjene, lahko pride do
eksplozije baterije in posledično do požara, telesnih
poškodb ali materialne škode. S takšno uporabo
boste tudi razveljavili garancijo Makita za orodje in
polnilnik Makita.
Nasveti za ohranjanje največje
zmogljivosti akumulatorja
1. Napolnite baterijski vložek, preden se v celoti
izprazni. Ko opazite, da ima orodje manjšo
moč, vedno ustavite delovanje orodja in napol-
nite baterijski vložek.
2. Nikoli znova ne polnite popolnoma napol-
njenega baterijskega vložka. Prenapolnjenje
skrajša življenjsko dobo akumulatorja.
3. Baterijski vložek s sobno temperaturo pol-
nite pri temperaturi okolja od 10 °C do 40 °C.
Počakajte, da se vroč baterijski vložek pred
polnjenjem ohladi.
4. Ko akumulatorske baterije ne uporabljate, jo
odstranite iz orodja ali polnilnika.
5. Če baterijskega vložka ne uporabljate dalj časa
(več kot 6 mesecev), ga napolnite.
OPIS DELOVANJA
POZOR: Pred nastavljanjem ali preizkusom
delovanja orodja se prepričajte, ali je orodje
izključeno in ali je akumulatorska baterija
odstranjena.
Nameščanje ali odstranjevanje
akumulatorske baterije
POZOR: Vedno izklopite orodje, preden name-
stite ali odstranite akumulatorsko baterijo.
POZOR: Kadar nameščate ali odstranjujete
akumulatorsko baterijo, trdno držite orodje in
akumulatorsko baterijo. Če orodja in akumulatorske
baterije ne držite trdno, se lahko zgodi, da vam zdr-
sneta iz rok, posledica pa je lahko poškodba orodja in
akumulatorske baterije ter telesna poškodba.
► Sl.1: 1. Rdeči indikator 2. Gumb 3. Baterijski vložek
Če želite odstraniti akumulatorsko baterijo, jo potisnite iz
orodja, pri tem pa pomikajte gumb na sprednji strani vložka.
Akumulatorsko baterijo vstavite tako, da poravnate jeziček na
bateriji z utorom na ohišju in jo potisnete v ležišče. Potisnite jo
do konca, da se zaskoči. Če je rdeči indikator na zgornji strani
gumba viden, pomeni, da baterija ni ustrezno zaklenjena.
POZOR: Vedno namestite akumulatorsko
baterijo tako, da rdeči indikator ni več viden. Če
tega ne upoštevate, lahko baterija nepričakovano
pade iz orodja in poškoduje vas ali osebe v neposre-
dni bližini.
POZOR: Ne nameščajte akumulatorske bate-
rije s silo. Če se akumulatorska baterija ne zaskoči
zlahka, ni pravilno vstavljena.
Zaščitni sistem orodja/akumulatorja
Orodje je opremljeno z zaščitnim sistemom orodja/aku-
mulatorja. Sistem samodejno prekine napajanje orodja,
da podaljša življenjsko dobo orodja in akumulatorja.
Orodje se bo samodejno zaustavilo med delovanjem,
če sta orodje ali akumulator zamenjana pod naslednjimi
pogoji. V nekaterih primerih svetijo indikatorji.
Zaščita pred preobremenitvijo
Kadar orodje/akumulator uporabljate na način, ki
povzroča uporabo neobičajno visokega toka, se orodje
samodejno ustavi. V tem primeru izklopite orodje in
prekinite delo, ki je povzročilo preobremenitev orodja.
Nato vklopite orodje, da ga znova zaženete.
Zaščita pred pregrevanjem
Ko se orodje/akumulator pregreje, se orodje samodejno ustavi,
indikator akumulatorja pa utripa pribl. 60 sekund. V tem primeru
počakajte, da se orodje ohladi, preden ga znova vklopite.
sveti utripa

19 SLOVENŠČINA
Zaščita pred izpraznjenjem
Ko se zmogljivost akumulatorja zmanjša, se orodje
samodejno ustavi. Če izdelek ne deluje, tudi če so
stikala vklopljena, odstranite akumulator iz orodja in ga
napolnite.
Sproščanje zaščitne zapore
Kadar zaščitni sistem nenehno deluje, je orodje zakle-
njeno in indikator akumulatorja prikazuje naslednje
stanje.
utripa Ne sveti
V tem primeru se orodje ne zažene, tudi če ga izklopite
in znova vklopite. Za sprostitev zaščitne zapore odstra-
nite akumulator, nastavite ga na polnilnik akumulatorja
in počakajte, dokler se polnjenje ne zaključi.
Prikazuje preostalo raven
napolnjenosti akumulatorja
Ko povlečete sprožilno stikalo, se na indikatorju akumu-
latorja prikaže preostala zmogljivost akumulatorja.
► Sl.2: 1. Indikator akumulatorja
Preostala zmogljivost akumulatorja je prikazana v nas-
lednji tabeli.
Indikator ravni napolnjenosti akumulatorja Prikaz
preostale
ravni napol-
njenosti
akumulatorja
Sveti Ne sveti Utripa
od 50 % do
100 %
od 20 % do
50 %
od 0 % do
20 %
Napolnite
akumulator
Prikazuje preostalo raven
napolnjenosti akumulatorja
Samo za akumulatorske baterije z indikatorjem
► Sl.3: 1. Indikatorske lučke 2. Gumb za preverjanje
Pritisnite gumb za preverjanje na baterijskem vložku,
da preverite raven napolnjenosti akumulatorja.
Indikatorske lučke na kratko zasvetijo.
Indikatorske lučke Prikaz pre-
ostale ravni
napolnjenosti
Sveti Ne sveti Utripa
od 75 % do
100 %
od 50 % do
75 %
od 25 % do
50 %
od 0 % do
25 %
Napolnite
akumulator.
Akumulator
je morda
okvarjen.
OPOMBA: Odvisno od pogojev uporabe in okoljske
temperature se označba lahko nekoliko razlikuje od
dejanske napolnjenosti.
OPOMBA: Prva opozorilna lučka (skrajno levo) bo
utripala, ko sistem za zaščito akumulatorja deluje.
Delovanje stikala
OPOZORILO: Preden vstavite akumulatorsko
baterijo v orodje, se vedno prepričajte, da stikalo
deluje brezhibno in se vrača v položaj za izklop
(OFF), ko ga spustite.
OPOZORILO: NIKOLI ne onesposobite
gumba za odklep, tako da ga zalepite ali podobno.
Stikalo z onesposobljenim gumbom za odklep lahko
privede do nenamernega delovanja in resnih telesnih
poškodb.
OPOZORILO: NIKOLI ne uporabljajte orodja,
kadar začne delovati, če pritisnete samo sprožilno
stikalo in pri tem ne pritisnete gumba za odklep.
Stikalo, ki ga je treba popraviti, lahko privede do
nenamernega delovanja in hudih telesnih poškodb.
PRED nadaljnjo uporabo vrnite orodje v servisni
center Makita v ustrezno popravilo.
Za preprečevanje nenamerne sprožitve stikala je name-
ščen gumb za odklep. Za zagon orodja hkrati pritisnite
gumb za odklep in sprožilno stikalo. Za izklop spustite
stikalo.
► Sl.4: 1. Sprožilo 2. Sprostilni gumb
OBVESTILO: Ne vlecite sprožilnega stikala
močno, ne da bi pri tem pritisnili sprostilni gumb.
Stikalo se namreč lahko zlomi.
POZOR: Takoj, ko spustite sprožilec, orodje
začne zavirati vrtenje rezila krožne žage. Trdno
držite orodje, da se odzovete na reakcijo zavore
ob spustitvi sprožilca. Zaradi nenadnr reakcije
vam lahko orodje pade iz rok ter povzroči telesno
poškodbo.

20 SLOVENŠČINA
Funkcija samodejne spremembe hitrosti
To orodje lahko deluje v „načinu z visoko hitrostjo“ in
„načinu z visokim navorom“.
Orodje samodejno spremeni način delovanja glede na
delovno obremenitev. Če je delovna obremenitev nizka,
orodje deluje v „načinu z visoko hitrostjo“ za hitrejše
rezanje. Če je delovna obremenitev visoka, orodje deluje
v „načinu z visokim navorom“ za močnejše rezanje.
► Sl.5: 1. Indikator načina
Indikator načina sveti zeleno, ko je orodje v „načinu z
visokim navorom“.
Če orodje uporabljate s čezmerno obremenitvijo, indikator
načina utripa zeleno. Indikator načina preneha utripati in
zasveti ali se izklopi, če zmanjšate obremenitev orodja.
Stanje indikatorja načina Način
delovanja
Sveti Ne sveti Utripa
Način z
visoko
hitrostjo
Način z viso-
kim navorom
Opozorilo o
preobreme-
nitvi
Nastavljanje globine rezanja
POZOR: Po nastavitvi globine rezanja vedno
varno pritrdite ročico.
Sprostite ročico in premaknite osnovno ploščo gor ali
dol. Čvrsto pritrdite osnovno ploščo na želeni globini
rezanja tako, da zategnete ročico.
Za čistejše in varnejše rezanje nastavite globino reza tako, da
en zob rezila sega pod obdelovanca. Uporaba ustrezne glo-
bine reza pomaga zmanjšati tveganje nevarnih POVRATNIH
UDARCEV, ki lahko povzročijo telesne poškodbe.
► Sl.6: 1. Ročica 2. Sprostite 3. Zategnite
Poravnanje z linijo reza
Poravnalno črto osnovne plošče namestite na predvi-
deno linijo reza na obdelovancu.
► Sl.7:
1. Poravnalna črta 2. Linija reza 3. Osnovna plošča
Prižiganje lučke
POZOR: Ne glejte neposredno v lučko ali vir
svetlobe.
Če želite vklopiti le lučko, ne da bi zagnali orodje, priti-
snite sprožilec, vendar ne pritisnite gumba za zaklep.
Če želite vklopiti lučko, ko orodje deluje, pritisnite in
zadržite gumb za zaklep ter pritisnite sprožilec.
Lučka se izklopi 10 sekund zatem, ko spustite sprožilec.
► Sl.8: 1. Lučka
OPOMBA: Uporabite suho krpo, da obrišete umaza-
nijo z leče lučke. Pazite, da ne opraskate stekla lučke,
ker praske občutno zmanjšajo svetilnost.
Zbiralnik za prah
OPOZORILO: Ne uporabljajte orodja brez
zbiralnika za prah. Neposreden stik z rezilom krožne
žage in razpršeno žagovino lahko povzroči resne
telesne poškodbe.
POZOR: Takoj po končani obdelavi se z golimi
rokami ne dotikajte žagovine in zbiralnika za prah.
Lahko sta zelo vroča in povzročita opekline kože.
POZOR: Ne žagajte materiala, na katerega je
naneseno razredčilo, bencin, mast ali druge kemi-
kalije. Zaradi žagovine takšnih materialov se lahko
poškoduje zbiralnik za prah in se lahko zlomi, zato
lahko pride do telesnih poškodb.
POZOR: Med praznjenjem zbiralnika za prah
uporabljajte zaščito za oči ali očala.
Žagovina se zbira v zbiralniku za prah. Pogosto praznite
žagovino iz zbiralnika za prah, da ne pride do toplotne
deformacije.
Potisnite ročico na zbiralniku za prah, da odprete
pokrov. Izpraznite žagovino, ko je zadnja stran orodja
obrnjena navzdol.
► Sl.9: 1. Pokrov 2. Ročica
► Sl.10
Zbiralnik za prah z notranjim
pokrovom
Dodatna oprema
Zbiralnik za prah z notranjim pokrovom preprečuje
deformacijo zaradi vroče žagovine med neprekinjenim
delovanjem.
Z inbus ključem sprostite vijak in odstranite originalni
zbiralnik za prah.
► Sl.11: 1. Vijak 2. Inbus ključ 3. Originalni zbiralnik
za prah
Za pritrditev zbiralnika za prah z notranjim pokrovom
sledite postopku odstranitve v obratnem vrstnem redu.
OBVESTILO: Odstranite žagovino, preden se
nabere čez zgornji rob notranjega pokrova. Če
tega ne storite, lahko pride do toplotne deformacije
zbiralnika za prah.
► Sl.12: 1. Notranji pokrov 2. Zgornji rob notranjega
pokrova
Kavelj
Dodatna oprema
POZOR: Kadar obešate orodje na kavelj,
vedno odstranite akumulator.
POZOR: Orodja ne obešajte na visoka mesta
ali površine, kjer se orodje lahko prevrne in pade.
POZOR: Ko je orodje obešeno na kavelj, ga ne
vlecite navzdol.
POZOR: Med uporabo orodja vedno zložite
kavelj.
Other manuals for DCS553
8
Table of contents
Languages:
Other Makita Cutter manuals

Makita
Makita DCS552Z User manual

Makita
Makita 4191D User manual

Makita
Makita CC300D User manual

Makita
Makita 4131 User manual

Makita
Makita 4100KB User manual

Makita
Makita 4112S Manual

Makita
Makita CS002G User manual

Makita
Makita 4100NH2R User manual

Makita
Makita 4131 User manual

Makita
Makita DCS551RMJ User manual

Makita
Makita 4131 User manual

Makita
Makita DCC500 User manual

Makita
Makita CP100D User manual

Makita
Makita ANGLE CUTTER 4110C User manual

Makita
Makita DCS553 User manual

Makita
Makita DCC500ZJ User manual

Makita
Makita DPC6411 (USA) Instruction Manual

Makita
Makita 4105KB User manual

Makita
Makita M4100 User manual

Makita
Makita 4112H User manual