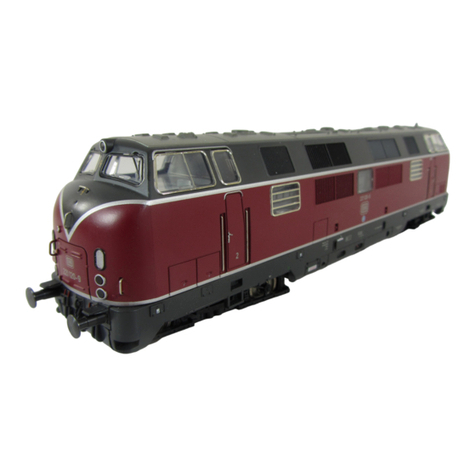
marklin 29302 User manual

Bedienungsanleitung
Manual
Notice d’utilisation
Gebruiksaanwijzing
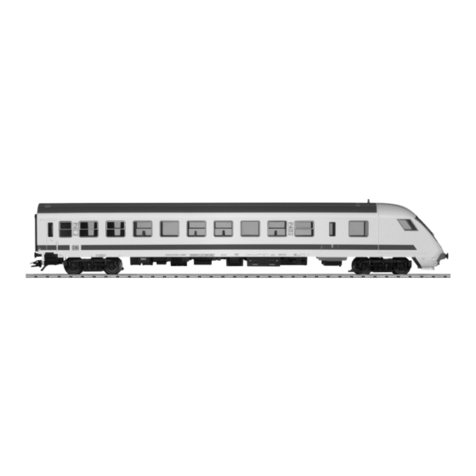
Startpackung „Inter City“
29302
D
USA UK
F
NL

2
F
NL
D
USA UK
Lesen Sie die Bedienungsanleitung vor der
ersten Inbetriebnahme aufmerksam durch. Die
Bedienungsanleitung ist Bestandteil des Pro-
duktes und muss deshalb aufbewahrt sowie bei
Weitergabe des Produktes an Dritte mitgegeben
werden.
Inhaltsverzeichnis: Seite
1. Bestimmungsgemäße Verwendung 3
2. Sicherheitshinweise 3
3. Lieferumfang 3
4. Technische Daten 3
5.
Hinweise zur ersten Inbetriebnahme 3
6. Vorbereitungen 4
7. Gleise aufbauen 5
8. Inbetriebnahme 6
9. Betriebshinweise 8
10. Funktionsstörungen 9
11. Reinigung und Wartung 9
12. Entsorgung 9
13. Garantie 10
14. Weitere Gleispläne 34
Carefully read through the operating instructions
before using the model for the first time. The
operating instructions come with the product
and must therefore be kept as well as passed on
when giving the product to a third party.
Table of Contents: Page
1. Using the Product as Intended 11
2. Safety Notes 11
3. Contents 11
4. Technical Information 11
5. Notes about Using this Model for
the First Time 11
6. Preparations 12
7. Track to build 13
8. Running the Train for the First Time 14
9. Information about Operating the Train 16
10. Trouble Running the Train 17
11. Cleaning and Maintenance 17
12. Disposing 17
13. Warranty 18
14. Weitere Gleispläne 34
Lire attentivement la notice d’utilisation avant la
première mise en service. La notice d‘utilisation
fait partie intégrante du produit ; elle doit donc
être conservée et, le cas échéant, transmise avec
le produit.
Sommaire : Page
1. Utilisation conforme à sa destination 19
2. Remarque sur la sécurité 19
3. Matériel fourni : 19
4. Caractéristiques techniques 19
5. Indications relatives à la première
mise en service 19
6. Préparatifs 20
7. Des voies développer 21
8. Mise en service 22
9. Indications relatives à l’exploitation 24
10. Dysfonctionnements 25
11. Nettoyage et entretien 25
12. Elimination 25
13. Garantie 26
14. Weitere Gleispläne 34
Lees voor het in bedrijfnemen van het product,
eerst de gebruiksaanwijzing aandachtig door. De
gebruiksaanwijzing is een wezelijk bestands-
deel van het product en dient derhalve bewaard
en meegegeven te worden bij het afstaan van het
product aan derden.
Inhoudsopgave: Pagina
1. Verantwoord gebruiken 27
2. Veiligheidsvoorschriften 27
3. Leveringsomvang: 27
4. Technische gegevens 27
5. Aanwijzingen voor het in gebruiknemen 27
6. Voorbereidingen 28
7. Spoorwegen bouwen 29
8. In gebruik nemen 30
9. Aanwijzingen voor het gebruik 32
10. Storingen 33
11. Reinigen en onderhoud 33
12. Afdanken 33
13. Garantie 34
14. Weitere Gleispläne 34

3
3. Lieferumfang
Zug 4-teilig
22 gebogene Gleise 243007
1 Kreuzung 30° 243008
4 gerades Gleis 505188,
7 gerades Gleis 505172,
2 gebogenes Gleis 505224,
1 Weiche links 505611,
1 Weiche rechts 505612,
1 Fernsteuerung
2 Batterien Type AAA/LR 03 1,5V
4 Batterien Type AA/LR 6 1,5V
1 Bausatz „Bahnsteig“ 72200
1 Signal 72201
1 Bahnübergang 72203
Bedienungsanleitung
D
USA UK
F
NL
Bedienungsanleitung S
DK
Garantieurkunde
4. Technische Daten
Spannungsversorgung Zug: 4 x 1,5 V DC
Batterietyp: 4 x 1,5 V Mignon, AA, LR6
Spannungsversorgung Fernsteuerung: 2 x 1,5 V DC
Batterietyp: 2 x 1,5V Micro, AAA, LR 03
Spurweite H0 (Maßstab 1:87)
5.
Hinweise zur ersten Inbetriebnahme
• MotorwagenundBatteriewagensindfest
verbunden und können nicht getrennt werden.
• FernsteuerungundZuggemäßKapitel6.2und
6.3 vorbereiten.
• Gelangt der Zug außerhalb der Reichweite der
Fernsteuerung (ca. 6 m), fährt er weiter, kann
jedoch nicht mehr gesteuert werden.
• Eskönnenmax.zweiZügeparallelbenützt
werden.
• SoferneinanderesGerätmitdergleichenFre-
quenz in Reichweite des Zuges betrieben wird,
können Störungen auftreten.
1. Bestimmungsgemäße Verwendung
Dieses Produkt ist eine Modelleisenbahn für Kinder
ab 3 Jahren in der Spurweite HO (Maßstab 1:87).
Der batteriebetriebene Zug kann auf Modellbahn-
anlagen, welche mit dem Märklin-C-Gleis ausge-
stattet sind, betrieben werden.
• DiebeiliegendenGleisesindfürdenBetriebmit
Transformator/Digitalfahrgerät nicht geeignet.
• DerZugkannnichtaufTeppichbödenbetrieben
werden.
• DerZugkannaufglattemundsauberemUnter-
grund oder auf H0 C-Gleisen betrieben werden.
2. Sicherheitshinweise
• DasProduktdarfnuringeschlossenenRäumen
verwendet werden.
• SetzenSiedasProduktkeinerdirektenSonnen-
einstrahlung, starken Temperaturschwankun-
gen oder hoher Luftfeuchtigkeit aus.
• LagernSiedasProduktnichtunterdirekter
Sonneneinstrahlung, starken Temperatur-
schwankungen oder hoher Luftfeuchtigkeit.
• ACHTUNG! Funktionsbedingte scharfe Kanten
und Spitzen. Erstickungsgefahr wegen abbrech-
und verschluckbarer Kleinteile.
• ACHTUNG! Den eingeschalteten Zug nicht in
das Gesicht oder in die Haare halten.
• ACHTUNG! Batterien gehören nicht in Kinder-
hände.
• ACHTUNG! Kontakte des Batteriekastens nicht
auf leitende Untergründe legen - Verbrennungs-
gefahr.
• ACHTUNG! Sollte ein Schaden an einem
Fahrzeug des Zuges aufgetreten sein, darf
das beschädigte Fahrzeug nicht mehr weiter
verwendet werden.
• ACHTUNG! Dieses Produkt enthält Magnete in
der Kupplung. Das Verschlucken von einem oder
mehreren Magneten kann unter Umständen
tödlich wirken. Suchen Sie sofort einen Arzt auf.
D
4
1.
2.
+
-
3.
-
+
5.
4.
6.
Batterien nur paarweise entsprechend
den Markierungen einlegen oder tau-
schen! Polarität beachten!
Batteriefach aufschrauben und abheben.
Zwei Batterien Type AAA/LR 03 gemäß Zeich-
nung einlegen
6.2 Fernsteuerung
1.
2.
+
-
3.
-
+
5.
4.
6.
1.
2.
+
-
3.
-
+
5.
4.
6.
6.3 Motorwagen mit Batteriewagen
3.
+
-
+
-
3.
+
-
+
-
3.
5.
6.
4.
2.
1.
1.
Batteriefachdeckel auflegen
und festschrauben
Batteriefach aufschrauben
Batteriefach herausnehmen
6. Vorbereitungen
6.1 Hinweise zum Umgang mit Batterien:
Hinweise zu Batterien und wiederaufladbaren
Akkus
•
Nicht wiederaufladbare Batterien dürfen nicht
aufgeladen werden.
• AuadbareBatterien(Akkus)vordemLaden
aus dem Spielzeug nehmen.
•
Aufladbare Batterien (Akkus) nur unter Aufsicht
Erwachsener laden. Beachten Sie dazu die Be-
dienungsanleitungen des jeweiligen Ladegerätes.
• UngleicheBatterietypenoderneueund
gebrauchte Batterien dürfen nicht zusammen
verwendet werden.
• BatterienmitderrichtigenPolaritäteinlegen.
•
Leere Batterien aus dem Spielzeug herausnehmen.
• Kontaktedürfennichtkurzgeschlossenwerden.
• WennSiedenZuglängereZeitnichtbenutzen,
entfernen Sie die Batterien aus dem Zug und
der Fernsteuerung.
• BeiausgelaufenenBatterienSchutzhand-
schuhe zum Entfernen der Batterien anziehen.
Anschließend das Batteriefach und die Kon-
takte mit einem trockenen Tuch reinigen.
• BatteriengehörennichtindieHändevonKin-
dern. Kinder könnten die Batterien in den Mund
nehmen und verschlucken. Sollte eine Batterie
verschluckt worden sein, muss sofort ärztliche
Hilfe in Anspruch genommen werden.
• EntsorgungsiehePunkt12.
1
2
3
1

5
2
3.
+
-
+
-
3.
+
-
+
-
3.
5.
6.
4.
2.
1.
1.
Vier Batterien Type AA/LR 06 gemäß Zeichnung
einlegen
Kontakte des Batteriekastens nicht
auf leitende Untergründe legen oder
kurzschließen - Verbrennungsgefahr!
3
3.
+
-
+
-
3.
+
-
+
-
3.
5.
6.
4.
2.
1.
1.
Die vier Batterien nur gemeinsam einle-
gen oder tauschen! Polarität beachten!
Batteriefach einschieben
4Batteriefach festschrauben
3.
+
-
+
-
3.
+
-
+
-
3.
5.
6.
4.
2.
1.
1.
7. Gleise aufbauen
Zusammenstecken
Lösen

6
Beispiel für den Aufbau (weiter Beispiele siehe
Seite 34):
Beim Aufbauen bitte die Gleisnummern und
Reihenfolge beachten!
Die Gleisnummern befinden sich auf der Gleisun-
terseite. In den Gleisplänen sind nur die letzten
drei Ziffern der Gleisnummer angegeben.
8. Inbetriebnahme
Motor- mit Batteriewagen auf die Gleise auf-
gleisen oder glatten, ebenen Boden stellen.
CD
C - C
D - D
C - D
D - C
C
D
Schalterstellung des IC und der
Fernsteuerung muss übereinstim-
men.
8.1 Zug vorbereiten/einschalten
2
1
Aufgleishilfe 7224 (Gehört nicht zum Lieferumfang).
007
007
007
007
007
007
007
007
007
007
612 172 172 172 611
224
172
224
188 172 172 172 188
007
007
007
007
007
007
188
188
007
007
007
007
007
007
505172
!
Vorsicht

7
Wagen ankuppeln
3
Zug einschalten, 1 x drücken
8.2 Fernsteuerung bedienen
Tastenfunktion
Funktionen schalten
Spitzensignal
(Licht vorne)
Geräusch:
Bahnhofsansage
Geräusch:
Signalhorn
Geräusch:
Schaffnerpfiff
Start, Fahrtrich-
tung, Beschleuni-
gen und Bremsen
Stop
1
4
Fahrtrichtung
Durch mehrmaliges Drücken der entsprechenden
Taste kann man den Zug beschleunigen
oder bremsen.
Geschwindigkeit
erhöhen
Bremsen
Bremsen
Geschwindigkeit
erhöhen
Fahrtrichtung
2a
2b

8
9. Betriebshinweise
- Achten Sie beim Fahren darauf, dass die Fern-
steuerung immer auf den Zug gerichtet ist.
- Gerät der Zug außerhalb der Reichweite der
Fernsteuerung (ca. 6 m), fährt er weiter, kann
jedoch nicht mehr gesteuert werden.
- Der Zug schaltet bei einer Spielpause nach 60
Minuten selbstständig aus.
- Fernsteuerung immer in Richtung des Zuges
halten.
max. 6 m
- Es darf sich kein Hindernis zwischen dem Zug
und der Fernsteuerung befinden.
- Die Fernsteuerung nicht vom Zug abwenden.

9
CD
C - C
C - D
D - C
C
D
9.1 Betrieb mit 2 IC
Es können 2 IC unabhängig voneinander auf der
selben Anlage betrieben werden. Dazu müssen
Sie einen IC und die Fernsteuerung auf Schalter-
stellung C-C (1), den zweiten IC und Fernsteuerung
auf D-D (2) einstellen. Die Schalterstellung von IC
und Fernsteuerung muss übereinstimmen!
CD
D - D C - D
D - C
C
D
10. Funktionsstörungen
• FährtderZugnicht,prüfenSie,obdieBatte-
rien richtig eingelegt sind. Sind die Batterien
ordnungsgemäß eingelegt und der Zug reagiert
trotzdem nicht, prüfen Sie die Batterien der
Fernsteuerung ebenfalls. Gegebenenfalls im
Zug und der Fernsteuerung die Batterien erneu-
ern.
• WirdderZugdeutlichlangsameroderbleibt
während des Spielens stehen, Batterien erneu-
ern. Automatische Abschaltzeit beachten!
(siehe Kap. 9)
• IstdieLokomotivebeschädigt,dieLokomotive
nicht mehr verwenden und Batterien entfernen.
Ist ein anderes Fahrzeug beschädigt, dieses aus
dem Zug nehmen und nicht mehr verwenden.
• VerringertsichdieReichweitederFernsteue-
rung, müssen die Batterien der Fernsteuerung
erneuert werden.
11. Reinigung und Wartung
• KontrollierenSie,obsichHaareoderSchmutz
an den Achsen befinden und entfernen Sie
diese Verunreinigung gegebenenfalls mit Hilfe
einer Pinzette von den Achsen.
• DerZugkannmiteinemtrockenen,fusselfreien
Tuch abgerieben werden.
• Wartungsarbeitensindnichterforderlich.
12. Entsorgung
Hinweise zum Umweltschutz:
Produkte, die mit dem durchgestri-
chenen Mülleimer gekennzeichnet
sind, dürfen am Ende ihrer Lebens-
dauer nicht über den normalen
Haushaltsabfall entsorgt werden,
sondern müssen an einem Sammelpunkt für das
Recycling von elektrischen und elektronischen
Geräten abgegeben werden. Das Symbol auf dem
Produkt, der Bedienungsanleitung oder der
Verpackung weist darauf hin. Die Werkstoffe sind
gemäß ihrer Kennzeichnung wiederverwertbar.
Mit der Wiederverwendung, der stofflichen
Verwertung oder anderen Formen der Verwertung
von Altgeräten leisten Sie einen wichtigen Beitrag
zum Schutze unserer Umwelt. Bitte erfragen Sie
bei Ihrer Gemeindeverwaltung die zuständige
Entsorgungsstelle.
1
2

10
Batterien gehören nicht in den
Hausmüll! Jeder Verbraucher in der
EU ist gesetzlich verpflichtet,
Batterien bei einer Sammelstelle
seiner Gemeinde oder im Handel
abzugeben. Die Batterien werden
dadurch einer umweltschonenden Entsorgung
zugeführt.
Batterien, die Schadstoffe enthalten, sind durch
chemische Symbole gekennzeichnet (Cd = Cadmi-
um, Hg = Quecksilber, Pb = Blei).
Weitere Informationen:
www.maerklin.com/en/imprint.html
13. Garantie
Gewährleistung und Garantie gemäß der beilie-
genden Garantieurkunde.
• FürReparaturenwendenSiesichbitteanIhren
Märklin-Fachhändler oder an
Gebr. Märklin & Cie. GmbH
Reparaturservice
Stuttgarter Str. 55 - 57
73033 Göppingen
Germany
Tel: 07161 608 222 )

11
3. Contents
4-part train
22 no. 243007 sections curved track
1 no. 243008 crossing track 30˚
4 no. 505188 sections straight Track 188 mm
7 no. 505172 sections straight Track 172 mm
2 no. sections curved track 505224,
1 no. 505611 tournout left Track
1 no. 505612 tournout right Track
1 remote controller
1 no. 72200 „Station Platform“ Building Kit
1 no 72203 manual Grade Crossing
1 no 72201 Bbattery-Operated Signal
2 type AAA/LR 03 1.5 volt batteries
4 type AA/LR 6 1.5 volt batteries
Operating instructions
D
USA UK
F
NL
Operating instructions
S
DK
Warranty card
4. Technical Information
• Voltagesuppliedtothetrain:4x1.5voltsDC
• Batterytype:4x1.5voltMignon,AA,LR6
• Voltagesuppliedtotheremotecontroller:
2 x 1.5 volts DC
• Batterytype:2x1.5voltsMicro,AAA,LR03
• H0Gauge(1:87scale)
5. Notes about Using this Model for
the First Time
• Themotorcarandthebatterycararecoupled
together permanently and cannot be separated.
• Preparetheremotecontrollerandthetrain
according to Sections 6.2 and 6.3.
• If the train goes outside of the range of the
remote controller (approximately 6 meters / 20
feet) it will go further but cannot be controlled
any more.
• Amaximumoftwotrainscanbeusedatthe
same time.
• Youmayhaveproblemsifanothercontroller
with the same frequency is operated in the
range of the train.
1. Using the Product as Intended
This product is an H0 Gauge (1:87 scale) model
train for children ages 8 and above. This battery-
powered train can be operated on model railroad
layouts equipped with
Märklin C Track.
• Thetrackincludedinthissetarenotsuitable
for use with a transformer / digital locomotive
controller.
• Thistrainmaynotberunonarugorcarpet.
• Thistraincanberunonsmooth,cleanoorsor
on H0 track.
2. Safety Notes
• Thisproductmayonlybeusedindoors.
• Donotexposethemodeltodirectsunlight,ex-
treme changes in temperature, or high humidity.
• Donotstorethisproductindirectsunlightor
exposed to extremes of temperature or to high
humidity.
• WARNING! Sharp edges and points required for
operation. Danger of choking due to detachable
small parts that may be swallowed.
• WARNING! Do not hold this product close to
your face or in your hair when it is turned on.
• WARNING! Batteries should not be handled by
children.
• WARNING! Do not lay the contacts for the bat-
tery pack on a conductive surface – This may
cause a fire!
• WARNING! If one of the cars in the train be-
comes damaged, the damaged car may not be
used any longer.
• WARNING! This product contains magnets in
the couplings. Swallowing one or more of the
magnets may be deadly under certain circum-
stances. Go to the emergency room of your
local hospital immediately.
UKUSA

12
1.
2.
+
-
3.
-
+
5.
4.
6.
6. Preparations
6.1 Notes about Handling Batteries:
Notes about Batteries and Rechargeable Batteries
• Batteriesthatcannotberechargedmustnotbe
put into a recharger.
•
Remove rechargeable batteries from the battery
pack before charging them!
• Rechargeablebatteriesshouldbechargedup
only under the supervision of adults. Make sure
that you pay attention to the instructions for
operating the recharger you are using.
• Inequalityofbatterytypes,ornewandused
batteries can not be used together.
• Batterieswiththecorrectpolarityinsert.
• Removerundownbatteriesfromthebattery
pack.
• Contactsshouldnotbeshorted.
• Ifyouarenotgoingtousethetrainforalonger
period of time, remove the batteries from the
train and the remote controller.
• Putonprotectiveglovestoremoverundown
batteries.Then clean the battery holder and the
contacts with a dry cloth.
• Batteriesshouldnotbehandledbychildren.
Children could put batteries in their mouth and
swallow them. If a battery should be swallowed
take your child immediately to a hospital emer-
gency room.
• SeeSection12aboutdisposingofbatteries.
1.
2.
+
-
3.
-
+
5.
4.
6.
Unscrew the battery holder and lift up the
cover
6.2 Remote Controller
1
Install or change the batteries only in
pairs according to the markings!
Pay attention to the polarity!
Insert two (2) type AAA/LR 03 batteries as
shown in the drawing
Put the cover for the battery
holder back in place.
Screw the battery holder down
into place.
1.
2.
+
-
3.
-
+
5.
4.
6.
2
3
6.3 Motor Car with the Battery Car
3.
+
-
+
-
3.
+
-
+
-
3.
5.
6.
4.
2.
1.
1.
Unscrew the battery holder.
Remove the battery holder.
1

13
2
3.
+
-
+
-
3.
+
-
+
-
3.
5.
6.
4.
2.
1.
1.
3.
+
-
+
-
3.
+
-
+
-
3.
5.
6.
4.
2.
1.
1.
Insert four (4) type AA/LR 06 batteries as shown
in the drawing.
Install or change the four (4) batteries
only as a group! Pay attention to the
polarity!
Slide the battery holder into place
Do not lay the contacts for the battery
pack on a conductive surface and/or do
not short circuit these contacts – This
may cause a fire!
3
4Screw the battery holder down into place
3.
+
-
+
-
3.
+
-
+
-
3.
5.
6.
4.
2.
1.
1.
7. Track to build
Put together
Disassemble

14
Idea for setting up the track (more ideas see
page 34):
Please note the track numbers and the order for
them when setting up the track layout!
The track numbers can be found on the underside
of the track sections. Only the last three digits for
the track numbers are given in the track plans
8. Running the Train for the First Time
Set the motor car with the battery car on the
track or on a smooth, even floor.
CD
C - C
D - D
C - D
D - C
C
D
The switch settings for the IC train
and the remote controller must be
the same.
8.1 Preparing the Train / Turning the Train on
1
2
Rerailer Ramp 7224 (Not included in delivery scope).
007
007
007
007
007
007
007
007
007
007
612 172 172 172 611
224
172
224
188 172 172 172 188
007
007
007
007
007
007
188
188
007
007
007
007
007
007
505172
!Caution

15
Couple the other cars to the train.
3
Turn the train on by pressing the button once.
8.2 Operating the Remote Controller
Operating the Remote Controller
Controllable Functions
Headlights
(Front)
Sound effect: Station
announcements
Sound effect:
Horn
Sound effect: Con-
ductor whistle
start, direction,
speed up, and
slow down
Stop
4
1
Driving directions
The train can be speeded up or slowed down by
pressing the appropriate button several
times.
Speeding up
Slow down
Slow down
Speeding up
Driving directions
2a
2b

16
9. Information about Operating the Train
- When running the train, make sure that the
remote controller is always pointed at the train.
- If the train goes outside of the range of the
remote controller (approximately 6 meters / 20
feet) it will go further but cannot be controlled
any more.
- The train will turn off by itself if you have not
played with it after 60 minutes.
max. 6 m / 20 feet
- Always hold the remote controller pointed at
the train.
- No obstacle can be allowed between the train
and the remote controller.
- Do not turn the remote controller away from the
train.

17
9.1. Running 2 IC Trains
CD
C - C
C - D
D - C
C
D
Youcanrun2ICtrainsindependentlyofeach
other on the same layout. To do this you must set
the switches for one IC and its remote controller
to C-C (1) and set the switches for the second IC
and its remote controller to D-D (2). The switch
settings for each IC and its remote controller must
be the same!
CD
D - D C - D
D - C
C
D
10. Trouble Running the Train
• Ifthetraindoesnotrun,checktomakesure
that the batteries are correctly installed. If the
batteries have been installed correctly, and the
train still does not run, check the batteries in the
remotecontrollertoo.Youmayneedtoreplace
the batteries in the train and/or the remote
controller.
• Ifthetrainclearlyrunsmoreslowlyorcomes
to a stop while you are playing with it, then you
need to replace the batteries. Make sure that
the automatic shutoff time has not been activa-
ted! (See Section 9)
• Ifthelocomotivebecomesdamaged,donot
use the locomotive anymore and remove the
batteries from it. If car becomes damaged,
remove this car from the train and do not use it
anymore.
• Iftherangeoftheremotecontrollerdecreases,
then the batteries for the remote controller need
to be replaced.
11. Cleaning and Maintenance
• Checktoseeifhairordirtgetsontheaxleson
the train and remove this hair or dirt from the
axles with the help of a pair or tweezers so that
the train runs correctly.
• Thetraincanbewipedwithadry,lint-freecloth.
•
Maintenance work for the train is not necessary.
12. Disposing (only EU)
Products marked with a trash
container with a line through it may
not be disposed of at the end of their
useful life in the normal household
trash. They must be taken to a
collection point for the recycling of
electrical and electronic devices.
There is a symbol on the product, the operating
instructions, or the packaging to this effect. The
materials in these items can be used again
according to this marking. By reusing old devices,
materially recycling, or recycling in some other
form of old devices such as these you make an
important contribution to the protection of our
environment. Please ask your city, town,
community, or county authorities for the location
of the appropriate disposal site.
1
2

18
Batteries Do Not Belong in the
Household Trash! Every user in the
EC area is legally obligated to turn in
batteries at a collection point in his
community or at a dealer. The
batteries are then disposed of
appropriately in order to protect the environment.
Batteries containing dangerous materials are
marked with this symbol and with chemical
symbols (Cd = Cadmium, Hg = Mercury, Pb =
Lead).
Other information:
www.maerklin.com/en/imprint.html
13. Warranty
The warranty card included with this product
specifies the warranty conditions.
• PleasecontactyourauthorizedMärklindealer
for repairs or contact:
U.S. only:
Märklin, Inc.
PO Box 510559
New Berlin WI 53151
Phone: 262-522-7080
Fax: 262-522-7288
Email: [email protected]
GB only
Gebr. Märklin & Cie. GmbH
Reparaturservice
Stuttgarter Str. 55 - 57
73033 Göppingen
Germany
Tel: +49 7161 608 222
E-Mail: [email protected]

19
3. Matériel fourni :
Train à 4 éléments
22 éléments courbes de voie 243007
1 Croisement 243008 30°
4 éléments droit de voie 188 mm 505188,
7 éléments droit de voie 172 mm 505172,
2 éléments courbes de voie 505224,
1 aiguillage à gauchx 505611,
1 aiguillage à droite 505612,
1 télécommande
1 Module « Quai »
1 Passage à niveaux manuel 72203
1 Signal fonctionnant sur piles 72201
2 piles type AAA/LR 03 1,5 V
4 piles type AA/LR 6 1,5 V
Notice d’utilisation
D
USA UK
F
NL
Notice d’utilisation S
DK
Bon de garantie
4. Caractéristiques techniques
Alimentation électrique du train : 4 x 1,5 V DC
Type de piles : 4 x 1,5 V Mignon, AA, LR6
Alimentation électrique de la télécommande :
2 x 1,5 V DC
Type de pile : 2 x 1,5V Micro, AAA, LR 03
Echelle H0 (1/87)
5. Indications relatives à la première
mise en service
•
Voiture motrice et voiture à piles sont reliées par
un attelage fixe et ne peuvent être désolidarisées.
• latélécommandeetletrainconformémentaux
instructions des chapitres 6.2 et 6.3.
• Si le train sort de la portée de la télécommande
(environ 6 m), il continue de rouler, mais ne
répond plus aux commandes.
• Aumaximumdeuxtrainspeuventêtreutilisés
en parallèle.
• Si un autre appareil de même fréquence est ex-
ploité dans le rayon d’action du train électrique,
des dysfonctionnements peuvent survenir.
1. Utilisation conforme à sa destina-
tion
Ce produit est un train miniature à l’échelle
H0 (1/87) destiné aux enfants à partir de 3 ans.
Ce train fonctionnant avec des piles peut être
exploité sur des réseaux miniatures réalisés avec
de la voie C Märklin.
• Lesélémentsdevoiefournisneconviennent
pas pour l’exploitation avec transformateur/
régulateur de marche numérique.
• Leproduitnedoitpasêtreutilisésurlestapis
ou moquettes.
• Letrainpeutêtreutilisésurunsupportlisseet
propre ou sur des éléments de voie C H0.
2. Remarque sur la sécurité
• Leproduitdoitêtreutiliséexclusivementdans
des pièces fermées.
• Nepasexposerlemodèleàunensoleillement
direct, à de fortes variations de température ou
à un taux d‘humidité important.
• Leproduitnedoitpasêtreentreposédansun
endroit exposé à un ensoleillement direct, à
de fortes variations de température ou à une
humidité importante.
•
ATTENTION ! Pointes et bords coupants lors du
fonctionnement du produit. Danger d’étouffement
à cause des petites pièces cassables et avalables.
• ATTENTION ! Ne pas approcher le produit
allumé du visage ou des cheveux.
• ATTENTION ! Ne pas laisser les piles à la por-
tée des enfants !
• ATTENTION !
Ne pas poser les contacts du com-
partiment à piles sur un support conducteur de
courant -
risque de brûlure !
• ATTENTION ! Si l’un des véhicules du train est
endommagé, il doit impérativement être exclu
de l’exploitation
• ATTENTION ! Ce produit contient des aimants
dans l’attelage. L’ingestion d’un ou de plusieurs
aimant(s) peut, dans certains cas, s’avérer
mortelle. Consultez immédiatement un médecin.
F

20
1.
2.
+
-
3.
-
+
5.
4.
6.
1.
2.
+
-
3.
-
+
5.
4.
6.
Insérer ou échanger les piles unique-
ment par deux, conformément au mar-
quage ! Tenir compte de la polarité !
Dévisser et enlever le couvercle du comparti-
ment des piles
Insérez deux piles type AAA/LR 03 conformé-
ment au dessin.
Le boîtier de la batterie à des couvertures
présenter.
Des couvertures de boîtier
de la batterie visser
6.2 Télécommande
1.
2.
+
-
3.
-
+
5.
4.
6.
6. Préparatifs
6.1 Indications relatives à l’utilisation des
piles :
Indications relatives aux piles et aux accus
rechargeables
•
Ne jamais recharger des piles non rechargeables
.
•
Retirez les accus rechargeables du boîtier
avant de les recharger !
• Nerechargerlespilesrechargeables(accus)
qu‘en présence d‘un adulte. A cet effet, tenir
impérativement compte des instructions de la
notice d’utilisation des chargeurs respectifs.
• Destypesdebatteriesinégauxoudesbatteries
nouvelles et usagées ne peut pas être utilisés
ensemble.
• Insérerdesbatteriesaveclapolaritécorrecte.
• Retirezlespilesusagéesduboîtier.
•
Des contacts ne peuvent pas être court-circuités.
• Sivousn’utilisezpasletraindurantunepériode
prolongée, retirez les piles du train et de la
télécommande.
• Silespilesontcoulé,utiliserdesgantsde
protection pour les retirer. Nettoyer ensuite le
compartiment à piles ainsi que les contacts à
l’aide d’un chiffon sec.
• Nepaslaisserlespilesàlaportéedesenfants
! Les enfants risquent de les porter à la bouche
et de les avaler. En cas d’ingestion d’une pile,
prévenir immédiatement le médecin.
• Elimination:voirpoint12.
1
2
3
6.3 Voiture motrice et voiture à piles
3.
+
-
+
-
3.
+
-
+
-
3.
5.
6.
4.
2.
1.
1.
Revisser le compartiment à piles.
Retirer le compartiment à piles.
1
Table of contents
Languages:
Other marklin Toy manuals

marklin
marklin 7319 User manual

marklin
marklin 37578 User manual

marklin
marklin Dampflok BR 99 4653 User manual

marklin
marklin BR 101 User manual

marklin
marklin 7244 User manual

marklin
marklin 72883 User manual

marklin
marklin BR 98.3 User manual

marklin
marklin 37949 User manual

marklin
marklin BR E 75 User manual

marklin
marklin BR 91 55036 User manual

marklin
marklin 39802 User manual

marklin
marklin 36243 User manual

marklin
marklin 39024 User manual

marklin
marklin 36740 User manual

marklin
marklin 39342 User manual

marklin
marklin BR 115 User manual

marklin
marklin 39371 User manual

marklin
marklin 7555 User manual

marklin
marklin 37137 User manual

marklin
marklin BR 003 User manual