manuals.online logo
Brands
  1. Home
  2. •
  3. Brands
  4. •
  5. marklin
  6. •
  7. Toy
  8. •
  9. marklin 37955 User manual

marklin 37955 User manual

2 Modelle der BR 03 und BR 03.10
37955
2
Informationen zum Vorbild:
Für den hochwertigen Reisezugverkehr auf Strecken, die
noch nicht für eine Achslast von 20 Mp ausgebaut waren,
wurde ab 1930 die Baureihe (BR) 03 von der Deutschen
Reichsbahn (DRG) beschafft.
Es handelte sich dabei um eine leichtere Variante der
BR 01: Die Zylinder und der Kessel waren kleiner
bemessen, der Barrenrahmen leichter. Von der 23,9 m
langen und 130 km/h schnellen Lokomotive wurden 298
Exemplare gebaut. Bei der Deutschen Bundesbahn (DB)
waren die letzten Lokomotiven noch bis 1973 als BR 003
im Dienst. Das Vorbild des vorliegenden Modells der
BR 003 248-2 wurde im Juni 1971 in Ulm ausgemustert.
Ab 1939 beschaffte die Deutsche Reichsbahn die
BR 03.10 mit 3 Zylindern, einer Höchstgeschwindigkeit
von 140 km/h und Vollverkleidung für den schweren
Schnellzugdienst. Wegen des Krieges wurden nur 60
Maschinen geliefert, davon kamen noch 26 zur Deutschen
Bundesbahn. Im Jahr 1950 entfernte man an den Loks
der BR 03.10 die Stromlinienverkleidungen und baute
Witte-Windleitbleche an. Drei Lokomotiven - darunter
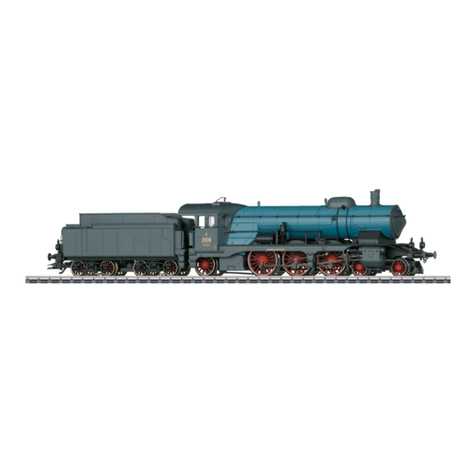
das Vorbild des vorliegenden Modells der BR 03 1014
- erhielten für den hochwertigen Schnellverkehr eine
Lackierung mit stahlblauem Kessel, Führerhaus und
Tenderaufbau, der Rest war wie üblich bei Dampfloko-
motiven rot/schwarz angestrichen. Die BR 03.10 zogen
unter anderem in den 50er-Jahren die Fernschnellzüge
"Rheingold-Express", "Loreley" und "Merkur". Bis 1966
wurden sämtliche BR 03.10 der DB ausgemustert.
Information about the Prototype:
In 1930 the German State Railroad began to purchase
the class 03 for express passenger traffic on lines with a
maximum axle load of 20 tons. The class 03 was a lighter
version of the class 01; the cylinders and boiler were
smaller and the frame was lighter in weight. 298 units of
this class were built. They were 23.9 meters long (11.68
feet) and had a maximum speed of 130 km/h (81.25
m.p.h.). As late as 1973 there were still representatives of
the class 003 in service on the German Federal Railroad.
The prototype of the model before you, road no. 003 248-
2, was retired in June of 1971 in Ulm.
The German State Railroad bought the class 03.10 start-
ing in 1939; this class of locomotives came with 3 cylin-
ders, a maximum speed of 140 km/h / 86 mph, and full
streamlining for heavy express train service. Due to the
war only 60 units were delivered, of which 26 ended up
on the German Federal Railroad. In 1950, the streamlining
was removed on the class 03.10 locomotives, and Witte
smoke deflectors were installed on them. Three locomo-
tives – among them the prototype of the model before
you of road number 03 1014 – were given a paint scheme
with the boiler, engineer‘s cab, and tender body in steel
blue for important express service; the rest of the locomo-
tive was painted the usual red/black for steam locomo-
tives. The class 03.10 pulled long distance express trains
in the Fifties such as the „Rheingold Express“, „Loreley“,
and „Merkur“. By 1966 all of the 03.10 locomotives were
retired on the DB.
3
Informations concernant la locomotive réele:
La Deutsche Reichsbahn a acquis, à partir de 1930 des
locomotives de la série BR 03 pour assurer le traficrapide
sur des lignes non encore équipées pour des charges de
20 Mp par essieu. Il s’agissait d’une variante plus légère
des locomotives de la série BR 01: Les cylindres et la
chaudière étaient plus petits et le cadre en profilés plus
léger. 298 locomotives de ce type, d’une longueur de
23,90 m, pouvant atteindre 130 km/h ont été acquises par
la deutsche Bundesbahn. Les dernières locomotives de la
série BR 003 étaient en service jusquèn 1973. Le modèle
ayant inspiré ce modèle réduit de la BR 003 248-2 fut/a
été réformé à Ulm en juin 1971.
A partir de 1939, la Deutsche Reichsbahn fit l’acquisition
de la BR 03.10 avec 3 cylindres, une vitesse maximale de
140 km/h et carénage intégral pour le service de trains
rapides. En raison de la guerre, seules 60 machines furent
livrées, dont 26 à la Deutsche Bundesbahn. En 1950, le
carénage aérodynamique des locomotives de la BR 03.10
fut enlevé et des écrans pare-fumée de type Witte furent
installés. Trois locomotives – dont celle ayant servi de
modèle pour la reproduction miniature de la BR 03 1014
– furent dotées pour le trafic rapide d’une livrée bleu-acier
pour la chaudière, la cabine de conduite et la superstruc-
ture du tender et rouge/noire pour le reste (ce qui était
la règle pour les locomotives à vapeur). Dans les années
50, les BR 03.10 remorquèrent entre autres les trains de
grandes lignes « Rheingold-Express », « Loreley » et «
Merkur ». Jusqu’en 1966, toutes les 03.10 de la DB furent
réformées.
Informatie van het voorbeeld:
Voor het kwalitatief betere reizigersverkeer op lijnen, die
nog niet berekend waren op een asdruk van 20 ton, werd
vanaf 1930 de bouwserie (BR) 03 van de Deutsche Bun-
desbahn aangeschaft. Het betrof hier een lichtere variant
van de BR 01, waarbij de cilinders en de ketel kleiner
waren en het van staven gevormde freem lichter was. Van
deze 23,9 m lange en 130 km/u snelle locomotief werden
298 exemplaren gebouwd. Bij de Deutsche Bundesbahn
waren de laatste locomotieven nog tot 1973 als BR 003 in
dienst. Het voorbeeld van het voor u liggende model van
de BR 003 248-2 werd in juni 1971 in Ulm buitendienst-
gesteld.
De BR 03.10, met drie cilinders, een maximumsnelheid
van 140 km/h en volledige stroomlijnbekleding, werd
vanaf 1939 door de Deutsche Reichsbahn aangeschaft
voor de zware sneltreindienst. Vanwege de oorlog werden
er slechts 60 afgeleverd, daarvan kwamen er nog 26
bij de Deutschen Bundesbahn terecht. In 1950 werd de
stroomlijnbekleding bij de BR 03.10 verwijderd en werden
Witte-windleiplaten aangebracht. Drie locomotieven
-waaronder het voorbeeld van het voor u liggende model
van de BR 03 1014 - kregen voor het hoogwaardige snel-
treinverkeer een beschildering met een staalblauwe ketel,
machinistenhuis en tenderopbouw. De rest was zoals bij
stoomlocomotieven gebruikelijk rood/zwart geschilderd.
De BR 03.10 trokken onder andere in de vijftiger-jaren de
sneltreinen voor de lange afstand als de “Rheingold-Ex-
press”, “Loreley” en “Merkur”. Tot 1966 werden alle 03.10
van de DB buitendienstgesteld.
4
Sicherheitshinweise
•
Die Lok darf nur mit einem dafür bestimmten Betriebssys-
tem (Märklin Wechselstrom-Transformator 6647, Märklin
Delta, Märklin Digital oder Märklin Systems) eingesetzt
werden. Keinesfalls Transformatoren für eine Eingangs-
spannung von 220 V - für USA 110 V - verwenden
• Die Lok darf nur aus einer Leistungsquelle gleichzeitig
versorgt werden.
• Für den konventionellen Betrieb der Lok muss das
Anschlussgleis entstört werden. Dazu ist das Entstör-
set 74046 zu verwenden. Für Digitalbetrieb ist das
Entstörset nicht geeignet.
• Beachten Sie unbedingt die Sicherheitshinweise in der
Gebrauchsanleitung zu Ihrem Betriebssystem.
Safety Warnings
• This locomotive is to be used only with an operat-
ing system designed for it (Märklin 6646/6647 AC
transformer, Märklin Delta, Märklin Digital or Märklin
Systems).Under no circumstances should transform-
ers rated for an input of 220 volts be connected to the
American 110 volt household current system.
• This locomotive must never be supplied with power
from more than one transformer.
•
The feeder track must be equipped to prevent interference
with radio and television reception, when the locomotive
is to be run in conventional operation. The 74046 interfer-
ence suppression set is to be used for this purpose.
• Pay close attention to the safety warnings in the
instructions for your operating system.
Remarques importantes sur la sécurité
• La locomotive ne peut être mise en service qu’avec
un système d’exploitation adéquat (Märklin courant
alternatif - transformateur 6647, Märklin Delta, Märklin
Digital ou Märklin Systems). N’utilisez en aucun cas de
transformateurs pour une tension à l’entrée de 220 V
- 110 V pour les Etats-Unis.
• La locomotive ne peut être alimentée en courant que
par une seule source de courant.
•
Pour l’exploitation de la locomotive en mode conventionnel,
la voie de raccordement doit être déparasitée. A cet effet,
utiliser le set de déparasitage réf. 74046. Le set de déparasi-
tage ne convient pas pour l’exploitation en mode numérique.
• Veuillez impérativement respecter les remarques sur
la sécurité décrites dans le mode d’emploi en ce qui
concerne le système d’exploitation.
Veiligheidsvoorschriften
•
De loc mag alleen met een daarvoor bestemd bedrjfssy-
steem (Märklin wisselstroom transformator 6647, Märklin
Delta, Märklin digitaal of Märklin Systems) gebruikt
worden. In geen geval transformatoren met een ingangs-
spanning van 220 V - voor USA 110 V - gebruiken.
• De loc mag niet vanuit meer dan één stroomvoorzie-
ning gelijktijdig gevoed worden.
• Voor het conventionele bedrijf met de loc dient de
aansluitrail te worden ontstoort. Hiervoor dient men
de ontstoor-set 74046 te gebruiken. Voor het digitale
bedrijf is deze ontstoor-set niet geschikt.
• Lees ook aandachtig de veiligheidsvoorschriften in de
gebruiksaanwijzing van uw bedrijfssysteem.
5
Aviso de seguridad
•
La locomotora solamente debe funcionar en un sistema de
corriente propio (Märklin corriente alterna – transformador 6647
– Märklin Delta – Märklin Digital o Märklin Systems). En ningún
caso utilizar los transformadores para una tensión de entrada
de 220 V (en el caso de EE.UU. esta tensión es de 110 V).
• La locomotora no deberá recibir corriente eléctrica
mas que de un solo punto de abasto.
• Para el funcionamiento convencional de la locomotora deben
suprimirse las interferencias en la vía de conexión de la
alimentación. Para ello debe emplearse el set supresor de
interferencias 74046. El set supresor de interferencias no es
adecuado para el funcionamiento en modo digital.
• Observe bajo todos los conceptos, las medidas de
seguridad indicadas en las instrucciones de su sistema
de funcionamiento.
Avvertenze per la sicurezza
•
Tale locomotiva deve essere impiegata soltanto con un siste-
ma di funzionamento adeguato per questa (trasformatore per
corrente alternata Märklin 6647, Märklin Delta, Märklin Digital
oppure Märklin Systems). Non si impieghino mai per USA, a
110 V, i trasformatori per una tensione di ingresso di 220 V.
• La locomotiva non deve venire alimentata nello stesso
tempo con più di una sorgente di potenza.
•
Per il funzionamento tradizionale della locomotiva il binario di
alimentazione deve essere protetto dai disturbi. A tale scopo
si deve impiegare il corredo antidisturbi 74046. Tale corredo
antidisturbi non è adatto per il funzionamento Digital.
• Vogliate prestare assolutamente attenzione alle
avvertenze di sicurezza nelle istruzioni di impiego per il
Vostro sistema di funzionamento.
Säkerhetsanvisningar
• Loket får endast köras med ett därtill avsett driftsystem
(Märklin Växelström-transformator 6647, Märklin Delta,
Märklin Digital eller Märklin Systems). Använd aldrig
någonsin transformatorer avsedda att anslutas till
ingångsspänning 220 V - ej eller USA 110 V.
• Loket får inte samtidigt försörjas av mer än en kraftkälla.
• När motorförsedda lokdel ska köras med konventio-
nell/analog drift måste anlutningsskenan vara avstörd.
Till detta använder man anslutningsgarnityr 74046 med
avstörning och överbelastningsskydd. Avstörnings-
skyddet får inte användas vid digital körning.
• Beakta alltid säkerhetsanvisningarna i bruksanvisning-
en som hör till respektive driftsystemet.
Vink om sikkerhed
• Lokomotivet må kun bruges med et driftssystem (Märklin
vekselstrøm-transformator 6647, Märklin Delta, Märklin
Digital eller Märklin Systems), der er beregnet dertil.
Transformatorer, der er beregnet til indgangsspændin-
gen 220 V, må aldrig tilsluttes til 110 V i USA.
• Lokomotivet må ikke forsynes fra mere end én strøm-
kilde ad gangen.
• Ved konventionel drift af lokomotivet skal tilslutnings-
sporet støjdæmpes. Dertil skal anvendes støjdæmp-
ningssættet 74046. Støjdæmpningssættet er ikke
egnet til digital drift.
• Vær under alle omstændigheder opmærksom på de
vink om sikkerhed, som findes i brugsanvisningen for
Deres driftssystem.
6
Funktion
• Mögliche Betriebssysteme:
Märklin Transformer 6647, Märklin Delta,
Märklin Digital, Märklin Systems.
• Erkennung der Betriebsart: automatisch.
• Einstellbare Adresse (Control Unit): 01 – 80.
Adresse ab Werk: 03.
Name ab Werk: BR 03 1014 (Lok 1)
BR 003 248-2 (Lok 2)
• Veränderbare Anfahrverzögerung (ABV).
• Veränderbare Bremsverzögerung (ABV).
• Veränderbare Höchstgeschwindigkeit.
• Einstellen der Lokparameter elektronisch über Control
Unit, Mobile Station oder Central Station.
• Rauchgenerator nachrüstbar.
Die bei normalem Betrieb anfallenden Wartungsarbeiten
sind nachfolgend beschrieben. Für Reparaturen oder
Ersatzteile wenden Sie sich bitte an Ihren Märklin-Fach-
händler.
Jegliche Garantie-, Gewährleistungs- und Schadensersatzan-
sprüche sind ausgeschlossen, wenn in Märklin-Produkten nicht
von Märklin freigegebene Fremdteile eingebaut werden und /
oder Märklin-Produkte umgebaut werden und die eingebauten
Fremdteile bzw. der Umbau für sodann aufgetretene Mängel und
/ oder Schäden ursächlich war. Die Darlegungs- und Beweislast
dafür, dass der Einbau von Fremdteilen oder der Umbau in bzw.
von Märklin-Produkten für aufgetretene Mängel und / oder Schäden
nicht ursächlich war, trägt die für den Ein- und / oder Umbau ver-
antwortliche Person und / oder Firma bzw. der Kunde.
Function
• Possible operating systems:
6646/6647 Märklin Transformer, Märklin Delta, Märklin
Digital, Märklin Systems.
•
Recognition of the mode of operation: automatic.
•
Addresses that can be set (Control Unit): 01 – 80.
Address set at the factory: 03.
Name set at the factory: BR 03 1014 (Lok 1)
BR 003 248-2 (Lok 2)
• Adjustable acceleration (ABV).
• Adjustable Braking delay (ABV).
• Adjustable maximum speed.
• Setting the locomotive parameters electronically with
the Control Unit, Mobile Station or Central Station.
• This locomotives can be retrofitted with a smoke gene-
rator.
The maintenance work necessary with normal operation
of this locomotive is described below.Please see your
authorized Märklin dealer for repairs or spare parts.
No warranty or damage claims shall be accepted in those cases
where parts neither manufactured nor approved by Märklin have
been installed in Märklin products or where Märklin products have
been converted in such a way that the non-Märklin parts or the
conversion were causal to the defects and / or damage arising.
The burden of presenting evidence and the burden of proof thereof,
that the installation of non-Märklin parts or the conversion in or of
Märklin products was not causal to the defects and / or damage
arising, is borne by the person and / or company responsible for
the installation and / or conversion, or by the customer.
7
Werking
• Mogelijke bedrijfssystemen:
Märklin Transformer 6647, Märklin Delta,
Märklin Digital, Märklin Systems.
•
Herkenning van het bedrijfssysteem: automatisch.
• Instelbaar adres (Control Unit): 01 – 80.
Vanaf de fabriek: 03.
Naam af de fabriek: BR 03 1014 (Lok 1)
BR 003 248-2 (Lok 2)
• Instelbare optrekvertraging (ABV).
• Instelbare afremvertraging (ABV).
• Instelbare maximumsnelheid.
• Elektronische instelling van de locomotiefparameters
via de Control Unit, Mobile Station of Central Station.
• Mogelijkheid om rookgenerator in te bouwen.
De in het normale bedrijf voorkomende onderhoudswerk-
zaamheden zijn verderop beschreven. Voor reparatie of
onderdelen kunt u zich tot uw Märklin winkelier wenden.
Elke aanspraak op garantie en schadevergoeding is uitgesloten,
wanneer in Märklin-producten niet door Märklin vrijgegeven vreem-
de onderdelen ingebouwd en / of Märklin-producten omgebouwd
worden en de ingebouwde vreemde onderdelen resp. de ombouw
oorzaak van nadien opgetreden defecten en / of schade was. De
aantoonplicht en de bewijslijst daaromtrent, dat de inbouw van
vreemde onderdelen in Märklin-producten of de ombouw van
Märklin-producten niet de oorzaak van opgetreden defecten en /
of schade is geweest, berust bij de voor de inbouw en/of ombouw
verantwoordelijke persoon en / of firma danwel bij de klant.
Fonction
• Systèmes d’exploitation possibles:
Märklin Transformer 6647, Märklin Delta,
Märklin Digital, Märklin Systems.
• Détection du mode d’exploitation: automatique.
• Adresses réglables (Control Unit): 01 – 80. Adresse
encodée en usine: 03.
Nom en codee en usine: BR 03 1014 (Lok 1)
BR 003 248-2 (Lok 2)
• Temporisation d’accélération/de freinage réglable (ABV).
• Vitesse maximale réglable.
• Réglage des paramètres de la loco électroniquement à
l’aide de la Control Unit, de la Mobile Station ou de la
Central Station.
• Possibilité d’installer un générateur fumigène.
Les travaux d‘entretien occasionnels à effectueren
exploitation normale sont décrits plus loin. Pour toute
réparation ou remplacement de pièces, adressez-vous à
votre détaillant-spécialiste Märklin.
Tout recours à une garantie commerciale ou contractuelle ou à
une demande de dommages-intérêt est exclu si des pièces non
autorisées par Märklin sont intégrées dans les produits Märklin
et / ou si les produits Märklin sont transformés et que les pièces
d’autres fabricants montées ou la transformation constituent la
cause des défauts et / ou dommages apparus. C’est à la personne
et / ou la société responsable du montage / de la transformation
ou au client qu’incombe la charge de prouver que le montage des
pièces d’autres fabricants sur des produits Märklin ou la transfor-
mation des produits Märklin n’est pas à l’origine des défauts et ou
dommages apparus.
8
Función
• Sistemas operativos posibles:
Märklin transformador 6647, Märklin Delta,
Märklin Digital, Märklin Systems.
• Reconocimiento del sistema: automático.
• Dirección ajustable (Control Unit): 01 – 80.
Código de fábrica: 03.
Nombre de fabrica: BR 03 1014 (Lok 1)
BR 003 248-2 (Lok 2)
• Arranque lento variable (ABV).
• Frenado lento variable (ABV).
• Velocidad máxima variable.
• Fijar parámetros de la locomotora electrónicamente
por el Control Unit, Mobile Station o Central Station.
• Se puede colocar posteriormente el kit de humo.
Los trabajos de mantenimiento normales están descritos
a continuación. Para reparaciones o recambios contacte
con su proveedor Märklin especializado.
Se excluye todo derecho de garantía, prestación de garantía e
indemnización sobre aquellos productos Märklin en los que se hu-
bieran montado piezas ajenas no autorizadas por Märklin y/o sobre
aquellos productos Märklin que hayan sido modificados cuando la
piezas ajenas montadas o la modificación sean las causas de los
desperfectos y/o daños posteriormente surgidos. La persona y/o
empresa o el cliente responsable del montaje o modificación será
el responsable de probar y alegar que el montaje de piezas ajenas
o la modificación en/de productos Märklin no son las causas de los
desperfectos y/o daños surgidos.
Funzionamento
• Possibili sistemi di funzionamento:
Märklin Transformer 6647, Märklin Delta,
Märklin Digital, Märklin Systems.
• Riconoscimento del tipo di funzionamento:automatico.
• Indirizzi impostabili (Control Unit): 01 – 80.
Indirizzo di fabbrica: 03.
Nome di fabrica: BR 03 1014 (Lok 1)
BR 003 248-2 (Lok 2)
• Ritardo di avviamento modificabile (ABV).
• Ritardo di frenatura modificabile (ABV).
• Velocità massima modificabile.
•
Regolazione dei parametri della locomotiva elettronicamente
tramite Control Unit, Mobile Station oppure Central Station.
• Apparato fumogeno equipaggiabile in seguito.
Le operazioni di manutenzione che si verificano nel
normale funzionamento sono descritte nel seguito. Per
riparazioni o parti di ricambio Vi preghiamo di rivolgerVi al
Vostro rivenditore specialista Märklin.
Märklin non fornisce alcuna garanzia, assicurazione e risarcimento
danni in caso di montaggio sui prodotti Märklin di componenti non
espressamente approvati dalla ditta. Märklin altresì non risponde in
caso di modifiche al prodotto, qualora i difetti e i danni riscontrati
sullo stesso siano stati causati da modifiche non autorizzate o dal
montaggio di componente esterni da lei non approvati. L‘onere
della prova che i componenti montati e le modifiche apportate
non sono state la causa del danno o del difetto, resta a carico del
cliente o della persona / ditta che ha effettuato il montaggio di
componenti estranei o che ha apportato modifiche non autorizzate.
9
Funktion
• Möjliga driftsystem:
Märklin Transformer 6647, Märklin Delta,
Märklin Digital, Märklin Systems.
• Driftsättet igenkänns automatiskt.
• Inställbar adress (Conrol Unit): 01 – 80.
Adress från tillverkaren: 03.
Namn fran tillverkaren:
BR 03 1014 (Lok 1)
BR 003 248-2 (Lok 2)
• Accelerationsfördröjning kan ändras (ABV).
• Bromsfördröjning kan ändras (ABV).
• Toppfart kan ändras.
• Elektronisk inställning av lokparametrar via
Control Unit, Mobile Station eller Central Station.
• Kan efteråt förses med rökgenerator.
Underhållsarbeten som uppstår vid normal användning
beskrivs som följer. Kontakta din Märklinfackhandlare för
reparationer och reservdelar.
Varje form av anspråk på garanti och skadestånd är utesluten
om delar används i Märklin-produkter som inte har godkänts av
Märklin och / eller om Märklin-produkter har modifierats och de
inbyggda främmande delarna resp. modifieringen var upphov till
de därefter uppträdande felen och / eller skadorna. Bevisbördan
för att inbyggnaden av främmande delar i eller ombyggnaden av
Märklin-produkter inte är upphovet till de uppträdande felen och /
eller skadorna, bär den person och / eller företag resp. kund som är
ansvarig för in- och / eller ombyggnaden.
Funktion
• Mulige driftssystemer:
Märklin Transformer 6647, Märklin Delta,
Märklin Digital, Märklin Systems.
• Registrering af driftsarten: automatisk.
• Indstillelig adresse (Control Unit): 01 – 80.
Adresse ab fabrik: 03.
Navn ab fabrik: BR 03 1014 (Lok 1)
BR 003 248-2 (Lok 2)
• Indstillelig opstartforsinkelse (ABV).
• Indstillelig bremseforsinkelse (ABV).
• Indstillelig maksimalhastighed.
• Elektronisk indstilling af lokomotivparametrene via
Control Unit, Mobile Station eller Central Station.
• Røggenerator kan eftermonteres.
Vedligeholdelsesarbejder ved normal drift er beskrevet i
det efterfølgende. For reparation eller reservedele bedes
De henvende Dem til Deres Märklinforhandler.
Ethvert garanti-, mangelsansvars- og skadeserstatningskrav er
udelukket, hvis der indbygges fremmeddele i Märklinprodukter,
der ikke er frigivet dertil af Märklin og / eller hvis Märklinprodukter
bygges om og de indbyggede fremmeddele hhv. ombygningen var
årsag til sådanne opståede mangler og / eller skader. Det påhviler
kunden hhv. den person og / eller det firma, der er ansvarlig for
ind- og / eller ombygningen, at påvise hhv. bevise, at indbygningen
af fremmeddele i, eller ombygningen af Märklinprodukter ikke var
årsag til opståede mangler og / eller skader.
10
Schaltbare Funktionen • Controllable
Functions • Fonctions commutables•
Schakelbare functies • Funciones posib-
les • Funzioni commutabili • Kopplings-
bara funktioner / Styrbare funktioner
6647 6021
STOP mobile station
systems
15
60652
central
station
60212
f0 f0f8
f8
EH
Lok 1 Lok 2
Dauernd ein
Always on
Activé en permanence
Continu aan
Siempre encendido
Accesa in permanenza
Permanent till
Konstant tændt
function
+ off
Licht-Taste
Headlight Button
Touche éclairage
Verlichtingstoets
Tecla alumbrado
Tasto luci
Ljustangent
Belysningstast
Taste f0 mit Symbol
Button f0 with symbol
Touche f0 avec symbole
Toets f0 met symbool
Tecla f0 con símbolo
Tasto f0 con simbolo
Knapp f0 med symbol
Knap f0 med symbol
Rangiergang (nur ABV)
Low speed Switching Range (only ABV)
Mode manoeuvre (uniquement ABV).
Rangeerstand (alleen ABV)
Marcha maniobras (ABV)
Andatura da manovra (solo ABV)
Rangergång (endast ABV)
Rangergear (kun ABV)
- f4
Taste 4 mit Symbol
Button 4 with symbol
Touche 4 avec symbole
Toets 4 met symbool
Tecla 4 con símbolo
Tasto 4 con simbolo
Knapp 4 med symbol
Knap 4 med symbol
Taste f4 mit Symbol
Button f4 with symbol
Touche f4 avec symbole
Toets f4 met symbool
Tecla f4 con símbolo
Tasto f4 con simbolo
Knapp f4 med symbol
Knap f4 med symbol
Rauchgenerator
Smoke generator
Générateur de fumée
Rookgenerator
Generador de humo
Apparato fumogeno
Röksats
Røggenerator
-f1
Taste 7 mit Symbol
Button 7 with symbol
Touche 7 avec symbole
Toets 7 met symbool
Tecla 7 con símbolo
Tasto 7 con simbolo
Knapp 7 med symbol
Knap 7 med symbol
Taste f1 mit Symbol
Button f1 with symbol
Touche f1 avec symbole
Toets f1 met symbool
Tecla f1 con símbolo
Tasto f1 con simbolo
Knapp f1 med symbol
Knap f1 med symbol
11
Lokparameter einstellen mit der Control Unit
1. Voraussetzung: Aufbau wie Grafik S. 15.
Nur die zu verändernde Lok ist auf dem Gleis.
2. „Stop“- und „Go“-Taste gleichzeitig drücken, bis „99“
in der Anzeige aufblinkt.
3. „Stop“-Taste drücken.
4. Lokadresse „80“ eingeben.
5. Umschaltbefehl am Fahrregler halten. Während des
Haltens die „Go“-Taste drücken.
6. Licht der Lok blinkt langsam. Wenn nicht, ab Schritt 2
wiederholen.
7. Registernummer für den zu ändernden Parameter
eingeben (=> Liste auf Seite17).
8. Fahrtrichtungswechsel betätigen.
9. Licht blinkt schnell
10. Neuen Wert eingeben (=> Liste auf Seite 17).
11. Fahrtrichtungswechsel betätigen.
12. Licht blinkt langsam (Ausnahme Werkreset)
13. Nächste Parametereinstellung ab 6. oder
beenden mit 14.
14. Vorgang beenden mit Drücken der „Stop“-
Taste. Anschließend Drücken der „Go“-Taste.
Setting Locomotive Parameters with the Control Unit
1. Requirement: Setup as in diagram on page 15. Only
the locomotive to be changed can be on the track.
2. Press the “Stop” and “Go” at the same time until
“99” blinks in the display.
3. Press the “Stop” button.
4. Enter the locomotive address „80“.
5. Hold the control knob in the reverse direction area. While
holding the control knob here, press the „Go“ button.
6. The headlights on the locomotive will blink slowly. If
they don‘t, repeat Step 2.
7. Enter the register number for the parameter to be
changed (=> List on page 17).
8. Active the change of direction.
9. The headlights will blink rapidly.
10. Enter the new value (=>List on page 17).
11. Active the change of direction.
12. The headlights will blink slowly (exception: factory
reset)
13. Enter the next parameter setting from 6 or end with 14.
14. End the process by pressing the „Stop“ button. Then
press the „Go“ button.
12
Réglage des paramètres de la loco avec la
Control Unit
1. Condition: Montage comme sur illustration en page
15. Seule la loco à modifier peut se trouver sur la voie.
2. Pressez simultanément les touches „Stop“ et „Go“
jusqu’à ce que le nombre „99“ clignote sur l’écran.
3. Pressez la touche „Stop“.
4. Introduisez l’adresse de loco „80“.
5. Maintenir l’ordre de commutation sur le régulateur de
marche. Durant le maintien, appuyer sur la touche „Go“.
6. Les feux de la locomotive clignotent lentement.
Dans le cas contraire, renouveler l’opération à partir
de l’étape 2.
7. Indiquer le numéro d’enregistrement pour le paramèt-
re à modifier (=> liste page 17).
8. Activer l’inversion du sens de marche.
9. Les feux clignotent rapidement.
10. Entrer la nouvelle valeur (=> liste page 17).
11. Activer l’inversion du sens de marche.
12. Les feux clignotent lentement (exception : réinitialisa-
tion aux valeurs d’usine)
13. Définition de paramètres suivante à partir du point 6
ou terminer par le point 14.
14. Terminez le processus en pressant la touche „Stop“.
Ensuite, pressez la touche „Go“.
Locparameters instellen met de Control Unit
1. Voorwaarde: opbouw zoals tekening op pagina 15.
Alleen de loc die gewijzigd moet worden op de rails.
2. ”Stop”- en ”Go”-toets gelijktijdig indrukken tot ”99”
in het display oplicht.
3. ”Stop”-toets indrukken.
4. Het adres „80“ invoeren.
5. Omschakelcommando met de rijregelaar vasthouden.
Tijdens het vasthouden de toets “Go” indrukken.
6. De verlichting van de loc knippert langzaam. Indien
dit niet het geval is, vanaf stap 2 opnieuw beginnen.
7. Het registernummer van de te wijzigen parameter
invoeren (=> lijst op pagina 17).
8. Omschakelcommando geven.
9. Verlichting gaat snel knipperen.
10. Nieuwe waarde invoeren (=> lijst op pagina 17).
11. Omschakelcommando geven.
12. Verlichting knippert langzaam (uitgezonderd bij
decoder reset)
13. Volgende parameterinstelling of beëindigen met 14
14. Sessie beëindigen door het indrukken van de toets
“Stop”. Aansluitend de toets “Go” indrukken.
13
Parámetros de la locomotora configurables con el
Control Unit
1. Condición previa: montaje como el gráfico
pág. 15. En la vía debe encontrarse solamente la
locomotora a configurar.
2. Apretar simultáneamente la tecla “Stop” y “Go” hasta
que aparece “99” en pantalla.
3. Apretar la tecla “Stop”.
4. Marcar el código de la locomotora „80“.
5. Mantener la orden de conmutación en el regulador
de marcha. Durante la parada, pulsar la tecla „Go“.
6. La luz de la locomotora se enciende con intermiten-
cia lenta. En caso negativo, repetir desde el paso 2.
7. Introducir el número de registro del parámetro que se
desee modificar (=> Lista en página 17).
8. Activar el cambio de sentido de la marcha.
9. La luz se enciende con intermitencia rápida
10. Introducir un valor nuevo (=> Lista en página 17).
11. Activar el cambio de sentido de la marcha.
12. La luz se enciende con intermitencia lenta (excep-
ción: se ha realizado un reset en fábrica)
13. Configuración de siguiente parámetro repitiendo a
partir de 6. o terminar con 14.
14. Repetir la operación pulsando la tecla „Stop“. A
continuación, pulsar la tecla „Go“.
Impostazione dei parametri della locomotiva con la
Control Unit
1. Predisposizione: assetto come da schema a pag. 15.
Soltanto la locomotiva da modificare si trova sul binario.
2. Premere contemporaneamente i tasti „Stop“ e „Go“,
fino a che sul visore lampeggia „99“.
3. Premere il tasto „Stop“.
4. Introdurre l’indirizzo della locomotiva „80“.
5. Tenere premuto il comando di commutazione sul
regolatore di marcia. Durante tale pressione, premere
il tasto „Go„.
6. I fanali della locomotiva lampeggiano lentamente. In
caso negativo, si riprenda dal passo 2.
7. Introdurre il numero di registro per il parametro da
modificare (=> elenco a pagina 17).
8. Azionare la commutazione della direzione di marcia.
9. I fanali lampeggiano velocemente
10. Introdurre il nuovo valore (=> elenco a pagina 17).
11. Azionare la commutazione della direzione di marcia.
12. I fanali lampeggiano lentamente (ad eccezione del
ripristino di fabbrica).
13. Impostazione del prossimo parametro ripartendo da
6. oppure terminare con 14.
14. Terminare il procedimento con la pressione del tasto
„Stop„.Successivamente premere il tasto „Go„.
14
Lokparametrar ställs in med Control Unit
1. Förutsättning: Montering som visas enligt grafik på
s. 15. Endast det lok som ska ändras ska finnas på
spåret.
2. Både „Stop“- och „Go“-tangenten hålls nedtryckt tills
„99“ blinkar på displayen.
3. „Stop“-tangenten hålls ner.
4. Lokadress „80“ matas in.
5. Tryck ned körkontrollen, som vid ändring av körrikt-
ningen. Håll ned knappen och tryck samtidigt på
„Go“-knappen.
6. Lokets strålkastare blinkar långsamt. Om inte
– upprepa steg 2.
7. Ange registernummren för de ändrade parametrarna
(=> Se lista på sidan 17).
8. Gör en körriktningsändring.
9. Strålkastarna blinkar snabbt.
10.
Ange önskade nya värden (=> Se lista på sidan 17)
.
11. Gör en körriktningsändring.
12. Strålkastarna blinkar långsamt (Gäller inte vid ge-
nomförd reset)
13. Nästa parameterinställning från steg 6. eller sluta
med steg 14.
14. Avsluta med att trycka på “Stop“-knappen. Tryck
därefter på “Go“-knappen.
Indstilling af lokomotivparametre med Control Unit
1. Forudsætning: Opbygning som på grafikken
s. 15. Kun det lokomotiv, der skal ændres, er på
sporet.
2. Tryk samtidig på „Stop“- og „Go“-tasten, indtil „99“
blinker i displayet.
3. Tryk på „Stop“-tasten.
4. Indtast den lokomotivadresse „80“.
5. Hold omskiftningskommando på køreregulator Tryk
på „Go“-knappen mens der holdes.
6. Lyset på lokomotivet blinker langsomt. Hvis ikke
gentages proceduren fra trin 2.
7. Indtast registernummeret for den parameter, der skal
ændres (=> liste på side 17).
8. Betjen køreretningsskiftet.
9. Lyset blinker hurtigt
10. ndtast den nye værdi (=> liste på side 17).
11. Betjen køreretningsskiftet.
12. Lyset blinker langsomt (undtaget fabriksnulstilling)
13. Udfør næste parameterindstilling fra 6. eller afslut
med 14.
14. Afslut proceduren ved at trykke på „Stop“-knappen
Tryk derefter på „Go“-knappen.
15
Lokparameter mit Control Unit ändern.
Changing Locomotive Parameters with the Control Unit.
Modification des paramètres avec la Control Unit.
Locparameter met de Control Unit.
Modificar los parámetros de la locomotora con el Control Unit.
Modifica dei parametri della locomotiva con la Control Unit.
Lokparametrar ändras med Control Unit.
Ændring af lokomotivparametre med Control Unit.
16
1
80
1
Lokparameter ändern mit der Control Unit 6021.
Changing Locomotive Parameters with the 6021 Control Unit.
Modification des paramètres de la locomotive avec la Control Unit 6021.
Locparameter wijzigen met de Control Unit.
Modificar los parámetros de la locomotora con el Control Unit 6021.
Modifica dei parametri della locomotiva con la Control Unit 6021.
Lokparametrar ändras med Control Unit 6021.
Ændring af lokomotivparametre med Control Unit 6021.
1
1
99
1
2
80
2
1
01
  

01
1
1
2
10
10
1

11

14
12
17
Parameter • Parameter • Paramètre • Parameter •
Parámetro • Parametro • Parameter • Parameter
Register • Register •
Registre • Register •
Registro • Registro •
Register • Register
Wert • Value •
Valeur • Waarde
• Valor • Valore •
Värde • Værdi
Adresse • Address • Adresse • Adres • Código • Indrizzo •
Adress • Adresse 01 01 - 80
Anfahr/Bremsverzögerung • Acceleration/Braking delay •
Temoprisation accélération/freinage • Optrekvertraging/Af-
remvertraging • Regulación arranque/Frenado lento • Ritardo
di avviamento/frentura • Igångsättningsreglering/Broms-
fördröjning • Opstartregulierung/Bremseforsinkelse
03 01 - 31
Höchstgeschwindigkeit • Maximum speed •
Vitesse maximale • Maximumsneilheid • Velocidad máxima •
Velocità massima • Toppfart • Maksimalhastighed 05 01 - 63
Rückstellen auf Serienwerte • Reset to series value • Remett-
re aux valeurs de série • Terugzetten naar serie-instellingen •
Restablecer los valores de serie • Pipristinare sui valori di serie
• Återställa till standardvärden • Tibagestil til serieværdien
08 08
18
Lokparameter mit der Mobile Station /
Central Station verändern
1. Lok aus der Lokliste auswählen.
2. Zum Untermenü „LOKÄNDERN“ wechseln.
3. Zum Untermenü „VMAX“ (Höchstgeschwindigkeit),
„ACC“ (Beschleunigung), „DEC“ (Bremsen),
oder „RESET“ (Decoder auf Werkeinstellung zurück)
wechseln.
4. Neuen Wert eingeben und übernehmen.
Beachten Sie die Hinweise in der Anleitung zur
Mobile Station / Central Station.
Changing Locomotive Parameters with the
Mobile Station/Central Station
1. Select the locomotive from the locomotive list.
2. Change to the submenu “EDIT LOC”.
3. Go to the submenu „VMAX“ (maximum speed),
„ACC“ (acceleration), „DEC“ (brakes),
or
„RESET“ (resetting the decoder to factory default
settings)
.
4. Enter the new value and accept it into the system.
Please note the information in the instructions for the
Mobile Station / Central Station.
Modification des paramètres de la loco avec la
Mobile Station / Central Station
1. Sélectionnez la loco dans la liste.
2. Allez au sous-menu „MODIF LOC“.
3. Ouvrir le sous-menu « VMAX » (vitesse maximale),
« ACC » (accélération), « DEC » (freinage), ou
« RESET » (réinitialisation du décodeur aux valeurs
d’usine).
4. Entrez la nouvelle valeur et acceptez.
Respectez les remarques mentionnées dans l’instruction
accompagnant la Mobile Station / Central Station
Locparameter wijzigen met het Mobile Station/
Central Station
1. Loc uit de loclijst kiezen.
2. Ga naar het nevenmenu ”WYZIG LOC”.
3. Naar het nevenmenu “VMAX” (maximumsnelheid)
“ACC” (optrekken), “DEC” (afremmen), of
“RESET” (decoder terugzetten naar fabrieksinstelling)
omschakelen.
4. Nieuwe waarde invoeren en overnemen.
Lees ook de opmerkingen in de gebruiksaanwijzing van
het Mobile Station / Central Station.
19
Modificar los parámetros de la locomotora con la
Mobile Station / Central Station
1. Seleccionar la locomotora de la lista de locomotora.
2. Pasar al menú subsidiario “EDIT LOC”.
3. Cambiar al submenú „VMAX“ (Velocidad máxima),
„ACC“ (Aceleración), „DEC“ (Frenado), o „RESET“
(Devolver decoder a configuración de fábrica).
4. Introducir el nuevo código y memorizar.
Observe las indicaciones en las instrucciones de la
Mobile Station / Central Station.
Modifica dei parametri della locomotiva con la
Mobile Station / Central Station
1. Selezionare la locomotiva dall’elenco locomotive.
2. Commutare al sottomenù „EDIT LOC“.
3. Sul menù sottostante commutare „VMAX„ (velocità
massima), „ACC„ (accelerazione), „DEC„ (frenatura), „
oppure „RESET„ (riporta il Decoder alle impostazioni di
fabbrica).
4. Introdurre il nuovo valore e accettarlo.
Prestate attenzione alle avvertenze nelle istruzioni della
Mobile Station / Central Station.
Lokparametrar ändras med Mobile Station /
Central Station
1. Välj lok från loklistan.
2. Växla till undermenyn „EDIT LOC“.
3. Byt till resp. Undermeny: “VMAX“ (maxhastighet),
“ACC“ (acceleration), „DEC„ (bromsning),
eller till „RESET„ (för återställning av dekodern till
ursprunglig fabriksinställning).
4. Mata in nytt värde och acceptera.
Glöm ej: Se även i anvisningarna i bruksanvisningen för
Mobile Station / Central Station!
Ændring af lokomotivparametre med Mobile Station/
Central Station
1. Vælg lokomotivet fra listen.
2. Skift til undermenuen „EDIT LOC“.
3. Til undermenu „VMAX“ (maksimalhastighed),
„ACC“ (acceleration), „DEC“ (bremse), eller
„RESET“ (nulstille dekoder til fabriksindstilling).
4. Indtast den nye værdi og overtag den.
Lagttag henvisningerne i vejledningen til Mobile Station /
Central Station.
20
Rauchsatz nachrüstbar
Can be equipped with a smoke unit
Générateur de fumée remplaçable
Met rookgarnituur om te bouwen
El equipo de humo se puede colocar posteriormente
Inserto fumogeno sostituibile
Kan kompletteras med röksats
Røgaggregat kan eftermonteres
Potentielle Fehlerquellen beim Rauchgenerator
• Der Rauchgenerator darf nur maximal halb mit Rauchöl
gefüllt sein.
• Im Rauchgenerator darf sich keine Luftblase befinden.
• Der Anschlussdraht an der Unterseite des Rauchge-
nerators muss sicheren Kontakt zur Anschlussfeder im
Lokomotiv-Fahrgestell besitzen.
Potential Problems with the Smoke Generator
• The smoke generator cannot be filled any more than
halfway with smoke fluid.
•
There should not be any air bubbles in the smoke generator.
•
The connecting wire on the underside of the smoke gene-
rator must have a clean contact with the connection field
in the locomotive’s frame.
7226

Other marklin Toy manuals

marklin 37137 User manual

marklin

marklin 37137 User manual

marklin BR E 44 User manual

marklin

marklin BR E 44 User manual

marklin V 188 37283 User manual

marklin

marklin V 188 37283 User manual

marklin 76480 User manual

marklin

marklin 76480 User manual

marklin VT 98 User manual

marklin

marklin VT 98 User manual

marklin 37927 User manual

marklin

marklin 37927 User manual

marklin 55181 User manual

marklin

marklin 55181 User manual

marklin 37127 User manual

marklin

marklin 37127 User manual

marklin 72060 User manual

marklin

marklin 72060 User manual

marklin 54325 User manual

marklin

marklin 54325 User manual

marklin 37001 User manual

marklin

marklin 37001 User manual

marklin 74 Series User manual

marklin

marklin 74 Series User manual

marklin F7 Santa-Fe User manual

marklin

marklin F7 Santa-Fe User manual

marklin Baureihe 602 User manual

marklin

marklin Baureihe 602 User manual

marklin 26567 User manual

marklin

marklin 26567 User manual

marklin 72720 User manual

marklin

marklin 72720 User manual

marklin 72941 User manual

marklin

marklin 72941 User manual

marklin 22390 User manual

marklin

marklin 22390 User manual

marklin 37547 User manual

marklin

marklin 37547 User manual

marklin 36608 User manual

marklin

marklin 36608 User manual

marklin 37667 User manual

marklin

marklin 37667 User manual

marklin 58182 User manual

marklin

marklin 58182 User manual

marklin 21410 User manual

marklin

marklin 21410 User manual

marklin BR 110 User manual

marklin

marklin BR 110 User manual

Popular Toy manuals by other brands

PIKO BR E63 Instructions for use

PIKO

PIKO BR E63 Instructions for use

Horizon Hobby E-flite Fw 190A 1.5m instruction manual

Horizon Hobby

Horizon Hobby E-flite Fw 190A 1.5m instruction manual

LGB 30511 instruction manual

LGB

LGB 30511 instruction manual

Swann Xtreem Micro Attack instruction manual

Swann

Swann Xtreem Micro Attack instruction manual

Eduard T-33A manual

Eduard

Eduard T-33A manual

Alexander Origami 3D Ladybug 2568 manual

Alexander

Alexander Origami 3D Ladybug 2568 manual

Trix 185 Series manual

Trix

Trix 185 Series manual

E-FLITE Habu 32 EDF ARF instruction manual

E-FLITE

E-FLITE Habu 32 EDF ARF instruction manual

Tiger 187-152 operating instructions

Tiger

Tiger 187-152 operating instructions

Viessmann 4500 Operation manual

Viessmann

Viessmann 4500 Operation manual

LEGO DIMENSIONS Teen Titans Go! Team Pack manual

LEGO

LEGO DIMENSIONS Teen Titans Go! Team Pack manual

LEGO Architecture Lincoln Memorial Assembly instructions

LEGO

LEGO Architecture Lincoln Memorial Assembly instructions

Canon PAPER CRAFT MANEKI NEKO Assembly instructions

Canon

Canon PAPER CRAFT MANEKI NEKO Assembly instructions

Fisher-Price Light SKETCHER quick start guide

Fisher-Price

Fisher-Price Light SKETCHER quick start guide

Step 2 Disney/Pixar Cars 3 Ride Around Racer 8747 manual

Step 2

Step 2 Disney/Pixar Cars 3 Ride Around Racer 8747 manual

V-tech Monster Fun user manual

V-tech

V-tech Monster Fun user manual

THE WORLD MODELS P-51 MUSTANG 60 instruction manual

THE WORLD MODELS

THE WORLD MODELS P-51 MUSTANG 60 instruction manual

WowWee Roborover user manual

WowWee

WowWee Roborover user manual

manuals.online logo
manuals.online logoBrands
  • About & Mission
  • Contact us
  • Privacy Policy
  • Terms and Conditions

Copyright 2025 Manuals.Online. All Rights Reserved.