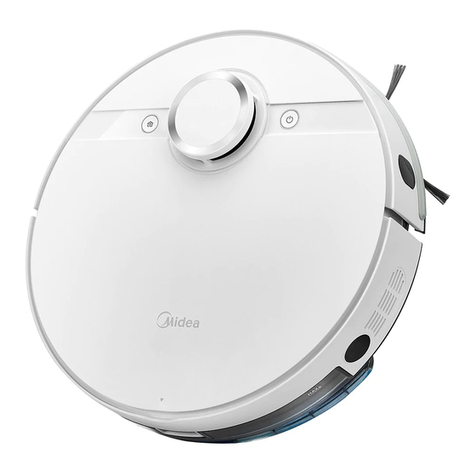
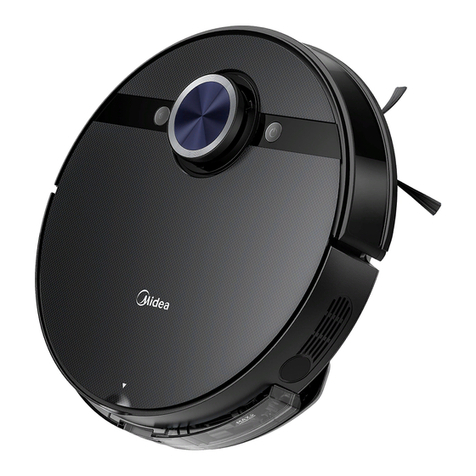
Midea MVC-S8+ User manual

ROBOT VACUUM CLEANER
MVC-S8+
Please read the manual before use
EN-BM


Installation
Installation of dust collector station 8
Use guide for vibration mop assembly 9
Installation of side brushes 10
Robot charging 10
Safety Instructions
Warning for the machine 1
Warning for docking station 3
Warning for battery 4
Technical data 5
Operating Guidelines
Power-on methods 11
Start cleaning 11
Pause cleaning 11
Return to charge 11
Trouble shooting 11
Power off 11
Dust Collection Methods 12
Status indicator of main unit/dust collector station 13
Introduction
Included accessories 6
Overview of Main unit 6
Parts introduction of dust collector station 7
Faults solution for main unit and its App 23
Daily Maintenance and Service
Maintenance of dust box
Maintenance of vibration mopping assembly
Cleaning tool
Maintenance of roller brush
Cleaning of drive wheels
Cleaning of side brushes
Cleaning of Sensors and spring chips
Replacement of dust bag for dust collector station
Maintenance of base for dust collector station
16
17
18
18
19
20
20
21
22
MSmartHome APP Quick Guide 15
MSmartHome APP
Using App 14
Table of Contents
EN

Warning for the machine
This appliance can be used by children aged from 8 years
and above and persons with reduced physical, sensory or
mental capabilities or lack of experience and knowledge if
they have been given supervision or instruction concerning
use of the appliance in a safe way and understand the
hazards involved.
Children shall not play with the appliance.
Cleaning and user maintenance shall not be made by
children without supervision.
Plug must be removed from the socket-outlet before
cleaning or maintaining the appliance. Switch off before
cleaning or maintaining the appliance.
If the supply cord is damaged, it must be replaced by the
manufacturer, its service agent or similarly qualified
persons in order to avoid a hazard.
WARNING: For the purposes of recharging the battery,
only use the detachable docking station provided with this
appliance.
Use only with BS2101 docking station.
This appliance contains batteries that are only replaceable
by skilled persons.
1.
2.
3.
4.
5.
Do not bring the smart robot close to heat source, radiation
or burning cigarette butts. It is strictly forbidden to vacuum
the following objects:
1) All liquids such as water and solvents;
2) Lime, cement dust and other construction dust and
garbage;
3) Heat generating objects, such as unextinguished carbon
butts, cigarette butts;
4) Sharp fragments, such as glass, etc.;
5) Flammable and explosive items, such as gasoline and
alcohol products.
Before using, please remove all fragile items from the
ground (such as glasses, lamps, etc.), and items that may
be tangled with the side brush, Roller brush and drive
wheels(such as wires, curtains and other easily-entangled
materials).
Please pay attention to your hair and avoid entanglement
on wheels or roller brushes when using, cleaning and
maintaining the robot.
Do not use this product at an altitude of more than 2000m.
6.
7.
8.
9.
Safety Instructions
1

Correct Disposal of this product.
This marking indicates that this product should not be
disposed with other household wastes throughout the EU.
To prevent possible harm to the environment or human
health from uncontrolled waste disposal, recycle it
responsibly to promote the sustainable reuse of material
resources. To return your used device, please use the
return and collection systems or contact the retailer where
the product was purchased. They can take this product for
environmental safe recycling.
Warranty Information
The manufacturer provides warranty in accordance with the
legislation of the customer's own country of residence, with
a minimum of 1 year (Germany: 2 years), starting from the
date on which the appliance is sold to the end user.
10.
11.
The warranty only covers defects in material or
workmanship.
The repairs under warranty may only be carried out by
an authorized service center. When making a claim
under the warranty, the original bill of purchase
(with purchase date) must be submitted.The warranty
will not apply in cases of:
-Normal wear and tear
-Incorrect use, e.g. overloading of the appliance, use of
non-approved accessories
-Use of force, damage caused by external influences
-Damage caused by non-observance of the user
manual, e.g. connection to an unsuitable mains supply
or non-compliance with the installation instructions
-Partially or completely dismantled appliances
2

WIFI:2400-2483.5MHz, MAX POWRE:20dBm.
BLUETOOTH MAX POWR:10dBm
To satisfy RF exposure requirements, a separation
distance of 20 cm or more should be maintained between
the antenna of this device and persons during device
operation.To ensure compliance, operations at closer than
this distance is not recommended.
CLASS 1 LASER PRODUCT
INVISIBLE LASER RADIATION
(Note: Laser classified to Class 1 according to
IEC 60825-1:2014)
12.
13.
1.
2.
3.
4.
5.
6.
“IMPORTANT SAFETY INSTRUCTIONS – SAVE
THESE INSTRUCTIONS" and "DANGER – TO
REDUCE THE RISK OF FIRE OR ELECTRIC SHOCK,
CAREFULLY FOLLOW THESE INSTRUCTIONS".
This appliance can be used by children aged from 8
years and above and persons with reduced physical,
sensory or mental capabilities or lack of experience and
knowledge if they have been given supervision or
instruction concerning use of the appliance in a safe
way and understand the hazards involved.
Children shall not play with the appliance.
Cleaning and user maintenance shall not be made by
children without supervision.
Plug must be removed from the socket-outlet before
cleaning or maintaining the appliance. Switch off before
cleaning or maintaining the appliance.
If the supply cord is damaged, it must be replaced by
the manufacturer, its service agent or similarly qualified
persons in order to avoid a hazard.
Docking base is only applicable to the product MVC-S8+.
(Battery pack type: Li-ion, DC 14.4 V, 5200 mAh)
The Docking base will automatically start charging after
Robot Vacuum Cleaner returned to the base.
Warning: The battery charger(Docking station) is not
intended to charge non-rechargeable batteries.
Warning for docking station
3
7. CAUTION: In order to avoid a hazard due to inadvertent
resetting of the thermal cut-out, this appliance must not be
supplied through an external switching device, such as a timer,
or connected to a circuit that is regularly switched on and off by
the utility.
Warning for battery
1.
2.
3.
4.
5.
6.
7.
8.
9.
10.
11.
12.
13.
The product must be powered off before removing
the battery;
Please note that do not disassemble the battery by yourself.
If you need to replace it, please contact the after-sales
service center.
Please dispose of used battery according to local laws
and regulations.
Do not dismantle, open or shred the battery.
Do not expose batteries to heat or fire. Avoid storage in
direct sunlight.
Do not short-circuit a battery.
Do not store batteries haphazardly in a box or drawer where
they may short-circuit each other or be short-circuited by other
metal objects.
Do not subject batteries to mechanical shock.
In the event of a leaking, do not allow the liquid to come in
contact with the skin or eyes. If contact has been made,
wash the affected area with copious amounts of water and
seek medical advice.
Do not use any charger other than that specifically provided
for use with the equipment.
Do not use any battery which is not designed for use
with the equipment.
Do not mix different manufacture, capacity, size or type
within a device.
14.
15.
Keep batteries out of the reach of children.
Seek medical advice immediately if the battery has
been swallowed.
[symbol IEC 60417-5957
( 2004-12 )]
[symbol ISO 7000-0790
( 2004-01 )]
[symbol IEC 60417-5031
( 2002-10 )]
[symbol IEC 60417-5032
( 2002-10 )]
[symbol IEC 60417-5172
( 2003-02 )]
time-lag miniature fuse-link where X is the symbol for the
time/current characteristic as given in IEC 60127
for indoor use only
read operator's manual
direct current
alternating current
class II equipment
4

16.
17.
18.
19.
20.
21.
Keep batteries clean and dry.
Do not leave a battery on prolonged charge when not in use.
After extended periods of storage, it may be necessary to
charge and discharge the batteries several times to obtain
maximum performance.
The batteries give their best performance when they are
operated at normal room temperature (20 °C ± 5 °C).
Retain the original product literature for future reference.
The battery may be irreversibly damaged if the battery is in
low power for a long time. It is recommended that the battery
retain sufficient power before storage.
Product Model: MVC-S8+
Host Charging Voltage: 16.9 V
Host Rated Voltage: 14.4 V
Host Rated Power: 55 W
Docking Station Model: BS2101
Docking Station Input: 220-240V~, 50-60Hz, 765W
Docking Station Output: 16.9V , 2A
Battery Model: BP14452F
Battery Rated Voltage: 14.4V
Battery Capacity: 5200mAh 74.88Wh
Charging Limit Voltage: 16.8V
1.
2.
3.
4.
5.
6.
7.
8.
9.
10.
11.
Note: you can also view the instructions on the app.
Technical data
5
Correct Disposal of this product.
This marking indicates that this product should not be
disposed with other household wastes throughout the EU.
To prevent possible harm to the environment or human
health from uncontrolled waste disposal, recycle it
responsibly to promote the sustainable reuse of material
resources. To return your used device, please use the
return and collection systems or contact the retailer where
the product was purchased. They can take this product for
environmental safe recycling.
Warranty Information
The manufacturer provides warranty in accordance with the
legislation of the customer's own country of residence, with
a minimum of 1 year (Germany: 2 years), starting from the
date on which the appliance is sold to the end user.

Upper-level layout
Introduction
Front view (with the cover not opened)
Overview of main unit
Return-to charge key Bumper plate
Power-on and power-
off/start/pause key
Laser radar
Vibration mopping assembly/
Water tank (including an
electrolytic water module inside)
Cover lifting port
Wi-Fi
Dust-box release
Cleaning brush
Reset
Dust box
Tank release
Anti-drop sensor
Charging chips
Special rag for
vibration mopping
Water outlet
(under the rag)
Universal wheel
Side brush
Drive wheel
Roller brush cover
Front view
(with the cover opened)
Bottom view
Lower-level Layout
Included accessories
Main Unit
Dust Collector
Station
6

Parts introduction of dust collector station
Bottom view
Indicator
Return-to-charge
signal emission area
Air outlet
Air inlet
Top cover
Top cover release
button of dust collector station
Air intake duct
Air exhaust
duct
Charging chips
Power cord
storage slot
7

4. Ensure the charging area is dry;
7. Keep the charging chips of the dust collector station dry and neat,
and clean and wipe them regularly.
6. If there are other cleaner charging
stations in your room, please store them
before using the dust collector station;
Installation
Cautions
Installation of dust collector station
1. Avoid direct sunlight;
2. Do not cover the signal emission area of
the dust collector station with stickers or
other objects;
3. Prevent putting the station
on carpets or soft surfaces;
1. Place the dust collector station against the wall on a hard floor;
2. Place the dust collector station in an area with Wi-Fi coverage, ensuring
stable networking of main unit and good functional experience of its App.
5. Store the power cord;
0.5m
0.5m
1.5m
8

Use guide for vibration mop assembly
Water inlet/outlet
2. Remove the rubber plug, and fill the
tank with water to the MAX line;
Cautions
1. Fill the tank with municipal water
instead of purified water;
2. Do not add washing powder, laundry
detergent, cleaning agents, disinfectants,
hand sanitizers, unknown oily liquids,
and alkaline substances;
4. Do not fill the tank with hot water to prevent
its distortion at high temperature;
3. Do not use the mopping function
on floor carpets;
6. The mopping water volume can be
adjusted in the App.
5. Keep the terminal dry and clean
before pushing in the vibration
mopping assembly.
Special rag for vibration mopping
Terminal
Water speed
Adhere the special rag for vibration mopping
to the bottom of the vibration mopping assembly
by aligning it along the middle seam, and you
can clean/replace it by simply peeling it off;
4. Push the vibration
mopping assembly in
the main unit until a
"click" sound is heard;
Mop Cloth Holder
Mop Cloth
Attach mopping holder to the
water tank.
1. Press the button on tank
and pull to remove.
Water Tank
9

Installation of side brushes
Instructions prior to use
Robot charging
2. Use relevant objects to block the robot, or establish a virtual wall in
the App;
Cautions
1. Prior to startup, clear away sundries
on the floor, and remove easily falling,
fragile, valuable, and possibly
hazardous items;
3. If there is an area that does not need cleaning or may trap the robot,
you can add a prohibited area or virtual wall at the appropriate location in
the map of the App, to prevent the robot from entering specific areas.
1. If the robot cannot be charged, check whether the charging chips on the
robot's bottom are blocked by fair bundles of left and right side brushes.
If yes, manually rotate relevant side brush to eliminate such blockage.
By keeping the side brush color
consistent with the side brush slots on
the base of the main unit,push the side
brush into the slot directly until a “click”
sound is heard;
To remove the side brush,turn the
robot’s bottom upwards,and grasp the
side brush by its rubber-coating leg(take
care not to pull on hair bundles of the
side brush with brute force)with your two
hands to pull it off.
Before first use, put robot on the station
closely, and make sure robot is in charging
status for first use, then start robot.
For future use, robot can automatically goes
to the charging base when cleaning is
finished.
1010

Power off
1. Long press " " for 3 seconds, and the power indicator starts to flash;
2. The robot sounds a chord voice, and the power indicator is off, indicating the robot is
powered off successfully;
Operating Guidelines
Power-on methods
Start the cleaning
1. During the standby mode, briefly press " " for 1 second, and the robot starts
to clean the whole room;
2. If you want to mop the floor, it is required to confirm that the vibration mopping
assembly is installed properly.
Pause the cleaning
1. During the cleaning, briefly press " " for 1 second, and the robot pauses the
cleaning and enters its standby status.
Return to charge
Troubleshooting
1. When the robot fails, the power indicator flashes quickly. Briefly press " " for 1
second to eliminate the fault;
Cautions
1. When it is not possible to start the
cleaning due to low battery level, please
charge the robot before starting the cleaning;
5. The robot cannot be powered off when being located in the charging station,
and if you need to power it off, remove it from the station.
or
2. The robot will return to charge
automatically during the cleaning in case
of low battery level, and then return to its
interruption point to proceed after being
fully charged;
3. During the charging, the power indicator
flashes slowly, and becomes continuously
on after completion of the charging;
4. The robot will enter its sleep mode
after being standby for more than 10
minutes, and in this mode, pressing
any key on the robot will awaken it;
1. When putting the robot in the charging station to charge, it will turn on
automatically (recommended practices)
2. Long press " " for 3 seconds, the power indicator flashes, the robot sounds
a chord voice, and the power indicator is continuously on, indicating the robot
is powered on successfully.
1. When the robot returns to charge after completion of the cleaning, the
return-to-charge indicator is continuously red;
When the robot returns to charge due to low battery level, the return-to-charge
indicator flashes.
2. ①During the standby mode, briefly press " " for 1 second, and the robot starts to
return to charge;
②During the cleaning, briefly press " " for 1 second, and the robot pauses the
cleaning; then briefly press " " for 1 second, and the robot starts to return to charge;
3. In case of special conditions (such as depleted battery, stuck robot etc.), the main
unit may not return to charge automatically. Please manually place the main unit
back to its charge station to charge.
1111
Connect Robot to Station
1.Fast Connect:When robot is under powered-off status,long press “ ” for 3 seconds.
The connection will automatically complete after robot turned on.A sound of “Di-du”
means connected successfully.
2.Connect Manually:When robot is under powered-on status,long press “ ” and “ ”
for 3 seconds at the same time.If connected successfully,a “Di-du” sound will be heard
and station indicator light will flicker 3 times.

Manual
dust
collection
Dust collection settings can be changed on the MSmartHome APP,
The dust collection length can be set from 6 to 14 seconds.
The dust collection frequency can be set 1 time, 3 times or 5 times
after cleaning.
The dust collection station will start to work automatically when
the robot returns to the dust collection station as it reaches the
scheduled cleaning times.
When the cleaning is finished, the robot can be returned to the dust
collector station manually. Dust collection will automatically start when
the robot reaches the scheduled cleaning times.
When the robot returns to the charging station,
press “Manual dust collection” to start dust collection.
Dust Collection Methods
12

Status indicators of the dust collector stationStatus indicators of the main unit
Indications SolutionsStatus
/
/
/
/
/
Indications SolutionsStatus
/
/
See Troubleshooting
(Page 11) for fault solutions
/
/
/
/
/
/
/
/
/
/
Standby indicator is
continuously on
Standby indicator is off
Standby indicator flashes
quickly
Standby indicator flashes
slowly
Return-to-charge indicator
is continuously on
Return-to-charge indicator
flashes
Return-to-charge indicator
is off
WiFi indicator is off
WiFi indicator flashes
slowly
Wi-Fiindicator flashes
quickly
WiFi indicator is
continuously on
Electrolytic water indicator
is on
Electrolytic water indicator
is off
Robot is standby, cleaning, and
return-to-charge after completion of
cleaning
Sleep/shutdown
Robot is faulty
Robot is charging
Robot is return-to-charge after completion
of cleaning
Robot is return-to-charge due to low
battery level
Robot is standby/cleaning/charging
Robot is not network paired or
disconnected from the network
Robot is waiting for network pairing
Robot is networking
Robot shows normal connection with the
network
Electrolytic water module is operating
Electrolytic water module does not start
Off
White indicator is
continuously on
Red indicator is
continuously on
Red indicator
flashes
Dust collector station is not powered
Dust collector station is standby
Dust collector station has been powered for a
while
Robot returns to the dust collector station,
starting to collect dust automatically
Dust collector station is collecting dust
Dust bag is full
Dust bag is not installed in place or dust collector
station is not tightly covered with its top cover
Please replace it with a new
dust bag
Install the dust bag and close
the top cover tightly
13

App supports iOS 9.0 and above, Android 6.0 and above phone system versions,
but Pad device is not accepted; Generally the phone system version may be
checked by clicking “Settings-About Mobile Phone” in the mobile phone;
This model does not support WEP encrypted router;
Wi-Fi network of
2.4GHz frequency range,5GHz frequency range is not currently compatible;
WiFi/2G/3G/4G network environment and the cleaner may be controlled remotely;
If your home Wi-Fi password is changed or the router is replaced, the cleaner will
be displayed offline on app, Without any changes of App account number, you
If others want to use App to operate same cleaner, they need be invited on App
by the family creator to join in (on the condition that the invitee has downloaded
App and registered an account);
When App changes, the old users may be invited to remove device on mobile App
with network accessing instructions (if the old users don’t remove the device on
successfully network accessing);
operations will result in clearance of Wi-Fi settings and secondary network
Wi-Fi information will be cleared;
1.
2.
3.
4.
5.
6.
7.
8.
9.
W iFi
Connect your robot to your Wi-Fi.
After assembling and powering on the robot , press and hold down the
" " button for 3 seconds until a beep is heard. The Wi-Fi indicator
light should start to flicker.Follow instructions on app for next steps.
4.
MSmartHome APP
If your home Wi-Fi name or password is changed, you will need to reestablish
connection with your robot vacuum.
Ensure mobile phone is connected to your home Wi-Fi.1.
Wi-Fi
Download the MSmartHome app and register your vacuum:2.
a.
b.
Scan the QR code or search for the MSmartHome app in
the Apple or Google Play store.Download the app.
Open the app and create your personal account.
Follow instructions on the screen.
Using APP
Add your robot vacuum to your app
Press the " + " button on the main screen of the app and select S8+
from the available list of products.
3.
Register and login
personal account
Add Equipment
Notes
1414

Manual
dust
collection
Notes
If the Wi-Fi in your home is unstable , it may cause a certain delay in
the related operations of the MSmartHome App (The content of the
MSmartHome App is subject to the upgraded version of App. Please refer
to the MSmartHome interface for details).
Back to
Cleaning
Time
Cleaning
Area
Charge Start
Cleaning
previous page
Sterilization
Switch
Cleaning
Setting
Forbidden
Area Setting
Note: This interface will be upgraded later,this interface is for reference only.
MSmartHome APP Quick Guide
15

Daily maintenance and service
Dust-box release key
1. Remove the dust box:
Pinch the dust box with your two
fingers, and press the dust box
release key with another hand
to remove the box.
2. Dust removal: open the dust box,
and remove dust from the box;
Filter assembly
3. Remove the filter assembly according to
text prompts on the filter assembly;
Maintenance of dust box (cleanup as required)
5. Clean dust from the dust collection port of the dust box.
Dust box Filter cotton Filter assembly
Dry in the air
4. Clean the
dust box, filter
assembly, and filter
cotton; after cleaning and
drying completely, re-install
them, and close the rear cover,
check whether it is installed in
place;
(Both of the dust box and the filter
assembly can be washed with wate)
16

5. Dry the vibration mopping assembly
and the special rag for vibration mopping;
Maintenance of vibration mopping assembly (weekly cleaning recommended)
4. Clean the rag;
Water inlet/outlet
5g
3. Pull off the water inlet/outlet plug from the
tank to drain all water in the tank; wipe
the tank surface with a piece of clean rag,
not cleaning the vibration tank with water;
6. Clean up water scales regularly according
to operating instructions. Fill the tank with
water to the MAX line, add 5g citric acid to
soak for 30 minutes, then pour out the
water and clean again with new water.
Repeat the above cleaning procedures for
heavy scales. During the cleaning, do not
energize the tank.
1. Press the button on tank and pull to remove. Once finished mopping,presee the water tank release
button the water tank.Detach the mop holder by
pulling them apart.
Water Tank
Mop Cloth Holder
Mop Cloth
For vibration tank, please note that the
pad cannot be removed, just remove
mop cloth, and wash it for next use.
17
Table of contents
Languages:
Other Midea Vacuum Cleaner manuals

Midea
Midea P7 MAX Wiring diagram

Midea
Midea KH19P User manual

Midea
Midea VTW21A15T-140 User manual

Midea
Midea MVC-12M-GR User manual

Midea
Midea C100-B Administrator Guide

Midea
Midea VTW21A15T User manual

Midea
Midea VHS01A17Z0A User manual

Midea
Midea M6 User manual

Midea
Midea 386600-i5C User manual

Midea
Midea VCS7P User manual

Midea
Midea MCS1825GB Pro User manual

Midea
Midea VC-15C189 User manual

Midea
Midea MVC-16P-BG User manual

Midea
Midea MVC-RTB2-R User manual

Midea
Midea M7 Pro User manual

Midea
Midea VC-02A14S User manual

Midea
Midea i5 Extra User manual

Midea
Midea H3 Series User manual

Midea
Midea MVC-16T-B User manual

Midea
Midea VCS861B User manual