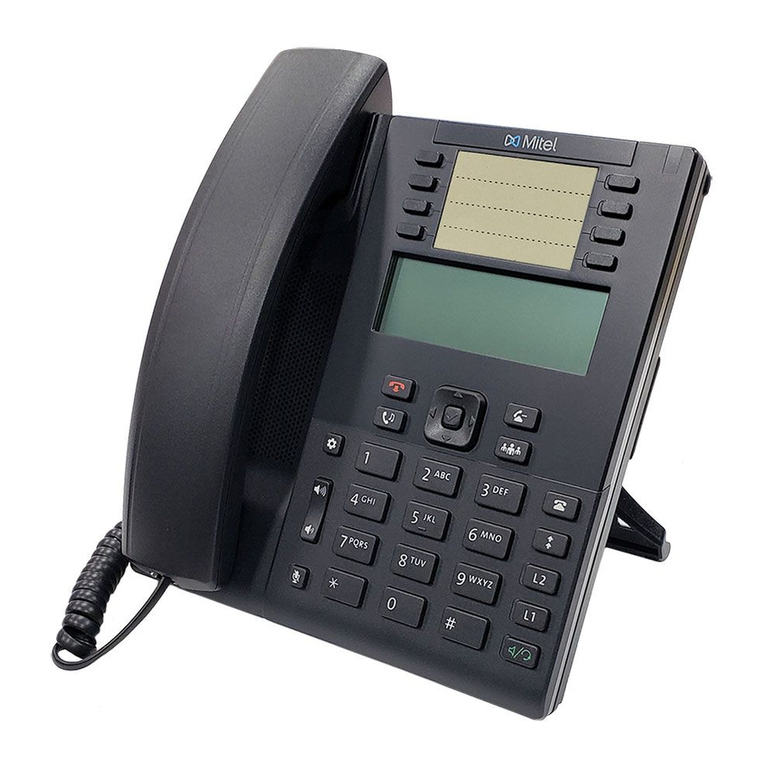
Mitel NAVIGATOR Service manual

SIP USER and ADMINISTRATOR GUIDE

NAVIGATOR - SIP User and Administrator Guide
ii
NOTICE
The information contained in this document is believed to be accurate in all respects but is not
warranted by Mitel Networks™ Corporation (MITEL®). The information is subject to change
without notice and should not be construed in any way as a commitment by Mitel or any of its
affiliates or subsidiaries. Mitel and its affiliates and subsidiaries assume no responsibility for any
errors or omissions in this document. Revisions of this document or new editions of it may be
issued to incorporate such changes.
Mitel is a registered trademark of Mitel Networks Corporation.
Internet Explorer is a trademark of Microsoft Corporation.
Netscape Navigator is a trademark of Netscape Communications Corporation.
Other product names mentioned in this document may be trademarks of their respective
companies and are hereby acknowledged.
Navigator SIP User and Administrator Guide
Release 1.0
February 2006
®,™ Trademark of Mitel Networks Corporation
© Copyright 2006, Mitel Networks Corporation
All rights reserved

Table of Contents
iii
GETTING STARTED ............................................................................................1
SIP User Accounts and Passwords ............................................................................... 1
SIP Administrative Mode ............................................................................................... 1
About Your SIP Phone................................................................................................... 1
Elements of Your Phone ...........................................................................................................2
Call Encryption Indicator ...........................................................................................................4
Accessories for Your Phone .......................................................................................... 4
Headsets ...................................................................................................................................4
PC Accessories .........................................................................................................................4
Supporting Documentation ............................................................................................ 5
Access the Web Configuration Tool Online Help......................................................................5
Access Other Documentation ...................................................................................................5
ABOUT THE NAVIGATOR TASK BAR ...............................................................6
Connect to the Navigator Task Bar................................................................................ 6
Elements of Your Navigator Task Bar ........................................................................... 7
Use the Navigator Task Bar........................................................................................... 8
Display the Task Bar .................................................................................................................8
Hide the Task Bar......................................................................................................................8
Scroll through Task Bar Pages .................................................................................................9
Close the Task Bar....................................................................................................................9
Use the Task Bar Personal Keys ..............................................................................................9
Use the Task Bar Tray Icon Menu ............................................................................................9
Customize the Task Bar Appearance .......................................................................... 10
Program Task Bar Personal Keys ............................................................................... 10
View Task Bar Key Programming ...........................................................................................11
Program a Speed Call Key......................................................................................................11
Program a Feature Key...........................................................................................................11
Program a PC Application Key................................................................................................12
Program an Open Document Key ...........................................................................................13
Program an Open URL Key ....................................................................................................13
Program a Hide/Display Task Bar Key....................................................................................13
Program a Navigator Keys Help Key ......................................................................................14
Clear Task Bar Key Programming ..........................................................................................14
Copy Task Bar Key Programming...........................................................................................14
Edit Task Bar Key Programming.............................................................................................14
Task Bar Shortcuts ...................................................................................................... 15
CUSTOMIZING YOUR PHONE.......................................................................... 17
Superkey Menu Interface............................................................................................. 17

NAVIGATOR - SIP User and Administrator Guide
iv
Web Configuration Tool ............................................................................................... 17
Web Configuration Tool Accounts and Passwords.................................................................17
Accessing the Web Configuration Tool ...................................................................................18
Display-Assisted Feature Selection ............................................................................. 18
Select Menu Options ...............................................................................................................18
Enter Numbers and Letters .....................................................................................................18
Ringer Volume Control ................................................................................................ 19
Ringer Pitch Control..................................................................................................... 20
Handset Volume Control.............................................................................................. 20
Speaker Volume Control.............................................................................................. 20
Display Contrast Control.............................................................................................. 20
Display Language ........................................................................................................ 20
Personal Keys.............................................................................................................. 21
View Speed Dial Key Programming ........................................................................................21
Program a Speed Dial Key......................................................................................................21
Programming Features in Speed Dial Keys ............................................................................22
Delete a Speed Dial Key .........................................................................................................23
Use PC Accessories .................................................................................................... 23
MAKING AND ANSWERING CALLS ................................................................25
Making Calls ................................................................................................................ 25
Dial by Number........................................................................................................................25
Dial by Name...........................................................................................................................25
Dial by SIP URL or IP Address ...............................................................................................25
Dial by Phone Book Entry .......................................................................................................26
Dial by Call Logs Entry............................................................................................................26
Redial ......................................................................................................................................26
Answering Calls ........................................................................................................... 26
Answer a Call ..........................................................................................................................26
Auto Answer ............................................................................................................................27
Answer a Call Waiting .............................................................................................................27
Calling and Called Party Display ................................................................................. 27
CALL HANDLING ..............................................................................................28
Hold ............................................................................................................................. 28
Hold a Call...............................................................................................................................28
Retrieve a Call from Hold ........................................................................................................28
Change On-Hold Settings .......................................................................................................28
Call Forward ................................................................................................................ 28
Program Call Forward .............................................................................................................28

NAVIGATOR - SIP User and Administrator Guide
v
Enable/Disable Call Forward...................................................................................................29
Call Transfer ................................................................................................................ 29
Transfer a Call to an Unconnected Third Party.......................................................................29
Transfer a Call to a Third Party Already on Hold ....................................................................30
Conference Call (Three-Way)...................................................................................... 30
Add a Third Party to a Call in Progress...................................................................................30
Add a Party On Hold to a Call in Progress..............................................................................30
Leave a Conference Call.........................................................................................................30
Messages - Advisory ................................................................................................... 31
Create an Advisory Message ..................................................................................................31
Enable/Disable your Advisory Message..................................................................................31
Messaging – Voice Mail............................................................................................... 31
Access your Voice Mail Messages..........................................................................................31
USING ADVANCED FEATURES ....................................................................... 32
Do Not Disturb ............................................................................................................. 32
Enable/Disable Do Not Disturb ...............................................................................................32
Call Logs...................................................................................................................... 32
View a Call Log Entry..............................................................................................................32
Delete a Call Log Entry ...........................................................................................................33
Call a Call Logs Entry..............................................................................................................33
Call Forking.................................................................................................................. 33
Handset, Handsfree and Telephony Headset Modes.................................................. 33
Switch between Handset and Handsfree................................................................................34
Switch between Handset and Telephony Headset .................................................................34
Switch between Telephony Headset and Handsfree ..............................................................34
Use a PC Headset...................................................................................................................34
Muting a Call................................................................................................................ 35
Phone Book ................................................................................................................. 35
Create a Phone Book Entry ....................................................................................................36
Modify a Phone Book Entry.....................................................................................................36
Delete a Phone Book Entry.....................................................................................................36
Call a Phone Book Entry .........................................................................................................36
Shared Lines and Keys................................................................................................ 37
Programming Shared Line Keys .............................................................................................37
Line Key Status .......................................................................................................................38
Time and Date ............................................................................................................. 38
Change the Time and Date .....................................................................................................38
ADMINISTRATOR TOOLS ................................................................................40
SIP Administrator Phone Passwords........................................................................... 40
NAVIGATOR - SIP User and Administrator Guide
vi
Change Phone Passwords......................................................................................................40
SIP User Accounts....................................................................................................... 40
Configure/Modify a SIP User account .....................................................................................40
View a User Name ..................................................................................................................40
Device Parameters ...................................................................................................... 41
Protocols...................................................................................................................... 41
Enable/Disable Protocols ........................................................................................................41
SRTP Call Encryption Indicator...............................................................................................42
Viewing/Modifying the Network Settings...................................................................... 42
View the IP and MAC Addresses ............................................................................................42
Modifying Network Settings.....................................................................................................42
Upgrade the Phone’s Firmware ................................................................................... 43
View the Firmware Version .....................................................................................................43
Upgrading the Firmware..........................................................................................................43
Automating Firmware Upgrades .............................................................................................44
Using SIP Enhanced Mode.......................................................................................... 44
Voice Mail .................................................................................................................... 44
Configuring Voice Mail ............................................................................................................45
Adjust Daylight Savings ............................................................................................... 45
Configuration Files....................................................................................................... 45
Hot Line ....................................................................................................................... 45
Media Configuration..................................................................................................... 45
Main Program and Boot Program Configuration Options ............................................ 45
SPECIFICATIONS..............................................................................................47
GLOSSARY........................................................................................................47

1
Getting Started
In SIP mode, the Mitel®Navigator manages its own call states and features. SIP uses the Internet
to connect your phone to other SIP phones. To make a call you can dial by SIP URL or by IP
address. You can also make calls to phones on the Public Switched Telephone Network (PSTN),
or “regular”, phone network. If you have an account with a SIP Service Provider, you can also dial
by a user ID (Identification) name or extension number.
In SIP Enhanced mode, your Navigator IP Phone becomes a dedicated SIP phone with advanced
SIP-B features like shared lines (also called "Bridged Line Appearance" (BLA) in Sylantro
environments or "Shared Call Appearance" (SCA) in Broadsoft environments). For more
information about SIP Enhanced mode, refer to Administrator Tools on page 3.
For information on how to program and change features on your SIP-supported phone, refer to
this guide and to the Web Configuration Tool online Help (see Supporting Documentation on
page 3).
SIP User Accounts and Passwords
Your Administrator usually configures SIP accounts for SIP phone Users and Administrators. You
need a SIP User account in order to
•Register your phone with your SIP Service Provider
•Make calls by dialing a user ID name or extension number
•Access the Web Configuration Tool.
If you do not have a SIP user account, you can use your phone with limited access to some SIP
features and functionality (for example, you will not be able to dial by user ID name or extension
number, or to access the Web Configuration Tool).
SIP Administrative Mode
Administrators need an administrator account and password to
•Modify network configuration settings and SIP Service Provider information
•Access SIP setting menus through the phone’s Superkey menu interface and Web
Configuration Tool.
See Administrator Tools on page 3 for more information.
About Your SIP Phone
The Navigator has eight fixed-function keys, two arrow keys, and 24 Personal Keys for one-touch
access to features. The Navigator also offers display-assisted selection of features, on-hook
dialing, handsfree speakerphone capability, and a large Ring/Message Indicator.
Note: The Navigator Task Bar application is a necessary part of your Navigator phone. You
must have the Navigator Task Bar application installed on your PC. The Navigator Task Bar
is supported on Microsoft™ Windows 2000, 2000 Professional and XP operating systems.

NAVIGATOR - SIP User and Administrator Guide
2
For more information about installing the Task Bar, refer to the Navigator Installation Guide
shipped with your phone.
For more key and feature information, see Elements of Your Phone on page 3.
Figure 1: Navigator
Elements of Your Phone
Each element is numbered according to the call-outs (e.g. n) in Figure 1 on page 3.

NAVIGATOR - SIP User and Administrator Guide
3
Element Function
nVolume and
Contrast Controls
(UP) and (DOWN) arrow keys control display contrast and
volume levels for the ringer, handset, and handsfree speakers.
Arrows keys also allow you to change character (letter) input from
upper or lower case and vice versa.
oFixed-Function
Keys •(MESSAGE): accesses your voice mailbox (optional).
•(TRANS/CONF): initiates a call transfer or establishes a
three-party conference call.
•(HOLD): places the current call on hold.
•(SUPERKEY): provides access to the phone's menus.
•(SPEAKER) puts the phone in Handsfree operation.
•(CANCEL): ends a call, and eliminates any input and
returns to the previous menu level during phone programming.
•(MUTE) toggles the microphone off and on. When it is ON,
the microphone is OFF and your party cannot hear you.
•(REDIAL): calls the last-dialed number, name, SIP URL,
or IP address.
pProgrammable
Personal Keys
Provides 24 keys (8 physical phone keys that correspond to 3
pages of eight programmable keys each on the Navigator Task
Bar) for one-touch access to Speed Dial, Shared Lines, Call
Logs, Forwarding, Headset, Phonebook, Do Not Disturb, and
Advisory Message features.
Personal keys can also be programmed to launch PC
Applications, open PC documents, and open your browser to
navigate to URLs. You can also program the remaining Personal
Keys as Shared Line keys.
The 8 physical phone keys correspond to 3 pages of eight
programmable key each on the Navigator Task Bar. See Personal
Keys on page 3.
qKeypad Use for dialing.
rSpeakers Transmits audio during a Handsfree call.
sHandset Used for handset calls.
tRing and Message
Indicator
Flashes to signal incoming calls and to indicate a message waiting
in your voice mailbox.
The indicator is ON solid while the phone reboots.
uSoftkeys Context-sensitive softkeys enable you to easily view and select
features.
vDisplay Two-line, 20-character liquid crystal display (LCD) viewing area for
selecting and using phone features, accessing your voice mail,
and identifying callers.
Superkey menu options appear on the display screen.
The stand built into your phone tilts to give you a better view of the
display. To adjust the angle of the phone, refer to the Installation
Guide shipped with your phone.

NAVIGATOR - SIP User and Administrator Guide
4
Call Encryption Indicator
The Navigator automatically provides Secure Real-time Transport Protocol (SRTP) voice
encryption when connected to a phone that also supports SRTP. A “secured call” icon (closed
padlock) appears on the display for encrypted calls, and for conference calls in which all
connected parties support SRTP. An “unsecured call” icon (open padlock) appears on the display
when the call connection is not secured (the connected party or parties do not support SRTP
encryption). For an icon to appear, SRTP must be enabled. Your Administrator can enable SRTP
on your phone.
Note: The padlock icon appears only when you are speaking to a party; it does not appear if
you receive a busy signal.
Accessories for Your Phone
Headsets
Mitel recommends Plantronics headsets. You can connect two different kinds of headsets to your
Navigator:
•Commercial telephony headset with Feature Control Switch – referred to as a “Mitel Headset”
in this guide. Mitel Headsets must be installed in the dedicated headset jack (the jack on the
back of the phone).
OR
•Stereo (PC) headset with or without microphone – referred to as a “PC headset” in this guide.
PC headsets (with or without microphone) connect to the PC headset jack (and PC
microphone jack) on the right side of the phone. Installing a PC headset with microphone
disables your Handsfree microphone. Disconnecting the PC headset with microphone at the
jack restores Handsfree operation.
Note: Procedures that do not specify “PC” or “Mitel” apply to both kinds of headset.
PC Accessories
Connect personal computer (PC) accessories — including PC headsets (with or without
microphone) and PC speakers — to your Navigator to do the following:
•Play audio (for example, music) from your PC on the Navigator Handsfree speakers.
•Hear audio from your PC through a PC headset that is connected to the Navigator and be
ready to receive or make a call in Headset mode.
•Hear audio from your PC through your PC speakers (normal PC speaker operation). When
connected to the Navigator, PC speakers play audio only when the phone is idle.
See Use PC Accessories on page 3 for more information about how to handle calls and play
music using your PC accessories.
To connect your PC headset to the Navigator:

NAVIGATOR - SIP User and Administrator Guide
5
1. Plug your PC headset cable into the PC headset port on the right side of the phone.
2. If you are connecting a PC headset with microphone, plug the microphone cable into the PC
microphone port on the right side of the phone.
To connect PC speakers to your Navigator:
•Plug the PC speaker cable into the speaker port on the back of the phone.
To play music from your PC on your Navigator Handsfree speakers:
•Plug the Navigator audio cable into the appropriate port on your PC.
For more detailed information on connecting PC accessories to the Navigator, refer to the
Navigator Installation Guide shipped with the phone.
Supporting Documentation
Access the Web Configuration Tool Online Help
To access the Web Configuration Tool online Help:
1. Access the Web Configuration Tool Home Page (see Accessing the Web Configuration Tool
on page 3).
2. Scroll to the bottom of the page.
3. In the left pane, click Help under Support. The Help page opens, presenting links to this
guide and the User Web Configuration Tool online Help.
Note: If you have administrative privileges, you will have access to both the User and the
Administrator Web Configuration Tool online Help systems.
Access Other Documentation
To access other Mitel phone and peripheral documentation:
1. In your browser, go to www.mitel.com .
2. Move your mouse pointer over Support, and then select Documentation Library.
3. From the drop-down list, select User Guides.

NAVIGATOR - SIP User and Administrator Guide
6
About the Navigator Task Bar
Use the Navigator Task Bar to make calls, program Personal Keys, launch PC applications, or
open a URL directly from your PC. The Task Bar can be customized to suit your communication
needs.
Note: To install and connect to the Navigator Task Bar application, refer to the Navigator
Installation Guide shipped with the phone. Your installer or administrator may have
completed all installation procedures for you.
Connect to the Navigator Task Bar
This procedure is primarily for installers or administrators. Your administrator may ask you to
complete this procedure if you need to re-associate the Task Bar application with the Navigator
phone.
To associate the Task Bar to the phone:
1. Close any open error dialogs (for example, “Failed to connect to phone”).
2. Access the Web Configuration Tool Network Configuration page, and set CSTA to On (see
Accessing the Web Configuration Tool on page 3).
3. (Optional) If desired, specify a CSTA password in the Network Configuration page, and save
your changes.
4. Click the button on the Task Bar to access the Main Menu.
5. Select Find Phone. The Find Phone dialog appears.
6. Enter the phone IP address in the field provided.
Tip: To find the IP address of the phone, press (SUPERKEY), and then press Line 1.
The IP address of the phone appears on the display.
7. (Optional) Enter the phone password only if you specified a password in the CSTA
Password field in the Network Configuration page of the Web Configuration Tool (see Step
3).

NAVIGATOR - SIP User and Administrator Guide
7
8. Click Save and Reboot.
When the Task Bar association is completed successfully, the Task Bar Personal Keys
display any configured information (for example, Speed Call contacts, or feature labels).
Figure 2: Navigator Task Bar
Elements of Your Navigator Task Bar
Element Function
nPage Selector Selects page number for display of programmable keys. (Three
pages of 8 keys per page)
oProgrammable Personal
Keys
Provides 24 programmable keys (8 physical keys and three pages of
Task Bar keys) that can be programmed as speed call keys, feature
keys, or line appearance keys.
Personal keys correspond to the physical Personal Keys along the
top of your Navigator phone. Each Personal Key label displays
above the Task Bar key and each key has a status indicator. In this
guide, “speed call key”, “feature key”, and “line key” refer to either the
physical Personal Key on your phone, OR the corresponding key on
the Task Bar on your PC screen.
Your Prime Line key is always the last Personal Key (counting from
left to right) on the first page of keys. On a SIP-mode Navigator, the
second key from the right is Line 2.
The first Personal Key (counting from left to right) is always the
Button Page # key. Press this key to scroll to the next page of
Personal Keys.
pMain Menu Click the button to access Main Menu options including
•View – specify how you want your Navigator Task Bar to display
when you launch it. Select from Normal, Always On Top, or
Pop to Front. You can also set the Task Bar to display Full
Width to the full width of your PC screen.
•Button Page – select from Page 1, Page 2, or Page 3 of your
Personal Keys. The page currently displayed on the Task Bar
has a checkmark (9) beside it.
•Display Call Notification – use this to obtain a visual cue of
incoming calls and the associated line.
•Find Phone… – administrators or support personnel may ask you

NAVIGATOR - SIP User and Administrator Guide
8
Element Function
to select this option for resolving phone connectivity issues (for
example, re-associating the Task Bar with the phone).
•Show Keys Help… – displays a legend to help you use the Fixed
Function (icon) keys on the left keypad on the phone.
•About… – displays application version information. Support
personnel might ask you to access this information during
troubleshooting.
•Hide – hides the Task Bar. (Hide makes the Task Bar invisible
and removes the Task Bar from the Windows tool bar, but it does
not close the application.)
qButton Page View Control •or toggles between the all-Page view and the single-Page
view
rsTask Bar Control •minimizes the Task Bar ( hides the Task Bar but leaves the
application visible on your Windows tool bar).
•hides the Task Bar ( hides the Task Bar and removes the
Task Bar from the Windows tool bar, but it does not close the
application).
Note: To close (or exit) the Task Bar application, right-click the
Task Bar tray icon ( ) on your Windows tool bar and select Exit.
Use the Navigator Task Bar
By default, the Task Bar automatically displays in single-Page view on your screen when you
start up your PC. Figure 2 shows the Navigator Task Bar single-Page view. You can toggle
between the all-Page view and the single-Page view.
Note: To ensure that the Navigator Task Bar displays properly, verify that your screen meets
the minimum VGA screen requirements documented in the Navigator Installation Guide.
Display the Task Bar
To display the Task Bar if it is hidden or minimized on your screen, do one of the following:
•Double-click the Task Bar application tray icon ( ) or desktop icon .
•Right-click the Task Bar application tray icon ( ) and select Restore.
Hide the Task Bar
To hide the Task Bar, do one of the following:
•Click on the Task Bar to hide the Task Bar but leave it accessible via your Windows tool
bar.
•Click on the Task Bar to hide the Task Bar and remove it from the Windows tool bar.
•Click the button to access Main Menu, then select Hide.

NAVIGATOR - SIP User and Administrator Guide
9
•Right-click the Task Bar application tray icon ( ) and select Hide.
•Press ALT + Fon your PC keyboard.
•Press ESC on your PC keyboard.
Scroll through Task Bar Pages
To scroll through the Task Bar pages, display the Task Bar and do one of the following:
•Click the Button Page # Personal Key on the Task Bar.
•Press the left-most physical Personal Key on the Navigator phone. The left-most key scrolls
between Task Bar Pages 1, 2 and 3.
•Press F1 on the PC keyboard to display Button Page 1, F2 to display Button Page 2, or F3
to display Button Page 3.
Close the Task Bar
To close (or exit) the Task Bar application
•Right-click the Task Bar tray icon ( ) on your Windows tool bar, then select Exit.
Use the Task Bar Personal Keys
To use the feature or function assigned to a Task Bar Personal Key, do one of the following:
•Click the key once.
•Right-click the key and select Launch from the pop-up menu.
•Press the corresponding physical Personal Key on the Navigator phone. The Navigator
Personal Keys are context-sensitive — they change to correspond to the Task Bar key page
that is currently displayed on your PC screen.
Note: If a key is not programmed, pressing it produces no result. See Program Task Bar
Personal Keys on page 3.
Use the Task Bar Tray Icon Menu
The Task Bar tray icon ( ) is located on your Windows tool bar. The tray icon menu provides
the following options:
•Restore – restores the Task Bar when it is hidden. Enabled only when the Task Bar is hidden
or minimized.
•About – displays detailed information about the Navigator application.
•Hide – hides the Task Bar. Enabled only when the Task Bar is visible on your PC screen or
Windows tool bar.
•Exit – closes the Task Bar application.
To select options from the Tray Icon menu:
•Right-click the Task Bar tray icon ( ), then select the desired option from the pop-up menu.

NAVIGATOR - SIP User and Administrator Guide
10
Customize the Task Bar Appearance
You can customize your Task Bar view and location on your PC screen according to your
preference.
To customize your Task Bar view:
1. Click the button to access Main Menu.
2. Select View, and then select one of the following options:
•Normal – displays directly adjacent to the Windows tool bar (at the bottom or top of the
PC screen, depending where the Windows tool bar is located).
•Always on Top – always displays in front of other open applications
•Full Width – expands to the full width of your PC display screen.
Note: When the Task Bar view is Full Width, you cannot move (drag and drop the Task Bar).
If you wish to move the Task Bar, ensure Full Width is not selected.
To move the Navigator Task Bar:
1. Move your mouse cursor anywhere on the Task Bar except over a key or functional icon.
2. Click and hold, and then drag your cursor to the desired position on the screen.
3. Release.
Note: If you minimize, hide, or move the Task Bar, it reopens in the position it was last in.
Program Task Bar Personal Keys
You can program any Task Bar Personal Key (except the Prime Line and Button Page # keys)
to do any of the following:
•Speed call a number
•Share a line with other user(s)
•Invoke a phone feature
•Launch a PC application
•Open a document
•Open a URL
•Hide or display the Navigator Task Bar
•Display Navigator Keys Help legend.
Your administrator may also program Personal Keys as line appearances.
You can also delete key programming or copy and paste programmed information from one
Personal Key to another.
Note: The left-most Personal Key is always your Button Page # key. Your Prime Line key is
always the first Personal Key (counting from right to left) on Button Page 1.

NAVIGATOR - SIP User and Administrator Guide
11
Note: If your administrator has programmed the Task Bar keys using an external program,
then you may not be able to modify the Task Bar key programming. If the Clear option is not
available on the pop-up menu when you right-click a Task Bar key, or if the Save button is
disabled in the Edit… dialog, contact your administrator to see if you have the option to
program your Task Bar keys.
For more information about programming shared line keys, see Shared Lines and Keys on page
3.
View Task Bar Key Programming
The Task Bar key labels provide key programming information at a glance. A pop-up tool tip also
shows you more detailed key programming (for example, Home – Speed Call – 5551234).
To view the key programming for a Task Bar key:
1. Click once anywhere on the Task Bar (not on a key or functional icon) to bring your mouse
focus to the Task Bar application.
2. Move your mouse over the key.
3. Review the key programming information in the pop-up that appears.
Program a Speed Call Key
1. Right-click the Task Bar key.
2. Select Edit…
3. Select Telephone Function from the Feature menu.
4. Select Speed Call from the Select a telephone feature… drop-down menu.
5. Type the desired label for the key in the Label field.
Note: If you do not enter a label, the Label field displays Speed Call # (for example, if this is
the first Speed Call you have programmed, the default label is Speed Call 1).
6. Type the phone or extension number in the Number field.
7. Click Save.
Program a Feature Key
You can program any number of telephony Feature Task Bar keys, but you cannot program a
Feature key more than once on the same Button Page. For example, you cannot program two
Auto Answer keys or two Headset keys on the same Button Page.
You can program the features in Table 1 to the Personal Keys on the Task Bar.
Table 1: Programmable Features for Task Bar Keys
Key Function Default Key Label
Auto Answer Auto Answer
Cancel Cancel
Do Not Disturb DND
Forwarding Forwarding

NAVIGATOR - SIP User and Administrator Guide
12
Headset Headset
Hold Hold
Message Message
Phone Book Phone Book
Redial Redial
Speed Dial Speed Call 1
Superkey Superkey
Transfer/Conference Trans/Conf
To program a Task Bar Feature key:
1. Right-click the Task Bar key.
2. Select Edit…
3. Select Telephone Function from the Feature menu
4. Select the desired feature from the Select a telephone feature… drop-down menu (for
example, Do Not Disturb).
5. Enter the required information in the fields provided.
6. Click Save.
Note: You can program any number of telephony Feature Task Bar keys, but you cannot
program the same Feature key more than once on the same Button Page. For example, you
cannot program two Headset keys on the same Button Page.
Program a PC Application Key
1. Right-click the Task Bar key.
2. Select Edit…
3. Select Launch Application from the Feature menu.
4. Do one of the following:
•Select an application from the drop down list of common applications (including
Microsoft® Notepad, Outlook, Outlook Express, Word, Excel, and PowerPoint).
•Click Browse…, navigate to the executable file on your PC and click Open.
The Application field display text similar to the following: C:\Program
Files\WINword.exe.
5. (Optional) Press Name icon to apply the %NAME% command line parameter to the
application being launched. The Name command inserts the name of the current or last-
incoming caller when you press PC Application key.
6. (Optional) Press Number icon to apply the %NUMBER% command line parameter to the
application being launched. The Number command inserts the number of the current or last-
incoming caller when you press PC Application key.
Note: If either the Name or Number is not available, then the command line value is blank.
7. Type the desired label for the key in the Label field.
Note: If you do not enter a label, the Label field displays the name of the application.
8. Click Save.

NAVIGATOR - SIP User and Administrator Guide
13
Program an Open Document Key
1. Right-click the Task Bar key.
2. Select Edit…
3. Select Open Document from the Feature menu.
4. Click Browse…, navigate to the document and click Open.
5. (Optional) Press Name icon to apply the %NAME% command line parameter to the
application being launched. The Name command inserts the name of the current or last-
incoming caller when you press the Open Document key.
6. (Optional) Press Number icon to apply the %NUMBER% command line parameter to the
application being launched. The Number command inserts the number of the current or last-
incoming caller when you press Open Document key.
Note: If either the Name or Number is not available, then the command line value is blank.
7. Type the desired label for the key in the Label field.
Note: If you do not enter a label, the Label field displays the name of the document.
8. Click Save.
Program an Open URL Key
1. Right-click the Task Bar key.
2. Select Edit…
3. Select Open URL from the Feature menu.
4. Type or paste the URL in the URL field.
Tip: Copy and paste the complete URL from your browser to avoid typing errors.
5. (Optional) Press Name icon to apply the %NAME% command line parameter to the
application being launched. The Name command inserts the name of the current or last-
incoming caller when you press Open URL key.
6. (Optional) Press Number icon to apply the %NUMBER% command line parameter to the
application being launched. The Number command inserts the number of the current or last-
incoming caller when you press Open URL key.
Note: If either the Name or Number is not available, then the command line value is blank.
7. Type the desired label for the key in the Label field.
Note: If you do not enter a label, the Label field displays the name of the URL.
8. Click Save.
Tip: To ensure that the Open URL feature key launches in a new window (instead of
launching in an already open window), you may need to configure your Internet browser
settings not to reuse open browser windows. For example, in Microsoft Internet Explorer, you
select Tools followed by Internet Options, click the Advanced tab, and then ensure that the
Reuse windows for launching shortcuts option is not selected. Refer to your browser help
files for detailed procedures.
Program a Hide/Display Task Bar Key
1. Right-click the Task Bar key.

NAVIGATOR - SIP User and Administrator Guide
14
2. Select Edit…
3. Select Hide/Display Navigator from the Feature menu.
4. Type the desired label for the key in the Label field.
Note: If you do not enter a label, the Label field displays Hide.
5. Click Save.
Program a Navigator Keys Help Key
1. Right-click the Task Bar key.
2. Select Edit…
3. Select Navigator Keys Help from the Feature menu.
4. Type the desired label for the key in the Label field.
Note: If you do not enter a label, the Label field displays Show Keys Help.
5. Click Save.
Clear Task Bar Key Programming
1. Right-click the key you wish to program.
2. Select Clear.
3. Re-program the key, if desired.
Copy Task Bar Key Programming
To copy and paste programming information from one Task Bar key to another
1. Right-click the key you wish to copy programming information from.
2. Select Copy.
3. Right-click the key you wish to paste programming information to.
4. Select Paste.
Edit Task Bar Key Programming
To change key programming
1. Right-click the Task Bar key.
2. Select Edit…
3. Select the desired feature from the Feature menu.
4. Type the new label for the key in the Label field.
Note: You must enter a new label when changing Task Bar key programming. If you do not
enter a new label, the Label field displays the label that applied to the previous programmed
key.
5. Click Save.
Other manuals for NAVIGATOR
1
Table of contents
Other Mitel IP Phone manuals

Mitel
Mitel 5230 User manual

Mitel
Mitel Mitel 5330 User manual

Mitel
Mitel 6863i How to use

Mitel
Mitel 5320 User manual

Mitel
Mitel 5550 User manual

Mitel
Mitel Aastra 6751i User manual

Mitel
Mitel 5540 User manual

Mitel
Mitel Deskphone 6867 User manual

Mitel
Mitel 6930 IP User manual

Mitel
Mitel OfficeConnect 5212 User manual

Mitel
Mitel MiVoice Office 5320e User manual

Mitel
Mitel 5330 5330 User manual

Mitel
Mitel MiVoice 5340e User manual

Mitel
Mitel MiVOICE 6920 User manual

Mitel
Mitel MiVoice 6940 User manual

Mitel
Mitel OfficeConnect 5212 User manual

Mitel
Mitel MiVoice Office 5320e User manual

Mitel
Mitel 5005 User manual

Mitel
Mitel 5540 User manual

Mitel
Mitel Mitel 5330 User manual