Miura WP2-200A User manual

MIURA_CONFIDENTIAL
No. S836-583-8110
START-UP USER’S MANUAL
Water Treatment Control
Board for Boiler
WP2-200A
MIURA CO., LTD.
This document was formulated in Japan. Comply with the regulations and
standards of the country of use regarding installation and usage.
The specifications of products and components may vary with country of use
and the site situation.
INFORMATION IN THIS MANUAL MAY BE CHANGED WITHOUT NOTICE.

MIURA_CONFIDENTIAL
No. S836-583-8110
This manual applies to the settings and start-up operation of the WP2-200A water treatment
control board for boiler (hereinafter called “the control board”). When performing start-up
operation of the control board, correctly make the settings and perform the start-up
operations as described in this manual.
-Table of Contents-
1. MAIN UNIT CONFIGURATION AND NAMES OF PARTS.............................. 1
1.1 OVERALL VIEW ................................................................1
1.2 INSIDE THE BOX ...............................................................1
2. STANDARD TOOLS AND MEASURING DEVICES.................................... 2
2.1 TOOLS ......................................................................2
2.2 MEASURING DEVICES ............................................................2
2.3 START-UP OPERATION RESULTS REPORT ...............................................2
2.4 PROTECTIVE EQUIPMENT ..........................................................2
3. INSTALLATION CHECK ..................................................... 3
3.1 CHECKING THE INSTALLATION STATUS ................................................ 3
3.2 CHECKING THE WIRING STATUS ..................................................... 4
3.2.1 Power Supply and Control Wiring ......................................... 4
3.2.2 M-NET3 Communications ................................................... 4
3.2.3 DS-NET Communications ................................................... 4
4. SWITCH OPERATIONS AND LCD SCREEN DISPLAYS............................... 5
4.1 NAMES AND FUNCTIONS OF DISPLAY AREAS.............................................5
4.1.1 Names of Parts and Functions of Operation Panel.......................... 5
4.1.2 Names of Parts and Functions of DIP Switches ............................ 6
4.2 OPERATION AND DISPLAY FLOW ..................................................... 8
4.2.1 Display Flow ............................................................ 8
4.2.2 Setting Method .......................................................... 8
4.3 USER MODE .................................................................. 10
4.3.1 User Monitor ........................................................... 10
4.3.2 Alarm Notifications .................................................... 11
4.4 MAINTENANCE MODE ............................................................12
4.4.1 Selecting Items ........................................................ 12
4.4.2 Maintenance Monitor .................................................... 13
4.4.3 Selecting Setting Items ................................................ 17
4.4.4 Manual Operation ....................................................... 18
4.4.5 Alarm History .......................................................... 20
5. VARIOUS SETTINGS ...................................................... 21
5.1 HARDWARE SETTINGS ...........................................................21

MIURA_CONFIDENTIAL
No. S836-583-8110
5.1.1 Communication ID Settings for the Control Board......................... 21
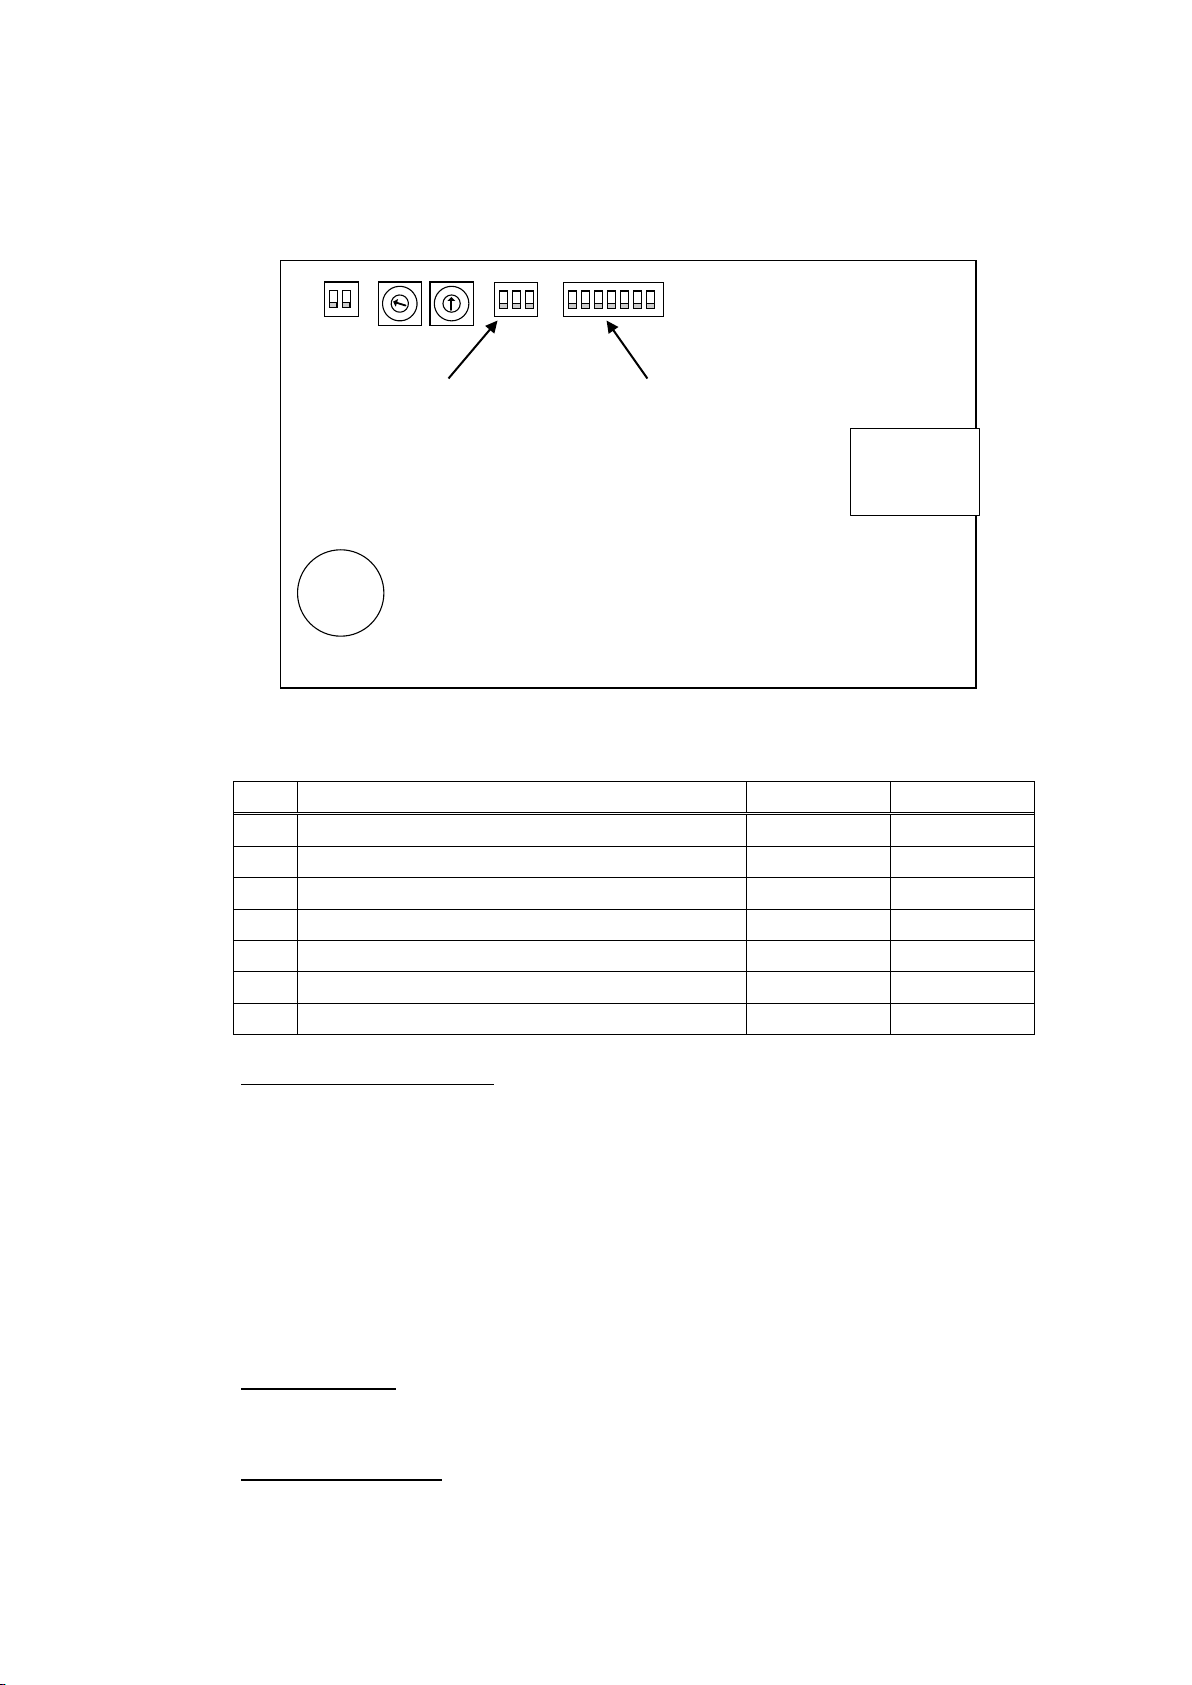
5.1.2 DIP Switch Settings .................................................... 21
5.2 SOFTWARE SETTINGS ...........................................................22
5.2.1 Chemical Feeder Settings (1 to 4) ...................................... 22
5.2.2 Feed Water Control Settings ............................................ 25
5.2.3 Condensate Recovery Settings ........................................... 29
5.2.4 ID Settings for M-NET3 Equipment ....................................... 30
5.2.5 ID Settings for DS-NET Equipment ....................................... 31
5.2.6 MSR Regeneration Control Settings ...................................... 32
5.2.7 Other Settings ......................................................... 33
5.3 ID SETTINGS AND ROM VERSION OF DS-NET EQUIPMENT ................................. 35
5.3.1 ID Settings for DS-NET Equipment ....................................... 35
5.4 SYSTEM EQUIPMENT SETTINGS .....................................................36
5.4.1 Colormetry Settings .................................................... 36
5.5 SETTINGS USING THE PC INSPECTION TOOL ..........................................37
5.5.1 Settings Using the PC Inspection Tool .................................. 37
5.5.2 External Input Contact Settings ........................................ 37
5.5.3 Alarm Notification/Report Settings ..................................... 38
5.5.4 Other Settings ......................................................... 38
6. START-UP OPERATION .................................................... 39
6.1 TURNING ON THE POWER SUPPLY ................................................... 39
6.2 CHECKING THE COMMUNICATION STATUS AND SETTINGS....................................39
6.2.1 Checking Communications with Central Management System and MIURA Office . 39
6.2.2 Checking Sensors ....................................................... 39
6.3 SUPPLYING WATER TO THE FEED WATER TANK .......................................... 40
6.3.1 Feed Water Control by Motor Valve Operation According to Feed Water Control
Signal Outputs................................................................. 40
6.3.2 Raw Water Pressure Pump Control ........................................ 40
6.3.3 Flowmeter (Instantaneous Flow Rate Display) ............................ 40
6.3.4 Low Water Level Bypass Feed Water Control .............................. 40
6.4 MI CHEMICAL FEED ............................................................41
6.4.1 Boiler Feed Water Chemical Feed ........................................ 41
6.4.2 Header Chemical Feed ................................................... 41
6.5 CONDENSATE .................................................................42
6.5.1 Initial Condensate Discharge Control ................................... 42
6.5.2 Condensate Recovery Rate ............................................... 42
7. SUPPORT DOCUMENTATION ................................................. 43
7.1 SETTING ITEMS............................................................... 43
7.1.1 Chemical Feeder Settings (1 to 4) ...................................... 43
7.1.2 Feed Water Control Settings ............................................ 44
7.1.3 Condensate Recovery Settings ........................................... 45
7.1.4 MSR Regeneration Control Settings ...................................... 46
7.1.5 Other Settings ......................................................... 46

MIURA_CONFIDENTIAL
No. S836-583-8110
Supporting data
Water Treatment Control Board for Boiler(WP2-200A) Start-Up Operation
Results Report

MIURA_CONFIDENTIAL
No. S836-583-8110
- 1-
1. Main Unit Configuration and Names of Parts
1.1 Overall View
Figure 1.1: Overall view
1.2 Inside the Box
No.
Part name
Quantity
Remarks
1
Box
1
A30N24ALP
2
CPU board assembly
1
EF21-CPU
3
I/O-A board assembly
1
EF21-I/O-A
4
I/O-B board assembly
(1)
EF21-I/O-B
5
Switching power
supply
1
24 V, 30 W
6
Earth leakage circuit
breaker
(4)
5 A, 15 mA
7
Floatless switch
1
61F-G3N
8
Molded case circuit
breaker
1
10 A, 120 V
9
Terminal block
1
WAGO60272179
11
OPR board assembly
1
EF21-OPR
No. 4 and 6 are installed when necessary.
Figure 1.2: Controller layout

MIURA_CONFIDENTIAL
No. S836-583-8110
- 2-
2. Standard Tools and Measuring Devices
2.1 Tools
A set of standard tools
PC inspection tool (This can be substituted by online communications.)
2.2 Measuring Devices
Tester
2.3 Start-Up Operation Results Report
This is appended at the end of this manual. Use a copy of this report sheet.
2.4 Protective Equipment
Wear protective equipment such as a helmet, protective glasses, protective mask, safety
shoes, and leather gloves as required for the task.

MIURA_CONFIDENTIAL
No. S836-583-8110
- 3-
3. Installation Check
* If the following conditions are not met, remedy the situation before performing start-up
operation.
3.1 Checking the Installation Status
(1) The control board is designed for indoor installation only. Ensure that the installation
location is protected from rain water and out of direct sunlight.
(2) Ensure that the control board is installed in the same room as the water treatment
equipment.
(3) Ensure that the control board is securely mounted on a vertical wall.
Figure 3.1: Maintenance space
Note 1: The door opens 24”. Ensure that the space to open and close the door + 12”or
more is available.
At least, leave adequate width for people to pass.

MIURA_CONFIDENTIAL
No. S836-583-8110
- 4-
3.2 Checking the Wiring Status
More accurate checking of the electrical wiring is possible by referring to the “Wiring”
diagrams in the Installation Manual of the water treatment control board for boiler in addition
to the check points below.
3.2.1 Power Supply and Control Wiring
(1) Ensure that the power supply meet the 120 VAC /60 Hz single-phase specifications.
(2) Ensure that the power supply capacity (capacity and wire diameter) is correct.
(3) Ensure that a dedicated earth leakage circuit breaker with overcurrent protection is
installed in the power supply wiring.
(120 VAC rated voltage, 15 A rated current, 30 mA rated sensitivity current)
(4) Ensure that the ground terminal on the control board is grounded (D-type grounding
or better).
(5) Do not install a circuit breaker in the grounding wire.
(6) Ensure that the wiring connections are correct.
(7) Ensure that the power supply ground phase is connected to terminal S on the power
supply terminal block.
(8) Ensure that the terminals have been retightened.
(9) Ensure that the length of wires to sensors such as water level sensors, electrodes,
or flowmeters is within 164ft.
3.2.2 M-NET3 Communications
The WP2-200A is compatible with M-NET3 communications. It cannot be connected to
M-NET communications.
3.2.3 DS-NET Communications
The communication wiring must be carried out for communications with the water
treatment equipment.

MIURA_CONFIDENTIAL
No. S836-583-8110
- 5-
4. Switch Operations and LCD Screen Displays
4.1 Names and Functions of Display Areas
4.1.1 Names of Parts and Functions of Operation Panel
①
②
③
⑤
④
⑧
⑦
⑥
Figure 4.1.1: Operation panel
Table 4.1.1: Description of operation panel
(1)“Normal”lamp (green)
Lights when all equipment is normal to indicate no Alarm or Notice
has occurred in the monitored water treatment equipment.
(2) “Alarm”lamp (red)
Flashes when an Alarm has been evaluated by the control board.
The flashing lamp lights continuously when the “Select/Check”
button is pressed.
The lamp goes out when the cause of the Alarm is removed and
the equipment status returns to normal.
(3) “Notice”lamp (yellow)
Flashes when a Notice has been evaluated by the control board
and a Notice has occurred in the monitored water treatment
equipment. The flashing lamp lights continuously when the
“Select/Check”button is pressed.
The lamp goes out when the cause of the Notice is removed and
the equipment status returns to normal or the Notice is confirmed
at the monitored equipment.
(4) “Select/Check”button
Used to select the water treatment information or set item.
Used to confirm details of an Alarm or Notice.
(5)LCD screen
Sequentially displays feed water tank(*) water level,
(instantaneous flow rate), Colormetry measured values, and
Alarm/Notice history as the “Select/Check”button is pressed
(5)LCD backlight
Lights when a button is pressed. Backlighting turns off if no button
is operated for ten minutes.
Also lights when an Alarm or Notice occurs in each piece of
equipment.
(6) “↑”button
Increases the set value when making settings. (Note 1)
(7) “→”button
Moves between digits when making settings. (Note 1)
(8) “Set/OK” button
Use to switch to a maintenance screen or to confirm changed
settings. (Note 1)
Note 1: Enabled when the “Maintenance display”(“Function”switch 1) is set to ON.

MIURA_CONFIDENTIAL
No. S836-583-8110
- 6-
4.1.2 Names of Parts and Functions of DIP Switches
Figure 4.1.2: Switch positions on CPU board
Table 4.1.2: List of “Function”switch functions
No.
Function
OFF
ON
1
Maintenance display
No display
Display
2
Language
Japanese
English
3
(Not used)
—
—
4
(Not used)
—
—
5
(Not used)
—
—
6
(Not used)
—
—
7
(Not used)
—
—
No. 1: Maintenance display
Turn ON to switch to the maintenance mode displays (settings, management data, manual
operation, alarm history). When the switch is turned ON, the maintenance mode is enabled,
a buzzer sounds to indicate that the maintenance mode is selected, and a screen to select
the display items appears. (The buzzer sounds continuously during the maintenance
mode.)
Turn OFF when start-up operation and inspections are complete.
(The mode does not switch to the user mode automatically. Make sure that the buzzer has
stopped.)
No. 2: Language
Turn ON to display all screens in English.
No. 3 to 7: (Not used)
Leave the not-used switches in the OFF position.
8
2
1
3
0
9
7
6
5
4
0
4
3
5
2
1
9
8
7
6
1
2
O
F
F
×10 ID_No ×1Function
マイコン基板
EF21-CPU
3
4
5
6
7
1
2
O
F
F
3
Initialize
1
2
O
F
F
NET_No
“Function”switch
“Initialize”switch
CPU board
EF21-CPU

MIURA_CONFIDENTIAL
No. S836-583-8110
- 7-
Table 4.1.3: List of “Initialize”switch functions
No.
Function
OFF
ON
1
Initialization 3 (All clear)
Disabled
Enabled
2
Initialization 2 (Memory clear)
Disabled
Enabled
3
Reset
—
—
* Normally leave each switch OFF.
No. 1: Initialization 3 (All clear)
Turn ON to initialize the setting data and equipment internal data.
No. 2: Initialization 2 (Memory clear)
Turn ON to initialize the equipment internal data without initializing the setting data. If both
switches No. 1 and No. 2 are turned ON, the “Initialization 3” function of switch No. 1 takes
priority.
No. 3: Reset
Turn this switch from OFF to ON and back OFF to reset the boiler controller.
Note: Turning ON the “Initialization 2”or “Initialization 3” deletes all internal data (history
data). The individual files should be saved using the PC inspection tool or online
communications.

MIURA_CONFIDENTIAL
No. S836-583-8110
- 8-
4.2 Operation and Display Flow
4.2.1 Display Flow
Figure 4.2: Operation flow
4.2.2 Setting Method
The setting method of the control board is described below using the example of the feed
water control settings.
Turn ON the “Maintenance display”switch (“Function”switch 1) to switch to the
maintenance mode. Refer to “4.4 Maintenance Mode”.
(1) Use the “Select/Check” button to select the maintenance mode items. Refer to “4.4
Maintenance Mode”.
(2) When the display appears as shown to the right,
press the “Set/OK” button.
(3) Use the “Select/Check” button to select the setting items for “Setting”.
Refer to “4.4.3 Selecting Setting Items”.
(4) Press the “Set/OK” button when the display
appears as shown to the right.
(5) Set the water level detection method.
Use the “Select/Check” button to select the water
level detection items. When the display appears as
shown to the right, press the “Set/OK” button.
Refer to “5.2.2 Feed Water Control Settings”.
(6) “Not Used”flashes on the display.
Use the “Select/Check” button to select the setting.
Press the “Set/OK” button to confirm the setting.
(7) “ON/OFF”stops flashing on the display.
The setting is confirmed.
Select:_________
_________Setting
Select:__Setting
_Feed_Water_CTRL
S:_______FW_CTRL
DETECT__Not_Used
S:_______FW_CTRL
DETECT____ON/OFF
S:_______FW_CTRL
DETECT____ON/OFF
4.4.1 項目選択4.3.1 ユーザモニタ
4.4.2 メンテナンスモニタ 4.4.3 設定項目選択 4.4.4 手動操作 4.4.5 アラーム履歴
4.3.2 アラーム報知
→
設定/確定
→
設定/確定 設定/確定
→→
設定/確定
Function 1をON
FunctionをOFF
又は
無操作で30分経過
未確認アラーム
判定
情報選択/確認
4.4 メンテナンスモード
4.3 ユーザモード
「5.2 ソフトウェア設定」参照
4.3 User Mode
4.3.1 User Monitor
4.3.2 Alarm Notification
Select/Check
Unconfirmed
alarm
evaluation
“Function”switch 1
is turned ON
“Function”switch 1
is turned OFF or no
operation is
performed for 30
minutes
4.4 Maintenance Mode
4.4.2 Maintenance
Monitor
4.4.1 Selecting Items
Set/OK
Set/OK
Set/OK
Set/OK
4.4.3 Settings
4.4.4 Manual
Operation
4.4.5 Alarm
History
Refer to “5.2 Software Settings”.

MIURA_CONFIDENTIAL
No. S836-583-8110
- 9-
<Changing values>
(8) To change the chemical feed amount setting,
press the “Set/OK” button when the display
appears as shown to the right.
(9) The value flashes on the display.
Press the “↑” button to change the flashing value.
The value increases when the “↑” button is
pressed.
(10) Press the “→” button to switch between digits. If
the “→” button is pressed when the “1” in 0.1 is
flashing, the flashing digit moves to “0”, as shown
to the right.
(11) Press the “Set/OK” button to confirm the setting.
The value stops flashing and the setting is
confirmed.
* Use the [↑] button to change values, such as a communication ID. Press the [→]
button to switch between digits.
S:___________CF1
CF/CORR__0.1mg/L
S:___________CF1
CF/CORR__0.0mg/L
S:___________CF1
CF/CORR__0.1m g / L
S:___________CF1
CF/CORR__0.1mg/L

MIURA_CONFIDENTIAL
No. S836-583-8110
- 10 -
4.3 User Mode
4.3.1 User Monitor
The user monitor is the monitor mode displaying water treatment information, Alarms,
and Notices.
Press the “Select/Check” button to switch between the items.
Table 4.3.1: User monitor display items
No.
Display item
LCD screen display
Remarks
(1-1)
Feed water tank
water level 1
FW_Tank_WL______
________##_Level
“LL”, “L”, “H”, or “HH” is displayed for
# during feed water control using a
floatless switch or float switch.
(1-2)
Feed water tank
water level 2
FW_Tank_WL______
_ _ _ _ _ _ _##($$$in)
For the water-level sensor
specification, “L”, “H”, or “HH” is
displayed for ## and the water level
height is displayed for $$$.
(2)
Instantaneous
flow rate
INSTANT_Flow____
__________123gpm
The instantaneous flow rate is
displayed if a flowmeter is connected
to the control board.
(3)
Feed water
controlstatus
FW_Status_______
___Feeding_Water
The feed water control status of the
control board is displayed.
(4-n)
Treated water
hardness
CMU-H_Hardness__
I D 3 6 _ _ _ _ _ 0 - 1 m g / L
The measurement results from the
Colormetry for hardness are displayed
for each communication ID.
5-1-n
Confirmed alarm
(Symptom)
Alarm:___#######
################
Alarm code and symptom are
displayed when an alarm occurs.
5-2-n
Confirmed alarm
(Details)
Alarm details are displayed when an
alarm occurs.
Note: Numbers in ( ) in the “No.”column indicate items that may not be displayed depending on
the settings.
No. 1: “Feed water tank water level”display details
This is displayed when the water level detection method is not set to “Not Used”.
The display shown in Table 4.3.2 or 4.3.3 appears depending on the water level detection
method setting.
No. 1-1 is displayed when floatless switches or float switches are used as the water level
detection method.
Table 4.3.2: “Feed water tank level 1” display items
LCD screen
display
Feed water tank level
Remarks
––
Unknown
LL
Level LL
“Feed water tank low water level” is evaluated.
L
Level L
Water feed is started.
H
Level H
Water feed is stopped.
HH
Level HH
“Feed water tank high water level” is evaluated.

MIURA_CONFIDENTIAL
No. S836-583-8110
- 11 -
No. 1-2 is displayed when water level sensors are used as the water level detection method.
Table 4.3.3: “Feed water tank level 2” display items
LCD screen
display
Feed water tank level
Remarks
––
Unknown
LL
Level LL
“Feed water tank low water level”is evaluated.
L
Level L
Water feed is started.
H
Level H
Water feed is stopped.
sub L
Level L (sub)
Displayed when feed water is controlled using the
sub water level by the water level switching signal.
sub H
Level H (sub)
HH
Level HH
“Feed water tank high water level” is evaluated.
No. 3: “Feed water control status” display details
The feed water control status is displayed when the water level detection method is not set
to “Not Used”.
Table 4.3.4: Feed water control status display details
Lower row of LCD
screen
Feed water control status
_________Standby
Displayed during water feed standby.
___Feeding_Water
Displayed during normal water feed, water feed by the backup sensor,
or manual water feed.
_______INTRMT_FW
Displayed during intermittent water feed due to a defective sensor.
_______Forced_FW
Displayed during forced water feed by external signals.
(Only when float switches are used.)
_______Bypass_FW
Displayed during bypass water feed.
No. 4: “Colormetry measurement results” display details
The Colormetry measurement results are displayed.
No. 5: “Current alarm” display details
Information for all currently evaluated alarms is displayed.
Notices can be manually reset on this screen by pressing and holding the “Select/Check”
button. Remove the cause of the Notice before resetting it.
Alarms and Cautions cannot be manually reset in the user mode. They can be forcibly
reset in the maintenance mode.
4.3.2 Alarm Notifications
This screen informs the user about unconfirmed alarms. Press the “Select/Check”button
to confirm the alarm and return to the original user mode screen.

MIURA_CONFIDENTIAL
No. S836-583-8110
- 12 -
4.4 Maintenance Mode
4.4.1 Selecting Items
The items that can be selected for maintenance are displayed: Maintenance monitor,
settings, management data, manual operation, and alarm history.
When the “Maintenance display”switch (“Function”switch 1) is turned ON, a buzzer
sounds to indicate that the maintenance mode is selected and a screen to select the
maintenance mode items appears. (The buzzer sounds continuously during the
maintenance mode.)
Press the “Select/Check”button to switch between the items. Press the “Set/OK”button to
set an item.
When maintenance is complete, turn OFF the “Maintenance display” switch to return to the
user mode screen.
(The mode does not switch to the user mode automatically. Make sure that the buzzer has
stopped.)
Table 4.4.1: Display items on maintenance mode item selection screen
No.
Display item
LCD screen display
Remarks
1
Maintenance
monitor
Select:_________
___MAINT_Monitor
Displays various information for
maintenance in real time.
2
Settings
Select:_________
_________Setting
Displays the set items, such as chemical
feed control, feed water control, and
monitored equipment ID.
3
Manual operation
Select:_________
Manual_Operation
Used for manual chemical feed pump
operation and forced water feed.
4
Alarm history
Select:_________
___Alarm_History
Displays information related to the last
10 alarms that occurred.

MIURA_CONFIDENTIAL
No. S836-583-8110
- 13 -
4.4.2 Maintenance Monitor
Various information for maintenance is displayed in real time.
Press the “Select/Check” button to switch between the items. Press the “→” button to
switch to the screen shown in “4.4.1 Selecting Items”.
Table 4.4.2: Maintenance monitor display items
No.
Display item
LCD screen display
Remarks
1
ON/OFF input 1
M:I_____ON/OFF_1
_______#########
Displays the I/O board input status as “1”
for input or “0” for no input. Refer to Table
4.4.3 or 4.4.4.
2
ON/OFF input 2
M:I_____ON/OFF_2
_______#########
3
Water level sensor input
current
M:I____WL_Sensor
__________##.#mA
Displays the water level sensor input
current value when water level sensors are
used.
4
Condensate water
temperature
M:I____CNDS_TEMP
___________###゚F
Displays the temperature of the
condensate return temperature sensor
(thermocouple).
5
Feed water temperature
M:I______FW_TEMP
___________###゚F
Displays the temperature of the boiler feed
water temperature sensor (thermocouple).
6
Feed water tank
electric conductivity
M:I______Tank_EC
________##.#mS/m
Displays the input value for the conductivity
meter used with the chemical-free
condensate support function.
7
Analog input 2
M:I_____Analog_2
__________##.#mA
Displays the input value for analog input 2
(not used).
8
Analog input 3
M:I_____Analog_3
__________##.#mA
Displays the input value for analog input 3
(not used).
9
Flowmeter pulse input
count per second
M:I_____FM_Pulse
________###P/sec
Displays the number of pulses per second
input from the flowmeter.
10
Discharge rate checker 1
pulse input rate
M:I__DISCHG_CHK1
__________###spm
Displays the number of pulses per minute
input from the discharge rate checker
connected to chemical feeder 1.
11
Discharge rate checker 2
pulse input rate
M:I__DISCHG_CHK2
__________###spm
Displays the number of pulses per minute
input from the discharge rate checker
connected to chemical feeder 2.
12
Discharge rate checker 3
pulse input rate
M:I__DISCHG_CHK3
__________###spm
Displays the number of pulses per minute
input from the discharge rate checker
connected to chemical feeder 3.
13
Discharge rate checker 4
pulse input rate
M:I__DISCHG_CHK4
__________###spm
Displays the number of pulses per minute
input from the discharge rate checker
connected to chemical feeder 4.
14
ON/OFF output
M:O_______ON/OFF
________########
Displays the I/O board output status as “1”
for output or “0” for no output. Refer to
Table 4.4.5.
15
Chemical feed pump 1
pulse output rate
M:O__________CF1
__________###spm
Displays the number of pump drive pulses
per minute for chemical feeder 1.
16
Chemical feed pump 2
pulse output rate
M:O__________CF2
__________###spm
Displays the number of pump drive pulses
per minute for chemical feeder 2.
17
Chemical feed pump 3
pulse output rate
M:O__________CF3
__________###spm
Displays the number of pump drive pulses
per minute for chemical feeder 3.
18
Chemical feed pump 4
pulse output rate
M:O__________CF4
__________###spm
Displays the number of pump drive pulses
per minute for chemical feeder 4.
19
Feed Water rate
M:D_FW_Tank_Flow
_ _ _ _ _ _ _ # # # # .#g p m
Displays the amount of supply water per
unit time supplied to the feed water tank.

MIURA_CONFIDENTIAL
No. S836-583-8110
- 14 -
20
System 1 boiler feed
water rate
M:D___System1_FW
_ _ _ _ _ _ _ # # # # .#g p m
Displays the amount of feed water per unit
time fed to boilers in system 1.
21
System 2 boiler feed
water rate
M:D___System2_FW
_ _ _ _ _ _ _ # # # # .#g p m
Displays the amount of feed water per unit
time fed to boilers in system 2.
22
System 1 steam output
M:D___Steam_OUT1
______######Lb/h
Displays the total steam output per unit
time in steam system 1.
23
System 2 steam output
M:D___Steam_OUT2
______######Lb/h
Displays the total steam output per unit
time in steam system 2.
24
Condensate recovery
rate
M:D____CNDS_RCVY
_____________##%
Displays the latest calculated condensate
recovery rate value.
25
Feed water control
status
M:J______FW_CTRL
__________Normal
Displays the feed water control status.
26
Chemical feeder 1
control status
M:J_____CF1_CTRL
__________Normal
Displays the control status of chemical
feeder 1.
Refer to Table 4.4.7.
27
Chemical feeder 2
control status
M:J_____CF2_CTRL
__________Normal
Displays the control status of chemical
feeder 2.
Refer to Table 4.4.7.
28
Chemical feeder 3
control status
M:J_____CF3_CTRL
__________Normal
Displays the control status of chemical
feeder 3.
Refer to Table 4.4.7.
29
Chemical feeder 4
control status
M:J_____CF4_CTRL
__________Normal
Displays the control status of chemical
feeder 4.
Refer to Table 4.4.7.
30
MSR regeneration
control status
M:J_____MSR_CTRL
G-####____H-####
Not used with the control board.
31-n
Confirmed alarm
(Symptom)
Alarm:___#######
################
Displays the code and symptom of the
current alarms.
32-n
Confirmed alarm
(Details)
Displays details of the current alarms.
No. 1 and 2: “Circuit board input signal 1”and “Circuit board input signal 2”display details
The contact input status of the I/O board is displayed.
Table 4.4.3: Circuit board input signals
M:I ON/OFF
(1)(2)(3)(4)(5)(6)(7)(8)(9)
Remarks
(1)
Level HH
Determine whether water reaches each level or
not according to the input settings
(normally-open contact (a contact) or
normally-closed contact (b contact)).
(2)
Level H
(3)
Level L
(4)
Level LL
(5)
Level B
(6)
Water level switching signal/
Forced water feed signal
Sub water level is used or forced water feed is
performed when the input is “1”.
(7)
Operation permission signal
If enabled in the settings, operation is permitted
when the input is “1”.
(8)
External signal input 1
The alarm status changes according to the
settings.
(9)
External signal input 2

MIURA_CONFIDENTIAL
No. S836-583-8110
- 15 -
Table 4.4.4: Circuit board input signals
M:I ON/OFF
(1)(2)(3)(4)(5)(6)(7)(8)
Remarks
(1)
Chemical refill 1
Chemical refill is required when the input is “1”.
(2)
Chemical refill 2
(3)
Chemical refill 3
(4)
Chemical refill 4
(5)
Chemical feeder 1 power
supply monitor
Power is supplied to chemical feeders when
input is “1”.
(6)
Chemical feeder 2 power
supply monitor
(7)
Chemical feeder 3 power
supply monitor
(8)
Chemical feeder 4 power
supply monitor
No. 10, 11, 12, and 13: “Discharge rate checker pulse input” display details
If a discharge rate checker is connected to the chemical feeder, the number of input pulses
per minute is displayed.
No. 14: “Circuit board output signal” display details
The contact output status of the I/O board is displayed. This is the electrical output status
and may not be linked to the motor valve or contact output open/closed status.
Table 4.4.5: Circuit board output signals
M:O ON/OFF
(1)(2)(3)(4)(5)(6)(7)(8)
Remarks
(1)
Raw water pressure pump
The pump output is OFF when the output is “1”.
(2)
Feed water control output
Feed water is not requested (stopped) when
the output is “1”.
(3)
Condensate discharge
Condensate is discharged when the output is
“1”.
(4)
Bypass feed water output
Bypass water feed is performed when the
output is “1”.
(5)
Low water level alarm
output
Low water level alarm has not occurred when
the output is “1”.
(6)
High water level alarm
output
High water level alarm has not occurred when
the output is “1”.
(7)
Alarm notification 1
No alarm has occurred when the output is “1”.
(8)
Alarm notification 2
No. 15, 16, 17, and 18: “Chemical feed pump drive output” display details
The number of pump drive pulses per minute output to the chemical feeder is displayed.
No. 19: “Supply water flow rate” display details
The instantaneous flow rate of supply water supplied to the feed water tank is displayed.
This is acquired according to the “Supply water flow rate detection method” setting.

MIURA_CONFIDENTIAL
No. S836-583-8110
- 16 -
No. 24: “Condensate recovery rate” display details
The latest calculated condensate recovery rate value is displayed.
No. 25: “Feed water control status” display details
The feed water control status is displayed.
Table 4.4.6: Feed water control status display items
Lower row of LCD
screen
Feed water control status
________Not_Used
Displayed when no feed water control setting is made.
__________Normal
Displayed during normal control based on water level
information.
______FW(Backup)
Displayed when the backup sensor is issuing a feed water
command.
_Standby(Backup)
Displayed when the backup sensor is not issuing a feed water
command.
______FW(INTRMT)
Displayed when control is not possible due to a defective
sensor and intermittent water feed is performed.
______FW(Manual)
Displayed during forced water feed by manual operations in
the maintenance mode.
____Stop(Manual)
Displayed during a forced stop by manual operations in the
maintenance mode.
______FW(Forced)
Displayed during forced water feed by external signals.
______FW(Bypass)
Displayed during bypass water feed.
No. 26, 27, 28, and 29: “Chemical feed control status” display details
The chemical feed control status is displayed.
Table 4.4.7: Chemical feed control status display items
Lower row of LCD
screen
Chemical feed control status
________Not_Used
Displayed when no chemical feed control setting is made.
__________Normal
Displayed during normal control based on the boiler steam
output.
____Stop(Forced)
Displayed during a forced stop of chemical feed by manual
operations in the maintenance mode.
______CF(Manual)
Displayed during manual chemical feed by manual
operations.
____Stop(Manual)
Displayed when manual chemical feed by manual operations
is complete.
_______Power_OFF
Displayed when the earth leakage circuit breaker is OFF.
No. 30: “Current alarm”display details
Information for all currently evaluated alarms is displayed, including unconfirmed alarms
and alarms with user notification disabled in the settings.
Press and hold the “Select/Check” button to forcibly reset the displayed alarms.
Remove the cause of alarms before resetting them. After a forced reset, an alarm may
occur again if the alarm evaluation conditions are still met.
Other manuals for WP2-200A
1
Table of contents
Other Miura Boiler Supplies manuals

Miura
Miura BP-201 User manual

Miura
Miura BP-201 Troubleshooting guide

Miura
Miura EJ-210 User manual

Miura
Miura CMU-324HE User manual

Miura
Miura MP1-200 User manual

Miura
Miura WP2-200A User manual

Miura
Miura Comm-Link User manual

Miura
Miura STEAM EO-010A User manual

Miura
Miura CONNECT User manual

Miura
Miura CMU-324HE User manual
Popular Boiler Supplies manuals by other brands

AFRISO
AFRISO PrimoBox ACB 910 Operation and installation manual

Xylem
Xylem McDonnell & Miller GuardDog 751P Series instruction manual

Immergas
Immergas 3.026302 manual

Immergas
Immergas VICTRIX PRO 35 V2 SET manual

Viessmann
Viessmann GENO-Neutra V N-70 Installation and service instructions

Buderus
Buderus GB162 installation instructions