manuals.online logo
Brands
  1. Home
  2. •
  3. Brands
  4. •
  5. Mocka
  6. •
  7. Indoor Furnishing
  8. •
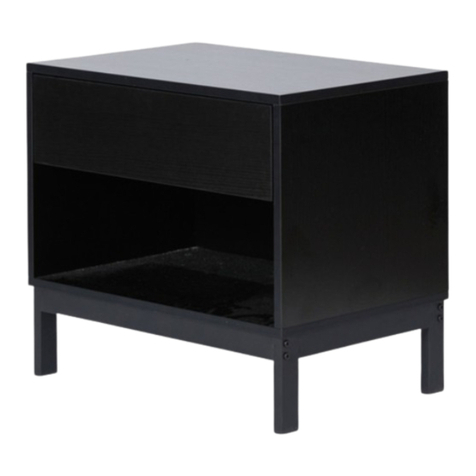
  9. Mocka Zara User manual

Mocka Zara User manual

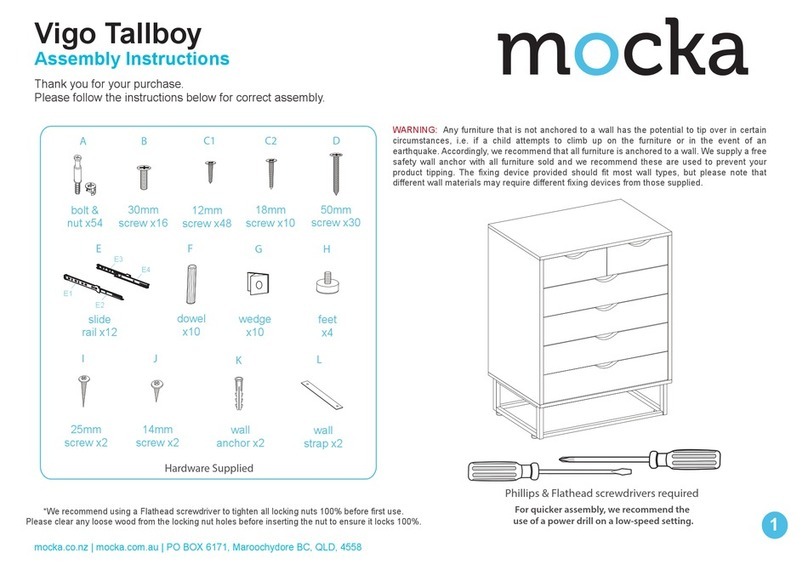
1
Wall Strap
x2
Z
washer
Y
wall
x1
X
anchor
safety
WV
strap x1 x1
screw wall
x1
screw
x14
bolt
wedge screw
x4 x4
A B C D EFGH
JKLMN
I
O P Q
Hardware Supplied
x10
dowelscrew
x26
slide
rail x2
slide
rail x2
slide
rail x2
slide
rail x2
locking
nut x14
x4
screw
bolt
x16
bracket
x2
bracket
x4
x1
Allen
key
cover
x2
seal
x2
felt
pad
x4
R S
x16
screw
mocka.co.nz I mocka.com.au I PO BOX 18, Pinkenba QLD 4008
ASSEMBLY I N S TRUCTION S
Zara
Bedside Table
Thank you for your purchase.
Please follow the instructions below for correct assembly
WARNING: Any furniture that is not anchored to a wall has the potential to tip over in certain
circumstances, i.e. if a child attempts to climb up on the furniture or in the event of an earthquake.
Accordingly, we recommend that all furniture is anchored to a wall. We supply a free safety wall
anchor with all furniture sold and we recommend these are used to prevent your product tipping.
The fixing device provided should fit most wall types, but please note that dierent wall materials
may require dierent fixing devices from those supplied.
Phillips & Flathead screwdrivers and hammer required.
*We recommend using a Flathead screwdriver to tighten
all locking nuts 100% before first use.
.
1
Zara
mocka.co.nz I mocka.com.au I PO BOX 18, Pinkenba QLD 4008
ASSEMBLY I N S TRUCTION S
2
Bedside Table
2
Insert 4x bolts (C) into panel [1] and tighten with a screwdriver. Attach 1x slide rail (F) and 1x slide rail (G) to panels [3] and [4] as shown and
secure with 12x screws (E). Tighten with .a screwdriver. Insert 2x bolts (C) into
panels [3] and [4]. Tighten with a screwdriver.
G
CR
E
F
CL
E
C
1
3
4
E
E
E
F
C
C
CE
E
EG
E
E
EG
C
EC
E
E
F
Zara
Bedside Table
mocka.co.nz I mocka.com.au I PO BOX 18, Pinkenba QLD 4008
ASSEMBLY I N S TRUCTION S
Attach 1x bracket (M) to panel [5] and secure with 2x screws (E).
Tighten with a screwdriver. Place 1x cover (N) over the bracket (M)
as shown.
3 4
Attach panel [4] and panel [3] to panel [5] with 2x dowels (A) and secure
with 2x locking nuts (D). Tighten with a screwdriver.
5
A
A
D
D
4
3
D
EE
5
EE
N
MM
The round head
is aligned with the
direction of the arrow.
M
mocka.co.nz I mocka.com.au I PO BOX 18, Pinkenba QLD 4008
ASSEMBLY I N S TRUCTION S
Zara
Bedside Table
5 6
Attach panel [4] and panel [3] to panel [1] with 4x dowels (A) and secure with 4x
locking nuts (D). Tighten with a screwdriver.
Slide panel [6] down along the grooves between the panels [4] and [3]
to form the back of the unit as shown.
A
D
D
3
4
1
3
4
6
A
A
A
Zara
Bedside Table
mocka.co.nz I mocka.com.au I PO BOX 18, Pinkenba QLD 4008
ASSEMBLY I N S TRUCTION S
Attach 1x bracket (M) to panel [2] and secure with 2x screws (E). Tighten with
a screwdriver. Place 1x cover (N) over the bracket (M) as shown.
Attach panel [2] to the unit with 4x dowels (A) and secure with 4x screws
(B). Tighten with a screwdriver.
7 8 2
A
B
B
A
B
A
B
3
4
EE
N
EE
MM
The round head
is aligned with the
direction of the arrow.
M
2
Zara
Bedside Table
mocka.co.nz I mocka.com.au I PO BOX 18, Pinkenba QLD 4008
ASSEMBLY I N S TRUCTION S
Attach 4x leg brackets (P) to legs [7] using 8x screws (R). Tighten with
a screwdriver. Attach legs [7] to panel [2] using 16x bolt (Q) as shown.
Tighten with an Allen key (S). Attach 4x felt pads (L) to the ends of the legs.
Insert 4x bolts (C) into panel [8]/[9]. Attach 1x seal (O) to panel [8]/[9] and
secure with 1x screw (E). Tighten with a screwdriver.
109 Drawers x2
R
Q
Q
Q
Q
Q
C
C
C
C
E
O
P
2
7
7
7
7
7
7
8
9
L
L
L
L
L
S
11
Zara
Bedside Table
mocka.co.nz I mocka.com.au I PO BOX 18, Pinkenba QLD 4008
ASSEMBLY I N S TRUCTION S
Attach panel [10] and panel [11] to panel [8]/[9] secure with 4x locking nuts (D).
Tighten with a screwdriver.
Slide panel [12] along the grooves between the side panels [10] and [11].
12Drawers x2Drawers x2
8
9
8
9
D
D
D
D
10
11
10
11
12
13
Zara
Bedside Table
mocka.co.nz I mocka.com.au I PO BOX 18, Pinkenba QLD 4008
ASSEMBLY I N S TRUCTION S
Attach panels [10], [11] and [13] as shown using 4x screws (R).
Tighten with a screwdriver.
Attach slide rail (I) and slide rail (H) to the underside of the side panels
as shown. Secure with 4x screws (E) and tighten with a screwdriver.
14 Drawers x2Drawers x2
10
11
13
R
R
R
RH
E
E
E
E
I
11
10
8
9
8
9
15
Zara
Bedside Table
mocka.co.nz I mocka.com.au I PO BOX 18, Pinkenba QLD 4008
ASSEMBLY I N S TRUCTION S
Insert the assembled drawers into the corresponding compartments as shown.
Ensure the drawers slide easily along the rails. If the door is not catching or
sitting flush, twist the end of the cover (N) until it catches on the seal (O).
Attach 4x wedges (J) into the corners of the back of the unit and secure
with 4x screws (K). Tighten with a screwdriver. Attach 1x safety straps (V)
to the top of the back side of the unit as shown using 1x washers (Z) and
1x screws (W). Tighten with a screwdriver.
16
8
9
V
Z
W
V
Z
W
K
J
K
J
N
17
Zara
Bedside Table
mocka.co.nz I mocka.com.au I PO BOX 18, Pinkenba QLD 4008
ASSEMBLY I N S TRUCTION S
Once assembled lift furniture into place, do not drag. Use a drill to create a small
hole lining up with the top of the safety strap (V). Fasten to the wall using 1x
washers (Z), 1x wall anchor (X) and 1x screws (Y). Ensure unit is balanced and
steady before use.
You’re done, enjoy!
18
X
Y
Z
anchor
wall
screw
strap
washer

Other manuals for Zara

17

Other Mocka Indoor Furnishing manuals

Mocka Parker User manual

Mocka

Mocka Parker User manual

Mocka Eclipse User manual

Mocka

Mocka Eclipse User manual

Mocka Sadie User manual

Mocka

Mocka Sadie User manual
Mocka Eliza Three Drawer User manual

Mocka

Mocka Eliza Three Drawer User manual

Mocka Watson Four Drawer User manual

Mocka

Mocka Watson Four Drawer User manual

Mocka Jimmy Change Table User manual

Mocka

Mocka Jimmy Change Table User manual

Mocka Soren King Single Bed User manual

Mocka

Mocka Soren King Single Bed User manual

Mocka Brooklyn Bedside Table User manual

Mocka

Mocka Brooklyn Bedside Table User manual

Mocka Sadie User manual

Mocka

Mocka Sadie User manual

Mocka Sadie Three Drawers User manual

Mocka

Mocka Sadie Three Drawers User manual

Mocka Blair User manual

Mocka

Mocka Blair User manual

Mocka Inca Tallboy User manual

Mocka

Mocka Inca Tallboy User manual

Mocka Kenny Desk User manual

Mocka

Mocka Kenny Desk User manual

Mocka Tahoe User manual

Mocka

Mocka Tahoe User manual

Mocka Octavia Change Table User manual

Mocka

Mocka Octavia Change Table User manual

Mocka Tahoe User manual

Mocka

Mocka Tahoe User manual

Mocka Savannah Two Door Cabinet User manual

Mocka

Mocka Savannah Two Door Cabinet User manual

Mocka Sadie Queen bed User manual

Mocka

Mocka Sadie Queen bed User manual

Mocka Sadie User manual

Mocka

Mocka Sadie User manual

Mocka Bronte Buffet User manual

Mocka

Mocka Bronte Buffet User manual

Mocka Sadie User manual

Mocka

Mocka Sadie User manual

Mocka Olwyn User manual

Mocka

Mocka Olwyn User manual

Mocka Kennedy Entertainment Unit User manual

Mocka

Mocka Kennedy Entertainment Unit User manual

Mocka Imogen User manual

Mocka

Mocka Imogen User manual

Popular Indoor Furnishing manuals by other brands

Zanzini 08510206 Assembly instruction

Zanzini

Zanzini 08510206 Assembly instruction

modway MOD-6199 Assembly instructions

modway

modway MOD-6199 Assembly instructions

Gami G10-MONTANA Assembly instructions

Gami

Gami G10-MONTANA Assembly instructions

Exclusive Heritage ED-10060D-WMES installation guide

Exclusive Heritage

Exclusive Heritage ED-10060D-WMES installation guide

Trinity TLS-4804 owner's manual

Trinity

Trinity TLS-4804 owner's manual

Amart Furniture Albion 62891 Assembly instruction

Amart Furniture

Amart Furniture Albion 62891 Assembly instruction

Fabritec designs Smartroll  32-1 installation instructions

Fabritec designs

Fabritec designs Smartroll 32-1 installation instructions

Teknion HABCDG Series Installation guides

Teknion

Teknion HABCDG Series Installation guides

Hillsdale Furniture LAUREN HUTCH 791-2275 quick start guide

Hillsdale Furniture

Hillsdale Furniture LAUREN HUTCH 791-2275 quick start guide

TUHOME Furniture ABA4446 Assembly instructions

TUHOME Furniture

TUHOME Furniture ABA4446 Assembly instructions

Kaboodle w-50552 installation guide

Kaboodle

Kaboodle w-50552 installation guide

Rauch Mosbach M1967 Assembly instructions

Rauch

Rauch Mosbach M1967 Assembly instructions

Bensons for Beds HIP HOP STK268006 Assembly instructions

Bensons for Beds

Bensons for Beds HIP HOP STK268006 Assembly instructions

Next 422159 Assembly instructions

Next

Next 422159 Assembly instructions

Kvik P15670 Assembly manual

Kvik

Kvik P15670 Assembly manual

Dunelm Marina Ladder Desk instructions

Dunelm

Dunelm Marina Ladder Desk instructions

Cooper Lighting Interior Wall Luminaire 651 Series Specification sheet

Cooper Lighting

Cooper Lighting Interior Wall Luminaire 651 Series Specification sheet

CAHABA BRAXTON 24 installation manual

CAHABA

CAHABA BRAXTON 24 installation manual

manuals.online logo
manuals.online logoBrands
  • About & Mission
  • Contact us
  • Privacy Policy
  • Terms and Conditions

Copyright 2025 Manuals.Online. All Rights Reserved.