manuals.online logo
Brands
  1. Home
  2. •
  3. Brands
  4. •
  5. Mocka
  6. •
  7. Indoor Furnishing
  8. •
  9. Mocka Eclipse Bedside Table User manual

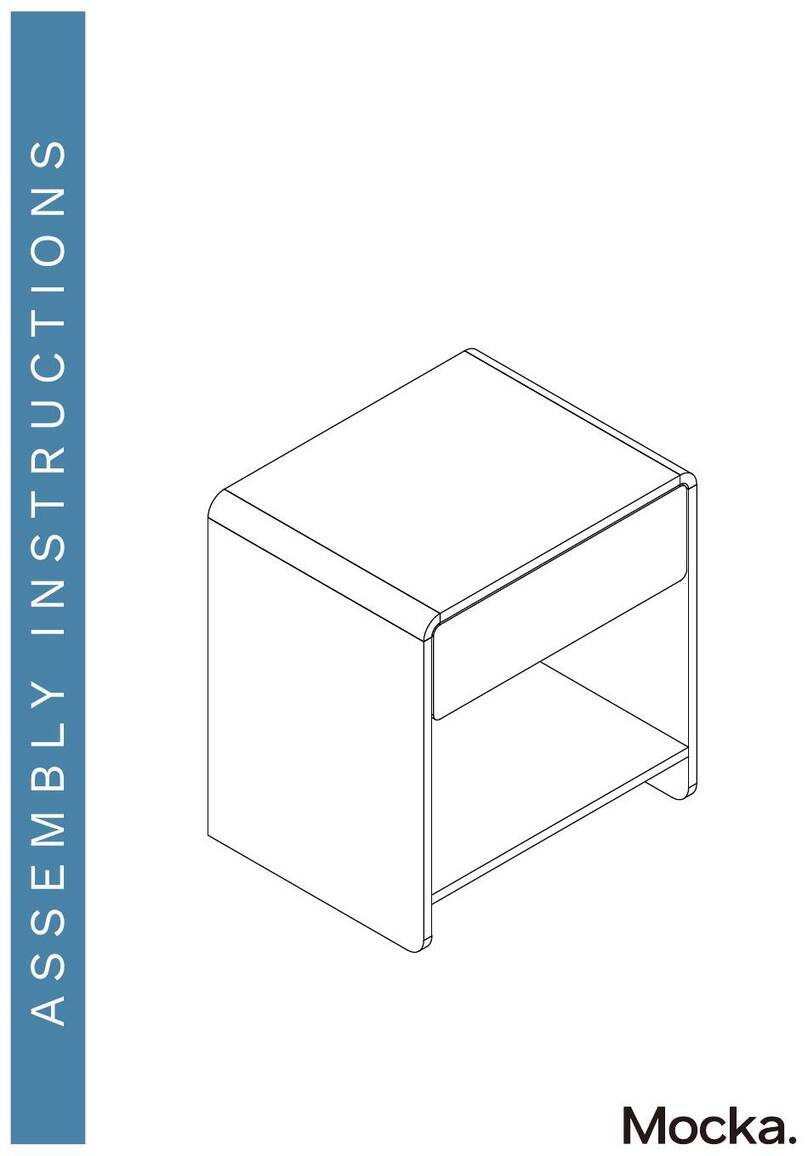
Mocka Eclipse Bedside Table User manual

mocka.co.nz I mocka.com.au I PO BOX 18, Pinkenba QLD 4008
ASSEMBLY I N S TRUCTION S
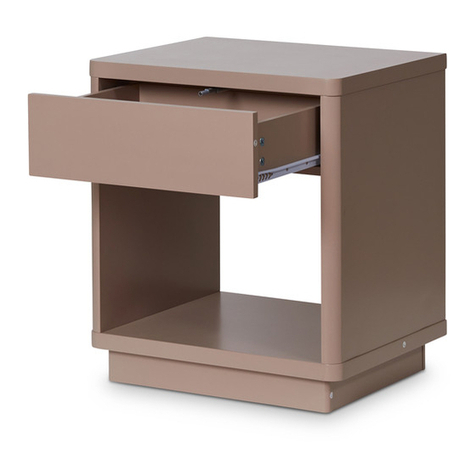
Eclipse
Bedside Table
Thank you for your purchase.
Please follow the instructions below for correct assembly
WARNING: Any furniture that is not anchored to a wall has the potential to tip over in certain
circumstances, i.e. if a child attempts to climb up on the furniture or in the event of an earth-
quake. Accordingly, we recommend that all furniture is anchored to a wall. We supply a free safety
wall anchor with all furniture sold and we recommend these are used to prevent your product
tipping. The fixing device provided should fit most wall types, but please note that dierent wall
materials may require dierent fixing devices from those supplied.
For quicker assembly, we recommend the
use of a power drill on a low-speed setting.
.
Phillips & Flathead screwdrivers
Wall Strap
x2
washer
Z
Y
wall
x1
X
anchor
safety
WV
strap x1 x1
screw wall
x1
screw
x12
bolt
x4
A B C D EFG H
JKL M
I
Hardware Supplied
x8
dowelscrew
x20
slide
rail x2
slide
rail x2
slide
rail x2
slide
rail x2
locking
nut x12
x4
screw
wedge
x4
screwbolt
x8
handle
x2
N
screw
handle
x4
x12
screw Allen Key
x1
O P
1
Eclipse
mocka.co.nz I mocka.com.au I PO BOX 18, Pinkenba QLD 4008
ASSEMBLY I N S TRUCTION S
2
Bedside Table
2
Insert 4x bolts (C) into panel [1] and tighten with a screwdriver. Attach 2x slide rail (F) and 2x slide rail (G) to panels [3] and [4] as
shown and secure with 12x screws (E). Tighten with a screwdriver.
G
CR
E
F
CL
E
C
1
3
4
C
C
C
E
E
E
E
E
F
F
G
G
E
E
E
E
E
E
E
Eclipse
Bedside Table
mocka.co.nz I mocka.com.au I PO BOX 18, Pinkenba QLD 4008
ASSEMBLY I N S TRUCTION S
Attach panel [4] and panel [3] to panel [1] with 4x dowels (A) and
secure with 4x locking nuts (D). Tighten with a screwdriver.
3 4
Slide panel [5] down along the grooves between the panels [3] and [4]
to form the back of the unit as shown.
3
4
1
3
4
5
A
A
A
A
D
D
D
A
D
mocka.co.nz I mocka.com.au I PO BOX 18, Pinkenba QLD 4008
ASSEMBLY I N S TRUCTION S
Eclipse
Bedside Table
5 6
Attach panel [2] to the unit with 4x dowels (A) and secure with 4x screws (B).
Tighten with a screwdriver.
Attach panels [6] to panels [7] and panels [8] and secure with 8x bolt (L).
Tighten with an Allen Key (P).
3
6
6
7
7
8
8
4
2
B
B
A
B
L
L
L
LL
L
L
L
B
A
A
L
B
A
P
Eclipse
Bedside Table
mocka.co.nz I mocka.com.au I PO BOX 18, Pinkenba QLD 4008
ASSEMBLY I N S TRUCTION S
Attach panels [8] to panel [2] and secure with 4x screw (O).
Tighten with a screwdriver.
Insert 8x bolts (C) into panels [9] and [10]. Tighten with a screwdriver.
7 8
6
6
8
9
10
2
O
O
O
O
8
3
CC
C
C
CC
CC
Eclipse
Bedside Table
mocka.co.nz I mocka.com.au I PO BOX 18, Pinkenba QLD 4008
ASSEMBLY I N S TRUCTION S
Attach panels [11] and [12] to panels [9] and [10] and secure with
4x locking nuts (D). Tighten with a screwdriver.
Slide panel [13] along the grooves between the side panels [11]
and [12] as shown.
109 Drawers x2 Drawers x2
D
D
DD
10
11
11
12
12
13
910 9
11
Eclipse
Bedside Table
mocka.co.nz I mocka.com.au I PO BOX 18, Pinkenba QLD 4008
ASSEMBLY I N S TRUCTION S
Attach panel [14] to panels [11] and [12] as shown using 4x screws (O).
Tighten with a screwdriver.
Attach slide rail (I) and slide rail (H) to the underside of the side
panels [11] and [12] as shown. Secure with 4x screws (E) and
tighten with a screwdriver.
12 Drawers x2
Drawers x2
O
O
O
OH
E
E
E
E
I
11
11
12
12
14
10 9
13
Eclipse
Bedside Table
mocka.co.nz I mocka.com.au I PO BOX 18, Pinkenba QLD 4008
ASSEMBLY I N S TRUCTION S
Attach 2x handles (M) to panels [9] and [10] and secure with 4x handle
screws (N). Tighten with a screwdriver.
Insert the assembled drawers into the corresponding compartments
as shown. Ensure the drawers slide easily along the rails.
14
M
M
N
N
NN
10
10
9
9
Tighten the
screws 90%..
Tighten the
screws 90%..
15
Eclipse
Bedside Table
mocka.co.nz I mocka.com.au I PO BOX 18, Pinkenba QLD 4008
ASSEMBLY I N S TRUCTION S
Attach 4x wedges (J) into the corners of the back of the
unit and secure with 4x screws (K). Tighten with a screwdriver.
Attach 1x safety straps (V) to the top of the back side of
the unit as shown using 1x washers (Z) and 1x screws (W).
Tighten with a screwdriver.
Once assembled lift furniture into place, do not drag. Use a drill to create
a small hole lining up with the top of the safety strap (V). Fasten to the wall
using 1x washers (Z), 1x wall anchor (X) and 1x wall screw (Y). Ensure unit is
balanced and steady before use. You’re done, enjoy!
16
K
J
V
Z
W
K
J
V
Z
W
X
Y
Z
anchor
wall
screw
strap
washer
17
Eclipse
Bedside Table
mocka.co.nz I mocka.com.au I PO BOX 18, Pinkenba QLD 4008
ASSEMBLY I N S TRUCTION S
After installation, if the two handles are not aligned, loosen the screws
in the back, adjust the two handles to align them, and then
tighten the screws back up.
M
M
M
M
M
M

Other Mocka Indoor Furnishing manuals

Mocka Zara User manual

Mocka

Mocka Zara User manual

Mocka Luna User manual

Mocka

Mocka Luna User manual

Mocka Aspen User manual

Mocka

Mocka Aspen User manual
Mocka Activity Table User manual

Mocka

Mocka Activity Table User manual

Mocka Addi Six Drawer - Wide User manual

Mocka

Mocka Addi Six Drawer - Wide User manual

Mocka Savannah Side Table User manual

Mocka

Mocka Savannah Side Table User manual

Mocka Maya Corner Shelf User manual

Mocka

Mocka Maya Corner Shelf User manual

Mocka Tahoe Entertainment Unit User manual

Mocka

Mocka Tahoe Entertainment Unit User manual

Mocka Boucle User manual

Mocka

Mocka Boucle User manual

Mocka Mischa User manual

Mocka

Mocka Mischa User manual

Mocka Pippin User manual

Mocka

Mocka Pippin User manual

Mocka Sonata User manual

Mocka

Mocka Sonata User manual

Mocka Sintra Side Table User manual

Mocka

Mocka Sintra Side Table User manual

Mocka Sadie Six Drawer User manual

Mocka

Mocka Sadie Six Drawer User manual

Mocka Olsen Entertainment Unit User manual

Mocka

Mocka Olsen Entertainment Unit User manual

Mocka Hudson Mini Table User manual

Mocka

Mocka Hudson Mini Table User manual

Mocka Leia User manual

Mocka

Mocka Leia User manual

Mocka Milton Small Plant Stand User manual

Mocka

Mocka Milton Small Plant Stand User manual

Mocka Avoca User manual

Mocka

Mocka Avoca User manual

Mocka Vigo Coffee Table User manual

Mocka

Mocka Vigo Coffee Table User manual

Mocka Eclipse Coffee Table User manual

Mocka

Mocka Eclipse Coffee Table User manual

Mocka Edmond User manual

Mocka

Mocka Edmond User manual

Mocka Jack User manual

Mocka

Mocka Jack User manual

Mocka Oslo Buffet User manual

Mocka

Mocka Oslo Buffet User manual

Popular Indoor Furnishing manuals by other brands

BYALEX The A Desk instructions

BYALEX

BYALEX The A Desk instructions

DIR Quartz 3777 instruction manual

DIR

DIR Quartz 3777 instruction manual

BCP SKY5962 instruction manual

BCP

BCP SKY5962 instruction manual

Beacon BSCTAB-750D owner's manual

Beacon

Beacon BSCTAB-750D owner's manual

ipeatech iTable 406 user manual

ipeatech

ipeatech iTable 406 user manual

Woood TOM quick start guide

Woood

Woood TOM quick start guide

DGS Retail NESTING Assembly instructions

DGS Retail

DGS Retail NESTING Assembly instructions

Alice's Garden SIENA LCA004 quick start guide

Alice's Garden

Alice's Garden SIENA LCA004 quick start guide

Levira FALDON 3083 Assembly instructions

Levira

Levira FALDON 3083 Assembly instructions

EKVIP 023993 operating instructions

EKVIP

EKVIP 023993 operating instructions

DS Produkte C85001 instructions

DS Produkte

DS Produkte C85001 instructions

Mooreco DOC Partition 661A Series manual

Mooreco

Mooreco DOC Partition 661A Series manual

Gloster Halifax Deep Seating Swivel Rocker Lounge... quick start guide

Gloster

Gloster Halifax Deep Seating Swivel Rocker Lounge... quick start guide

CorLiving BBT-201-S quick start guide

CorLiving

CorLiving BBT-201-S quick start guide

DURAVIT Vitrium VT 7380 Mounting instructions

DURAVIT

DURAVIT Vitrium VT 7380 Mounting instructions

Next 569477 Assembly instructions

Next

Next 569477 Assembly instructions

Klaxon Salamander Wire-Free Door Holder user guide

Klaxon

Klaxon Salamander Wire-Free Door Holder user guide

Homelegance 5658 Assembly instruction

Homelegance

Homelegance 5658 Assembly instruction

manuals.online logo
manuals.online logoBrands
  • About & Mission
  • Contact us
  • Privacy Policy
  • Terms and Conditions

Copyright 2025 Manuals.Online. All Rights Reserved.