manuals.online logo
Brands
  1. Home
  2. •
  3. Brands
  4. •
  5. Mocka
  6. •
  7. Indoor Furnishing
  8. •
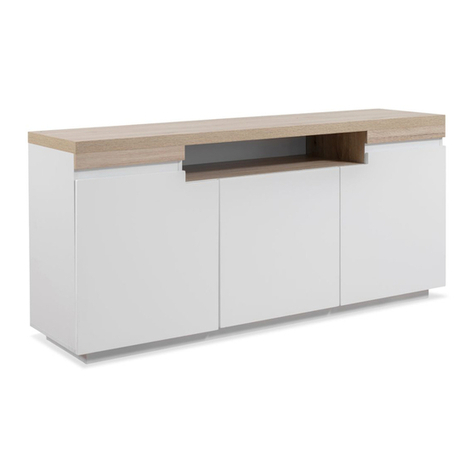
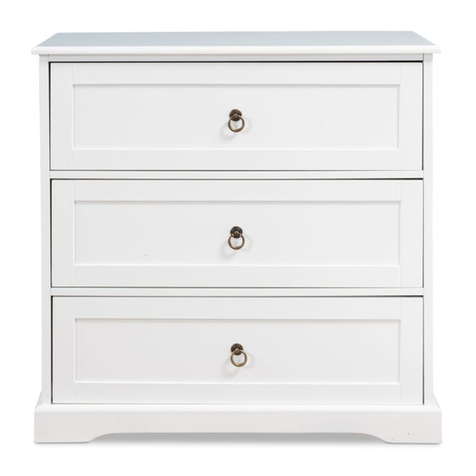
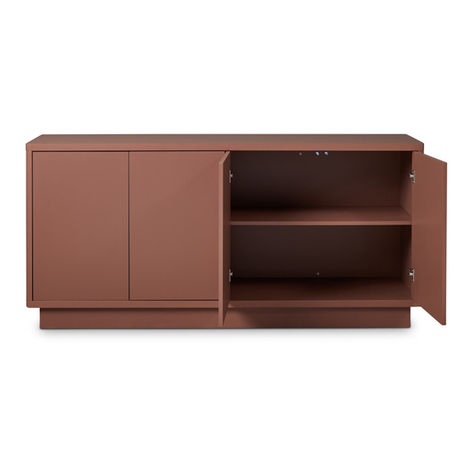
  9. Mocka Hamptons Buffet User manual

Mocka Hamptons Buffet User manual

mocka.co.nz I mocka.com.au
ASSEMBLY INSTRUCTIONS
Hamptons Buet
Thank you for your purchase.
Please follow the instructions below for correct assembly.
A
43 x
bolt
B
43 x
locking
nut
C
30 x
dowel
W
1x
safety
strap
HARDWARE SUPPLIED
D
8 x
long
screw
E
24 x
small
screw
40 mm
12 mm
6x 6 x
L+R
slide rail
J
5 x
small
screw
1x
long
screw
XY
Z
1x
wall
anchor
1x
screw
1x
washer
L+R
slide rail
I
F
15 x
medium
screw
30 mm
*We recommend using a Flathead screwdriver to tighten all locking nuts 100% before first use.
Phillips & Flathead screwdrivers and hammer required
WARNING: Any furniture that is not anchored to a wall has the potential to
tip over in certain circumstances, i.e. if a child attempts to climb up on the
furniture or in the event of an earthpuake. Accordingly, we recommend that
all furniture is anchored to a wall. We supply a free safety wall anchor with
all furniture sold and we recommend these are used to prevent your product
tipping. The fixing device provided should fit most wall types, but please note
that dierent wall materials may require dierent fixing devices from those
supplied.
CL
CR
DL
DR
M N PQ
2 x
shelf
plug
2 x
long
screw
3 x
handle
25 mm
18 x
wedge
4x
hinge
KL
24 x
small
screw
14 mm
8 x
shelf
plug
OR
12 x
cover
2 x
handle
mocka.co.nz I mocka.com.au
ASSEMBLY INSTRUCTIONS
Hamptons Buet
1 2
Attach 3 x left slide rails (CL) to panel [5] and secure with 6 x small screws (E).
Insert 2 x bolts (A) into panel [5]. Tighten with a screwdriver.
A
CL
CL
E
5
A
A
E
E
E
E
E
E
E
CL
CL
A
A
A
J
J
J
J
J
A
A
A
A
A
Y
W
1
6
Insert 8 x bolts (A) into panels [1]. Attach 5 x screws (J) into panels [6] and [1].
Attach 1 x wall strap (W) to panel [1] using 1 x screw (Y). Tighten with a screwdriver.
mocka.co.nz I mocka.com.au
ASSEMBLY INSTRUCTIONS
Hamptons Buet
3 4
Attach 3 x right slide rails (CR) to panel [7] and secure with 6 x small screws (E).
Insert 2 x bolts (A) into panel [7]. Tighten with a screwdriver.
CR
E
B
CR
7
A
A
E
E
E
E
E
E
E
CR
CR
7
5
8
8
B
C
C
B
B
B
C
C
Insert 4 x dowels (C) into panels [8]. Attach panels [8] to panels [5] and [7] and
secure with 4 x locking nuts (B). Tighten with a screwdriver.
mocka.co.nz I mocka.com.au
ASSEMBLY INSTRUCTIONS
Hamptons Buet
5 6
2
A
A
AA
A
A
A
A
AA
A
A
Attach 12 x bolts (A) into panels [2]. Tighten with a screwdriver.
M
M
M
N
N
D
2
D
DD
D
C
C
D
D
D
C
CC
C
4
7
5
3
Insert 8 x dowels (C) into panels [3], [4], [5] and [7]. Attach panels [3], [4], [5]
and [7] to panel [2] and secure with 8 x long screws (D). Attach 2 x long screws
(M) to centre supports (N) as shown. Tighten with a screwdriver.
C
C
mocka.co.nz I mocka.com.au
ASSEMBLY INSTRUCTIONS
Hamptons Buet
7
8
22
22
21
21
C
B
A
B
A
C
B
A
C
BC
A
Attach 4 x bolts (A) into panels [21]. Attach 4 x dowels (C) to panels [22]
and [21]. Insert 4 x locking nuts (B) into panels [22]. Tighten with a screwdriver.
2
4
21
22 BB
C
B
BB
B
C
B
B
C
B
B
B
B
C
C
C
Insert 6 x dowels (C) into panels [2], [21] and [22]. Attach panels [2], [21]
and [22] and secure with 12 x locking nuts (B). Tighten with a screwdriver.
3
mocka.co.nz I mocka.com.au
ASSEMBLY INSTRUCTIONS
Hamptons Buet
9
10
11
10
10
3
5
7
4
11
10 10 9
9
Slide panels [10] into the groves of panels [11]. Slide panels [9] and [10] between
the grooves on panels [3], [4], [5] and [7] to form the back of the unit as shown.
O
5
1
3
57
7
12
12
OO
OO
B
B
B
B
CC
B
B
CC
CC
CC
BB
Insert 8 x dowels (C) into panel [1]. Attach panel [1] to panels [3], [4], [5] and [7],
secure with 8 x locking nuts (B). Insert 8 x shelf plugs (O) to panels [3], [4], [5]
and [7]. Attached panels [12] to panels [3], [4], [5] and [7] as shown.
E
mocka.co.nz I mocka.com.au
ASSEMBLY INSTRUCTIONS
Hamptons Buet
11
12
Attach 4 x hinges (K) to paneks [13] and [14], secure with 8 x small screws (L).
Attach 2 x handles (P) into panels [13] and [14]. Tighten with a screw driver.
K
L
L
P
P
K
K
K
K
EL EL
EL EL
EL EL
EL EL
14
13
Drawers x 3
19
16
17
F
F
F
F
F
20
Attach panels [16], [17] and [19] to panels [20], secure with 15 x medium screws (F).
Tighten with a screwdriver.
mocka.co.nz I mocka.com.au
ASSEMBLY INSTRUCTIONS
Hamptons Buet
13
14
Drawers x 3 Drawers x 3
18
17
16
Slide panels [18] between the grooves on panels [16], [17] and [20] to form the
base of the drawer as shown.
20
15
A
A
A
A
A
I
I
Attach 15 x bolts (A) into panels [15]. Insert 3 x handles (I) into panels [15].
Tighten with a screwdriver.
mocka.co.nz I mocka.com.au
ASSEMBLY INSTRUCTIONS
Hamptons Buet
15 16
Drawers x 3 Drawers x 3
15
B
BB
B
B
19
17
16
B
I
II
BR
x 12
Attach panels [15] to panels [16], [17] and [19], secure with 15 x locking nuts
(B). Cover locking nuts (B) with 12 covers (R). Tighten with a screwdriver.
16
17
E
E
E
E
15
DL
DR
Attach 6 x slide rails (DL) and (DR) to panels [16] and [17], secure with 12 x small
screws (E). Tighten with a screwdriver.
mocka.co.nz I mocka.com.au
ASSEMBLY INSTRUCTIONS
Hamptons Buet
17
18
JQ
Attach 18 x wedges (Q) to panels [9] and [10]. Tighten with a screwdriver.
NOTE: If the doors are
uneven or there is a gap in
the middle, loosen or tighten
the screw on the hinge until
9
9
Q
14
13
15
15
15
they are sitting flush.
K
Q
Q
Q
Q
Q
Q
Q
Q
Q
Q
Q
Q
Q
Q
Q
Q
Q
10 10
Attach panels [13] and [14] to panels as shown. Secure with 16 x screws (L).
Tighten with a screwdriver.
mocka.co.nz I mocka.com.au
ASSEMBLY INSTRUCTIONS
Hamptons Buet
19
Strap
Washer
Wall
anchor
Wall
screw
X
Z
Wall
screw
Once assembled lift furniture into place, do not drag. Use a drill to create a
small hole lining up with the top of the safety stap (W). Fasten to wall using
wall anchor (X), washer (Z) and screw. Ensure the unit is balaced and steady
before use. You’re done, enjoy!

Other Mocka Indoor Furnishing manuals

Mocka Kids Armchair User manual

Mocka

Mocka Kids Armchair User manual

Mocka Theo User manual

Mocka

Mocka Theo User manual

Mocka Locka User manual

Mocka

Mocka Locka User manual

Mocka Kids House Bookcase User manual

Mocka

Mocka Kids House Bookcase User manual

Mocka Zander Side Table User manual

Mocka

Mocka Zander Side Table User manual

Mocka Tahoe Entertainment Unit User manual

Mocka

Mocka Tahoe Entertainment Unit User manual

Mocka Oska Buffet User manual

Mocka

Mocka Oska Buffet User manual

Mocka Porto Entertainment Unit User manual

Mocka

Mocka Porto Entertainment Unit User manual

Mocka Jolt Six Drawer - Slim User manual

Mocka

Mocka Jolt Six Drawer - Slim User manual

Mocka Soren Queen bed User manual

Mocka

Mocka Soren Queen bed User manual

Mocka Zara User manual

Mocka

Mocka Zara User manual

Mocka Marlow Entertainment Unit User manual

Mocka

Mocka Marlow Entertainment Unit User manual

Mocka Hamptons Desk User manual

Mocka

Mocka Hamptons Desk User manual

Mocka Jesse Three Drawer User manual

Mocka

Mocka Jesse Three Drawer User manual

Mocka Charli Three Drawer User manual

Mocka

Mocka Charli Three Drawer User manual

Mocka Kennedy User manual

Mocka

Mocka Kennedy User manual

Mocka Sadie Desk User manual

Mocka

Mocka Sadie Desk User manual

Mocka Eclipse Eight Drawer User manual

Mocka

Mocka Eclipse Eight Drawer User manual

Mocka Sadie User manual

Mocka

Mocka Sadie User manual

Mocka Otto Woven Chair User manual

Mocka

Mocka Otto Woven Chair User manual

Mocka Olsen Entertainment Unit User manual

Mocka

Mocka Olsen Entertainment Unit User manual

Mocka Kenny Desk User manual

Mocka

Mocka Kenny Desk User manual

Mocka Avoca User manual

Mocka

Mocka Avoca User manual

Mocka Maisie User manual

Mocka

Mocka Maisie User manual

Popular Indoor Furnishing manuals by other brands

Next 271398 Assembly instructions

Next

Next 271398 Assembly instructions

U-Line H-6991 quick start guide

U-Line

U-Line H-6991 quick start guide

Luxor CVTR32 manual

Luxor

Luxor CVTR32 manual

kupper 12120 Assembly instruction

kupper

kupper 12120 Assembly instruction

Ironwood Glacier CDBC manual

Ironwood

Ironwood Glacier CDBC manual

Vinsetto 921-664v70 manual

Vinsetto

Vinsetto 921-664v70 manual

Anmytek Olso H0035 Assembly and Care Guide

Anmytek

Anmytek Olso H0035 Assembly and Care Guide

Jumbo MAX CUBE 9 MX9R/018 Assembly instructions

Jumbo

Jumbo MAX CUBE 9 MX9R/018 Assembly instructions

Otto HORSENS 2 DRAWER LATERAL FILING CABINET... Assembly instructions

Otto

Otto HORSENS 2 DRAWER LATERAL FILING CABINET... Assembly instructions

Kogan ovela WAKEFIELD OVWAKMBSBA user guide

Kogan

Kogan ovela WAKEFIELD OVWAKMBSBA user guide

Hay 6X instruction manual

Hay

Hay 6X instruction manual

BUSH FURNITURE kathy ireland HOME Kl30101 manual

BUSH FURNITURE

BUSH FURNITURE kathy ireland HOME Kl30101 manual

Horreds VX10 Assembly instruction

Horreds

Horreds VX10 Assembly instruction

Next U01043 Assembly instructions

Next

Next U01043 Assembly instructions

Forte HVKD43 Assembling Instruction

Forte

Forte HVKD43 Assembling Instruction

Winners Only DELFINI TI-DF30R-G Assembly instructions

Winners Only

Winners Only DELFINI TI-DF30R-G Assembly instructions

JAMES MARTIN VANITIES 410-V30-GW Assembly instructions

JAMES MARTIN VANITIES

JAMES MARTIN VANITIES 410-V30-GW Assembly instructions

BLACK RED WHITE NIKA STANDARD 260 FRONTY EKRAN 65 Assembly manual

BLACK RED WHITE

BLACK RED WHITE NIKA STANDARD 260 FRONTY EKRAN 65 Assembly manual

manuals.online logo
manuals.online logoBrands
  • About & Mission
  • Contact us
  • Privacy Policy
  • Terms and Conditions

Copyright 2025 Manuals.Online. All Rights Reserved.