manuals.online logo
Brands
  1. Home
  2. •
  3. Brands
  4. •
  5. Mocka
  6. •
  7. Indoor Furnishing
  8. •
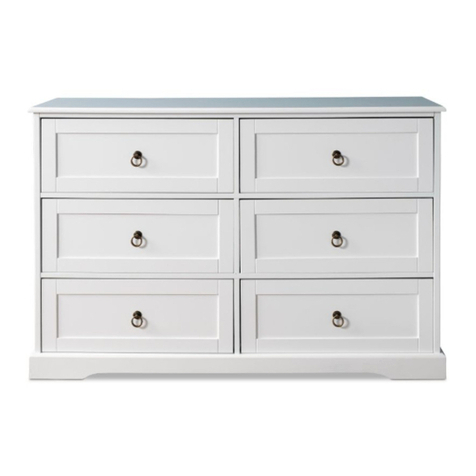
  9. Mocka Hamptons User manual

Mocka Hamptons User manual

mocka.co.nz I mocka.com.au I PO BOX 18, Pinkenba QLD 4008
ASSEMBLY I N S TRUCTION S
Hamptons
Bedside Table
Thank you for your purchase.
Please follow the instructions below for correct assembly
WARNING: Any furniture that is not anchored to a wall has the
potential to tip over in certain circumstances, i.e. if a child
attempts to climb up on the furniture or in the event of an
earthquake. Accordingly, we recommend that all furniture is
anchored to a wall. We supply a free safety wall anchor with
all furniture sold and we recommend these are used to
prevent your product tipping. The fixing device provided should
fit most wall types, but please note that dierent wall materi-
als may require dierent fixing devices from those supplied.
For quicker assembly, we recommend the
use of a power drill on a low-speed setting.
.Phillips & Flathead screwdrivers
and hammer required
X
Z
Y
W
safety
x1
strap
x1
screw
long
x1
screw
wall
x1
anchor
x1
washer
B
ACDEF
GH
30 mm
12 mm
Hardware Supplied
bolt
x32
locking
nut x 32 x20
dowelsmall
I
screw x24
L + R
x6
slide rail
L + R
x6
slide rail
long
screw x 12
40 mm
long
J
25 mm
screw x 4
small
screw x2
handle
x 3
P1
wedge
x6
1
Hamptons
mocka.co.nz I mocka.com.au I PO BOX 18, Pinkenba QLD 4008
ASSEMBLY I N S TRUCTION S
2
Bedside Table
2
Insert 4 x bolts (A) into panels [1]. Attach panels [6] to panel [1] and secure
with 2 x screws (J). Attach 1 x wall strap (W) to panel [1] using 1x screw(Y).
Tighten with a screwdriver
Attach 3 x left slide rails (G) to panel [3] and secure with 6 x small screws (E).
Attach 3 x right slide rails (G) to panel [4] and secure with 6 x small screws (E).
Insert 4 x bolts (A) into panels [3] and [4]. Tighten with a screwdriver.
A
6
A
A
A
A
W
Y
1J
J
GG
A
AA
A
EEEE
EE
E
E
EEEE
G
G
G
G
G
G
34
Hamptons
Bedside Table
mocka.co.nz I mocka.com.au I PO BOX 18, Pinkenba QLD 4008
ASSEMBLY I N S TRUCTION S
Insert 4 x dowels (C) into panels [5]. Attach panels [5] to panels [3]
and [4] and secure with 4 x locking nuts (B).
Tighten with a screwdriver.
3 4
Attach 12 x bolts (A) into panels [2] and [13]. Attach 4 x dowels (C)
to panels [13] and [14]. Insert 4 x locking nuts (B) into panels [14].
Tighten with a screwdriver.
C
3
4
C
B
B
B
B
C
C
5
52
AA
AA
AA
A
A
A
C
A
C
A
A
B
B
B
BC
C
13
13 14
14
mocka.co.nz I mocka.com.au I PO BOX 18, Pinkenba QLD 4008
ASSEMBLY I N S TRUCTION S
Hamptons
Bedside Table
5 6
Insert 4 x dowels (C) into panels [3] and [4]. Attach panels [3] and [4] to
panel [2] and secure with 4 x long screws (D).
Tighten with a screwdriver.
Insert 4 x dowels (C) into panels [2], [13] and [14]. Attach panels [13]
and [14] to panel [2] and secure with 8 x locking nuts (B).
Tighten with a screwdriver.
3
4
2
D
D
D
D
C
C
C
C
C
C
C
C
B
B
B
B
2
13
14
Hamptons
Bedside Table
mocka.co.nz I mocka.com.au I PO BOX 18, Pinkenba QLD 4008
ASSEMBLY I N S TRUCTION S
Slide panel [7] between the grooves on panels [3] and [4]
to form the back of the unit as shown.
Insert 4 x dowels (C) into panel [1]. Attach panels [1] to panel [3], [4]
and [7] and secure with 4 x locking nuts (B).
Tighten with a screwdriver.
7 8
3
4
7
1
4
3
B
CC
CC
7
BBB
Hamptons
Bedside Table
mocka.co.nz I mocka.com.au I PO BOX 18, Pinkenba QLD 4008
ASSEMBLY I N S TRUCTION S
Insert 12 x bolts (A) into panels [8]. Attach panels [10] and [11] to panel [8],
secure with 12 x locking nuts (B). Tighten with a screwdriver.
Slide panels [9] between the grooves on panels [10] and [11] to form
the base of the drawer as shown.
109
10
B
B
A
B
B
A
AA
A
11
10
11
8
9
11
Hamptons
Bedside Table
mocka.co.nz I mocka.com.au I PO BOX 18, Pinkenba QLD 4008
ASSEMBLY I N S TRUCTION S
Attach panels [12] to panels [9], [10] and [11], secure with 12 x medium screws (F).
Tighten with a screwdriver.
Attach 6 x slide rails (H) to panels [10] and [11] and secure with 12 x
small screws (E). Insert 3 x Handles and screws (I) into panels [8] .
12
F
9
F
F
F
12
10
11
E
E
H
I
8
10
11
E
H
E
13
Hamptons
Bedside Table
mocka.co.nz I mocka.com.au I PO BOX 18, Pinkenba QLD 4008
ASSEMBLY I N S TRUCTION S
Attach 6 x wedges (P1) to panel [7]. Tighten with a screwdriver Once assembled lift furniture into place, do not drag. Use a drill to create
a small hole lining up with the top of the safety strap (W). Fasten to wall
using wall anchor (X), washer (Z) and screw. Ensure the unit is balaced and
steady before use. You’re done, enjoy!
14
P1
P1
P1
P1
P1
P1
P1
7
X
Z
x1
wall
screw
wall
anchor
wall
screw
Washer
Strap

Other manuals for Hamptons

18

Other Mocka Indoor Furnishing manuals

Mocka Kirra Coffee Table User manual

Mocka

Mocka Kirra Coffee Table User manual

Mocka Sintra User manual

Mocka

Mocka Sintra User manual

Mocka Theo User manual

Mocka

Mocka Theo User manual

Mocka Luna Cube 8 User manual

Mocka

Mocka Luna Cube 8 User manual

Mocka Sadie Entertainment Unit - Large User manual

Mocka

Mocka Sadie Entertainment Unit - Large User manual

Mocka Solid Wooden Stool User manual

Mocka

Mocka Solid Wooden Stool User manual

Mocka Kids Moon Table and Star Chair Set User manual

Mocka

Mocka Kids Moon Table and Star Chair Set User manual

Mocka Jesse User manual

Mocka

Mocka Jesse User manual

Mocka Brixton User manual

Mocka

Mocka Brixton User manual

Mocka Harlin Kids Bedside Table User manual

Mocka

Mocka Harlin Kids Bedside Table User manual

Mocka Eliza Buffet User manual

Mocka

Mocka Eliza Buffet User manual

Mocka Alps Cabinet User manual

Mocka

Mocka Alps Cabinet User manual

Mocka Hatcher Desk User manual

Mocka

Mocka Hatcher Desk User manual

Mocka Kids Rocking Horse User manual

Mocka

Mocka Kids Rocking Horse User manual

Mocka Addi Entertainment Unit User manual

Mocka

Mocka Addi Entertainment Unit User manual

Mocka Axel Kids Desk & Chair Set User manual

Mocka

Mocka Axel Kids Desk & Chair Set User manual

Mocka Kids House Hanger User manual

Mocka

Mocka Kids House Hanger User manual

Mocka Zack User manual

Mocka

Mocka Zack User manual

Mocka Sadie Bedside Table User manual

Mocka

Mocka Sadie Bedside Table User manual

Mocka Zander Bench Seat User manual

Mocka

Mocka Zander Bench Seat User manual

Mocka Inca Buffet User manual

Mocka

Mocka Inca Buffet User manual

Mocka Livi User manual

Mocka

Mocka Livi User manual

Mocka Edmond Entertainment Unit User manual

Mocka

Mocka Edmond Entertainment Unit User manual

Mocka Mischa Coffee Table User manual

Mocka

Mocka Mischa Coffee Table User manual

Popular Indoor Furnishing manuals by other brands

American Standard COLONY 4175.200 installation instructions

American Standard

American Standard COLONY 4175.200 installation instructions

Steelcase 9000 Series Replacement

Steelcase

Steelcase 9000 Series Replacement

Next COMPTON 377962 Assembly instructions

Next

Next COMPTON 377962 Assembly instructions

Pitarch 14070 Assembly instructions

Pitarch

Pitarch 14070 Assembly instructions

Wampat W11F4123W Assembly instructions

Wampat

Wampat W11F4123W Assembly instructions

Lorell LLR68573 Assembly instructions

Lorell

Lorell LLR68573 Assembly instructions

GoStand 2 Series Assembly instructions

GoStand

GoStand 2 Series Assembly instructions

Furniture of America CM3630SC-2PK Assembly instructions

Furniture of America

Furniture of America CM3630SC-2PK Assembly instructions

Cello Pluto 550 instruction manual

Cello

Cello Pluto 550 instruction manual

FURNITUREBOX ELLWOOD Assembly guide

FURNITUREBOX

FURNITUREBOX ELLWOOD Assembly guide

BENE FRIENDS COAT STAND user manual

BENE

BENE FRIENDS COAT STAND user manual

GrainWood Shaker SH2201 Assembly instructions

GrainWood

GrainWood Shaker SH2201 Assembly instructions

Modus Furniture PARAGON 4N02L4 Assembly instructions

Modus Furniture

Modus Furniture PARAGON 4N02L4 Assembly instructions

Home Decorators Collection WSFP60ECHD-19 Assembly instructions

Home Decorators Collection

Home Decorators Collection WSFP60ECHD-19 Assembly instructions

Amart Furniture MAPLETON 72741 Assembly instruction

Amart Furniture

Amart Furniture MAPLETON 72741 Assembly instruction

Livarno Living 347574 Assembly instruction

Livarno Living

Livarno Living 347574 Assembly instruction

DURAVIT Delos DL 1290 L Mounting instructions

DURAVIT

DURAVIT Delos DL 1290 L Mounting instructions

SEI BC925600TX Assembly instruction

SEI

SEI BC925600TX Assembly instruction

manuals.online logo
manuals.online logoBrands
  • About & Mission
  • Contact us
  • Privacy Policy
  • Terms and Conditions

Copyright 2025 Manuals.Online. All Rights Reserved.