manuals.online logo
Brands
  1. Home
  2. •
  3. Brands
  4. •
  5. Mocka
  6. •
  7. Indoor Furnishing
  8. •
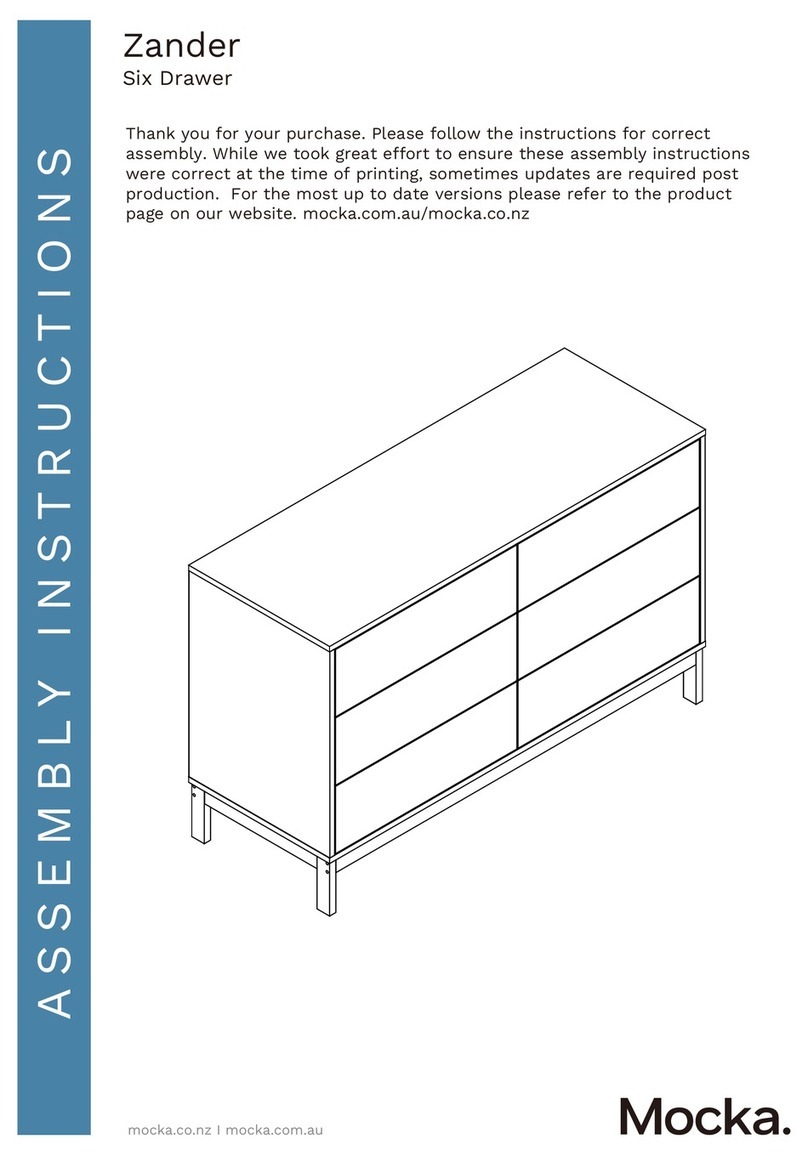
  9. Mocka Sadie User manual

Mocka Sadie User manual

mocka.co.nz I mocka.com.au I PO BOX 18, Pinkenba QLD 4008
ASSEMBLY I N S TRUCTION S
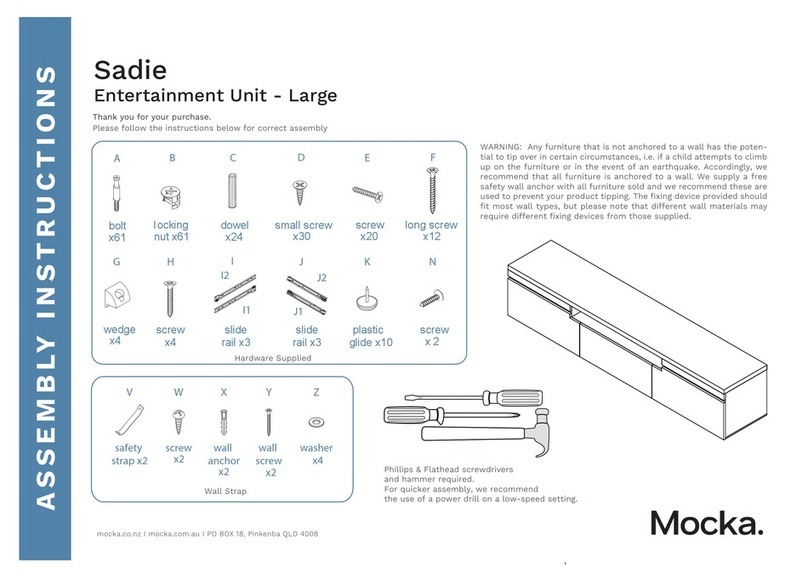
Sadie
Entertainment Unit
Thank you for your purchase.
Please follow the instructions below for correct assembly
Phillips & Flathead screwdrivers and hammer required
wedge
x4 x4
screw
A B C D E F
GHJ
I
Wall Strap
Hardware Supplied
dowel
x24
screw
x12
bolt
x60
locking
nut x60
small
screw x36
slide
rail x3
slide
I1
I2
J1
J2
rail x3
x12
long screw
x4
washer
Z
wall
screw
Y
wall
x2
X
anchor
safety
W
V
strap x2 x2
screw
x2
K
glide x10
plastic
For quicker assembly, we recommend the use of a power drill on a low-speed setting.
WARNING: Any furniture that is not anchored to a wall has
the potential to tip over in certain circumstances, i.e. if a
child attempts to climb up on the furniture or in the event
of an earthquake. Accordingly, we recommend that all
furniture is anchored to a wall. We supply a free safety
wall anchor with all furniture sold and we recommend
these are used to prevent your product tipping. The fixing
device provided should fit most wall types, but please
note that dierent wall materials may require dierent
fixing devices from those supplied.
Sadie
mocka.co.nz I mocka.com.au I PO BOX 18, Pinkenba QLD 4008
ASSEMBLY I N S TRUCTION S
21
Entertainment Unit
2
Insert 2x bolts (A) into panel [4]. Attach 1x slide rail (I1) to panel [4]
using 3x screws (D). Insert 2x bolts (A) into panel [5]. Attach 1x slide
rail (I2) to panel [5] using 3x screws (D). Tighten with a screwdriver.
Attach 1x slide rail (I1) to one side of panel [9] using 3x screws (D). Turn it
over and attach 1x slide rail (I2) to the other side using 3x screws (D).
Tighten with a screwdriver. Repeat this step for the other panel [9].
5
4
I2
I1
D
D
D
D
D
AA
AA
I2
D
A
DI2
D
D
D
I1
D
D
D
9x2
9x2
I1
D
Sadie
Entertainment Unit
mocka.co.nz I mocka.com.au I PO BOX 18, Pinkenba QLD 4008
ASSEMBLY I N S TRUCTION S
Insert 4x bolts (A) into panel [3]. Insert 2x bolts (A) into panel [6],
and insert 2x bolts (A) into panel [7].
3 4
Attach panels [9] to panel [3] using 4x dowels (C) and secure with
4x locking nuts (B). Tighten with a screwdriver.
AA
AA
A
A
A
A
C
C
C
C
B
7
6
3
93
9
B
B
B
B
mocka.co.nz I mocka.com.au I PO BOX 18, Pinkenba QLD 4008
ASSEMBLY I N S TRUCTION S
Sadie
Entertainment Unit
5 6
Attach panels [6] and [7] to panel [3] using 4x dowels (C) and secure
with 4x screws (F). Tighten with a screwdriver.
Attach panel [5] to panel [20] using 2x locking nuts (B). Attach panel [4]
to the other panel [20] using 2x locking nuts (B). Attach both panels [20]
to panels [6] and [7] using 4x locking nuts (B). Tighten with a screwdriver.
C
C
C
C
F
F
F
B
7
6
3
5
4
20
20
B
B
B
B
7
6
3
Sadie
Entertainment Unit
mocka.co.nz I mocka.com.au I PO BOX 18, Pinkenba QLD 4008
ASSEMBLY I N S TRUCTION S
Insert 8x dowels (C) into the tops of the panels as shown. Insert 12x bolts (A) to panel [1]. Attach panels [21] to panel [1]
using 4x locking nuts (B). Tighten with a screwdriver.
7 8
C20
C
C
C
C
C
C
C
20
5
4
7
6
1
A
A
A
A
AA
A
A
A
A
AA
21
B
B
21
B
B
Sadie
Entertainment Unit
mocka.co.nz I mocka.com.au I PO BOX 18, Pinkenba QLD 4008
ASSEMBLY I N S TRUCTION S
Attach panel [1] to panel [5], [7], [6] and [4] using 8x
locking nuts (B). Tighten with a screwdriver.
Slide back panel [12] down along the grooves between panel [5] and [4].
Insert 8x dowels (C) into panel [4], [5] and both panels [9].
109
1
5
7
6
4
B
B
B
B
B
B
B
B
B
C
C
C
C
C
12
4
9
9
5
11
Sadie
Entertainment Unit
mocka.co.nz I mocka.com.au I PO BOX 18, Pinkenba QLD 4008
ASSEMBLY I N S TRUCTION S
Attach panel [2] to panel [5], [4] and [9] using 8x screws (F).
Tighten with a screwdriver.
Insert 16x bolts (A) into panel [2]. Insert 4x bolts (A)
into each panel [10].
12
10 x2
A
A
A
A
A
A
AA
AA
A
A
AA
A
A
A
A
A
A
2
2
F
F
F
F
F
F
F
F
12
12
13
Sadie
Entertainment Unit
mocka.co.nz I mocka.com.au I PO BOX 18, Pinkenba QLD 4008
ASSEMBLY I N S TRUCTION S
Attach panels [10], [8] and [11] together as shown using 8x l
ocking nuts (B). Tighten with a screwdriver.
Attach panels [10], [11] and [8] to panel [2] using 16x locking nuts (B).
Tighten with a screwdriver. Attach 10x plastic glides (K) as shown.
14
10
8
10
8
11
11
B
B
B
B
B
B
B
B
2
B
B
B
B
B
10
8
B
B
B
B
B
12
K
K
K
K
K
K
K
K
K
K
15
Sadie
Entertainment Unit
mocka.co.nz I mocka.com.au I PO BOX 18, Pinkenba QLD 4008
ASSEMBLY I N S TRUCTION S
Attach 4x wedges (G) using 4x screws (H) to the corners of panel [12].
Attach 2x safety straps (V) and 2x washers (Z) to the back of top
panel [1] using 2x screws (W). Tighten with a screwdriver.
Insert 4x bolts (A) into each panel [13], [14] and [15]. Attach panels [16]
and [17] to panel [15] using 4x locking nuts (B). Attach panels [16] and
[17] to panels [13] and [14] using 8x locking nuts (B). Slide down panels
[19] to form the base of the drawers.
16
1
12
AA
AA
AA
AA
AA
AA
B
B
B
B
B
B
B
B
13 14
15
17
16
19
13
14
15
17
16
19
H
G
G
G
G
H
H
H
G
H
V
ZW
V
ZW
screw
strap
washer
17
Sadie
Entertainment Unit
mocka.co.nz I mocka.com.au I PO BOX 18, Pinkenba QLD 4008
ASSEMBLY I N S TRUCTION S
Attach back panels [18] to the side panels using 12x screws (E). Attach 1x
slide rail (J1) and 1x slide rail (J2) to the sides of each drawer and secure
with 6x screws (D) as shown. Tighten with a screwdriver.
Insert the drawers into the unit as shown. Ensure the drawers slide
smoothly and easily along the rails.
18
D
D
DD
D
J1
J2
D
D
DD
D
J1
J2
D
D
D
D
DD
J1
J2
D
D
D
D
EE
E
E
E
E
E
E
13
14
15
13 14
15
18
18
13
14
15
19
Sadie
Entertainment Unit
mocka.co.nz I mocka.com.au I PO BOX 18, Pinkenba QLD 4008
ASSEMBLY I N S TRUCTION S
Lift the furniture into the desired location, do not drag. Use a drill to
create two small holes lining up with the top of the safety straps.
Fasten to wall using 2x wall plugs (X), 2x washers (Z) and 2x screws (Y).
Tighten with a screwdriver.
You’re done, enjoy!
20
X
Y
Z
X
Y
Z
wall
plug
screw
strap
washer

Other manuals for Sadie

23

Other Mocka Indoor Furnishing manuals

Mocka Hatcher Desk User manual

Mocka

Mocka Hatcher Desk User manual

Mocka Claremont Entertainment Unit User manual
Mocka

Mocka Claremont Entertainment Unit User manual

Mocka Betti Bobbin User manual

Mocka

Mocka Betti Bobbin User manual

Mocka Eclipse Change Table User manual

Mocka

Mocka Eclipse Change Table User manual

Mocka Maya Bedside Table User manual

Mocka

Mocka Maya Bedside Table User manual

Mocka Boston Three Drawer User manual

Mocka

Mocka Boston Three Drawer User manual

Mocka Brixton User manual

Mocka

Mocka Brixton User manual

Mocka Sadie User manual

Mocka

Mocka Sadie User manual

Mocka Bentley Low Shelf User manual

Mocka

Mocka Bentley Low Shelf User manual

Mocka Zara User manual

Mocka

Mocka Zara User manual

Mocka Marlow Entertainment Unit User manual

Mocka

Mocka Marlow Entertainment Unit User manual

Mocka Aspen Classic Cot User manual

Mocka

Mocka Aspen Classic Cot User manual

Mocka Octavia Change Table User manual

Mocka

Mocka Octavia Change Table User manual

Mocka Locka Bedside Table User manual

Mocka

Mocka Locka Bedside Table User manual

Mocka Axel Kids Desk & Chair Set User manual

Mocka

Mocka Axel Kids Desk & Chair Set User manual

Mocka Malena User manual

Mocka

Mocka Malena User manual

Mocka Zander User manual

Mocka

Mocka Zander User manual

Mocka Tasman User manual

Mocka

Mocka Tasman User manual

Mocka Hamptons User manual

Mocka

Mocka Hamptons User manual

Mocka Watson Bookcase User manual

Mocka

Mocka Watson Bookcase User manual

Mocka Tahoe User manual

Mocka

Mocka Tahoe User manual

Mocka Jack Coffee Table User manual

Mocka

Mocka Jack Coffee Table User manual

Mocka Torrance Occasional Chair User manual

Mocka

Mocka Torrance Occasional Chair User manual

Mocka Sadie Six Cube Unit User manual

Mocka

Mocka Sadie Six Cube Unit User manual
Popular Indoor Furnishing manuals by other brands

Profijt Meubel YORK BAR1 manual

Profijt Meubel

Profijt Meubel YORK BAR1 manual

Neo Chair CNTT Assembly instructions

Neo Chair

Neo Chair CNTT Assembly instructions

Established & Sons ISLAND manual

Established & Sons

Established & Sons ISLAND manual

BCP SKY5171 instruction manual

BCP

BCP SKY5171 instruction manual

Geuther 2712 manual

Geuther

Geuther 2712 manual

SOHO BABY 43088 Assembly instructions

SOHO BABY

SOHO BABY 43088 Assembly instructions

WWBeds Face Unassembled Alpha Murphy Assembly instructions

WWBeds

WWBeds Face Unassembled Alpha Murphy Assembly instructions

Aseptico ADC-02 Operation maintenance manual & parts list

Aseptico

Aseptico ADC-02 Operation maintenance manual & parts list

SEI BC951800TX Assembly instructions

SEI

SEI BC951800TX Assembly instructions

Hooker Furniture 3016-90851 Assembly instruction

Hooker Furniture

Hooker Furniture 3016-90851 Assembly instruction

Walker Edison W60NOR2D Assembly instructions

Walker Edison

Walker Edison W60NOR2D Assembly instructions

Courtyard Creations RTS735G Assembly instructions

Courtyard Creations

Courtyard Creations RTS735G Assembly instructions

Moebelix GNTV111 Assembly instructions

Moebelix

Moebelix GNTV111 Assembly instructions

Gilman Creek 1363152 manual

Gilman Creek

Gilman Creek 1363152 manual

Global Kate 2811-8 Specifications

Global

Global Kate 2811-8 Specifications

MAJA Möbel Soundboard K164 manual

MAJA Möbel

MAJA Möbel Soundboard K164 manual

huxie 50060 Assembly instructions and directions for use

huxie

huxie 50060 Assembly instructions and directions for use

Better Homes and Gardens Cambridge Place BH15-084-299-05 manual

Better Homes and Gardens

Better Homes and Gardens Cambridge Place BH15-084-299-05 manual

manuals.online logo
manuals.online logoBrands
  • About & Mission
  • Contact us
  • Privacy Policy
  • Terms and Conditions

Copyright 2025 Manuals.Online. All Rights Reserved.