9
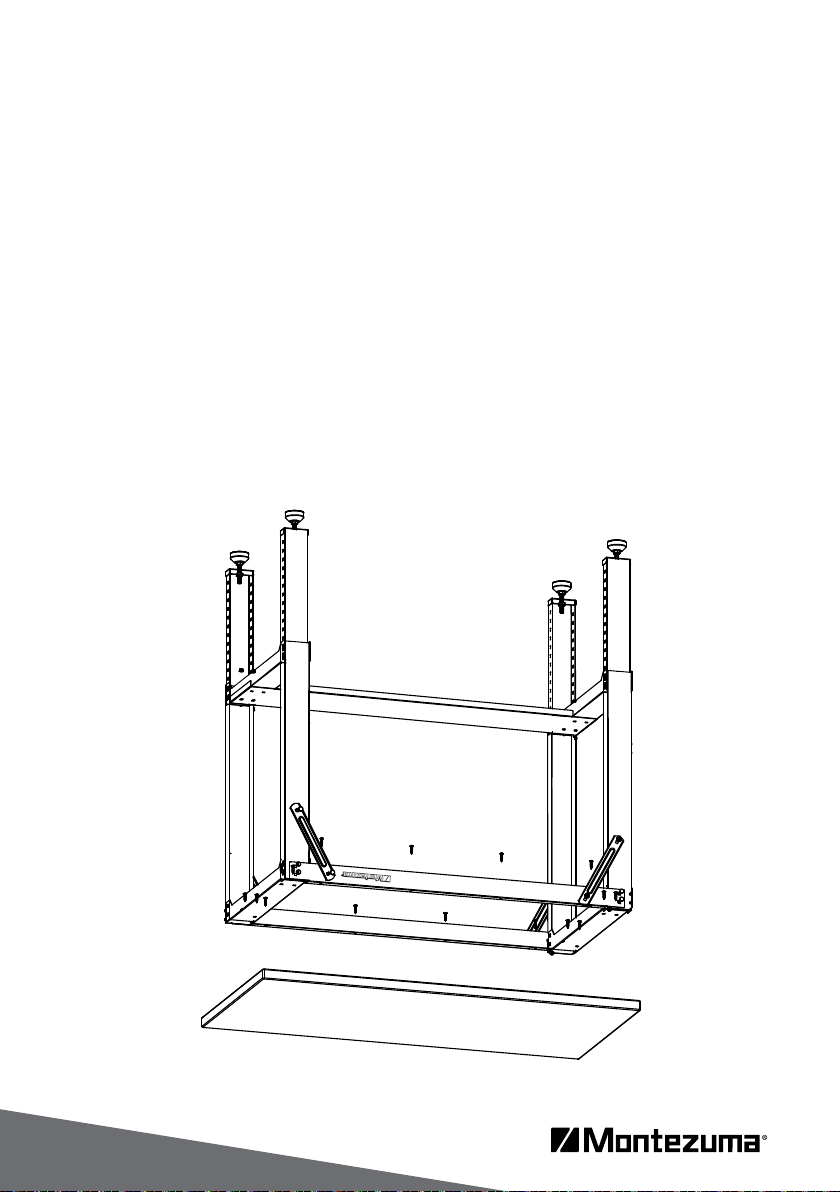
CAUTION: You may require the assistance of a second person to complete this step.
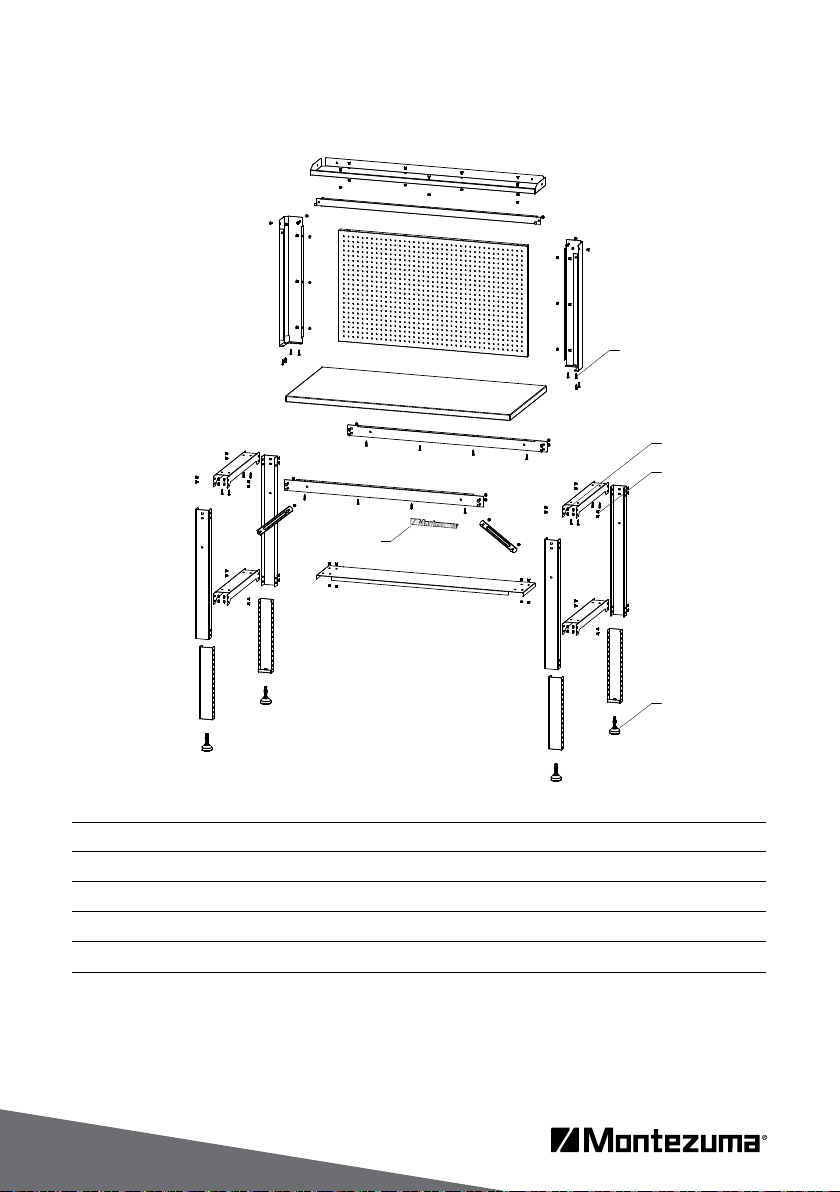
Build the back wall onto the workbench by slipping a column onto one back corner of the
work top. The column should be nested above and below the work top. Mark the location
of the holes in the bottom of the column on the bottom of the work top. Remove the
column and drill pilot holes in the bottom of the work top. Set the column back in place so
the work top is nested into the column and secure the column in place using the four (4)
lag screws. Repeat on the other side with the remaining column.
Attach the top shelf by nesting it down in the tops of each of the columns. The columns have
been designed with notches to help locate the top shelf into place. Fasten the top shelf to
each of the columns using two (2) nuts and bolts in the side and back of the columns.
Place the column cross brace under the top shelf and secure it to each column with one
(1) nut and bolt. The cross brace is notched so it will set under the top shelf and the end
of the cross brace will overlap the front of each column.
On the back side of the workbench, lift the pegboard panel into place. Line up the holes
of the pegboard panel with the holes in the inside edge of the columns. Secure with three
(3) nuts and bolts. It may be easier to complete this step with one person inserting the
bolts into the holes from the front and another person in back tightening the nut. Secure
the top of the pegboard panel to the top shelf with two (2) nuts and bolts. Repeat this
assembly with the other side of the pegboard panel.
Carefully drill pilot holes in the top of the work top that line up with the holes in the bottom of
the pegboard panel. Screw the bottom of the pegboard panel into place using lag screws.
Check one more time to make sure your workbench and back wall are level. Secure all
fasteners and move into place. Make sure it is level in the area it will be used.