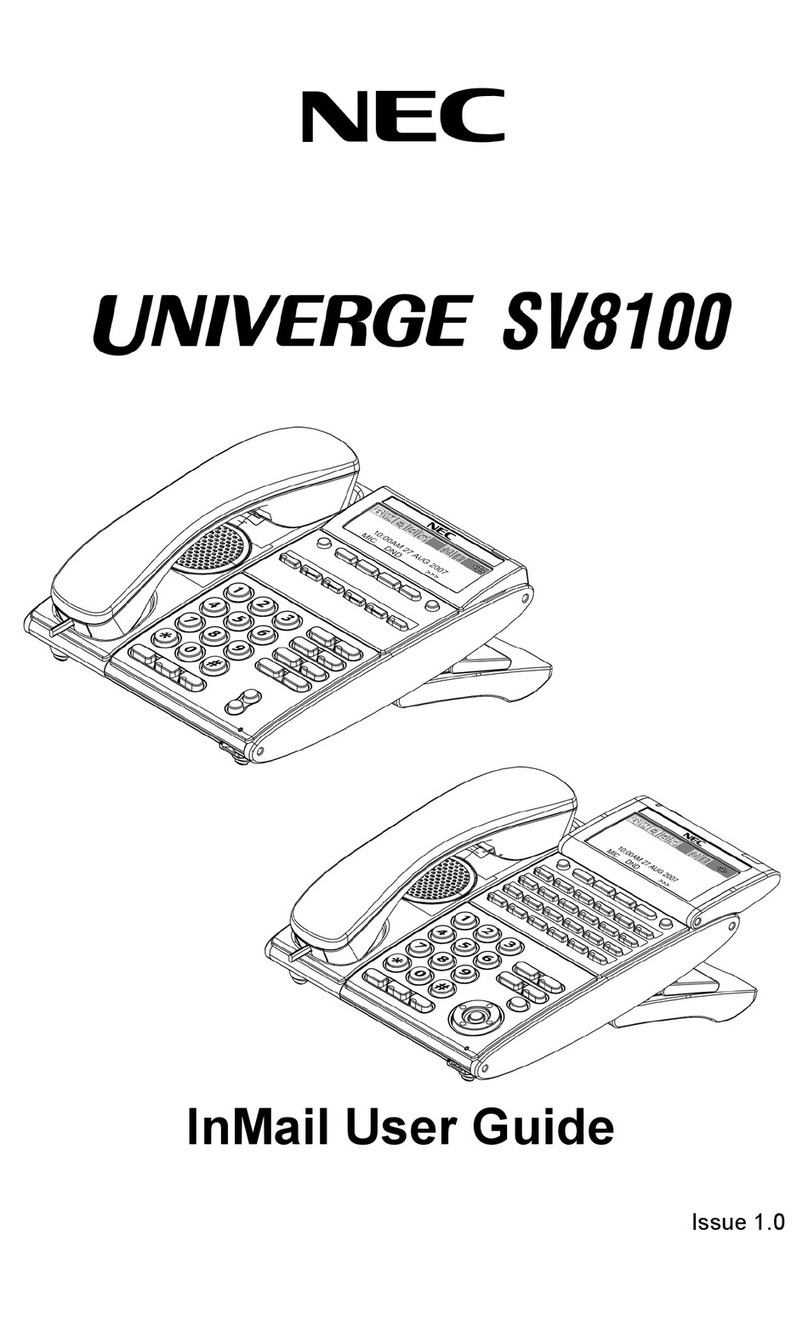
NEC DT710 User manual

Quick Reference Guide Univerge Blue Cloud Services ITL Phones
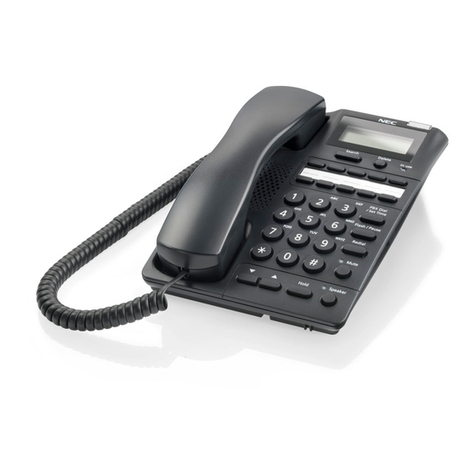
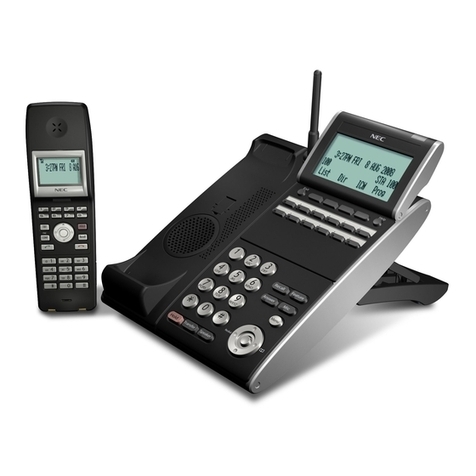
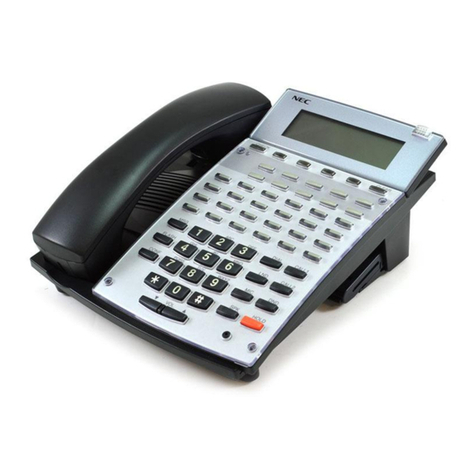
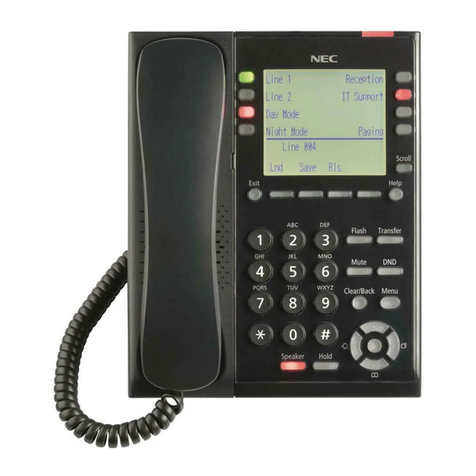
NEC ITL Phone Models
Placing Calls
Phone Registration
The or icon in the display indicates that the
terminal is currently not registered with any server
and you cannot make any calls.
The icon indicates that the network cable is
disconnected. You cannot make any calls.
The icon indicates that the terminal is successfully
registered with a server.
If you have a colour display LCD phone the icon will be
Orange for not registered and Green for registered
To place calls:
1. Lift the handset, press the Speaker key, or press
the NewCall soft-key to receive dial tone.
2. Enter the telephone number of the person you want
to call, including an outside access code (for external
calls).
3. Press the Dial soft-key to initiate the call, or wait a
few seconds for the call to be automatically dialed.
4. When the dialed party answers, use the handset,
headset or MIC to start the conversation.
Answering Calls
• Using the handset: Lift the telephone handset.
• Using the speaker: Press the Speaker key.
• Using a headset: Press the Answer key.
• If you are in the Personal Directory, Call
History or Menu screens: Press the Line Key to view
the caller information, then use the handset, speaker
or headset to answer the call.
Phone Features
1. Hold - Places current call on hold.
• To resume the held call, press the Hold key, or press
the Resume soft-key.
• During a held call, you can dial another party by
pressing the NewCall softkey, which provides dial tone.
ITL-6DE Phones:
• On hold duration is displayed in MM:SS format for
the first hour of the call, and then HH:MM format for
the remainder of the call. The maximum duration is
99:59:59.
All Other Phones:
• On hold duration is displayed in HH:MM:SS format.
The maximum duration is 99:59:59.
2. Transfer - Initiates/completes a transfer.
3. Speaker - Full-duplex speaker phone capability.
The LED on this key lights when the speaker is active.
4. Recall - Press to receive dial tone.
5. Feature - This key displays a set of menu options
that provide additional capabilities such as Speed Dial
and key programming.
6. Answer - Press this key to answer an incoming call.
7. Mic - Press key to mute the microphone. The LED
on this key flashes when the microphone is muted.
Press the key again to un-mute the microphone.
8. Menu - Accesses user settings and information local
to the phone.
9. Cursor Pad - Use this key to access various
features with simple operation.
• Redial - Press this key to re-dial the last number
dialed.
• Directory - Press this key to open the Personal
Directory menu.
• Up /Down - Used to adjust ringer volume and
call volume.
• Handset, Headset and Speaker call
volume: Press (UP) or (DOWN) key during
conversation.
• Ringer Volume: Press (UP) or (DOWN) key
while ring tone is playing.
• Soft Ring Volume: Press (UP) or (DOWN)
key while Soft Ring is playing.
(Continued Next Page …)

Quick Reference Guide Univerge Blue Cloud Services ITL Phones
• Enter: • Press to select the highlighted menu item.
• Cursor Pad within Menu Screens:
• Up - Move the highlighted area one line up
the screen.
• Down - Move the highlighted area one line
down the screen.
• Left - Go back to the previous screen.
• Right - Go to the screen which corresponds
to the highlighted menu item.
• Enter - Go to the screen which corresponds
to the highlighted menu item.
10. Line Key - This LED is lit when you have a dial
tone or are on a telephone call. For concurrent calls,
press this LED to switch the focus between calls.
11. Programmable Keys/Speed Dial Keys -
Programmable keys can be Speed Dial Keys. Press a
key to automatically dial the speed dial number or star
code.
12. Soft-keys - The soft-keys show the available
features for your current activity. Any feature shown
at the bottom of the LCD is available.
13. Exit - This key allows you to exit from the Menu or
Help mode and go back to the telephone main screen.
14. Help - Press this key to display information about
the soft-keys that are in the current LCD display.
15. LCD - Displays call information and options, Menu
information and soft-keys.
16. Call Indicator Lamp -
• Flashing: A flashing light indicates an incoming call.
• Solid: A solid light indicates you have new voice
mail, and the voice mail icon is shown on the LCD.
Softkeys
Softkeys are buttons that change function depending
on the situation. Their current function is highlighted
immediately above the button on the LCD screen.
NewCall - Generates dial tone for a call.
Voicemail - Automatically dials the voice mail
extension on your system. This feature may not be
available on all systems.
DND - Do Not Disturb. Silences the phone from
ringing. This feature may not be available on all
systems.
Pickup - Answers calls to other users in your Pickup
group from your phone. This feature may not be
available on all systems.
EndCall - Terminates the current call.
Conference/Conf - Initiates/completes a conference.
Resume - Takes the call off Hold status.
Dial - Dials the number.
Delete - Deletes the last digit entered (backspace).
Reject - Transfers call to your Voice Mail or
forwarding conditions.
Soft Keys
Idle
Pickup
VoiceMail
NewCall
Active Call
Conf
EndCall
Hold
EndCall
Conf
Resume
NewCall
Transfer
Blind
End Call
Conference
Split
Headset
End Call
Basic Settings
• To adjust ringer volume (handset or headset)
Press the up/down cursor key while on-hook.
• To adjust call volume (handset or headset)
Press the up/down cursor key in the off-hook
status or during a call.
• To adjust speaker volume
Press the up/down cursor key during speaker
phone operation, or during a call that is being played
on the speaker.
• Ringtone
Press the Menu key and select [3] User Settings [1]
Ringtone:
[1] Internal Ringtone:
[1] Ringtone 1
[2] Default
Press the OK softkey.
[2] External Ringtone:
[1] Ringtone 1
[2] Default
Press the OK soft-key.
• Headset Operation
Enable / Disable
Press the Menu key and select [3] Use Settings [2]
Headset, [1] Enable / Disable, [1] Enable / [2]
Disable). Press the OK soft-key.
Headset Ringing
Press the Menu key and select [3] User Settings[2]
Headset, [2] Ringing, [1] Phone / [2] Headset / [3]
Phone & Headset). Press the OK soft-key.
• Language
Press the Menu key and select [3] User Settings, [3]
Language:
[1] English (Internal)
[2] English (US)
[3] Francais (French).
Press the OK soft-key.
• Tone Volumes
Press the Menu key and select [3] User Settings [4]
Tone Volumes:
[1] Call Waiting Volume - 0 (Off) to 19
[2] Hold Reminder Volume –0 (Off) to 19

Quick Reference Guide Univerge Blue Cloud Services ITL Phones
Press the OK soft-key.
• Date/Time
Date Format
Press the Menu key and select [3] User Settings [5]
Date/Time,
[1] Date Format:
[1] Mon, Jan 1
[2] Mon, 1 Jan
[3] Jan 1, Mon
[4] 1 Jan, Mon
[5] YYYY/MM/DD
[6] MM/DD/YYYY
[7] DD/MM/YYYY
Press the OK soft-key.
Time Format
Press the Menu key and select [3] User Settings [5]
Date/Time,
[2] Time Format:
[1] 12 Hour
[2] 24 Hour
Press the OK soft-key.
• LCD Settings
LCD Contrast
Press the Menu key and select [3] User Settings [6]
User Settings, [6] LCD Settings, [1] LCD Contrast then
use the soft-keys to adjust the LCD contrast. (Range 0
(Low) to 7 (High).Default setting 4.
LCD Backlight Timeout
Press the Menu key and select [3] User Settings, [6]
LCD Settings, [2] LCD Backlight Timeout, then use the
telephone keypad to enter a new backlight timeout (in
seconds) and press the OK soft-key. 0 (None) to 255
(Seconds).
• Clear Settings
Press the Menu key and select [3] User Settings [7]
Clear Settings:
1 Clear User Settings
2 Clear Personal Directory
3 Clear Call History
Accept Clear Confirmation Request
Press the OK soft-key.
Call History
You can view information about Missed Calls, Received
Calls and Placed Calls on your telephone.
The phone stores call information for the most recent
50 calls, displaying the newest entries first. For
multiple phone calls from the same telephone number,
the most recent time and date information for that
number is shown. If you have a Personal Directory
entry that matches a number in your Call History, the
name from the Personal Directory is shown.
The or icon indicates a missed call. This icon
disappears after you check the Call History.
To view Missed Calls:
1. Press the Menu key.
2. Select [2] Call History.
3. Select [1] Missed Calls.
4. Use the Up and Down soft-keys or the
Up/Down keys on the cursor pad to scroll through the
missed call information.
To view Received Calls:
1. Press the Menu key.
2. Select [2] Call History.
3. Select [2] Received Calls.
4. Use the Up and Down soft-keys or the
Up/Down keys on the cursor pad to scroll through the
received call information.
To view Placed Calls:
1. Press the Menu key.
2. Select [2] Call History.
3. Select [3] Placed Calls.
4. Use the Up and Down soft-keys or the
Up/Down keys on the cursor pad to scroll through the
placed call information.
Call Waiting / Concurrent Calls
Note: The call waiting feature and maximum number
of concurrent calls you can receive is determined by
your system administrator.
If you have call waiting on your phone line, you will
hear a tone in your handset and the call indicator lamp
flashes when another call on the line is waiting for
consultation.
To answer the other incoming call (Call Waiting):
1. You will hear a tone that indicates you have another
call. Also, the Call Indicator Lamp on the phone will
blink.
2. Do one of the following:
• To review the caller information before
answering the call: Press the Line Key, and then
press the Answer key to take the call, or press the
Reject soft-key to reject the call.
• To answer the call without reviewing the caller
information: Press the Answer key. 3. When you
have completed the call, press the EndCall soft-key to
end the call and return to your original call. 4. Press
the Resume soft-key to resume the original call.
To place a second call (Concurrent call):
If it is enabled by your system administrator, you can
place a new call while you are on another call. They
will be treated like two separate phone calls and you
cannot switch between phone calls.
1. Do one of the following:
• Press the Hold key to place the current call on hold,
then press the NewCall soft-key to get dial tone.
• Press the Recall key to get dial tone.
2. Enter the phone number you want to call.
3. Press the Dial soft-key to initiate the call, or wait a
few seconds for the call to be automatically dialed.
4. When you have completed the call, press the
EndCall soft-key to end the call and return to your
original call.
5. Press the Resume soft-key to resume the original
call.
To switch between calls:
• Press the Shuttle soft-key to switch between the
calls.

Quick Reference Guide Univerge Blue Cloud Services ITL Phones
Transferring Calls
To transfer a call:
• Consult with the other party (Attended
Transfer)
1. While on a call press the Transfer key.
2. Use the key pad to dial the telephone number to
which the held call is to be transferred.
3. If you want all three parties to speak together, then
a 3-way call can be established by pressing the Conf
or Conference soft-key.
4. If you decide not to complete the transfer, then the
call can be terminated by pressing the EndCall soft-
key.
5. You can complete the transfer by pressing the
Transfer key.
• Transfer without consulting with the other
party (Blind Transfer)
1. While on a call press the Transfer key.
2. Press the Blind soft-key, then use the use the key
pad to dial the telephone number to which the held
call is to be transferred.
3. You can complete the transfer by pressing the
Transfer key.
Conference Calls
To conference a call:
1. While on a call, press the Conference or Conf soft-
key.
2. Use the key pad to dial the telephone number of the
party to be joined in the conference.
3. Press the Dial soft-key to initiate the call, or wait a
few seconds for the call to be automatically dialed.
4. If you want to transfer the held party instead, press
the Transfer key.
5. If you decide not to complete the conference, then
the call can be terminated by pressing the EndCall
soft-key.
6. You can complete the conference by pressing the
Conf or Conference soft-key.
Hang Up while conferencing:
• If you are establishing a conference call and want to
hang up on the person you are calling, press the
EndCall soft-key.
If you hang up the telephone handset or press the
Speaker key while the phone for the third party is still
ringing, the other two parties will be connected in a
blind transfer call.
Note: Do not hang up the telephone handset or press
the Speaker key unless you want the two calls to be
connected in a blind transfer call. You can hang up the
telephone handset or press the Speaker key after you
connect with all the callers.
Call Pickup
To pick up a call:
1. When a new call arrives, press the Pickup softkey.
2. Depending on the type of call you want to pick up,
do one of the following:
• To answer a call ringing on a specific
extension:
• Press the Extn soft-key.
• Enter the number of the extension you want to pick
up.
• Press the Pickup soft-key.
• To answer a call from a Pickup Zone:
• Press the Zone soft-key.
• Enter the zone number from which you want to pick
up the call.
• Press the Pickup soft-key.
• To answer a call from your Pickup Group:
• Press the Group soft-key.
The Personal Directory
• If there is a Corporate Directory on your
system:
1. Press the Menu key.
2. Select [1] Directory.
3. Select [1] Personal Directory.
To access the Personal Directory using the cursor
pad:
1. Press the Directory key (right cursor pad key).
2. Select 1 Directory.
3. Select 1 Personal Directory.
Using the Personal Directory:
Use the Up and Down soft-keys or the d Up/b
Down keys on the cursor pad to scroll through the
Personal Directory, and use the soft-keys to Add, Edit
and Delete entries.
To view a specific Personal Directory entry:
1. Use the Up and Down soft-keys or the
Up / Down keys on the cursor pad to scroll through the
Personal Directory.
2. Press the More soft-key twice and then the Detail
soft-key to view the details for that entry. This
displays the name and number for the entry, along
with the Speed Dial and Monitor settings.
3. Press the Exit soft-key to exit details screen and
return to the Personal Directory.
To add a Personal Directory entry:
1. Press the Menu key.
2. Select [1] Personal Directory.
3. Press the More soft-key, and then the Add soft-key.
4. Use the keypad to enter the a name for the Speed
Dial key, then press Enter on the cursor pad or the
OK soft-key.
Use the “*” key to switch between uppercase ,
lowercase and numeric keypad entry mode.

Quick Reference Guide Univerge Blue Cloud Services ITL Phones
[Abc] Mode First Capital / Rest Lower Case
[ABC] Mode All Capital
[abc] Mode All Lower case
[1] Mode Numeric
5. Use the telephone keypad to enter a phone number
for the entry and press. Enter on the cursor pad or
the OK soft-key.
6. Use the telephone keypad to enter a Speed Dial
number (if desired) for the entry and press Enter
on the cursor pad or the OK soft-key.
Note: Only digits, “* “and “#” are accepted as
numerical input in a Speed Dial.
7. If you have set a Speed Dial Key number for this
entry, set the monitor settings for this entry and press
Enter on the cursor pad or the OK soft-key.
8. Press the Save soft-key to save your changes.
Note: The Name in the Personal Directory will
override at your phone only, the contact name in
the assigned in the Univerge Blue Cloud Services
database.
The Corporate Directory
If it is enabled on your system, you can access a
Corporate Directory.
To access the Corporate Directory using the
Menu Key:
1. Press the Menu key.
2. Select [1] Directory.
3. Select [2] Corporate Directory.
To access the Corporate Directory using the
cursor pad:
1. Press the Directory key (right cursor pad key).
2. Select [1] Directory.
3. Select [2] Corporate Directory.
Using the Corporate Directory:
Use the Up and Down soft-keys or the
Up/Down keys on the cursor pad to scroll through the
Corporate Directory. Use the soft-keys to Search
entries and Dial from the Corporate Directory.
Speed Dial Keys
To configure a Programmable as a Speed Dial
Key:
1. When the phone is in idle state, press the Feature
key.
2. Press the desired Speed Dial Key. The Speed Dial
Key LED flashes.
Note: For Speed Dial Keys that have already been
configured, the Speed Dial information is shown.
3. Use the keypad to enter a name for the Speed Dial,
then press Enter on the cursor pad or the OK soft-
key. Use the “*” key to switch between uppercase and
lowercase keypad entry mode.
4. Use the telephone keypad to enter a phone number
for the entry and press
Enter on the cursor pad or the OK soft-key.
5. Enter on the cursor pad or the OK soft-key to
use this Speed Dial number, or use the keypad to edit
the number.
Note: Only digits, “* “and “#” are accepted as
numerical input in a Speed Dial.
6. Select the monitor settings for the Speed Dial, the
press Enter on the cursor pad or the OK soft-key.
7. Select Show in Directory if you want to also add this
entry to your Personal Directory, and press Enter
on the cursor pad or the OK soft-key.
8. Press the Save soft-key to save the Speed Dial
information.
9. Press the Exit soft-key to exit the Speed Dial
Programming mode.
To originate a call from a Speed Dial
Key:
• Press the desired Speed Dial Key.
Or
Lift the handset and press the desired Speed Dial Key.
Or
Press the Speaker key and press the desired Speed
Dial Key.

Quick Reference Guide Univerge Blue Cloud Services ITL Phones
Presence Monitoring
Monitor Presence Icons in the Directories
Monitor Presence LED Colors for Speed Dial Keys
Using the Help Key
You can use the Help key to view information about
the soft-keys that are displayed on your phone.
1. Press the Help key.
2. Press the soft-key you want to see Help information
for. You can use the Up and Down softkeys or the
Up/Down keys on the cursor pad to scroll
through the help information, if needed.
3. Press the Exit soft-key to return to the previous
screen.
Help screens may not be available for all the soft-keys
on your phone.
Service Assistance
For Service Assistance
1-888-330-6775
helpdesk@ecitech.ca
Document Revision
January 4thth 2016

Univerge Blue Voice Mail & Unified Messaging User Guide –Getting Started
Change Your Message Order
When you review your messages on the telephone,
your mailbox plays unheard messages first, followed
by heard then saved messages.
You can set the order your voice messages are played
on the telephone and listed on the Web.
Telephone User Interface (TUI)
Shortcut
4-2-4-1 Newest First
4-2-4-2 Oldest First
Web Administration
Settings > Message Settings
Message Envelope
The message envelope includes the date and time of
arrival, and the sender’s telephone or mailbox number.
Press 5 during or after listening to a message to hear
the envelope. You can also set the envelope to play
automatically for every message.
Telephone User Interface (TUI)
Shortcut
1-1-5 Review Messages & Sub Menu
Web Administration
Settings > Message Settings
Replying to Voice Messages
You can reply to a received voice message in two
ways:
Call the Sender
Reply by voice message to the sender
Telephone User Interface (TUI)
Shortcut
1-1-3-# Dial Caller
1-1-3-## Disconnect & Return to Menu
1-1-8 Reply with Message
Web Administration
Only available on Telephone User Interface (TUI)
Forwarding Messages
You can forward voice or fax messages to one or more
users or distribution lists on a system. You can also
record a comment to send with a forwarded message.
Note: You cannot forward a Private Message
Telephone User Interface (TUI)
Shortcut
1-1-6-1 Without Comment
1-1-6-2 With Comment
Web Administration
Only available on Telephone User Interface (TUI)
Undeleting Messages
Once you end your call, the messages you marked for
deletion are permanently removed from your mailbox.
Messages that you have marked for deletion can be
recovered, or undeleted, before you end your
telephone session only.
Telephone User Interface (TUI)
Shortcut
1-1-1 Undelete
Web Administration
Only available on Telephone User Interface (TUI)
Create & Review a Voice Message
You can record and review a voice message to send to
another user on the system.
Telephone User Interface (TUI)
Shortcut
2 Create Message & Sub Menu
Web Administration
Only available on Telephone User Interface (TUI)
Private Messages
You can mark a message sent from your mailbox as
private. Private messages cannot be forwarded by the
recipient.
Telephone User Interface (TUI)
Shortcut
2-#-1-1 Delivery Option - Private
Web Administration
Only available on Telephone User Interface (TUI)
Section 1 - Voice Mail Getting Started
Before you begin...
This guide describes many features for managing your
calls and messages. Depending on your class of
service, some features may not be available to you.
Contact your administrator or service provider for
further information.
To access VoiceMail
Extension Number: 1992
DID Number XXX-XXX-XXXX
Unified Messaging Users:
Unified Messaging Web URL
http://vm.neccloud.ca/demo01/
Change Your Passcode
Call VoiceMail Access Number (Default 1992) or press
VoiceMail SoftKey on your phone.
Enter current passcode. For first time setup this will be
the default passcode 951357 then # or the passcode
assigned to you by the System Administrator.
You will hear voice mail box summary (Default)
Press # to Continue

Univerge Cloud Services Unified Messaging User Guide
Shortcut 4-2-1-1
Menu Step by Step
Press 4 Personal Options
Press 2 Administrative Options
Press 1 Change Passcode Options
Press 1 Change Passcode
Enter your New Passcode followed by the # key
Your new Passcode is XXXX
To Keep Press #
To Change Press 3
To return to Previous Menu Press *
Your Passcode has been changed.
Unified Messaging Users:
http://vm.neccloud.ca/demo01/passwordSettings
Settings > Passcode
Record Your Mailbox Name
Dial 1992 or press VoiceMail Soft Key
Enter your Passcode followed by the # Key
You will hear voice mail box summary (Default)
Press # to Continue
Shortcut 4-3-3
Menu Step by Step
Press 4 Personal Options
Press 3 Greetings
Press 3 Name
Record as <First Name>, <Last Name>, <Extension
Number>.
To Keep Press #
To Replay Press 1
To Change Press *
Message Waiting Indication
Message waiting indication (MWI) is indicated by light
on your phone (Top Right of Phone).
Record Your Greetings
Dial 1992 or press VoiceMail Soft Key
Enter your Passcode followed by the # key
Press # to Continue
You will hear voice mail box summary (Default)
Shortcut 4-3-1-1 (Personal Greeting)
Shortcut 4-3-1-2 (Extended Absence Greeting)
Menu Step by Step
Press 4 Personal Options
Press 3 Greetings
Press 1 Personal Greeting
Press 2 Extended Absence Greeting
Press * to return to Previous Menu
Personal Greeting Script Example
You have reached the voice mail for <First Name>,
<Last Name>, <Job Position>, <Company>, at
Extension <XXXX>.
Pressing the # key bypasses this greeting.
I am either busy on another call or away from my
desk.
Please leave a message and I will return your call
shortly. When you are finished recording, you may
hang up or press 1 for more options. Thank You
Extended Absence Greeting Script Example
Vacation Alert: You have reached the voice mail for
<First Name>, <Last Name>.
I am on Vacation until <Month, Date, Year>, during
this time I will not be checking messages. If you need
assistance please contact <contact name> at <contact
number>. Thank You
Test Your System
Internal Call - No Answer to Voice Mail
Call your extension from another phone. Did the call
forward to voicemail and play the correct greeting?
Internal Call - Busy to Voice Mail
Call yourself so you are busy. Did the call forward to
voicemail and play the correct greeting?
External Number Testing
Call your DID number or calling company Automated
Attendant and selecting your extension. Did the call
forward to voicemail and play the correct greeting?
Message Waiting Lamp (MW)
Leave message in your own voicemail box. Did the
Message Waiting Light illuminate?
Check Messages
Call into your mailbox, is a password required, did
your messages auto-play?
Section 2 - Voice Mail Popular Features
Voice Message Autoplay
Voice Message Autoplay automatically plays your
mailbox status and your unheard voice messages after
you have logged in to your mailbox. When you have
no more unheard voice messages, the system
automatically hangs up unless you press # to continue
using it. You can set how your messages are handled
after autoplay.
Autoplayed messages can be immediately marked
heard, saved or for deletion by the system.
Telephone User Interface (TUI)
Shortcut
4-2-6-1 On
4-2-6-2 Off
4-2-6-3 Modify Options
Web Administration
Settings > Voice Settings

Univerge Cloud Services Unified Messaging User Guide
Urgent Messages
You can mark a message sent from your mailbox as
urgent. Urgent messages are played before non-
urgent messages in the recipient’s mailbox.
Telephone User Interface (TUI)
Shortcut
2-#-1-2 Delivery Option - Urgent
Web Administration
Only available on Telephone User Interface (TUI)
Message Confirmation
You can request confirmation that a message sent
from your mailbox has been received
Telephone User Interface (TUI)
Shortcut
2-#-1-3
Delivery Option - Message Confirmation
Web Administration
Only available on Telephone User Interface (TUI)
Future Delivery
You can select a future delivery date for a message
you send from your mailbox. The delivery outcome is
not known until the future delivery date. When you
have reached your mailbox’s future delivery message
limit, you are not allowed to send another future
delivery message until one of your outstanding future
delivery messages has been delivered.
Telephone User Interface (TUI)
Shortcut
2-#-1-4 Delivery Option - Future Delivery
Web Administration
Only available on Telephone User Interface (TUI)
Extended Absence Greeting (Vacation)
Telephone User Interface (TUI)
Shortcut
2-#-1-3
Delivery Option - Message Confirmation
Web Administration
Only available on Telephone User Interface (TUI)
Email Notification
New Voice Messages can be sent to you by email
Use TUI or Web Page for turning this feature on / off
Use Web page to setup feature parameters.
Telephone User Interface (TUI)
Only available on Web Page.
Web Administration
Settings > Message Settings

Univerge Cloud Services Unified Messaging User Guide
Section 3 - Session Dialog Menu Options
Log-In Conversation
Voice Mail plays “Recorded Name”
Enter your passcode followed by # key or press * to
log into a different mailbox. (Enter Password then #).
Current Voice Mail Summary is played.
Press # to continue using your mailbox or do nothing
to be disconnected.
Main Menu
To Review your Messages Press 1
Send a Message Press 2
To modify your Personal Options Press 4
To re-start your session Press 5
To modify your Call Connect options Press 6
To disconnect Press *
Menu - 1: Review Your Messages
To listen to your Voice Messages Press 1
To review your Fax Message Envelope Press 2
Note: This option is Not Supported
To return to Previous Menu Press *
Option 1 Listen to your Voice Messages
First Saved Message received (date & time).then
(Caller ID).
Or
First Heard Message arrived (date & time) then (Caller
ID).
Message Plays
To Delete the Message Press 7
To Mark Unheard Press 2
To Save Press 9
To Reply by Calling the Sender Press 3
To Replay Press 4
To Hear the Message Envelope Press 5
To Forward the Message Press 6
To Reply by Sending a Voice Message Press 8
To Skip the Message Press #
To Return to the Previous Menu Press *
There are No More Messages
Menu - 2: Send a Message
Record Message at the Tone. Press # when finished
recording.
If satisfied with Message Press #
Listen to Message Press 2
Erase & Re-Record Message Press 3
Continue Recording where you left off Press 4
Cancel delivery of this message Press *
Enter the Destination Mailbox Number
Or
Enter Distribution List ID
Followed by # Key
Or to Spell a Name Press #
Cancel Delivery Press *
Send Message Press #
Modify Delivery Options Press 1
Cancel Delivery Press *
Mark Private Press 1
Flag as Urgent Press 2
Request Message Confirmation Press 3
Specify Future Delivery Press 4
Send Message Press #
Return to Previous menu Press *
Menu - 4: Modify your Personal Options
Notification Options Press 1
Administrative Options Press 2
Greetings Press 3
Outcall Notification Schedule Press 4
Fax Options Press 5
Return to Previous Menu Press *
Unified Messaging Users
Settings > Messages
Menu - 5: Re-Start your Session
Logs Out and begins new session.
Menu - 6: Call Connect Options
To Direct Calls to Mailbox Press 1
Modify Follow Me Options Press 2
To Direct Calls to or Modify For:
Office Telephone Number Press 3
Mobile Telephone Number Press 4
Home Telephone Number Press 5
Other Telephone Number Press 6
Temporary Telephone Number Press 7
Unified Messaging Users
Settings > Call Connect

Univerge Cloud Services Unified Messaging User Guide
Section 4 –Web Page Menu Navigation
For user Web Page mailbox administration or Unified
Message mailbox delivery of Voice Mail messages a
Univerge Blue UM License is required.
Media Player Applications
For Unified Messaging:
Microsoft Windows require Windows Media Player.
Apple MAC OSX systems require QuickTime Media
Player.
Unified Messaging Web Page
Log into Web Page (Requires Univerge Blue UM
License).
Unified Messaging Users:
http://vm.neccloud.ca/demo01
Summary Web Page showing Message Summary is
displayed after entering correct Phone Number &
Passcode
Summary of Messages is displayed
Click on Messages TAB, (this is default display)
Sub Menu Options are:
New Voice Mail
Saved Voice Mail
New Fax (Not Supported)
Saved Fax (Not Supported)
Refresh Mailbox
Click on Settings TAB,
Summary of Voice Mail Settings is displayed.
Sub Menu Options are:
Passcode
Messages
Voice and Fax
Call Connect
Distribution List
Web Page > Settings > Passcode
Change your Passcode Settings
Web Page > Settings > Messages
Configure your Message Order & Notification Options
Message Order
List Newest Messages First
List Oldest Messages First
Date & Time Playback
Enable Automatic Message Envelope Playback
Autoplay
Autoplay automatically starts playing your unheard
messages, immediately after login with your telephone
Message Waiting Indication
Indicates that you have a new voice message by
activating a Message Waiting Indicator Light on your
telephone.
Outcall Notification
Outcall Notification is not supported with Univerge
Blue service.
eMail Nofification
Notifies you via email about new messages in your
mailbox. Select if you want to be notified of new
messages. Then, enter the addresses to which your
notifications will be sent and choose how you want
your message information to be provided. Your
preferred notification type will depend on the device
you use to retrieve your notifications.
To be notified with an SMS message when new
messages arrive, enter your mobile telephone email
address in one of the email fields and choose
'notification in email subject' from the drop-down list.
Web Page > Settings > Voice and Fax
Configures how your mailbox handles Voice and Fax
messages. Summary & Quick Setting Options
displayed at top of page.
Passcode Skip
If passcode skip is enabled, accessing your mailbox
from your express login number will log you in
automatically.
Attendant
Attendant routing is not supported with Univerge Blue
service.
Telephone Interface Language
Language choice of English or French.
Caller Languages
Callers may choose a language in which to hear
system prompts and greetings. Select a language from
the left and transfer it to the enabled box on the right.
Callers hear the active language choices in the order
you arrange. If no caller languages are active, callers
are greeted with your mailbox’s default language.

Univerge Cloud Services Unified Messaging User Guide
Web Page > Settings > Call Connect
Call Connect
Call Connect feature group is not supported with
Univerge Blue service.
Web Page > Settings > Distribution List
Distribution Lists
Distribution Lists are not supported with Univerge Blue
service.
Telephone Tips & Caller Shortcuts
Telephone Tips
Common keys you can use on the telephone:
Caller Shortcuts
Callers to your mailbox can use the following keys:
Service Assistance
For Service Assistance
1-888-330-6775
helpdesk@ecitech.ca
Document Revision
January 6th 2016
Copyright Notice
Windows Media Player is a trademark of Microsoft
Corporation.
QuickTime is a trademark of Apple Computer
Corporation.
CX-C is a trademark of AVST Corporation

Auto Attendant: ________ Voice Mail: ____2999_____ Meeting Hub: __________ Collaboration Hub: ____________
Doc 10-3
Quick Reference Guide Univerge Blue Desktop UC Client
Soft Media Phone
Video Call in Progress
Soft Media Phone
Video Control Panel
Ring Indicator
Notifies you of an incoming call
Voice mail
Be notified of any voicemails
Missed Calls
View your missed calls
Do Not Disturb
Check if your phone is set to Do Not
Disturb
Quick Set Preferences
Access your quick profiles (set in
preferences)
Soft phones
See the status of your soft phone
Search
Enter text to search or numbers to
dial
Contact List management
Manage the current list of contacts
Dial a contact
Call the person from your selected
phone
Send an Instant Message
Click to send and Instant message
Message of the Day
Set a 140 character message of the
day
Call control
Access your calls / swap between
active calls
Contacts Status
Is the contact available to
communicate?
Contacts Message of the day
Your contact’s message of the day
Contacts location
Where is your contact?
TAB Bar- Search
View your last Search results
Status Dropdown
Set your status / Change
preferences / Exit
Get more information
Navigate menus / redial / directory /
volume
TAB Bar - Call History
Search your call history
TAB Bar - Contact List
Access your contact lists
Tab conversations
One tab per conversation
Click to dial
Click to call the person you are chatting
with
Current Conversation
Your conversation
Your Message
Type your message here

Auto Attendant: ________ Voice Mail: ____2999___ Meeting Hub: __________ Collaboration Hub: ____________
Doc 10-3
Quick Reference Guide Univerge Blue Desktop UC Client
Configuration
When first installed the Univerge Blue UC Client needs to
know where to connect to the Univerge Blue UC Server.
1. In the Configuration URL enter
http://ucaas.demo01.neccloud.ca_
2. Press Submit.
3. If presented a choice of clusters, choose
UNIVERGECLOUD
4. Click Connect.
Logging in
1. Enter your username
_username@demo01.neccloud.ca_
You can also just enter username
(without domain name)
2. Enter your password:
_________________________________
3. Click Remember me if desired.
4. Click Sign in.
Configuring your SMP softphone (Optional)
1. From the UC Client click the status drop down
2. Click Preferences.
3. Click the Soft Media Phone tab button.
4. Select your preferred Audio device from the list
5. If you wish to use video, select your Video device
from the list.
6. Click Save.
Once configured you will see a check on the Soft Media
phone icon.
Incoming Call (Toaster Pop)
The incoming call notification can be enabled / disabled in:
Preferences > Alerts > Desktop Alerts > Calls (Checkbox)
Call Control
When on a call you will see a strip like the following appear
in the UC Client.
Call Waiting
By default Univerge Blue Cloud Services allows for you to
handle 4 concurrent calls. You will hear a tone to tell you
that have a call waiting, you will also get a separate call
control strip for each call.
Call Recording (Recording a Call)
Call Recording requires additional license. Check with
administrator
From Call Control Window (Active Call), click on Call
Record Icon, a red Connected Message appears indicating
recording.
To end recording click on Call Record Icon.
Call Recording (Call Playback or File Save)
To review recorded calls clock on Call History Icon (Clock-
face)
Look for Call that has Call Record “Tape Recorder” Icon.
Click on >> for more information.
Dial pad (only on soft phone calls)
Record the call (if allowed)
Hold / Un-hold the call
Transfer the call to another party
Hang-up the call
Swap the call to another phone.

Auto Attendant: ________ Voice Mail: ____2999___ Meeting Hub: __________ Collaboration Hub: ____________
Doc 10-3
Quick Reference Guide Univerge Blue Desktop UC Client
From this screen you can play the recording or save the
recording to MP3 file (bottom right disk icon).
Setting Presence
From Status Dropdown Bar
Dropdown Presence Options are:
Online
Away
Be Right Back
Busy
Out to Lunch
Out of Office
In a Meeting
Appear Offline
Presence Notes:
For all Presence options except Online and Appear Offline
there is a white Presence Notes box. Move mouse over
White box and Text Entry Box appears. Type Presence
Note in the box and press return.
This builds a Presence Notes list, you can then return to
the Presence Option, click on desired Presence, mouse
over White Presence Note box and then select desired
Presence Note.
Contact Status:
To the right of the contact image photo is Contact Status
square colour box. This indicates by colour bezel the
current status of the contact.
Online
Away
Be Right Back
Busy
Out To Lunch
Out Of Office
In a Meeting
Appear Offline
Quick Set Profiles
Quick set profiles allow you to quickly set your presence
and presence notes, and which phones are active.
1. From the UC Client click the status drop down
1. Click Preferences.
2. Click Quick Set Profiles.
3. Click Create New.
4. Enter a Name.
5. Choose your presence status from the list.
6. Enter a presence note if desired
7. Select the devices that you want to ring (active)
8. Click save.
You can now choose the quick profile straight from the
home screen.
Example of Quick Set Profiles:
Name: Toronto Office
Presence: Online
Presence Note: Since you are “online” you cannot enter a
presence note
Active Devices: ITL Office Phone
Name: Home Office
Presence: Online
Presence Note: Since you are “online” you cannot enter a
presence note
Active Device: ITL Office Phone
Active Device: ITL Home Phone
Name: Out to Lunch
Presence: Out of Office
Presence Note: Back at 1:30 PM
Active Device: ITL Office Phone
Active Device: iPhone SMP Phone
Note: Quick Set profiles are available on Desktop UC Client
only.
Quick Set Profiles
Below the Status / Dropdown Bar is Message of the Day
(MOTD) text box.
Enter your MOTD, note web URL’s can also be included in
the message.

Auto Attendant: ________ Voice Mail: ____2999___ Meeting Hub: __________ Collaboration Hub: ____________
Doc 10-3
Quick Reference Guide Univerge Blue Desktop UC Client
Create a New Contact List (TAB Bar)
9. Click on any contact list.
10. Click the Contact List Management button
11. Select Add List.
From Dropdown Menu
Add Contact
Remove Contact
Add List
Remove List
Rename List
Add a Contact to your List (TAB Bar)
From Dropdown Menu Click on desired Contact List
Click Contact List Management button
Add Contact
Remove Contact
Add List
Remove List
Rename List
Enter desired name in Search, Press White Search button.
Check the name if the desired contact(s) on the left.
Click OK at bottom of panel to Save.
OR
1. Enter part of the person’s name in the search
box and hit enter.
2. Click the Add contact to contact list button.
(Persons Icon with + Sign)
3. Choose the list you want to add the contact too.
Call History (TAB Bar)
Select Call History from bottom TAB Bar. (The Clock Icon)
Apply Filter Options from Call History Panel.
Click Find
Call History results
Now from Sort Management button
Sort by desired parameter.

Auto Attendant: ________ Voice Mail: ____2999___ Meeting Hub: __________ Collaboration Hub: ____________
Doc 10-3
Quick Reference Guide Univerge Blue Desktop UC Client
Missed Calls
The UC Client Toolbar has Missed Call Handset Icon, the
red numeric icon shows number of missed calls.
Click on the Missed call Icon to see Missed Calls.
Contact Call Display
Hover mouse over a contact currently “On the Phone”.
Information the active call is displayed
Search
Enter directory search name.
Click on Magnify Glass
Search Results
Exiting the UC Client
1. From the UC Client click the status drop down
2. Select Exit.
Getting Help
1. From the UC Client click the status drop down
2. Select Help.

Auto Attendant: ________ Voice Mail: ____2999___ Meeting Hub: __________ Collaboration Hub: ____________
Doc 10-3
Quick Reference Guide Univerge Blue Desktop UC Client
UC Client Setup & Preferences
Preferences
The preference screen gives you access to a wide range of
settings and features that allow you customise you
communications experience.
1. From the UC Client click the status drop down
2. Click Preferences.
Setting your location
1. In the preferences dialog, click My Profile.
2. Enter your location.(i.e. Toronto, Ontario)
Setting / Changing Your Picture
In the preferences dialog, click My Profile.
Click on Yellow Pencil Edit Icon
UC Client Ring Tone
When someone calls you the UC Client will notify you of
the incoming call (regardless of which devices are ringing).
1. From the UC Client click the status drop down
1. Click Preferences.
2. Click Alerts.
3. Choose an “Audible Call Notification” from the
list, or choose your own from your music
collection.
Changing your active phone settings
Univerge Cloud Services allows you to choose which of
your phones you can answer a call on (active). Note you
will always be able to initiate a call regardless of this
setting.
1. From the UC Client click the status drop down
2. Click Preferences.
3. Click the phone icon.
4. Choose the phones you want to be Active.
5. Choose the phone you want to be the default.
6. Click Save.
Forward your phone to voicemail (first time)
1. From the UC Client click the status drop down
2. Click Preferences.
3. Click the forwarding arrow at the top of the
screen.
4. Click create forwarding now.
5. Enter the name “voice mail” and click the
search icon.
6. Select how long you want it to ring before going
to voicemail.
7. Click OK. - Click Save.
Time based call forward
Univerge Cloud Services allows you to decide the
times/days a call forward is valid.
1. From the UC Client click the status drop down
2. Click Preferences.
3. Click the forwarding arrow at the top of the
screen.
4. Click Modify on the call forward profile you want
to change.
5. Click the “right” arrow
6. Select the days and times you want this
forwarding active.
7. Click the “right” arrow
8. Select the dates you want the call forwards
active for.
Forward based on my status
UNIVERGE 3C allows you to set call forwards based on
your status.
1. From the UC Client click the status drop down
2. Click Preferences.
3. Click the forwarding arrow at the top of the
screen.
4. Click Modify on the call forward profile you want
to change.
5. Click Presence.
6. Click Only forward when your presence is.
7. Choose the presence states you want.
8. Click Save.

Auto Attendant: ________ Voice Mail: ____2999___ Meeting Hub: __________ Collaboration Hub: ____________
Doc 10-3
Quick Reference Guide Univerge Blue Desktop UC Client
Soft Media Phone (Video Call)
If Video Camera is enable in Preferences a Video Control
window will open when the call is SMP to SMP.
The user on each end must press the Play Icon for the
Video camera to start sending. In the example below the
far end has started their video camera and is sending
Video. Other control icons set the Video image size.
Icon Representation (Left to Right)
Start / Pause Video
Wide Screen 16:9 or Standard 4:3 format
Image Mirror
Stop Video
Example of two way Video (below)
Service Assistance
For Service Assistance
1-800-Associate
NEC Canada
support@neccloudsupport.ca
Client Download URL
https://ucaas.demo01.neccloud.ca:9443/UCClient/downloa
d.html
SSL Certificate Download
http://neccloudcanada.ca/
Document Revision
January7th 2016
Other manuals for DT710
1
This manual suits for next models
1
Table of contents
Other NEC Telephone manuals

NEC
NEC DS1000 User manual

NEC
NEC DTerm Series 80 User manual

NEC
NEC G277 Installation guide

NEC
NEC ST4 User manual

NEC
NEC Univerge SV8100 User manual

NEC
NEC NEAX7400 ICS M120e User manual

NEC
NEC Portrait 308 User manual

NEC
NEC DSX User manual

NEC
NEC UNIVERGE UM8500 User manual

NEC
NEC Univerge SV9100 Instruction Manual