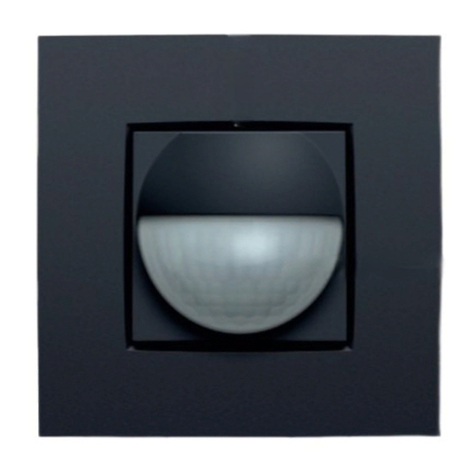
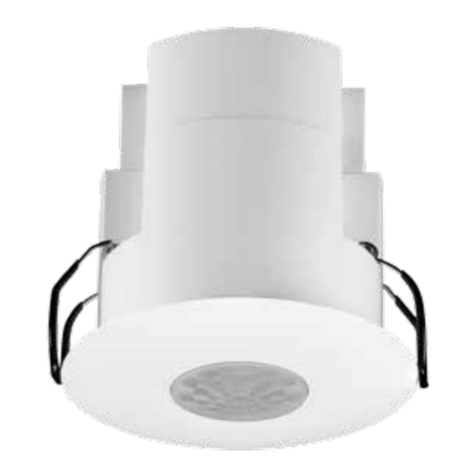
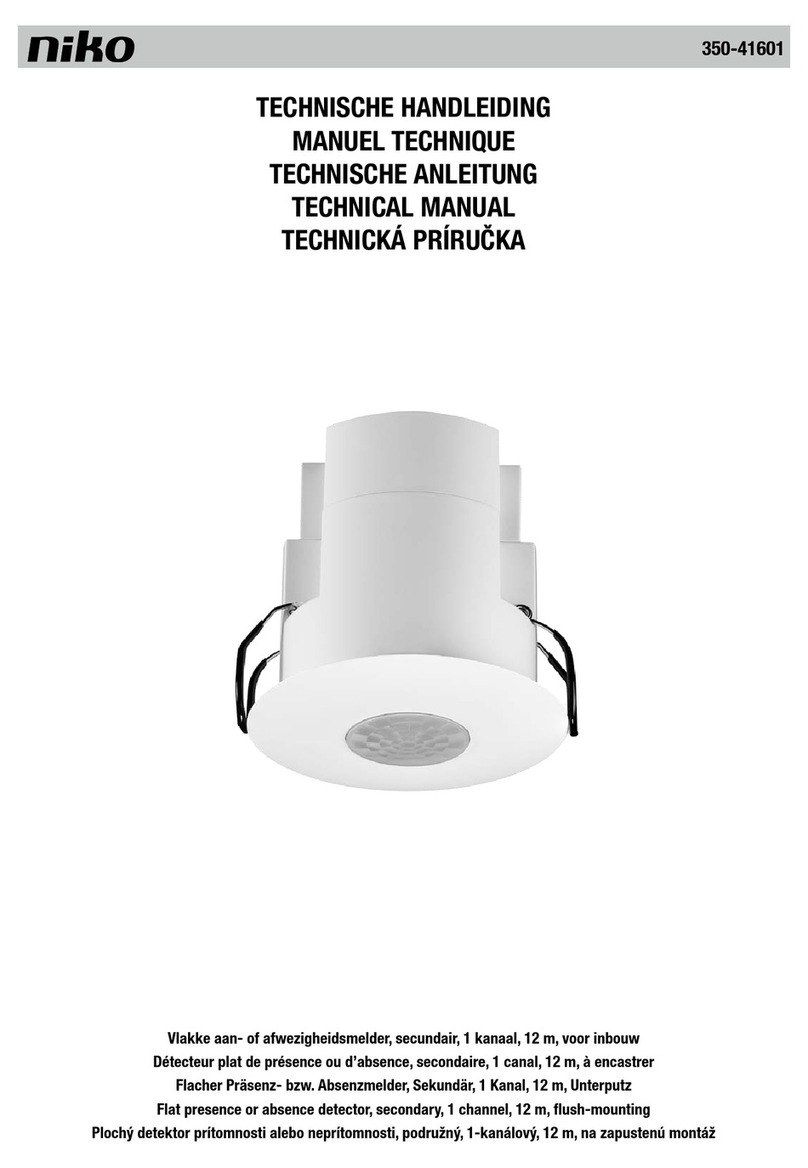
Niko 25380CH User manual

R
H
21 3 4
7
L
N
L
L’
S R N
7a
3a
max. 1000VA cos ϕ= 0,5
3b230V AC DC
❆
x
❄
❆
❄
❄
z
>1m
Time
Mode
Lux
4a
2a 2b 2c
4b
Master
detector
Secondary
detector
4c
7b
L
N
L
L’
S R N
Master
LSRN
Secondary
LS R N
Secondary
176°
R
B
100%
ca. 50%
Presence detector 8m, 180°
Präsenzmelder 8 m, 180°
Détecteur de présence 8m, 180°
Rilevatore di presenza 8m, 180°
Czujnik obecności o zasięgu 8m, 180°
DE
FR
IT
EN
PL
Swiss Garde 180 Presence
master / secondary detector UP
Edition 12-2021
Art.-Nr. 25380CH, 24380CH, 25382CH, 24386CH
Edition
CH
6
88 mm
60 mm
54.5 mm
12.7 mm
88 mm
88 mm
60 mm
54.5 mm
12.7 mm
88 mm
5
Ø
Ø
360°
ca. 50%
100%
H = 0,9–1,3
m
H
BRBR
1m 5 m 8m 3m 4,5 m
EN INSTALLATION INSTRUCTIONS
1. Product description (1)
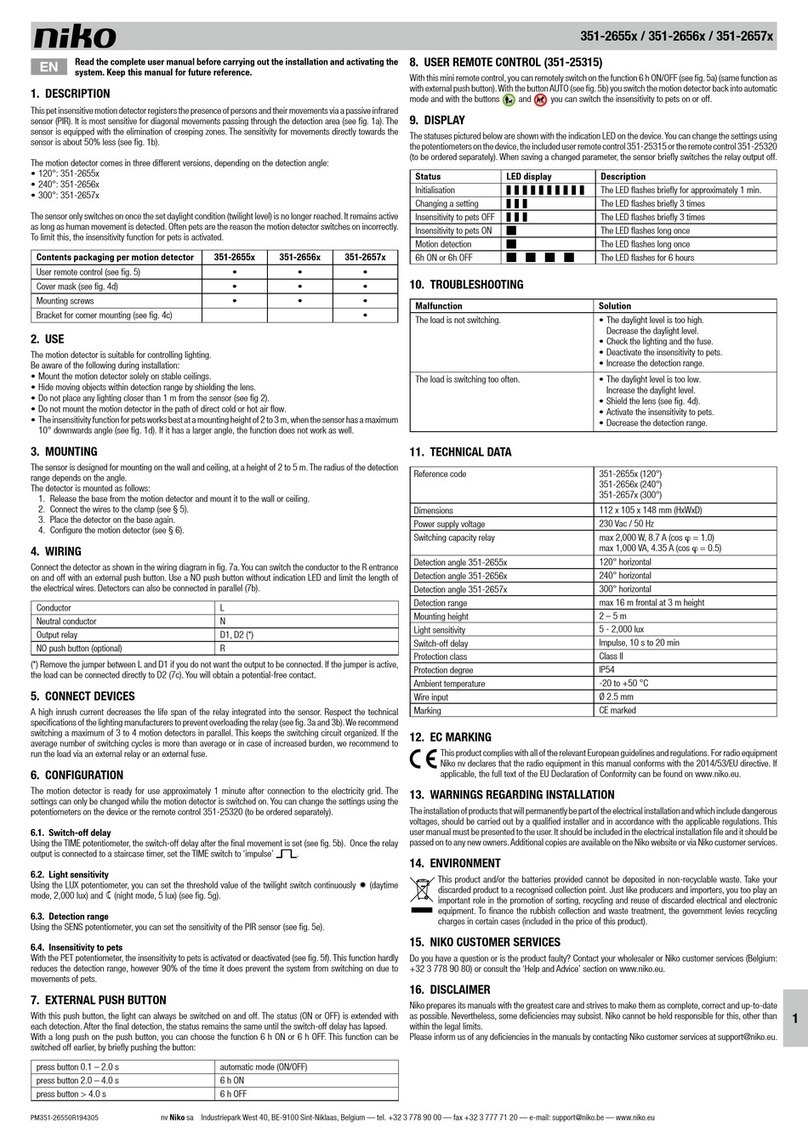
The presence detector detects movements and the presence of persons using a passive infrared sensor (PIR). It reacts
most sensitively to movements tangential to the monitored area.Movements directly towards the presence detector
are detected with a reduced sensitivity of approx. -50%. The Master detector does not switch until the brightness
drops below the set value (twilight threshold). The switching duration is extended as long as movements of people
(entire area) or the presence of people (presence area) are detected. The device detects an increase in daylight after
switching on and, if there is sufficient daylight, it switches off automatically. The secondary detector cannot switch
any loads and is used only to increase the Master device’s detection range. Products indicated as accessories are not
included in the scope of delivery.
2. Application
The detector is designed for indoor lighting control.
Adhere to the following instructions during installation:
– Install only on stable walls.
– Mask moving objects in the monitored area by covering up the lens.
– Do not place any lamps below or less than 1 m next to the detector (2a).
– Do not install in direct cold (2b) or hot air flows (2c).
3. Safety notes
!
Ensure that the electrical lines are de-energised before installation.
Installation is only permitted by electricians in compliance with local legislation.
4. Installation
The detector is designed for wall installation at a height of 0.9 to 1.3 m. Place the Master device in an area with
medium ambient light influence in master/secondary applications.
Installation:
– Remove front cover.
– Remove push-button by inserting screw driver into lateral opening and gently turning (4a).
– Wire the detector according to item 5.
– Fasten the detector in the flush-mounting box.
– Configure device according to item 7.
– Replace front cover.
5. Wiring (7a–7b)
The electric circuit must be protected with a circuit breaker. The external push-button switches the live wire to the
R terminal. Use push-buttons without a pilot lamp and keep wires short. We recommend using a secondary wall
detector instead of an external push-button. Lighting may be switched via any wall detector via connection to the R
terminal. Use the S terminal to connect up to 10 secondary detectors to increase the detection area, keep wires as
short as possible.
Master detector Secondary detector
Live wire L L
Neutral wire N N
Relay switching output L’ –
External push-button (optional) R –
Secondary switch (optional) R R
Secondary detector (optional) S S
6. Connection of loads
High inrush currents reduce the lifetime of the integrated relay considerably. Observe the technical information of the
lamp or luminaire manufacturer to avoid overloading the relay (3a–b). To keep the circuit/wiring well-arranged, we re-
commend switching no more than 3 to 4 master detectors in parallel. If there is an above-average number of switching
cycles or in case of increased loads, we recommend switching the load via an external contactor.
7. Configuration (4b)
The detector is ready for operation about 1 min after mains connection. Parameter changes must be made during
operation either by adjusting the device‘s potentiometers or using the remote control (accessory).
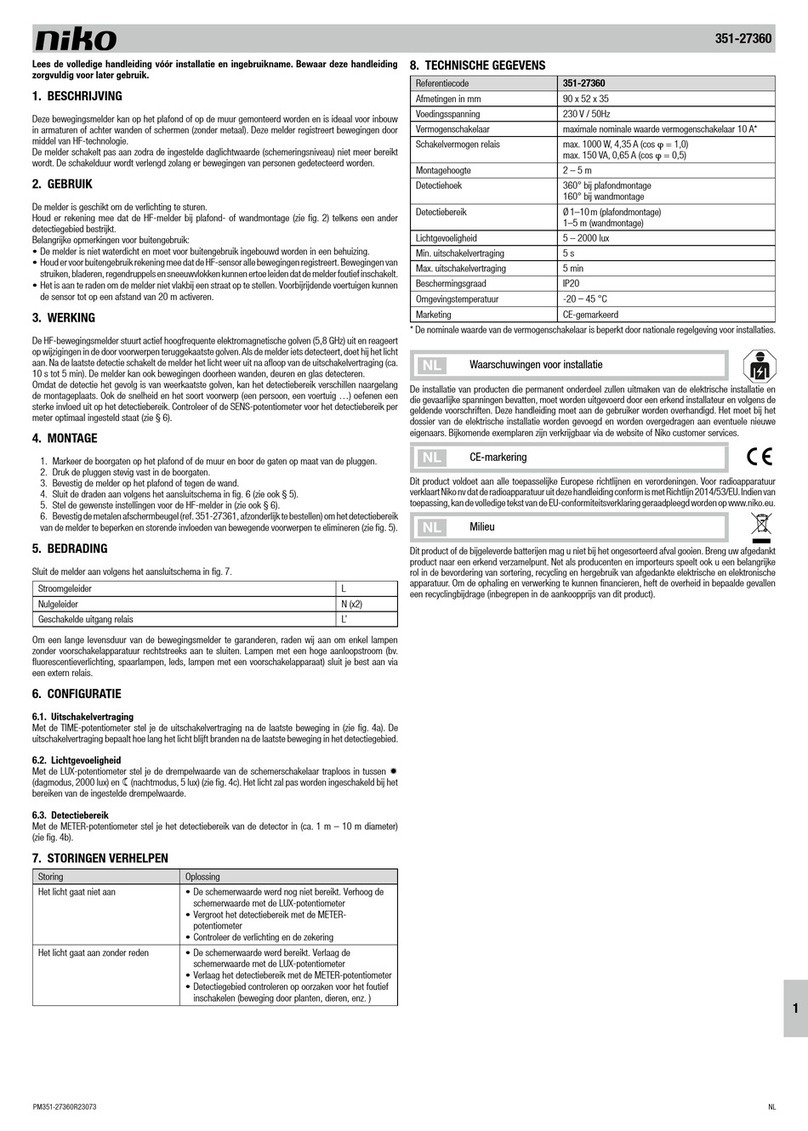
Time: TIME determines the delay time after the last movement. If the relay output is wired to an automatic staircase
switch, the TIME controller has to be set to pulse mode ( ).
Twilight threshold: LUX gradually sets the trigger threshold of the twilight sensor between 2000lx day mode and
5lx night mode.
Mode: The active Mode is displayed for 3s in case of changes. MODE toggles
between the following operational modes:
AUTO mode ➡ LED green
CORRIDOR mode ➡ LED flashing green and orange
SEMI AUTO mode ➡ LED orange
Note: In CORRIDOR mode, the light may only be switched ON via internal or external push-button. Switching off
manually is not possible. In SEMI AUTO mode, lighting must be switched ON manually. The light will be switched off
automatically by the detector after delay time expiry, after which the detector is in readiness mode for 5 s. During
readiness, the detector will switch on again in case of motion detection.
8. External or internal push-button
Lights may be switched on or off manually anytime via the push-buttons. After manual switch-on, the ON mode will
be extended at each motion detection. In corridor mode, the light can only be switched ON, but not OFF. After the
last motion detection, ON mode will be active throughout the set delay time. Depressing the push-buttons puts the
detector into the modes 6 h ON and 6 h OFF respectively. Both 6 h ON and 6 h OFF can be terminated by a short push
on the push-buttons:
Press push-button for AUTO mode CORRIDOR mode SEMI-AUTO mode
0,1–2s ON/OFF ON ON/ OFF
2,0–4s 6h ON –6h ON
>4,0s 6h OFF – –
9. Display
The following conditions are indicated by an LED indicator. Adjust the device‘s potentiometers or use the remote
control (accessory) to change parameters.The detector briefly switches off the relay output during parameter changes.
Status Red Green Orange Duration
Start-up master/secondary detector short flashes during 1min.
Motion detection or secondary detector
signal 1x long flash
6h ON/6 h OFF long flashes during 6 hours
AUTO mode change 3x long flashes
CORRIDOR mode change 3x alternating flashes
SEMI-AUTO mode change 3x long flashes
Readiness mode 5s on
Remote command 3x short flashes
Push-button input master detector 1x long flash
Push-button input secondary detector 1x long flash
10. Technical data
Master detector Secondary detector
Supply voltage 230V / 50 Hz
Switching power
2000W / 8.7A resistive
1000VA/ 4.35A inductive
350W LED
–
Detection area 176°
Detection range max. 4.5m radius presence, max. 8m radius at a height of 1.3 m
Lux level control 5–2000lx –
Timer control , 10s to 20 min –
Protection type IP20
Temperature range -10 to +45°C
Dimensions (L x W x H) Edition CH: 88x88x12.7mm; Edition EU: 80x80x12.7mm
DE INSTALLATIONSANLEITUNG
1. Produktbeschreibung (1)
Der Melder erkennt Personenbewegungen und Personenanwesenheit mittels Passiv-Infrarot Sensor (PIR). Er reagiert
am empfindlichsten bei Bewegungen, die tangential zum überwachten Bereich verlaufen. Bewegungen, welche direkt
auf den Melder zu erfolgen, haben eine reduzierte Empfindlichkeit von ca. -50%. Der Master-Melder schaltet erst,
wenn der eingestellte Helligkeitswert (Dämmerungsschwelle) unterschritten ist. Die Schaltdauer wird verlängert so-
lange Personenbewegungen (gesamter Bereich) oder Personenanwesenheit (Präsenzbereich) detektiert werden. Der
Melder detektiert die Zunahme des Tageslichts nach dem Einschalten und schaltet bei genügend Tageslicht auto-
matisch aus. Der Sekundär-Melder kann keine Lasten schalten. Er wird als Bereichserweiterung für Master-Melder
eingesetzt. Produkte, welche als Zubehör erwähnt werden, sind nicht im Lieferumfang.
2. Anwendung
Der Melder ist für den Innenbereich zur Steuerung von Leuchten geeignet.
Bei der Installation beachten:
– Nur an stabilen Wänden montieren.
– Bewegliche Gegenstände im überwachten Bereich durch Abkleben der Linse ausblenden.
– Keine Leuchten unterhalb oder weniger als 1m neben dem Melder platzieren (2a).
– Nicht in direktem Kälte- (2b) oder Wärmeluftstrom (2c) montieren.
3. Sicherheitshinweise
!
Vor der Installation prüfen, dass die elektrischen Leitungen spannungsfrei sind.Die Installation
darf nur durch Elektrofachpersonal unter Einhaltung der landesüblichen Vorschriften erfolgen.
4. Montage
Der Melder ist für eine Wandmontage von 0,9 bis 1,3m Höhe vorgesehen. Master-/Sekündar- Anwendung ist der
Master an einer Position mit mittlerer Helligkeit zu montieren.
Zur Montage:
– Frontabdeckung entfernen.
– Zum Entfernen des Druckknopfs, Schraubenzieher in seitlichen Spalt halten
und leicht drehen (4a).
– Melder gemäss Punkt 5 verdrahten.
– Melder in Unterputzdose befestigen.
– Konfiguration gemäss Punkt 7 durchführen.
– Frontabdeckung befestigen.
5. Verdrahtung (7a–7b)
Der Stromkreis muss mit einem Leistungsschutzschalter abgesichert sein. Der externe Taster schaltet den stromfüh-
renden Leiter zum R-Eingang. Impulstaster ohne Glimmlampe verwenden und Leitungen kurz halten. Anstelle eines
externen Taster empfehlen wir, einen Sekündar-Wandmelder zu verwenden. Durch Verbinden der R-Klemme kann das
Licht über jeden Wandmelder jederzeit geschaltet werden. Zusätzlich erweitert der Sekundär-Melder den Erfassungs-
bereich. Am S-Eingang können maximal 10 Sekundär-Melder angeschlossen werden, Leitungen kurz halten.
Master-Melder Sekundär-Melder
Stromführender Leiter L L
Neutralleiter N N
Schaltausgang Relais L’ –
Externer Taster (optional) R –
Sekundär-Taster (optional) R R
Sekundär-Melder (optional) S S
6. Anschluss von Verbrauchern
Hohe Einschaltströme verkürzen die Lebendsauer des im Melder integrierten Relais. Beachten Sie die technischen
Angaben des Leuchten- bzw.Leuchtmittelherstellers, damit das Relais nicht überbelastet wird (3a–b). Um den Schalt-
kreis übersichtlich zu halten, empfehlen wir,maximal 3–4 Master-Melder parallel zu schalten. Bei überdurchschnittlich
häufigen Schaltzyklen oder bei erhöhten Lasten, empfehlen wir, die Last über ein externes Relais/einen externen
Lastschutzschalter zu schalten.
7. Konfiguration (4b)
Der Melder ist ca. 1min nach dem Anschluss ans Stromnetz betriebsbereit. Parameteränderungen müssen im Betrieb
erfolgen: Die Parameter werden direkt an den Reglern am Melder oder über die Fernbedienung (Zubehör) eingestellt.
Zeit: Mit TIME wird die Nachlaufzeit nach der letzten Bewegung bestimmt.
Ist der Relaisausgang auf einen Lichtautomaten verdrahtet, muss der
TIME-Regler auf Impuls ( ) gesetzt werden.
Dämmerungsschwelle: Mit LUX wird die Ansprechschwelle des Dämmerungssensors stufenlos zwischen 2000 lx
Tagbetrieb und 5 lx Nachtbetrieb eingestellt.
Modus: Bei Änderungen wird der aktive Modus für 3s angezeigt.
Mit MODE wird zwischen folgenden Betriebsarten umgeschaltet:
Automatik ➡ LED grün
Korridor ➡ LED grün und orange blinkend
Halbautomatik ➡ LED orange
Hinweis: Im Korridormodus kann das Licht nur über den ihnen oder externen Taster nur eingeschaltet werden. Ein
manuelles Ausschalten ist nicht möglich. Im Halbautomatikmodus muss die Beleuchtung manuell eingeschaltet
werden. Der Melder schaltet das Licht bei Abwesenheit automatisch aus. Nach dem automatischen Ausschalten ist
der Melder für 5s in Bereitschaft. Während der Bereitschaft schaltet der Melder bei einer Detektion wieder ein.
8. Externer oder interner Taster
Das Licht kann jederzeit manuell geschaltet werden. Nach einem manuellen Schalten wird der Zustand bei jeder
Erfassung verlängert. Im Korridor Modus kann das Licht nur eingeschaltet werden. Nach der letzen Erfassung ist der
Zustand noch für die eingestellte Zeitdauer aktiv. Durch langes Drücken des Tasters schaltet der Melder in die Zu-
stände 6h ON und 6 h OFF. Die Zustände 6h ON und 6h OFF werden durch erneutes kurzzeitiges Drücken des Tasters
vorzeitig beendet:
Taster Auto Korridor Semi-Auto
0,1–2s ON/OFF ON ON/ OFF
2,0–4s 6h ON –6h ON
>4,0s 6h OFF – –
9. Anzeige
Die folgenden Zustände werden mittels LED angezeigt. Parameteränderungen können an den Drehschaltern oder
über die Fernbedienung (Zubehör) erfolgen. Bei der Übernahme einer Parameteränderung schaltet der Melder den
Relaisausgang kurzzeitig aus.
Status Rot Grün Orange Signal
Aufstarten Master-Melder/Sekundär-
Melder ca. 1min kurz blinken
Bewegungsdetektion
oder Sekundär-Melder Signal 1x lang blinken
6h ON/6 h OFF 6 Stunden lang blinken
Änderung Automatikmodus 3x lang blinken
Änderung Korridormodus 3x abwechselnd blinken
Änderung Halbautomatikmodus 3x lang blinken
Bereitschaft 5s ein
Befehl Fernsteuerung 3x kurz blinken
Betätigung Master-Taster 1x lang blinken
Betätigung Sekundär-Taster 1x lang blinken
10. Technische Daten
Master-Melder Sekundär-Melder
Nennspannung 230V / 50 Hz
Schaltleistung Relais
2000W / 8,7A ohmisch
1000VA/ 4,35A induktiv
350W LED
–
Erfassungsbereich 176°
Reichweite max. 4,5 m Radius Präsenz, max. 8 m Radius bei 1,3 m Höhe
Dämmerungsregler 5–2000lx –
Zeitregler , 10s bis 20 min –
Schutzart IP20
Temperaturbereich -10 bis +45°C
Masse (L x B x H) Edition CH: 88x88x12,7mm; Edition EU: 80x80x12,7mm

R
H
21 3 4
7
L
N
L
L’
S R N
7a
3a
max. 1000VA cos ϕ= 0,5
3b230V AC DC
❆
x
❄
❆
❄
❄
z
>1m
Time
Mode
Lux
4a
2a 2b 2c
4b
Master
detector
Secondary
detector
4c
7b
L
N
L
L’
S R N
Master
LSRN
Secondary
LS R N
Secondary
176°
R
B
100%
ca. 50%
Presence detector 8m, 180°
Präsenzmelder 8 m, 180°
Détecteur de présence 8m, 180°
Rilevatore di presenza 8m, 180°
Czujnik obecności o zasięgu 8m, 180°
DE
FR
IT
EN
PL
Swiss Garde 180 Presence
master / secondary detector UP
Edition 12-2021
Art.-Nr. 25380CH, 24380CH, 25382CH, 24386CH
Edition
CH
6
88 mm
60 mm
54.5 mm
12.7 mm
88 mm
88 mm
60 mm
54.5 mm
12.7 mm
88 mm
5
Ø
Ø
360°
ca. 50%
100%
H = 0,9–1,3
m
H
BRBR
1m 5 m 8m 3m 4,5 m
FR NOTICE D’INSTALLATION
1. Description du produit (1)
Le détecteur perçoit les mouvements et donc la présence de personnes par l’intermédiaire d’un système à capteur
infrarouge passif (PIR). La réaction de celui-ci est la plus sensible lorsque le mouvement est tangentiel au cercle formé
par la zone surveillée. L’appareil est moins sensible, env. 50% de moins, lorsque le déplacement se fait en direction du
détecteur. Le détecteur maître ne réagit que si la valeur de luminosité qu’il mesure est sous la consigne réglée (seuil
crépusculaire en lux). La durée d’allumage est prolongée tant que des mouvements sont détectés dans l’ensemble
de la zone de détection ou tant que des personnes sont considérées présentes dans la zone dite de présence. Le
détecteur maître perçoit l’augmentation de la luminosité environnante après commutation et coupe l’alimentation de
la charge en cas de luminosité suffisante. Le détecteur secondaire ne peut commuter aucune charge et est seulement
utilisé pour augmenter la portée de détection du détecteur maître. Les éléments mentionnés en tant qu’accessoires
ne font pas partie de la livraison.
2. Utilisation
Le détecteur est adapté à un usage intérieur pour la commande de luminaires.
Tenir compte des points suivants lors de l’installation :
– Ne monter que sur des supports stables.
– Utiliser les caches ou du ruban adhésif sur la lentille pour limiter la zone
de surveillance ou masquer les sources de détection non désirées.
– Ne pas mettre de luminaire sous le détecteur ou à moins
d’un mètre à côté du détecteur (2a).
– Ne pas installer directement dans les courants d’air froids (2b) ou chauds (2c).
3. Consignes de sécurité
!
Avant l’installation, vérifier la mise hors tension des câbles.
L’installation doit exclusivement être effectuée par des électriciens
spécialisés dans le respect des normes nationales.
4. Installation
Le détecteur est prévu pour un montage au mur à une hauteur de 0,9 à 1,3m. Placez le détecteur maître dans une
zone avec influence moyenne de la lumière ambiente dans les applications maîtres/secondaires.
Pour le montage :
– Déposer l’enjoliveur du détecteur.
– Pour retirer le poussoir, insérer un tournevis dans la fente latérale et faire levier (4a).
– Câbler le détecteur selon paragraphe 5.
– Fixer le détecteur sur la boite d’encastrement.
– Effectuer la configuration selon paragraphe 7.
– Reposer l’enjoliveur du détecteur.
5. Raccordement (7a–7b)
Le circuit électrique doit être protégé par un dispositif respectant les normes en vigueur. Le bouton poussoir optionnel
externe envoie la phase sur l’entrée R. Utiliser impérativement un poussoir sans lampe témoin et faire le câblage de
ce poussoir au plus court. Au lieu d’un poussoir externe, nous conseillons d’utiliser un détecteur secondaire. Le fait de
relier toutes les bornes R ensemble permet l’allumage à partir de chaque détecteur. De plus, le détecteur secondaire
augmente la zone de détection. L’entrée S du détecteur maître accepte jusqu’à 10 détecteurs secondaires, le câblage
doit être au plus court.
Détecteur maître Détecteur secondaire
Phase L L
Neutre N N
Sortie relais L’ –
Maître - Entrée poussoir optionnel externe R –
Détecteur secondaire - Entrée poussoir optionnel externe R R
Détecteur secondaire - Détection optionnelle S S
6. Raccordement de la charge
Des courants d’appel élevés réduisent la durée de vie du relais intégré dans le détecteur. Tenir compte des indications
techniques du fabricant de luminaires et d’ampoules, pour que le relais ne soit pas soumis à une surcharge (3a–3b).
Pour une configuration optimale du circuit, nous recommandons de monter en parallèle au maximum 3–4 détecteurs.
En cas de cycles de commutation particulièrement fréquents ou en cas de charges élevées, nous recommandons de
commuter la charge au travers d’un relais externe ou d’une minuterie.
7. Configuration (4b)
Le détecteur est fonctionnel env. 1 min après la mise sous tension. La modification des paramètres doit se faire en
service : les réglages sont effectués directement sur le corps du détecteur ou via la télécommande disponible en
accessoire.
Temporisation : TIME ; détermine la durée après le dernier mouvement. Si le détecteur actionne une minuterie, il
faut régler le paramètre TIME sur impulsion ( ).
Seuil crépusculaire : LUX ; détermine le seuil crépusculaire sous lequel,
entre le jour (2000lx) et la nuit (5 lx), le détecteur est actif.
Fonctionnalité : MODE détermine le mode de fonctionnement du détecteur qui est indiqué à chaque changement
pendant 3s :
Automatique ➡ Voyant LED vert
Couloir ➡ Voyant LED vert/orange
Semi-Automatique ➡ Voyant LED orange
Remarque : Dans le mode couloir, un appui sur le poussoir intégré ou externe provoque uniquement l’allumage,
l’extinction manuelle est impossible. Dans le mode semi-automatique, l’allumage n’est possible que par appui sur le
poussoir intégré ou externe. L’extinction est manuelle ou automatique. Le détecteur est encore actif durant 5 s après
coupure automatique et peut alors allumer à nouveau en cas de détection.
8. Commande externe intégré
La lumière peut être allumée ou éteinte manuellement à tout moment.
L’état, ON ou OFF, est prolongé à chaque détection. En mode couloir seul l’allumage est possible manuellement. Apres
la dernière détection, l’état est encore maintenu pendant la durée réglée. Un appui long sur le bouton poussoir amène
le détecteur dans un état ON ou OFF prolongé de 6h.L’état prolongé de 6h, ON ou OFF, est désactivé après un appui
bref sur le bouton poussoir :
Appui Auto Couloir Semi-Auto
0,1–2s ON/OFF ON ON/ OFF
2,0–4s 6h ON –6h ON
>4,0s 6h OFF – –
9. Affichage
Les états suivants sont indiqués par le comportement de la LED. Les paramètres peuvent être modifiés sur le
corps du détecteur ou via la télécommande (accessoire). Lorsqu’une modification de paramètre est enregistrée, le
détecteur désactive brièvement la sortie du relais.
Etat Rouge Vert Orange Affichage
Démarrage détecteur maître/secondaire env. 1 min clignotement bref
Détection ou signal du détecteur se-
condaire 1x clignotement long
6h ON/6 h OFF 6h clignotement long
Mode changement Auto 3x clignotement long
Mode changement Couloir 3x clignotement alterné
Mode changement Semi-Auto 3x clignotement long
Actif après coupure automatique Allumé 5s
Ordre de la télécommande 3x clignotement bref
Action poussoir sur détecteur maître 1x clignotement long
Action poussoir sur détecteur secondaire 1x clignotement long
10. Données techniques
Détecteur maître Détecteur secondaire
Alimentation 230V / 50 Hz
Pouvoir de coupure
du relais
2000W / 8,7A charge ohmique
1000VA/ 4,35A charge inductive
350W LED
–
Angle de détection 176°
Portée de détection max. rayon 4,5m en présence, max. rayon 8m à 1,3 m de hauteur
Réglage crépusculaire 5–2000lx –
Minuterie , 10s à 20 min –
Indice de protection IP20
Température d'utilisation -10 à +45°C
Dimensions (L x l x H) Edition CH: 88x88x12,7mm; Edition EU: 80x80x12,7mm
IT ISTRUZIONI PER L’INSTALLAZIONE
1. Descrizione del prodotto (1)
Il rivelatore di presenza rileva i movimenti e la presenza di persone utilizzando un sensore infrarosso passivo (PIR).
Esso reagisce sensibilmente ai movimenti tangenziali rispetto la zona monitorata. Movimenti diretti verso il sensore
vengono rilevati con una sensibilità ridotta di circa -50%. Il rivelatore si attiva solo quando viene raggiunto il valore di
luminosità impostato (soglia crepuscolare). Il tempo di accensione si prolunga finché vengono rilevati dei movimenti di
persone (intera area) o di presenza di persone (area presenza). Il rilevatore si spegne automaticamente quando rileva
una luce ambientale sufficiente. Il rivelatore secondario non trasmette carichi ad altri apparecchi. Viene utilizzato solo
come estensione per il raggio di rilevamento del master. I prodotti menzionati quali accessori (opzionali) non sono
compresi nell’ambito della fornitura.
2. Applicazione
Il rivelatore è concepito per usi interni.
Osservazioni per l‘installazione:
– Montare solo su pareti stabili.
– Nascondere eventuali oggetti mobili coprendo la corrispondente
zona con nastro adesivo sulla lente
– Non posizionare nessuna lampada a meno di 1m di distanza dal rilevatore (2a).
– Non installare direttamente sotto il flusso di aria fredda (2b) o aria calda (2c).
3. Indicazioni di sicurezza
!
Prima dell’installazione verificare che i cavi elettrici siano privi di tensioni.
L’installazione è consentita solo ad elettricisti specializzati nel rispetto delle
comuni disposizioni nazionali.
4. Montaggio
Il rivelatore è stato progettato per il montaggio a parete da 0,9 a 1,3m di altezza.In caso di applicazione master/
secondari, il Master deve essere montato in una posizione con luminosità media.
Per il montaggio:
– Rimuovere il coperchio anteriore.
– Per rimuovere il pulsante, tenere il cacciavite lateralmente e ruotarlo leggermente (4a).
– Collegare i cavi seguendo il punto 5.
– Fissare il rilevatore nella scatola a incasso.
– Configurare seguendo il punto 7.
– Fissare il coperchio anteriore.
5. Cablaggio (7a–7b)
Il circuito deve essere protetto da un interruttore automatico. Il tasto esterno (quando premuto) porta la fase all’in-
gresso R. Utilizzare i tasti a impulso per un installazione senza lampade a bagliore e mantenendo preferibilmente i fili
corti. Generalmente è consigliato l‘utilizzo di un rilevatore secondario invece di un tasto esterno. Con il collegamento
tramite entrata R, ogni rilevatore può essere usato per il controllo manuale della luce usando il tasto integrato. Inoltre,
il rivelatore secondario estende il raggio di rilevamento. All‘ingresso S possono essere collegati un massimo di 10
rilevatori secondari, mantenendo preferibilmente i cavi più corti possibile.
Rivelatore master Rivelatore secondario
Cavo sotto tensione L L
Cavo neutro N N
Potenza di commutazione relè L’ –
Tasto esterno (opzionale) R –
Tasto secondario (opzionale) R R
Rilevatore secondario (opzionale) S S
6. Carico del collegamento
Le correnti d’entrata elevate riducono seriamente la durata del relè integrato nel rilevatore. Prestare attenzione alle
specifiche tecniche del produttore di lampade per non sovraccaricare il relè (3a–b).
Per una gestione più facile dell’installazione, si consiglia di attivare in parallelo un massimo di 3–4 rilevatori master.
In presenza di cicli di attivazione con una frequenza superiore alla media o in caso di carichi elevati, si consiglia di
impostare il carico attraverso un relè esterno / interruttore automatico.
7. Configurazione (4b)
Il rilevatore entra in funzione operativa dopo circa 1 min dall’allacciamento alla rete.
Le impostazioni vanno configurate mentre il rilevatore è in funzione. Si può configurate tramite i potenziometri
integrati o mediante l‘uso di un telecomando a distanza (opzionale).
Tempo: Questa funzione (TIME) determina il tempo di ritardo, ovvero quanto tempo deve trascorre dopo l’ultimo mo-
vimento rilevato. Se l’installazione è collegata con un relè esterno, questa funzione deve essere configurata
su impulso breve ( ).
Soglia crepuscolare: Con LUX la soglia del sensore crepuscolare è regolabile 2000lx funzione giorno e 5lx
funzione notte.
Modalità: Con MODE viene determinato il modo di funzionamento, il quale è indicato dall’accensione del LED per
3s ogni volta che viene modificato.
Automatico ➡ LED verde
Corridoio ➡ LED lampeggia verde e arancione
Semi-automatico ➡ LED arancione
Avvertenze: Nella modalità corridoio la luce può essere accesa automaticamente o con il pulsante integrato o ester-
no. Non è possibile però lo spegnimento manuale. In modalità semi-automatica, l‘illuminazione deve essere accesa
manualmente. Il rilevatore spegne in vostra assenza le luci automaticamente. Dopo lo spegnimento automatico il
rilevatore rimane 5s in stand-by. Durante lo standby, il rivelatore si riaccende in caso di movimento.
8. Tasto integrato o esterno
La luce può essere accesa o spenta manualmente (tramite tasto) in qualsiasi momento. Lo stato dell’apparecchio, on
o off, si estende dopo ogni movimento. Nella modalità corridoio, la luce può essere solo accesa.
Dopo l‘ultima rilevazione, lo stato rimane attivo per il tempo impostato. Premendo a lungo il tasto il rilevatore passa agli
stati 6h ON e 6 h OFF. Queste funzioni possono essere disattivate premendo brevemente il tasto.
Tasto Auto Corridoio Semi-Auto
0,1–2s ON/OFF ON ON/ OFF
2,0–4s 6h ON –6h ON
>4,0s 6h OFF – –
9. Indicazioni
I seguenti stati vengono visualizzati tramite LED. Le modifiche dei parametri possono verificarsi
tramite potenziometri o tramite telecomando (opzionale).
Durante il cambiamento dei parametri il rivelatore commuta brevemente l‘uscita del relè.
Stato Rosso Verde Arancione Indicazione
Avvio rivelatore master/
secondario ca. 1min lampeggio breve
Rilevamento del movimento 1x lampeggio lungo
6ore ON/6 ore OFF Lampeggio per 6 ore
Cambiamento su modo Auto 3x lampeggi lunghi
Cambiamento su modo Corridoio 3x lampeggi
ad intermittenza
Cambiamento su modo Semi-Auto 3x lampeggi lunghi
Fase di preparazione 5s acceso
Ordine dal telecomando 3x lampeggi conti
Attività tasto rivelatore master 1x lampeggio lungo
Attività tasto rivelatore secondario 1x lampeggio lungo
10. Dati tecnici
Rivelatore master Rivelatore secondario
Tensione nominale 230V / 50 Hz
Potenza di apertura
2000W / 8,7A carico resistivo
1000VA/ 4,35A carico induttivo
350W LED
–
Raggio di azione 176°
Campo di rilevazione max. 4,5m presenza, max. 8m movimento a 1,3 m altezza
Soglia crepuscolare 5–2000lx –
Regolatore tempo , 10s fino 20 min –
Tipo di protezione IP20
Temperatura -10 fino +45°C
Dimensioni Edition CH: 88x88x12,7mm; Edition EU: 80x80x12,7mm
R
H
21 3 4
7
L
N
L
L’
S R N
7a
3a
max. 1000VA cos ϕ= 0,5
3b230V AC DC
❆
x
❄
❆
❄
❄
z
>1m
Time
Mode
Lux
4a
2a 2b 2c
4b
Master
detector
Secondary
detector
4c
7b
L
N
L
L’
S R N
Master
LSRN
Secondary
LS R N
Secondary
176°
R
B
100%
ca. 50%
Presence detector 8m, 180°
Präsenzmelder 8 m, 180°
Détecteur de présence 8m, 180°
Rilevatore di presenza 8m, 180°
Czujnik obecności o zasięgu 8m, 180°
DE
FR
IT
EN
PL
Swiss Garde 180 Presence
master / secondary detector UP
Edition 12-2021
Art.-Nr. 25380CH, 24380CH, 25382CH, 24386CH
Edition
CH
6
88 mm
60 mm
54.5 mm
12.7 mm
88 mm
88 mm
60 mm
54.5 mm
12.7 mm
88 mm
5
Ø
Ø
360°
ca. 50%
100%
H = 0,9–1,3
m
H
BRBR
1m 5 m 8m 3m 4,5 m
PL INSTRUKCJA INSTALACJI
1. Opis produktu (1)
Czujnik wykrywa ruchy i obecność osoby w pomieszczeniu dzięki pasywnej czujce podczerwieni (PIR). Czujnik jest
najbardziej czuły na ruchy przebiegające po stycznej do monitorowanego obszaru. Ruchy przebiegające bezpośrednio
w kierunku czujnika mają czułość niższą o ok. -50%. Czujnik nadrzędny załącza dopiero wtedy, gdy zostanie prze-
kroczona dolna granica ustawionej wartości jasności (próg zmierzchu). Czas przełączania jest wydłużany dopóty,
dopóki wykrywane są ruchy (cały obsza) lub obecność osób (strefa obecności). Po włączeniu czujnik wykrywa wzrost
natężenia światła dziennego i wyłącza automatycznie oświetlenie przy dostatecznym natężeniu światła dziennego.
Czujnik podrzędny nie może załączać obciążeń. Stosowane jest rozszerzenie obszaru dla czujnika nadrzędnego. Pro-
dukty wymienione jako akcesoria nie są objęte zakresem dostawy.
2. Zastosowanie
Czujnik jest przeznaczony do sterowania oświetleniem wewnątrz pomieszczeń.
Podczas instalacji pamiętać, aby:
– Montować tylko na stabilnych ścianach.
– Poprzez zaklejenie soczewki ukryć ruchome przedmioty w monitorowanym obszarze.
– Nie umieszczać źródeł światła pod czujnikiem ani w odległości
mniejszej niż 1m od czujnika (2a).
– Nie montować w miejscu bezpośrednio narażonym na strumień zimnego (2b) lub ciepłego powietrza (2c).
3. Wskazówki bezpieczeństwa
!
Przed instalacją sprawdzić, czy wszystkie przewody elektryczne znajdują się w stanie
beznapięciowym. Instalacja może być wykonana tylko przez wykwalifikowanych elektryków zgod-
nie z przepisami krajowymi.
4. Montaż
Czujnik przewidziany jest do montażu naściennego na wysokości od 0,9 do 1,3m. Przy konfiguracji nadrzędny/
podrzędny należy zamontować czujnik nadrzędny w pozycji, w której jasność ma średnią wartość.
W celu dokonania montażu:
– Zdjąć pokrywkę.
– W celu wyjęcia przycisku należy włożyć wkrętak w boczną szczelinę i lekko nim obracać (4a).
– Wykonać oprzewodowanie czujnika wg punktu 5.
– Zamocować czujnik w puszce podtynkowej.
– Dokonać konfiguracji wg punktu 7.
– Zamocować pokrywkę.
5. Oprzewodowanie (7a–7b)
Obwód prądowy musi być zabezpieczony wyłącznikiem instalacyjnym. Przycisk zewnętrzny przełącza przewód pod
napięciem na wejście R. Zastosować przycisk impulsowy bez lampki neonowej, przewody powinny być krótkie. Za-
miast zewnętrznego przycisku zalecamy zastosowanie podrzędnego czujnika naściennego. Po połączeniu zacisku R
zawsze możliwe jest włączanie oświetlenia za pomocą każdego czujnika naściennego. Czujnik podrzędny rozszerza
dodatkowo zakres detekcji. Do wejścia S może zostać maksymalnie podłączonych 10 czujników podrzędnych, ich
przewody powinny być jak najkrótsze.
Czujnik nadrzędny Czujnik
podrzędny
Przewód pod napięciem L L
Przewód zerowy N N
Wyjście załączania przekaźnika L’ –
Przycisk zewnętrzny (opcjonalnie) R –
Przycisk podrzędny (opcja) R R
Czujnik podrzędny (opcja) S S
6. Podłączenie odbiorników
Wysokie prądy załączeniowe skracają żywotność przekaźnika zintegrowanego w czujniku. Przestrzegać danych
technicznych producenta lamp i urządzeń oświetleniowych, aby nie dopuścić do przeciążenia przekaźnika (3a–b).
W celu zapewnienia przejrzystości układu przełączającego, zalecamy równoległe załączanie maks. 3–4 czujników
nadrzędnych. W przypadku zwiększonej liczby cykli łączeniowych lub większych obciążeń, zalecamy załączanie
obciążenia za pomocą zewnętrznego przekaźnika/ zewnętrznego wyłącznika ochronnego mocy.
7. Konfiguracja (4b)
Czujnik jest gotowy do pracy po ok. 1 minucie po podłączeniu do sieci elektrycznej. Zmiany parametrów muszą być
przeprowadzane podczas pracy czujnika: parametry ustawiane są bezpośrednio na regulatorach na czujniku lub za
pomocą pilota (wyposażenie dodatkowe).
Czas: Funkcja TIME służy do określania czasu opóźnienia liczonego od ostatniego ruchu. Jeżeli wyjście przekaźnika
okablowane jest na automacie światła, regulator TIME
musi być ustawiony na impuls ( ).
Próg zmierzchu: Dzięki funkcji LUX ustawiany jest próg zadziałania
pomiędzy 2000lx pracą w dzień a 5 lx pracą w nocy.
Tryb: Przy wprowadzeniu zmian aktywny tryb wyświetlany jest przez 3 sekundy.
Za pomocą funkcji MODE można przełączać pomiędzy trybami:
Automatycznym ➡ zielona LED
Korytarzem ➡ zielona LED i pomarańczowa migająca
Półautomatycznym ➡ pomarańczowa LED
Wskazówka: W trybie Korytarz światło może być włączane tylko przez zewnętrzny lub wewnętrzny przycisk. Ręczne
wyłączenie nie jest możliwe. W trybie półautomatycznym oświetlenie musi być ręcznie włączane. Czujnik automatyc-
znie wyłącza światło w przypadku nieobecności osób. Po automatycznym wyłączeniu czujnik jest przez 5 sekund w
stanie gotowości. W stanie gotowości czujnik włącza się w przypadku wykrycia ruchu.
8. Zewnętrzny lub wewnętrzny przycisk
Światło może zostać w każdej chwili ręcznie włączone. Po ręcznym włączeniu stan wydłużany jest po każdej detekcji.
W trybie Korytarz światło może zostać tylko włączone. Po ostatniej detekcji stan jest aktywny jeszcze przez ustawiony
okres czasu. Poprzez długie wciskanie przycisku czujnik przełącza się na stany 6h ON i 6h OFF. Stany 6h ON i 6h OFF
zostają wcześniej zakończone poprzez ponowne krótkie wciśnięcie przycisku:
Przycisk Automatyczny Korytarz Półautomatyczny
0,1–2s ON/ OFF ON ON /OFF
2,0–4s 6h ON –6h ON
>4,0s 6h OFF – –
9. Wyświetlacz
Podane stany wyświetlane są za pomocą diod LED. Zmiany parametrów mogą być dokonywane za pomocą
przełączników obrotowych lub pilota zdalnego sterowania (akcesoria). Przy przejmowaniu zmiany parametru czujnik
na krótko wyłączy wyjście przekaźnika.
Stan Czerwony Zielony Pomarańczowy Sygnał
Uruchomienie nadrzędny/
podrzędny Krótkie miganie
przez ok. 1 min.
Wykrycie ruchu lub sygnał
urządzenia podrzędnego 1x długie mignięcie
6h ON/6 h OFF 6 godz. długie miganie
Tryb zmiany Automatyczny 3x długie mignięcie
Tryb zmiany Korytarz 3x miganie na zmianę
Tryb zmiany Półautomatyczny 3x długie mignięcie
Gotowość 5 sekund wł.
Polecenie Zdalne sterowanie 3x krótkie mignięcie
Przycisk uruchamiania
czujnika nadrzędnego 1x długie mignięcie
Przycisk uruchamiania
czujnika podrzędnego 1x długie mignięcie
10. Dane techniczne
Czujnik nadrzędny Czujnik podrzędny
Zasilanie 230V / 50 Hz
Moc wyjścia przekaźnikowego
2000W / 8,7A rezystancyjne
1000VA/ 4,35A indukcyjne
350W LED
–
Kąt detekcji 176°
Zakres detekcji promień maks. 4,5m przy obecności,
promień maks. 8m na wysokości 1,3 m
Regulator zmierzchowy 5–2000lx –
Regulator czasu , 10s do 20 min –
Stopień ochrony IP20
Zakres temperatury -10 do +45°C
Wymiary (dł. x szer. x wys.) Edition CH: 88x88x12,7mm; Edition EU: 80x80x12,7mm
EN Warnings regarding installation
The installation of products that will permanently be part of the electrical installation and which include
dangerous voltages,should be carried out by a qualified installer and in accordance with the applicable
regulations. This user manual must be presented to the user. It should be included in the electrical
installation file and it should be passed on to any new owners. Additional copies are available on the
Niko website or via Niko customer services.
FR Mises en garde relative à l’installation
L’installation de produits qui feront, de manière permanente, partie de l’installation électrique et qui
comportent des tensions dangereuses, doit être effectuée par un installateur agréé et conformément
aux prescriptions en vigueur. Ce mode d’emploi doit être remis à l’utilisateur. Il doit être joint au
dossier de l’installation électrique et être remis aux nouveaux propriétaires éventuels.Des exemplaires
supplémentaires peuvent être obtenus sur le site internet ou auprès de Niko customer services.
DE Vor der Installation zu beachtende Sicherheitshinweise
Die Installation von Produkten, die fest an eine elektrische Anlage angeschlossen werden und
gefährliche Spannungen enthalten,müssen gemäß den geltenden Vorschriften von einem anerkannten
Installateur vorgenommen werden.
Hinweis !
Installation nur durch Personen mit einschlägigen elektrotechnischen Kenntnissen und Erfahrungen!*
Durch eine unsachgemäße Installation gefährden Sie:
• Ihr eigenes Leben;
• das Leben der Nutzer der elektrischen Anlage.
Mit einer unsachgemäßen Installation riskieren Sie schwere Sachschäden, z. B. durch Brand.
Es droht für Sie die persönliche Haftung bei Personen- und Sachschäden.
Wenden Sie sich an einen Elektroinstallateur!
* Erforderliche Fachkenntnisse für die Installation
Für die Installation sind insbesondere folgende Fachkenntnisse erforderlich:
• die anzuwendenden „5 Sicherheitsregeln”: Freischalten; gegen Wiedereinschalten sichern;
Spannungsfreiheit feststellen; Erden und Kurzschließen; benachbarte, unter Spannung stehende
Teile abdecken oder abschranken;
• AuswahldesgeeignetenWerkzeuges,der Messgeräteundggf.derpersönlichenSchutzausrüstung;
• Auswertung der Messergebnisse;
• Auswahl des Elektro-Installationsmaterials zur Sicherstellung der Abschaltbedingungen;
• IP-Schutzarten;
• Einbau des Elektroinstallationsmaterials;
• Art des Versorgungsnetzes (TN-System, IT-System, TT-System) und die daraus folgenden
Anschlussbedingungen (klassische Nullung, Schutzerdung, erforderliche Zusatzmaßnahmen
etc.).
Diese Gebrauchsanleitung muss dem Benutzer ausgehändigt werden.Die Gebrauchsanleitung ist den
Unterlagen der elektrischenAnlage beizufügen und muss aucheventuellen neuen Besitzern ausgehändigt
werden. Zusätzliche Exemplare erhalten Sie über die Website oder den Kundendienst von Niko.
IT Istruzioni di sicurezza da osservare
L’installazione di prodotti incorporati in modo permanente nell’impianto elettrico e comprendenti tensioni
pericolose dovrà essere eseguita da un installatore qualificato e in conformità alle normative applicabili.
Fornire il presente manuale d’uso all’utente. Il manuale deve essere incluso nel file di installazione
elettrica e deve essere presentato a tutti i nuovi proprietari. Sono disponibili copie aggiuntive sul sito
web Niko o tramite i servizi di supporto Niko.
PL Ostrzeżenia dotyczące instalacji
Instalacja produktów,które będą stałą częścią instalacji elektrycznej i które zasilane są niebezpiecznym
napięciem,powinna być przeprowadzana przez wykwalifikowanegoinstalatora, zgodniez obowiązującymi
przepisami.Niniejsza instrukcja użytkownika musi zostać przedstawiona użytkownikowi. Powinna zostać
zawarta w dokumentacji instalacji elektrycznej i powinna zostać przekazana nowym właścicielom.
Dodatkowe egzemplarze są dostępne na stronie internetowej Niko lub za pośrednictwem działu
obsługi klienta Niko.
EN CE marking
This product complies with all of the relevant European guidelines and regulations. For
radio equipment Niko llc declares that the radio equipment in this manual conforms with
the 2014/53/EU directive. The full text of the EU declaration of conformity is available at
www.niko.eu under the product reference, if applicable.
FR Marquage CE
Ce produit est conforme à l’ensemble des directives et règlements européens applicables. Pour
l'appareillage radio, Niko SA déclare que l'appareillage radio de ce mode d'emploi est conforme à la
Directive 2014/53/EU.Le texte complet de la déclaration de conformité UE est disponible,le cas échéant,
sur le site www.niko.eu à la rubrique référence produit.
DE CE-Kennzeichnung
Dieses Produkt erfüllt alle anwendbaren europäischen Richtlinien und Verordnungen. Für Funkgeräte
erklärt Niko nv, dass die Funkgeräte aus dieserAnleitung der Richtlinie 2014/53/EU entsprechen.Den
vollständigenText der EU-KonformitätserklärungfindenSieunterwww.niko.eu unter der Produktreferenz,
falls zutreffend.
IT Marcatura CE
Questo prodottoè conformea tuttele direttivee normativeeuropee pertinenti.Relativamente alleapparecchiature
radio, Niko nv dichiara che le apparecchiature radio contenute nel presente manuale sono conformi alla
direttiva 2014/53/UE. Il testo completo della dichiarazione di conformità UE è disponibile su www.niko.eu
sotto il riferimento del prodotto, se applicabile.
PL Oznakowanie EC
Ten produkt jest zgodny ze wszystkimi odnośnymi europejskimi wytycznymi i przepisami.W odniesieniu
do sprzętu radiowego Niko nv deklaruje,że sprzęt radiowy w niniejszej instrukcji jest zgodny z dyrektywą
2014/53/UE. Pełny tekst deklaracji zgodności UE jest dostępny na stronie www.niko.eu pod numerem
referencyjnym produktu, jeśli dotyczy.
EN Environment
This product and/or the batteries provided cannot be disposited in non-recyclable waste. take your
discarded product to a recognised collection point. Just like producers and importers,you too play an
important role in the promotion of sorting, recycling and reuse of discarded electrical and electronic
equipment. To finance the rubbish collection and waste treatment, the government levies recycling
charges in certain cases (included in the price of this product).
FR Environnement
Vous ne pouvez pas mettre ce produit ou les batteries fournies au rebut en tant que déchet non trié.
Déposez votre produit usagé à un point de collecte agréé.Tout comme les fabricants et importateurs,
vous jouez un rôle important dans la promotion du tri, du recyclage et de la réutilisation d’appareils
électriques et électroniques mis au rebut.Pour financer la collecte et le traitement,les pouvoirs publics
ont prévu,dans certains cas,une cotisation de recyclage (comprise dans le prix d’achat de ce produit).
DE Umwelt
Sie dürfen dieses Produkt oder die mitgelieferten Batterien nicht über den normalen Hausmüll entsorgen.
Bringen Sie Ihr ausgedientes Produkt zu einer anerkannten Sammelstelle. Genau wie Hersteller und
Importeure spielen auch Sie eine wichtige Rolle bei Sortierung, Recycling und Wiederverwendung
von ausgedienten elektrischen und elektronischen Geräten. Um die Abholung und Verarbeitung
wiederverwertbarer Abfälle finanzierenzu können, istim Verkaufspreis oftmals bereits eine obligatorische
Recyclingabgabe enthalten.
IT Ambiente
Questo prodotto e/o le batterie fornite in dotazione non possono essere smaltiti come rifiuti non
riciclabili.Conferire il prodotto da smaltire in un punto di raccolta riconosciuto. Così come i produttori e
gli importatori,anche l’utente può svolgere un ruolo importante nella promozione della differenziazione,
del riciclaggio e del riutilizzo delle apparecchiature elettriche ed elettroniche dismesse. Per finanziare
la raccolta e il trattamento dei rifiuti, in alcuni casi il governo riscuote imposte per il riciclaggio (incluse
nel prezzo di questo prodotto).
PL Środowisko
Ten produkt i/lub dostarczone baterie nie mogą być składowane z odpadami nienadającymi się do
recyklingu. Zużyty produkt należy oddać do uznanego punktu zbiórki.Tak jak producenci i importerzy,
klient również ma ważną rolę do odegrania w promowaniu sortowania, recyklingu i ponownego
wykorzystania zużytego sprzętu elektrycznego i elektronicznego. W celu sfinansowania zbiórki i
przetwarzania odpadów rząd w niektórych przypadkach pobiera opłatę na recykling (wliczona w cenę
tego produktu).
EMBALLAGES
CARTONS ET PAPIER
À TRIER
Support & contact
nv Niko sa
Industriepark West 40
9100 Sint-Niklaas, Belgium
www.niko.eu
EN +32 3 778 90 80 [email protected]
FR Suisse: +41 44 878 22 22 [email protected]
DE
Deutschland: +49 7623 96697-0
Schweiz: +41 44 878 22 22
Österreich: +43 1 7965514
IT +41 44 878 22 22 [email protected]
PL +48 509 378 373 [email protected]
Niko prepares its manuals with the greatest care and strives to make them as complete,
correct and up-to-date as possible. Nevertheless, some deficiencies may subsist. Niko
cannot be held responsible for this, other than within the legal limits. Please inform us of
PM2538x_2438xR21494
This manual suits for next models
3
Other Niko Security Sensor manuals

Niko
Niko KNX SG360P User manual

Niko
Niko 351-25458 User manual

Niko
Niko 351-25475 User manual

Niko
Niko 351-27360 User manual

Niko
Niko 350-20110 User manual

Niko
Niko 350-20060 User manual

Niko
Niko SG360KNX/KLR RA 16 m User manual

Niko
Niko 350-41750 Operating instructions

Niko
Niko 25264 User manual

Niko
Niko 351-25000 User manual