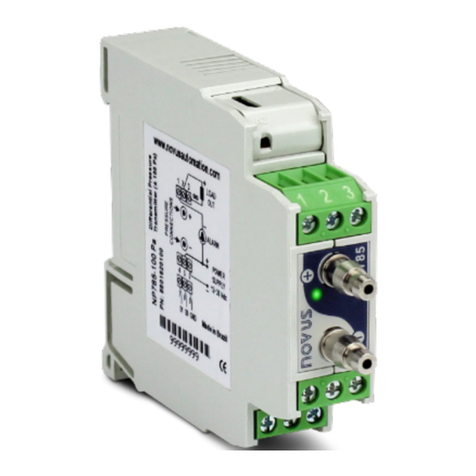
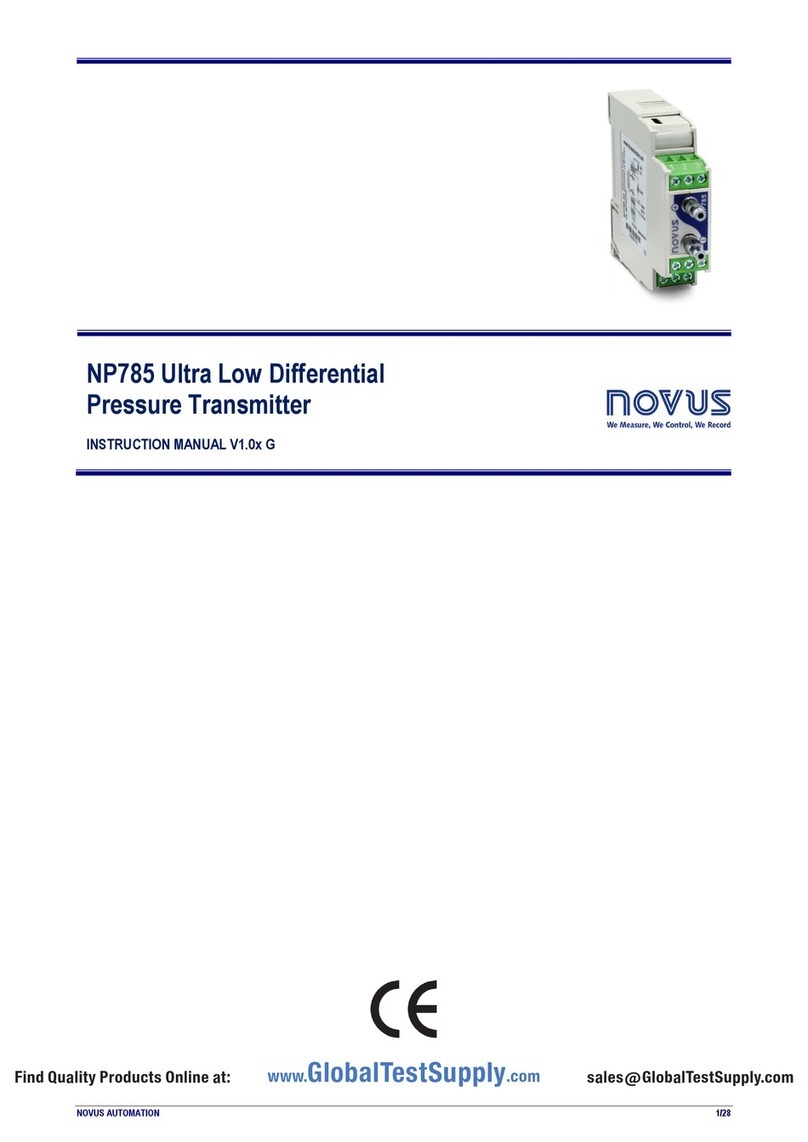
Novus NP785 User manual

NOVUS AUTOMATION 1/28
NP785 Ultra Low Differential
Pressure Transmitter
USER GUIDE V 2.0x C
Recommended for devices with firmware version V 2.0x and higher.

NOVUS AUTOMATION 2/28
1SAFETY ALERTS...............................................................................................................................................................................................3
2PRESENTATION................................................................................................................................................................................................4
3IDENTIFICATION ...............................................................................................................................................................................................5
3.1 DEVICE IDENTIFICATION..........................................................................................................................................................................5
3.2 DEVICE MODEL..........................................................................................................................................................................................5
4INSTALLATION ..................................................................................................................................................................................................7
4.1 MECHANICAL INSTALLATION ..................................................................................................................................................................7
4.1.1 INSTALLATION RECOMMENDATIONS...........................................................................................................................................7
4.1.2 DIMENSION ......................................................................................................................................................................................8
4.2 ELECTRICAL INSTALLATION....................................................................................................................................................................8
4.2.1 INSTALLATION RECOMMENDATIONS...........................................................................................................................................8
4.2.2 SPECIAL PRECAUTION...................................................................................................................................................................8
4.2.3 ELECTRICAL CONNECTIONS.........................................................................................................................................................8
4.2.4 USB CONNECTION ..........................................................................................................................................................................9
4.2.5 AUTO-ZERO KEY .............................................................................................................................................................................9
4.2.6 DIAGNOSTIC LED ............................................................................................................................................................................9
5SETTINGS........................................................................................................................................................................................................10
5.1 GENERAL SETTINGS ..............................................................................................................................................................................10
5.2 ALARM SETTINGS ...................................................................................................................................................................................10
5.3 ANALOG OUTPUT CONFIGURATION.....................................................................................................................................................11
6USB INTERFACE .............................................................................................................................................................................................12
9.1 CONNECTING TO A COMPUTER ...........................................................................................................................................................12
9.2 CONNECTING TO A SMARTPHONE.......................................................................................................................................................12
7SERIAL COMMUNICATION.............................................................................................................................................................................13
7.1 REGISTERS TABLE..................................................................................................................................................................................13
8SIGNOW SOFTWARE AND APP ....................................................................................................................................................................17
8.1 SIGNOW SOFTWARE ..............................................................................................................................................................................17
8.2 SIGNOW APP............................................................................................................................................................................................17
8.3 STARTING SIGNOW.................................................................................................................................................................................17
8.4 CONNECTING TO SIGNOW SOFTWARE ...............................................................................................................................................18
8.5 CONNECTING TO SIGNOW APP ............................................................................................................................................................19
8.6 CONFIGURING THE DEVICE ..................................................................................................................................................................20
8.6.1 GENERAL / BASIC..........................................................................................................................................................................20
8.6.2 COMMUNICATION..........................................................................................................................................................................20
8.6.3 INPUT ..............................................................................................................................................................................................21
8.6.4 OUTPUT ..........................................................................................................................................................................................21
8.6.5 ALARM ............................................................................................................................................................................................22
8.6.6 DIAGRAM ........................................................................................................................................................................................22
8.6.7 SECURITY.......................................................................................................................................................................................23
8.6.8 FIRMWARE UPDATE......................................................................................................................................................................23
8.7 PERFORMING DIAGNOSTICS ................................................................................................................................................................24
9TECHNICAL SPECIFICATION.........................................................................................................................................................................26
10 WARRANTY .....................................................................................................................................................................................................28

NOVUS AUTOMATION 3/28
1SAFETY ALERTS
The symbols below are used in the device and throughout this manual to draw the user’s attention to important information related to device safety
and use.
CAUTION
Read the manual fully before installing and
operating the device.
CAUTION OR HAZARD
Risk of electric shock.
ATTENTION
Material sensitive to static charge. Check
precautions before handling.
All safety recommendations appearing in this manual must be followed to ensure personal safety and prevent damage to the instrument or system.
If the instrument is used in a manner other than that specified in this manual, the device’s safety protections may not be effective.

NOVUS AUTOMATION 4/28
2PRESENTATION
NP785 Ultra Low Differential Pressure Transmitter uses a high precision differential pressure sensor and has the stability required to perform
measurements in applications that require high sensitivity. It is a micro processed device with two communication interfaces: USB and RS485 via
Modbus RTU protocol. The magnitude read by the sensor is provided through any of its interfaces, converted to a selected pressure unit from a set
of options.
This device has a digital alarm output, which supports the configuration of the alarm condition, adjustable Setpoints and custom timing, among
other functions. Its transmission output can be configured to operate in the 0-10 V and 4-20 mA standards, with adjustable range within the sensor
limits, and has adjustable behavior options in case of sensor error.
The SigNow software and app are the key tools for configuring, downloading, and analyzing NP785 data. They allow you to explore all features of the
device.
NP785 Ultra Low Differential Pressure Transmitter is suitable for use in HVAC applications such as environmental monitoring or climate control
or environmental monitoring of industrial processes where high accuracy is required at low pressure ranges.

NOVUS AUTOMATION 5/28
3IDENTIFICATION
3.1 DEVICE IDENTIFICATION
The identification of the device model is described on its side label, together with information regarding its electrical connections and its serial
number. Figure 1 shows the information available in the device housing:
Figure 1 –NP785
3.2 DEVICE MODEL
The NP785 Ultra Low Differential Pressure Transmitter line is available in 7 models:
•NP785-50 of ± 50 Pa
•NP785-100 of ± 100 Pa
•NP785-05 of ± 5 mbar
•NP785-20 of ± 20 mbar
•NP785-68 of ± 68 mbar
•NP785-400 of ± 400 mbar
•NP785-1000 of ± 1000 mbar
Model
Minimum Pressure
Extended Range
[-3.13%]
Minimum Pressure
Extended Range
[-1,25%]
Minimum
Pressure
Maximum
Pressure
Maximum Pressure
Extended Range
[103.13%]
Unity Standard
Configuration
50 Pa
-0.531 -0.513 -0.500 0.500 0.531 mbar
-7.97 -7.69 -7.50 7.50 7.97 mpsi
-0.213 -0.205 -0.200 0.200 0.213 inH2O
-5.42 -5.23 -5.10 5.10 5.42 mmH2O
-53.1 -51.3 -50.0 50.0 53.1 Pa ×
100 Pa
-1.063 -1.025 -1.000 1.000 1.063 mbar
-15.94 -15.38 -15.0 15.00 15.94 mpsi
-0.425 -0.410 -0.400 0.400 0.425 inH2O
-10.84 -10.46 -10.20 10.20 10.84 mmH2O
-106.3 -102.5 -100.0 100.0 106.3 Pa ×
5 mbar
-5.313 -5.125 -5 5 5.313 mbar ×
-77.06 -74.33 -72.52 72.52 77.06 mpsi
-2.133 -2.057 -2.007 2.007 2.133 inH2O
-54.17 -52.25 -50.98 50.98 54.17 mmH2O
-531.3 -512.5 -500 500 531.3 Pa
20 mbar
-21.252 -20.500 -20 20 21.252 mbar ×
-308.24 -297.33 -290.08 290.08 308.24 mpsi

NOVUS AUTOMATION 6/28
Model
Minimum Pressure
Extended Range
[-3.13%]
Minimum Pressure
Extended Range
[-1,25%]
Minimum
Pressure
Maximum
Pressure
Maximum Pressure
Extended Range
[103.13%]
Unity Standard
Configuration
-8.532 -8.230 -8.029 8.029 8.532 inH2O
-216.71 -209.04 -203.94 203.94 216.71 mmH2O
-2125.2 -2050.0 -2000 2000 2125.2 Pa
68 mbar
-72.257 -69.700 -68 68 72.257 mbar ×
-1062.60 -1025.00 -1000 1000 1062.60 mpsi
-29.753 -28.700 -28 28 29.753 inH2O
-743.82 -717.50 -700 700 743.82 mmH2O
-7438.2 -7175.0 -7000 7000 7438.2 Pa
400 mbar
-425.040 -410.000 -400 400 425.040 mbar ×
-6163.08 -5945.00 -5800 5800 6163.08 mpsi
-170.016 -164.000 -160 160 170.016 inH2O
-4250.40 -4100.00 -4000 4000 4250.40 mmH2O
-42504.0 -41000.0 -40000 40000 42504.0 Pa
1000 mbar
-1062.600 -1025.000 -1000 1000 1062.600 mbar ×
-15939.00 -15375.00 -15000 15000 15939.00 mpsi
-425.040 -410.000 -400 400 425.040 inH2O
-11157.30 -10762.50 -10500 10500 11157.30 mmH2O
-109872.8 -105985.0 -103400 103400 109872.8 Pa
Measuring ranges

NOVUS AUTOMATION 7/28
4INSTALLATION
4.1 MECHANICAL INSTALLATION
NP785 Ultra Low Differential Pressure Transmitter is designed to be fixed on 35 mm DIN rail, as shown in Figure 2. The 35 mm DIN rail
installation must be carried out after the device has been configured.
Figure 2 –Mechanical installation
4.1.1 INSTALLATION RECOMMENDATIONS
•The pneumatic hoses must be installed after the device has been fitted to the 35 mm DIN rail.
•To avoid problems with condensation, the device must be installed above the point to be measured.
•The extension of the hoses does not affect the device accuracy. Very long hoses, however, can result in measurement delays.
•Hoses should not be bent, and sharp curves should not be taken. Such actions may result in airflow interruption and possible sensor reading
blockage.
Figure 3 –Hose handling
The hose does not come with the device.
Overpressure: Excessive pressure, which exceeds the NP785 Ultra Low Differential Pressure Transmitter capacity, can
cause irreversible mechanical and electrical damage to the device. To avoid damaging the operator or the device
installer, follow the installation instructions and use the appropriate protection and device.

NOVUS AUTOMATION 8/28
4.1.2 DIMENSION
Figure 4 shows the device dimensions:
Figure 4 –Dimensions
4.2 ELECTRICAL INSTALLATION
4.2.1 INSTALLATION RECOMMENDATIONS
•Signal conductors should run through the plant separately from the power supply and output conductors. If possible, in grounded conduits.
•The power supply for electronic instruments must come from an appropriate grid for instruments.
•RC FILTERS (noise suppressor) are recommended in contactor coils, solenoids, etc.
•In control applications, it is essential to consider what could happen when some part of the system fails. The device’s internal devices do not
ensure total protection.
•Grounding helps limit the effects of noise due to electromagnetic interference (EMI). Run the grounding connection by using the grounding bolt
and the grounding plane before turning on the device.
4.2.2 SPECIAL PRECAUTION
Because it is an electronic module, the device needs some care when handling:
•Due to the risk of damage caused by static electricity and may occur if the electronic circuit is exposed, the device should not be opened.
•Pay close attention when connecting the wires.
•Remember to pass all wires through a cable clip before completing electrical connections.
•When closing the housing, the cover should be placed again properly, ensuring proper sealing for this device.
4.2.3 ELECTRICAL CONNECTIONS
Figure 5 shows the device electrical connections:
Figure 5 –Electrical connections
Electrical connections

NOVUS AUTOMATION 9/28
The table below helps you connect the RS485 communication interface connectors:
Bi-directional data line. Terminal 7
Inverted bi-directional data line. Terminal 8
Optional connection that improves communication performance. Terminal 9
RS485 connections
4.2.4 USB CONNECTION
The USB connection is used exclusively for the device diagnosis and configuration. The USB interface is on the NP785 Ultra Low Differential
Pressure Transmitter side.
It is recommended to configure the device before attached it to the DIN rail.
For more information, see USB INTERFACE chapter.
Figure 6 –USB Cable connection
4.2.5 AUTO-ZERO KEY
You can use the Auto-Zero function to automatically reset the sensor by pressing the key located next to the USB interface for more than 2
seconds. If the pressure read from the sensor is within the allowable range (see Table 10), the sensor reading will be reset to zero.
You can also perform this function through the software (see SIGNOW SOFTWARE AND APP chapter). For more information about the Auto-Zero
function, see GENERAL SETTINGS chapter.
You can also define in the software whether the Auto-Zero function will reset the User Offset. By factory default the Auto-
Zero function does not change previous Offset settings.
4.2.6 DIAGNOSTIC LED
This LED is used to perform a diagnosis during the operation of the device. When turning the device on, the LED will remain on for about 3 seconds
and will flash in the following circumstances:
•LED on: The device is operating correctly, within the configured limits.
•LED flashing slowly: An alarm is triggered.
•LED flashing quickly: The measured pressure is outside the configured relay limits.
•One long flash: The Auto-Zero function has been performed successfully.
•Three short flashes: The Auto-Zero function was not performed.
•LED off: There was an error in the device.

NOVUS AUTOMATION 10/28
5SETTINGS
NP785 Ultra Low Differential Pressure Transmitter is configurable by any of its interfaces. Due to the ease of use of the interface, it is
recommended to configure via USB using the SigNow software or app, but the device can also be configured via Modbus RTU by writing directly in
their configuration registers.
The description of the device registers, together with the configuration tables, can be found in the SERIAL COMMUNICATION chapter.
5.1 GENERAL SETTINGS
The differential pressure value is obtained by counting the digital analog converter of the device internal sensor. It is possible to select any of the
following pressure units: mbar, mpsi, inH2O, mmH2O or Pa. Changing this setting reverts the transmission limits and alarm setpoints to the default
values, which are the operation limits of the device.
The device also features Auto-Zero and Offset functions and an internal digital filter to process the measured signal.
You can use the Auto-Zero function to correct small differences in the sensor read value with no differential pressure applied, caused by mounting,
device position or natural variations of the sensor over time. You can use the Auto-Zero function by pressing the Auto-Zero key for another 2
seconds or by using the SigNow software or app. If the pressure value read is within the allowable limits, the pressure reading will be reset to zero.
You can also use the software to determine if the Auto-Zero function will reset the Offset value.
You can set an Offset value, which will be described in the selected pressure unit, to make small adjustments to the output value. The digital filter,
in turn, allows you to set the 1st order filter time constant (in seconds). This helps to reduce the occurrence of noise effects and pressure peaks at
the expense, however, of a faster response.
It is recommended to run the Auto-Zero function after changing the configuration of the device.
It is also possible to configure the parameters of Modbus RTU communication, such as Baud Rate, parity, and slave address of the device.
To differentiate between units of the same model, you can set an identifier on the device.
For test purposes, the device allows forcing the measurement of differential pressure, analog output, and alarm output. For each of these cases,
you can configure a value to be forced and enable or disable forcing.
5.2 ALARM SETTINGS
NP785 Ultra Low Differential Pressure Transmitter has a digital alarm output. The digital output will be activated whenever an alarm situation is
satisfied, except cases defined by some of its settings.
You can configure the alarm operation mode, high and low setpoints, hysteresis value, status transition timers, error condition and initial blocking.
Alarm configuration can be performed through the SigNow software or app (see OUTPUT PARAMETER section), allowing different operation
modes:
•Off: No alarm situation is active.
•Sensor Error: While there is some error reading the sensor, the alarm output will remain on.
•Below Lower Setpoint: The alarm output will be activated when the current pressure is lower than the lower setpoint. To exit the alarm
condition, the differential pressure must be greater than the lower setpoint plus the hysteresis value.
•Above Higher Setpoint: The alarm output will be activated when the differential pressure is higher than the upper setpoint. To exit the alarm
condition, the differential pressure must be lower than the lower setpoint minus the hysteresis value.
•Intra-range: The alarm output will be activated when the differential pressure is higher than the lower set point and lower than the upper set
point. To exit the alarm condition, the differential pressure must be greater than the upper setpoint plus the hysteresis value or lower than the
lower setpoint minus the hysteresis value.
•Extra-range: The alarm output will be activated when the differential pressure is higher than the setpoint higher or lower than the lower
setpoint. To exit the alarm condition, the differential pressure must be less than the upper setpoint minus the hysteresis value and higher than
the lower setpoint plus the hysteresis value.
In addition to the alarm operation modes, other parameters, which do not apply to the Sensor Error mode, can be configured to refine the behavior
of the alarm output:
•Initial Blocking: This parameter determines the use of the alarm output lock soon after the device is started. After initialization, a non-alarm
condition is required for the alarm output to be enabled.
•Error Condition: The status of this parameter determines whether the alarm output will remain on or off in case of sensor failure.
•Hysteresis: This parameter stores the pressure value that, with the values of the set points, determines the limit value to leave the alarm
situation. Figure 7 shows the conditions for alarm activation and deactivation.
The alarm output can be timed by means of the Time On and Time Off parameters. For a given status transition to occur, the device must remain
in the new status for a period equal to the one configured in the respective transition parameter. These values are initialized to 0 by default.
Extra-range mode is the default mode of alarm output. The default values of the setpoints, in turn, are the operating limits of the device. Any
changes in the pressure unit configuration readjust the values of the set points to the operating limits.

NOVUS AUTOMATION 11/28
Figure 7 –Conditions of activation and deactivation of the different alarm modes
5.3 ANALOG OUTPUT CONFIGURATION
The device has a configurable analog output. You can configure it using the SigNow software or app (see OUTPUT PARAMETERS section), and
you can define: the electrical pattern, the error mode, and the excursion range of the pressure to be transmitted.
The electrical pattern can be selected between 0-10 V and 4-20 mA modes, and the error mode determines the behavior of the analog output in
case of sensor failure, as shown in table below:
ERROR MODE
Mode Low High Low/High*
0 – 10 V 0 V 10 V
< Minimum Limit 0 V
Sensor error 10 V
> Maximum Limit
10 V
4 – 20 mA 3.6 mA 21.0 mA
< Minimum Limit 3.6 mA
Sensor error 21.0 mA
> Maximum Limit 21.0 mA
* Available starting with firmware version 1.20.
Behavior of the analog output in case of sensor failure
The excursion of the electric signal respects the values set in the configuration of the lower and upper transmission limits, which allows customizing
the differential pressure range. The factory setting also defines the upper and lower limits of the sensor as the maximum operating limits of each
respective model.
The 4-20 mA output follows the NAMUR NE-43 recommendations:
Figure 8 –4-20 mA output
The device leaves the factory with the 4-20 mA electrical standard and with the pressure unit configured according to the selected model (see
Table 1). Any changes in the pressure unit configuration readjust the values of the transmission limits to the device operating limits.

NOVUS AUTOMATION 12/28
6USB INTERFACE
9.1 CONNECTING TO A COMPUTER
The USB interface is used to CONFIGURE or MONITOR the device.
To CONFIGURE, you should use SigNow software or SigNow app, which offer features to create, view, save, and open configurations from the
device or from files on your computer. The feature to save and open settings in files allows you to transfer settings between devices and create
backups.
You can update the NP785 Ultra Low Differential Pressure Transmitter firmware (internal software) via the USB interface.
To MONITOR, you can use any supervisory (SCADA) or laboratory software that supports Modbus RTU communication over a serial
communication port. When connected to the USB interface of a computer, NP785 Ultra Low Differential Pressure Transmitter will be recognized
as a conventional serial port (COM x).
You should use SigNow software or consult the Device Manager in the Windows Control Panel to identify the COM port assigned to the device. To
MONITOR, refer to the Modbus memory mapping in the device communication manual and the supervisory software documentation.
To use the USB communication, follow the steps below:
•Download SigNow software (see SIGNOW SOFTWARE section) from our website.
•Install the software on the computer to be used. The USB drivers required for the operation of the communication will be installed along with
the software.
•Connect the USB cable between the device and the computer. The device does not need to be powered. The USB interface will provide
enough power for communication operation (other device functions may not operate).
•Run the software, configure the communication, and start the device recognition.
The USB interface IS NOT ISOLATED from the relay outputs and alarm outputs. Its purpose is temporary use during
CONFIGURATION and MONITORING periods. For the safety of people and devices, it should only be used when the device
is fully disconnected from the external power input.
In any other situation it is possible to use the USB interface, but it requires careful consideration by the people performing
the installation.
For MONITORING over long periods and with the inputs and outputs connected, it is recommended to use the RS485
interface, available or optional in most of our devices.
9.2 CONNECTING TO A SMARTPHONE
Smartphones with On the Go (OTG) technology can be directly connected to the device via the USB input. By connecting the OTG cable to the
smartphone, you can recognize and configure your NP785 Ultra Low Differential Pressure Transmitter by running SigNow app.
To use the USB communication, follow the steps below:
•Download SigNow app from Google Play Store or App Store.
•Install the app on the smartphone to be used.
•Connect the USB cable between the device and the computer. The device does not need to be powered. The USB interface will provide
enough power for communication operation (other device functions may not operate).
•Run the software, configure the communication, and start the device recognition.
If you position the cable end incorrectly, it is possible that the device will not be recognized by the application.

NOVUS AUTOMATION 13/28
7SERIAL COMMUNICATION
NP785 Ultra Low Differential Pressure Transmitter can be recognized on an RS485 network with Modbus RTU protocol as a slave device. All the
configurable parameters of the device can be read and/or written via serial communication.
The device supports writing in Broadcast mode, using the slave address Modbus 0.
The available Modbus commands are as follows:
03 – Read Holding Register
05 – Write Single Coil
06 – Write Single Register
16 – Write Multiple Register
7.1 REGISTERS TABLE
OUTPUT REGISTERS
Address
Register
Description
Type
Minimum
Maximum
Decimal
0 HR_PRESS
Differential pressure
value RO
Depends on model and unit of measure
selected¹ mbar: 3 decimal places
mpsi: 2 decimal places
inH2O: 3 decimal places
mmH20: 2 decimal places
Pa: 1 decimal place
1 HR_PRESS_H
2
HR_PRESS_MIN
Minimum differential
pressure value RO
Depends on model and unit of measure
selected¹
3 HR_PRESS_MIN_H
4 HR_PRESS_MAX
Maximum differential
pressure value RO
Depends on model and unit of measure
selected¹
5 HR_PRESS_MAX_H
6 HR_F_PRESS
Floating point
differential pressure
value²
RO
Depends on model and unit of measure
selected¹
Does not apply
7 HR_ F_PRESS_H
8
HR_ F_PRESS_MIN
Minimum value of
differential pressure in
floating point²
RO
Depends on model and unit of measure
selected¹
9 HR_F_PRESS_MIN_H
10
HR_ F_PRESS_MAX
Maximum value of
differential pressure in
floating point²
RO
Depends on model and unit of measure
selected¹
11 HR_F_PRESS_MAX_H
¹ Maximum and minimum values according to Table 1.
² The value of the registers should be interpreted as little-indian with byte inversion.
Output registers
ANALOG OUTPUT TRANSMISSION REGISTERS
Address Register Description Type Minimum Maximum Standard
100 HR_SENSOR_TYPE Sensor type RO
0 →5 mbar
1 →20 mbar
3 →68 mbar
4 →400 mbar
5 →1000 mbar
6 →50 Pa
7 →100 Pa
Depends on the
model
101 HR_OUT1_TYPE Retransmission output type RW
0 → 4 a 20 mA
1 →0 a 10 V 0
103
HR_OUT1_IN_HIGH_LIMIT
Upper limit of retransmission input RW Depends on model and unit of measure selected¹
104 HR_OUT1_IN_HIGH_LIMIT_H
105 HR_OUT1_IN_LOW_LIMIT Lower limit of retransmission input RW Depends on model and unit of measure selected¹
106
HR_OUT1_IN_LOW_LIMIT_H
107 HR_OUT1_ERR Error value RW
0 →Low error
1 →High error
2 →Low/high error²
0
108 HR_OUT1_HIGH_LIMIT Retransmission upper limit RO Depends on model and unit of measure selected¹
109 HR_OUT1_HIGH_LIMIT_H
110
HR_OUT1_LOW_LIMIT
Retransmission lower limit RO Depends on model and unit of measure selected¹
111 HR_OUT1_LOW_LIMIT_H
¹ Maximum and minimum values according to Table 1.
² Output behavior in case of error according to Table 4.
Analog output transmission registers

NOVUS AUTOMATION 14/28
FILTER AND UNITY SYSTEM REGISTERS
Address
Register
Description
Type
Minimum
Maximum
Standard
113 HR_PRESS_FLTR Filter for differential pressure reading RW 0 300 0
115 HR_UNIT_SYSTEM Unit configuration RW
0 → mbar
1 →mpsi
2 →inH2O
3 →mmH2O
4 →Pa
0
Filter and unity system registers
ALARM OUTPUT REGISTERS
Address
Registers
Description
Type
Minimum
Maximum
Standard
178 HR_A1FU Alarm type RW
0 → Off
1 → Sensor error
2 → Below Setpoint
3 → Above Setpoint
4 → Inside range
5 → Out-of-range
0
179 HR_A1SPHI_IN Alarm High setpoint for input RW Depends on model and unit of measure selected¹
180 HR_A1SPHI_IN_H
181 HR_A1SPLO_IN Alarm Low setpoint for input RW Depends on model and unit of measure selected¹
182 HR_A1SPLO_IN_H
183 HR_A1BL Alarm blocking RW 0 1 0
184
HR_A1HY_IN
Alarm hysteresis input RW 0 20 % of the
maximum value¹ 0
185 HR_A1HY_IN_HI
186 HR_A1HY Alarm hysteresis RO 0 20 % of the
maximum value¹ 0
187
HR_A1HY_H
188 HR_A1T1 Alarm ON time RW 0 6500 0
189 HR_A1T2 Alarm OFF time RW 0 6500 0
190 HR_A1IERR
Defines alarm status in case of sensor
failure RW 0 1 0
191 HR_A1SPHI Alarm High Setpoint RO Depends on model and unit of measure selected¹
192 HR_A1SPHI_H
193
HR_A1SPLO
Alarm Low Setpoint RO Depends on model and unit of measure selected¹
194 HR_A1SPLO_H
¹ Maximum and minimum values according to Table 1.
Alarm output registers
MODBUS RS485 COMMUNICATION PORT CONFIGURATION REGISTERS
Address
Register
Description
Type
Minimum
Maximum
Standard
137 HR_BAUD Baud Rate RW
0 →1200
1 →2400
2 →4800
3 →9600
4 →19200
5 →38400
6 →57600
7 →115200
4
138 HR_PRTY Parity RW
0 →No parity
1 →Odd parity
2 →Even parity
0
139 HR_ADDR Slave Address RW 1 247 1
Modbus RS485 communication port configuration registers

NOVUS AUTOMATION 15/28
OFFSET REGISTERS
Address
Registers
Description
Type
Minimum
Maximum
Standard
142 HR_F_OFFSET_IN Input for differential pressure offset in
floating point RW
20 % of the
minimum
value¹
+ 20 % of the
maximum value¹ 0
143 HR_F_OFFSET_IN_HI
144
HR_F_OFFSET
Differential pressure offset in floating
point RO
20 % of the
minimum
value¹
+ 20 % of the
maximum value¹ 0
145 HR_F_OFFSET_H
147 HR_AZ_CLEAR_OFFSET Sets the Auto-Zero action on Offset RW 0 1 0
148 HR_FORCE_ZERO Runs Auto-Zero function RW 0 1 0
149 HR_PRESSURE_ZERO
Auto-Zero value RO
-20 % of the
minimum
value¹
+20 % of the
maximum value¹ Factory default
150 HR_PRESSURE_ZERO_H
¹ Maximum and minimum values according to Table 1.
Offset registers
FORCE AND MINIMUM AND MAXIMUM REGISTERS
Address Register Description Type Minimum Maximum Standard
152 HR_OUT1_FORCE_ENAB Enables you to force the exit RW 0 1 0
153 HR_OUT1_FORCE_VAL Forced value for output RW
0.00 V
3.60 mA
10.00 V
21.00 mA 0
154
HR_A1_FORCE_ENAB
Enables you to force the alarm
RW
0
1
0
155 HR_A1_STATE Changes the alarm status RW 0 1 0
156 HR_FORCE_IN_PRESS
Enables you to force the differential
pressure RW 0 1 0
157 HR_FORCE_PRESS Input for the differential pressure value
that was forced RW Depends on model and unit of measure selected¹
158 HR_FORCE_PRESS_HIGH
159 HR_FORCE_PRESS
Differential pressure value that was
forced RO Depends on model and unit of measure selected¹
160 HR_FORCE_PRESS_HIGH
161
HR_RESET_MIN_MAX
Reset of all min and max
RW
0
1
0
¹ Maximum and minimum values according to Table 1.
Force and minimum and maximum registers
DEVICE TAG REGISTERS
Address
Register
Description
Type
166 HR_PRODUCT_TAG01
Device name string
RW ASCII CARACTER 2 CARACTER 1
167 HR_PRODUCT_TAG02 RW ASCII CARACTER 4 CARACTER 3
168
HR_PRODUCT_TAG03
RW
ASCII
CARACTER 6
CARACTER 5
169 HR_PRODUCT_TAG04 RW ASCII CARACTER 8 CARACTER 7
170 HR_PRODUCT_TAG05 RW ASCII CARACTER 10 CARACTER 9
171 HR_PRODUCT_TAG06 RW ASCII CARACTER 12 CARACTER 11
172 HR_PRODUCT_TAG07 RW ASCII CARACTER 14 CARACTER 13
173 HR_PRODUCT_TAG08 RW ASCII CARACTER 16 CARACTER 15
174 HR_PRODUCT_TAG09 RW ASCII CARACTER 18 CARACTER 17
175
HR_PRODUCT_TAG10
RW
ASCII
CARACTER 20
CARACTER 19
Device tag registers
The registers 103 to 106, 123 to 126, 157 and 158 must be used by the user to enter the values of their respective parameters. If they are within
limits, the device will automatically pass these values to registers 108 to 111, 132 to 135, 159 and 160, which show the values considered during
the operation. In case of extrapolation of limits, this condition will be signaled in register 343 (HR_DIAGNOSE03).
For 32-bit data, the two registers that compose them must be read and/or written for the values to be updated.

NOVUS AUTOMATION 16/28
DIAGNOSTIC REGISTERS
Address
Register
Description
Type
Bit
341 HR_DIAGNOSE01
Unit configuration error
RO
0
Overload detection at alarm output 1
Forced alarm status 3
Alarm status 5
Alarm forcing is enabled 10
Forcing the exit is enabled 12
342 HR_DIAGNOSE02 Differential pressure sensor error RO 0
343 HR_DIAGNOSE03
The input of retransmission limits is out of range
RO
1
Alarm setpoint input is out of range 3
Pressure forcing value input is out of range
6
344 HR_DIAGNOSE04 Indicates that the lower range limit has been exceeded RO 1
Indicates that the upper range limit has been exceeded 2
Diagnostic registers
LIMIT REGISTERS
Address
Register
Description
Type
Minimum
Maximum
359 HR_PRESS_HIGH_LIMIT Maximum limit RO Depends on model and unit of measure
selected¹
360
HR_PRESS_HIGH_LIMIT_H
RO
361 HR_PRESS_LOW_LIMIT Minimum limit RO Depends on model and unit of measure
selected¹
362 HR_PRESS_LOW_LIMIT_H RO
¹ Maximum and minimum values according to Table 1.
Limit registers

NOVUS AUTOMATION 17/28
8SIGNOW SOFTWARE AND APP
8.1 SIGNOW SOFTWARE
SigNow software is the main tool for configuring, downloading, and analyzing data from NP785 Ultra Low Differential Pressure Transmitter. It allows
you to use all the features of the device, communicating through the USB interface.
To install SigNow, just download and run the SigNowSetup.exe file, available on our website.
This manual describes the generic features of the software. For detailed instructions on setting up other devices and operating certain tools, you
should check the specific operation manual. The software and its respective manual can be downloaded for free in the Download Area of our
website www.novusautomation.com.
8.2 SIGNOW APP
SigNow app is the ideal tool for the daily use of NP785 Ultra Low Differential Pressure Transmitter. It is compatible with both Android and iOS
devices, making it accessible to everyone.
SigNow app can be downloaded for free from Google Play Store or App Store.
To configure the device through the app, you must connect it to the smartphone via an OTG cable (see USB INTERFACE chapter).
8.3 STARTING SIGNOW
When running SigNow, the following screens will appear:
Figure 9 –SigNow main screen
To communicate with the software, NP785 Ultra Low Differential Pressure Transmitter must be connected to the computer and have the USB
drivers previously installed (see CONNECTING TO A COMPUTER section). To communicate with the app, you must connect the device to the
smartphone via an OTG cable (see CONNECTING TO A SMARTPHONE chapter).
Next, you can click either Configuration or Diagnostics.
The Create Configuration option allows you to create a configuration. The device does not need to be connected. This configuration can be saved
to a file for future use or be written to a connected device. The Open Configuration option, on the other hand, allows you to read an already
created configuration file.

NOVUS AUTOMATION 18/28
8.4 CONNECTING TO SIGNOW SOFTWARE
Once the SigNow software is running, it is possible to read a device. To do this, you must click Configuration, select the USB option, and then the
connected device:
Figure 10 –Selecting a device
When you click on the NP785 Ultra Low Differential Pressure Transmitter icon, the software will read the current device configuration and
present all available features, as shown in the figure below:
Figure 11 –Device configuration screen
The configuration screen is divided into 8 sections: General, Communication, Input, Output, Alarm, Diagram, Security, and Firmware Update.
You can access these sections via side menu. The General screen is the first screen to appear.
The bottom part of the screen displays information about model, serial number, and firmware version, non-editable fields that are read by the
software directly from the device. In addition, it displays the following buttons: , Send Batch, Save, and Send.
The button compiles the following options:
1) Manual: Allows you to access the online manual for the device.
2) Support: Allows you to access the Technical Support page.
3) Event Log: Allows you to access a window that displays information about the settings made so far.
4) Report: Allows you to create a report with a .pdf extension, displaying all settings of the device.

NOVUS AUTOMATION 19/28
8.5 CONNECTING TO SIGNOW APP
When using SigNow app, however, there is no need to select the device. It will be automatically recognized by the smartphone, as shown in the
figure below:
Figure 12 –Recognized device
Clicking the Configuration button on the home screen will take you directly to the device information screen:
Figure 13 –Information screen
This screen can be accessed at any time by clicking the Info button and displays information about product model and serial number, non-editable
fields that are read by the app directly from the device. In addition, it displays the following buttons:, Home, Basic, and Advanced.
The button compiles the following options:
1) Manual: Allows you to access the online manual for the device.
2) Support: Allows you to access the Technical Support page.
3) Save: Allows you to save the settings made so far.
4) Send: Allows you to send the settings to the device.

NOVUS AUTOMATION 20/28
8.6 CONFIGURING THE DEVICE
The connection mode is slightly different between software and app, but the configuration and distribution of information and parameters is the
same between both.
8.6.1 GENERAL / BASIC
This screen allows you to view general device information. The name of the screen changes between software (called General) and app (called
Basic):
Figure 14 –General Screen
In the Device Tag field, you can assign a name to the device to be configured. This way, the device can be easily recognizable within a network
with multiple devices.
Model,Serial Number, and Firmware Version are non-editable fields read by the software directly from the device.
8.6.2 COMMUNICATION
This screen allows you to configure the communication parameters of the device:
Figure 15 –Communication screen
For NP785 Ultra Low Differential Pressure Transmitter to be recognized as a slave device in an RS485 Modbus network, you need to set a
unique Modbus address on the network, as well as Baud Rate and Parity.
Other manuals for NP785
2
Table of contents
Other Novus Transmitter manuals

Novus
Novus TxIsoBlock-HRT User manual

Novus
Novus RHT-XS User manual

Novus
Novus TxBlock-USB User manual

Novus
Novus NP620 User manual

Novus
Novus RHT Climate WM User manual

Novus
Novus TxMiniBlock User manual

Novus
Novus TXRAIL Series User manual

Novus
Novus TL400-I User manual

Novus
Novus TXMINI-M12 User manual

Novus
Novus NP785 User manual

Novus
Novus TxIsoRail User manual

Novus
Novus NP600 User manual

Novus
Novus DigiRail-VA User manual

Novus
Novus TxIsoRail User manual

Novus
Novus TxIsoRail-HRT User manual

Novus
Novus TxIsoBlock-HRT User manual

Novus
Novus RHT-Air User manual

Novus
Novus TxRail User manual

Novus
Novus TXMINI-M12-485 User manual

Novus
Novus RHT Climate-WM Series User manual