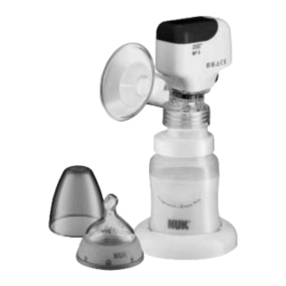
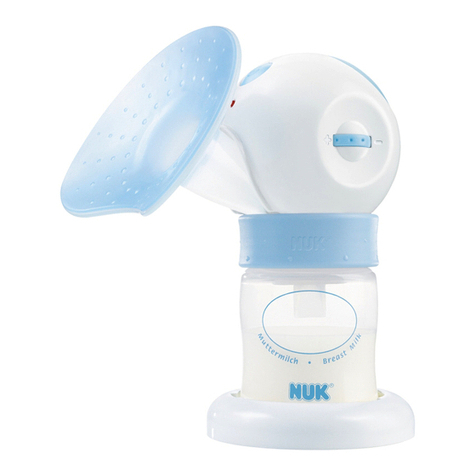
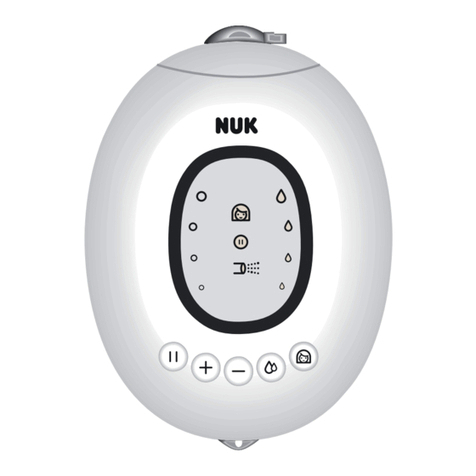
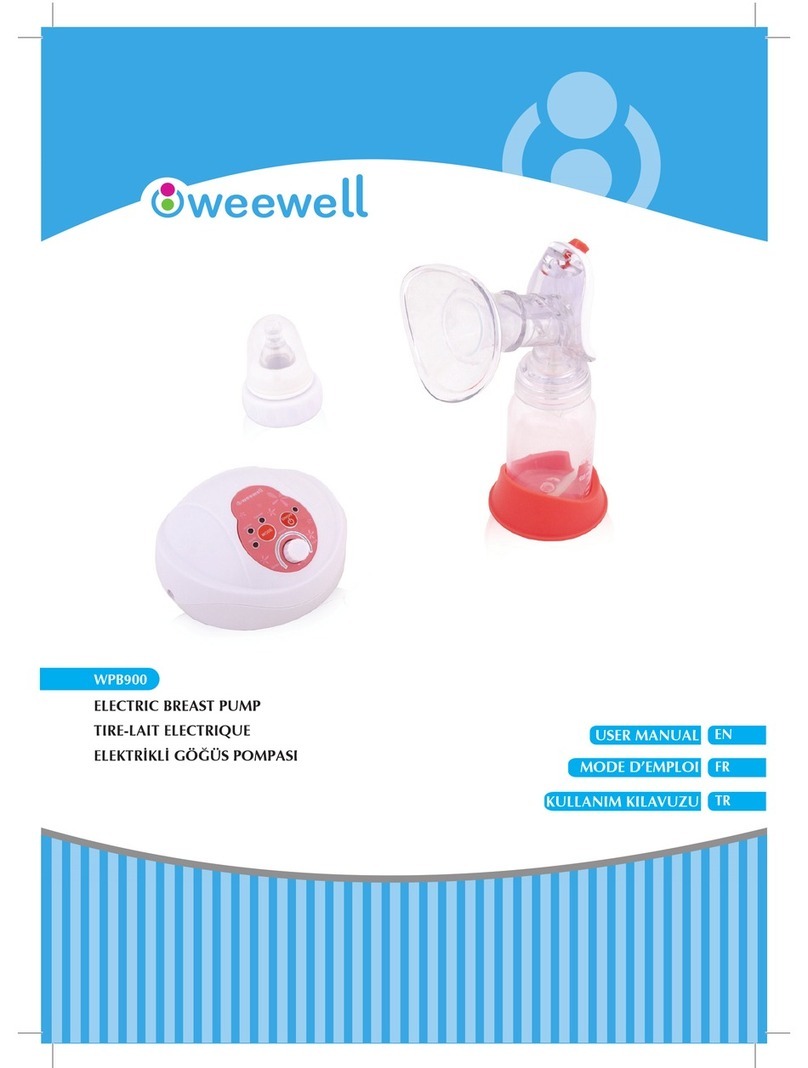
NUK e-Motion User manual

Operating Manual
ELECTRIC BREAST PUMP
Included: NUK FIRST CHOICE Bottle -Teat Feeding System
Please retain for future reference
Important!
Please read the cleaning
instructions on page 6

The underside of the box - in which the NUK
e-Motion ELECTRIC BREAST PUMP is packaged
- has been sealed with tamper-proof tape for your
protection. While the adhesive tape seals remain
intact you are guaranteed that from the time of its
manufacture and packaging no-one else has handled
this product.
Once the protective seals have been broken, the
Australian Distributor (Simes) can no longer
guarantee that the product has not been used after
its manufacture. Accordingly, for hygiene reasons,
once the adhesive tape seals have been broken, Simes
will not offer a cash refund unless you have a right
to a refund under the Trade Practices Act 1974, any
other applicable State or Federal legislation or at
common law. This statement does not affect a
consumer’s statutory rights.
Should you experience any difficulties with this
product, please address all queries to Simes and not
to the place of purchase. Simes’ contact details
are set out below. Trained staff at Simes will be
pleased to assist you with detailed advice.
Only Simes can carry out repairs or replace any faulty
parts within the terms of its 12 months warranty.
Subject to careful treatment and use of your
appliance in accordance with the operating
instructions, we provide in addition to your
statutory rights, an Australian Distributor’s
warranty for one year from the date you acquire
the appliance (whether by purchase or as a gift).
Appliances sent to us during the warranty period
will be repaired or replaced free of charge unless the
product has been damaged by accident, misuse,
neglect or by non-observance of the instructions for
installation and operation. Reasonable proof of
purchase may be required to support a warranty claim.
To validate your manufacturer’s warranty entitlement,
the warranty registration card must be completed
and sent to us within one month of the date on
which you acquire the appliance.
Also, please fill in the CUSTOMER’S RECORD
and attach your purchase receipt below for future
reference.
Australian Distributor:
SIMES AUSTRALIA PTY. LTD.
5 George Street
Stepney SA 5069
Postal Address:
PO BOX 335
Kent Town SA 5071
Telephone: 08 8363 0411
Toll Free: 1800 804 918
Email: info@simes.com.au
Web: www.nuk.com
NUK 12 Months Australian Distributor’s Warranty
Turn Page
My Receipt
Please complete for future reference in case of claim.
Date of acquisition*: / / Purchased by:
* By purchase, or as gift
Purchased from*:
* If known
FOR CUSTOMER ASSISTANCE WITHIN AUSTRALIA, CALL US TOLL FREE ON 1800 804 918.
Customer’s Record

Pump Assembly
1
1.
2.
3.
4.
5.

2
3

or
5 Min.100ϒC
2.
Micro
Micro
1.
2.
4
1
2
3
4
5
6
7
8
9
10
11
12
13 14 15 16
17
18
19

If you experience any difficulties when using
the NUK® e-Motion Electric Breast Pump,
have any questions or queries regarding its
operation or if you require replacement
parts, please do not hesitate to contact us.
Our Customer Service staff are trained to offer
detailed advice and assistance on all NUK®
Products. Simply call our toll-free number
1800 804 918 (Adelaide area, call 8363 0411),
Monday to Friday, 9am to 4pm central time
and someone will gladly assist you with any
questions you may have.
Simes Australia Pty. Ltd.
Customer Service
Australia

Contents
Important Information Before Using for the First Time 1
2 Key Features 1
2.1 Intended Function 1
2.2 Key Benefits 1
2.3 When should you stop using the pump? 1
2.4 Symbols on the pump 2
3. Information for Safety and Use 2
3.1 General Information 3
3.2 Hygiene 3
3.3 NUK Breast Milk Container 3
3.4 NUK FIRST CHOICE Silicone Teat 3
4. Overview of Working Parts 4
5. Tips for Successful Expressing 4
5.1 Frequency of Expressing 4
5.2 Procedure 4
5.3 Milk Quality 5
5.4 Milk Flow Reflex 5
6. Dismantling the Breast Pump 5
7. Cleaning and Sterilising 6
8. Assembly 6
9. Power Supply 7
9.1 Mains Operation 7
9.2 Interchangeable plug attachments 7
9.3 Battery Operation 7
10. Operation 8
10.1 Feeding expressed milk 8
10.2 Storing expressed milk 9
11. Tips for Successful Expressing 9
11.1 Frequency of expressing 9
11.2 Procedure 9
11.3 Milk quantity 9
11.4 Milk flow reflex 9
12. Hygiene Tips 9
13. Storing Milk 10
13.1 NUK Breast Milk Container 10
13.2 Tips for Handling Breast Milk 10
14. Feeding Baby 11
15. Troubleshooting 12
16. Technical Data 12

Breast Milk is the optimum and essential
nourishment that you can give to your baby for
the best start in life. That is why NUK supports you
with the NUK Breastfeeding Program, providing
practical and convenient aids to meet every
requirement of breastfeeding, so that you and your
baby can enjoy every precious moment together.
This easy-to-handle breast pump is designed to help
you and your baby whenever natural breastfeeding
is not possible.
Please allow 5 minutes of your time to read these
instructions for use carefully before using your NUK
e-Motion Electric Breast Pump for the first time.
We wish you and your baby every happiness.
2.1 Intended Function
The NUK e-Motion Electric Breast Pump is an aid
to expressing and collecting breast milk:
- in the workplace, when baby is away, at
home or when travelling
- to maintain milk production during a break
in breast feeding
- to relieve engorgement.
Once expressed, breast milk can be collected,
stored, frozen, warmed and fed to your baby in
the NUK Breast Milk Container.
2.2 Key Benefits
The NUK e-Motion Electric Breast Pump has an
electric suction pump and offers the following
benefits:
• A 2-stage pump system imitates your baby’s
natural sucking action
• easily adjustable suction strength
• soft, close – fitting breast shield
• versatile, mains powered or battery operated
(mains adapter supplied)
• collects expressed milk
• supplied with stand for stable, convenient storage.
• fits on any NUK FIRST CHOICE 150ml or
300ml bottle.
2.3 When should you stop using
the pump?
In the event of certain nipple problems
(inflammation, open cuts) the NUK e-Motion
Electric Breast Pump should not be used or only
used with special care. If you are unsure at any time
about whether to use the NUK e-Motion Electric
Breast Pump please consult your doctor or health
nurse.
Dear Mother,
2. Key Features
Clean and sterilise all parts except the motor unit (12) and mains adapter (18) before using the
NUK e-Motion Electric Breast Pump for the first time (see “7. Cleaning and Sterilising”).
Please open both front and back covers
to reveal all three diagrams whilst reading
the operating manual.
1. Important Information Before Using for the First Time
!
1.

2.
3. Information for Safety and Use
For your own safety please note the following points:
3.1 General Information
• Please read these operating instructions carefully
before use. They will ensure correct use of the
pump and must be kept available at all times.
• Use the NUK e-Motion Electric Breast Pump
and accessories for their intended purpose only
(see “2.1 Intended Function”).
• Never immerse the motor unit (12) in water as
there is a danger of electrocution and the motor
may become damaged if water leaks into unit.
• Do not expose the device to direct sunlight
as UV rays and overheating may make the plastic
brittle.
• Electric medical products such as this must only
be used by adults.
• The breast pump must be operated using only
the adapter supplied.
• Check that the mains voltage required for the
adapter (18) (see type plate) is compatible with
your mains voltage.
• Use of mains power is recommended. However,
if this is not accessible the unit may be operated
with high quality alkaline batteries. Be aware that
even fresh battery power will be good for no
more than 1-2 sessions.
• The batteries must be removed when flat or
if the device is not going to be used for a while as
leaking batteries may damage the pump.
• Do not use rechargeable batteries as their
voltage is too low for the pump to work to its
full capacity.
• Keep the pump’s small parts out of the reach
of children as they present a choking hazard if
swallowed accidently.
• If ointments or creams are used, please check in
the manufacturer’s information whether the
ointment or cream needs to be removed before
nursing or expressing milk.
• Only use original NUK Accessories, as only this
will guarantee the pump’s proper functioning.
• If accessories (including bottles) from other
manufacturers are used, the pump may not
function properly.
2.4 Symbols on the Pump
In the motor unit (battery compartment)
Symbol Meaning
When inserting the batteries, align them
according to the matching polarity
Do not dispose of batteries or the pump
with household waste
Refer to this operating manual
Refer to chapter 9 of this operating manual
Serial Number
On the motor unit
Symbol Meaning
Model name
Complies with all the requirements of
applicable EC directives
Electrically protected device,
Protection Class II
Electromedical device, Type BF
Direct current 4.5V, max 0.5A
Refer to chapter 9 of this operating manual

• Please note that any liability or claim under the
warranty expires if accessories are used that are
not recommended in these operating
instructions, or if any parts other than original
spare parts are used for repairs. This also applies
to repairs that are not carried out by qualified
persons.
• In the event of any malfunction, the pump must be
returned to the Australian Distributor for repair.
Failure to do so will invalidate your warranty.
• Never dismantle the motor unit housing
(12) as this will invalidate the warranty.
• If the breast milk is intended for a premature
baby, it is essential that you follow your
doctor’s advice.
3.2 Hygiene
• When handling breast milk, hygiene is of
particular importance to ensure your baby’s
healthy development.
• Please refer to Section “7. Cleaning and
Sterilising” (on page 6) to prevent infection or
bacterial contamination and to prevent the
device from becoming damaged.
• The breast pump will attain its full suction
power if it is in a clean state, free of breast
milk residue.
3.3 NUK Breast Milk Container
• If the bottle is damaged on the inside (eg. by
scratches), it should be replaced for hygiene
reasons.
• All unused individual parts should always be
kept out of the reach of children as there may
be a danger of choking.
• Tea or juices may discolour bottles and
accessories.
• Give only the quantities of food and drink
recommended by the manufacturer and in the
recommended consistency.
• Breast milk can be frozen in the breast milk
container.
• Feeding bottles that are sealed and contain food
should not be put in the microwave as there may
be a risk of explosion or material damage.
Heating in this way could cause the contents of
the bottle to explode. Uneven heating may result
in scalding.
• NUK Bottles and Teats are only compatible with
the NUK FIRST CHOICE system.
3.4 NUK FIRST CHOICE
Silicone Teat
Clean and sterilise the teat thoroughly before using
for the first time and before each further use.
• Use of a NUK Steam Steriliser is recommended
for sterilising.
• When boiling, check that there is sufficient liquid
in the pan in order to avoid damage (5 minutes
boiling time is sufficient).
• The teat must not be cleaned in a dishwasher as
it could be damaged or deformed by the
aggressive cleaning agent.
For your child’s health and safety:
CAUTION!
• Store in a hygienic condition and away from
light sources.
• Always check food temperature before feeding.
• This product must only be used under adult
supervision. A teat should never be used as a
soother. Continuous and prolonged sucking of
fluids may cause tooth decay.
• Do not dip the teat in sweetened liquids or
medicine.
• Check the teat before each use by pulling
the baglet firmly – especially when
children are teething. Discard the teat
at the first sign of tearing or biting damage
as there is a danger that small parts may
become detached and swallowed.
3.
• Do not leave teats in cold sterilising solution
beyond the period specified by the manufacturer,
as this may cause damage to the material.
• For hygiene and safety reasons, teats should be
replaced every 1–2 months.
• Use NUK FIRST CHOICE Teats only with
NUK FIRST CHOICE Bottles. The NUK FIRST
CHOICE Teat complies with European Safety
Standard EN 14350.
4.
1. Valve
2. Breast Shield
3. Connection ring
4. Lip valve (+ 1 replacement lip valve)
5. NUK Breast Milk Container
6. Stand for NUK Breast Milk Container
7. Sealing disc
8. Teat
9. Screw ring
10. Protective cap
11. Power supply plug
12. Motor unit
13. Warning light when the voltage is too low
(batteries need changing)
14. On/off button
15. Battery compartment catch lock
16. Battery compartment lid
17. Suction power regulator
18. Mains adapter
19. Interchangeable plug attachments
4. Overview of Working Parts (Figure 4)
5. Tips for Successful Expressing
Correct expressing needs practice. You should first
become accustomed to your new pump.
5.1 Frequency of Expressing
The frequency of expressing depends on individual
requirements.
If you will be apart from your child and/or want to
sustain milk production, the natural breastfeeding
rhythm should be maintained. You should therefore
express 6 to 8 times over a 24 hour period (this
includes at least once during the night).
In all other cases you should express entirely to suit
your own individual needs.
5.2 Procedure
Express milk from each breast in turn.
• Alternate between breasts when the milk flow
slows down or ceases.
• The amount of time needed to express milk will
vary considerably from one person to another.
The following intervals have proved effective,
but times may vary according to the individual:
• right 5 - 7 minutes; left 5 - 7 minutes;
right 3 - 5 minutes; left 3 - 5 minutes;
right 2 - 3 minutes; left 2 - 3 minutes.

5.
5.3 Milk Quantity
Do not be surprised if it takes a little longer at
first before the milk really starts to flow. This is
not unusual, in fact it is perfectly normal, because
in general:
milk production adjusts to daily
requirements.
This means that the quantity of milk produced may
vary considerably.
• Be sure to drink enough fluids to stimulate milk
production.
• Do not set the suction pressure too high.
Higher suction pressure does not produce a
larger amount of milk (see figure 17).
5.4 Milk Flow Reflex
During natural breast feeding, placing the baby on the
breast stimulates the milk flow reflex and the milk
begins to flow. Also the nobbled breast shield of
the breast pump helps stimulate the milk flow and
massages the skin at the same time.
You can further stimulate the milk flow reflex if you:
• Find a quiet place where you can be fully relaxed
as you express the milk.
• Adopt a comfortable and relaxed sitting position.
• Place warm compresses on your breast for a few
minutes to relax the tissue before expressing.
• Make sure you have eye contact with your baby. If
that is not possible, look at a photo of your baby.
• The milk flow reflex releases the flow of milk
to both breasts simultaneously. Any surplus milk
leaking from the breast that is not currently
being expressed can be collected using a NUK
Breast Shell or absorbed into a NUK Ultra
Dry Nursing Pad.
Caution! Always hold the bottle upright when it
contains milk or the milk may spill out.
Caution! Unplug the mains adapter (18) from wall
socket before dismantling.
• Unscrew the motor until (12) together with
the connection ring (3) from NUK Breast Milk
Container (5).
• Place the NUK Breast Milk Container in the
stand so that it cannot fall over.
• Remove the lip valve (4) from the lower part of
the breast shield.
• Unscrew the connection ring (3) from the
motor unit (12).
• Pull the motor unit (12) off the breast shield (2).
• Remove the valve (1) from the breast shield (2)
Caution! This piece is very small,
please ensure you put it in a safe place
when removing.
• Finally, clean the individual parts as described in
“7. Cleaning and Sterilising”.
6. Dismantling the Breast Pump (Figure (1) in reverse order)

Hygiene is of priority when handling
breast milk and all parts that come into
contact with it. The pump should
therefore only be used in a clean
and sterile condition.
After each use, all accessories except for
the motor unit (12) and adapter (18) must be
thoroughly cleaned with water and sterilised
immediately after each use.
7.1 Cleaning
Caution! Unplug the mains adapter (18) from the
wall socket before cleaning.
Caution! Clean the lip valve (4) carefully. Hard and
pointed bristles, as well as sharp objects may damage
the valve.
Caution! Valve (1) is very small, please ensure you
do not drop it down the drain when cleaning it.
1. Clean all parts, except the motor unit (12)
and adapter (18), in a sink using
commercially available washing up liquid. (Use of
the NUK Baby Bottle Cleanser is recommended)
2. Wipe motor unit (12) with a damp cloth. This
cleaning is sufficient because the pump unit does
not come into immediate contact with
breast milk.
Caution! Never immerse the motor unit (12)
or adapter (18) in water as this could damage the
electrics.
3. An oval-shaped area is provided on the breast
milk container for you to write the date on which
the milk was expressed. Be sure to use a water
soluble felt pen. This can be wiped with a sponge
or cloth and written on again.
7.2 Sterilising
Before sterilising, clean as described in “7.1 Cleaning”
Important! The motor unit (12) and adapter (18)
should never be sterilised as this may damage the
electrics.
1. Sterilise all parts except the motor unit (12) and
adapter (18):
- in a NUK Steam Steriliser, observing the relevant
operating instructions, or
- sterilise the parts in boiling water for 5 minutes.
Ensure there is sufficient water in the saucepan to
avoid damage.
Note: When using any steriliser please follow the
manufacturer’s instructions to avoid damage to the
pump accessories, bottle or teat.
Caution! Not all products are suitable
for microwave sterilisation. Before
using the appliance, please always check
manufacturer’s notices of each product to be
sterilised. Material damages can occur if the
instructions are not followed.
Important! Ensure that the accessories and
parts have completely cooled down and dried
before using again.
1. Insert the valve (1) into the breast shield (2)
with the knob point upwards.
2. Position the motor unit (12) on the
breast shield (2).
3. Screw the connection ring (3) from below onto
the motor unit (12).
4. Insert the lip valve (4) from below into the
assembled breast shield (2).
5. Screw together the assembled motor unit (12)
and the Breast Milk Container (5).
7. Cleaning and Sterilising
8. Assembly (Figure 1)
!
6.

Commonwealth, Africa, Asia,
Great Britain, Middle East
Australia, New Zealand, China
Europe. South America, Africa
North, Central & South America,
Japan, South East Asia
1.
2.
3.
9. Power Supply (Figure (2))
7.
9.1 Mains Operation
For mains operation use only the enclosed adapter;
model KSD 10-045-0800.
1. Open the battery compartment by the catch lock
(15).
2. Insert the plug (11) on the
adapter (18) into the socket in
the battery compartment.
3. Close the battery compartment
again. Push both the “feet” on the lid into
the relevant recess and the motor unit and shut
the lid, ensuring the catch lock (15) engages with
an audible click.
Note: The device should not be operated
without the battery compartment lid.
4. The mains adapter is supplied with an
Australian plug attachment, however if you
are travelling overseas, you can fit one of the
interchangeable plug attachments (19) to the
adapter so that it matches the power supply of
the country you are visiting (refer to the following
section)
5. Plug the mains plug (18) into a wall socket.
9.2 Interchangeable plug attachments
The mains adaptor is supplied with an Australian
type plug. Additional interchangeable plugs are also
included. You can use these to operate your breast
pump when overseas as follows:
Changing the Plug
1. Using an item such as a ballpoint
pen, press on the release catch
on the plug.
2. Slide the plug about 1.5cm
upwards and then remove it to
the front.
3. Position the interchangeable plug
attachment so that the
grooves on the attachment meet
the contacts on the adaptor.
4. Slide the plug attachment
downwards until the locking
mechanism clicks audibly into place.
9.3 Battery Operation
Battery operation requires three AAA, 1.5V batteries.
Rechargeable batteries should not be used to
operate the pump. Rechargeable batteries only have
a voltage of 1.2V; disposable batteries have 1.5V.
The lower voltage of rechargeable batteries means
that the pump under performs. Moreover, any
rechargeable batteries that may be inserted will not
be recharged.
The warning light (13) will warn you that the
voltage is too low when the pump is operated on
battery power. As soon as this light shines red you
need to change the batteries. When the batteries
are fully discharged the warning light (13) can no
longer light up, as the pump switches off due to too
low voltage.
1. Open the battery compartment by the catch lock
(15).
2. Insert the batteries, ensuring that they are
positioned correctly according to the + and –
symbols in the battery compartment.
3. Close the battery compartment. Push
both “feet” on the lid into the relevant
recess on the motor unit and shut
the lid, ensuring the catch lock (15) engages
with an audible click.

8.
Note: The device should not be operated without
the battery compartment lid.
Caution! The batteries should be removed if the
device is not going to be used for a while to prevent
the possibility of leaking batteries causing damage to
the device.
10. Operation (Figure (3)
Hygiene is very important before operating the
pump and therefore everyday hygiene routines, such
as washing your hands, should carried out before
expressing.
Important!
First set the suction power regulator (17) to
minimum by rotating the ring towards the “–”
symbol. You can then easily increase the suction
strength as you express milk in Phase 2.
1. Switch the breast pump on. To do this, press the
On/Off button (14).
2. Position the breast shield (2) on your breast
so that the nipple is positioned in the centre of
the shield. Gently press the breast shield in order
to ensure a good seal when expressing the milk.
Hold the pump in a vertical position.
Note! If you hold the pump at too great an angle
or if the pump topples over, it will switch off
automatically.
Important! The breast pump automatically
simulates your baby’s natural sucking action:
Phase 1: In the first
minute the sucking
rhythm is short and
stimulating to simulate the
milk flow letdown.
Phase 2: After this the pump changes to a slow
and intensive suction rhythm.
Important! If the pump is switched off and then
switched on again the programme goes back to the
beginning with the fast suction rhythm. This gives
you the opportunity to extend Phase 1.
3. Now you can adjust the suction using the suction
power regulator (17) until the optimum suction
strength is reached.
If the suction is too weak, rotate towards the “+”
symbol. If the suction is too strong, rotate the
suction power regulator (17) towards the “–” symbol.
Note: In phase 2 the breast pump automatically
changes to a stronger suction power, so remember
to select a lower suction setting at the beginning.
Caution: In order not to damage the pump you
should ensure that the expressed milk does not
reach as far as the lip valve (4).
4. Press the On/Off button (14) again to stop the
pumping action.
5. When removing pump funnel from breast, please
do so very carefully. The pump suction will have
firmly pulled your breast into the funnel and
may be quite sensitive when removing from
funnel. You may wish to run phase 1 again for a
short period of time to release some of
the suction pressure.
6. After use, place the breast pump in the stand (6)
for stability.
7. Unscrew the bottle (5) from the connection ring
(3) and motor unity. Keep the bottle vertical.
8. Disconnect the plug (if you are not using
the batteries) in order to disconnect the pump
completely from the power supply.
9. Clean the parts directly after expressing as
described in section “7: Cleaning & Sterilising”.
10.1 Feeding expressed milk
1. Screw the teat (8) onto the bottle with the
screw ring (9).
10.2 Storing expressed milk
1. To store the milk, secure the bottle using the
supplied screw ring (9) and sealing disc (7).
– = low suction
+ = high suction

9.
Caution: Please observe the information in section
“12. Storing Milk”.
2. Use the blank space of the oval panel
for labelling the container with the date
and time of expressing.
11. Tips for
Successful Expressing
Correct expressing needs practice. You should first
become accustomed to your new pump.
11.1 Frequency of expressing
The frequency of expressing depends on your
individual requirements.
If you are apart from your baby and/or want to
sustain milk production, the natural breastfeeding
rhythm should be maintained. You should therefore
express 6 to 8 times daily, including once during the
night. In all other cases you should express entirely
to suit your own individual needs.
11.2 Procedure
Express milk from each breast in turn.
This electric breast pump’s DUALogic 2-phase pump
system imitates your baby’s natural sucking action.
Milk is expressed at short intervals for about one
minute. This simulates your baby’s sucking action
which is rapid at first in order to quench the baby’s
thirst. At the same time, rapid sucking stimulates the
milk flow.
After this the breast pump changes automatically
to a slow, more intensive pumping rhythm. This
corresponds to your baby’s drinking behaviour. As
soon as baby’s thirst is quenched it changes to a
calm, slow and intensive sucking action so as to then
drink until full.
Alternate between breasts when the milk flow slows
down or ceases.
The amount of time needed to express milk will
vary considerably from one person to another.
11.3 Milk quantity
Please do not be surprised if initially it takes a while
for the milk to start to flow. This is not unusual. In
fact it is quite normal for the following reasons:
Milk production will adapt itself to daily
requirements.
This means that the quantity of milk produced may
vary considerably.
• Always ensure that you drink plenty of fluids.
This helps to stimulate milk production.
• Do not set the suction strength too high. A
higher suction strength does not increase the
quantity of milk produced.
11.4 Milk flow reflex
With breastfeeding, putting your baby to the breast
stimulates the milk flow reflex and the milk will
begin to flow. You can also stimulate the milk flow
reflex as follows:
• Find yourself a quiet place to sit, where you can
relax fully when using the breast pump.
• Find a comfortable and relaxed sitting position.
• Before starting, place a warm object (eg: a warm
flannel) on your breasts for a few minutes to help
relax the tissue.
• Make sure you have eye contact with your baby.
Or if this is not possible, look at a photo of your
baby.
• The milk flow reflex releases the flow of milk
to both breasts simultaneously. Any surplus milk
leaking from the breast that is not currently being
expressed can be collected using the NUK Breast
Shell or absorbed into a NUK Ultra Dry nursing
pad.
12. Hygiene Tips
Hygiene is particularly important when using the
breast pump. This applies to all the individual pump
components as well using commonsense cleanliness
routines when breast-feeding baby or when
expressing milk.
Particular attention should be given to your nipples
or breasts. Where possible, avoid using soap on your
nipples, as this may cause irritation.

10.
13. Storing Milk
Breast milk Storage location Storage periods
Freshly expressed At room temperature Max 6-8 hours
Refrigerator (not in door) 72 hours at 4ºC
Refrigerator freezer compartment 2 weeks
Upright/chest freezer 6 months at -18ºC
Defrosted, unopened Refrigerator (not in door) 24 hours at 4ºC
Defrosted, opened Refrigerator (not in door) 12 hours at 4ºC
Defrosting milk Gradually in refrigerator Approx 24hrs at 4ºC
At room temperature followed by immediate feeding
If time is short, under running cold water or
lukewarm water (max 37ºC), then feed
If the breast milk is not to be used immediately, you should seal the filled bottle well and store it
in the refrigerator. Caution! Only the bottle with its lid should be stored in the refrigerator, not the entire
NUK e-Motion Electric Breast Pump.
13.1 NUK Breast Milk Container
The breast milk may be chilled, frozen and thawed out again in the breast milk container. The container may
also be used for re-heating and feeding. Please always observe the information below on handling breast milk.
Note: When freezing breast milk, do not fill the container with more than 150ml (5 fl.oz), as breast milk
expands as it freezes and the container could burst.
13.2 Tips for Handling Breast Milk
• To attain the correct feed temperature of approx.
37°C, place the container in a NUK Baby Food
Warmer.
Note: The container must be open to prevent
pressure building up as the milk is warmed.
Caution: Breast milk must not be thawed out in
a microwave as this will destroy valuable nutrients
as well as causing possible damage to the container
material, which may cause the risk of explosion.
Uneven heating may result in scalding to your baby.
• The milk should therefore be shaken gently
before feeding to ensure that milk and milk fats
are well mixed and that the warm breast milk is
evenly distributed.
• Defrosted, re-heated or unused milk must be
disposed of and not refrozen.
• If you express breast milk more than once within
a period of 24 hours, the freshly expressed milk
may be added to the previously cooled breast
milk under the following conditions:
– The temperatures must be the same (cold on
cold). Freshly expressed milk must therefore
be cooled first before being added to milk that is
already cool.
• Consult your health nurse, midwife, doctor or
paediatrician for more detailed information
about long-term storage.

11.
14. Feeding Baby
When it is time to feed your baby, simply retrieve
your breast milk from storage and prepare it
according to one of the steps recommended in
section 11 (Storing Milk).
• Unscrew the lid off the NUK Breast Milk
Container.
• Separate the disc part from the screw ring part
and set the disc aside away from the reach of
children.
• Thread the NUK FIRST CHOICE Silicone Teat
through the ring and screw it back on the NUK
Breast Milk Container.
14.1 NUK FIRST CHOICE Teat
• This special orthodontic NUK Teat with
extra-wide lip support was designed to simulate
a mother’s breast while breastfeeding; the nipple
changes its shape, adapting to form a perfect unit
with baby’s mouth.
• The NUK FIRST CHOICE Silicone Teat included
in the kit is recommended for babies 0-6 months
(Age Group 1). It has a small feed hole (S) suitable
for breast milk feeds.
• The NUK Teat is in the correct position when
the NUK AIR SYSTEM valve is visible, pointing
upwards and the nipple part is inside Baby’s mouth,
with the feeding hole aimed at the palate.
14.2 Parts of the NUK FIRST CHOICE
Bottle-Teat Feeding System
Protective teat cover with snap
on closure.
Easy-grip screw ring.
The NUK Orthodontic Teat with
extra-wide lip support designed
to simulate a mother’s breast while
breastfeeding.
This NUK Valve is the heart of the
ANTI-COLIC AIR SYSTEM.
It operates only during feeding,
allowing a continual flow of air into
the bottle to maintain a constant air
pressure within. This prevents the
swallowing of air, which is thought
to be a common cause of colic.
Feed type identification S M or L
Sealing disc - for leakage-free
transport.
Extra-wide neck and very even,
smooth surfaces inside and out.
Ergonomically shaped bottle for
a comfortable and secure grip.
Clear volume indicator (ml/FL OZ).
High quality printing.
IMPORTANT:
• NUK FIRST CHOICE Teats are designed to be
fitted on NUK FIRST CHOICE Bottles only.
1.
1.
3.
2.
4.
5.
6.
7.
8.
9.
2.
3.
4.
5.
6.
7.
8.
9.

12.
15. Troubleshooting
Problem Reason Remedy
Pump does not work
Pump suction too
powerful
• There is no power
• Lip valve is missing or incorrectly
positioned or damaged
• Pump is being held at an angle
• Suction strength is set too low
• For battery operation: check that the batteries
are inserted correctly.
• Check if there is sufficient battery power. If a
light is illuminated beneath the On/Off button,
the batteries are too weak. Insert new batteries.
• Turn the suction power regulator towards “+”
to attain the optimum suction strength.
16. Technical Data
Medical product in accordance with 93/42/EEC Class 1
NUK Vented Teat Complies with EN 14350
Temperature range:
• Operation 8ºC to +40ºC
• Storage 8ºC to +40ºC
Power supply:
• Mains operation via adapter Input 100-240V~/50Hz, output 4.5VDC,
Type KSD10-045-0800 800mA, hollow plug: polarity inner +, outer –
• Battery operation 3 Type AAA batteries, 1.5V
• Low battery power
• Turn the suction power regulator towards “–”.• Suction strength is set too high
Poor pump suction
• Hold the pump upright. If the pump is held at
an angle it will switch off automatically.
• For mains operation: check that the mains plug
or mains adapter is correctly inserted.
• Check that the lip valve is correctly positioned. If
it is damaged use provided replacement lip valve.
• Breastmilk container is full and
lip valve is already touching the
expressed milk
• Exchange breastmilk container.
Pump makes unusual
noises
• Lip valve cannot handle the flow
of breast milk
• Reduce the suction strength. With maximum
milk flow a lower suction strength is sufficient
to allow efficient expressing.

Notes
Other manuals for e-Motion
2
Table of contents
Other NUK Breast Pump manuals