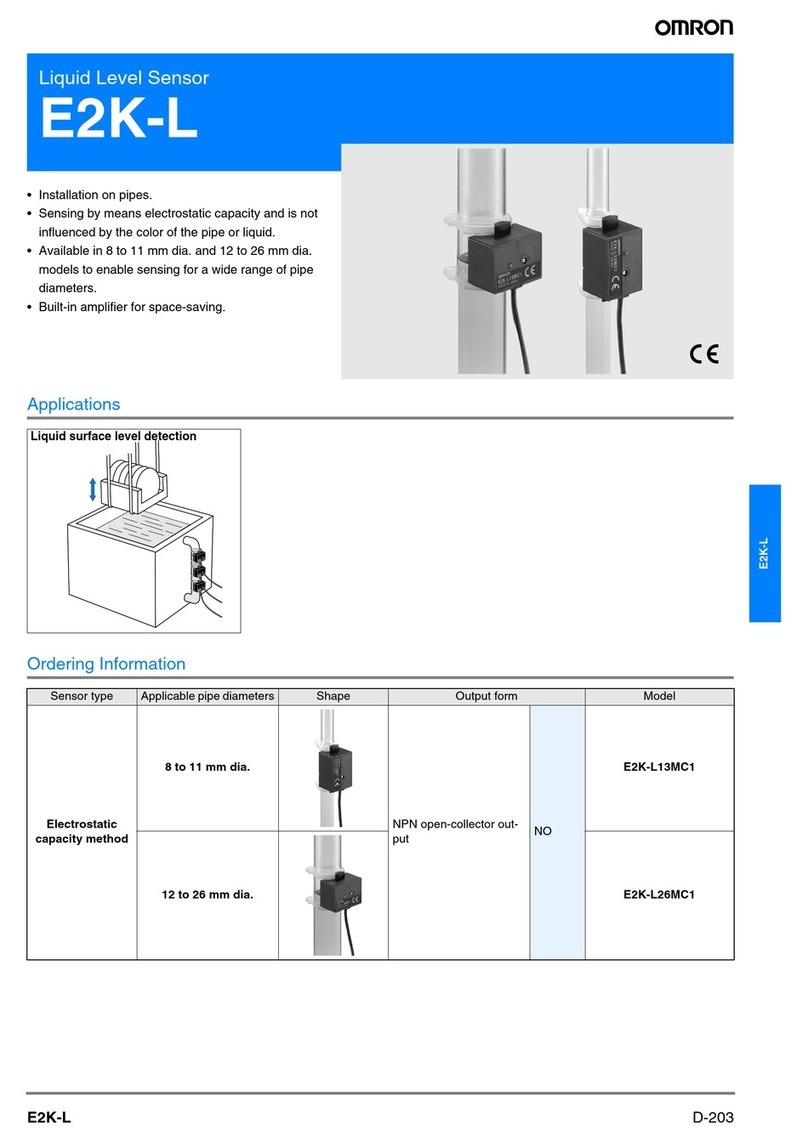
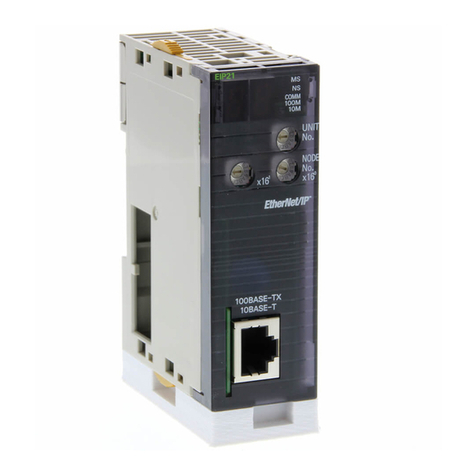
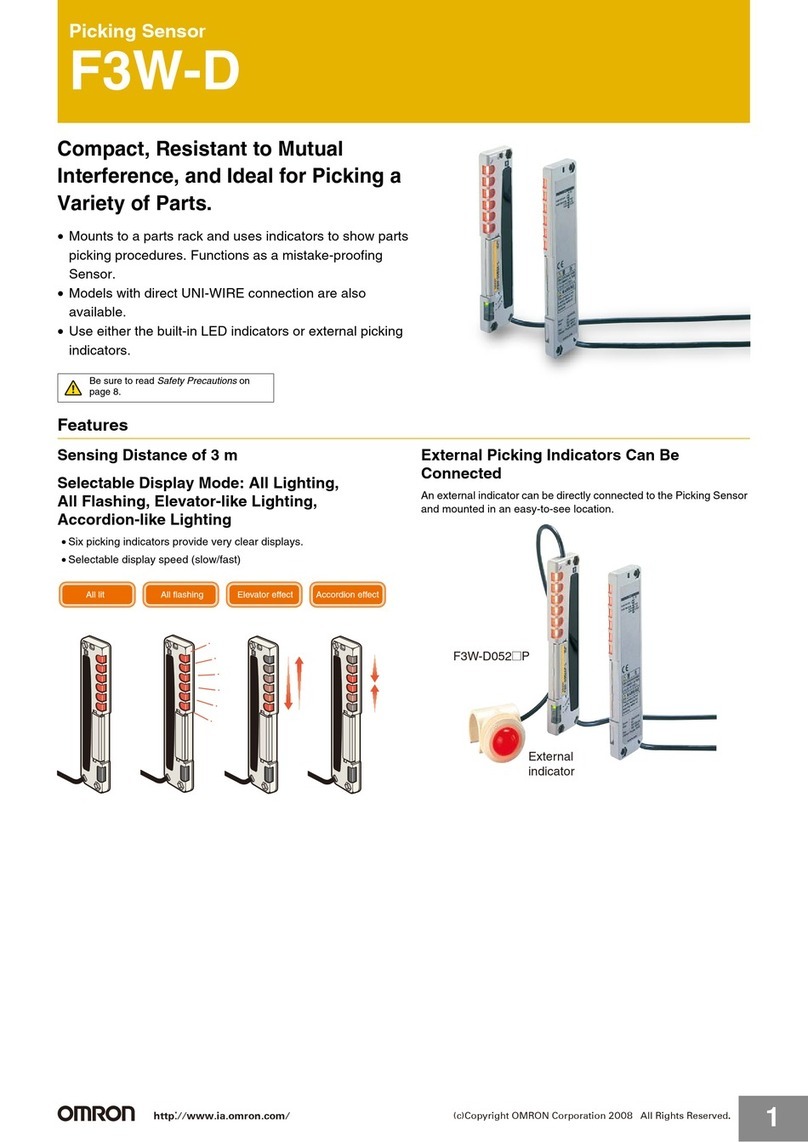
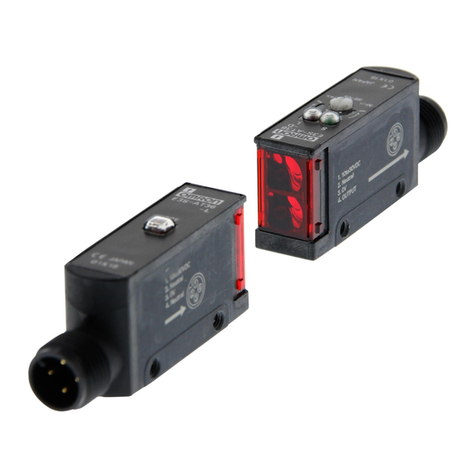
Omron ZX2 Series User manual

1
Smart Sensors Laser Sensors CMOS Type
ZX2
Stable measurement that is unaffected by
workpiece changes.
The simple setting for everyone.
• High-precision measurement to approx. 10 μm.
• Stable measurement regardless of movement or changes in
workpiece color or material.
• Smart tuning for optimal setting with one button for essentially any user.
• The 11-segment display enables reading characters at a glance.
• Four built-in banks make changeovers easy.
• Stable measurement in harsh environments with IP67
protection for Sensor Head and robot cable.
• Laser life indicator to prevent line stoppage through visualization.
Features
For the most recent information on models that have been certified for
safety standards, refer to your OMRON website.
Be sure to read Safety Precautions on page 11
Stability
Measurements to a Precision in the Order of 10 µm for any Workpiece
PAT.P
The use of a unique OMRON HSDR-CMOS (high-speed and dynamic range) image sensor
and a step-less laser power adjustment algorithm enable stable measurements for any
color or surface conditions, from metals to substrates, rubber, and transparent objects.
Linearity of 0.05% F.S.* achieves a measurement precision in the order of 10 µm.
Shinny metals Black rubber
Light
intake
amount
The light intake amount remains
the same even if the workpiece changes.
Two-element
automatic adjustment
Stable measurements on objects with changing color/material
CMOS shutter time
Laser emission power
Small Large
Weak Strong
Shinny metals Black rubber
m
ount remains
or
kp
ie
ce c
ha
nges
me
nt
j
ustment
color/material
t
er ti
m
o
n powe
r
L
arg
e
S
trong
Blac
k ru
bb
m
e
L
T
he li
gh
t in
t
th
e
sa
me
e
ve
n
g
T
auto
m
e
measuremen
t
s on o
bj
ec
t
s w
ith
c
ha
C
M
O
L
aser
e
W
ea
k
Shinny metals
Sma
ll
Measurements for Bright Workpieces Measurements for Dark Workpieces
Linearity characteristic of
the ZX2 according to material
0-2-4-6-8-10
-1
-0.6
-0.6
-0.4
-0.2
0
0.2
0.4
0.6
0.8
1
246810
Distance (mm)
Linearity (%FS)
Linearity characteristic of
existing product according to material
0
-2-4-6-8-10
-1
-0.6
-0.6
-0.4
-0.2
0
0.2
0.4
0.6
0.8
1
246810
Distance (mm)
Linearity (%FS)
-40
-30
-20
-10
0
10
20
30
40
Measurement error (µm)
Max error:
approx.7µm
Moving conditionRest state
workpiece
-400
-300
-200
-100
0
100
200
300
400
Measurement error (µm)
Max error: approx.400µm
Moving condition
Rest state
workpiece
Workpiece:SUS304, hairline (parallel) Workpiece:SUS304, hairline (parallel)
White ceramic
SUS304, mirror finishing
SUS304, hairline (orthogonal)
SUS304, hairline (parallel)
Black rubber
White ceramic
SUS304, mirror finishing
SUS304, hairline (orthogonal)
SUS304, hairline (parallel)
Black rubber
A line beam is used in addition to an emitter beam when dealing with rough surfaces to average out the
amount of reflected light and to offset the amount of light received at a high-speed measurement period of
30 µs in order to reduce variations in received light and to enable stable measurements for moving objects.
Stable measurements on moving objects
* Linearity: The maximum error that occurs for measurements within the measurement range.
A linearity of ±0.05% F.S. means that when the LD50L is used for a measurement range of 40 to 50 mm,
the maximum error within the measurement range will be 10 µm.
Limit of resolution of
existing product when workpiece is moving
Limit of resolution of
the ZX2 when workpiece is moving
Stable measurement even for changes in colors and materials or for moving
workpieces with CMOS that has a dynamic range of two million times
No Variation
for Different
Workpieces
No Variation
for Moving
Workpieces
Easy
Sensorconfigurationbyjustapushing
theSMARTbutton
Essentially Anyone Can Set Optimum Conditions
Easily select smart tuning
with one button. PAT.P
The optimum settings for stable measurement can be achieved with one
smarttuningbutton.Thesettingswillnotrelyontheskilloftheuser.
Scene.3
Onetypeofworkpiece
Scene.1
Severaltypesofworkpiece
Scene.2
Surfaceconditions
oftheworkpiecearevariable
Three selectable tunings
Moreaccuratesettingsaremadepossiblebythethreetuning
methodsfordifferentworkpiecetypesandsurfaceconditions.
Singlesmarttuning
Bestconfigurationforstabledetection
in case of objects do not change by
pushingthebuttonforonesecond
Multi-smarttuning
Idealconfigurationforstabledetection
ofchangingobjectsbypushingthe
buttonforthreeseconds
Activesmarttuning
Continuousconfigurationimprovement
forthestabledetectionofalllocations
bypushingthebuttonforfiveseconds
Для заказов: +7(499)707-11-20,
Email: [email protected]
8-800-511-65-88(Бесплатно по РФ)

2
ZX2
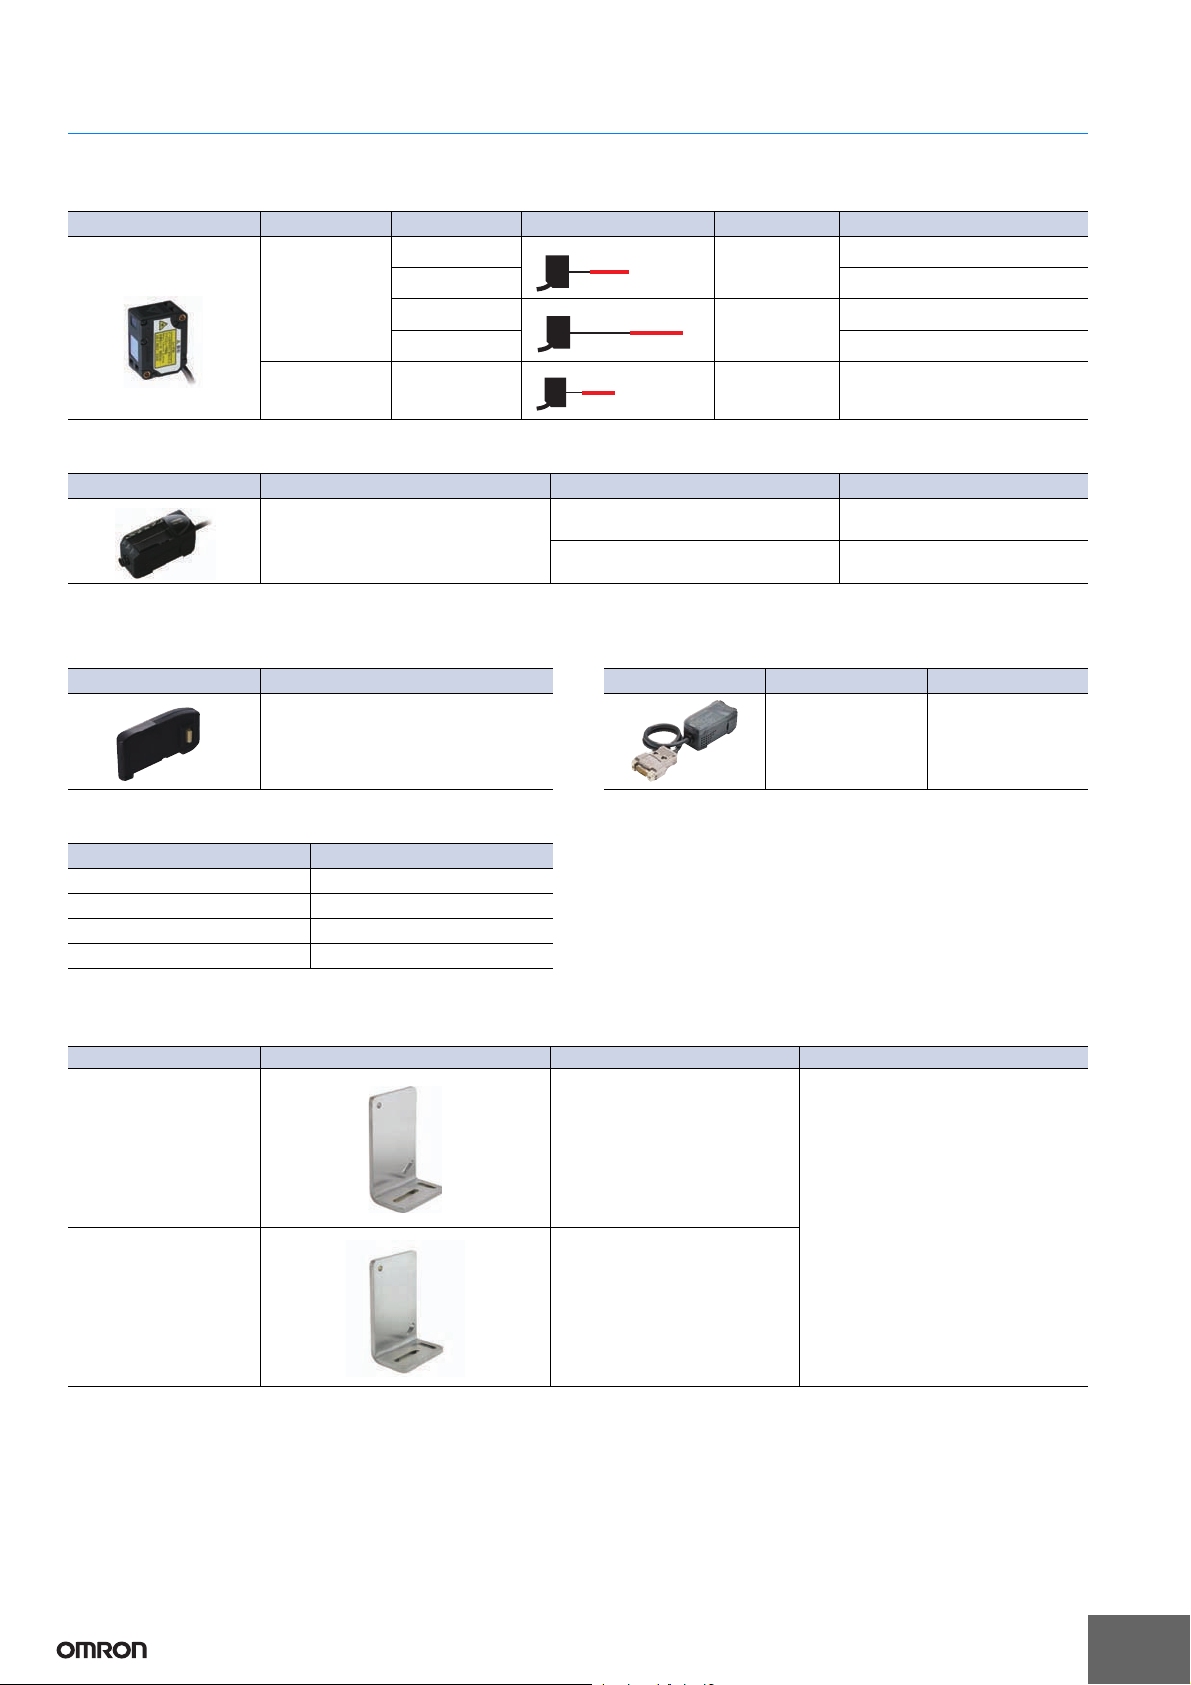
Ordering Information
Units
Sensor Heads
[Dimensions➜page 11]
Amplifier Units
[Dimensions ➜page 11]
Accessories (sold separately)
These are not included with the Sensor Head or Amplifier Unit. Please order as necessary.
Calculating Unit
[Dimensions ➜page 12]
Communications Interface Unit
[Dimensions
➜
page 12]
Sensor Head Extension Cables
[Dimensions ➜page 12]
Note: Extension cables cannot be coupled and used together.
Mounting Brackets
[Dimensions ➜page 13]
Appearance
Sensing method
Beam shape Sensing distance Resolution Model
Diffuse reflection type Diffuse-
reflective
Line beam 1.5 μmZX2-LD50L 0.5M
Spot beam ZX2-LD50 0.5M
Line beam 5 μmZX2-LD100L 0.5M
Spot beam ZX2-LD100 0.5M
Regular-
reflective Spot beam 1.5 μmZX2-LD50V 0.5M
Appearance Power supply Output type Model
DC NPN ZX2-LDA11 2M
PNP ZX2-LDA41 2M
40
50±10 mm
60
65
100±35 mm
135
43
48±5mm
53
Appearance Model
ZX2-CAL
Appearance Type Model
RS-232C ZX2-SF11
Cable Length Model
1 m ZX2-XC1R
4 m ZX2-XC4R
9 m ZX2-XC9R
20 m ZX2-XC20R
Applicable Sensor Head Appearance Model Remarks
ZX2-LD50V
ZX2-LD50L
ZX2-LD50 E39-L178
Mounting Brackets (1)
Nut Plate (1)
Phillips screws (M30 ✕30) (2)
ZX2-LD100L
ZX2-LD100 E39-L179

ZX2
3
Sensor Head
47.47.5
mmmm
47.5
mm
35.5
mm
22.6
mm
*If the room temperature varies 1°C, the measured value varies 0.02% F.S.
(corresponding to 4µm for the Model ZX2-LD50)
*According to OMRONinvestigation of CMOS laser
displacement sensors performed in September 2010. Cable can be
fed through
from the back
World smallest*
Compact sensor for easy mounting
IP67, robot cable
& temperature characteristic 0.02% F.S./°C
Reliable measurements in harsh environments
Spot beam
Precise measurement on
micro-scale objects
Line beam
Stable measurement on
rough-surfaced objects
Regular-reflective
Stable wafer
measurement
•Measurement range
50
mm
±10
mm
•Resolution
1.5µm
•Linearity Line beam
±0.05%F.S.
*1
Spot beam
±0.10%F.S.
*1
•Beam size Line beam Approx.60µm×2.6mm
Spot beam Approx.60µm dia.
ZX2-LD50L
Line beam type
ZX2-LD50
Spot beam type
•Measurement range
100
mm
±35
mm
•Resolution
5µm
•Linearity Line beam
±0.05%F.S.
*2
Spot beam
±0.10%F.S.
*2
•Beam size Line beam Approx.110µm×2.7mm
Spot beam Approx.110µm dia.
ZX2-LD100L
Line beam type
ZX2-LD100
Spot beam type
•Measurement range
48
mm
±5
mm
•Resolution
1.5µm
•Linearity Spot
beam
±0.3%F.S.
•Beam size Spot beam Approx.60µm dia.
ZX2-LD50V
Spot beam type
*1 Using 40 to 50mm
*2 Using 65 to 100mm
(regular-reflective)
Sensor Heads for Various Applications-select
the Range and Type of Beam
New Regular-reflective Sensor Head Designed for Optimal Wafer Measurement
IP67 protection class enables to use the sensor in harsh
environments. A robot cable is used as standard between the
head and amplifier, that the unit can be used reliably on moving
parts. In addition, as 3D UV bond is used to fix the optical
components rather than screws, stress can be controlled and a
temperature characteristic 0.02% F.S./°C* is realized.
The world’s smallest CMOS laser displacement sensor
head is realized in a resin case. Enables to mount the
sensor in smallest spaces and to minimize measure-
ment errors arising from temperature fluctuations.

ZX2
4
Amplifier and Calculating Unit
T
K
A
B
B
A
S
38
mm
72
mm
30
mm
31
mm
64
mm
30
mm
BANK
3
BANK
2
1
BANK
0
Ease of Use by “LED Display” and “Calculating Unit”
11-segment LED display for intuitive configuration
Easy calculations of measurements
Intuitive operation through
cross buttons
11 Segment LED Display
Determination output indicators
High (orange)/Pass (green)/
Low(orange), two color display
11 Segment LED Display
No need for a manual
Thickness + subtraction mode
Perform two calculations with ease
Equipped with 4 banks
Easy change of setup
The 7 segment display
on existing models The 11 segment display
on model ZX2
Thickness mode
The compact housing stays just as it is
Sensor 1
Sensor 2
Sensor1 0criterion
Sensor2 0criterion
Level difference S=B
-
A
Thickness T=K+(A+B)
Subtraction mode
Existing models ZX2
Built into the unit
Amplifier unit
+
Bank unit
The calculated results of two sensor heads are displayed on the amplifier unit by just connecting the calculating unit between
the two amplifier units. The calculation function can be chosen from the two modes of thickness and subtraction. It is also
possible to prevent mutual interference by coupling via the calculating units. (Up to five amplifier units can be connected.)
An 11 segment LED display is integrated
in the compact housing. Alphanumeric
characters can be read with ease and
there is no need to refer to a manual.
The amplifier unit is equipped
with four bank functions.
Easy change of setup between
four modes is supported by
just switching between the
bank functions.
Comparison of the existing 7 segment LED display and
the 11 segment LED display

ZX2
5
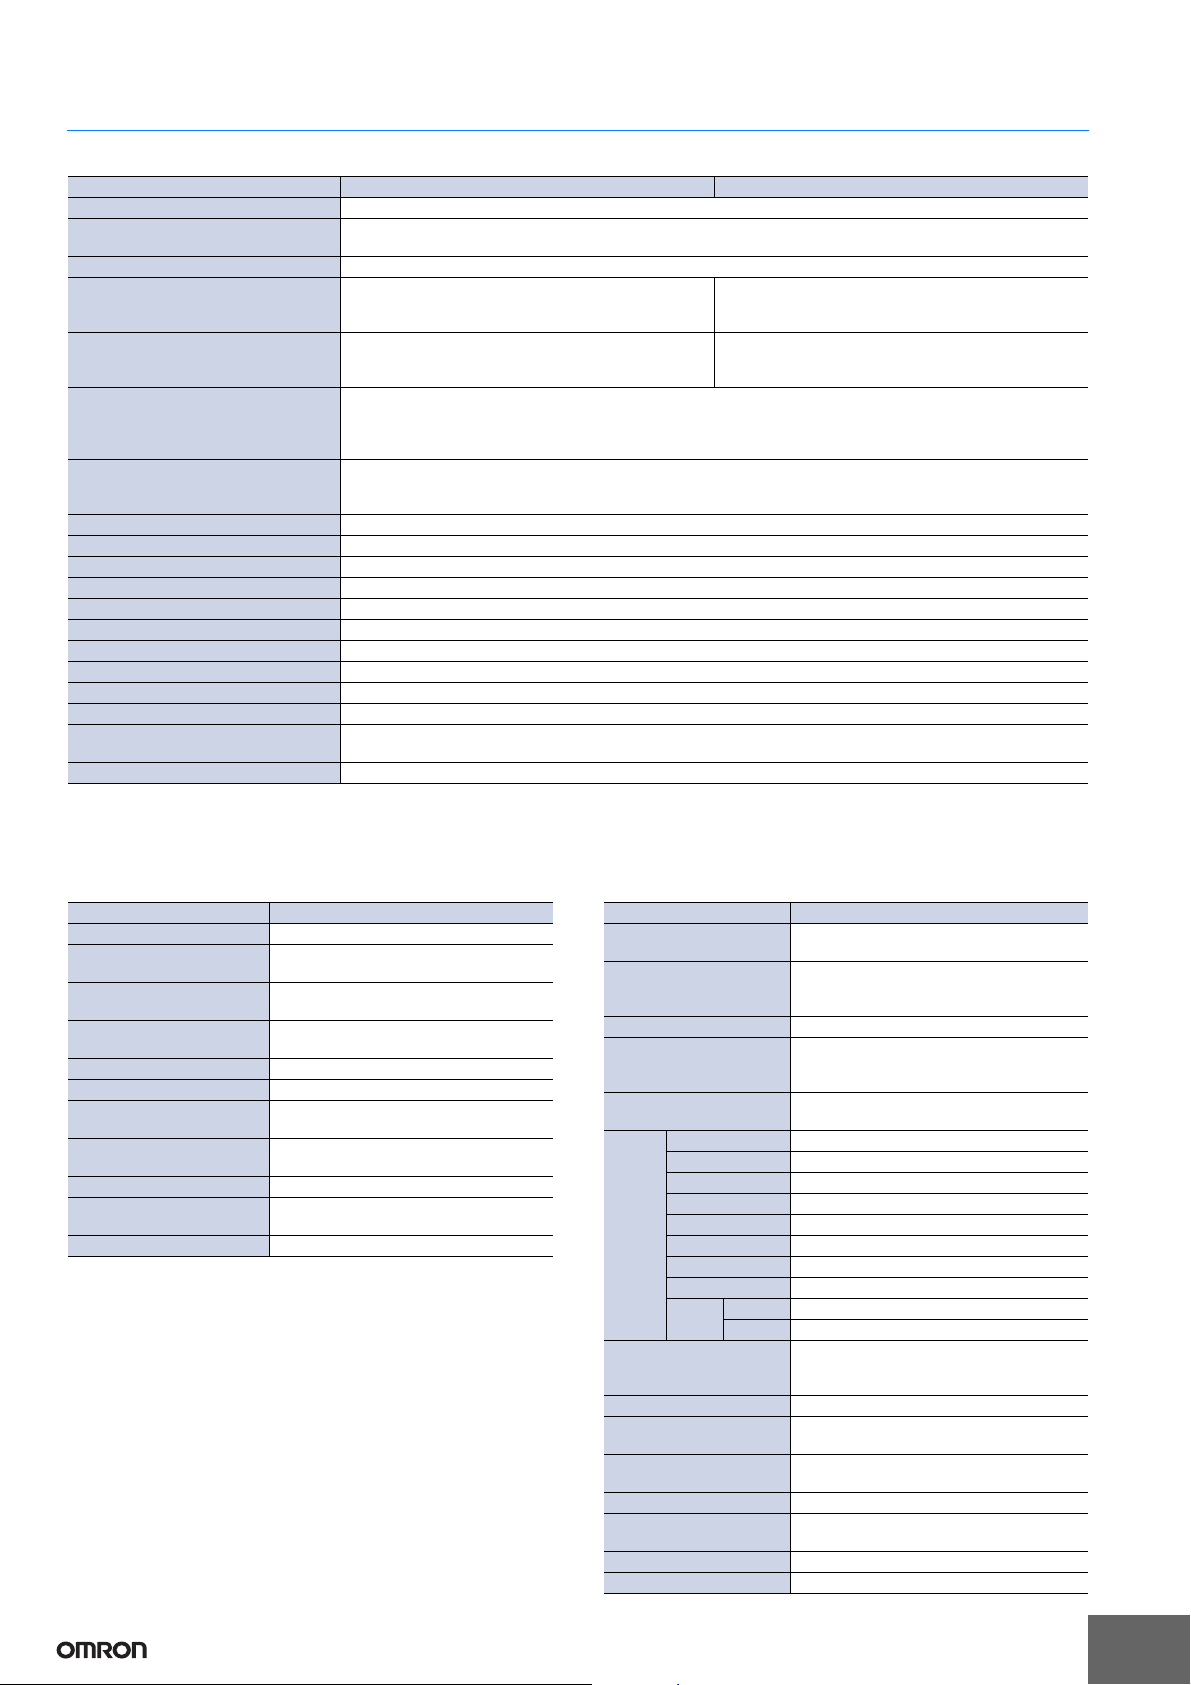
Specifications
Diffuse-reflective Sensor Heads
Regular-reflective Sensor Head
Note: False detection outside the measurement range can occur in the case of an object with high reflectance.
*1. Beam size: Defined as 1/e2(13.5 %) of the center optical intensity at the minimum value of the measurement range (effective value).
False detections can occur in the case there is light leakage outside the defined region and the surroundings of the target object have a high
reflectance in comparison to the target object. Correct measurements may not be obtained if the workpiece is smaller than the beam size.
*2. Resolution: indicates the degree of fluctuation (±3σ) of analog output when connected to the ZX2-LDA.
(The measured value is given for the center distance for OMRON’s standard target object (diffuse-reflective models: white ceramic object,
regular-reflective models:1/4 λflat mirror) when the response time of the ZX2-LDA is set to 128 ms.)
Indicates the repetition accuracy for when the workpiece is in a state of rest. Not an indication of distance accuracy.
Resolution performance may not be satisfied in a strong electromagnetic field.
*3. Linearity: indicates the error with respect to the ideal straight line of the displacement output in the case of measuring Omron’ s standard target
object. Linearity and measured value may vary depending on target object.
F.S. indicates the full scope of the measurement range. (ZX2-LD50(L): 20 mm)
*4. Temperature characteristic: Value for the case the space between the sensor head and Omron’ s standard target object is secured by an
aluminum jig. (Measured at the measurement center distance)
*5. These Sensors are classified as Class 2 laser devices for diffuse-reflective models and Class 1 for regular-reflective models under EN 60825-
1 and the regulations of Laser Notice No. 50 for FDA certification. CDRH registration has been completed.
Item Model ZX2-LD50L ZX2-LD50 ZX2-LD100L ZX2-LD100
Optical system Diffuse reflective
Light source
(wave length)
Visible-light semiconductor laser with a wavelength of 660 nm and an output of 1mW max.
EN class 2, FDA class 2 *5
Measurement center point 50 mm 100 mm
Measurement range ±10 mm ±35 mm
Beam shape Line Spot Line Spot
Beam size *1Approx. 60 μm × 2.6 mm Approx. 60 μm dia. Approx.110 μm × 2.7 mm Approx. 110 μm dia.
Resolution *21.5 μm5μm
Linearity *3±0.05% F.S. (40 to 50 mm) ±0.1% F.S. (40 to 50 mm)
±
0.05% F.S. (65 to 100 mm)
±0.1% F.S. (65 to 100 mm)
Temperature characteristic
*40.02% F.S. /°C
Ambient illumination Incandescent lamp: 10,000 lx max. (on light receiving side)
Ambient temperature Operating: 0 to 50 °C, Storage: −15 to 70 °C (with no icing or condensation)
Ambient humidity Operating and storage: 35% to 85% (with no condensation)
Dielectric strength 1,000 VAC, 50/60 Hz for 1 min.
Vibration resistance (destruction)
10 to 150 Hz, 0.7-mm double amplitude, 80 min. each in X, Y, and Z directions
Shock resistance (destruction)
300 m/s23 times each in six directions (up/down, left/right, forward/backward)
Degree of protection IEC60529, IP67
Connection method Connector connection (standard cable length: 500 mm)
Weight (packed state) Approx. 160 g (main unit only: Approx. 75 g)
Materials Case and cover: PBT (polybutylene terephtahalate), Optical window: Glass, Internal thread: Brass, Cable: PVC
Accessories Instruction sheet, Ferrite core ×1 (made by TDK Corp. ZCAT1730-0730A), Laser warning label (English), FDA
Item Model ZX2-LD50V
Optical system Regular reflective
Light source (wave length)
Visible-light semiconductor laser with a wavelength of 660 nm and an output of 0.24 mW max. EN class 1, FDA class 1 *5
Measurement center point 48mm
Measurement range ±5mm
Beam shape Spot
Beam size *1Approx. 60 μm dia.
Resolution *21.5 μm
Linearity *3±0.3%F.S. (entire range)
Temperature characteristic
*40.06%F.S./°C
Ambient illumination Incandescent lamp: 10,000lx max. (on light receiving side)
Ambient temperature Operating: 0 to 50 °C, Storage: -15 to 70 °C (with no icing or condensation)
Ambient humidity Operating and storage: 35% to 85% (with no condensation)
Dielectric strength 1,000 VAC, 50/60 Hz for 1 minute
Vibration resistance (destruction)
10 to 150 Hz, 0.7-mm double amplitude, 80 minutes, each in X,Y,and Z directions
Shock resistance (destruction)
300 m/s23 times each in six directions (up/down,left/right,forward/backward)
Degree of protection IEC 60529, IP67
Connection method Connector connection (standard cable length: 500 mm)
Weight (packed state) Approx.160g (Sensor Head only: Approx.75g)
Materials Case and cover: PBT (polybutylene terephtahalate), Optical window: Glass, Internal thread: Brass, Cable: PVC
Accessories Instruction sheet, Ferrite core ×1 (made by TDK Corp. ZCAT1730-0730A), Laser warning label (English), FDA

ZX2
6
Amplifier Units
*1. In the case of Omron’s standard target object (white ceramic)
*2. Select current output (4 to 20 mA) and voltage output (±5Vor 1 to 5V) by MENU mode.
*3. Calculating unit (ZX2-CAL) is necessary. Calculations are possible for up to two amplifier units. Mutual interference prevention is possible for
up to five amplifier units.
Calculating Unit ZX2-series Communications Interface Unit
Item Model ZX2-LDA11 ZX2-LDA41
Measurement period *1Min. 30 μs
Response time 60 μs, 120 μs, 240 μs, 500 μs, 1 ms, 2 ms, 4 ms, 8ms, 12 ms, 20 ms, 36 ms, 66 ms, 128ms, 250 ms,
500ms
Analog output *24 to 20 mA, Max. load resistance: 300Ω/±5 VDC or 1 to 5 VDC, Output impedance: 100Ω
Judgement outputs
(HIGH/PASS/LOW: 3 outputs),
error output
NPN open-collector outputs, 30 VDC, 50 mA max.
(residual voltage: 1 Vmax. for load current 10 mA
max., 2Vmax. for load current above 10 mA)
PNP open-collector outputs, 30 VDC, 50 mA max.
(residual voltage: 1 Vmax. for load current 10 mA
max., 2 Vmax. for load current above 10 mA)
Laser OFF input, zero reset input,
timing input, reset input,
bank input ON: Short-circuited with 0-Vterminal or 1.2 Vor less
OFF: Open (leakage current: 0.1 mA max.) ON:Supplyvoltageshort-circuitedorsupplyvoltage
within -1.2 V
OFF: Open (leakage current: 0.1 mA max.)
Functions Smart tuning, scaling, sample hold, peak hold, bottom hold, peak-to-peak hold, self-peak hold,
self-bottom hold, average hold, zero reset, On-delay timer, OFF-delay timer, keep/clamp switch,
(A-B) calculations *3, thickness calculation *3, mutual interference prevention *3,
laser deterioration detection, bank function (4 banks), differential function
Indications Judgement indicators: HIGH (orange), PASS (green), LOW(orange), 11-segment main display (red),
11-segment sub-display (orange), laser ON (green), zero reset (green), enable (green), menu (green),
HIGH threshold (orange), LOWthreshold (orange)
Power supply voltage 10 to 30 VDC, including 10%ripple (p-p)
Power consumption 3,000 mWmax. (at 24 VDC: 125 mA max., at 12 VDC: 250 mA max.)
Ambient temperature Operating: 0 to 50 °C, Storage: −15 to 70 °C (with no icing or condensation)
Ambient humidity Operating and storage: 35%to 85%(with no condensation)
Dielectric strength 1,000 VAC, 50/60 Hz for 1 min.
Vibration resistance (destruction) 10 to 150 Hz, 0.7-mm double amplitude, 80 min. each in X, Y, and Z directions
Shock resistance (destruction) 300 m/s
2
3 times each in six directions (up/down, left/right, forward/backward)
Degree of protection IEC60529, IP40
Connection method Prewired (standard cable length: 2 m)
Weight (packed state) Approx. 200 g (main unit only: Approx. 135 g)
Materials Case: PBT (polybutylene terephtahalate), Cover: Polycarbonate, Display: Methacrylic resin,
Button: Polyacetal, Cable: PVC
Accessories Instruction sheet
Item Model ZX2-CAL
Applicable Amplifier Units
ZX2-LDA11, ZX2-LDA41
Current consumption 12 mA max. (supplied from the Smart
Sensor Amplifier Unit)
Ambient temperature Operating: 0 to +50°C, storage: -15 to
+70°C (with no icing or condensation)
Ambient humidity Operating and storage: 35%to 85%
(with no condensation)
Connection method Connector
Dielectric strength 1,000 VAC, 50/60 Hz for 1 minute
Vibration resistance
(destruction)
10 to 150 Hz, 0.7-mm double amplitude,
80 minutes, each in X,Y,and Z directions
Shock resistance
(destruction) 300 m/s
2
3 times each in six directions
(up/down, left/right, forward/backward)
Materials Case: ABS, Display: Methacrylic resin
Weight (packed state) Approx. 50g
(Calculating Unit only: Approx. 15g)
Accessories Instruction sheet
Item Model ZX2-SF11
Power supply voltage
10 to 30 VDC ±10%(including 10%ripple (p-p))
(Supplied from Sensor Amplifier.)
Power
consumption
720 mWmax. (at 24 V: 30 mA max., at 12 V: 60 mA max.)
(Not including Sensor Amplifier current consumption or
output current
Applicable Amplifier Units
ZX2-LDA
@@
(Production after November 2013)
Applicable Amplifier
Unit versions
Sensor Amplifier Unit version: V1.330 or higher
(The Sensor Amplifier version is shown on the sub-digital
display when the power of the Sensor Amplifier is turned ON.)
Max. No. of Amplifier
Units 5
Commu-
nications
functions
Port RS-232C (9-pin, D-Sub connector)
Communications method
Full duplex
Synchronization method
Start/stop synchronization
Transmission code
ASCII
Baud rate
38,400 (at shipping)/9,600 bps switchable
Data bit length 8bits
Parity check None
Stop bit length 1 bit
Data
delimiter
Receiving
CR or CR + LF is automatically recognized.
Sending
CR + LF fixed
Indicators
Power supply: green, Sensorcommunications: green, Sensor
communicationserror:red,Externalterminalcommunications:
green, External terminal communications error: red
Protective circuits
Power supply reverse polarity protection
Ambient temperature
Operating: 0 to 50°C, storage: -15 to 60°C
(with no icing or condensation)
Ambient humidity Operating and storage: 35%to 85%
(with no condensation)
Insulation resistance 20 MΩmin. (at 500 VDC)
Dielectric strength 1,000 VAC, 50/60 Hz for 1 min,
Leakage current: 10 mA max.
Materials
Case: PBT (polybutylene terephthalate), Cover: Polycarbonate
Accessories Instruction sheet, 2 clamps
ZX2
7
Engineering Data (Reference Value)
Angle Characteristic
The angle characteristic is a plot of the inclination of the sensing object in the measurement range and the maximum value of the error to analog output.
Note: SUS304 = Stainless steel SUS304
ZX2-LD50
Side-to-side Inclination Front-to-back Inclination
ZX2-LD50L
Side-to-side Inclination Front-to-back Inclination
ZX2-LD100
Side-to-side Inclination Front-to-back Inclination
ZX2-LD100L
Side-to-side Inclination Front-to-back Inclination
1.0
0.8
0.6
0.4
0.2
0
−0.2
−0.4
−0.6
−0.8
−1.0 0−10−20−30−40−50 10 20 30 40 50
White ceramic
SUS304, mirror finish
Black rubber
Error (%F.S.)
Angle of Inclination (°)
+ Inclination
-
Inclination
1.0
0.8
0.6
0.4
0.2
0
−0.2
−0.4
−0.6
−0.8
−1.0 0−10−20−30−40−50 10 20 30 40 50
White ceramic
SUS304, mirror finish
Black rubber
Error (%F.S.)
Angle of Inclination (°)
+
Inclination
-
Inclination
1.0
0.8
0.6
0.4
0.2
0
−0.2
−0.4
−0.6
−0.8
−1.0 0−10−20−30−40−50 10 20 30 40 50
White ceramic
SUS304, mirror finish
Black rubber
Error (%F.S.)
Angle of Inclination (°)
+ Inclination
-
Inclination
1.0
0.8
0.6
0.4
0.2
0
−0.2
−0.4
−0.6
−0.8
−1.0 0−10−20−30−40−50 10 20 30 40 50
White ceramic
SUS304, mirror finish
Black rubber
Error (%F.S.)
Angle of Inclination (°)
+ Inclination
-
Inclination
1.0
0.8
0.6
0.4
0.2
0
−0.2
−0.4
−0.6
−0.8
−1.0 0−10−20−30−40−50 10 20 30 40 50
White ceramic
SUS304, mirror finish
Black rubber
Error (%F.S.)
Angle of Inclination (°)
+ Inclination
-
Inclination
1.0
0.8
0.6
0.4
0.2
0
−
0.2
−
0.4
−
0.6
−
0.8
−
1.0 0
−
10
−
20
−
30
−
40
−
50 10 20 30 40 50
White ceramic
SUS304, mirror finish
Black rubber
Error (%F.S.)
Angle of Inclination (°)
+ Inclination
-
Inclination
1.0
0.8
0.6
0.4
0.2
0
−0.2
−0.4
−0.6
−0.8
−1.0 0−10−20−30−40−50 10 20 30 40 50
White ceramic
SUS304, mirror finish
Black rubber
Error (%F.S.)
Angle of Inclination (°)
+ Inclination
-
Inclination
1.0
0.8
0.6
0.4
0.2
0
−0.2
−0.4
−0.6
−0.8
−1.0 0−10−20−30−40−50 10 20 30 40 50
White ceramic
SUS304, mirror finish
Black rubber
Angle of Inclination (°)
Error (%F.S.)
+ Inclination
-
Inclination

ZX2
8
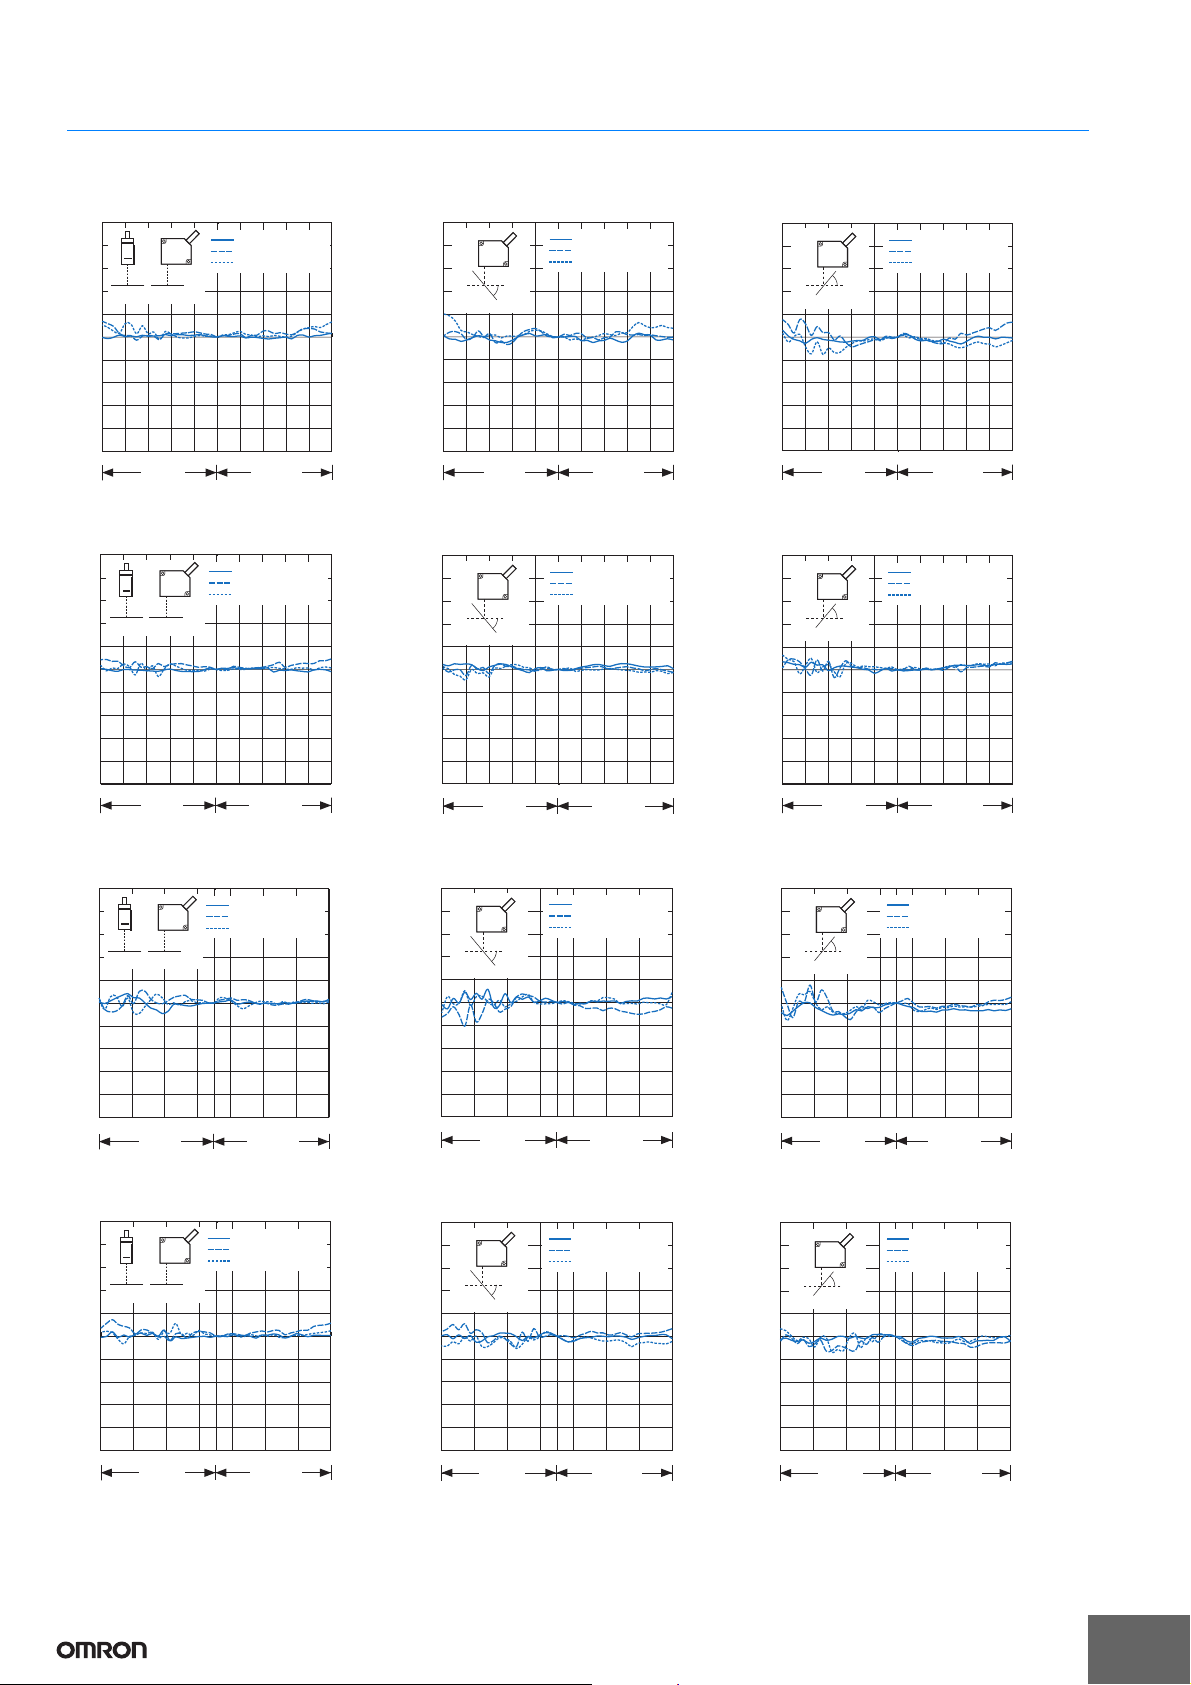
Linearity Characteristic for Different Materials
Note:
The x-axis displacement indicates the measurement distance displayed by the amplifier unit. The measurement distance displayed by the amplifier
unit takes the measurement center distance as 0, and the NEAR and FAR sides from the sensor are displayed by + and
−
, respectively.
ZX2-LD50
0°Inclination −50°Inclination Front-to-back +50°Inclination
ZX2-LD50L
0°Inclination −50°Inclination Front-to-back +50°Inclination
ZX2-LD100
0°Inclination −50°Inclination Front-to-back +50°Inclination
ZX2-LD100L
0°Inclination −50°Inclination Front-to-back +50°Inclination
1.0
0.8
0.6
0.4
0.2
0
−0.2
−0.4
−0.6
−0.8
−1.0 0−2
−4
−6
−8
−10 246810
0° Inclination
Measurement center distance
FAR side NEAR side
White ceramic
SUS304, mirror finish
Black rubber
Error (%F.S.)
Displacement (mm)
1.0
0.8
0.6
0.4
0.2
0
−0.2
−0.4
−0.6
−0.8
−1.0 0−2
−4
−6
−8
−10 246810
−50° Inclination
Measurement center distance
FAR side NEAR side
White ceramic
SUS304, mirror finish
Black rubber
Error (%F.S.)
Displacement (mm)
1.0
0.8
0.6
0.4
0.2
0
−0.2
−0.4
−0.6
−0.8
−1.0 0−2
−4
−6
−8
−10 246810
+50° Inclination
Measurement center distance
FAR side NEAR side
White ceramic
SUS304, mirror finish
Black rubber
Error (%F.S.)
Displacement (mm)
1.0
0.8
0.6
0.4
0.2
0
−0.2
−0.4
−0.6
−0.8
−1.0 0−2
−4
−6
−8
−10 246810
0° Inclination
Measurement center distance
FAR side NEAR side
White ceramic
SUS304, mirror finish
Black rubber
Error (%F.S.)
Displacement (mm)
Displacement (mm)
1.0
0.8
0.6
0.4
0.2
0
−0.2
−0.4
−0.6
−0.8
−1.0 0−2
−4
−6
−8
−10 246810
−50° Inclination
Measurement center distance
FAR side NEAR side
White ceramic
SUS304, mirror finish
Black rubber
Error (%F.S.)
1.0
0.8
0.6
0.4
0.2
0
−0.2
−0.4
−0.6
−0.8
−1.0 0−2
−4
−6
−8
−10 246810
+50° Inclination
Measurement center distance
FAR side NEAR side
Displacement (mm)
White ceramic
SUS304, mirror finish
Black rubber
Error (%F.S.)
1.0
0.8
0.6
0.4
0.2
0
−0.2
−0.4
−0.6
−0.8
−1.0 35251550−5
−15
−25
−35
0° Inclination
Displacement (mm)
Measurement center distance
FAR side NEAR side
White ceramic
SUS304, mirror finish
Black rubber
Error (%F.S.)
Displacement (mm)
1.0
0.8
0.6
0.4
0.2
0
−0.2
−0.4
−0.6
−0.8
−1.0 3525155−5
−15
−25
−35
−50° Inclination
0
Measurement center distance
FAR side NEAR side
White ceramic
SUS304, mirror finish
Black rubber
Error (%F.S.)
1.0
0.8
0.6
0.4
0.2
0
−0.2
−0.4
−0.6
−0.8
−1.0 3525155−5
−15
−25
−35
+50° Inclination
0
Measurement center distance
FAR side NEAR side
Displacement (mm)
White ceramic
SUS304, mirror finish
Black rubber
Error (%F.S.)
1.0
0.8
0.6
0.4
0.2
0
−0.2
−0.4
−0.6
−0.8
−1.0 3525155−5
−15
−25
−35 0
0° Inclination
Measurement center distance
FAR side NEAR side
Displacement (mm)
White ceramic
SUS304, mirror finish
Black rubber
Error (%F.S.)
1.0
0.8
0.6
0.4
0.2
0
−0.2
−0.4
−0.6
−0.8
−1.0 3525155−5
−15
−25
−35 0
−50° Inclination
Measurement center distance
FAR side NEAR side
Displacement (mm)
White ceramic
SUS304, mirror finish
Black rubber
Error (%F.S.)
1.0
0.8
0.6
0.4
0.2
0
−0.2
−0.4
−0.6
−0.8
−1.0 35251550−5
−15
−25
−35
+50° Inclination
Measurement center distance
FAR side NEAR side
Displacement (mm)
White ceramic
SUS304, mirror finish
Black rubber
Error (%F.S.)

ZX2
9
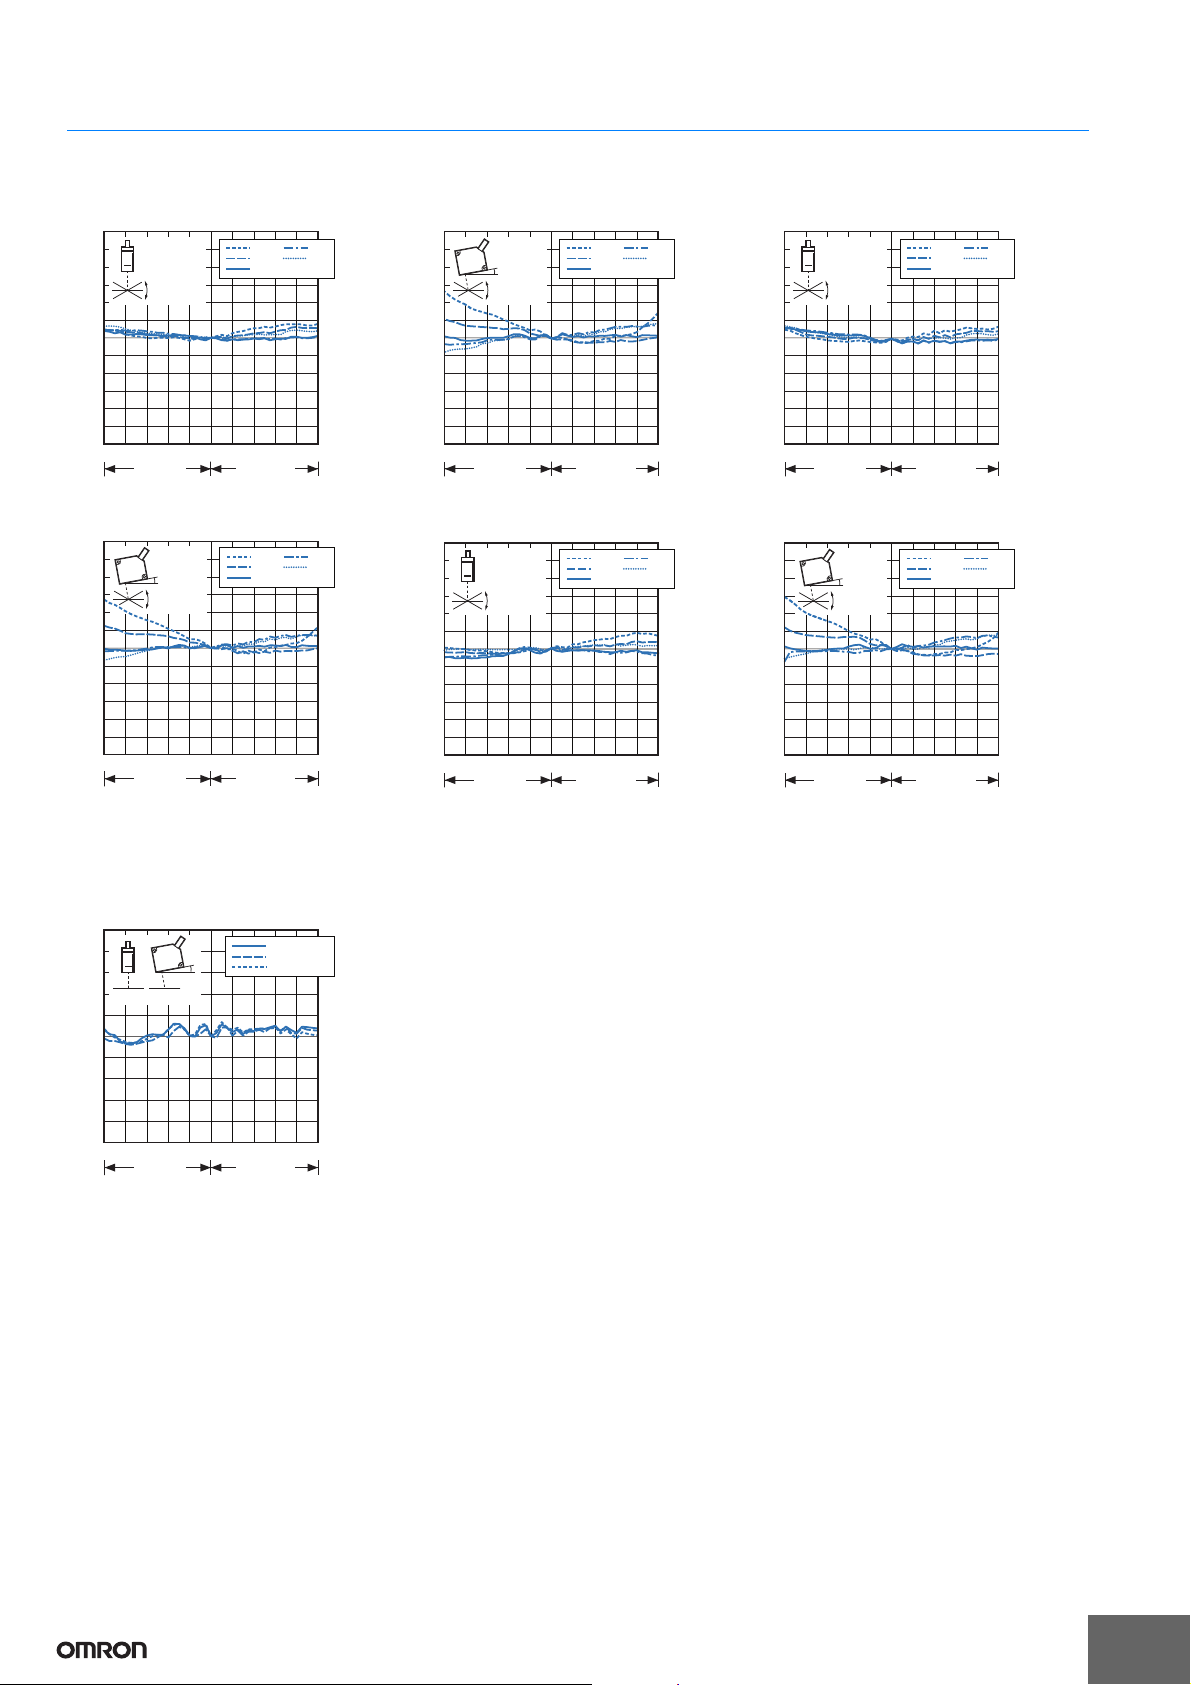
Angle Characteristic
Linearity Characteristic for Different Materials
Note:
The x-axis displacement indicates the measurement distance displayed by the amplifier unit. The measurement distance displayed by the amplifier
unit takes the measurement center distance as 0, and the NEAR and FAR sides from the sensor are displayed by + and
−
, respectively.
ZX2-LD50V
Side-to-side Inclination for Flat Mirror
Front-to-back Inclination for Flat Mirror Side-to-side Inclination for Silicon Wafer
Front-to-back Inclination for Silicon Wafer
Side-to-side Inclination for Glass Front-to-back Inclination for Glass
ZX2-LD50V
0° Inclination
Displacement (mm)
Measurement center distance
FAR side NEAR side
Error (%F.S.)
3.0
2.5
2.0
1.5
1.0
0.5
0
-
1.0
-
0.5
-
1.5
-
2.0
-
2.5
-
3.0
-
3
-
5
-
11 3
-
2
-
40245
+ Inclination
-
Inclination
-1.0°
-0.5°
0°
0.5°
1.0°
Displacement (mm)
Measurement center distance
FAR side NEAR side
Error (%F.S.)
3.0
2.5
2.0
1.5
1.0
0.5
0
-
1.0
-
0.5
-
1.5
-
2.0
-
2.5
-
3.0
-
3
-
5
-
11 3
-
2
-
40245
+ Inclination
10.5°
-
Inclination
-1.0°
-0.5°
0°
0.5°
1.0°
Displacement (mm)
Measurement center distance
FAR side NEAR side
Error (%F.S.)
3.0
2.5
2.0
1.5
1.0
0.5
0
-
1.0
-
0.5
-
1.5
-
2.0
-
2.5
-
3.0
-
3
-
5
-
11 3
-
2
-
40245
+ Inclination
-
Inclination
-1.0°
-0.5°
0°
0.5°
1.0°
Displacement (mm)
Measurement center distance
FAR side NEAR side
Error (%F.S.)
3.0
2.5
2.0
1.5
1.0
0.5
0
-
1.0
-
0.5
-
1.5
-
2.0
-
2.5
-
3.0
-
3
-
5
-
11 3
-
2
-
40245
+ Inclination
10.5°
-
Inclination
-1.0°
-0.5°
0°
0.5°
1.0°
Displacement (mm)
Measurement center distance
FAR side NEAR side
Error (%F.S.)
1.0
0.8
0.6
0.4
0.2
0
-0.2
-0.4
-0.6
-0.8
-1.0 -3-5 -1 1 3 5-4 -2 0 2 4
0° Inclination
Flat Mirror
Silicon Wafer
Glass
10.5°

ZX2
10
Beam Size
Spot Beams
ZX2-LD50
ZX2-LD100
Line Beams
ZX2-LD50L
ZX2-LD100L
* Measurement distance displayed by the amplifier unit. The measurement distance displayed by the amplifier unit takes the measurement center
distance as 0, and the NEAR and FAR sides from the sensor are displayed by + and −, respectively.
I/O Circuit Diagrams
NPN Amplifier Unit (ZX2-LDA11) PNP Amplifier Unit (ZX2-LDA41)
Wiring
Amplifier Units
ZX2-LDA11/ZX2-LDA41
L *+10 mm 0 mm −4 mm −10 mm
XApprox.
600 μmApprox.
160 μmApprox.
40 μmApprox.
220 μm
YApprox.
350 μmApprox.
90 μmApprox.
60 μmApprox.
130 μm
L *+35 mm 0 mm −20 mm −35 mm
XApprox.
1.1 mm Approx.
400 μmApprox.
70 μmApprox.
250 μm
YApprox.
550 μmApprox.
190 μmApprox.
110 μmApprox.
150 μm
Beam cross-section
Y
X
L
L *+10 mm 0 mm −4 mm −10 mm
XApprox.
2.6 mm Approx.
2.6 mm Approx.
2.6 mm Approx.
2.6 mm
YApprox.
350 μmApprox.
90 μmApprox.
60 μmApprox.
130 μm
L *+35 mm 0 mm −20 mm −35 mm
XApprox.
2.1 mm Approx.
2.5 mm Approx.
2.7 mm Approx.
2.9 mm
YApprox.
550 μmApprox.
190 μmApprox.
110 μmApprox.
150 μm
Beam cross-section
Y
X
L
100 Ω
Brown: 10 to 30 VDC
10 to
30 VDC
White: HIGH judgement output
Load
Load
Load Load Load
Green: PASS judgement output
Gray: LOW judgement output
Yellow: Error output
Blue: GND (0 V)
Pink: LD-OFF input
Purple:Timing input/BANK input 0
Orange: Zero reset input
Red: Reset input/BANK input 1
Current output
4 to 20 mA
Current output: 300 Ωor lower
Voltage output: 10 kΩor higher
Voltage output
±5 V
1 to 5 V
Current/voltage
output switch Black: Analog output
Shield: Analog GND
Internal circuits
100 Ω
Brown: 10 to 30 VDC
White: HIGH judgement output
Load
Load Load Load Load
Green: PASS judgement output
Gray: LOW judgement output
Yellow: Error output
Blue: GND (0 V)
Pink: LD-OFF input
Purple:Timing input/BANK input 0
Orange: Zero reset input
Red: Reset input/BANK input 1
Current output
4 to 20 mA
Internal circuits
Current output: 300 Ωor lower
Voltage output: 10 kΩor higher
Voltage output
±5 V
1 to 5 V
Current/voltage
output switch Black: Analog output
Shield: Analog GND
10 to
30 VDC
10 to 30 VDC
GND (0V)
HIGH judgement output
PASS judgement output
LOW judgement output
Analog output
Error output
Analog GND
LD-OFF input
Zero reset input
Timing input/BANK input 0
Reset input/BANK input 1
Black
Yellow
Shield
Pink
Orange
Purple
Red
Gray
Green
White
Blue
Brown
Note: 1. Use a separate stabilized power supply for the Amplifier Unit,
particularly when high resolution is required.
2. Wirethe Unit correctly. Incorrect wiring may resultin damage to the
Unit. (Do not allow wiring, particularly the Analog output, to come
into contact with other wires.)
3. Use the 0-Vground (blue) for the power supply and use the Analog
ground (shield) for Analog output. Each of these grounds must be
used for the designed purpose. When not using the Analog output,
connect the Analog ground (shield) to the 0-Vground (blue).

ZX2
11
Safety Precautions
For details, refer to common precautions, warranty, limitation of liability, and other related information.
Dimensions
Units
This product is not designed or rated for ensuring
safety of persons.
Do not use it for such purposes.
WARNING
Precautions for Correct Use and Other Details
Refer to the “Smart Sensors Laser Displacement Sensors
CMOS Type ZX2 Series User’s Manual” (Cat. No. Z310).
(Unit: mm)
Tolerance class IT16 applies to dimensions in thes data sheet unless otherwise specified.
Reference surface
Reference surface
Range indicator
Laser
warning light
Range indicator
Reference surface
4
Two, 3.2-dia. (Mounting holes)
Emitter
axis
Receiver axis
Emitter axis
6
Vinyl insulated round robot cable, 4.7 dia., 4 conductors
(Conductor cross-section: 0.086 mm
2
/Insulator diameter: 0.9 mm)
Standard length: 0.5 m, Minimum bending radius: 30 mm
9.7
Emitter center
15.1
10.1
4±0.05
Tw o, M 3
Mounting
reference surface
Mounting
reference surface
4±0.05
43.5±0.05
4.8
4.8
10.5 7
35.3
16.7
(9.7)
L *
27.5
35.535.5
7
A*
4
20.9
39.5 47.547.5
28.43
29.8
12.6 dia. 31.5±0.05
22.622.6
Sensor Heads
ZX2-LD50
ZX2-LD50L
ZX2-LD100
ZX2-LD100L
ZX2-LD50V
* In the case of ZX2-LD50 (L), L=50, A=21 °
In the case of ZX2-LD100 (L), L=100, A=11.5 °
Mounting Dimensions
Note: Attach the enclosed
ferrite core (16.5 dia.,
length: 30 mm) to the
cable within 100 mm
from the Sensor Head.
6.2
4.2
6.1
9.6
Vinyl insulated round cable,5.2 dia., 11 conductors
(Conductor cross-section 0.09 mm2/Insulator diameter: 0.7 mm)
Standard length: 2 m, Minimum bending radius: 30 mm
The analog output line (black) has double shielding and
the diameter of the insulator is 2.3 mm.
11.7
50
15.4
16.6 38.4
38.4
*1
10.9
16.9
47.6
72
72
(when cover open, 84.6)
34.2
20.7 36.8
30
30
18
*2
Note:
Amplifier Units
ZX2-LDA11
ZX2-LDA41
*1. Maximum height when cover open: 56
*2. Minimum length when connected: 50

ZX2
12
Accessories (sold separately)
15.115.1
Coupled indicators
Coupling connectors
8
3.4
12
14.4
3030
9.5
24.9
44.05
5757
536.7
15
Calculating Unit
ZX2-CAL
Amplifier Unit
attachment connector
(female, 6 poles)
Sensor Head
attachment connector
(male, 6 poles)
Vinyl insulated round robot cable, 4.7 dia.
(ZX2-XC20R: 5.1 dia.)
12 dia.
29.8 28.9
L *
12.6 dia.
Sensor Head Extension Cables
ZX2-XC1R
ZX2-XC4R
ZX2-XC9R
ZX2-XC20R
* Length L is as follows.
ZX2-XC1R: 1 m, ZX2-XC4R: 4 m, ZX2-XC9R: 9 m, ZX2-XC20R: 20 m
Minimum bending radius: 30 mm
Note: Attach the enclosed ferrite cores (16.5 dia., length: 30 mm) within 100 mm of
each end of the extension cable.
Coupling
connector
Connector
Sensor communications indicator (communications operation)
External terminal
communications indicator
(communications operation)
Sensor communications indicator (communications error)
External terminal communications indicator (communications error)
Power supply indicator
30
15
13.2
(336)
64.3
31.5
36.8
29
11.7
4.3
3 5 6.55
11.7
2.2
13
4.2 4.2
3
(46)
(33.1)
Vinyl -insulated round cable,
5.23 dia. Standard length 100 mm
ZX2-series Communications Interface Unit
ZX2-SF11

ZX2
13
Material: Stainless steel
(SUS304)
Thickness: 2.0 mm
Material: Stainless steel (SUS304)
Thickness: 3.0 mm
Accessories: Phillips screws (M3×30): 2
Nut plate: 1
Nut plateMounting Bracket
R48.1
3.2 dia.
5
5
31.4
(36.4)
58
23
3.5
2-R3
54.1 48.1
2
-
M3
P=0.5
24.5°
(Regular-reflective
Sensor mounting)
34.7°
(Diffuse-reflective
Sensor mounting)
6
2-R3
14
3.2
3.2
5.2
12
8.8
16.8
16.8
16.8
(26.4)
9.6
Mounting Bracket
E39-L178
*
Nut plate
Use this Mounting Bracket when installing the ZX2-LD100 (L) as a normal
Diffuse-reflective or Regular-reflective Sensor Head.
Material: Stainless steel
(SUS304)
Thickness: 2.0 mm
Material: Stainless steel (SUS304)
Thickness: 3.0 mm
Accessories: Phillips screws (M3×30): 2
Nut plate: 1
Mounting Bracket
3.5
54.1 48.1
2-M3
P=0.5
R48.1
5
5
31.6
(36.6)
56
23
2-R3
3.2 dia.
29.2°(Regular-reflective
Sensor mounting)
34.7°(Diffuse-reflective
Sensor mounting)
6
2-R3
14
3.2
12
8.8
3.2
5.2
16.8
16.8
16.8
(26.4)
9.6
Mounting Bracket
E39-L179
Mounting Bracket
Nut plate
Phillips screws
22.6
10.5°
*
2
*
1
(32)
Installation Method for Regular-reflective Sensor Head
Using a E39-L178 Mounting Bracket:
Note:
When securing the Sensor Head in the
Mounting Bracket, insert the screws into
the side of the Sensor Head where the
warning label is located and secure the
Sensor Head into place.
*1. The measurement distance reference
position is the end of the Mounting Bracket.
*2. For the Regulalr-reflective Sensor Heads,
rotate the Sensor Head counterclockwise,
secure it in place, and then perform any
necessary fine adjustments.
Mounting Bracket
Nut plate
Phillips screws
(32)
22.6
*
2
*
1
5.75°
Installation Method for Regular-reflective Sensor
Heads (Installing a Diffuse-reflective Sensor
Head as a Regular-reflective Sensor Head)
Using a E39-L179 Mounting Bracket:
Note:
When securing the Sensor Head in the
Mounting Bracket, insert the screws into the
side of the Sensor Head where the warning
label is located and secure the Sensor Head
into place.
*1. The measurement distance reference position is
the end of the Mounting Bracket.
*2. For the IInstalling a Diffuse-reflective Sensor as
a Regular-reflective Sensor, rotate the Sensor
Head counterclockwise, secure it in place, and
then perform any necessary fine adjustments.
workpiece
Measurement
center distance
10.5°
10.5°
±0.1°
±0.1°
(19.85)
(19.85)
(43.85)
(43.85)
79.4±0.05
79.4±0.05
48
48
*The mounting hole dimensions in parentheses
(reference values) are for when the Sensor is
installed at 10.5°.
Adjust the installation so that the angle is 10.5° ±0.1°.
Not Using a Mounting Bracket:
Tilt the Sensor Head towards the workpiece as shown below.

ZX2
14
(32)
22.6
*1The measurement distance reference position is
the Sensor’s sensing surface.
*1
Mounting Bracket
Nut plate
Phillips screws
Installation Method for Diffuse-reflective Sensor Heads
Using a E39-L178, E39-L179 Mounting Bracket:
Note: When securing the SensorHead in the
Mounting Bracket, insert the screws
intothe sideofthe Sensor Headwhere
thewarninglabel islocated andsecure
the Sensor Head into place.
workpiece
*ZX2-LD50 (L): 50
ZX2-LD100 (L): 100
Measurement
center distance
39.5±0.05
4.0
±0.05
31.5
±0.05
L*
Not Using a Mounting Bracket:
Mount the Sensor Head in relation to the workpiece as shown below.
Для заказов: +7(499)707-11-20,
Email: [email protected]
8-800-511-65-88(Бесплатно по РФ)
Other manuals for ZX2 Series
2
Table of contents
Other Omron Accessories manuals

Omron
Omron Z510 User manual

Omron
Omron Z550 User manual

Omron
Omron F150-3 - User guide

Omron
Omron B5W-LB21 Series User manual

Omron
Omron E3ZM-V61 User manual

Omron
Omron ZX2-LDA User manual

Omron
Omron XPECTIA FZ3 User manual

Omron
Omron E3F User manual

Omron
Omron E3ZM-C - User manual

Omron
Omron E3S-LS10XE4 2M User manual

Omron
Omron E3NT-L User manual

Omron
Omron F160 Vision Sensor User manual

Omron
Omron F210 User guide

Omron
Omron E2E-Y - User manual

Omron
Omron ZW-7000 Series User manual

Omron
Omron E3S-C - User manual

Omron
Omron Z550 User guide

Omron
Omron E2EQ User manual

Omron
Omron E2C-EDA Series User manual

Omron
Omron F3SH-A - User manual