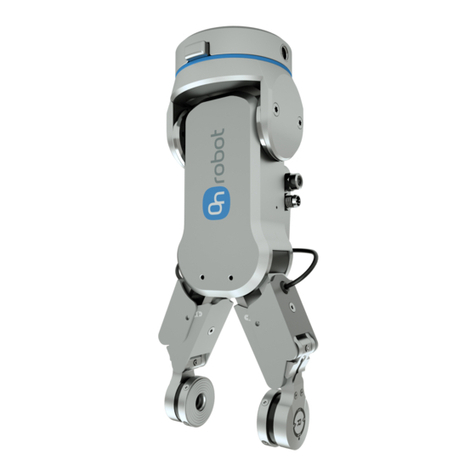
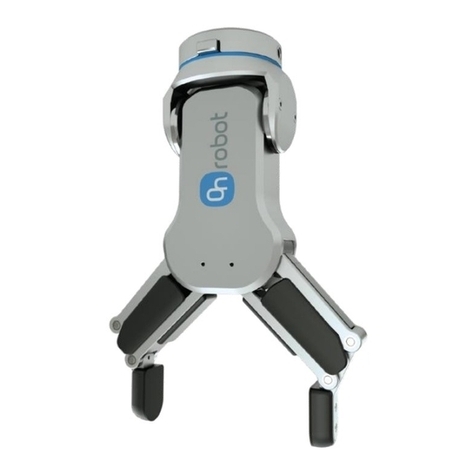
OnRobot RG2 User manual

Original
User Manual
By On Robot ApS
RG2
Industrial Robot Gripper

RG2 User Manual –version 1.44
Specifications is periodically reviewed and may change without notice Copyright © 2015 –2016 by On Robot ApS. All rights reserved
Content
1Preface....................................................................................................... 1
1.1 Scope of delivery.................................................................................................. 1
1.2 Important safety notice......................................................................................... 1
2Introduction ................................................................................................ 2
3Safety instructions...................................................................................... 2
3.1 Validity and responsibility..................................................................................... 2
3.2 Limitations of liability............................................................................................ 2
3.3 Warning symbols in this manual........................................................................... 3
3.4 General warnings and cautions............................................................................ 4
3.5 Intended use ........................................................................................................ 5
3.6 Risk assessment.................................................................................................. 5
4Mechanical interface .................................................................................. 6
4.1 Mounting the gripper ............................................................................................ 6
4.2 Mechanical dimensions........................................................................................ 7
4.3 Load capacity....................................................................................................... 8
4.4 Fingers................................................................................................................. 8
4.5 Gripper Work Range............................................................................................ 9
4.5.1 Finger thickness ....................................................................................................................9
4.5.2 Gripping speed .....................................................................................................................9
5Electrical interface.................................................................................... 10
5.1 Tool connections................................................................................................ 10
5.1.1 Power supply..................................................................................................................... 10
6Technical.................................................................................................. 11
6.1 Technical Specifications..................................................................................... 11
7Gripper programming............................................................................... 12
RG2 User Manual –version 1.44
Specifications is periodically reviewed and may change without notice Copyright © 2015 –2016 by On Robot ApS. All rights reserved
7.1 Quick Start ......................................................................................................... 12
7.2 Programming introduction.................................................................................. 14
7.3 Gripper control ................................................................................................... 15
7.3.1 Control variables................................................................................................................ 15
7.3.2 Teach Mode....................................................................................................................... 15
7.3.3 Control script/functions...................................................................................................... 15
7.3.3.1 Adding a script file .....................................................................................................................16
7.3.3.2 Adding a function.......................................................................................................................18
7.3.4 Control outputs signals...................................................................................................... 19
7.4 Gripper feedback................................................................................................ 19
7.4.1 Feedback variables ........................................................................................................... 20
7.4.2 Feedback input signals...................................................................................................... 20
7.4.2.1 Digital feedback .........................................................................................................................20
7.4.2.2 Analog feedback ........................................................................................................................20
7.4.3 LED feedback.................................................................................................................... 20
7.5 Two Grippers...................................................................................................... 21
7.6 Add RG2 to existing robot program.................................................................... 22
8Declarations and certificates .................................................................... 25
8.1 CE Declaration of Incorporation (original) .......................................................... 25

RG2 User Manual –version 1.44
Specifications is periodically reviewed and may change without notice Copyright © 2015 –2016 by On Robot ApS. All rights reserved
1
1 Preface
Congratulations on your new RG2 Industrial Robot Gripper.
The RG2 is an electrical industrial robot gripper that can handle a variation of different object sizes. Typically for
pick and place applications. The gripping force as well as the gripping width can be preset to custom
requirements.
1.1 Scopeofdelivery
The appearance of the delivered components may be different from the images and illustrations in this manual.
1.2 Importantsafetynotice
The Gripper is partly completed machinery and a risk assessment is required for each application the gripper is a
part of. It is important that all safety instructions herein are followed.
1x RG2 Industrial Robot Gripper
1x RG2 Mounting Coupling
2x RG2 Fingertips
1x USB Flash Drive
-Software
-Manual
1x Bag of bolts

RG2 User Manual –version 1.44
Specifications is periodically reviewed and may change without notice Copyright © 2015 –2016 by On Robot ApS. All rights reserved
2
2 Introduction
The RG2 is an industrial robot gripper. Designed for grabbing objects, typically used in pick and place applications.
Its long stroke allows it to handle a variety of object sizes and the option to adjust the gripping force allows the
gripper to handle both delicate and heavy objects. The standard fingers can be used with many different objects,
but it is also possible to fit custom fingers. The installation complexity is minimal as the RG2 cable attaches
directly onto any supported robot. All configuration of the gripper are controlled in the robot software.
3 Safety instructions
3.1 Validityandresponsibility
The information in this manual is not a guide to design a complete robotic application. The safety instructions is
limited to the RG2 gripper only and does not cover the safety precautions of a complete application. The
complete application must be designed and installed in accordance with the safety requirements specified in the
standards and regulations of the country where the application is installed.
The application integrators are responsible for ensuring that the applicable safety laws and regulations in the
country concerned are observed and that any significant hazards in the complete application are eliminated.
This includes, but is not limited to:
Making a risk assessment for the complete application.
Validating that the complete application is designed and installed correctly.
3.2 Limitationsof liability
The safety instructions and other information in this manual is not a guarantee that the user wont suffer injury.
Even if all instructions are followed.

RG2 User Manual –Version 1.44
Specifications is periodically reviewed and may change without notice Copyright © 2015 –2016 by On Robot ApS. All rights reserved
3
3.3 Warning symbolsinthismanual
DANGER:
This indicates a serious dangerous situation which, if not avoided,
could result in death or injury.
WARNING:
This indicates a potentially hazardous electrical situation which, if
not avoided, could result in injury or major damage to the equipment.
WARNING:
This indicates a potentially hazardous situation which, if not
avoided, could result in injury or major damage to the equipment.
CAUTION:
This indicates a situation which, if not avoided, could result in
damage to the equipment.
NOTE:
This indicates additional information such as tips or recommendations.

RG2 User Manual –Version 1.44
Specifications is periodically reviewed and may change without notice Copyright © 2015 –2016 by On Robot ApS. All rights reserved
4
3.4 Generalwarnings andcautions
This section contains general warnings and caution.
WARNING:
1. Make sure that the Gripper is properly mounted.
2. Make sure the gripper is not collided into obstacles.
3. Never use a damaged Gripper.
4. Make sure not to have any limbs in contact with or between the Gripper fingers and finger
arms, when it is operating or in teach mode.
5. Make sure to follow the safety instructions of all equipment in the application.
6. Never modify the Gripper. A modification might cause dangerous situations. On Robot
DISCLAIMS ANY LIABILITY IF THE PRODUCT IS CHANGED OR MODIFYED IN ANY WAY.
7. When mounting external equipment such as custom fingers make sure that the safety
instructions both herein and in the external manual are followed.
8. If the gripper is used in applications were it is not connected to a UR robot.
Make sure the connections resembles the analog input, digital in and outputs
and the power connections. Make sure you use a RG2 gripper programming
script that are adapted to fit your specific application.
For more information, please contact your supplier.
CAUTION:
1. When the gripper is combined with or working with machines capable of damaging the
gripper, then it is highly recommended to test all functions separately outside the potentially
hazardous workspace.
2. When the gripper feedback (I/O ready signal) is relied upon for continuing operation and a
malfunction will cause damage to the gripper and/or other machines, it is highly
recommended to use external sensors in addition to the gripper feedback for insuring correct
operations even if a failure should occur. On Robot cannot be held responsible for any
damages caused to the gripper or other equipment due to programming errors or
malfunctioning of the gripper.
3. Never let the gripper come into contact with corrosive substances, soldering splashes or
abrasive powders as they may damage the gripper. Never let personnel or objects stand
within the operating range of the gripper. Never operate the gripper if the machine on which
it is fitted does not comply with safety laws and standards of your country

RG2 User Manual –Version 1.44
Specifications is periodically reviewed and may change without notice Copyright © 2015 –2016 by On Robot ApS. All rights reserved
5
3.5 Intendeduse
The Gripper is industrial equipment and intended as an end effector or tool for industrial robots. It is intended for
pick and place operations of a variety of different objects.
The RG2 gripper is intended for use with robots from Universal Robots. The information in this manual about
electrical connections, programming and use of the gripper are described only for robots from Universal Robots.
CAUTION:
Use without a UR robot is not described in this manual and misuse can cause damage to the gripper
or the connected equipment.
Collaborative use of the gripper, were humans are close to or within the work area, is only intended for non-
hazardous applications, where the complete application, including the object, is without any significant risks
according to the risk assessment of the specific application.
Any use or application deviating from the intended use is deemed to be impermissible misuse. This includes, but
is not limited to:
1. Use in potentially explosive environments.
2. Use in medical and life critical applications.
3. Use before performing a risk assessment.
3.6 Riskassessment
It is important to make a risk assessment. Since the Gripper itself is considered partly completed machinery, it is
also important to follow the guidelines in the manuals of all additional machines in the application.
It is recommended that the integrator uses guidelines in ISO 12100 and ISO 10218-2 to conduct the risk
assessment.
Below is listed some potential dangerous situations that the integrator as a minimum must take to consideration.
Please note that there can be other dangerous situations depending on the specific situation.
1. Entrapment of limbs between the grippers finger arms.
2. Penetration of skin by sharp edges and sharp points on the object.
3. Consequences due to incorrect mounting of the gripper.
4. Objects falling out of the gripper, e.g. due to incorrect gripping force or to high acceleration from a robot.

RG2 User Manual –Version 1.44
Specifications is periodically reviewed and may change without notice Copyright © 2015 –2016 by On Robot ApS. All rights reserved
6
4 Mechanical interface
The Gripper is constructed such a way that should a power loss occur, it will maintain the gripping force.
4.1 Mountingthegripper
The design of the standard gripper coupling is in such a way, that the angle of the gripper can be adjusted from 0°
to 180° in steps of 30°.
Mount the gripper coupling with 4 pcs M6x8 bolts.
Tighten the bolts with minimum 7Nm.
Mount 4-6 pcs M4x8 bolts.
Tighten the bolts with minimum 2Nm.
DANGER:
Make sure that the gripper is properly mounted using correct torque to tighten the bolts. Incorrect
mounting can result in injury.
CAUTION:
The M4 threads in the gripper are 6mm deep. Do not exceed this.

RG2 User Manual –Version 1.44
Specifications is periodically reviewed and may change without notice Copyright © 2015 –2016 by On Robot ApS. All rights reserved
7
4.2 Mechanical dimensions
The dimensions are in millimeters

RG2 User Manual –Version 1.44
Specifications is periodically reviewed and may change without notice Copyright © 2015 –2016 by On Robot ApS. All rights reserved
8
Fy
Mz
My1
Mx
Mx1
Mz1
My
4.3 Loadcapacity
Be aware that when grapping an object, some of the parameters below are not directly aplicative. But can be
used to calculate the load on the gripper.
The parameters in the finger tips are
calculated at the shown position
and will change in relation to the finger
positions.
4.4 Fingers
The standard fingers can be used for many different
workpieces. If custom fingers are required, they can be
made to fit the gripper fingertips.
Parameter
Static Unit
Fy
362
[N]
Mx
7,55
[Nm]
My
4,1
[Nm]
Mz
6,92
[Nm]
Mx1
22
[Nm]
My1
11
[Nm]
Mz1
22
[Nm]
Standard fingers
For a variety of workpieces
Dimensions of the gripper aluminum fingertips.
Dimensions are in millimeters.

RG2 User Manual –Version 1.44
Specifications is periodically reviewed and may change without notice Copyright © 2015 –2016 by On Robot ApS. All rights reserved
9
0
50
100
150
200
0
10
20
30
40
50
60
70
80
90
100
110
Gripper Spped [mm/s]
Gripper finger gab [mm]
Speed
4.5 GripperWorkRange
The work range is measured between the aluminum fingers. The gripper can be used for both internal and
external grip, e.g. by rotating the fingers. Make sure that the offset is included before entering values into the
gripper settings.
4.5.1 Finger thickness
In this example, we want to grip an object of 20mm.
To clear the object before gripping we want to set the gripping width
to 28mm in the gripper settings on the robot. Because of the finger
thickness, the resulting actual gripper width will be 19mm, which is not
enough to clear the object. To calculate the needed setting, you need the
finger thickness, which is the offset from the inner aluminum finger to the
contact flange of the mounted finger, in this case 4,5mm.
2*finger thickness + clearing gap + object width = Actual gripping width
In this example: 2*4,5+8+20 = 37 type 37 into the gripper settings on the robot.
4.5.2 Gripping speed
Speed table illustrating the difference in speed
relative to the gripper finger position.
External Grip
Internal Grip
Rotated fingers

RG2 User Manual –Version 1.44
Specifications is periodically reviewed and may change without notice Copyright © 2015 –2016 by On Robot ApS. All rights reserved
10
5 Electrical interface
This chapter describes all the electrical interfaces of the gripper. The term “I/O” refers to both digital and analog
control signals going from or to the gripper.
5.1 Tool connections
The Gripper cable is intended to fit the tool connector on robots from Universal Robots. The connections are
described below. The output tool connector on the gripper shares the same connections as the input cable
described below.
CAUTION:
1. If the gripper is used in applications were it is not connected to a UR robot.
i. Make sure the connections resembles the analog input, digital in and outputs
and the power connections.
ii. Make sure you use a RG2 gripper programming
script that are adapted to fit your specific application.
For more information, please contact your supplier.
2. Do not operate the gripper in a wet environment.
5.1.1 Power supply
The gripper can operate at both 12V and 24V. Please Note that at 12V the forces, speed and some of the function
tolerances described in this manual does not apply. It is recommended to use 24V.
pin
wire
UR tool
UR I/O V3
1
White
AI2
Tool analog input 2
2
Brown
AI3
Tool analog input 3
3
Green
DI9
Tool input 1
4
Yellow
DI8
Tool input 0
5
Gray
Power
24V DC
6
Pink
DO9
Tool output 1
7
Blue
DO8
Tool output 0
8
Red
GND
0V DC
Cable RKMV 8-354

RG2 User Manual –Version 1.44
Specifications is periodically reviewed and may change without notice Copyright © 2015 –2016 by On Robot ApS. All rights reserved
11
6 Technical
6.1 TechnicalSpecifications
* see speed table
** based on 8mm total movement between fingers, see speed table
***At 12V the gripper runs at approximately half the normal speed
Technical data
Min
Typical
Max
Units
Total stroke (adjustable)
0
-
110
[mm]
Finger position resolution
-
0,1
-
[mm]
Repetition accuracy
-
0,1
0,2
[mm]
Reversing backlash
0,2
0,4
0,6
[mm]
Gripping force (adjustable)
3
-
40
[N]
Gripping force accuracy
±0,05
±1
±2
[N]
Gripping speed*
55
110
184
[mm/s]
Gripping time**
0,04
0,07
0,11
[s]
Operating voltage***
10
24
26
[V DC]
Power consumption
1,9
-
14,4
[W]
Maximum Current
25
-
600
[mA]
Ambient operating temperature
5
-
50
[°C]
Storage temperature
0
-
60
[°C]
Product weight
-
0,65
-
[kg]

RG2 User Manual –Version 1.44
Specifications is periodically reviewed and may change without notice Copyright © 2015 –2016 by On Robot ApS. All rights reserved
12
7 Gripper programming
7.1 Quick Start
The easiest way to start using the RG2 gripper is by using the RG2_Template.urp file. When done the robot will
open and close the gripper. Alternatively the gripper can be used in teach mode, see 7.3.2 Teach Mode
Mount and connect the gripper and turn on the robot.
Insert the included USB Flash Drive
Select Program Robot
Select Load Program

RG2 User Manual –Version 1.44
Specifications is periodically reviewed and may change without notice Copyright © 2015 –2016 by On Robot ApS. All rights reserved
13
Select RG2_Template.urp
Click Open
Set Close to the distance in millimeters that should be between the aluminum fingers, when the gripper is closed.
Repeat for the same with the Open variable.
Press Play The popup will appear. After approximately 3 seconds, the gripper will
start opening and closing.
If the gripping force needs to be adjusted, or another set of open and close width needs to be added, the RG2
settings folder can be unfolded. The variable Force_ controls the gripping force for Open and Close width, the unit

RG2 User Manual –Version 1.44
Specifications is periodically reviewed and may change without notice Copyright © 2015 –2016 by On Robot ApS. All rights reserved
14
is in Newton. The variables Force2, Open2 and Close2 holds the settings for the script/functions close_2() and
open_2(),see 7.3.1 Control variables.
7.2 Programmingintroduction
When the RG2 gripper is powered on, it will receive its programming parameters. These parameters are stored in
the control variables; Close, Open, Force_, Close2, Open2, Force2 and they are transferred by the
program_RG2.script (see 7.3.1 Control variables). If the gripper does not receive the programming parameters
within 5 seconds, it selects its default parameters. This state of the gripper is called teach mode and is indicated
by the green flashing LED (see 7.3.2 Teach Mode).
When the programming parameters is determent, the gripper detects if a second gripper is connected. If that is
the case, the programming parameters are transferred to the connected gripper (see 7.5 Two Grippers).
The gripper is basically controlled through tool_out[0] and tool_out[1] and gives feedback through tool_in[0],
tool_out[1], analog_in[2] and analog_in[3]. The gripper can be controlled directly by tool_out[0] and tool_out[1]
(see 7.3.4 Control outputs signals), or the scripts/functions delivered by On Robot (see 7.3.3 Control
script/functions) can be used. The gripper feedback can be read directly from tool_in[0], tool_out[1], analog_in[2]
and analog_in[3] (7.4.2 Feedback input signals), or by reading the feedback values (see 7.4.1 Feedback variables).
The script that transfers the programming parameters to the gripper is included in the following robot programs
delivered by On Robot: RG2_Template.URP (see section 7.17.1 Quick Start), RG2_Dual.URP (see 7.5 Two Grippers)
and RG2_SubP.URP (see 7.6 Add RG2 to existing robot program).

RG2 User Manual –Version 1.44
Specifications is periodically reviewed and may change without notice Copyright © 2015 –2016 by On Robot ApS. All rights reserved
15
7.3 Grippercontrol
7.3.1 Control variables
The control variables Close, Open, Force_, Close2, Open2 and Force2 holds the programming parameters that
are transferred to the gripper in the program_RG2.script.
Changing the variable does not affect the gripper before the program_RG2.script is executed.
7.3.2 Teach Mode
When the robot is turned on, the gripper can be used without programming it first. Use the tool output I/O’s.
The table to the right shows the preset configuration.
1) Go to the I/O screen on the teach pendant
2) Turn on 24V in the tool section, wait 5 seconds
3) Use tool output 0 to move the gripper
4) And tool output 1 to select High or Low Force
7.3.3 Control script/functions
The RG2 gripper can be controlled directly through tool_out[0] and tool_out[1] (see 7.3.4 Control outputs
signals). The typical use case is that the robot should wait until the gripper is done with operation. That
functionality is implemented in a couple of script functions delivered by On Robot.
A table with the control script/functions for single gripper operation is shown in the below table:
Control variable
min
max
unit
resolution
Open
0
110
[mm]
0.1
Close
0
110
[mm]
0.1
Force_
3
40
[N]
1
Open2
0
110
[mm]
0.1
Close2
0
110
[mm]
0.1
Force2
3
40
[N]
1
Teach Mode
Tool Outputs
0
1
Open Gripper (110mm)
Off
-
Close Gripper (0mm)
On
-
High Force (40N)
-
Off
Low Force (5N)
-
On
Script
Function
Width
Force
open.script
open()
Open
Force_
close.script
close()
Close
Force_
open2.script
open2()
Open2
Force2
close2.script
close2()
Close2
Force2

RG2 User Manual –Version 1.44
Specifications is periodically reviewed and may change without notice Copyright © 2015 –2016 by On Robot ApS. All rights reserved
16
The script open.script implements exactly the same functionality as the function open(), but there are small
differences by adding the script files vs. the functions. The functions can be tracked in the program tree while
executing, but it cannot be single stepped. The script files cannot be tracked in the program tree while
executing, but it can be single stepped.
7.3.3.1 Adding a script file
Select the place In the Robot Program in the program tree were you want the gripper to perform an action.
Go to the Structure tap and then to Advanced.
Select Script Code.

RG2 User Manual –Version 1.44
Specifications is periodically reviewed and may change without notice Copyright © 2015 –2016 by On Robot ApS. All rights reserved
17
With the new Script highlighted, go to the Command tap, click on the Dropdown menu in the upper right corner
and select File.
Then click on Edit, right under the dropdown menu.
In the File Editor, click on Select File
In the Load Text File window click on the bottom dropdown menu and select All Files.
Then the .script files should appear.
Select the text file named close.script and click open.
Table of contents
Other OnRobot Robotics manuals

OnRobot
OnRobot Gecko Gripper User manual

OnRobot
OnRobot 3FG15 User manual

OnRobot
OnRobot Gecko Gripper Product information sheet

OnRobot
OnRobot UR CB3 Series User manual

OnRobot
OnRobot 2FGP20 User manual

OnRobot
OnRobot RG2-FT User manual

OnRobot
OnRobot SG User manual

OnRobot
OnRobot HEX-E QC User manual

OnRobot
OnRobot Gecko SP1 User manual

OnRobot
OnRobot VGC10 User manual