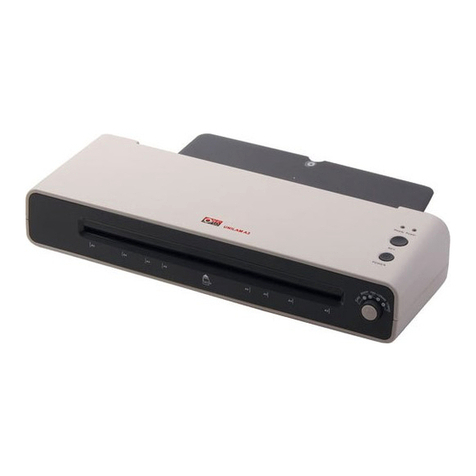
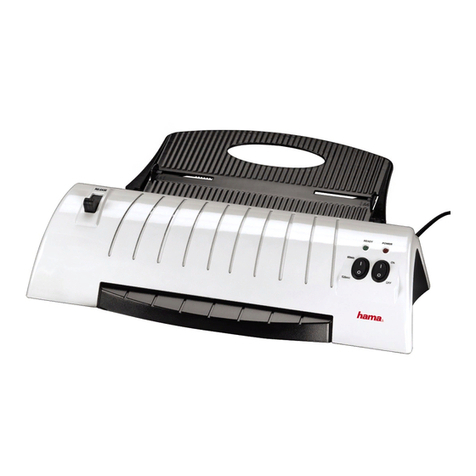
Opus AutoLAM A3 User manual

OPUS AutoLAM A3 • User guide EN
OPUS AutoLAM A3
User guide
EN

1 HEALTH & SAFETY PRECAUTIONS
• Before operating the equipment please read the Health & Safety precautions,
manufacturer recommendations and the operating manual.
• The equipment must be operated according to general Health & Safety rules.
• The operating manual should be easily available at any time for the operator.
• The equipment: should be installed on a sturdy level surface near a mains socket.
• = should be protected against dust and moisture.
• = must not be placed near a heating or ventilation units.
• = must not be used in vicinity of inflammable liquids or
gases.
• = power cable should be protected against damage and
not be used to move the equipment or pull the plug
from the socket.
• = must be kept away and out of the reach of children and
animals.
• = must not be used for any other purposes than those indi
cated in the instruction manual.
• = must not be located outside and operated in room tem
peratures lower 8 °C.
• Danger! The equipment contains rotary elements. Ensure long hair, loose jewel-
lery, ties and other loose clothing are keep away they can be get entangled in
the rolls.
• It is necessary to check and supervise if the equipment is operated correctly.
• In case of any malfunctions, you must contact the dealer or service team.
• Before removing any covers from the equipment, remove the power plug from
a mains socket.
• Using inappropriate lubricants causes a fire hazard.
• Any repairs must be carried out only by authorized sta during the guarantee
period.
• Do not leave the equipment unattended while in operation.
• After operating wait for the cooling down procedure has finished, turn o the
equipment by power switch on the unit. Then remove the power plug from a
socket.
2
2 MANUFACTURER’S RECOMMENDATIONS
• Use only recommended supplies and accessories.
• Do not put documents thicker than 0.6 mm into the laminator.
• Remove the power plug from the socket before moving the equipment or when not in use
for long periods.
• If the equipment is switched on and not operated for long periods, it can become over-
heated.
• To avoid bad quality lamination put 2 or 3 sheet of A4 paper through in order to cool the
rollers down.

OPUS AutoLAM A3 • User guide EN
UNIT DECRIPTION
1. Auto/Manual Mode Button.
2. Pouch Selection Button.
3. Auto mode Indicator.
4. Exit Tray.
5. Cold Lamination Indicator.
6. Pouch Indicator, 75 – 250 μm/micron.
7. Reverse Button.
8. On/O Switch.
9. Pouch /Document Entry Slot.
3
• Always insert the laminating pouch, with the close end first.
• Putting the open end first can cause bubbling and the films to be stuck or rapped round
the rollers inside.
• Should a document get stuck inside the laminator use the reverse function (REV) switch
to eject the document.
• Tailor cut pouches can make the rollers sticky, dirty and rapped round them, use a carrier.
• Remove all metal elements (staples & paper clips, etc.) before laminating the documents.
• WARNING! The equipment contains heating elements, be aware high temperatures!
• Use a laminating pouch recommended for the size of the document.
• Insert the document into the centre of the pouch and the laminating slot.
• Do not laminate pouches without a document inside.
• Laminated documents should be cut after they have cool down.
• Self-adhesive pouch should only be laminated in the cold mode.
• Temperature sensitive documents should not be laminated in hot the lamination mode.
• Before laminating important document make a test on a similar document.
• NOTE! Not compliance with the rules and recommendations above can void the Gua-
rantee/Warranty.
VS100AF
A
D I
H
E
G
F
B
C
A. On/Off Switch
B. Auto/Manual Mode Button
C. Pouch Selection Button
D. Auto mode Indicator
E. Cold Lamination Indicator
F. Pouch Indicator (75mic-250mic)
G. Reverse Button
H. Pouch /Document Entry Slot
I. Exit Tray
LAMINATOR CONTROLS
8
1
2
3
5
6
7
4
9

4 QUICK START GUIDE IN AUTO MODE
4
20”
QUICK START GUIDE-AUTO MODE
1 2
3 4
5
7
6
50 cm

OPUS AutoLAM A3 • User guide EN
5 QUICK START GUIDE IN MANUAL MODE
5
VS100AF
20”
QUICK START GUIDE-MANUAL MODE
1 2
3 4
5
7
6
50 cm

6 FEATURES OF THE UNIT
• AUTO SENSOR: This feature will detect and alert the user if there is a miss-feed, or
the document has not gone completely through in the normal operating time,
it will automatically reverse until the jammed document is cleared. The unique
system detects the pouch thickness and self-adjusts to an optimal laminating
setting.
• REVERSE - REV button - if a problems occur during laminating a pouch, press and
hold the reverse button (REV) until the document is removed from the laminator.
The pouch may go either forward and a little faster or reveres out.
• If the equipment is not active for 30 minutes, the equipment will be put into the
standby mode.
7 OPERATION
• Check there is enough clear space of 50 cm behind the unit to allow items to pass
through freely.
• Plug the unit into an easily accessible power socket.
• Ensure the Exit Tray is fitted properly for the best laminating results.
LAMINATING IN AUTO MODE
• Switch the power on with the switch at the rear on the right side of the unit.
All indicators will flash once as part of the checking system to ensure proper
operation. Then the cold lamination indicator will turn on with a soft white
light and bleep twice. After that, you can start cold laminating. Note! to use the
cold setting after hot lamination, you may have to wait for the laminator to cool
down for 30-60 minutes.
• When you press the Auto/Manual button. The auto mode is activated and will
warmed up, the Auto indicator light will come on and bleep twice and the unit
is now ready for laminating. When you insert the pouch it will automatically
recognise the pouch thickness and start laminating.
• Place the pouch, with the sealed edge first, into the laminating slot. Keep the
pouch straight and in the centre of the slot. Do not put the pouch in at an angle.
Use the entry markings as a guide. Note: when working with dierent pouch
thicknesses the temperature settings change, it is recommended to first start
6

OPUS AutoLAM A3 • User guide EN
with the thinnest pouches. After long hot laminating periods, it is recommen-
ded to let the unit cool down to laminate thinner pouches.
• This unit is equipped with an Advanced Pouch Tracking System that will detect
and alert the user if there is a miss-feed. If a jam is detected the unit will au-
tomatically reverse the document to help clear the jam. If the jam is not com-
pletely cleared, press and hold the reverse button while pulling on the pouch to
completely remove it from the unit. Once the jam is cleared the unit will return
to normal operation.
• When the laminated pouch exits it will be hot and soft. For the best quality and
to prevent jamming remove the pouch immediately. Place the pouch on to a flat
place to cool. Take care when handling a hot pouch. Always remove laminated
documents before starting the next laminating job.
For best performance/results, use the exit tray supplied.
Laminating in Manual Mode
• Switch the power on with the switch at the rear on the right side of the unit.
All indicators will flash once as part of the checking system to ensure proper
operation. Then the cold lamination indicator will turn on with a soft white
light and bleep twice. After that, you can start cold laminating. Note! to use the
cold setting after hot lamination, you may have to wait for the laminator to cool
down for 30-60 minutes.
• For 75 μm/micron – 250 μm/micron hot laminating, press the pouch selection
button to switch to the pouch size required and the light will come on and when
the light will stop flashing it is ready to start laminating.
Note: when working with dierent pouch thicknesses the temperature set-
tings change, it is recommended to first start with the thinnest pouches. After
long hot laminating periods, it is recommended to let the unit cool down to
laminate thinner pouches.
7

8 TROUBLESHOOTING
9 MAINTENANCE AND SERVICE
8
Problem Possible cause Solution
No control panel
illumination. The unit is not switched on. Switch on the unit at rear next to plug inlet
and at the wall socket.
Pouch does not com-
pletely seal the item. Item may be too thick to laminate.
Maximum document thickness is 0.6mm.
Check the thickness is correctly selected
and pass it through again, when using
manual mode.
Pouch has waves or
bubbles. Temperature setting may be incorrect.
Check the thickness is correctly selected
and pass through again when using manu-
al mode.
Pouch is sealed in the
unit. Temperature setting may be incorrect.
Check the thickness is correctly selected
and pass it through again when using
manual mode.
Pouch is lost in the
unit.
Pouch is jammed.
The unit will automatically reverse the
document. If the jam is not completely
cleared, press and hold the reverse button
while pulling
on the pouch to completely remove it from
the unit.
Pouch was used ‘open end’ first.
Pouch was not cantered on entry.
Pouch was not straight upon entry.
Empty pouch was used.
Pouch is damaged
after lamination. Damaged rollers or adhesive on rollers.
Damaged rollers or adhesive on rollers. Pass
cleaning sheets through the unit to test
and clean the rollers.
Pouch selection but-
tons does not work. Switch the settings when using auto mode. Press Auto/Manual button again to switch
back to manual mode.
• Switch o the unit at the wall. Allow the unit to cool.
• The outside of the unit can be cleaned with a damp cloth. Do not use solvents or
flammable materials to polish the unit.

OPUS AutoLAM A3 • User guide EN
10 TECHNICAL DATA
Equipment and products marked with this symbol cannot be deposed together with normal
or municipal waste. The user is required to take their used product to a collection point for
recycling of waste electrical and electronic equipment. Proper segregation of used equip-
-ment reduces the negative impact of hazardous substances that may be in there, in to
the environment which could impact, human and wild life health. For more detailed in-
formation concerning the disposal of used equipment, please contact your local authority,
waste disposal service or the point of sale where you purchased the product. By ensuring
proper disposal of equipment we are helping to protect the environment, humanity and
wild life health.
13.08.2019 OPUS Sp. z o.o. ● ul. Toruńska 8 ● 44 – 122 Gliwice ● Poland ● www.opus.pl
8
• Number of rollers:....................................................................................... 6
• Entry width: .................................................................................... 330 mm
• Preheating time:................................................................................... 1 min
• Cool down time: .......................................................................... 30 – 60 min
• Laminating pouch thickness: ................................................ 75 - 250 μm/micron
• Ready indication:........................................................................ Light & beep
• Maximum document thickness:.............................................................0.6 mm
• Laminating Speed: ............................................................. up to 1500 mm/min
• Voltage: ...........................................................AC 220 - 240 V / 50 - 60 Hz 7.5 A
• Power:.............................................................................................. 1700 W
• Net weight: ........................................................................................ 6.7 kg
• Gross weight: ...................................................................................... 7.7 kg
• Dimensions: ..............................................................H 480 x W 203 x D 127 mm
9

10

OPUS AutoLAM A3 • Instrukcja obsługi PL
Instrukcja obs ugi
PL
OPUS AutoLAM A3
11

1 ZASADY BEZPIECZEŃSTWA
• Przed rozpoczęciem pracy z urządzeniem, należy zapoznać się z zasadami
bezpieczeństwa, zaleceniami producenta i instrukcją obsługi. Instrukcję należy
zachować i korzystać z niej w przypadku jakichkolwiek wątpliwości dotyczących
obsługi urządzenia.
• Urządzenie należy ustawić na stabilnym podłożu w pobliżu gniazdka o napięciu
AC 220 -240 V 50-60 Hz.
• Urządzenie należy chronić przed wilgocią i kurzem.
• Nie wolno ustawiać urządzenia w pobliżu urządzeń grzejnych lub wentylacyjnych.
• Nie wolno używać urządzenia w pobliżu łatwopalnych gazów lub cieczy.
• Należy chronić przewód zasilający urządzenie przed uszkodzeniem, nie używać
przewodu do przenoszenia urządzenia i wyciągania wtyczki z gniazdka.
• Urządzenie należy trzymać poza zasięgiem dzieci i zwierząt.
• Urządzenie zawiera elementy obrotowe, które mogą spowodować wciągnięcie
luźnych elementów garderoby, włosów itp. Należy zachować ostrożność.
• Nie wolno używać urządzenia do innych celów niż określone w instrukcji obsługi.
• Należy kontrolować sprawność urządzenia. W przypadku zauważenia jakichkol-
wiek nieprawidłowości w pracy, należy skontaktować się z serwisem.
• Urządzenie jest przeznaczone wyłącznie do pracy w pomieszczeniach zamkniętych,
w temperaturze powyżej 8°C.
• Przed zdjęciem jakiejkolwiek osłony, należy wyjąć wtyczkę z gniazdka siecio-
wego.
• Stosowanie niewłaściwych substancji smarujących stwarza zagrożenie pożarowe.
• Wszelkich napraw urządzenia może dokonywać jedynie osoba uprawniona.
• Urządzenie należy obsługiwać zawsze zgodnie z ogólnymi zasadami BHP.
• Nie wolno pozostawiać włączonego urządzenia bez nadzoru.
• Po zakończeniu pracy należy wyłączyć urządzenie wyłącznikiem głównym.
• Całkowite wyłączenie urządzenia następuje po wyjęciu wtyczki z sieci.
12
2 ZALECENIA PRODUCENTA
• Używaj tylko sprawdzonych materiałów eksploatacyjnych firmy OPUS.
• Laminuj papier lub materiały o podobnych właściwościach, nie grubsze jednak niż 0,6 mm.
• Odłącz laminator z sieci zawsze kiedy go przenosisz lub kiedy nie używasz go przez dłuższy
okres.
• Jeśli laminator jest włączony i nie był używany przez dłuższy czas, może nastąpić jego
zbytnie nagrzanie. Aby uniknąć niezadowalających efektów laminowania, będących na-
stępstwem przegrzania, włóż do szczeliny laminatora kartkę formatu A4, aby usunąć na-

OPUS AutoLAM A3 • Instrukcja obsługi PL
OPIS URZĄDZENIA
1 - Tryb Automatyczny / Ręczny
2 - Zmiana grubości folii
3 - Wskaźnik trybu auto
4 - Taca odbiorcza
5 - Wskaźnik laminacji na zimno
6 - Wskaźnik wyboru grubości folii (75 - 250 μm )
7 – Rewers
8 - Włącznik / wyłącznik
9 - Szczelina podawcza
13
gromadzone ciepło, zanim zaczniesz proces laminowania.
• Przy wkładaniu dokumentu do szczeliny podawczej, nigdy NIE wkładaj go otwartym brze-
giem. Grozi to wciągnięciem folii w wałki urządzenia.
• W razie zablokowania się folii laminacyjnej w szczelinie podawczej należy wcisnąć przy-
cisk „REV” przytrzymać do całkowitego wyciągnięcia zablokowanego materiału.
• Nie używaj folii przycinanej indywidualnie, gdyż może to spowodować trudne do usunię-
cia zabrudzenia wałków lub nawinięcie się folii na wałki.
• Dokument przeznaczony do laminowania nie może zawierać żadnych elementów metalo-
wych (spinacze, zszywki itp.).
• Używaj folii laminacyjnej dostosowanej do wielkości dokumentu.
• Włóż dokument w środek folii laminacyjnej.
• Nie należy laminować foli bez dokumentu.
• Zalaminowany dokument należy przycinać po schłodzeniu.
• Folie samoprzylepne należy laminować tylko na zimno.
• Dokumenty wrażliwe na temperaturę nie należy laminować w trybie laminacji na gorąco.
• Przed rozpoczęciem właściwej laminacji należy przeprowadzić test na podobnym
dokumencie.
UWAGA!!! Urządzenie zawiera elementy grzejne, należy zachować ostrożność.
VS100AF
A
D I
H
E
G
F
B
C
A. On/Off Switch
B. Auto/Manual Mode Button
C. Pouch Selection Button
D. Auto mode Indicator
E. Cold Lamination Indicator
F. Pouch Indicator (75mic-250mic)
G. Reverse Button
H. Pouch /Document Entry Slot
I. Exit Tray
LAMINATOR CONTROLS
8
1
2
3
5
6
7
4
9

4 SZYBKI START - PRZEWODNIK - TRYB AUTOMATYCZNY
14
20”
QUICK START GUIDE-AUTO MODE
1 2
3 4
5
7
6
50 cm

OPUS AutoLAM A3 • Instrukcja obsługi PL
5 SZYBKI START - PRZEWODNIK - TRYB RĘCZNY
15
VS100AF
20”
QUICK START GUIDE-MANUAL MODE
1 2
3 4
5
7
6
50 cm

16
6 CECHY URZĄDZENIA
• Funkcja Auto SENSE - tryb automatyczy - automatycznie wykryje i powiadomi
użytkownika jeśli wystąpił błąd w trakcie przejścia dokumentu przez lamina-
tor lub gdy dokument nie przeszedł całkowicie przez laminator w normalnym
czasie pracy. Po wykryciu błędu urządzenie automatycznie wycofa laminowany
dokument. Unikalny system wykrywa również grubość laminowanego materiału
dostosowując parametry pracy urządzenia.
• REVERSE - Przycisk REV – w przypadku pojawienia się problemów podczas la-
minacji należy nacisnąć i przytrzymać przycisk rewers (REV) do czasu usunięcia
dokumentu z laminatora. Dokument zostanie wycofany lub przejdzie przez la-
minator w przyspieszonym tempie.
• Auto Shut OFF- wyłącznik czasowy - jeżeli urządzenie nie będzie obsługiwane
przez 30 min, automatycznie przejdzie w tryb gotowości.
7 OBSŁUGA URZĄDZENIA
• Upewnij się, że za urządzeniem jest wystarczająca ilość miejsca aby wyciągnąć
zalaminowany dokument (ok 50 cm).
• Podłącz urządzenie do sieci.
• Zainstaluj tacę odbiorczą.
Laminacja w trybie automatycznym (Auto Mode)
• Włącz zasilanie (włącznik znajduje się z tyłu po prawej stronie urządzenia).
Wszystkie wskaźniki od zimnej laminacji do foli 250 μm zapalą się raz jako kon-
trola działania systemu. Następnie urządzenie przejdzie w tryb zimnej lamina-
cji co zostanie potwierdzane zapaleniem się wskaźnika zimnej laminacji (kolor
biały oraz dwukrotnym sygnałem dźwiękowym . Jeżeli zamierzasz używać trybu
laminacji na zimno po wcześniejszej laminacji na gorąco należy odczekać 30 -
60 min do czasu ochłodzenia się urządzenia.
• Naciśnij przycisk Auto / Manual. Tryb automatyczny jest włączony, gdy urządze-
nie się nagrzeje zapala się odpowiedni wskaźnik, urządzenie wydaje podwójny
sygnał dźwiękowy. Laminator w trybie Auto posiada funkcję automatycznego
rozpoznawania grubości folii.
• Włóż dokument wraz z folią do szczeliny podawczej. Folię należy wkładać za-

OPUS AutoLAM A3 • Instrukcja obsługi PL
17
mkniętą krawędzią, prosto i centralnie na środku. Możesz użyć oznaczeń na
laminatorze pomagających prawidłowo włożyć folie do szczeliny podawczej.
Laminując różne grubości folii zalecamy rozpocząć pracę z najcieńszą folią la-
minacyjną. Po dłuższej laminacji w wyższej temperaturze zalecamy schłodzić
urządzenie przed laminacja foli cieńszej.
• Laminator wyposażony jest w zaawansowany system kontroli przejścia doku-
mentu przez laminator, który wykryje i powiadomi użytkownika jeżeli nastą-
pi błąd na wejściu dokumentu do laminatora. Jeżeli zostanie wykryte zacięcie
urządzenie automatycznie wycofa laminowany dokument. Jeżeli zacięty doku-
ment nie wycofał się w pełni, naciśnij i przytrzymaj przycisk rewers jednocześnie
wyciągając dokument z urządzenia. Po usunięciu zacięcia urządzenie powróci do
normalnego działania.
• Dokument po zalaminowaniu może być miękki i gorący. Aby uzyskać najlepszą
jakość i zapobiec zablokowaniu się dokumentu w laminatorze należy wyjąć go
po zakończeniu procesu laminacji, a następnie umieścić na płaskiej powierzchni
do ostygnięcia. Zachowaj ostrożność podczas wyciągania gorącego dokumentu.
Zawsze usuń zalaminowany dokument przed rozpoczęciem laminowania ko-
lejnego dokumentu. Dla lepszej wydajności użyj tacy odbiorczej.
Laminacja w trybie ręcznym (Manual Mode)
• Włącz zasilanie (włącznik znajduje się z tyłu po prawej stronie urządzenia).
Wszystkie wskaźniki od zimnej laminacji do foli 250 μm zapalą się raz jako kon-
trola działania systemu. Następnie urządzenie przejdzie w tryb zimnej lamina-
cji co zostanie potwierdzane zapaleniem się wskaźnika zimnej laminacji (kolor
biały oraz dwukrotnym sygnałem dźwiękowym). Jeżeli zamierzasz używać trybu
laminacji na zimno po wcześniejszej laminacji na gorąco należy odczekać 30 -
60 min do czasu ochłodzenia się urządzenia.
• Aby samodzielnie wybrać odpowiednią grubość foli pomiędzy 75 a 250 μm na-
ciśnij przycisk wyboru grubości foli. Gdy urządzenie się nagrzeje wskaźnik wy-
branej grubości foli przestaje migać - urządzenie jest gotowe do pracy.
Laminując różne grubości folii zalecamy rozpocząć pracę z najcieńszą folią la-
minacyjną. Po dłuższej laminacji w wyższej temperaturze zalecamy schłodzić
urządzenie przed laminacja foli cieńszej.

8 ROZWIĄZYWANIE PROBLEMÓW
9 PRZECHOWYWANIE I CZYSZCZENIE
18
Problem Możliwa przyczyna Rozwiązanie
Panel kontrolny nie
działa – brak pod-
świetlenia.
Urządzenie nie jest włączone. Włącz urządzenie przełącznikiem z tyłu,
podłącz do zasilania.
Dokument nie został
zalaminowany na
obrzeżach.
Dokument jest zbyt gruby do laminacji.
Maksymalna grubość dokumentu prze-
znaczonego do laminacji wynosi 0,6 mm.
Upewnij się czy grubość dokumentu jest
odpowiednia, wykonaj ponowne lamino-
wanie w trybie ręcznym.
Folia faluje lub ma
pęcherzyki. Niewłaściwa temperatura laminacji.
Upewnij się czy wybrana grubość folii jest
odpowiednia, wykonaj ponowne lamino-
wanie w trybie ręcznym.
Folia zablokowała się
w urządzeniu. Niewłaściwa temperatura laminacji.
Upewnij się czy wybrana grubość folii jest
odpowiednia, wykonaj ponowne lamino-
wanie w trybie ręcznym.
Zacięcie
Folia zacięła się w urządzeniu.
Urządzenie automatycznie wycofa doku-
ment. Jeżeli laminowany dokument nie
wycofa się w pełni, naciśnij i przytrzy-
maj przycisk revers aby w pełni wycofać
dokument.
Folia została włożona otwartym brzegiem.
Folia nie została włożona w środek szczeliny
podawczej.
Folia nie została włożona prosto do szczeci-
ny podawczej.
Folia została włożona pusta, bez doku-
mentu.
Folia została zniszczo-
na podczas laminacji.
Uszkodzone rolki lub klej pozostał na
rolkach.
Przepuść arkusz czyszczący przez laminator
aby przetestować i wyczyścić rolki.
Przycisk wyboru
folii laminacyjnej nie
działa.
Urządzenie jest w trybie automatycznym
Auto Mode.
Naciśnij przycisk Auto / Manual aby przełą-
czyć urządzenie w tryb ręczny.
• Odłącz urządzenie z sieci i pozostaw do schłodzenia.
• Urządzenie należy przecierać wilgotną szmatką nasączoną detergentem.
Nie należy używać rozpuszczalników oraz materiałów łatwopalnych.
W przypadku pojawienia się innych problemów, należy skontaktować się z serwisem.

OPUS AutoLAM A3 • Instrukcja obsługi PL
10 DANE TECHNICZNE
Zużyty sprzęt oznakowany niniejszym symbolem nie może być umieszczany i usuwany łącz-
-nie z innymi odpadami, w tym odpadami komunalnymi. Obowiązkiem użytkownika jest
przekazanie zużytego produktu do punktu zbiórki w celu recyklingu odpadów powstałych
ze sprzętu elektrycznego i elektronicznego. Właściwa segregacja i selektywna zbiórka od-
padów zużytego sprzętu zmniejsza negatywne oddziaływanie substancji niebezpiecznych,
które mogą się w nim znajdować, na środowisko naturalne i zdrowie człowieka. W celu
uzyskania bardziej szczegółowych informacji dotyczących utylizacji zużytego sprzętu pro-
simy skontaktować się z przedstawicielem władz lokalnych, dostawcą usług utylizacji od-
padów lub punktem sprzedaży, gdzie nabyto produkt. Zapewniając prawidłową utylizację
sprzętu pomagamy chronić środowisko naturalne.
13.08.2019 OPUS Sp. z o.o. ● ul. Toruńska 8 ● 44 – 122 Gliwice ● Poland ● www.opus.pl
18 19
• Ilość wałków: ............................................................................................ 6
• Szerokość szczeliny podawczej:............................................................. 330 mm
• Czas nagrzewania:................................................................................. 1 min
• Czas chłodzenia: ..........................................................................30 – 60 min
• Grubość folii laminacyjnej:............................................................. 75 - 250 μm
• Wskaźnik gotowości:......................................................... świetlny i dźwiękowy
• Maksymalna grubość dokumentu:..........................................................0,6 mm
• Prędkość laminacji: ................................................................do 1500 mm/min
• Zasilanie: .........................................................AC 220 - 240 V / 50 - 60 Hz 7,5 A
• Moc: ................................................................................................ 1700 W
• Waga netto:........................................................................................ 6,7 kg
• Waga brutto: ....................................................................................... 7,7 kg
• Wymiary (W x S x G): ............................................................ 480 x 203 x 127 mm
Table of contents
Languages:
Other Opus Laminator manuals

Opus
Opus ProfiLAM A2 User manual

Opus
Opus cityLAM A3 User manual

Opus
Opus cityLAM A4 User manual

Opus
Opus Coverator 330 User manual

Opus
Opus rolLAM 380 User manual

Opus
Opus popLAM A3 User manual

Opus
Opus uniLAM A3 User manual

Opus
Opus uniLAM A4 User manual

Opus
Opus SpeedLAM A3 User manual

Opus
Opus uniLAM A4 User manual

Opus
Opus AutoLAM A3 Instant User manual

Opus
Opus uniLAM A3 User manual

Opus
Opus Coverator 330 User manual

Opus
Opus uniLAM A4 User manual

Opus
Opus popLAM A3 User manual

Opus
Opus rolLAM 380 User manual

Opus
Opus everLAM 330LCD User manual

Opus
Opus RolLAM 720 Super User manual

Opus
Opus Coverator User manual

Opus
Opus uniLAM A3 User manual