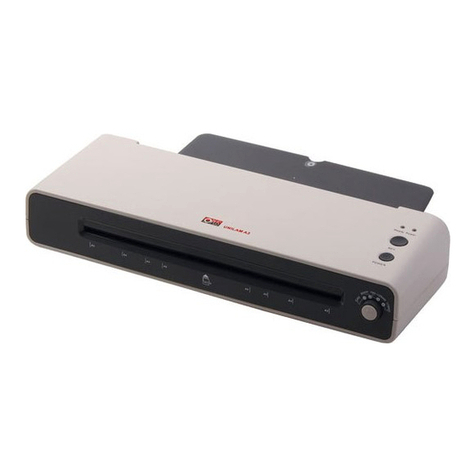
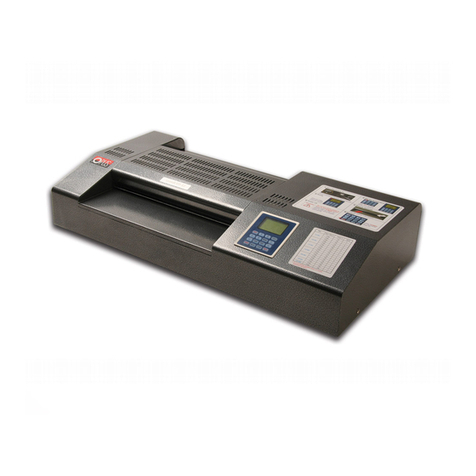
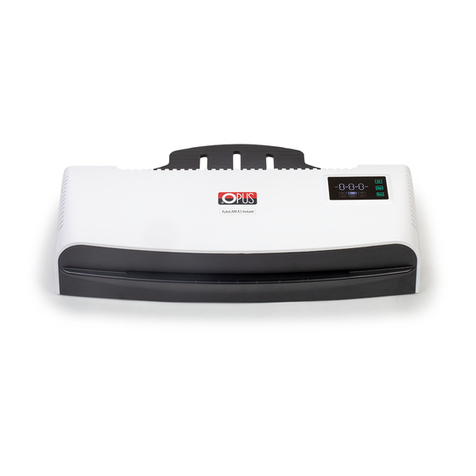
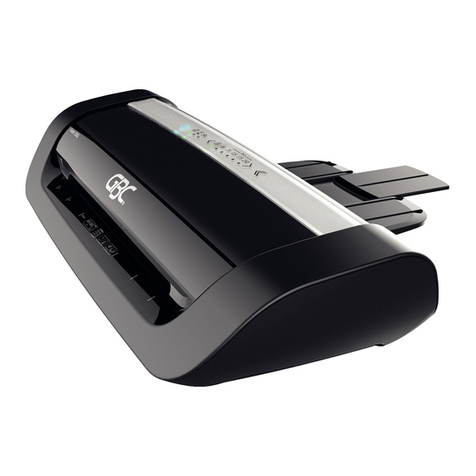
Opus ProfiLAM A2 User manual

PL
Instrukcja obsługi/ User Guide Opus MasterPress EMD
Instrukcja
MasterPressEMD
OPUS ProfiLAM A2
PL

1
· Przed rozpoczęciem pracy z urządzeniem, należy zapoznać się z zasadami
bezpieczeństwa, zaleceniami producenta i instrukcją obsługi. Instrukcję należy
zachować i korzystać z niej w przypadku jakichkolwiek wątpliwości dotyczących
obsługi urządzenia.
· Urządzenie należy ustawić na stabilnym podłożu w pobliżu gniazdka o napięciu
AC 230V 50Hz .
· Urządzenie należy chronić przed wilgocią i kurzem.
· Nie wolno ustawiać urządzenia w pobliżu urządzeń grzejnych lub wentylacyjnych.
· Nie wolno używać urządzenia w pobliżu łatwopalnych gazów lub cieczy.
· Na urządzeniu nie wolno kłaść przedmiotów ciężkich lub posiadających ostre
krawędzie.
· Należy chronić przewód zasilający urządzenia przed uszkodzeniem. Nie używać
przewodu do przenoszenia urządzenia i wyciągania wtyczki z gniazdka. W razie
uszkodzenia należy wymienić przewód zasilający.
· Urządzenie należy wyłączyć z sieci, jeśli nie jest używane przez dłuższy czas lub gdy
jest przenoszone.
· Całkowite wyłączenie urządzenia następuje po wyjęciu wtyczki z gniazda
zasilającego AC 230V 50Hz.
· Urządzenie należy trzymać poza zasięgiem dzieci.
· Urządzenie zawiera elementy obrotowe, które mogą spowodować wciągnięcie
luźnych elementów garderoby, włosów itp. Należy zachować ostrożność!
· UWAGA! Urządzenie posiada elementy grzejne! Nie wolno dotykać powierzchni
urządzenia lub kłaść na niej łatwopalnych materiałów!
· Po zakończeniu pracy należy wyłączyć urządzenie, a następnie wyciągnąć wtyczkę
z gniazdka zasilającego. Nie wolno zasłaniać szczelin, aby wałki grzejne mogły
ostygnąć.
· Nie wolno używać urządzenia do innych celów niż określone w instrukcji obsługi.
· Należy kontrolować sprawność urządzenia. W przypadku zauważenia jakichkolwiek
nieprawidłowości w pracy, należy wyłączyć urządzenie z prądu, a następnie
skontaktować się z serwisem.
· Urządzenie jest przeznaczone wyłącznie do pracy w pomieszczeniach zamkniętych,
dobrze wywietrzonych, w temperaturze powyżej 8 °C.
· Przed zdjęciem jakiejkolwiek osłony, należy wyjąć wtyczkę z gniazda zasilającego
AC 230V 50Hz .
· Stosowanie niewłaściwych substancji smarujących stwarza zagrożenie pożarowe.
· Urządzenie należy obsługiwać zawsze zgodnie z ogólnymi zasadami BHP.
· W przypadku pojawienia się usterki, należy wyłączyć laminator i skontaktować się
ze sprzedawcą. Wszelkich napraw urządzenia może dokonywać jedynie osoba
uprawniona.
2

Używaj tylko sprawdzonych materiałów eksploatacyjnych firmy OPUS.
Przy wkładaniu dokumentu do szczeliny podawczej, nigdy NIE wkładaj go otwartym
brzegiem. Grozi to wciągnięciem folii w wałki urządzenia.
Nie używaj folii przycinanej indywidualnie, gdyż może to spowodować trudne
do usunięcia zabrudzenia wałków lub nawinięcie się folii na wałki.
Dokument przeznaczony do laminowania nie może zawierać żadnych elementów
metalowych (spinacze, zszywki itp.).
3
PL
Wybierz odpowiednią grubość i rodzaj folii laminacyjnej.
Umieść dokument centralnie wewnątrz foliowej kieszeni.
Posługując się tabelą poniżej, wybierz odpowiednią temperaturę i prędkość laminacji.
GRUBOŚĆ FOLII PAPIER TEMP (0C) PRĘDKOŚĆ
80 μm 80 g/m21000C 5
120 g/m21000C 4
100 μm 80 g/m21000C 4
120 g/m21000C 3
125 μm 80 g/m21100C 4
120 g/m21100C 3
150 μm 80 g/m21200C 4
120 g/m21200C 3
175 μm 80 g/m21200C 4
120 g/m21200C 3
250 μm 80 g/m21300C 2
120 g/m21300C 2
Jeśli folia zwija się, oznacza to, że temperatura jest zbyt wysoka. Należy obniżyć
temperaturę lub wybrać wyższy numer prędkości.
Jeśli folia nie jest zalaminowana, oznacza to, że temperatura jest zbyt niska, należy
podwyższyć temperaturę laminacji lub wybrać niższy numer prędkości.

Włącz laminator. Wciśnij przycisk HOT przytrzymując go 1sekundę.
Ustawienia fabryczne laminatora: 100˚C i 4 prędkość są odpowiednie dla laminacji folią
o grubości 100 [μm].
Laminator sygnalizuje osiągnięcie żądanej temperatury trzema krótkimi dźwiękami,
dodatkowo na wyświetlaczu pojawia się napis „READY”.
Rozpocznij laminację.
Temperaturę laminacji można zmienić za pomocą przycisków oraz (maksymalna
temperatura 160oC).
Prędkość laminacji może zostać zmieniona za pomocą przycisków oraz (prędkość
laminacji 1 – 6).
Jeśli jakość laminacji nie jest zadowalająca, przytrzymaj przycisk REWERS.
Aby wyłączyć urządzenie, należy najpierw wcisnąć przycisk COLD w celu wychłodzenia
urządzenia, kiedy temperatura osiągnie wartość poniżej 90oC należy w tym celu przełączyć
przełącznik zasilania w pozycję „0” .
Włącz laminator. Wciśnij przycisk COLD.
Kiedy na wyświetlaczu pojawi się komunikat READY oraz pojawi się dźwięk rozpocznij
laminację.
Jeśli obawiasz się uszkodzenia materiałów takich jak zdjęcia, laminuj je „na zimno”,
używając specjalnej folii.
4
( lub ) - Przyciśnij odpowiedni przycisk, aby zwiększyć lub zmniejszyć
temperaturę w zależności od wymogów. Skala ustawień zawiera się w przedziale 0 - 160OC
zmieniając się co 1 stopień.
– Ustawienia 130˚C / prędkość 3. Są to ustawienia robocze dla laminatu 80 [μm]
(3 mil). Praca przy użyciu carriera.
– Ustawienia przeznaczone do laminacji dokumentu o grubości pow. 1 mm.
Temperatura 150˚C / prędkość 1.˚C/ ˚F – zmiana skali temperatury.
– funkcja stand by wykorzystywana w przerwie między laminowaniem.
80˚C / prędkość 2.
-Używane do laminowania na gorąco. 120˚C / prędkość 4.
-Używane do laminowania na zimno. 0˚C / prędkość 0.
SPEED -Przyciśnij odpowiedni przycisk ( lub ), aby zwiększyć lub zmniejszyć prędkość
w zależności od wymogów. Skala ustawień składa zawiera 1-6 stopni.
-Pokazuje obecną temperaturę.
-Wybierane w celu zastopowanie obrotu wałków (w celu ochrony wałków nie należy
używać funkcji powyżej 90OC ).
– Wybierane w celu odwrócenia kierunku obrotu wałków.

Zbrudzenia wałków negatywnie wpływają na jakość laminacji.
Ustaw temperaturę na 60˚C oraz 2. prędkość laminacji.
Kilkukrotnie przepuść złożona kartkę papieru.
Laminator należy przecierać bawełnianą szmatką nasączoną alkoholem.
Czyszcząc powierzchnię urządzenia zawsze odłącz zasilanie.
Jeśli folia została wciągnięta w wałki lub laminator nie działa poprawnie, skontaktuj
się z autoryzowanym punktem serwisowym.
Problem Przyczyna Rozwiązanie
Urządzenie nie działa lub
wałki się nie obracają.
-Zasilanie jest podłączone w
nieodpowiedni sposób
-Zasilanie jest wyłączone.
-Sprawdź podłączenie
urządzenia do gniazdka
elektrycznego.
-Sprawdź czy przycisk
zasilania jest włączony lub
skontaktuj się z serwisem.
Zła jakość laminowania. - Laminowane dokumenty
marszczą się lub załamują.
- Dopasuj niższą lub wyższą
temperaturę.
Brzegi dokumentu nie są
sklejone.
- Dokument jest zbyt gruby. - Użyj cieńszego dokumentu
lub zostaw więcej miejsca na
brzegach (około 5mm).
Pojawia się stań awaryjny. -Coś utknęło pomiędzy
warstwami grzewczymi lub
znajdują się one na nieod-
powiednich pozycjach.
- Należy przeprowadzić
czyszczenie wałków.
W przypadku dalszych problemów związanych z funkcjonowaniem urządzenia należy
skontaktować się z autoryzowanym serwisem.
PL
5

Maks. szerokość laminowania:...............................................................480 mm
Maks. prędkość laminowania:..........................................................550 mm/min
Maks. grubość folii:.............................................................................250 [μm]
Max grubość laminowania:.......................................................................3 mm
System grzewczy:........................................................................„gorące wałki”
Ilość wałków:..............................................................................................6
Temperatura działania:......................................................................0o– 160 oC
Kontrola temperatury i prędkości:..................................................................tak
Przełącznik rewersu:...................................................................................tak
Czas nagrzewania:.................................................................................8 min.
Zasilanie:.........................................................................AC 230 V 50 Hz 1200 W
Rozmiary (W x S x G):..............................................................145 x 714 x 303 mm
Waga netto:...........................................................................................22 kg
Waga brutto:..........................................................................................23 kg
Zużyty sprzęt oznakowany niniejszym symbolem nie może być umieszczany
i usuwany łącznie z innymi odpadami, w tym odpadami komunalnymi.
Obowiązkiem użytkownika jest przekazanie zużytego produktu do punktu zbiórki
w celu recyklingu odpadów powstałych ze sprzętu elektrycznego i elektronicznego.
Właściwa segregacja i selektywna zbiórka odpadów zużytego sprzętu zmniejsza negatywne
oddziaływanie substancji niebezpiecznych, które mogą się w nim znajdować, na środowisko
naturalne i zdrowie człowieka. W celu uzyskania bardziej szczegółowych informacji
dotyczących utylizacji zużytego sprzętu prosimy skontaktować się z przedstawicielem
władz lokalnych, dostawcą usług utylizacji odpadów lub punktem sprzedaży, gdzie nabyto
produkt. Zapewniając prawidłową utylizację sprzętu pomagamy chronić środowisko
naturalne..
05.04.2018 OPUS Sp. z o.o. ● ul. Toruńska 8 ● 44 – 122 Gliwice ● www.opus.pl
6

7
Instrukcja obsługi/ User Guide Opus MasterPress EMD

1
· Before operating the equipment please read the Health & Safety precautions,
manufacturer’s recommendations and the operation manual.
· The operation manual should be easily available at any time for the operator.
· The equipment must be installed on a sturdy level surface near a 230 V, AC 50 Hz,
correctly earth socket.
· The equipment:
· must be protected against dust and moisture.
· should be operated according to the general HEALTH AND SAFETY rules.
· must not be placed near the heating units or ventilation units.
· must not be used in vicinity of inflammable liquids or gases.
· do not put anything on top o the equipment.
· the power supply cable must be protected against damage.
· must not be used to pull or move the equipment or to remove the plug
from the socket.
· during a long standstill or before moving the equipment, the plug
should be removed from a mains socket.
· must be kept away and out of reach of children and animal’s.
· must not be located outside, should be operated in room temperature
higher than +80C.
· Danger! Equipment contains rotary elements. Ensure that long hair, loose
jewellery, ties and other loose pieces of clothing are kept away from the slot,
AS they can be pulled into the slot and get entangled into the rollers!
· Danger! Equipment contains heated rollers, pay special attention. Do not touch the
cover or put any inflammable materials on the top of the equipment or cover
the grill!
· After using the laminator it should be turned o by the main switch and
unplugged from the power socket. Do not cover the feed opening or the grill
so that the rollers can cool down.
· The equipment must not be used for any other purposes than those indicated
in the instruction manual,
· Should there be a malfunction it is necessary to check and supervise if the
equipment is being operated correctly, then contact the service team.
· Before removing any cover from the equipment, remove the plug from the socket.
· Using inappropriate lubricants can cause a fire hazard.
· Should there be any bad smells unplug immediately and call the service team.
· Any repairs during the Guarantee period must be carried out by authorised sta.
Failure to do so could void the Guarantee.
· There are high voltage parts and moving elements inside this equipment. To avoid
electric shock or accidents, do not open the cover without unplugging the cable from
the main socket.
8

POUCH PAPER TEMP (0C) SPEED
80 μm microns
80 g/m21000C 5
120 g/m21000C 4
100 μm microns
80 g/m21000C 4
120 g/m21000C 3
125 μm microns
80 g/m21100C 4
120 g/m21100C 3
150 μm microns
80 g/m21200C 4
120 g/m21200C 3
175 μm microns
80 g/m21200C 4
120 g/m21200C 3
250 μm microns
80 g/m21300C 2
120 g/m21300C 2
9
Use only recommended supplies and accessories from OPUS.
Always insert the pouch with the close end into the laminator first. Putting the open
end first can cause the pouch and document to get stuck round the rollers inside the
laminator and destroy the documents.
The equipment is designed for laminating pouches from 25 – 250 μm microns. Do not use
thicker pouch thickness.
Individually cutout pouches can make the rollers dirty because of the glue going on the
rolls and wind the pouch around the rollers. Always use a carrier when laminating cut
pouches. Ask your dealer for information.
Remove all metal elements, clips, clamps, staples etc. before laminating any document.
Choose correct thickness and type of the pouch.
Put the document into the pouch. Always feed the pouch in sealed end first.
Select temperature and lamination speed using the table below.
If the pouch is wrinkled, that means the temperature is too high. Decrease the
temperature or choose higher speed setting.
If the pouch is not hot that means temperature is too low. Increase the temperature
or select a lower speed setting.

Turn the laminator on. You must press the “HOT” button for 1 second each time you
switch on to set the laminator to the factory setting.
Factory settings are temperature - 100˚C and speed 4, these settings are suitable
for laminating 100 μm, microns pouches.
The laminator will make 3 short bleeps and show ‘READY’ on the display when
it reach the set temperature.
Now you can start laminating.
Lamination temperature can be changed by pressing the buttons ( ) for up or ( )
for down by in increments of 1 degree (maximum 160 ˚C).
Lamination speed can be changed by pressing the button ( ) for faster or ( )
for slower buttons speed 1 – 9 in increments of 1.
If the quality of lamination is not satisfactory, press the REV button until the
document is reversed out, when you release the button after 2 seconds the rollers
start to move forward.
Change the lamination settings and insert document once again into the slot.
To turn the laminator o, do not turn o by the main switch as the rollers need to
cool down. Press the POWER button. When the temperature decreases to a safe level
the powers will turn o automatically.
Turn the laminator on. Press the COLD button.
Start lamination, when READY is displayed on a screen.
To avoid damaging of materials like picture, it is recommended to choose COLD
lamination and use a special pouch.
10
– Push the proper button to increase or decrease temperature.
- 160˚C and changes each 1 ˚C.
– Set the equipment to 130˚C speed 3, the default setting for lamination of 80 μm
(E mil). Using a carrier.
– This function can be selected upon laminating hard board types with more than
1mm thickness, and temperature of 150˚C at & speed 1 is automatically set when selected.
– Change the temperature format.
– This function can be selected when you have a short break not for long periods.
Temp 80˚C and speed 2 is set automatically.
- When selecting hot function key, laminating temperature is set to 100 ˚C speed
4 is set automatically.
- Function can be selected for cold laminating, automatically set the temperature 0˚C
speed 2.
SPEED – This function can be selected ( or ) for increasing or decreasing lamination speed
from 1 - 9 speed.
- This function shows present temperature. The measured is displayed for
3 seconds.

Problem Cause Solution
Machine Has no power or
roller is not rolling.
Power plug is not plugged in.
Power switch is o.
Check the Power plug is
properly plugged. Check if the
Power switch is turned on or
contact support.
Excessive noise. Operation of gear is not
smooth.
Turn o the machine, contact
support.
Bad laminating. Laminated document
wrinkled, damp or folded.
Turn o the machine, contact
support.
No increase of temp. Check power plug. Check if the Power plug and
switch is turned on or contact
support.
Corners are not sealed. Document is to thick to seal
the edges of the film.
Use a thinner document or
leave more around the edges,
aprox 5 mm.
11
- This can be selected to stop rotation of the rollers for a very short time. To protect
the rollers, please avoid manually stopping the rollers for a long period when the
temperature of the roller are over 90 0C.
– This can be selected to reverse the rotation of the rollers. In case of incorrectly feed
pouch, withdraw it by reverse the rollers by pressing REV button.
Dirty rolls lower lamination quality.
Set the temperature on 60˚C and 2nd speed level.
Fold the sheet paper and feed it trough several times with a clean side to remove the dirt.
Wipe the cover of the laminator with piece of clothing using a domestic home cleaner
do not use a petroleum or alcohol cleaner.
Always disconnect the power when cleaning the device.
If the pouch has been pulled in and rapped round the rollers or the laminator or it
is not working properly, contact an authorized service center.

Maximum lamination width:.................................................................480 mm
= lamination speed:..........................................................550 mm/min
= pouch thickness:......................................................250 μm (microns)
= laminating thickness:...............................................................3 mm
Heating system:...............................................................................„hot rolls”
Quantity of rolls:..........................................................................................6
Temperature:..................................................................................0o– 160 oC
Temperature and speed control:....................................................................yes
Reverse:...................................................................................................yes
Preheating time:...................................................................................8 min.
Power:............................................................................AC 230 V 50 Hz 1200 W
Dimensions:.................................................................H 145 x W 714 x D 303 mm
Net weight:............................................................................................22 kg
Gross weight:.........................................................................................23 kg
Equipment and products marked with this symbol cannot be deposed together with
normal or municipal waste. The user is required to take their used product to a collection
point for recycling of waste electrical and electronic equipment. Proper segregation of used
equipment reduces the negative impact of hazardous substances that may be in there, in to the
environment which could impact, human and wild life health. For more detailed information
concerning the disposal of used equipment, please contact your local authority, waste disposal
service or the point of sale where you purchased the product. By ensuring proper disposal of
equipment we are helping to protect the environment, humanity and wild life health.
05.04.2018 OPUS Sp. z o.o. ● ul. Toruńska 8 ● 44 – 122 Gliwice ● www.opus.pl
12
Table of contents
Languages:
Other Opus Laminator manuals

Opus
Opus RolLAM 720 User manual

Opus
Opus SpeedLAM A3 User manual

Opus
Opus popLAM A3 User manual

Opus
Opus cityLAM A4 User manual

Opus
Opus uniLAM A3 User manual

Opus
Opus Coverator User manual

Opus
Opus Coverator 330 User manual

Opus
Opus RolLAM 720 Super User manual

Opus
Opus cityLAM A3 User manual

Opus
Opus Coverator 330 User manual

Opus
Opus AutoLAM A3 User manual

Opus
Opus uniLAM A4 User manual

Opus
Opus uniLAM A3 User manual

Opus
Opus popLAM A3 User manual

Opus
Opus rolLAM 380 User manual

Opus
Opus AutoLAM A3 Instant User manual

Opus
Opus rolLAM 380 User manual

Opus
Opus everLAM 330LCD User manual

Opus
Opus uniLAM A4 User manual

Opus
Opus uniLAM A4 User manual