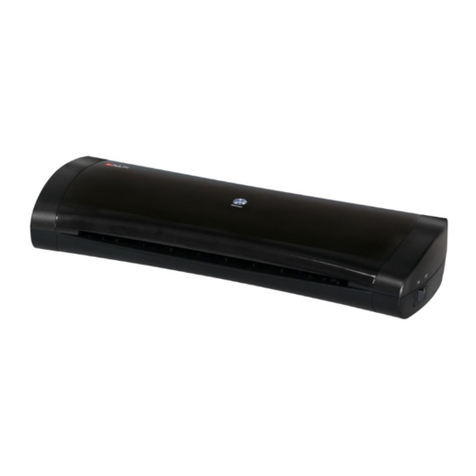
Opus Coverator 330 User manual

USER GUIDE
Coverator 330

User guide Coverator 330
2
HEALTH &SAFETY PRECAUTIONS
Before using and operating the equipment, please read the USER GUIDE
/ MANUAL, Health & Safety precautions and manufacturers recommendations.
USER GUIDE/MANUAL must be available at all times for an operator to read.
The equipment should be placed on a sturdy and level surface near a power socket
with correct earth connection and voltage. SEE TECHNICAL DATA
EQUIPMENT MUST BE:
1. protected against dust, moisture, and any liquids.
2. kept out of reach and away from children and animals.
EQUIPMENT MUST NOT:
1. be placed near heating or ventilation units.
2. be used in the vicinity/near inflammable liquids or gases.
3. be used for any other purposes than those indicated in the
USER GUIDE/MANUAL.
4. be located outside and should be operated in a room temperatures
higher than (+8 ºC ) (USA +46.4 ºF) due to condensation.
The power supply cable must be protected against any damage, nor used to pull
or move the equipment, and remove the mains plug from the socket.
Should there be any malfunction, it is necessary to check if the equipment is being
used and operated correctly, before contacting the service team, to avoid any
unnecessary cost to your company.
Before opening removing the outer cover from the equipment, remove the plug from
a power socket.
Opening or removing the outer cover from the equipment will VOID / CANCEL,
the Guarantee /Warranty during period.
Using any aerosols or inappropriate lubricants could cause a fire hazard.
Any repairs must be carried out by qualified and authorised staff only.
The equipment should be operated according to general Health & Safety rules.
The equipment should be operated only with the inspection panel closed.
Do not leave equipment operating without supervision or control.
After use and at night, you must turn the equipment off, using the main power switch
on the equipment.
! DANGER !
DO NOT STAND ANY LIQUIDS ON TOP OF THE UNIT: e.g.
MUGS, CUPS, TINNED/CANNED DRINKS, BOTTLES OF ANY SORT.
The equipment contains rotary elements, Keep long hair, loose
jewellery, ties and other loose pieces of clothing away from the
equipment they could get entangled in the rollers.
User guide Coverator 330
3
RECOMMENDATIONS:
Use only recommended supplies and accessories.
Unplug the equipment and allow to cool down, before moving or during long
standstills.
Always insert the closed, end or side of the pouch cover into the laminator first.
Putting the open edge first can cause air bubbles and the pouch to wrap round the
rollers and destroy the document inside, plus damage the rollers.
It is recommended to put the O.Pouch Cover in a thin paper carrier before putting it
into the feed slot of the Coverator. It will prevent the rollers from being damage,
caused by excess glue coming out of the edges of the cover.
Thickness of the CARRIER must be about 40 gr/m². Thicker paper will cause bad
lamination.
If the document gets jammed inside the laminator, use the reverse function button
on the front (see diagram below) to remove cover/document.
Remove all metal elements (paper clips, clamps, staples etc.) before laminating.
EQUIPMENT CONFIGURATION DIAGRAM (DIAG)1

User guide Coverator 330
4
OPERATION:
1. STARTING THE EQUIPMENT
Plug the equipment into the power socket, turn ON by the main switch at the side,
red & green LEDS flash and hear a short bleep. The pre-heating process will start.
Tined
Pre-heat time for the Coverator is about 8 minutes. When the Coverator is ready
to operate, the green LED light at the front comes on.
Set the lever maximally to the left. (see DIAG: opposite )
2. DESCRIPTION OF LED’S SIGNALS AND SOUNDS
At the front on the right side of the equipment are two LED lights indicating the status
of equipment:
Switching on the equipment you will see the red & green LED’S at the front flash
and you will hear a short bleep.
Red LED on and green LED off –this means that the equipment is on but the
rollers are not hot enough.
Red and green LED’s are on an audible bleep sound – this means that rollers have
reached temperature and informs you that the equipment is ready to use.
Red LED flashes and the green LED is off –it means that the temperature sensor
is damaged. Call the suppler or service team.
Red LED is on and the green LED flashes and there is an additional audible signal
–this means that the heater or the temperature regulator is broken.
Call the suppler or service team.
3. PREPARING THE COVER
Use a trimmer to cut your printout according to the O•pouch-covers template. In
each box of O•pouch-covers there is a template with the correct dimensions.
Take the trimmed printout and place it in the laminating Pouch Cover.
The pouch must cover all the trimmed printout surface.
When laminating O•Pouch Covers you must use a paper carrier supplied in the box
of covers.
4. LAMINATION OF O•POUCH COVER
Slowly insert the O•Pouch Cover in the carrier to the front slot (see DIAG:) with the
closed edge first and the printout face up in the middle of the slot.
When Inserting the cover in the front slot, it is confirmed by 1 bleep.
The cover will move through the unit and exit at the back laminated.
3 bleeps indicate the end of the laminating process and the cover is out.
After the 3 bleeps remove the cover from the back straightaway or the cover will be
damaged.
When a paper carrier is not used or the O.Pouch Cover slips out of the carrier while
laminating, there is a big risk of putting glue on or damaging the rollers.
SEE CLEANING SECTION PAGE 6

User guide Coverator 330
5
If a pouch get stuck or you need to remove the job from the rollers use the reverse
button on the front of the Coverator. ( see page 11)
When the laminated cover comes out bent, in either direction, there are plates
inside the equipment, which you can be adjusted with the lever (A) on the front of
the equipment. Moving it left or right will make the cover come out flat.
a. Cover bent downwards, move the lever (A) to the right, a little at a time to get
the cover flat.
b. Cover bent upwards, move the lever (A) to the left a little at a time to get the
cover flat.
We recommend that you first make a test, to check that the cover comes out flat.
Then you can make any adjustment that may be necessary at this time.
It may be possible to straighten a bent cover by putting it through once more,
‘’remember’’ use a paper carrier and make the adjustment with the lever (A).
If your cover has dirty marks after lamination, clean it with a soft cloth and a cleaning
agent suitable for Pouch covers, for example use NOVOGUM, a product made by
FujiFILM. Or see supplies & materials on our webpage www.opus.pl/en
5 LAMINATING POBC (PHOTO BOOK COVERS)COVERS USING THE COVERATOR.
To laminate POBC pouches you must use a laminating carrier larger than the
pouch, e.g. a thin card/paper each side so there is no damage to the pouch.
Cut your graphics/picture to the sizes of the POBC pouch, put it in the pouch and
then in the carrier, and then to the laminating slot.
When laminating the pouch to the card you must protect the rollers from excess
glue, which may come out of the sides, by putting a larger sheet of paper over the
cover before laminating for the best results. ( follow the instructions as above 4)
If the POBC pouch comes out of the carrier during laminating it could leave marks
on the rollers (see cleaning section 6.)

User guide Coverator 330
6
6. CLEANING
Note!
Before cleaning the outside of the equipment, remove the mains plug from the
power socket, and let the Coverator COOL DOWN BEFORE CLEANING for
a minimum of 30 minutes. Not applicable for Additional cleaning of the upper
rollers (see below “Additional cleaning of the upper rollers”).
To clean the outer cover of the laminator use a gentle domestic detergent or a damp
cloth.
Do not: put the equipment into water or let water or any liquid get inside.
Do not: use or wipe the unit with petrol, alcohol or solvents, they can cause
permanent damage to the outer cover and equipment.
After laminating the a cover, if it come out with dirty marks.
This means that the rollers could have glue on them. To clean the rollers take
a normal hardcover and cover it with clean white paper. Use A3 or USA ledger, run
it through the rollers as many, times as it takes to clean the rollers, changing the
paper each time.
Additional cleaning of the upper rollers.
The device has a inspection panel that allows access to the upper rollers.
To open the panel, use your finger to raise the panel in the slot at the side, which
is held by magnets, mounted in the main top cover.
You can clean the upper rollers with a soft cloth moistened with alcohol or
methylated.
Always clean the rollers when they are cold.
The equipment contains rotary elements, Keep long hair, loose
jewellery, ties and other loose pieces of clothing away from the
equipment they could get entangled in the rollers.
In an emergency, switch off the main power.
If a pouch cover gets entangled and you cannot remove it or the laminator
does not operate correctly; contact the dealer or the service team.

User guide Coverator 330
7
Technical Data:
Europe USA
Heating system: Hot rollers + heater plate:
Temperature : 145 °C : 293 °F
Preheating time : 8 minutes : 8 minutes
Laminating speed per min : 240 mm/ min : 9.5” inches
Power : 1,1 KW : 1.1 KW
Rated current : 8 Amps : 10 Amps
Power voltage AC : 230 volts 50/60 Hz : 110 volts 50/60 Hz
Net weight of Coverator : 10 kg : 22.8 lbs
Gross weight of Coverator : 11,5 kg : 25,3 lbs
Dimensions: H. 122 x W. 525 x D. 281 mm : H. 4.80” x W. 20.67” x D. 11.07”
Equipment and products marked with this symbol cannot be deposed together with normal or municipal waste.
The user is required to take their used product to a collection point for recycling of waste electrical and electronic
equipment. Proper segregation of used equipment reduces the negative impact of hazardous substances that
may be in there, in to the environment which could impact, human and wild life health. For more detailed
information concerning the disposal of used equipment, please contact your local authority, waste disposal
service or the point of sale where you purchased the product. By ensuring proper disposal of equipment we are
helping to protect the environment, humanity and wild life health.
10.10.2017 OPUS Sp. z o.o. ● ul. Toruńska 8 ● 44 – 122 Gliwice ● www.opus.pl


Instrukcja obsługi urządzenia
Coverator 330

Instrukcja obsługi Coveratora 330
10
Zasady bezpieczeństwa:
Przed rozpoczęciem pracy z urządzeniem, należy zapoznać się
z zasadami bezpieczeństwa, zaleceniami producenta i instrukcją obsługi. Instrukcję
należy zachować i korzystać z niej w przypadku jakichkolwiek wątpliwości
dotyczących obsługi urządzenia.
Urządzenie należy ustawić na stabilnym podłożu w pobliżu gniazdka o napięciu
230 V 50/60 Hz.
Urządzenie należy chronić przed wilgocią i kurzem.
Nie wolno ustawiać urządzenia w pobliżu urządzeń grzejnych lub wentylacyjnych.
Nie wolno używać urządzenia w pobliżu łatwopalnych gazów lub cieczy.
Należy chronić przewód zasilający urządzenie przed uszkodzeniem, nie używać
kabla do przenoszenia urządzenia i wyciągania wtyczki z gniazdka.
Urządzenie należy trzymać poza zasięgiem dzieci i zwierząt.
Urządzenie zawiera elementy obrotowe, które mogą spowodować wciągnięcie
luźnych elementów garderoby, włosów itp. Należy zachować ostrożność.
Nie wolno używać urządzenia do innych celów niż określone w instrukcji obsługi.
Należy kontrolować sprawność urządzenia. W przypadku zauważenia jakichkolwiek
nieprawidłowości w pracy, należy skontaktować się z serwisem.
Urządzenie jest przeznaczone wyłącznie do pracy w pomieszczeniach
zamkniętych, w temperaturze powyżej 8°C.
Przed zdjęciem jakiejkolwiek osłony, należy wyjąć wtyczkę z gniazdka sieciowego
(Nie dotyczy czyszczenia dodatkowego górnych wałków punkt 6).
Stosowanie niewłaściwych substancji smarujących stwarza zagrożenie pożarowe.
Wszelkich napraw urządzenia może dokonywać jedynie osoba uprawniona.
Urządzenie należy obsługiwać zawsze zgodnie z ogólnymi zasadami BHP.
Nie wolno pozostawiać włączonego urządzenia bez nadzoru.
Po zakończeniu pracy należy wyłączyć urządzenie wyłącznikiem głównym.
Dopuszcza się normalną pracę laminatora tylko z założoną osłoną rewizyjną.
UWAGA! Należy zachować ostrożność - obrotowe elementy grzejne mogą
wciągnąć luźne części garderoby, biżuterię itp.

Instrukcja obsługi Coveratora 330
11
Zalecenia producenta:
Używaj tylko materiałów eksploatacyjnych dostarczonych przez producenta.
Odłącz urządzenie z sieci zawsze kiedy je przenosisz lub kiedy nie używasz przez
dłuższy okres czasu.
Przy wkładaniu dokumentu do szczeliny podawczej, nigdy NIE wkładaj go otwartym
brzegiem. Grozi to wciągnięciem folii w wałki urządzenia.
Zaleca się aby przed włożeniem okładki do szczeliny podawczej, owinąć ją w papier
o nieco większym formacie niż sama okładka (tzw. „carrier”). Zapobiegnie to
ewentualnemu pobrudzeniu wałków przez wyciśnięty z krawędzi okładki klej.
Gramatura „carriera” powinna wynosić 40 gr/m² (zbyt gruby spowoduje
niedolaminowanie okładki).
W razie zablokowania się folii laminacyjnej w szczelinie podawczej użyj funkcji
„rewers”.
Okładka przeznaczona do laminowania nie może zawierać żadnych elementów
metalowych (spinacze, zszywki itp.).
Budowa urządzenia

Instrukcja obsługi Coveratora 330
12
Obsługa:
1. Uruchomienie urządzenia Coverator
Włóż wtyczkę do kontaktu i włącz przełącznik zasilania znajdujący się
z prawej strony urządzenia, rozpocznie się proces nagrzewania urządzenia.
Po około 8 minutach laminator osiągnie temperaturę roboczą (zapali się zielona
dioda LED sygnalizująca gotowość do laminacji). Urządzenia jest gotowe do pracy.
Ustaw rączkę korekcji wygięcia okładki w lewo, pozycja „normal”.
2. Opis sygnalizacji LED
Z prawej strony urządzenia znajdują się dwie diody LED sygnalizujące jego aktualny
stan:
Czerwona dioda świeci światłem ciągłym a zielona jest nieaktywna - oznacza, że
urządzenie jest włączone i działa poprawnie, ale grzałki nie osiągnęły
odpowiedniej temperatury.
Czerwona i zielona dioda świecą światłem ciągłym - oznacza, że grzałki osiągnęły
prawidłową temperaturę, krótki, pojedynczy sygnał dźwiękowy informuje
o gotowości urządzenia do użycia.
Czerwona dioda pulsuje a zielona jest nieaktywna - oznacza, że któryś z czujników
temperatury jest uszkodzony.
Czerwona dioda świeci światłem ciągłym, zielona dioda pulsuje oraz dodatkowo
słychać alarm dźwiękowy. - oznacza przegrzanie grzałki lub uszkodzenie
regulatora temperatury. Urządzenie wymaga naprawy.
3. Przygotowanie do laminacji
Za pomocą trymera przytnij wydruk, który zamierzasz laminować według szablonu
znajdującego się w pudełku z okładkami O.Pouch Cover.
Przycięty do odpowiednich rozmiarów wydruk umieść w okładce O.Pouch Cover
tak, by cała jego powierzchnia znalazła się pod folią laminacyjną.
Okładkę, wraz z umieszczonym w niej wydrukiem, owiń w papier o nieco większym
formacie niż sama okładka (tzw. „carrier”).
4. Laminacja okładek O.Pouch Cover
Powoli, do oporu wsuń okładkę zgrzaną stroną do szczeliny podawczej urządzenia.
Włożenie okładki do szczeliny podawczej zostaje potwierdzone pojedynczym
sygnałem dźwiękowym.
Zalaminowana okładka po przejściu przez wałki laminatora wysunie się ze
szczeliny znajdującej się z tyłu urządzenia.
Potrójny sygnał dźwiękowy oznacza zakończenie procesu laminacji.
Wyjmij okładkę niezwłocznie po zakończeniu laminacji. Pozostawienie okładki
w laminatorze może spowodować jej uszkodzenie.

Instrukcja obsługi Coveratora 330
13
W momencie gdy papier ( „carrier” ) w trakcie laminacji zsunie się
z okładki (lub w ogóle nie zostanie użyty), istnieje ryzyko zabrudzenia wałków.
W takim przypadku należy niezwłocznie przepuścić przez urządzenie owiniętą
w papier offsetowy (80 g/m²) twardą okładkę. Czynność powtórz 3 – 5 razy,
wymieniając w międzyczasie pobrudzony papier.
W przypadku gdy okładka po zalaminowaniu będzie nienaturalnie wykrzywiona,
należy skorygować pozycję płyty prostującej okładkę poprzez przesunięcie rączki
korekcji wygięcia okładki w lewo bądź w prawo.
Jeśli okładka wygięta jest do dołu należy dźwignię przesunąć w prawo.
Jeśli okładka wygięta jest do góry należy dźwignię przesunąć w lewo.
Ewentualne zabrudzenia zalaminowanej okładki należy usunąć za pomocą szmatki
nasączonej środkiem czyszczącym, na przykład NOVOGUM firmy FujiFILM.
Dla określenia odpowiedniej pozycji dźwigni należy przeprowadzić indywidualne
próby przy kolejnych laminacjach okładek.
5. Laminacja okładek POBC
Za pomocą Coveratora istnieje możliwość laminowania wydruków do okładek POBC
oraz samych okładek.
Przy laminowaniu wydruku do okładki POBC pamiętaj aby folię laminacyjną
położyć na twardej tekturze a na folię kartkę papieru (o nieco większych wymiarach
niż folia).
Przy laminowaniu całej okładki pamiętaj aby na jej miękką część nałożyć np. kartkę
papieru. Ochroni to wałki Coveratora przed klejem, którzy może wypłynąć z samej
okładki.
W momencie gdy papier ( „carrier” ) w trakcie laminacji zsunie się
z okładki (lub w ogóle nie zostanie użyty), istnieje ryzyko zabrudzenia wałków.
W takim przypadku należy niezwłocznie przepuścić przez urządzenie owiniętą
w papier offsetowy (80 g/m²) twardą okładkę. Czynność powtórz 3 – 5 razy,
wymieniając w międzyczasie pobrudzony papier.

Instrukcja obsługi Coveratora 330
14
6. Czyszczenie laminatora i wałków.
UWAGA! Czyszcząc powierzchnię urządzenia zawsze odłącz je z prądu!
Zabrudzoną obudowę przetrzyj miękką ściereczką nasączoną wodą lub delikatnym
detergentem; nie zanurzaj urządzenia do wody; nie używaj
benzenu, alkoholu, rozpuszczalnika do farb czy benzyny - użycie tych środków
może spowodować trwałe zniszczenie powłoki lakierniczej.
W razie zabrudzenia powierzchni okładki po laminacji, należy przeczyścić wałki
urządzenia. Owiń twardą okładkę w papier offsetowy (80 g/m²) i tak przygotowaną
okładkę umieść w szczelinie podawczej Coveratora. Powtórz czynność 3 do 5 razy,
wymieniając w międzyczasie pobrudzony papier.
Dodatkowe czyszczenie górnych wałków (dodatkowe czyszczenie należy wykonać
gdy nie pomogło czyszczenie za pomocą papieru offsetowego).
Urządzenia posiada osłonę rewizyjną umożliwiającą dostęp do górnych wałków.
W celu otwarcia osłony rewizyjnej podnieś ja do góry - osłona zamocowana jest na
magnesach .
Górne wałki można przeczyścić miękką szmatka nasączoną alkoholem.
Czyszczenie należy wykonać przy włączonym urządzeniu tylko gdy wałki są zimne
(maksymalna temperatura 600C).
Uwaga! Urządzenie zawiera elementy obrotowe, które mogą spowodować
wciągnięcie luźnych elementów garderoby, włosów itp. Należy zachować
ostrożność.
W przypadku niebezpieczeństwa natychmiast wyłącz zasilanie urządzenia
wyłącznikiem głównym.
Jeśli folia została wciągnięta w wałki, czyszczenie nie przyniosło spodziewanego
efektu lub laminator nie działa poprawnie, skontaktuj się z autoryzowanym punktem
serwisowym.

Instrukcja obsługi Coveratora 330
15
Dane Techniczne:
System grzewczy : gorące wałki +płyta grzejna
Temperatura: 145°C
Czas nagrzewania: 8 min
Prędkość laminacji: 240 mm/min
Moc: 1,1 kW
Prąd znamionowy: 8 A
Napięcie sieciowe: 230 V 50/60 Hz
Waga netto: 10 kg
Waga brutto: 11,5 kg
Wymiary (w x S x G) : 122 x 525 x 281 mm
Zużyty sprzęt oznakowany niniejszym symbolem nie może być umieszczany i usuwany łącznie z innymi
odpadami, w tym odpadami komunalnymi. Obowiązkiem użytkownika jest przekazanie zużytego
produktu do punktu zbiórki w celu recyklingu odpadów powstałych ze sprzętu elektrycznego
i elektronicznego. Właściwa segregacja i selektywna zbiórka odpadów zużytego sprzętu zmniejsza
negatywne oddziaływanie substancji niebezpiecznych, które mogą się w nim znajdować, na środowisko
naturalne i zdrowie człowieka. W celu uzyskania bardziej szczegółowych informacji dotyczących
utylizacji zużytego sprzętu prosimy skontaktować się z przedstawicielem władz lokalnych, dostawcą
usług utylizacji odpadów lub punktem sprzedaży, gdzie nabyto produkt. Zapewniając prawidłową
utylizację sprzętu pomagamy chronić środowisko naturalne.
10.10.2017
OPUS Sp. z o.o. ● ul. Toruńska 8 ● 44 – 122 Gliwice ● www.opus.pl
Other manuals for Coverator 330
1
Table of contents
Languages:
Other Opus Laminator manuals

Opus
Opus cityLAM A3 User manual

Opus
Opus Coverator 330 User manual

Opus
Opus rolLAM 380 User manual

Opus
Opus popLAM A3 User manual

Opus
Opus AutoLAM A3 User manual

Opus
Opus everLAM 330LCD User manual

Opus
Opus SpeedLAM A3 User manual

Opus
Opus uniLAM A3 User manual

Opus
Opus uniLAM A4 User manual

Opus
Opus Coverator User manual

Opus
Opus popLAM A3 User manual

Opus
Opus rolLAM 380 User manual

Opus
Opus uniLAM A3 User manual

Opus
Opus ProfiLAM A2 User manual

Opus
Opus uniLAM A4 User manual

Opus
Opus cityLAM A4 User manual

Opus
Opus uniLAM A3 User manual

Opus
Opus uniLAM A4 User manual

Opus
Opus RolLAM 720 Super User manual

Opus
Opus RolLAM 720 User manual