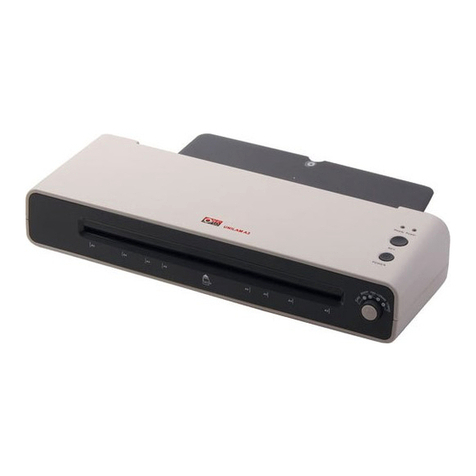
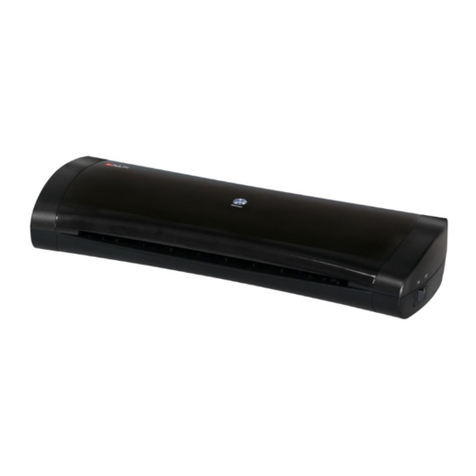
Opus uniLAM A4 User manual


2
HEALTH & SAFETY PRECAUTIONS
•Before operating the equipment please read the Health & Safety precautions, manufacturer’s
recommendations and the operation manual.
•The operation manual should be easily available at any time for the operator.
•The equipment should be installed on a sturdy level surface near a 220-240 V, 50 - 60 Hz
AC correctly earth socket.
The equipment:
•Should be protected against dust and moisture.
•Must not be placed near a heating or ventilation unit.
•Should not be used in vicinity of inflammable liquids or gases.
•Power supply cable must be protected against damage.
•Must not be used to pull or move the equipment or to remove the plug from the socket.
•During long standstill or moving the equipment and to ensure that it is turned o com-
pletely, remove the plug from the mains socket.
•Should be kept away and out of the reach from children and animals.
•Must not be used for any other purposes, than those indicated in the instruction manual.
DANGER!
•The equipment contains electrically driven rollers. Ensure long hair, loose jewellery, ties
and other loose clothing are kept away from the entry slot they could get entangled in
the rollers.
•It is necessary to check and supervise, if the equipment is operated and used correctly, if
there should be a malfunction, you must contact the dealer or service team.
•The equipment must not be located outside and should be operated in a room tempera-
ture higher than +8 °C.
•Before removing any covers from the equipment, remove the power plug from
a mains socket.
•Using inappropriate lubricants such as petroleum based cleaning materials, can cause a
fire HAZARD.
•Only authorized and qualified sta may carry out any repairs during the Guarantee/War-
ranty period.
•The equipment must be operated in accordance with the general Health & Safety rules.
•Do not leave the equipment operating without an operator.
•After use turn the equipment o by the switch on unit, next remove the plug from a socket
if not in regular use.
• HAZARD Warning the top of the laminator gets hot during use.

OPUS uniLAM A4 Basic • User guide EN
3
MANUFACTURER'S RECOMMENDATIONS
•Use only recommended supplies and accessories from OPUS (see www.opus.pl)
•If the equipment is switched on and is not operated for more than one hour, it could get
overheated in such an instance, to avoid bad quality laminating put 1 or 2 sheet of A4
paper through in order to cool the rollers down.
•Always insert the pouch with the closed end first into the laminator. Putting the open
end first can cause bubbling and the film may rap and get stuck round the rollers inside
the laminator.
•When cutting tailor made shapes from the pouch it can make the rollers sticky and dirty
from the glue which can cause the pouch to wind round the rollers, you must use a car-
rier. ASK YOUR DEALER FOR INFORMATION.
•Remove any sharp or metal elements from the document like (staples & paper clips, etc.)
before laminating.
WARNING!
THE EQUIPMENT CONTAINS HEATING ELEMENTS, BE AWARE OF HIGH TEMPERATURES!
!! BURN HAZARD !!
WARNING!
THE ROLLERS START TURNING WHEN YOU SWITCH ON THE LAMINATOR AND RUN UNTIL YOU
SWITCH OFF.
WARNING!
NOT COMPLIANCE WITH THE RULES AND RECOMMENDATIONS ABOVE CAN VOID THE GUARAN
TEE/WARRANTY

4
OPERATION
HOT LAMINATING
• Connect the laminator to the power supply outlet.
• Slide the switch (2) to HOT position to start the heat up process. The indicator (3) will light
up in RED.
• After 3-5 minutes heating process finishes and the LED (3) turns BLUE, now you are ready
to laminate.
• Choose size and thickness of the foil pouch from 100 μm (2 x 50 μm ) to 160 μm (2 x 80
μm).
• Place the item to be laminated into the laminating pouch, centring it with 3-5mm all
round the item.
• Insert the sealed edge of the laminating pouch into the centre straight of the laminating
slot.
•The laminating pouch will pass through the laminator and exit at the back. Remove the
laminating pouch when it has stopped moving.
•Slide the switch to OFF after use.
•Disconnect the laminator from the power supply outlet.
COLD LAMINATING
• Connect the laminator to the power supply outlet.
• Slide the switch (2) to COLD to start the laminating process. The indicator (3) will light up
in RED.
IMPORTANT! Cold laminating requires the laminator to be cooled down for about 2 hours
when it is switched from hot to cold laminating.
• Only use laminating pouches that are expressly suitable for cold laminating.
• Place the item to be laminated into the laminating pouch, centring it.
• Insert the sealed edge of the laminating pouch into the centre straight of the laminating
slot.
• The laminating pouch will pass through the laminator and exit at the rear of the lamina-
tor. Remove the laminating pouch when it has stopped moving.
LAYOUT
Laminating Insert
Rear Exit ABS Switch
Slide Switch Indicator
Part Names & Functions
Operation Guide
Maintenance
1. After using the machine, pls plug off the machine and pls don't cover up the small holes so as to
let out the heat.
2. Don't place heavy or sharp materials onto the machine in order not to distort or damage the machine.
3. Before and after laminating, you may insert 1pc of white paper so as to take out the possible dust in
the roller.
4. Don't clean the surface of the machine with corrosive solvent. Don't drop any water inside the
machine when cleaning the machine with a wet cloth, otherwise, it may lead to problems in PCB.
5. If the machine is unused for a long time, pls cover up the machine with a plastic or cloth to
get rid of the dust.
IMPORTANT
Do not touch the top of the laminator during use. The top of the laminator gets very hot during use
and takes approx. 3-4 hours to cool down after use.
Do not laminate any heat-sensitive material e.g. thermo-fax paper in this mode.
These materials are only suitable for cold laminating.
(A) HOT LAMINATING
OFF
COLD HOT
HO TLAMINAT IN G
OFF
COLD HOT
COL DL AMINATING
1. Connect the laminator to the power supply outlet.
2. Slide the switch to HOT to start the heating process. The indicator
will light up in RED.
3. After 3-5 minutes heating process, the indicator will light up in
BLUE, meaning the laminator has reached the correct operating
temperature and is ready to laminate.
4. Place the item to be laminated into the laminating pouch, centring
it within the pouch alongside the pre-sealed edge. Leave a margin
of 3-5mm all round the item.
* Do not use pouches thicker than 160micron(2X80micron per side) or less than
100micron(2X50micron per side).
(B) COLD LAMINATING
IMPORTANT
Cold laminating requires the laminator to be cooled down for about 2 hours when it is
switched from hot to cold laminating.
CLEARING ABLOCKAGE
This laminator is equipped with an anti-blockage function to resolve any
blockage of the laminating items during laminating.
1. Slide the switch to OFF and disconnect the laminator from the power supply outlet immediately when it’s
jammed. Cool the laminator down briefly.
2. Slide and hold the anti-blockage switch (ABS) on the back of the laminator as in the direction indicated by
the arrow sign, and pull the jammed item completely out from the laminator opening.
ABS Switch
ABS
1. Connect the laminator to the power supply outlet.
2. Slide the switch to COLD to start the laminating process. The indicator will light up in RED.
3. Insert the cold laminating pouches straightly into the centre of the laminator opening. Only use laminating
pouches that are expressly suitable for cold laminating.
4. The laminating pouch will pass through the laminator and exit at the rear of the laminator. Remove the
laminating pouch when it has stopped moving.
5. Slide the switch to OFF after use.
6. Disconnect the laminator from the power supply outlet.
Attentions for Operation
In order to use the machine properly and avoid causing any damage or loss to yourselves and others,
we use diagrams and icons in this operation manual to illustrate. Kindly pls refer to following form
for detailed meanings. Pls make sure that following form is well understood before you read the
rest contents in this manual.
Attentions!
Don't place any other substance
onto the machine.
* It may be hurt.
Don't disassemble, rebuild or repair
the machine on your own.
* This may cause an electric shock or
accidental hurt.
Pls make sure that you use the correct
voltage, and don't use several power
cords.
* This may cause an electric shock or
fire disaster.
When the machine is working,
don't touch the covers;
* Maybe you will get hurt.
If the machine is not used for a long
time, pls plug off the machine and in
sert the power cord into the power cord slot.
* This may cause an electric shock or fire disaster.
If the machine is over preheated, or there is
a strange smell, or there is a paper jam,
pls stop using the machine and plug it off
immediately.
* This may cause an electric shock or fire
disaster.
5. Insert the sealed edge of the laminating pouch straightly into the centre of the laminator opening.
6. The laminating pouch will pass through the laminator and exit at the rear of the laminator.
Remove the laminating pouch when it has stopped moving.
7. Some sorts of paper do not laminate evenly, or appear somewhat cloudy. In such cases the lamination
can be fed through the laminator a second time and the
lamination process repeated.
8. Slide the switch to OFF after use.
9. Disconnect the laminator from the power supply outlet.
6
123
4
5
1. Lamination slot
2. Three position switch COLD/OFF/HOT
3. LED indicator
4. Anti-block system ABS
5. Housing
6. Exit
OPUS uniLAM A4 Basic • User guide EN
Malfunction Cause Remedy
When the equipment LED
stays blue, the laminating
material does not come out
from the exit for a long time
or there is a noise as well
as a bad smell.
Improper use of laminating film,
such as: uneven laminated edges
on the film which
makes the roller sticky with glue;
you left to much space at the edges
of the pouch; laminating pouch too
thick. Glue on the rollers.
Please switch o the power and
unplug the machine, pull out the
jammed pouch from slot:
If there is still any problem, Contact
the service centre.
There is a barrier at the
rear exit.
The power LED not on. The machine is not yet plug in. Check and make sure if the machi-
ne is plug in and the power switch
on. If still not working Contact the
service centre or your supplier.
The power switch is not switched
on.
The main fuse is broken.
5
• Slide the switch (2) to OFF after use.
• Disconnect the laminator from the power supply outlet.
CLEARING A BLOCKAGE
This laminator is equipped with an anti-blockage function to resolve any blockage of the
laminating items during laminating.
1. Slide the switch to OFF and disconnect the laminator from the power supply outlet
immediately when it’s jammed. Cool the laminator down briefly.
2. Slide and hold the anti-blockage switch ABS (4) on the back of the laminator as in the
direction indicated by the arrow sign, and pull the jammed item completely out from the
laminator opening.
MAINTENANCE AND SERVICE
• After use, disconnect the device from the power supply. DO NOT cover and leave room for
ventilation openings.
• Before and after laminating, insert one sheet of white paper to remove any dirt on the
rollers.
• When cleaning the surface of the device, always disconnect it from the power supply. Do
not use solvents or petroleum based products for cleaning or get the unit wet, as this may
damage the laminator.
• If the foil has been drawn into the rollers or the laminator does not work properly, contact
an authorized service center.
• If the device is not used for a long time, cover it with a protective cover from dust.

6
• Heating system:.....................................................................................2 rollers
• Preheating time:..............................................................................3-5 minutes
• Maximum pouch thickness:..........................................................160 μm (Microns)
• Laminating width:.................................................................................230 mm
• Laminating speed:.........................................................................230 mm / min
• Power voltage:.................................................................AC 220-240 V, 50 / 60 Hz
• Power load:............................................................................................250 W
• Rated current:............................................................................................1.1 A
• Operating time:........................................................30 minutes on, 30 minutes o
• Dimensions:...................................................................H 66 x W 358 x D 120 mm
• Net weight:............................................................................................1.19 kg
• Gross weight:.........................................................................................1.69 kg
Equipment and products marked with this symbol cannot be deposed together
with normal or municipal waste. The user is required to take their used product
to a collection point for recycling of waste electrical and electronic equipment.
Proper segregation of used equipment reduces the negative impact of haz-
ardous substances that may be in there, in to the environment which could
impact, human and wild life health. For more detailed information concerning
the disposal of used equipment, please contact your local authority, waste dis-
posal service or the point of sale where you purchased the product. By ensur-
ing proper disposal of equipment we are helping to protect the environment,
humanity and wild life health.
In case of any other problems switch o the equipment, remove the plug from
a socket and contact the Dealer or service team.
6 TECHNICAL DATA
15.11.2018 OPUS Sp. z o.o. ● ul. Toruńska 8 ● 44 – 122 Gliwice ● Poland ● www.opus.pl

OPUS uniLAM A4 Basic • Instrukcja obsługi PL
Instrukcja obsugi
PL
OPUS uniLAM A4 Basic
7

8
ZASADY BEZPIECZEŃSTWA
•Przed rozpoczęciem pracy z urządzeniem, należy zapoznać się z zasadami bezpieczeństwa,
zaleceniami producenta i instrukcją obsługi. Instrukcję należy zachować i korzystać z niej w
przypadku jakichkolwiek wątpliwości dotyczących obsługi urządzenia.
•Urządzenie należy ustawić na stabilnym podłożu w pobliżu gniazdka o napięciu 220-240V,
50 / 60 Hz.
•Urządzenie należy chronić przed wilgocią i kurzem.
•Nie wolno ustawiać urządzenia w pobliżu urządzeń grzejnych lub wentylacyjnych.
•Nie wolno używać urządzenia w pobliżu łatwopalnych gazów lub cieczy.
•Należy chronić przewód zasilający urządzenie przed uszkodzeniem. Nie używać przewodu do
przenoszenia urządzenia i wyciągania wtyczki z gniazdka.
•Urządzenie należy trzymać poza zasięgiem dzieci i zwierząt.
•Urządzenie zawiera elementy obrotowe, które mogą spowodować wciągnięcie luźnych ele-
mentów garderoby, włosów itp. Należy zachować ostrożność.
•Nie wolno używać urządzenia do innych celów niż określone w instrukcji obsługi.
•Należy kontrolować sprawność urządzenia. W przypadku zauważenia jakichkolwiek niepra-
widłowości w pracy, należy skontaktować się z serwisem.
•Urządzenie jest przeznaczone wyłącznie do pracy w pomieszczeniach zamkniętych, w tem-
peraturze powyżej 8°C.
•Przed zdjęciem jakiejkolwiek osłony, należy wyjąć wtyczkę z gniazdka sieciowego.
•Stosowanie niewłaściwych substancji smarujących stwarza zagrożenie pożarowe.
•Wszelkich napraw urządzenia może dokonywać jedynie osoba uprawniona.
•Urządzenie należy obsługiwać zawsze zgodnie z ogólnymi zasadami BHP.
•Nie wolno pozostawiać włączonego urządzenia bez nadzoru.
•Po zakończeniu pracy należy wyłączyć urządzenie wyłącznikiem głównym ustawiając go
w pozycji OFF lub wyłączyć z sieci, należy pamiętać, że całkowite wyłączenie urządzenia
następuje po wyciągnięciu wtyczki z gniazda sieciowego.
•Uwaga górna powierzchnia laminatora nagrzewa sie podczas pracy. Ryzyko oparzenia.

OPUS uniLAM A4 Basic • Instrukcja obsługi PL
9
ZALECENIA PRODUCENTA
•Używaj tylko sprawdzonych materiałów eksploatacyjnych firmy OPUS.
•Jeśli laminator jest włączony i nie był używany przez ponad godzinę, może nastąpić jego
zbytnie nagrzanie. Aby uniknąć niezadowalających efektów laminowania, będących na-
stępstwem przegrzania, włóż do szczeliny laminatora kartkę formatu A4, aby usunąć nagro-
madzone ciepło, zanim zaczniesz proces laminowania.
•Przy wkładaniu dokumentu do szczeliny podawczej, nigdy NIE wkładaj go otwartym brze-
giem. Grozi to wciągnięciem folii w wałki urządzenia.
•W razie zablokowania się folii laminacyjnej w szczelinie podawczej użyj przycisku systemu
antyblokującego ABS, a następnie wyciągnij dokumentację.
•Nie wolno używać folii przycinanej indywidualnie, gdyż może to spowodować trudne do
usunięcia zabrudzenia wałków lub nawinięcie się folii na wałki.
•Dokument przeznaczony do laminowania nie może zawierać żadnych elementów metalo-
wych (spinacze, zszywki itp.).
•Uwaga!!! Urządzenie zawiera elementy grzejne, należy zachować ostrożność.
UWAGA!
NIESTOSOWANIE SIĘ DO POWYŻSZYCH ZALECEŃ MOŻE DOPROWADZIĆ DO UTRATY
GWARANCJI.

10
BUDOWA URZĄDZENIA
4 OBSŁUGA URZĄDZENIA
Laminacja na gorąco
• Podłącz laminator do zasilania.
• Przełącznik trybu pracy (2) ustaw w pozycji HOT - grzanie. Wskaźnik gotowości (3) zapali
się na czerwono.
• Po około 3 - 5 minutach wskaźnik gotowości (3) zapali się na niebiesko - urządzenie
jest gotowe do pracy.
• Wybierz odpowiednią grubość i rozmiar folii laminacyjnej w przedziale od 100 μm
(2 x 50 μm na stronę) do 160 μm (2 x 80μm na stronę).
• Umieść dokument centralnie wewnątrz foliowej kieszeni.
• Przygotowany dokument z folią laminacyjną wsuń do szczeliny podawczej (1), laminacja
rozpocznie się. UWAGA! Folię laminacyjną zawsze należy wprowadzać do laminatora
zamkniętym brzegiem!
• Folia wraz z dokumentem przesunie się wewnątrz laminatora i zostanie wysunięta
po drugiej stronie urządzenia, odczekaj 2-3 sekundy aby uniknąć poparzenia i odbierz
zalaminowany dokument→ laminacja jest zakończona.
• Po zakończeniu laminacji przełącznik trybu pracy (2) ustaw w pozycji OFF wyłączony,
a następnie odłącz urządzenie od zasilania.
Laminacja na zimno
• Podłącz laminator do zasilania.
• Przełącznik trybu pracy (2) ustaw w pozycji COLD - laminacja na zimno. Wskaźnik
gotowości (3) zapali się na czerwono.
Uwaga! Jeżeli urządzenie zostało przełączone z trybu HOT (grzanie) na COLD (laminacja
na zimno) należy odczekać ok 2h do czasu całkowitego schłodzenia się urządzenia.
• Używaj wyłącznie folii przeznaczonej do zimnej laminacji.
• Umieść dokument centralnie wewnątrz foliowej kieszeni.
Laminating Insert
Rear Exit ABS Switch
Slide Switch Indicator
Part Names & Functions
Operation Guide
Maintenance
1. After using the machine, pls plug off the machine and pls don't cover up the small holes so as to
let out the heat.
2. Don't place heavy or sharp materials onto the machine in order not to distort or damage the machine.
3. Before and after laminating, you may insert 1pc of white paper so as to take out the possible dust in
the roller.
4. Don't clean the surface of the machine with corrosive solvent. Don't drop any water inside the
machine when cleaning the machine with a wet cloth, otherwise, it may lead to problems in PCB.
5. If the machine is unused for a long time, pls cover up the machine with a plastic or cloth to
get rid of the dust.
IMPORTANT
Do not touch the top of the laminator during use. The top of the laminator gets very hot during use
and takes approx. 3-4 hours to cool down after use.
Do not laminate any heat-sensitive material e.g. thermo-fax paper in this mode.
These materials are only suitable for cold laminating.
(A) HOT LAMINATING
OFF
COLD HOT
HO TLAMINAT IN G
OFF
COLD HOT
COL DL AMINATING
1. Connect the laminator to the power supply outlet.
2. Slide the switch to HOT to start the heating process. The indicator
will light up in RED.
3. After 3-5 minutes heating process, the indicator will light up in
BLUE, meaning the laminator has reached the correct operating
temperature and is ready to laminate.
4. Place the item to be laminated into the laminating pouch, centring
it within the pouch alongside the pre-sealed edge. Leave a margin
of 3-5mm all round the item.
* Do not use pouches thicker than 160micron(2X80micron per side) or less than
100micron(2X50micron per side).
(B) COLD LAMINATING
IMPORTANT
Cold laminating requires the laminator to be cooled down for about 2 hours when it is
switched from hot to cold laminating.
CLEARING ABLOCKAGE
This laminator is equipped with an anti-blockage function to resolve any
blockage of the laminating items during laminating.
1. Slide the switch to OFF and disconnect the laminator from the power supply outlet immediately when it’s
jammed. Cool the laminator down briefly.
2. Slide and hold the anti-blockage switch (ABS) on the back of the laminator as in the direction indicated by
the arrow sign, and pull the jammed item completely out from the laminator opening.
ABS Switch
ABS
1. Connect the laminator to the power supply outlet.
2. Slide the switch to COLD to start the laminating process. The indicator will light up in RED.
3. Insert the cold laminating pouches straightly into the centre of the laminator opening. Only use laminating
pouches that are expressly suitable for cold laminating.
4. The laminating pouch will pass through the laminator and exit at the rear of the laminator. Remove the
laminating pouch when it has stopped moving.
5. Slide the switch to OFF after use.
6. Disconnect the laminator from the power supply outlet.
Attentions for Operation
In order to use the machine properly and avoid causing any damage or loss to yourselves and others,
we use diagrams and icons in this operation manual to illustrate. Kindly pls refer to following form
for detailed meanings. Pls make sure that following form is well understood before you read the
rest contents in this manual.
Attentions!
Don't place any other substance
onto the machine.
* It may be hurt.
Don't disassemble, rebuild or repair
the machine on your own.
* This may cause an electric shock or
accidental hurt.
Pls make sure that you use the correct
voltage, and don't use several power
cords.
* This may cause an electric shock or
fire disaster.
When the machine is working,
don't touch the covers;
* Maybe you will get hurt.
If the machine is not used for a long
time, pls plug off the machine and in
sert the power cord into the power cord slot.
* This may cause an electric shock or fire disaster.
If the machine is over preheated, or there is
a strange smell, or there is a paper jam,
pls stop using the machine and plug it off
immediately.
* This may cause an electric shock or fire
disaster.
5. Insert the sealed edge of the laminating pouch straightly into the centre of the laminator opening.
6. The laminating pouch will pass through the laminator and exit at the rear of the laminator.
Remove the laminating pouch when it has stopped moving.
7. Some sorts of paper do not laminate evenly, or appear somewhat cloudy. In such cases the lamination
can be fed through the laminator a second time and the
lamination process repeated.
8. Slide the switch to OFF after use.
9. Disconnect the laminator from the power supply outlet.
6
123
4
5
1.Szczelina podawcza
2.Przełaczniki trybu pracy COLD/OFF/HOT
3.Wskaźnik gotowości
4.System antyblokujący ABS
5. Obudowa
6.Szczelina odbiorcza

OPUS uniLAM A4 Basic • Instrukcja obsługi PL
• Przygotowany dokument z folią laminacyjną wsuń do szczeliny podawczej (1), laminacja
rozpocznie się. UWAGA! Folię laminacyjną zawsze należy wprowadzać do laminatora
zamkniętym brzegiem!
• Folia wraz z dokumentem przesunie się wewnątrz laminatora i zostanie wysunięta
po drugiej stronie urządzenia, odbierz zalaminowany dokument→ laminacja jest
zakończona.
• Po zakończeniu laminacji przełącznik trybu pracy (2) ustaw w pozycji OFF wyłączony,
a następnie odłącz urządzenie od zasilania.
Usuwanie zablokowanego materiału
Laminator został wyposażony w funkcję umożliwiającą odblokowanie materiału, który
zablokował się podczas laminacji.
• Przełącznik trybu pracy ustaw w pozycji OFF wyłączony.
• Przełącznik systemu antyblokującego ABS znajdujący się z tyłu obudowy (4) przesuń
w prawo i przytrzymaj, a następnie wyjmij zablokowany dokument z laminatora.
KONSERWACJA I NAPRAWA LAMINATORA
• Po użyciu odłącz urządzenie od zasilania i zapewnij dostęp do otworów wentylacyjnych.
• Przed i po laminowaniu włóż 1 kartkę białego papieru w celu usunięcia ewentualnych
zabrudzeń na wałkach.
• Czyszcząc powierzchnię urządzenia zawsze odłącz je od zasilania. Do czyszczenia nie
używaj rozpuszczalników ani nie przecieraj urządzenia mokrą szmatką, gdyż może to
spowodować uszkodzenie laminatora.
• Jeśli folia została wciągnięta w wałki lub laminator nie działa poprawnie, skontaktuj się
z autoryzowanym punktem serwisowym.
• Jeśli urządzenie nie jest używane przez dłuższy czas, należy przykryć je folią
zabezpieczając je przed kurzem.
Nieprawidłowość Przyczyna Środek zaradczy
Zacięcie papieru,
wskaźnik gotowości
(3) świeci na nie-
biesko, materiał nie
wysuwa sie, wydoby-
wa się nieprzyjemny
zapach i dźwięk.
Została użyta niewłaściwa folia
laminacyjna, folia została nierówno
włożona - klej wydostał się na wałki,
dokument nie został poprawnie wło-
żony do końca folii - zbyt dużo pustej
przestrzeni lub zastosowano zbyt grubą
folię laminacyjną.
Wyłącz urządzenie przesuwając prze-
łącznik trybu pracy do pozycji OFF
- wyłączony, a następnie odłącz je
od zasilania. Usuń zacięty materiał.
Jeżeli nie rozwiąże to problemu
skontaktuj się z serwisem.
Wskaźnik gotowości
nie świeci się.
Urządzenie nie zostało podłączone do
zasilania.
Podłącz urządzenie do zasilania.
Ustaw przełącznik trybu pracy w po-
zycji HOT (grzanie) lub COLD (lamina-
cja na zimno). Jeżeli nie rozwiąże to
problemu skontaktuj się z serwisem.
Przełącznik trybu pracy znajduje się w
pozycji OFF - wyłączony.
Bezpiecznik został uszkodzony.
11
Jeśli pojawią się inne problemy, należy natychmiast wyłączyć urządzenie, wyjąć wtyczkę
z gniazda zasilającego i skontaktować się z serwisem.

• System grzewczy:....................................................................................2 wałki
• Czas nagrzewania:.............................................................................3 - 5 minut
• Maksymalna grubość folii:.........................................................................160 μm
• Szerokość laminacji................................................................................230 mm
• Prędkość laminacji:........................................................................230 mm / min
• Zasilanie:.........................................................................AC 220-240 V, 50 / 60Hz
• Moc:......................................................................................................250 W
• Prąd znamionowy:......................................................................................1,1 A
• Czas pracy:......................................................................30 min wł., 30 min wył.
• Wymiary (W x S x G):.................................................................66 x 358 x 120 mm
• Waga netto:............................................................................................1,19 kg
• Waga brutto:..........................................................................................1,69 kg
Zużyty sprzęt oznakowany niniejszym symbolem nie może być umieszczany
i usuwany łącznie z innymi odpadami, w tym odpadami komunalnymi.
Obowiązkiem użytkownika jest przekazanie zużytego produktu do punktu zbiór-
ki w celu recyklingu odpadów powstałych ze sprzętu elektrycznego i elektro-
nicznego. Właściwa segregacja i selektywna zbiórka odpadów zużytego sprzętu
zmniejsza negatywne oddziaływanie substancji niebezpiecznych, które mogą
się w nim znajdować, na środowisko naturalne i zdrowie człowieka. W celu uzy-
skania bardziej szczegółowych informacji dotyczących utylizacji zużytego sprzętu
prosimy skontaktować się z przedstawicielem władz lokalnych, dostawcą usług
utylizacji odpadów lub punktem sprzedaży, gdzie nabyto produkt. Zapewniając
prawidłową utylizację sprzętu pomagamy chronić środowisko naturalne.
15.11.2018 OPUS Sp. z o.o. ● ul. Toruńska 8 ● 44 – 122 Gliwice ● Poland ● www.opus.pl
12
6 DANE TECHNICZNE
Other manuals for uniLAM A4
2
Table of contents
Languages:
Other Opus Laminator manuals

Opus
Opus RolLAM 720 User manual

Opus
Opus Coverator 330 User manual

Opus
Opus Coverator User manual

Opus
Opus uniLAM A3 User manual

Opus
Opus cityLAM A3 User manual

Opus
Opus Coverator 330 User manual

Opus
Opus everLAM 330LCD User manual

Opus
Opus ProfiLAM A2 User manual

Opus
Opus AutoLAM A3 User manual

Opus
Opus rolLAM 380 User manual

Opus
Opus rolLAM 380 User manual

Opus
Opus popLAM A3 User manual

Opus
Opus cityLAM A4 User manual

Opus
Opus uniLAM A4 User manual

Opus
Opus AutoLAM A3 Instant User manual

Opus
Opus uniLAM A3 User manual

Opus
Opus uniLAM A3 User manual

Opus
Opus popLAM A3 User manual

Opus
Opus uniLAM A4 User manual

Opus
Opus RolLAM 720 Super User manual