9
3 Operation, settings
Use of the sensor and configuration in the system separate manual for the control unit used.
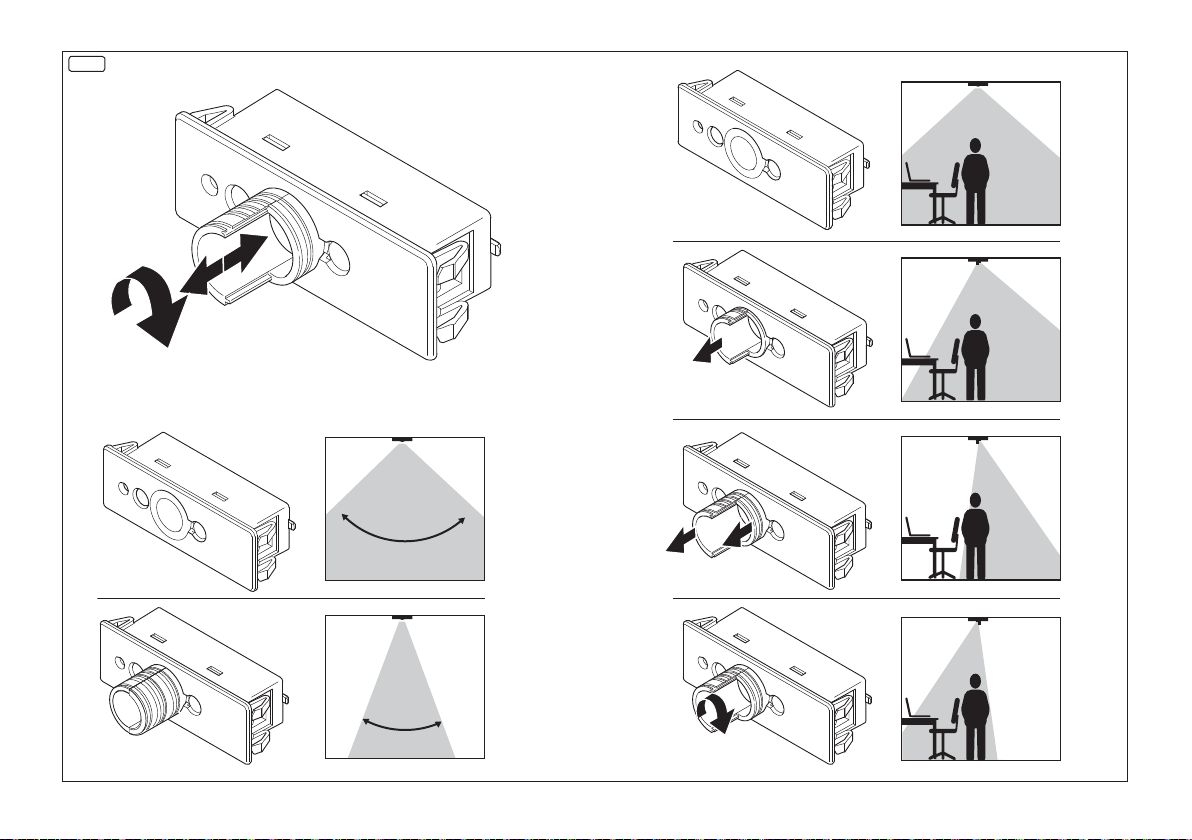
3.1 Setting the detection range for presence detection
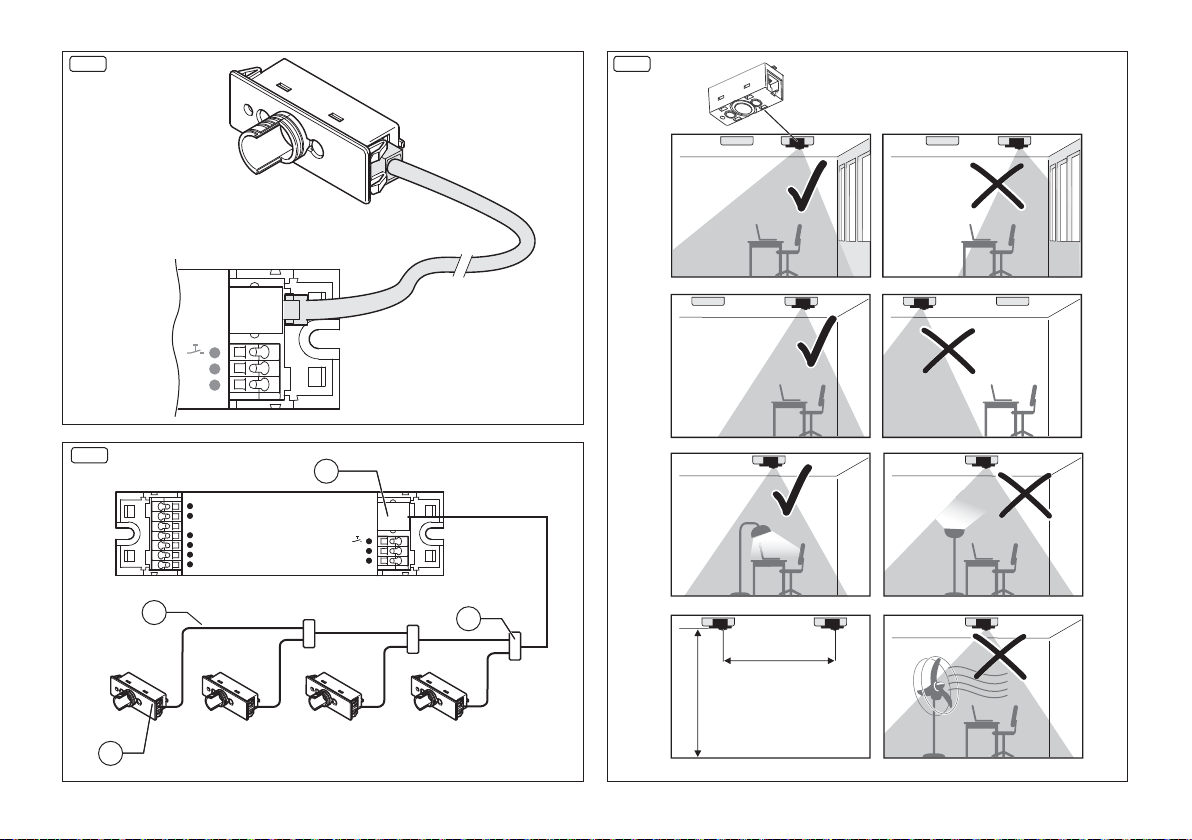
In order to use the presence detection in a targeted way, the detection range of the sensor can/
must be set independently of the spatial conditions 7.
1. Remove/insert or rotate one or both shutters where necessary.
2. By changing the shutter position, you can influence the detection range of the sensor direc-
tionally in order to prevent undesired presence detection.
3. For a quick test of the effectiveness of the settings, use the test function of the remote
control usedseparate manual for the control unit used.
3.2 Sensor button 3a
This button (2) executes different functions depending on the duration of activation.
1. Press the sensor button (SP) in order to switch the IR reception of the remote controls on
(sensor LED flashes red for 3 seconds) or off (sensor LED illuminated red for 3 seconds)
2. Press the sensor button (VLP) in order to start Auto Setup and thereby calibration.
After a 3-minute calibration, the light flashes and the automatic lighting control is started.
Functional description of Auto Setup separate manual for the control unit used.
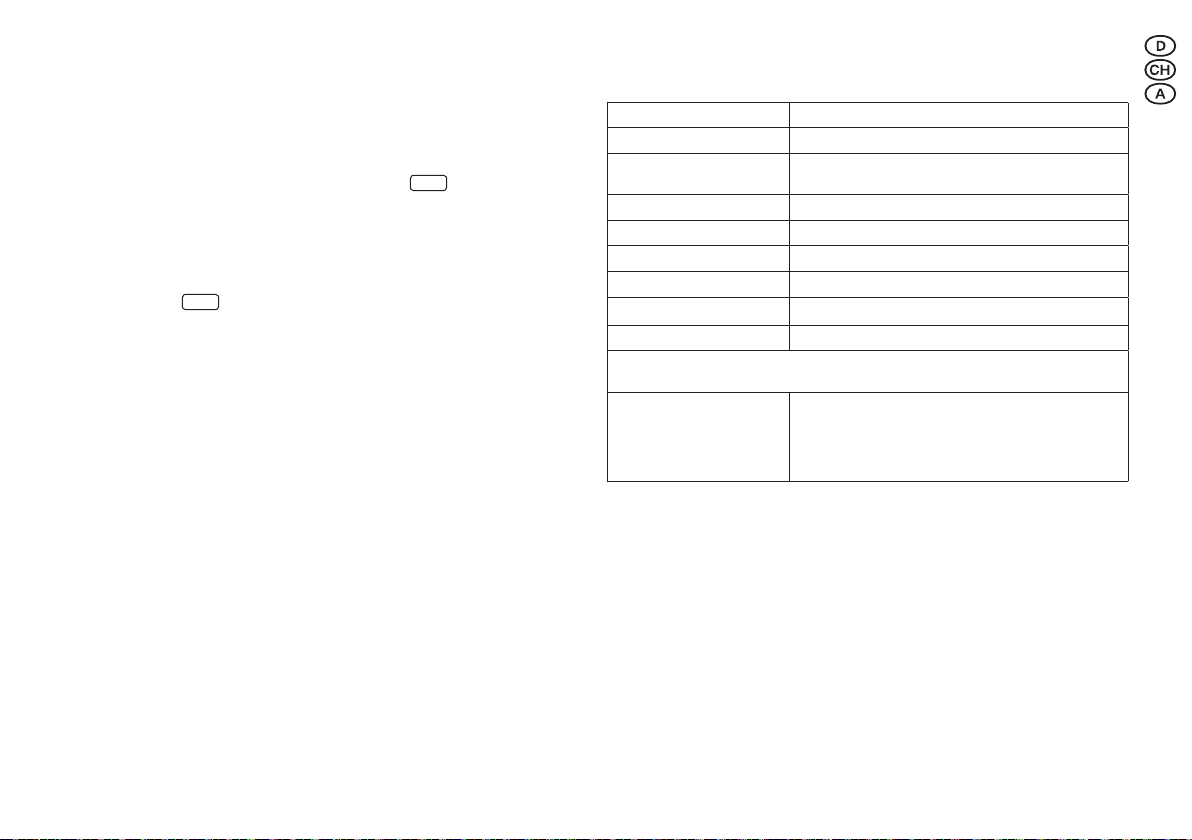
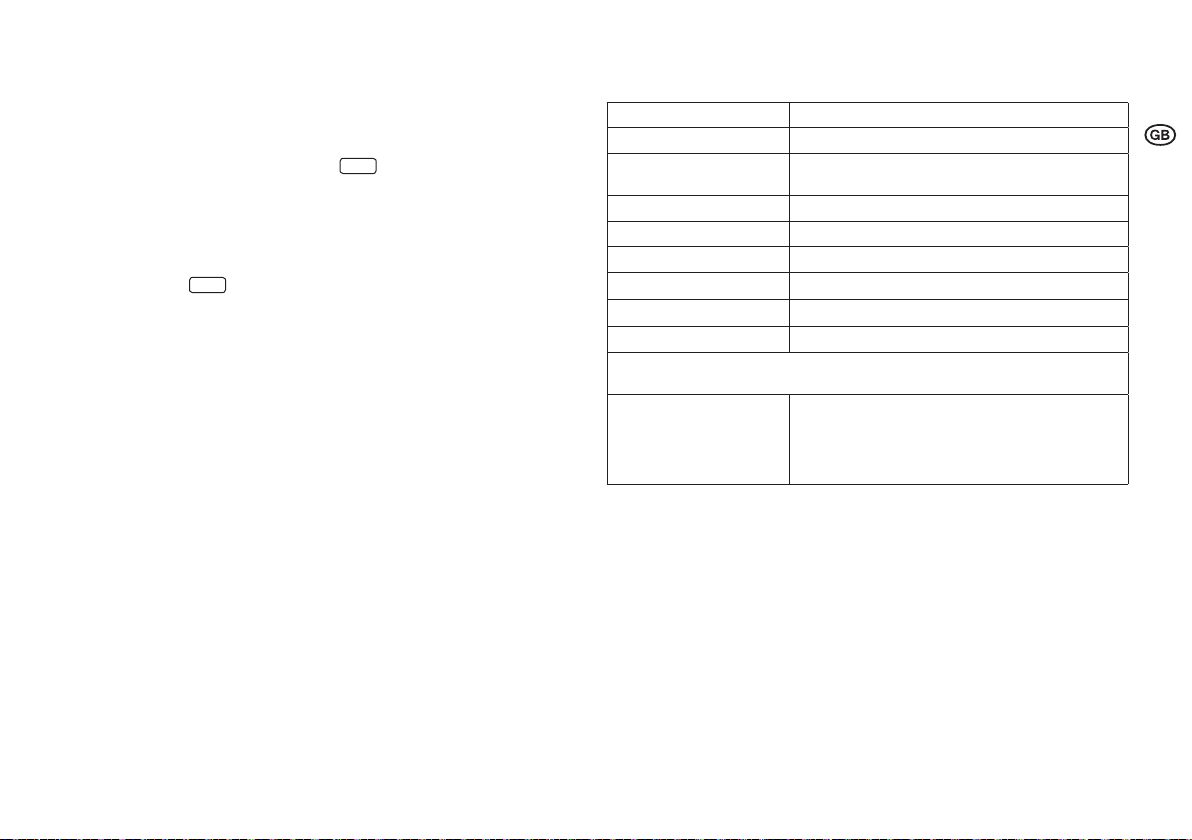
4 Technical data
Cable connection 4p4c, max. total cable length 25 m
Ambient temperature -20 °C to +50 °C (operation)
Max. cable length, sensor 25 m, ensure contact assignment 1:1
for extension/shortening
Working range, light sensor 20 - 800 lux (directly on the sensor)
Protection class IP20
CE conformity EMC acc. to EN 61547; low voltage acc. to EN 60928
Installation height max. 5.0 m
Detection range max. Ø 7.0 m
Detection angle 40° - 90°
Detection range adjustable via shutter (min. 40° - max. 90°)
Installation height 2.0 m
Installation height 2.5 m
Installation height 3.0 m
Installation height 3.5 m
Max. installation height5.0 m
Detection range Ø 1.5 m - 4.0 m
Detection range Ø 1.8 m - 5.0 m
Detection range Ø 2.0 m - 6.0 m
Detection range Ø 2.5 m - 7.0 m
Max. detection range Ø 7.0 m