Otto Bock 317L20 User manual

317L20
Gebrauchsanweisung ����������������������������������������������������������������������������������������������������������� 2
Instructions for Use �������������������������������������������������������������������������������������������������������������� 5
Instructions d‘utilisation �������������������������������������������������������������������������������������������������������� 8
Istruzioni per l’uso ���������������������������������������������������������������������������������������������������������������11
Instrucciones de uso �����������������������������������������������������������������������������������������������������������15
Manual de utilização ������������������������������������������������������������������������������������������������������������18
Gebruiksaanwijzing �������������������������������������������������������������������������������������������������������������21
Bruksanvisning �������������������������������������������������������������������������������������������������������������������25
Brugsanvisning �������������������������������������������������������������������������������������������������������������������28
Bruksanvisning �������������������������������������������������������������������������������������������������������������������31
Instrukcja użytkowania ���������������������������������������������������������������������������������������������������������33
Használati utasítás ���������������������������������������������������������������������������������������������������������������37
Návod k použití �������������������������������������������������������������������������������������������������������������������40
Kullanma talimatı �����������������������������������������������������������������������������������������������������������������43
Οδηγίες χρήσης ������������������������������������������������������������������������������������������������������������������46
Руководство по применению �����������������������������������������������������������������������������������������������50

2 | Ottobock 317L20
Deutsch
INFORMATION
Datum der letzten Aktualisierung: 2015-02-26
fLesen Sie dieses Dokument vor Gebrauch des Produkts aufmerksam durch.
fBeachten Sie die Sicherheitshinweise, um Verletzungen und Produktschäden zu
vermeiden.
fLassen Sie sich von Fachpersonal in den sachgemäßen und gefahrlosen Gebrauch des
Produkts einweisen.
fWenden Sie sich an das Fachpersonal, wenn Sie Fragen zum Produkt haben (z.B. bei
Inbetriebnahme, Benutzung, Wartung, unerwartetem Betrieb oder Vorkommnissen). Sie
nden die Kontaktdaten auf der Rückseite.
fBewahren Sie dieses Dokument auf.
1 Verwendungszweck
Verwenden Sie das Impulsladegerät 317L20 ausschließlich zum Laden von Ottobock Wechsel-
akkus 317B20.
2 Sicherheitshinweise
Achtung!
Kurzschlussgefahr
• Nehmen Sie das Gerät nicht in Betrieb, wenn es eine sichtbare Beschädigung
aufweist. Überprüfen Sie das Impulsladegerät vor jedem Einsatz auf sichtbare
Schäden. Ist eine Beschädigung aufgetreten, übergeben Sie das Gerät
unverzüglich einer Ottobock Servicestelle.
• Öffnen Sie niemals das Impulsladegerät. Reparaturen auch einzelner
Komponenten darf nur ein autorisierter Ottobock Service-Techniker vornehmen.
•Nehmen Sie die Ladestation nur in Verbindung mit dem Netzteil
757L16-2 in Betrieb.
•Betreiben Sie das Impulsladegerät nur in trockenen Räumen.
• Achten Sie darauf, dass weder feste Teilchen noch Flüssigkeit
in das Impulsladegerät eindringen können.
• Setzen Sie das Impulsladegerät niemals intensiven Rauch oder Staub,
mechanischen Vibrationen oder Stößen und keiner großen Hitze aus.
3 Lieferumfang
1 St. Ladestation
1 St. 757L16-2 Netzteil mit EU- und US-Stecker
1 St. Bedienungsanleitung

Ottobock | 3317L20
4 Beschreibung und Funktion
Mit dem Impulsladegerät 317L20 können Sie einen oder gleichzeitig zwei Wechselakkus laden.
Das Ladegerät besteht aus der Ladestation und dem Netzteil 757L16-2.
Die Wechselakkus werden mit einem impulsförmigen Ladestrom geladen. Bei Erreichen einer
oberen Spannungsgrenze wird auf Erhaltungsstrom zurückgeregelt. Die Ruhestromaufnahme ist
dabei auf einen Minimalwert reduziert. Dadurch wird der Ladewirkungsgrad verbessert und die
Lebensdauer der Wechselakkus verlängert. Zwei Leuchtdioden zeigen deren Ladezustand an.
5 Inbetriebnahme
Achtung!
Ununterbrochenes Laden über mehrere Tage kann den Wechselakku schädigen.
Vermeiden Sie Ladevorgänge von mehr als 12 Stunden und nehmen Sie den Akkumulator mög-
lichst nach jedem Ladevorgang aus dem Ladegerät.
1.Verbinden Sie das Netzteil mit der Ladestation
und schließen Sie das Netzteil an die Steckdose an.
2.Stecken Sie einen oder zwei Wechselakkus in die Ladeschächte.
Das Gerät ist betriebsbereit und der Ladevorgang beginnt, sobald die Leuchtdioden am belegten
Schacht leuchten (s. Abschnitte 6 und 7).
Die Ladezeit für einen entladenen Wechselakku beträgt zwischen 8 bis 10 Stunden (s. Abschnitt 11).
Ist der Wechselakku vollständig geladen, wird auf einen kleineren Erhaltungsstrom zurückgeregelt.
Dadurch können der oder die Wechselakkus einige Stunden im Ladegerät verbleiben.
Sie beenden den Ladevorgang, indem Sie den Wechselakku herausziehen.
6 Bedeutung der Leuchtsignale
Die Leuchtdioden zeigen Lade- und Betriebszustände der Akkumulatoren an.
Signal Bedeutung Empfehlung
Dauerleuchten Wechselakku wird geladen Wechselakku in Ladestation lassen
Gleichmäßiges Blinken
(An/Aus gleicher Intervall)
schnelles Blinken
langsames Blinken
Wechselakku weiterladen,
nicht vollständig geladen
Wechselakku vollständig geladen
und kann entnommen werden
7 Störungen der Ladefunktion und mögliche Ursachen
Wird Ihr Wechselakku nicht geladen, prüfen Sie folgende mögliche Fehlerursachen.
Signal Ursache Empfehlung
kein Leuchten bei
Inbetriebnahme
Laderät/Netzteil nicht
angeschlossen
Ladegerät defekt
Netzteil an Ladegerät/Ladege-
rät an Steckdose anschließen
Ladegerät einer Ottobock
Servicestelle übergeben

4 | Ottobock 317L20
Signal Ursache Empfehlung
zwei Wechselakkus ein-
gesteckt, nur eine Diode
leuchtet
Wechselakkus umstecken!
a) dieselbe Diode leuchtet:
Ladegerät defekt
b) die andere Diode leuchtet:
Wechselakku defekt
Ladegerät einer Ottobock
Servicestelle übergeben
Wechselakku einer Ottobock
Servicestelle übergeben
Blinken unmittelbar nach
Einstecken eines vollständig
entladenen Wechselakkus
Wechselakku defekt Wechselakku einer Ottobock
Servicestelle übergeben
kein Blinken nach mehr
als 8 Stunden Ladezeit
Wechselakku defekt Wechselakku einer Ottobock
Servicestelle übergeben
Diode leuchtet, obwohl
Wechselakku entnommen
Ladegerät defekt Ladegerät einer Ottobock
Servicestelle übergeben
8 Pegehinweise
•Halten Sie die Kontakte der Wechselakkus und des Ladegerätes sauber und fettfrei.
Verwenden Sie zur Reinigung ein trockenes Wattestäbchen.
•Reinigen Sie die Oberäche mit einem leicht feuchten Tuch.
9 Rechtliche Hinweise
Alle rechtlichen Bedingungen unterliegen dem jeweiligen Landesrecht des Verwenderlandes und
können dementsprechend variieren.
9.1 Haftung
Der Hersteller haftet, wenn das Produkt gemäß den Beschreibungen und Anweisungen in die-
sem Dokument verwendet wird. Für Schäden, die durch Nichtbeachtung dieses Dokuments,
insbesondere durch unsachgemäße Verwendung oder unerlaubte Veränderung des Produkts
verursacht werden, haftet der Hersteller nicht.
9.2 CE-Konformität
Das Produkt erfüllt die Anforderungen der europäischen Richtlinie 93/42/EWG für Medizinpro-
dukte. Aufgrund der Klassizierungskriterien nach Anhang IX dieser Richtlinie wurde das Produkt
als Zubehör in die Klasse I eingestuft. Die Konformitätserklärung wurde deshalb vom Hersteller
in alleiniger Verantwortung gemäß Anhang VII der Richtlinie erstellt.
10 Technische Daten
Gehäuse: schlagfester, bruchsicherer Kunststoff
Abmessungen: 100×74×46 mm (Länge×Breite×Höhe)
Bauweise: gemäß einschlägiger Vorschriften
Betriebsspannung: 100 – 240 V
Ladestrom für 317L20: impulsförmig, mittlerer Ladegleichstrom ca. 250 mA,
Rückregelung auf Erhaltungsladung
Gewicht: 190 g
Ladezeit 317B20: bei vollständiger Entladung ca. 10 Stunden
Betriebstemperatur: 0 – 40° C

Ottobock | 5317L20
English
INFORMATION
Last update: 2015-02-26
fPlease read this document carefully before using the product.
fFollow the safety instructions to avoid injuries and damage to the product.
fReceive instruction in the correct and safe use of the product by qualied personnel.
fPlease contact the qualied personnel if you have questions about the product (e.g. regar-
ding the start-up, use, maintenance, unexpected operating behaviour or circumstances).
Contact information can be found on the back page.
fPlease keep this document in a safe place.
1 Intended Use
Use the 317L20 Pulse Charger exclusively for charging 317B20 Ottobock Interchangeable Batteries.
2 Safety Instructions
Attention!
Risk of short circuit
• Do not use the charger if there is any visible damage. Check the pulse charger
for any visible damage before every use. In case of damage immediately send the
charger to an Ottobock Service facility.
• Never open the pulse charger. The pulse charger as well as individual components
of it may only be repaired by an authorized Ottobock Service technician.
•The charging station may be operated only together with the 757L16-2 AC-Adapter.
•Use the pulse charger only under dry conditions.
• Do not let foreign particles or uids enter the pulse charger.
• Do not expose the pulse charger to excessive smoke, dust, mechanical vibrations,
shocks or high temperatures.
3 Scope of Delivery
1 pc. Charging Station
1 pc. 757L16-2 AC-Adapter with EC and US plug
1 pc. Instructions for Use
4 Description and Function
With the 317L20 Pulse Charger you can charge one or two interchangeable batteries simultane-
ously. The battery charger consists of the charging station and the 757L16-2 AC-Adapter.
The interchangeable batteries are charged with a pulse-shaped current that is automatically re-
duced to a trickle charging current once the voltage reaches a certain upper limit. The standby
current is reduced to a minimum. This improves efciency and lengthens life expectancy of the
interchangeable batteries. Two LEDs give information regarding the charging state of the batteries.

6 | Ottobock 317L20
5 Putting into Operation
Attention!
Continuous charging over several days can damage the interchangeable battery.
Avoid charging processes of more than 12 hours and remove the interchangeable battery from
the battery charger after every charging process, if possible.
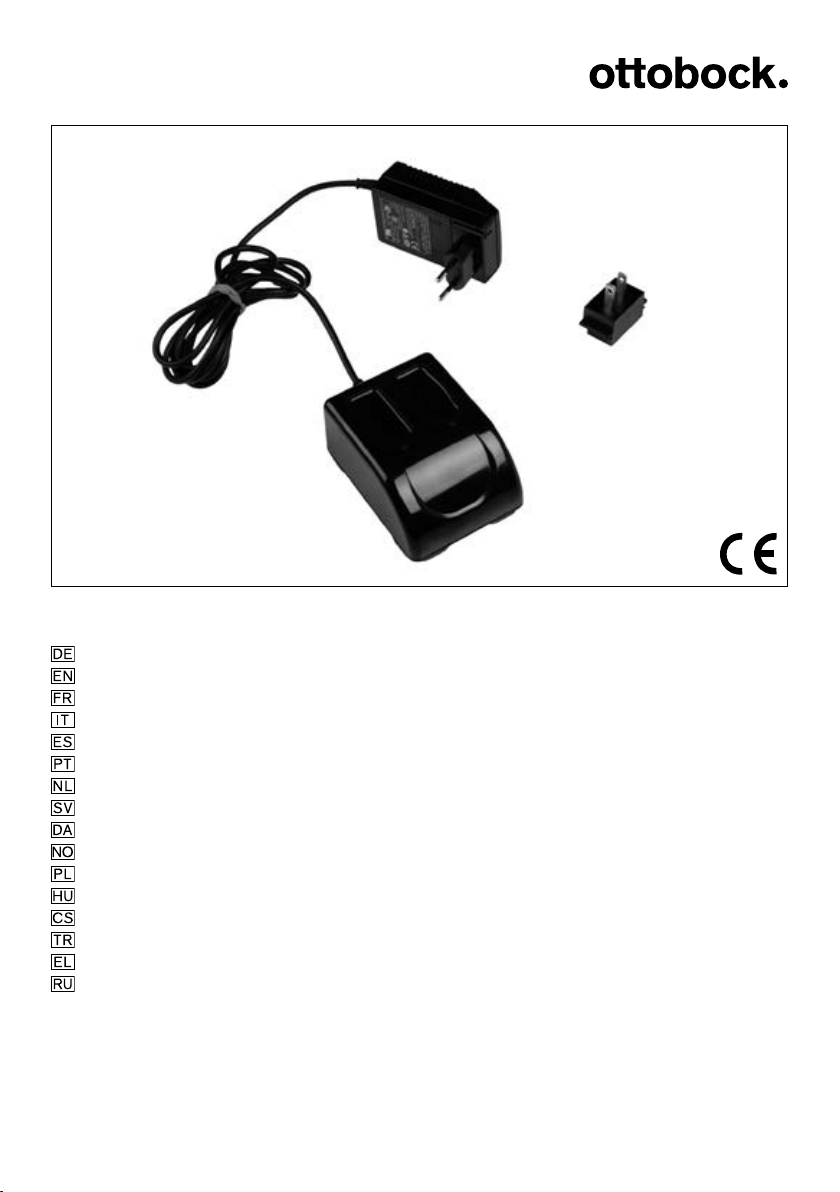
1. Connect the AC-adapter to the charging station
and plug the AC-adapter into an electrical outlet.
2.Place one or two interchangeable batteries into the charger.
The charger is ready to use and the charging process will begin when the LEDs corresponding
to each battery light up (refer to sections 6 and 7).
Charging time for one empty interchangeable battery is between 8 to 10 hours (refer to section 11).
When the interchangeable battery is completely charged the current is reduced to a trickle charg-
ing current. The interchangeable batteries may therefore remain in the charger for several hours.
Charging ceases when the interchangeable batteries are removed from the charger.
6 Light Emitting Diodes
The LEDs show charging and operating states of the batteries.
Signal Signication Recommendation
Permanent light Interchangeable battery is
charging
Leave the interchangeable
battery in the charging station
Regular ashing
(On/Off equal interval)
Fast ashing
Slow ashing
Charging has not yet been
completed and must
be continued
Interchangeable battery is fully
charged and can be removed
7 Disruptions of the Charging Function and Possible Causes
If your interchangeable battery does not start charging, please verify the following possible causes.
Signal Cause Recommendation
No LED is lit when putting
the charger into operation
Battery charger/ AC-adapter
not connected
Defective battery charger
Connect AC-adapter to
battery charger/ battery
charger to electrical outlet
Return the battery charger to
an Ottobock Service facility
Two interchangeable
batteries inserted, but
only one LED is lit
Change interchangeable
battery positions!
a) The same LED lights up:
defective battery charger
b) The other LED lights up:
defective interchangeable
battery
Return the battery charger to
an Ottobock Service facility
Return the interchangeable
battery to an Ottobock Service
facility

Ottobock | 7317L20
Signal Cause Recommendation
Flashing begins immedi-
ately after a completely
discharged interchange-
able battery is inserted in
the charger
Defective interchangeable bat-
tery
Return the interchangeable
battery to an Ottobock Service
facility
No ashing after approxi-
mately 8 hours of charging
Defective interchangeable
battery
Return the interchangeable
battery to an Ottobock Service
facility
LED is lit although the
battery has been removed
Defective battery charger Return the battery charger to
an Ottobock Service facility
8 Cleaning Instructions
•Keep the electrical contacts of interchangeable batteries and battery charger clean and free
of grease. Clean with dry cotton swabs.
•For cleaning the surface use a slightly moistened cloth.
9 Legal information
All legal conditions are subject to the respective national laws of the country of use and may vary
accordingly.
9.1 Liability
The manufacturer will only assume liability if the product is used in accordance with the descrip-
tions and instructions provided in this document. The manufacturer will not assume liability for
damage caused by disregard of this document, particularly due to improper use or unauthorised
modication of the product.
9.2 CE conformity
This product meets the requirements of the European Directive 93 / 42 / EEC for medical devices.
This product has been classied as class I accessories according to the classication criteria
outlined in Annex IX of the directive. The declaration of conformity was therefore created by the
manufacturer with sole responsibility according to Annex VII of the directive.
10 Technical Data
Housing: impact and break resistant plastic
Dimensions: 100 × 74 × 46 mm (length × width × height)
Design: in conformity with relevant prescriptions
Operating voltage: 100 - 240 V
Charging current for 317L20: pulse-shaped, average DC current approx. 250 mA,
reduction to trickle charge current
Weight: 190 g
Charging time 317B20: approx. 10 hours for completely discharged batteries
Operating temperature: 0 – 40 °C,

8 | Ottobock 317L20
Français
INFORMATION
Date de la dernière mise à jour: 2015-02-26
fVeuillez lire attentivement l’intégralité de ce document avant d’utiliser le produit.
fRespectez les consignes de sécurité an d’éviter toute blessure et endommagement du
produit.
fLaissez le personnel spécialisé vous expliquer comment utiliser le produit correctement et
en toute sécurité.
fAdressez-vous au personnel spécialisé si vous avez des questions concernant le produit
(p. ex. lors de la mise en service, l’utilisation, la maintenance ou en cas de fonctionnement
inattendu ou évènements particuliers). Vous trouverez les coordonnées au verso.
fConservez ce document.
1 Champs d‘application
Le chargeur à impulsion 317L20 est exclusivement destiné à la recharge des accumulateurs
interchangeables Ottobock 317B20.
2 Consignes de sécurité
Attention !
Risque de court-circuit
• Ne jamais utiliser un chargeur endommagé. Vériez avant chaque utilisation
si le chargeur ne présente pas d‘endommagements visibles. Si c‘est le cas,
remettez le chargeur immédiatement au SAV Ottobock.
• Ne jamais ouvrir le chargeur. Toute réparation doit être effectuée exclusivement
par le Service SAV Ottobock.
•Utilisez le chargeur exclusivement avec son câble de connexion 757L16-2.
•N‘utilisez le chargeur à impulsion que dans des locaux secs.
• Veillez à ce que ni particules compactes ni liquides ne puissent pénétrer
dans le boîtier du chargeur
• Ne soumettez pas le chargeur à la fumée intense, à la poussière,
aux vibrations mécaniques, aux chocs ou à une température excessive (chaleur).
3 Contenu de la livraison (ill. 1)
1 Chargeur
1 Câble pour raccord au réseau 757L16-2 avec prise CE et prise US
1 Notice d‘emploi

Ottobock | 9317L20
4 Description et fonctions
Le chargeur à impulsion 317L20 permet de charger un ou deux accumulateurs interchangeables.
Il est composé du chargeur et du câble d‘alimentation 757L16-2.
Les accumulateurs interchangeables sont chargés avec un courant à impulsion. Dès l‘atteinte
de la tension maximum, le chargeur fournit seulement le courant nécessaire au maintien de la
charge. La consommation du courant au repos est réduite au minimum. De ce fait, l‘efcacité du
niveau de charge est améliorée et la durée d‘utilisation des accumulateurs interchangeables est
prolongée. Deux diodes lumineuses indiquent le niveau de charge.
5 Mise en service
Attention !
Un processus de charge de plusieurs jours peut endommager l‘accumulateur inter
-
changeable.
Evitez une charge de plus de 12 heures. Si possible, retirez l‘accumulateur immédiatement après
chaque processus de charge.
1. Reliez le chargeur avec son câble d‘alimentation et branchez le sur le secteur.
2.Introduisez un ou deux accumulateurs interchangeables dans les ouvertures de charge.
Le chargeur est prêt à fonctioner, dès que la diode correspondante à l‘ouverture de charge oc-
cupée s‘illimune (voir § 6 et 7).
Le temps de charge complète d‘un accumulateur interchangeable se situe entre 8 et 10 heures
(voir § 11). Dès que l‘accumulateur interchangeable est complètement rechargé, le courant est
converti en courant de maintien, les accumulateurs interchangeables peuvent rester plusieurs
heures dans le chargeur.
L‘extraction des accumulateurs interchangeables termine le processus de charge.
6 Les diodes lumineuses
Les diodes lumineuses indiquent le niveau de charge et de fonctionnement des accumulateurs.
Signal Signication Recommandation
Les diodes restent allumées
L‘accumulateur interchangeable
se recharge
Laissez l‘accumulateur interchan-
geable dans le chargeur
Clignotement régulier
(les diodes s’allument/
s’éteignent à intervalles
réguliers)
Clignotement rapide
Clignotement lent
Poursuivez le chargement de
l’accumulateur interchangeable
qui n’est pas complètement
chargé
L’accumulateur interchan-
geable est complètement char-
gé et peut être retiré

10 | Ottobock 317L20
7 Dysfonctionements et erreurs possibles
Si votre accumulateur interchangeable ne se charge pas, vériez les points énumérées ci-dessous :
Signal Cause Recommandation
Aucune diode s‘allume
après branchement du
chargeur et l‘introduction
des accumulateurs
Le câble n‘est pas connecté
correctement
Le chargeur est défectueux
Reliez le chargeur avec son
câble d‘alimentation et bran-
chez le sur le secteur.
Remettre le chargeur au SAV
d‘Ottobock.
Deux accumulateurs interchan-
geables sont introduits,
une seule diode s‘allume
Inversez l‘emplacement
des accumulateurs
interchangeables!
a)la même diode s‘allume -
le chargeur est défectueux
b)l‘autre diode s‘allume -
l‘accumulateur
interchangeable est
défectueux
Remettre le chargeur au SAV
d‘Ottobock.
Remettre l‘accumulateur in-
terchangeable au SAV
d‘Ottobock.
Clignotement dès que vous rac-
cordez un accumulateur inter-
changeable complètement vide
L‘accumulateur interchan-
geable est défectueux
Remettre l‘accumulateur in-
terchangeable au SAV d‘Ot-
tobock.
Absence de clignotement
après plus de 8 heures
de charge
L‘accumulateur interchan-
geable est défectueux
Remettre l‘accumulateur in-
terchangeable au SAV d‘Ot-
tobock.
La diode s’allume bien que l’ac-
cumulateur ait été retiré
Le chargeur est défectueux Remettre le chargeur au SAV
d‘Ottobock
8 Conseils d‘entretien
•
Les surfaces de contact électrique des accumulateurs interchangeables et du chargeur doivent
toujours être propres et sans trace de gras. Utilisez un coton tige sec pour les nettoyer !
•Nettoyer le boîtier avec un chiffon légèrement humide.
9 Informations légales
Toutes les conditions légales sont soumises à la législation nationale du pays d’utilisation concer-
né et peuvent donc présenter des variations en conséquence.
9.1 Responsabilité
Le fabricant est responsable si le produit est utilisé conformément aux descriptions et instructions
de ce document. Le fabricant décline toute responsabilité pour les dommages découlant d’un
non-respect de ce document, notamment d’une utilisation non conforme ou d’une modication
non autorisée du produit.

Ottobock | 11317L20
9.2 Conformité CE
Ce produit répond aux exigences de la directive européenne 93 / 42 / CEE relative aux dispositifs
médicaux. Le produit a été classé, en tant qu’accessoire, dans la classe I sur la base des cri-
tères de classication d’après l’annexe IX de cette directive. La déclaration de conformité a donc
été établie par le fabricant sous sa propre responsabilité, conformément à l’annexe VII de la di-
rective.
10 Données techniques
Boîtier : en matière plastique incassable, résistant aux chocs
Dimensions : 100×74×46 mm (Longueur×largeur×hauteur)
Construction : conforme à la réglementation en vigueur
Tension du secteur : 100 240 V
Courant de charge
du 317L20: courant continu pulsé moyen d’env. 250 mA., réglage dégressif sur
charge de maintien
Poids : 190 g
Durée du chargement
du 317B20 : env. 10 heures pour un accumulateur complètement déchargé
Température de service : 0 – 40° C
Italiano
INFORMAZIONE
Data dell‘ultimo aggiornamento: 2015-02-26
fLeggere attentamente il presente documento prima di utilizzare il prodotto.
fAttenersi alle indicazioni di sicurezza per evitare lesioni e danni al prodotto.
fFarsi istruire sull‘utilizzo corretto e sicuro del prodotto dal personale tecnico specializzato.
In caso di domande sul prodotto (p. es. durante la messa in funzione, l‘utilizzo, la manu-
tenzione o in caso di funzionamento o eventi inaspettati) rivolgersi al personale tecnico
specializzato. I dati di contatto sono disponibili sul retro della copertina.
fConservare il presente documento.
1 Campo d‘impiego
Utilizzate il caricabatteria ad impulsi 317L20 esclusivamente per ricaricare l‘accumulatore di
ricambio Ottobock 317B20.

12 | Ottobock 317L20
2 Norme per la sicurezza
Attenzione!
Pericolo di corto circuito
• Non azionare il caricabatteria ad impulsi, qualora siano visibili segni di
danneggiamento. Vericare prima di ogni utilizzo che il caricabatteria ad impulsi sia
privo di danneggiamenti. Se si verica un danneggiamento, inviatelo alla Ottobock.
• Non aprire mai il caricabatteria ad impulsi. Anche le riparazioni dei singoli
componenti devono essere eseguite solo da personale autorizzato Ottobock.
•Mettere in funzione il caricabatteria ad impulsi solo in collegamento con il
trasformatore 757L16-2.
•Mettere in funzione il caricabatteria ad impulsi solo in luogo asciutto.
• Vericare che nel caricabatteria ad impulsi non penetrino parti solide nè liquidi.
• Non esporre il caricabatteria ad impulsi a fumo intenso, polvere,
vibrazioni meccaniche, urti nè a calore intenso.
3 Contenuto della spedizione
1 pz. caricabatteria
1 pz. 757L16-2 trasformatore EU- e cavo US
1 pz. istruzione d‘uso
4 Descrizione e funzione
Con il caricabatteria ad impulsi 317L20 si possono caricare uno o due accumulatori di ricambio
contemporaneamente. Il caricabatteria è composto dal caricabatteria e dal trasformatore 757L16-2.
Gli accumulatori di ricambio vengono ricaricati da un usso di corrente ad impulsi. Una volta
raggiunto il limite di tensione massimo nell‘accumulatore, il caricabatteria abbassa automatica-
mente la corrente ad un usso minimo di mantenimento della carica. L‘assorbimento di corrente
in condizioni di non utilizzo è ridotto al minimo. In tal modo viene migliorato il livello di ricarica e la
durata degli accumulatori di ricambio. Due diodi luminosi ne mostrano lo stato di carica.
5 Messa in funzione
Attenzione!
Se l‘accumulatore di ricambio viene ricaricato per vari giorni ininterrottamente si possono
vericare malfunzionamenti.
Evitare che il processo di carica superi le 12 ore e possibilmente estrarre l‘accumulatore dal ca-
ricabatteria non appena è terminata la carica.
1. Collegare il trasformatore all‘apparecchio e connettere il trasformatore alla presa.
2.Inserire uno o due accumulatori di ricambio negli alloggiamenti dell‘apparecchio.
Il caricabatteria è pronto per l‘uso ed inizia il procedimento di ricarica, non appena i diodi luminosi
si accendono (v. capitoli 6 e 7).
Il tempo di carica per un accumulatore di ricambio scarico va dalle 8 alle 10 ore (v. capitolo 11).
Se l‘accumulatore di ricambio è completamente carico, il caricabatterie abbassa automatica-

Ottobock | 13317L20
mente la corrente ad un usso minimo di mantenimento della carica. In tal modo l‘accumulatore
o gli accumulatori di ricambio rimangono alcune ore nel caricabatteria.
Terminare il processo di carica, estraendo gli accumulatori di ricambio.
6 Signicato dei segnali luminosi
I segnali luminosi indicano lo stato di carica degli accumulatori.
Segnale Signicato Indicazione
Luci accese l‘accumulatore di ricambio viene
ricaricato
lasciare l‘accumulatore di ri-
cambio in carica
Inizia a lampeggiare
durante il processo
di carica
Acceso/Spento
(stesso intervallo)
Lampeggio veloce
Lampeggio lento
Lasciare l’accumulatore di ri-
cambio in carica, carica non
completata
Carica accumulatore di ricam-
bio completata, rimuovere l’ac-
cumulatore
7 Malfunzionamenti della funzione di ricarica e possibili cause
Se l‘accumulatore di ricambio non viene ricaricato, vericare le seguenti possibili cause di errore.
Segnale Causa Indicazione
Nessun segnale luminoso
durante la messa in
funzione
il caricabatteria/trasformatore
non è collegato
il caricabatteria è difettoso
Collegare il trasformatore al
caricabatteria/il caricabatteria
alla presa
Inviare il caricabatteria ad un
centro assistenza Ottobock
Sono collegati due
accumulatori di ricambio,
si accende solo un diodo
Invertire gli accumulatori di
ricambio!
a) si accende lo stesso diodo:
il caricabatteria è difettoso
b) si accende l‘altro diodo:
l‘accumulatore di ricambio
è difettoso
Inviare il caricabatteria ad un
centro assistenza Ottobock
Inviare l‘accumulatore di ricam-
bio ad un centro assistenza
Ottobock
Lampeggio subito dopo
il collegamento di un ac-
cumulatore di ricambio
completamente scarico
l‘accumulatore è difettoso Inviare l‘accumulatore di ricam-
bio ad un centro assistenza
Ottobock
Non lampeggia dopo più
di 8 ore di carica
l‘accumulatore è difettoso Inviare l‘accumulatore di ricam-
bio ad un centro assistenza
Ottobock
Il diodo è acceso anche se
la batteria è stata rimossa
Il caricabatteria è difettoso Inviare il caricabatteria ad un
centro assistenza Ottobock

14 | Ottobock 317L20
8 Indicazioni per la cura
•Mantenere i contatti degli accumulatori di ricambio e del caricabatteria puliti e privi di grasso.
Per pulirli utilizzare un cotton oc.
•Pulire la supercie con un leggero panno umido.
9 Note legali
Tutte le condizioni legali sono soggette alla legislazione del rispettivo paese di appartenenza
dell’utente e possono quindi essere soggette a modiche.
9.1 Responsabilità
Il produttore risponde se il prodotto è utilizzato in conformità alle descrizioni e alle istruzioni ripor-
tate in questo documento. Il produttore non risponde in caso di danni derivanti dal mancato ri-
spetto di quanto contenuto in questo documento, in particolare in caso di utilizzo improprio o
modiche non permesse del prodotto.
9.2 Conformità CE
Il prodotto è conforme ai requisiti previsti dalla direttiva europea 93/42/CEE relativa ai prodotti
medicali. In virtù dei criteri di classicazione ai sensi dell’allegato IX della direttiva di cui sopra, il
prodotto è stato classicato come accessorio sotto la classe I. La dichiarazione di conformità è
stata pertanto emessa dal produttore, sotto la propria unica responsabilità, ai sensi dell’allegato
VII della direttiva.
10 Dati tecnici
Alloggiamento: sicuro, materiale antirottura
Dimensioni: 100×74×46 mm (lunghezza×larghezza×altezza)
Struttura: conforme alle norme
Tensione di regime: 100 – 240 V
Corrente di carica 317L20: ad impulsi, corrente media alternata ca. 250 mA, abbassamento
della corrente ad un usso minimo di mantenimento della carica
Peso: 190 g
Tempi di ricarica 317B20: per ricaricare completamente ca. 10 ore
Temperatura di regime: 0 – 40°

Ottobock | 15317L20
Español
INFORMACIÓN
Fecha de la última actualización: 2015-02-26
fLea este documento atentamente y en su totalidad antes de utilizar el producto.
fSiga las indicaciones de seguridad para evitar lesiones y daños en el producto.
fEl personal técnico le explicará cómo utilizar el producto de forma correcta y segura.
fPóngase en contacto con el personal técnico si tiene dudas sobre el producto (p. ej.,
sobre la puesta en marcha, el uso o el mantenimiento, o en caso de un funcionamiento
inesperado o incidente). Los datos de contacto se encuentran al dorso.
fConserve este documento.
1 Campo de aplicación
Utilice el cargador por impulsos 317L20 exclusivamente para cargar los acumuladores inter-
cambiables de Ottobock 317B20.
2 Recomendaciones de seguridad
Atención!
Peligro de corto-circuito
• No utilizar el aparato, cuando indica daños visibles. Compruebe el cargador antes
de cada uso acerca de daños visibles. Si ha surgido un daño, entregue el aparato
inmediatamente al Servicio técnico de Ottobock.
• Abrir nunca el cargador por impulsos. Las reparaciones de incluso componentes
sueltos, sólo las puede realizar un servicio técnico autorizado de Ottobock.
•El cargador sólo se puede utilizar en conjunto con el conector a red 757L16-2.
•Utilizar el cargador por impulsos sólo en lugares libres de humedad.
• Evitar la entrada de partículas y líquidos en el cargador por impulsos.
• No exponer el cargador por impulsos nunca a humos intensos o polvo,
vibraciones mecánicas, golpes ni a fuentes de mucho calor.
3 Suministro
1 ud. Cargador
1 ud. 757L16-2 Conector a red con enchufe EU y US
1 ud. Instrucciones de uso
4 Descripción y función
Con el cargador por impulsos 317L20 es posible cargar uno o dos acumuladores intercambia-
bles al mismo tiempo. El kit de carga se compone del cargador y del conector a red 757L16-2.
Los acumuladores intercambiables se cargan con corriente de carga por impulsos. Al conseguir
el límite superior de tensión, cambia a corriente de mantenimiento. La recepción de corriente de
reposo se reduce a un valor mínimo. Con ello mejora el grado del efecto de carga y se prolonga la
duración de los acumuladores intercambiables. Dos diodos iluminosos indican su estado de carga.

16 | Ottobock 317L20
5 Puesta en marcha
Atención!
La carga ininterrumpida durante varios días puede dañar al acumulador intercambiable.
Evitar los procesos de carga de más de 12 horas y si es posible extraer el acumulador del car-
gador después de cada proceso de carga.
1. Enchufar el conector de red con el cargador y conectar con la red.
2.Introducir uno o dos acumuladores intercambiables en las aperturas previstas.
El aparato está preparado para su funcionamiento y el proceso de carga comienza, cuando se
iluminan los diodos iluminosos correspondientes (ver párr. 6 y 7).
El tiempo de carga para un acumulador intercambiable descargado es entre 8 hasta 10 horas
(ver párr. 11). Si el acumulador intercambiable está completamente cargado, cambia a una menor
corriente de mantenimiento, por lo que el o los acumuladores intercambiables pueden permanecer
durante algunas horas en el cargador.
El proceso de carga naliza, extrayendo el acumulador intercambiable.
6 Signicado de las señales iluminosas
Los diodos iluminosos indican los estados de carga y de funcionameinto de los acumuladores
intercambiables.
Señal Signicado Recomendación
Iluminación permanente Acumulador intercambiable
en carga
El acumulador intercambiable
permanece en el cargador
Comienzo parapadeo
durante la carga
(Encendido/apagado
mismo intervalo)
Parpadeo rápido
Parpadeo lento
Seguir cargando el acumulador
intercambiable, ya que no se
ha cargado completamente
El acumulador intercambiable
está completamente cargado y
puede extraerse
7 Irregularidades en la función de carga y posibles causas
Si el acumulador intercambiable no se carga, comprobar las siguientes posibles causas.
Señal Causa Recomendación
Sin iluminación una vez
encendido
Cargador/conector
no conectado
Carregador avariado
Enchufar el conector con el
cargador a la red
Entregar al servicio técnico de
Ottobock

Ottobock | 17317L20
Señal Causa Recomendación
Dos acumuladores inter-
cambiables introducidos,
sólo se ilumina un diodo
Sustituir el acumulador inter-
cambiable por otro
a)
no se ilumina el mismo
diodo: Cargador defectuoso
b) se ilumina el otro diodo:
acumulador intercambiable
defectuoso
Entregar el cargador al servicio
técnico de Ottobock
Entregar el acumulador inter-
cambiable al servicio técnico
de Ottobock
Parpadea inmedia-
tamente después de
insertar un acumulador
intercambiable total-
mente descargado
Acumulador intercambiable
defectuoso
Entregar el acumulador inter-
cambiable al servicio técnico
de Ottobock
Sin parpadeo después
de un tiempo de carga
de más de 8 horas
Acumulador intercambiable
defectuoso
Entregar el acumulador inter-
cambiable al servicio técnico
de Ottobock
El diodo está iluminado
aunque la batería no está
puesta
Cargador defectuoso
Entregar el cargador al servicio
técnico de Ottobock
8 Recomendaciones para el cuidado
•Los contactos de acumuladores intercambiables y del cargador tienen que ser limpios y
libres de grasa. Limpiar los contactos con bastoncillos secos.
• Limpiar la supercie con un paños ligeramente húmedo.
9 Aviso legal
Todas las disposiciones legales se someten al derecho imperativo del país correspondiente al
usuario y pueden variar conforme al mismo.
9.1 Responsabilidad
El fabricante se hace responsable si este producto es utilizado conforme a lo descrito e indicado
en este documento. El fabricante no se responsabiliza de los daños causados debido al incum-
plimiento de este documento y, en especial, por los daños derivados de un uso indebido o una
modicación no autorizada del producto.
9.2 Conformidad CE
El producto cumple las exigencias de la Directiva europea 93/42/CEE relativa a productos sani-
tarios. Sobre la base de los criterios de clasicación según el anexo IX de la directiva, el produc-
to se ha clasicado en la clase I en calidad de accesorio. La declaración de conformidad ha sido
elaborada por el fabricante bajo su propia responsabilidad según el anexo VII de la directiva.

18 | Ottobock 317L20
10 Datos técnicos
Carcasa: Plástico resistente a golpes y roturas
Medidas: 100 × 74 × 46 mm (L × A × a)
Construcción: de acuerdo de las normativas especiales
Tensión de funcionamiento: 100 – 240 V
Corriente de carga 317L20: por impulsos, corriente contínua mediana aprox. 250 mA,
cambio a carga de mantenimiento
Peso: 190 g
Tiempo de carga 317B20: descarga completa aprox. 10 horas
Temperatura de funcionam.: 0 – 40 °C
Português
INFORMAÇÃO
Data da última atualização: 2015-02-26
fLeia este documento atentamente antes de utilizar o produto.
fObserve as indicações de segurança para evitar lesões e danos ao produto.
fSolicite a um técnico que o instrua na utilização correta e segura do produto.
fSe tiver dúvidas sobre o produto (p. ex., quanto à colocação em funcionamento, uti-
lização, manutenção ou em caso de operação inesperada ou incidentes), dirija-se ao
técnico. Os dados de contatos encontramse no verso.
fGuarde este documento.
1 Utilização
O carregador por impulso 317L20 destina-se exclusivamente ao carregamento da bateria inter-
cambiável 317B20 Ottobock.
2 Recomendações de segurança
Atenção!
Perigo de curto-circuito
• Não pôr o aparelho em funcionamento se surgirem danos perceptíveis. Antes de
cada uso do Carregador por Impulso checar o aparelho. Caso haja visíveis danos,
favor deixar de usá-lo e enviá-lo imediatamente à assistência técnica da Ottobock.
• É terminantemente vedado abrir o Carregador por Impulso. Reparos nos
componentes é da alçada exclusiva da assitência técnica autorizada pela Ottobock.
•Usar a estação de carga somente em combinação
com a fonte de alimentação 757L16-2.
•Utilizar o Carregador por Impulso unicamente em lugares secos.
• Evitar a entrada de líquidos ou partículas sólidas no interior do
Carregador por Impulso.
• Jamais expor o Carregador por Impulso a fumaça intensa, poeira,
vibrações mecânicas ou pancadas. Evitar altas temperaturas.

Ottobock | 19317L20
3 Conteúdo do fornecimento
1 pç. estação de carga
1 pç. fonte de alimentação 757L16-2 com cha EU e US
1 ex. manual de instruções
4 Descrição e função
Com o carregador por impulso 317L20 é possível carregar um ou duas baterias intercambiáveis
em simultâneo. O carregador é constituído por uma estação de carregamento e por um adap-
tador 757L16-2.
As baterias intercambiáveis são carregadas com uma corrente de carga em forma de impulsos.
Ao atingir um limite de tensão superior é mudado novamente para corrente de manutenção. A
entrada de corrente de repouso está reduzida a um valor mínimo. Isto melhora o grau de ecá-
cia do carregamento e prolonga a vida útil das baterias intercambiáveis. Dois díodos luminosos
indicam o estado de carregamento.
5 Entrada em funcionamento
Atenção!
Carregamentos ininterruptos ao longo de vários dias podem danicar a bateria inter-
cambiável.
Evitar processos de carregamentos que ultrapassem 12 horas. Sempre que possível, após o
processo de carregamento, retirar o acumulador do carregador.
1. Conectar a fonte de alimentação com a estação de carga. Conectar a fonte de alimentação
na cha.
2.Insira uma ou duas baterias intercambiáveis no compartimento de carregamento.
O aparelho está pronto para funcionar. O processo de carregamento começa tão logo
acenderem os diodos luminosos na caixa ocupada (ver itens 6 e 7).
O tempo de carregamento de uma bateria intercambiável descarregada é de 8 a 10 horas (con-
sulte a secção 11).
Quando a bateria intercambiável estiver completamente carregada reduz para uma corrente de
manutenção menor. Desta forma a bateria ou as baterias intercambiáveis podem permanecer
algumas horas no carregador.
O processo de carregamento é terminado retirando as baterias intercambiáveis.
6 Signicado dos sinais luminosos
Os diodos luminosos mostram as condições de funcionalidade e carregamnto dos acumuladores.
Sinal Signicado Recomendação
Brilho constante Bateria intercambiável
a carregar
Deixar a bateria intercambiável na
estação de carregamento
Piscar contínuo
(Ligar/Desligar
mesmo intervalo)
Piscar rápido
Piscar lento
Continuar a carregar a bateria inter-
cambiável, não está completamente
carregada
Bateria intercambiável completa-
mente carregada e pode ser retirada

20 | Ottobock 317L20
7 Falhas no funcionamento de carga e possíveis causas
Se a bateria intercambiável não é carregada, verique as seguintes causas de erro.
Sinal Causa Recomendação
nenhum diodo aceso
ao entrar em funcio-
namento
carregador/fonte de alimen-
tação desconectados
carregador com defeito
conectar fonte de alimentação no
carregador/carregador na cha
enviar o carregador a uma assistên-
cia técnica da Ottobock
Duas baterias inter-
cambiáveis ligadas,
apenas um díodo
brilha
Mudar a bateria intercambiável!
a) o mesmo díodo brilha:
defeito no carregador
b) o outro díodo brilha defeito
na bateria intercambiável
Entregar o carregador num ponto
de assistência técnica da Ottobock
Entregar a bateria intercambiável
num ponto de assistência técnica
da Ottobock
Pisca imediatamente
antes da introdução
de uma bateria inter-
cambiável completa-
mente descarregada
Defeito na
bateria intercambiável
Entregar a bateria intercambiável
num ponto de assistência técnica
da Ottobock
Não pisca após mais
de 8 horas de tempo
de carregamento
Defeito na
bateria intercambiável
Entregar a bateria intercambiável
num ponto de assistência técnica
da Ottobock
Díodo brilha, apesar
de a bateria inter-
cambiável ter sido
retirada
Defeito no carregador Entregar a bateria intercambiável
num ponto de assistência técnica
da Ottobock
8 Recomendações para o cuidado
•Mantenha os contactos das baterias intercambiáveis e do carregador limpos e livres de
gordura para evitar falhas no funcionamento. Para a limpeza, utilize cotonetes secos.
•Limpar a superfície com um pano levemente umedecido.
9 Notas legais
Todas as condições legais estão sujeitas ao respectivo direito em vigor no país em que o produ-
to for utilizado e podem variar correspondentemente.
9.1 Responsabilidade
O fabricante se responsabiliza, se o produto for utilizado de acordo com as descrições e instru-
ções contidas neste documento. O fabricante não se responsabiliza por danos causados pela
não observância deste documento, especialmente aqueles devido à utilização inadequada ou à
modicação do produto sem permissão.
Other manuals for 317L20
1
Table of contents
Languages:
Other Otto Bock Batteries Charger manuals

Otto Bock
Otto Bock 757L20 User manual

Otto Bock
Otto Bock AxonCharge Integral User manual

Otto Bock
Otto Bock 757L35 User manual

Otto Bock
Otto Bock 757L35 User manual

Otto Bock
Otto Bock AxonCharge Integral 757L500 User manual

Otto Bock
Otto Bock 4E50-2 User manual

Otto Bock
Otto Bock 757L13 User manual

Otto Bock
Otto Bock 4X156 User manual